For 1990-2009 cars only
Removal Procedure
- Disconnect the battery negative cable. Refer to Battery Negative Cable Disconnection and Connection.
- Position the left second row seat to a cargo position.
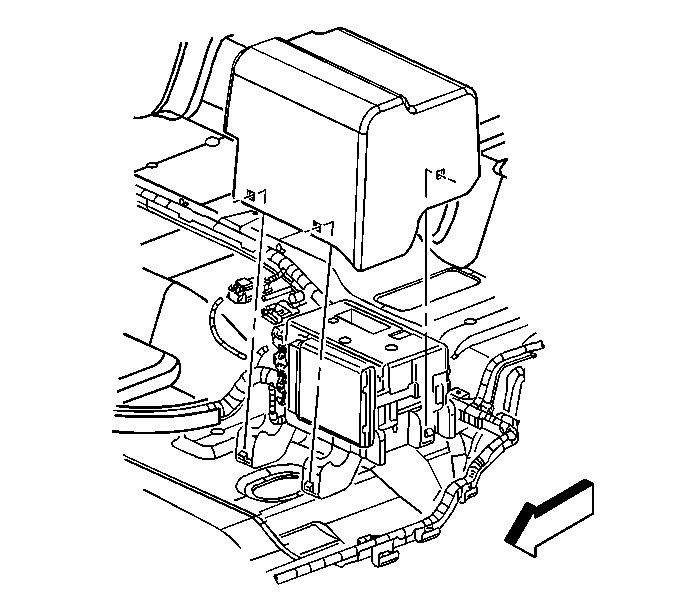
- Remove the rear electrical center cover.
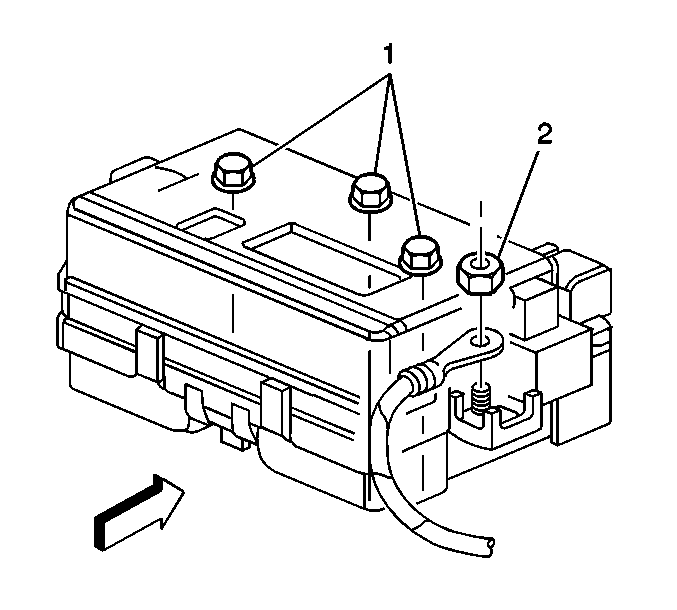
- Remove the battery feed terminal nut (2) from the junction block.
- Remove the body control module (BCM) from the rear electrical center. Refer to Body Control Module Replacement.
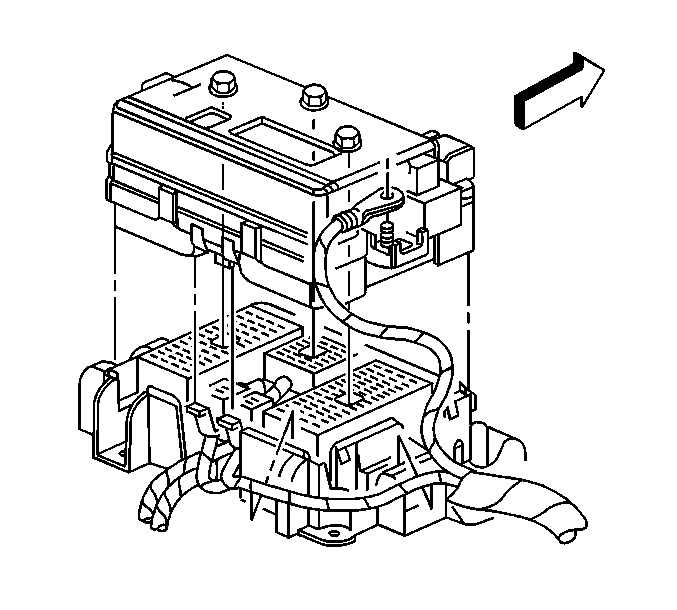
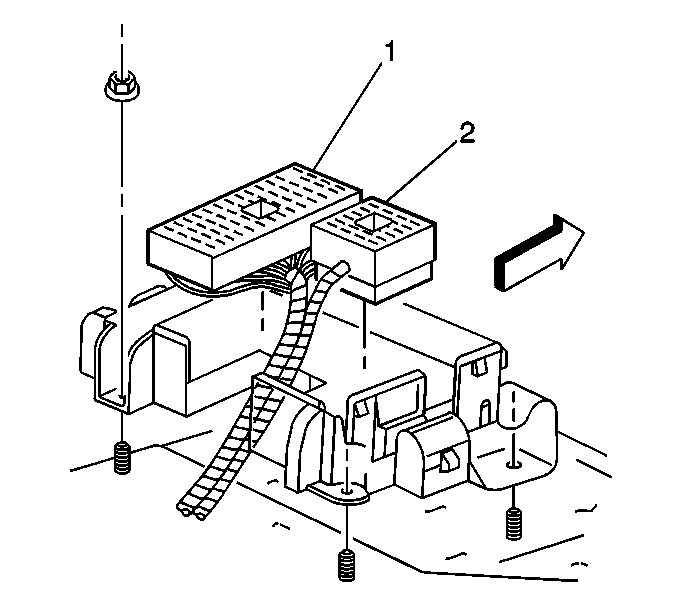
- Fully loosen the 3 bolts (1) that retain the junction block to the electrical connectors.
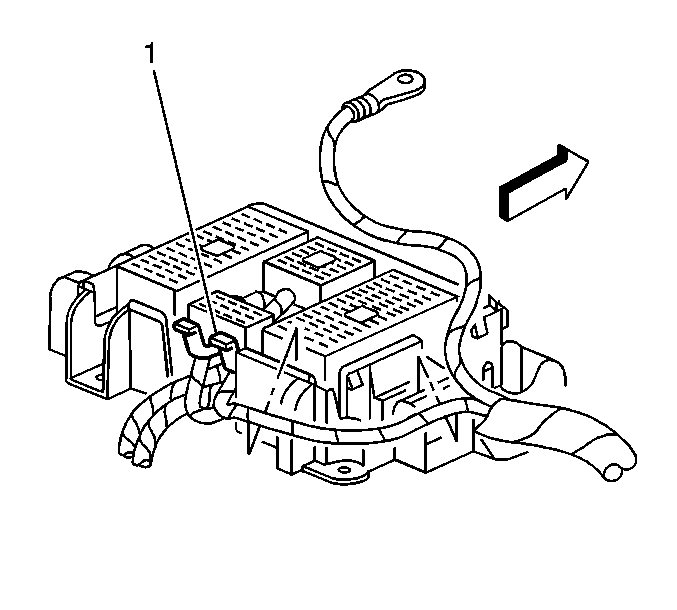
- Release the tabs that retain the junction block to the block base.
- Remove the junction block from the block base.
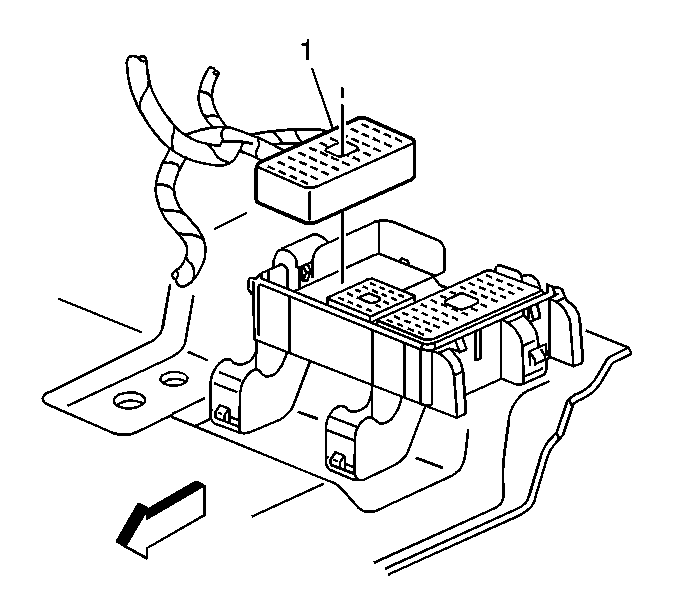
- Disconnect the instrument panel harness connector (1) from the junction block.
- Disconnect the mobile telephone harness connector (1) from the junction block.
- Disconnect the body wiring harness connector (1) from the junction block.
- Disconnect the headliner harness connector (2) from the junction block.
- Disconnect the console harness connector from the junction block.
- Remove the block base retaining nuts from the floor studs.
- Remove the block base from the floor panel.
Warning: Refer to Battery Disconnect Warning in the Preface section.
Installation Procedure
- Install the block base to the floor studs.
- Install the block base retaining nuts to the floor studs and tighten to 10 N·m (88 lb in).
- Connect the console harness connector to the block base.
- Connect the headliner harness connector (2) to the block base.
- Connect the body wiring harness connector (1) to the block base.
- Connect the mobile telephone harness connector (1) to the junction block.
- Connect the instrument panel harness connector (1) to the block base.
- Install the junction block to the block base.
- Install the 3 bolts (1) that retain the junction block to the block base and tighten to 3.5 N·m (31 lb in).
- Install the BCM to the rear electrical center. Refer to Body Control Module Replacement.
- Install the battery feed terminal nut (2) to the junction block and tighten to 10 N·m (88 lb in).
- Install the rear electrical center cover.
- Position the left second row seat to a passenger position.
- Connect the battery negative cable. Refer to Battery Negative Cable Disconnection and Connection.

Caution: Refer to Fastener Caution in the Preface section.


Ensure that the retaining tabs are fully seated.


