For 1990-2009 cars only
Air Conditioning Compressor Hose Replacement LH6
Special Tools
J 39400-A Halogen Leak Detector
Removal Procedure
- Recover the refrigerant. Refer to Refrigerant Recovery and Recharging.
- Remove the washer bottle. Refer to Windshield Washer Solvent Container Replacement.
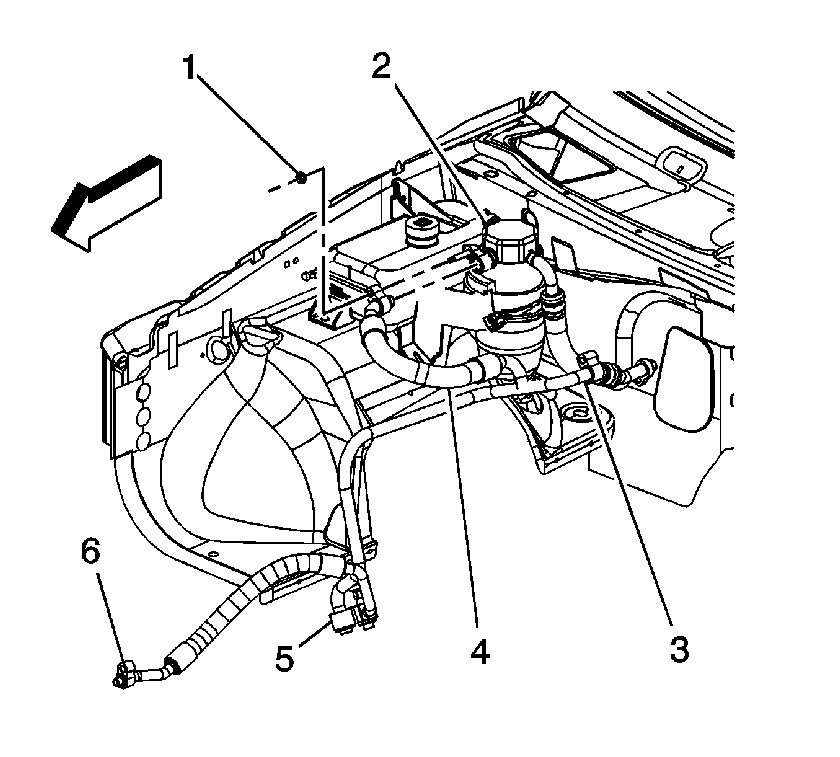
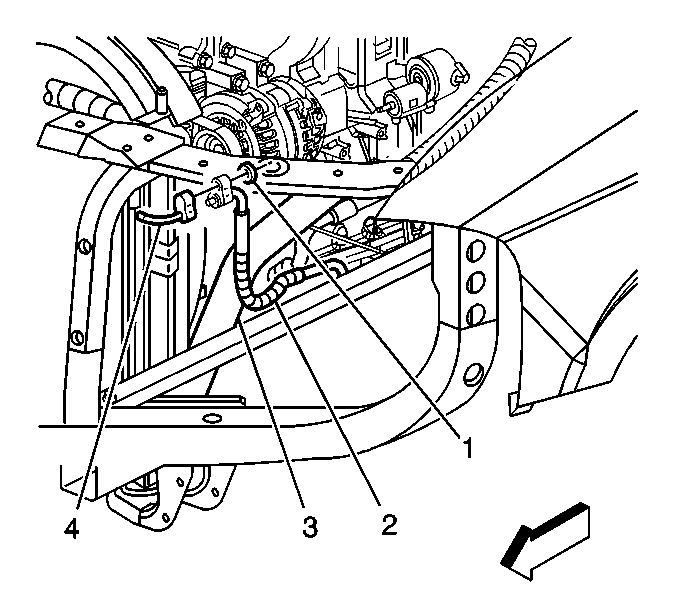
- Remove the retaining nut (1) from the compressor hose (4) at the accumulator (2).
- Remove the retaining nut from the compressor hose at the auxiliary HVAC piping connection (3).
- Remove the compressor hose from the accumulator (2).
- Remove the compressor hose from the auxiliary HVAC piping.
- Disconnect the pressure sensor electrical connector.
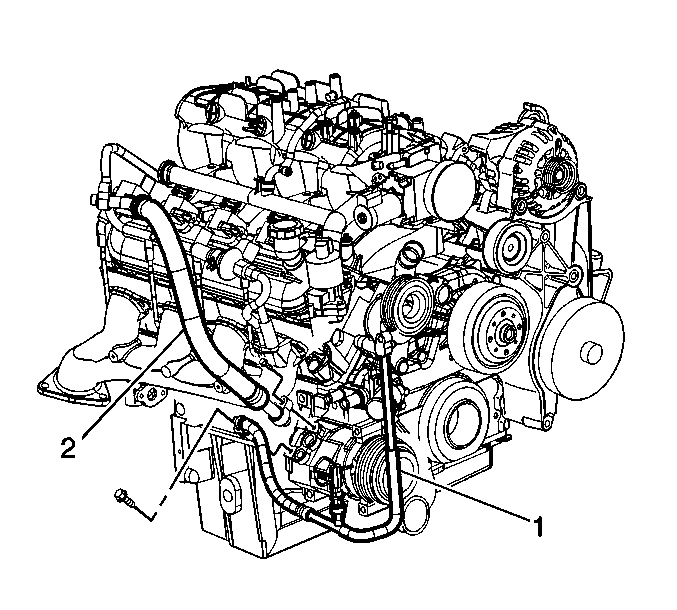
- Remove the compressor hose mounting nut (2) from the A/C compressor.
- Remove the heater hose bracket nut at the engine.
- Remove the bracket from the stud.
- Turn the compressor hose assembly to clear the heat shield.
- Lift and remove the compressor hose assembly from the compressor.
- Remove the compressor hose assembly from the condenser.
- Remove the compressor hose assembly.
- Remove the compressor hose from the A/C compressor.
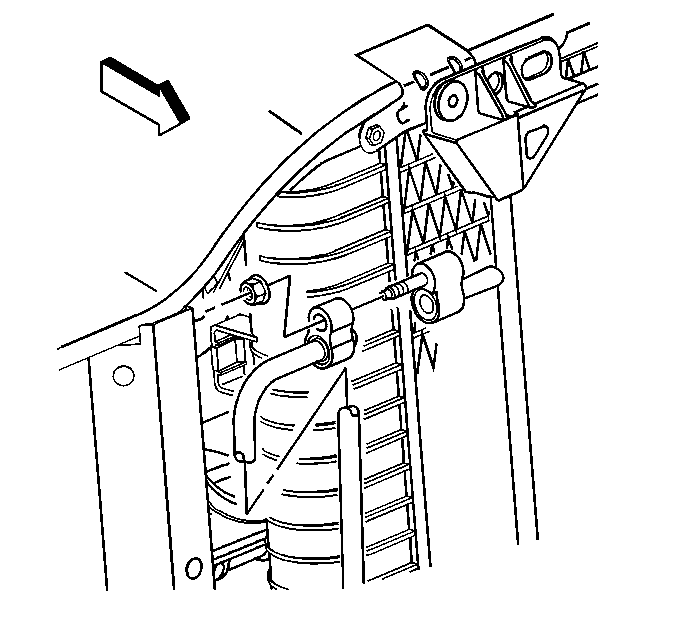
- Remove the compressor hose from the condenser.
- Disconnect the electrical connector from the A/C low pressure switch.
- Remove the nut from the compressor hose at the accumulator.
- Remove the compressor hose from the accumulator.
- Remove the compressor hose from the vehicle.
- Discard all of the used sealing washers. Cap the system openings.
Installation Procedure
- Install the compressor hose assembly.
- Install the compressor hose to the condenser using new sealing washers. Refer to Sealing Washer Replacement.
- Install the compressor hose nut to the condenser and tighten to 16 N·m (12 lb ft).
- Connect the electrical connector to the A/C low pressure switch.
- Install the compressor hose to the accumulator using new sealing washers. Refer to Sealing Washer Replacement.
- Install the nut (1) to the accumulator and tighten to 16 N·m (12 lb ft).
- Install the compressor hose (1) to the A/C compressor using new sealing washers. Refer to Sealing Washer Replacement.
- Install the compressor hose nut and tighten to 16 N·m (12 lb ft).
- Install the washer bottle. Refer to Windshield Washer Solvent Container Replacement.
- Evacuate and recharge the A/C system. Refer to Refrigerant Recovery and Recharging.
- Leak test the fittings of the component using J 39400-A .

Caution: Refer to Fastener Caution in the Preface section.


Air Conditioning Compressor Hose Replacement LL8
Special Tools
J 39400-A Halogen Leak Detector
Removal Procedure
- Recover the refrigerant. Refer to Refrigerant Recovery and Recharging.
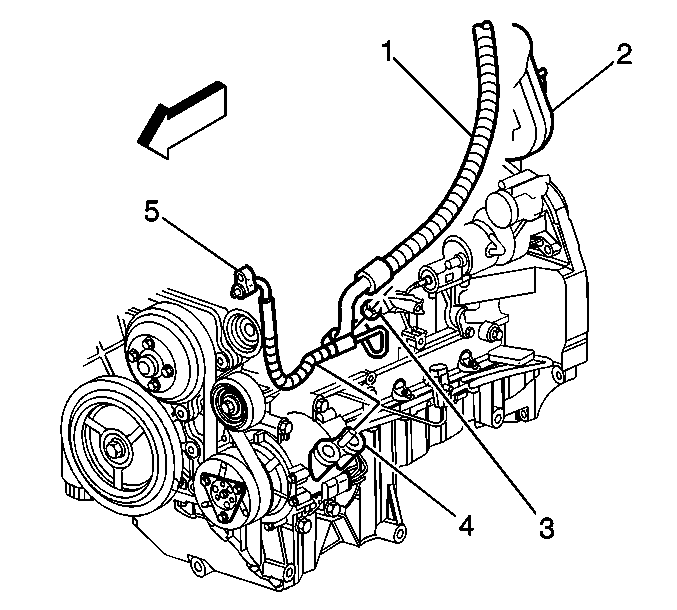
- Remove the compressor hose assembly nut (3).
- Remove the compressor hose assembly from the compressor (4).
- Remove the sealing washers.
- Remove the compressor suction hose nut from the accumulator.
- Remove the compressor suction hose from the accumulator.
- Remove the O-ring seal.
- Remove the bolt from the lift bracket.
- Remove the nut from the engine stud.
- Remove the compressor discharge hose (2) from the condenser (4).
- Remove the nut from compressor hose connection in driver wheel opening.
- Remove the O-ring seals.
- Cap or plug all of the open connections.
Installation Procedure
- Install new O-ring seals. Refer to O-Ring Replacement.
- Install the compressor discharge hose (2) to the condenser (4).
- Install the compressor discharge hose nut and tighten to 28 N·m (21 lb ft).
- Install the compressor hose to the connector through the driver wheel opening.
- Install the nut and tighten to 48 N·m (35 lb ft).
- Install the compressor suction hose to the stud on the engine.
- Install the nut and tighten to 48 N·m (35 lb ft).
- Install the compressor suction hose to the engine lift bracket.
- Install the bolt and tighten to 48 N·m (35 lb ft).
- Connect the compressor suction hose (1) to the accumulator.
- Install the compressor suction hose nut to the accumulator and tighten to 48 N·m (35 lb ft).
- Install the sealing washers. Refer to Sealing Washer Replacement.
- Connect the compressor hose assembly hose to the compressor (4).
- Install the compressor hose assembly washers.
- Install the retaining nut (3) and tighten to 33 N·m (24 lb ft).
- Evacuate and recharge the A/C system. Refer to Refrigerant Recovery and Recharging.
- Leak test the fittings of the components using the J 39400-A .

Caution: Refer to Fastener Caution in the Preface section.

