For 1990-2009 cars only
Drive Belt Tensioner Replacement LAT
Removal Procedure
- Remove the drive belt. Refer to Drive Belt Replacement.
- Remove the right side engine mount. Refer to Engine Mount Replacement.
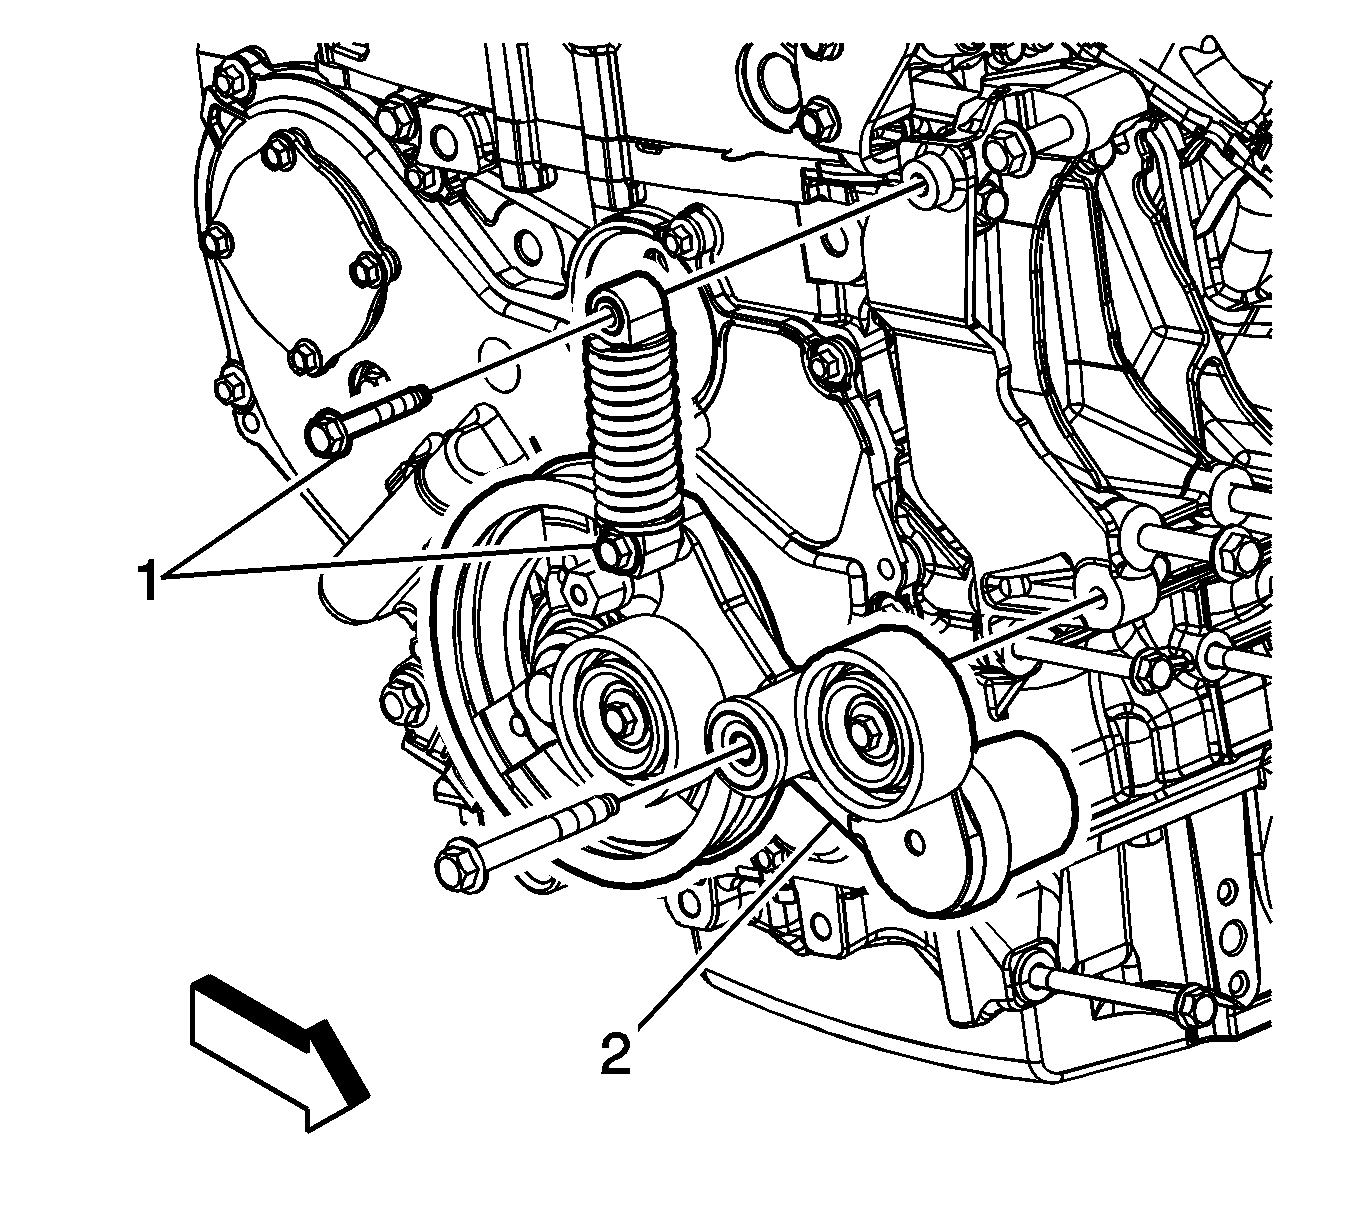
- Remove the tensioner spring bolts (1) from the tensioner.
- Remove the tensioner spring from the tensioner.
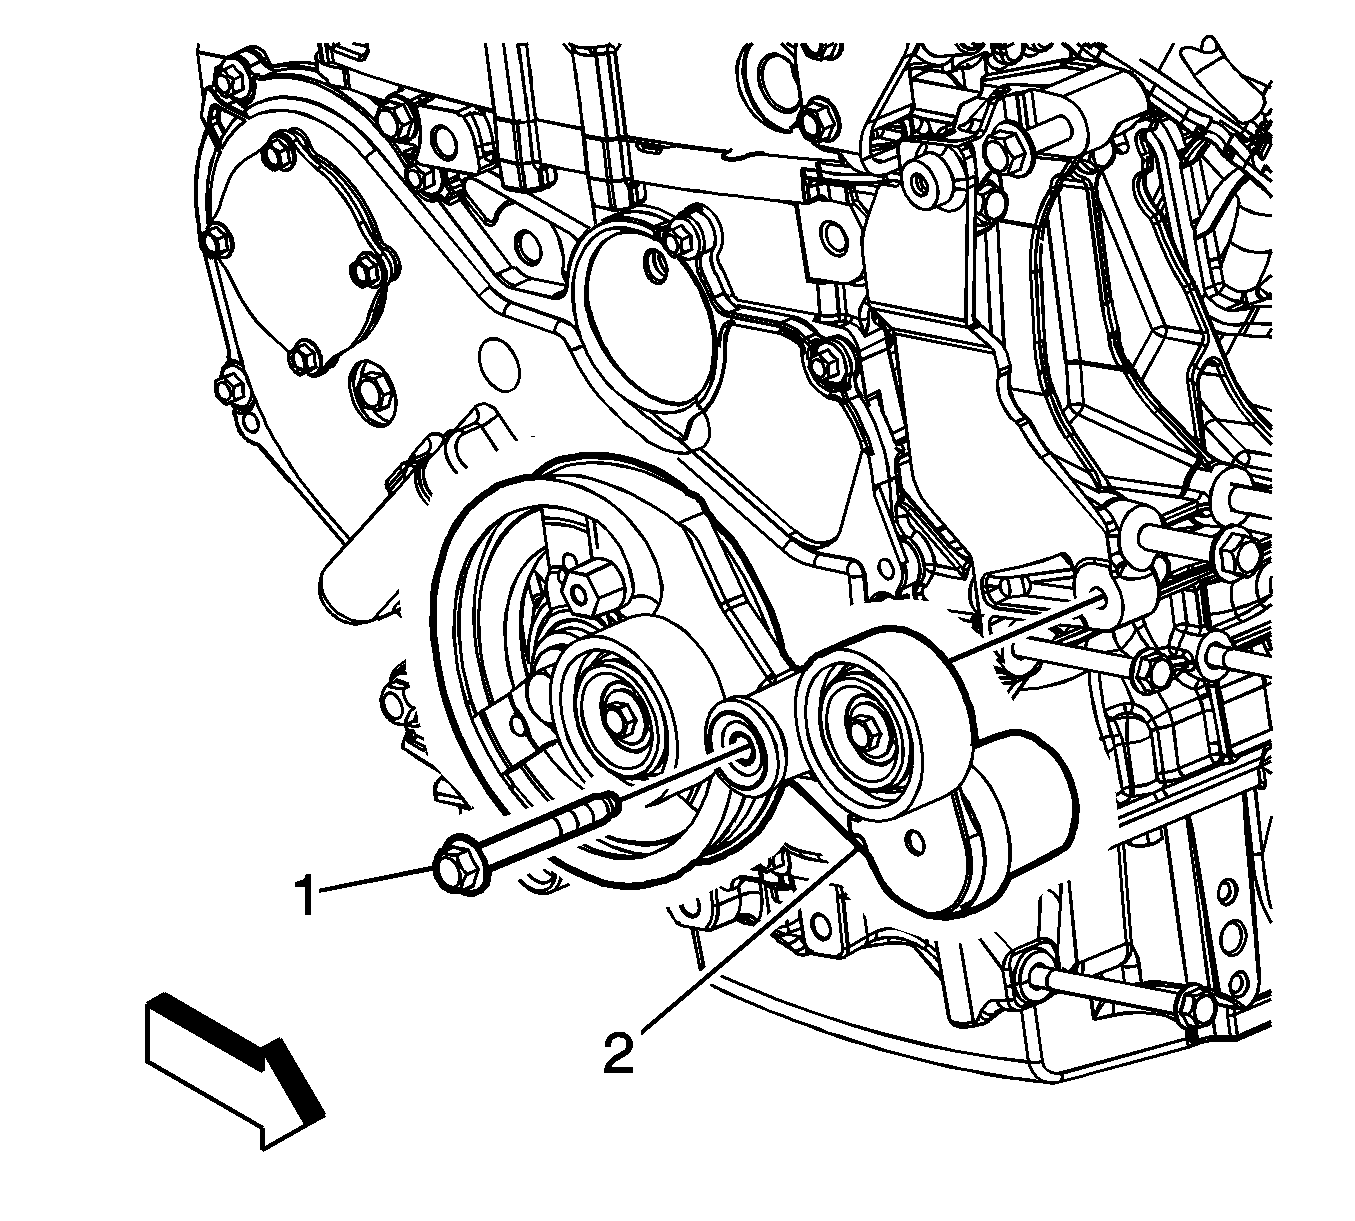
- Loosen the drive belt tensioner bolt (1).
- Raise and support vehicle. Refer to Lifting and Jacking the Vehicle.
- Remove the drive belt tensioner (2) with drive belt tensioner bolt (1).


Installation Procedure
- Install the lower tensioner bolt into the tensioner.
- Position the tensioner assembly in place.
- Lower the vehicle.
- Install but do not tighten the drive belt tensioner bolt (1).
- Position the tensioner spring to the tensioner.
- Install the tensioner spring bolts (1) to the tensioner.
- Install the right side engine mount. Refer to Engine Mount Replacement.
- Install the drive belt. Refer to Drive Belt Replacement.
- Using a 6 point socket on the hex boss on the drive belt tensioner, release the tension and remove the shipping clip by hand. Discard the clip.

Important: Install the accessory drive belt tensioner and bolt as an assembly.
Notice: Refer to Fastener Notice in the Preface section.
Caution: To avoid personal injury, only remove the tensioner shipping clip when the tensioner is properly mounted to the engine and the accessory drive belt is in place and properly routed.

Tighten
| • | Tighten the tensioner spring bolts to 22 N·m (16 lb ft). |
| • | Tighten the lower tensioner bolt to 58 N·m (43 lb ft). |
