For 1990-2009 cars only
Sunroof Sunshade Replacement C3Y - Reinstall
Removal Procedure
- Cycle the sunshade to the middle of opening.
- Lower the headliner. Refer to Headlining Trim Panel Replacement.
- Grasping the front corners of the sunshade, roll the sunshade counterclockwise.
- Sunshade guides (2) are located in the front of the sunshade, one on each side.
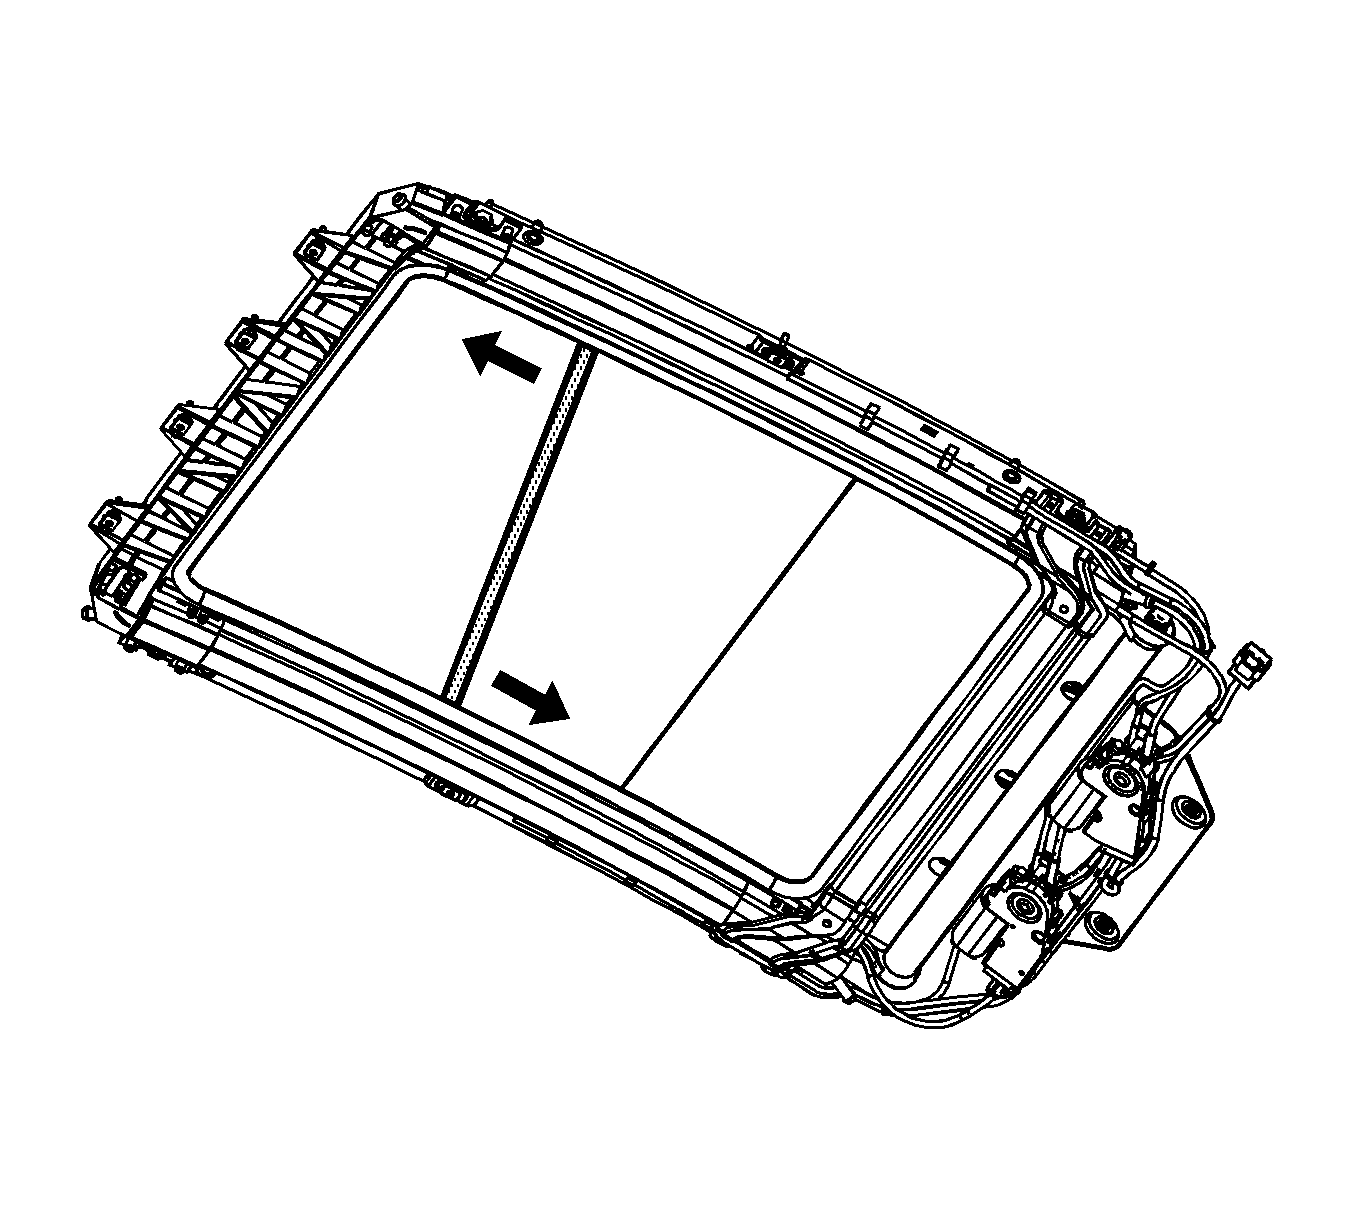
- Pull forward and turn outward to release the sunshade from the tracks.
- Roll the sunshade rearward over the front edge of the sunroof support.
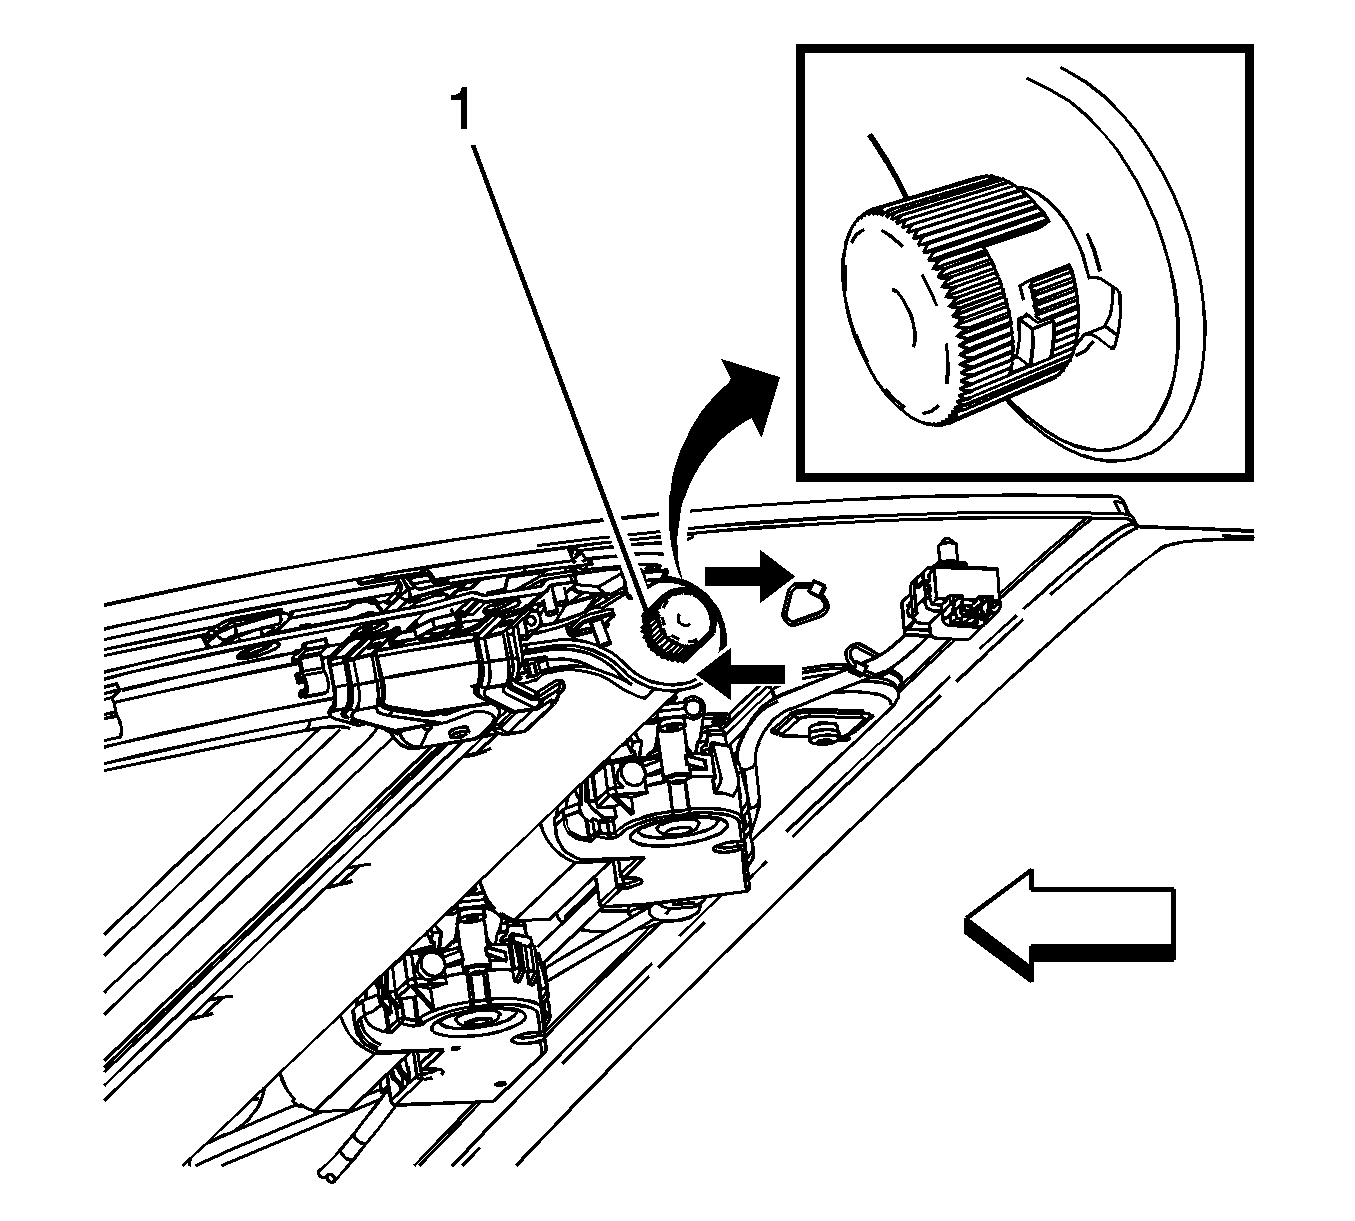
- Remove the end cap (1) on the left side that holds the sunshade spring in place.
- Remove the sunshade from the sunroof assembly.
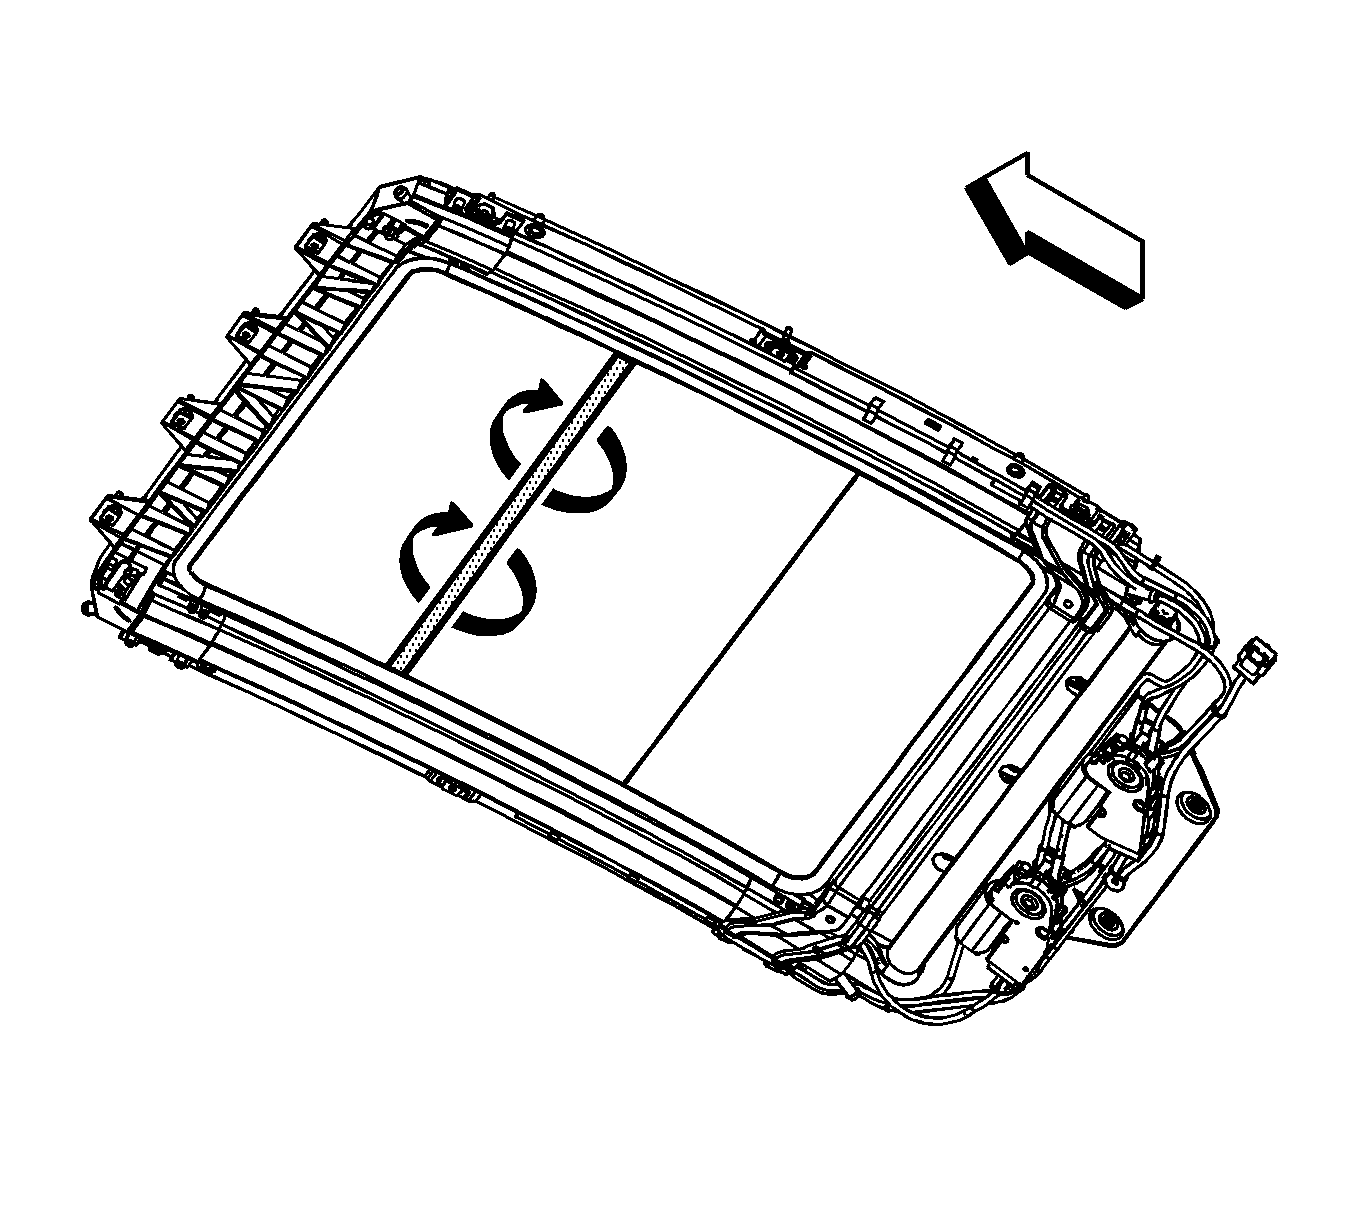
Important: Do this from inside the vehicle.
Release the sunshade from the forward rail to release tension.
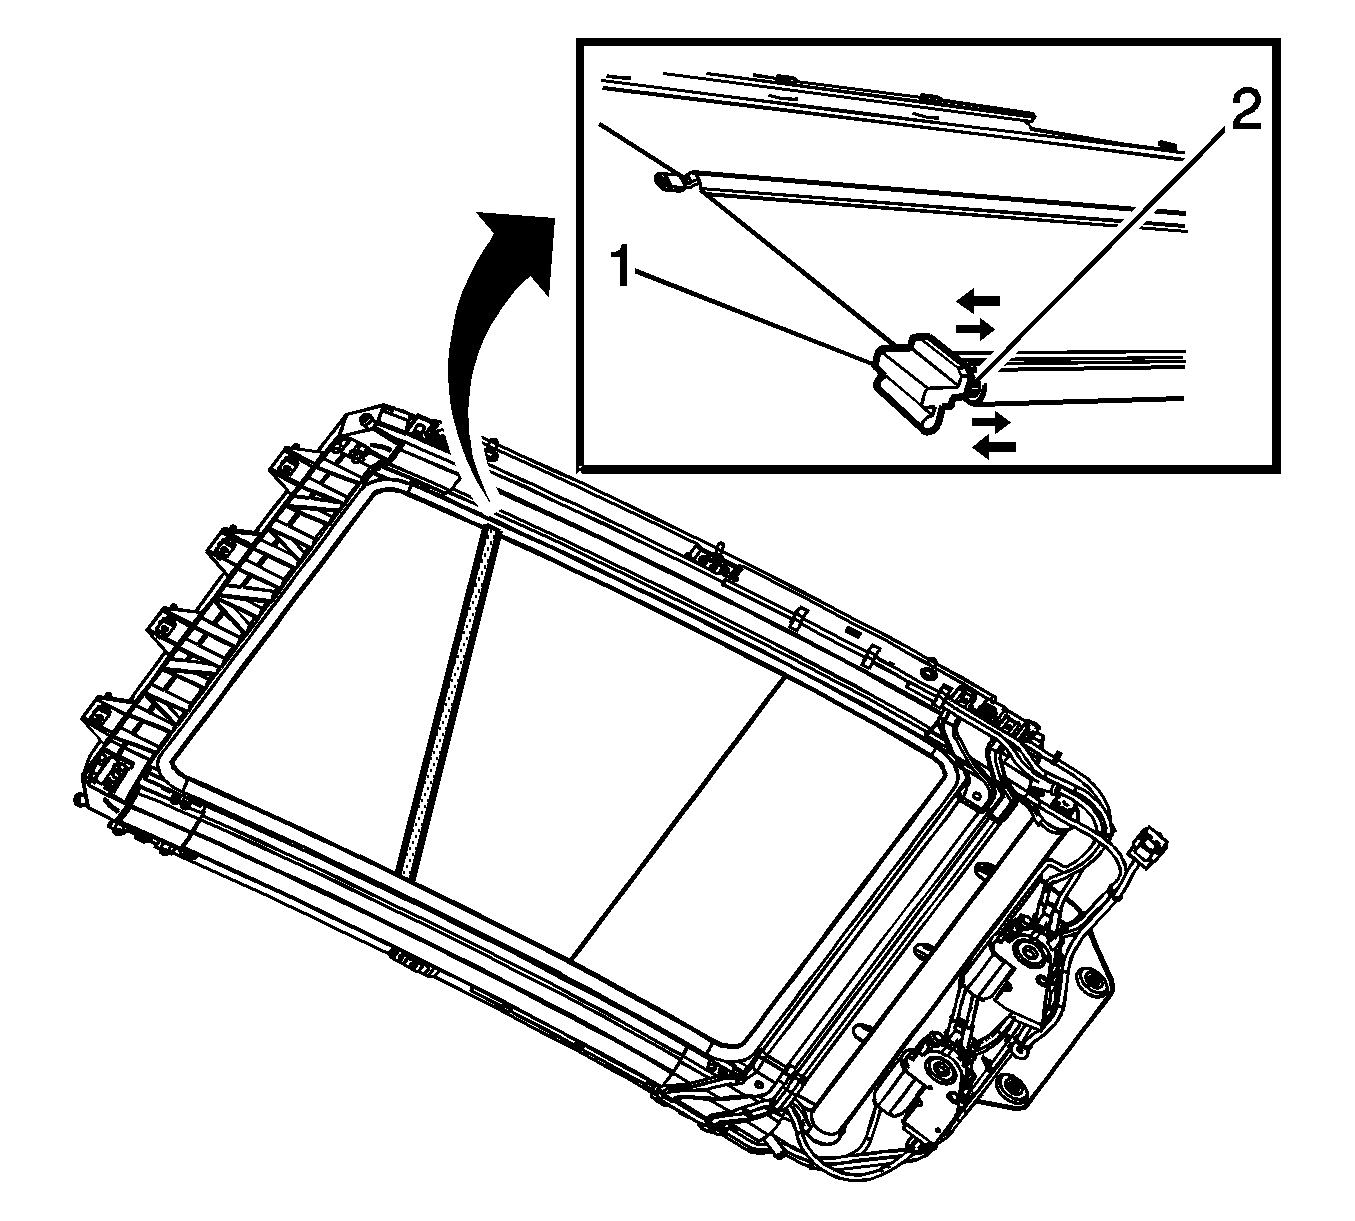
The guide block (1) stays in the track.
Installation Procedure
- Roll the sunshade up and place a tie wraps at each end of the sunshade, this will prevent the sunshade from unwapping.
- Install the sunshade end to the slot in the end plate.
- Install the sunshade to the sunroof assembly.
- Install the spring and cap (1) to the left side of the sunshade.
- Rewind the sunshade 21 times in the counter clock wise direction.
- Have assistant hold the sunshade, this will maintain tenison on the roller spring.
- Remove the tie wraps at each end.
- Feed the forward edge of the sunshade over the sunroof support.
- Install the sunshade to the guides (2) to the guide blocks (1) located in the front of the sunshade, one on each side.
- Pull forward and turn clockwise to install the sunshade to the tracks.
- Inspect the sunroof for proper operation.
- Install the headliner. Refer to Headlining Trim Panel Replacement.

Push inward on the cap while turning counterclockwise to lock in place.


Sunroof Sunshade Replacement C3Y - New
Removal Procedure
- Cycle the sunshade to the middle of opening.
- Lower the headliner. Refer to Headlining Trim Panel Replacement.
- Grasping the front corners of the sunshade, roll the sunshade counterclockwise.
- Sunshade guides (2) are located in the front of the sunshade, one on each side.
- Pull forward and turn outward to release the sunshade from the tracks.
- Roll the sunshade rearward over the front edge of the sunroof support.
- Remove the end cap (1) on the left side that holds the sunshade spring in place.
- Remove the sunshade from the sunroof assembly.

Important: Do this from inside the vehicle.
Release the sunshade from the forward rail to release tension.

The guide block (1) stays in the track.


Installation Procedure
- Install the sunshade roller to the end plate, allowing the pin to be expose through the end plate.
- Install the sunshade to the sunroof assembly.
- Install the spring and cap (1) to the left side of the sunshade.
- Feed the forward edge of the sunshade over the sunroof support.
- Install the sunshade to the guides (2) to the guide blocks (1) located in the front of the sunshade, one on each side.
- Pull forward and turn clockwise to install the sunshade to the tracks.
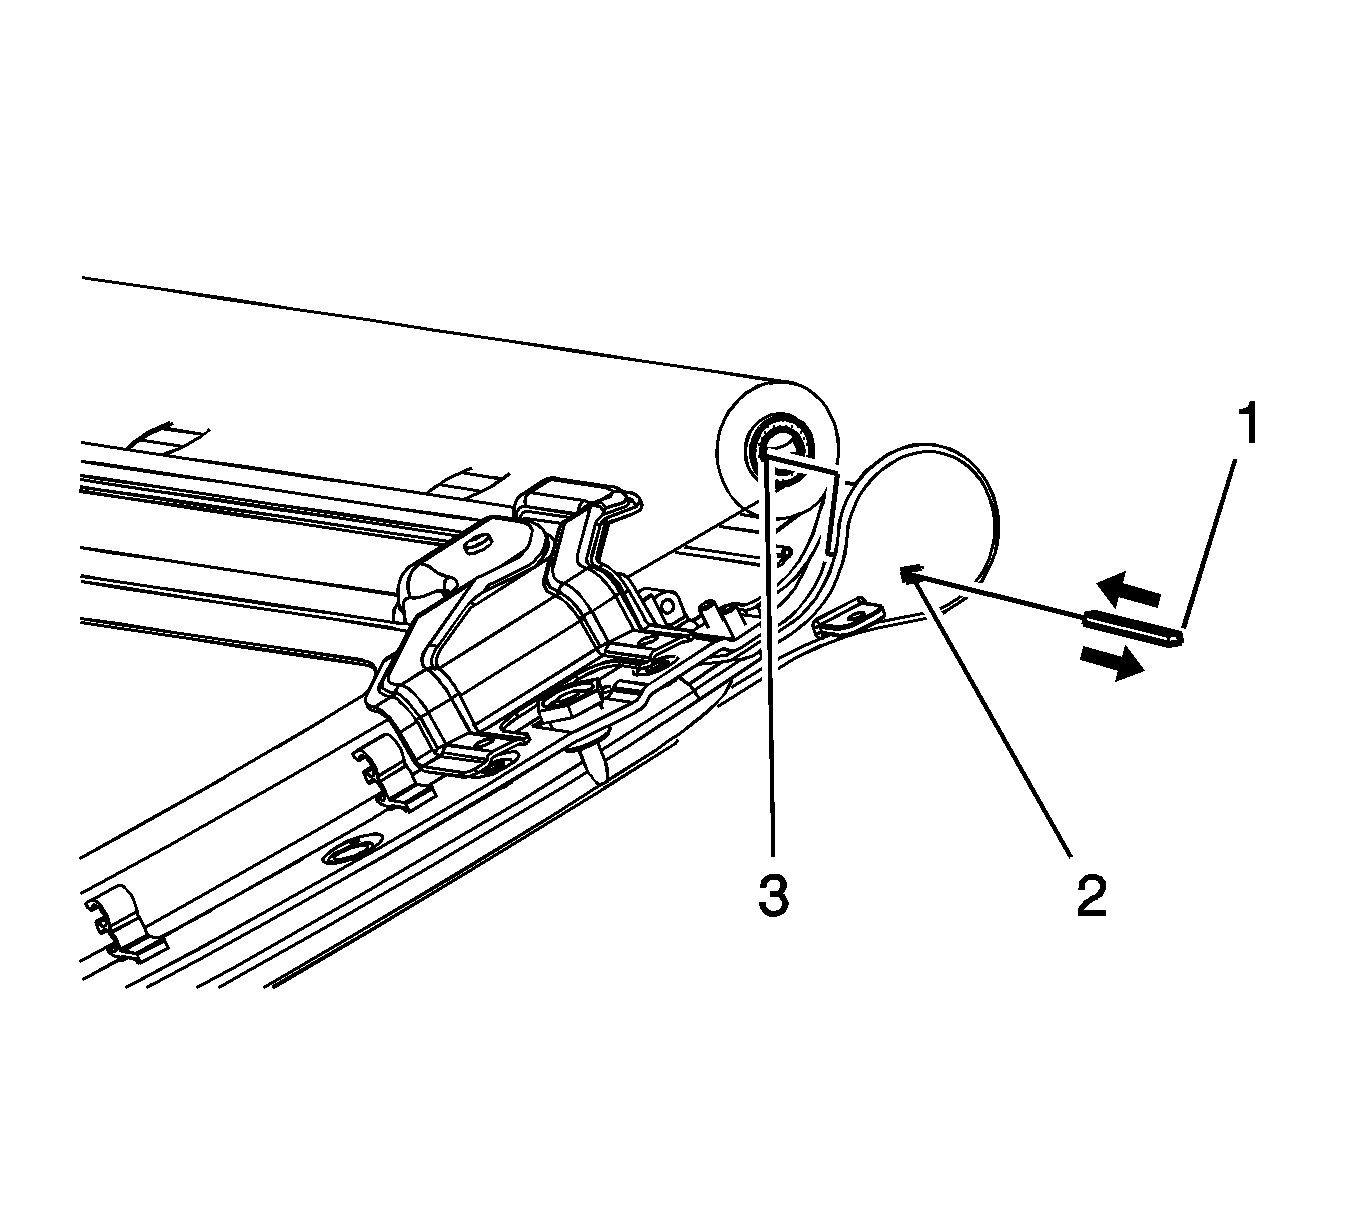
- Remove the tool (1) from the end plate slot (2)and sunshade roller (3).
- Inspect the sunroof for proper operation.
- Install the headliner. Refer to Headlining Trim Panel Replacement.
Important: If the sunshade spring releases, Refer to Reinstall within this cell.
A new sunshade service part comes pre-loaded with a pin tool holding spring tension on the sunshade.
Push inward on the cap while turning counterclockwise to lock in place.


Sunroof Sunshade Replacement CF5
Removal Procedure
- Remove the sunroof window panel from the sunroof module. Refer to Sunroof Window Replacement.
- Remove the sunroof sunshade (7) from the module.
- Do the following from the right side and through the sunroof opening, outside the vehicle:
- Remove the sunshade from the tracks.
Note: Use caution NOT to loosen the center fastener for the water gutter. If the fastener unhooks, it will be necessary to remove the dome lamp to gain access to the water gutter hole to reinstall the retainer. If equipped.
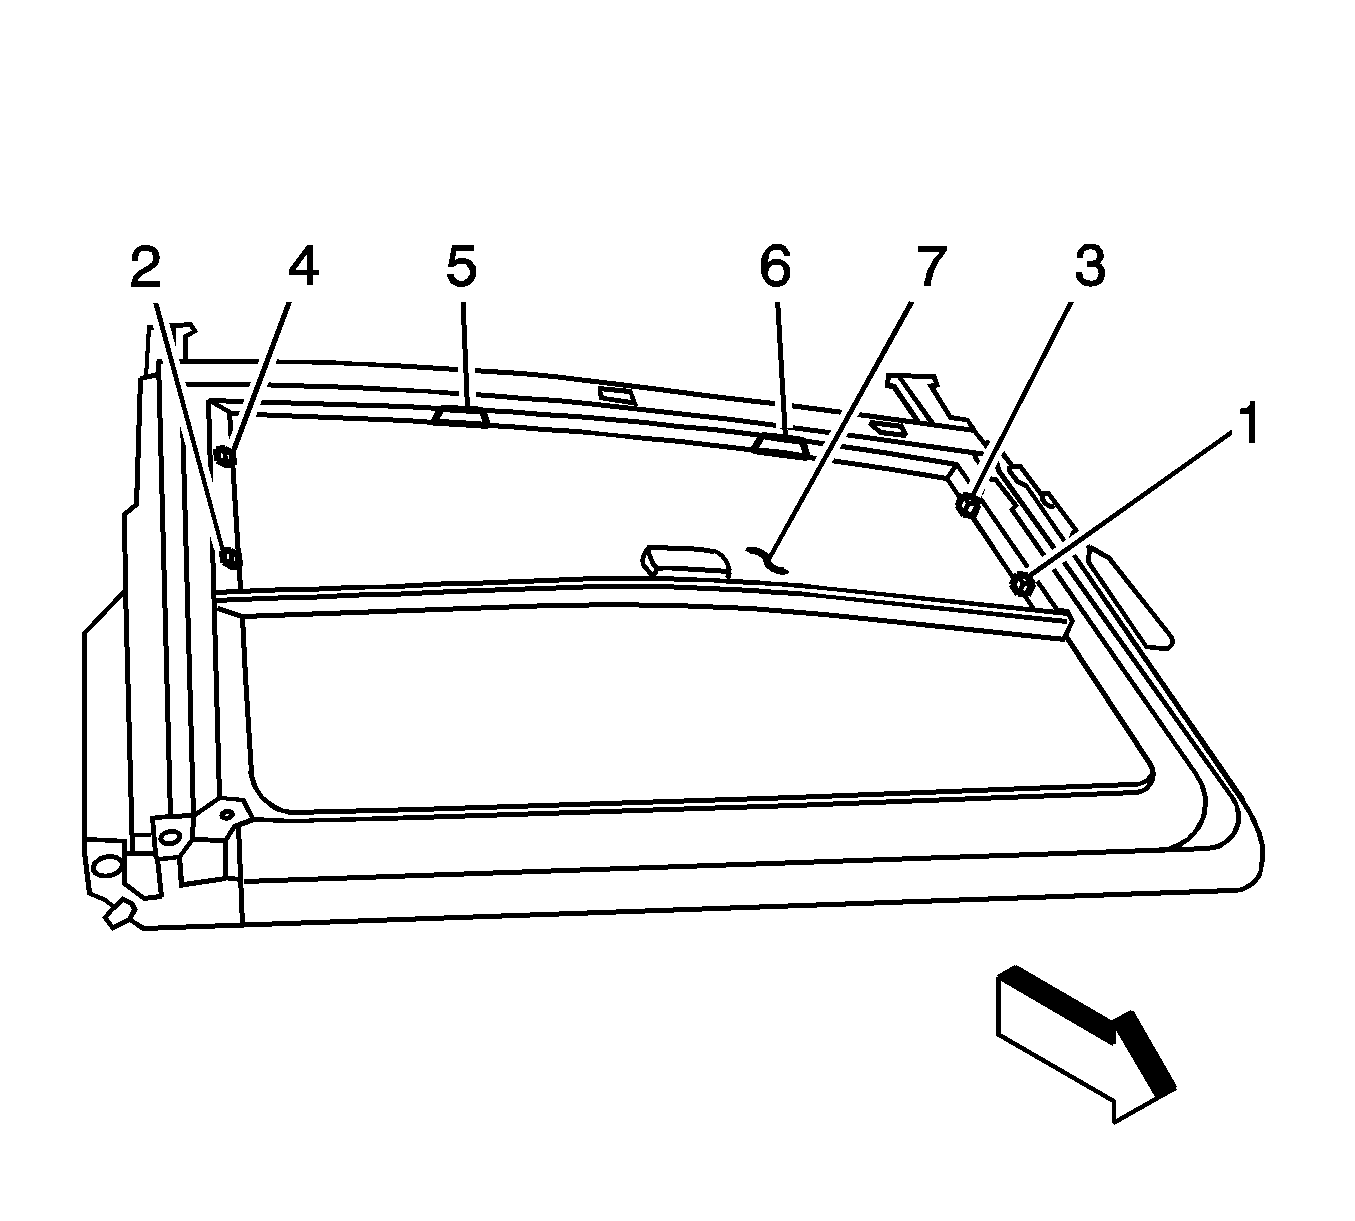
| 3.1. | Close the sunshade to with in an inch of the front opening. |
| 3.2. | Carefully arch the rear center of the sunshade. |
| 3.3. | Pull upward in the rear center of the sunshade (7). |
| 3.4. | Release the tabs (5, 6) from under the water gutter. |
| 3.5. | Lift upward in the rear center of the sunshade until the guide tabs (3) release from the track. |
| 3.6. | Slightly rotate the sunshade clockwise at the same time push forward releasing (4, 2) and then (1). |
Installation Procedure
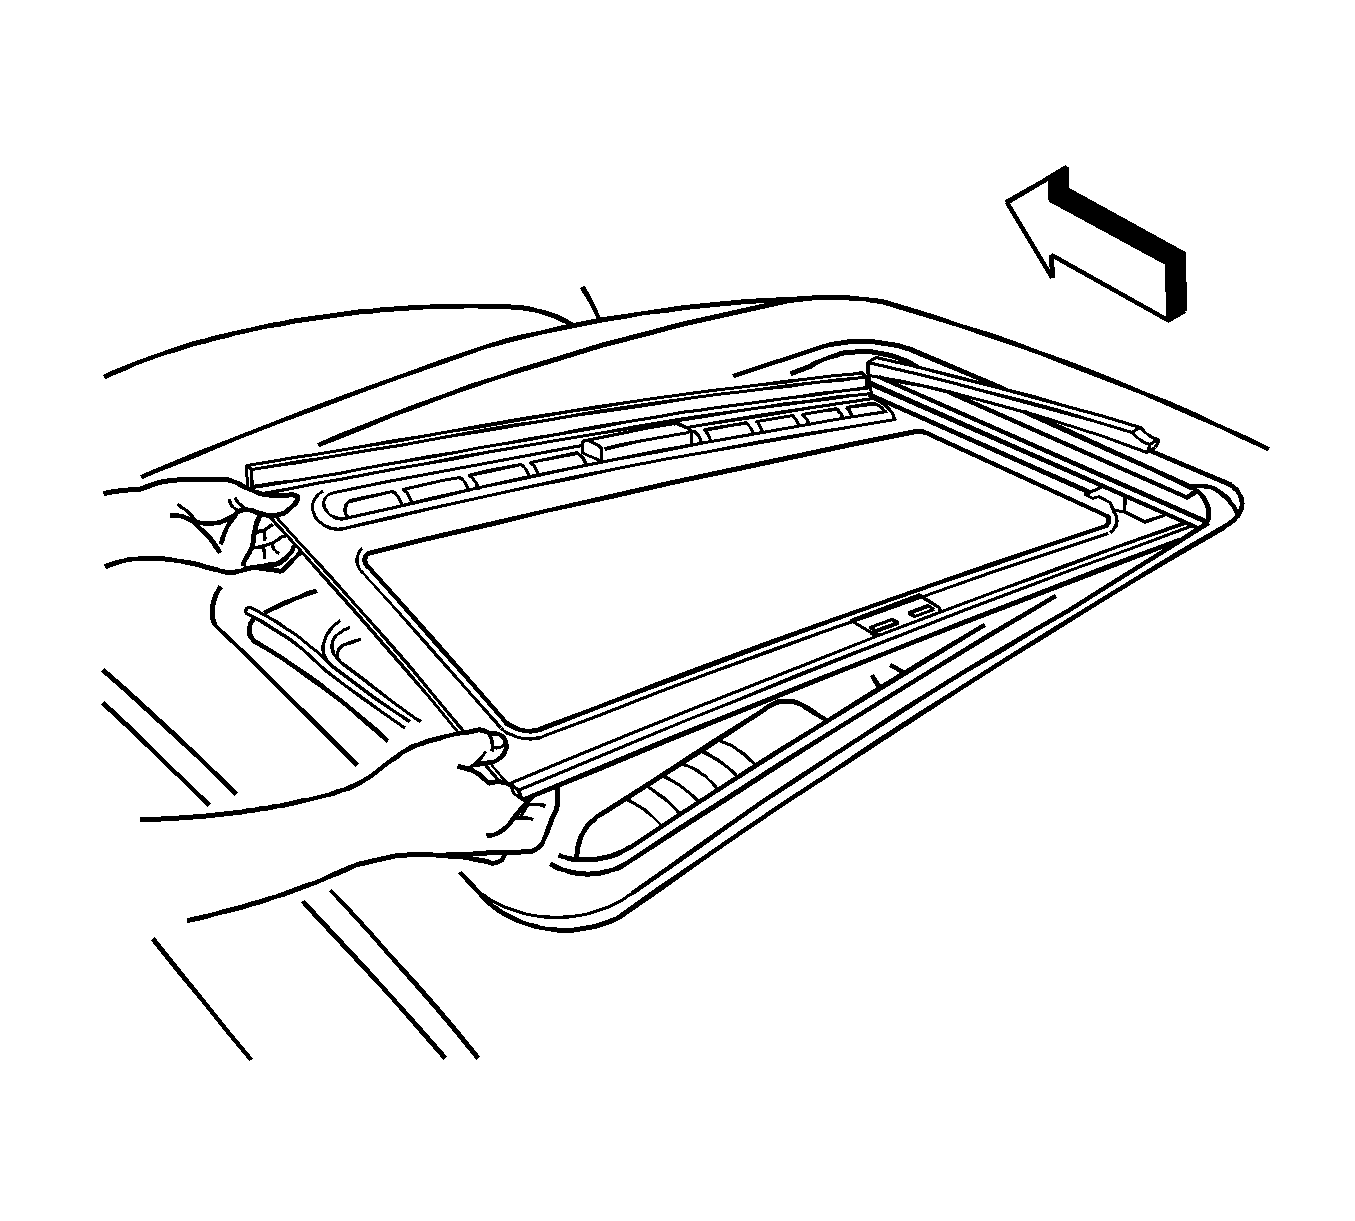
- Install the sunshade front tab to the left corner of sunroof track.
- Do the following from outside the vehicle and through the opening of the sunroof window from the right of left sides.
- While seated inside the vehicle with the sunshade in the closed position, verify that the front of the sunroof is not bent upward. If the sunshade is bent, grab the front middle of the sunshade and carefully pull down to adjust the shade to fit the front center edge.
- Install the sunroof window panel. Refer to Sunroof Window Replacement.
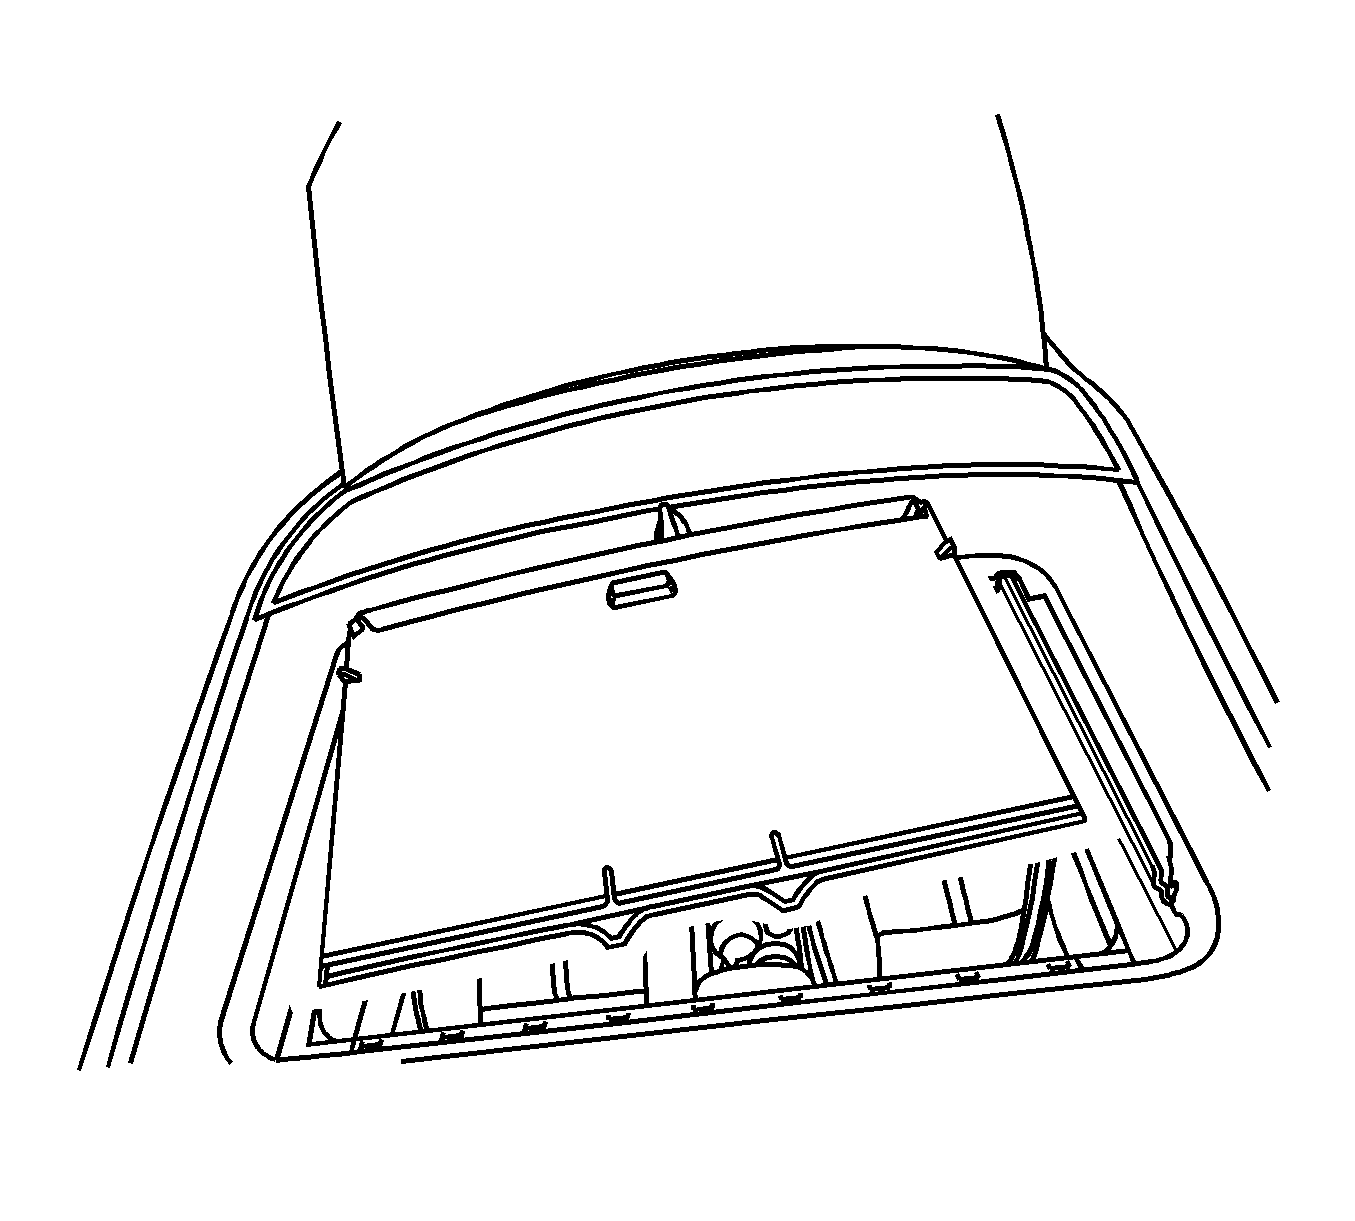

| 2.1. | Install the guide tab (1) into left front corner. |
| 2.2. | Rotor the sunshade until the guide tab (2) is insert into the right corner. |
| 2.3. | Insert the sunshade guide tab (3) flex the sunshade panel as needed to seat. |
| 2.4. | Arch the sunshade in the rear right corner (4) until guide tab can be installed. |
| 2.5. | Carefully flex the rear of the sunshade under water drain channel to allow the sunshade guide tabs (5) and (6) to clear. |
