Rattle Noise From Sunroof Area When Driving Over Bumps (Install Flocking Tape and Foam Strip)

| Subject: | Rattle Noise From Sunroof Area When Driving Over Bumps (Install Flocking Tape and Foam Strip) |
| Models: | 2007 Chevrolet Malibu |
| 2007 Pontiac G6 |
| 2007 Saturn Aura |
| with RPO CF5 |
This bulletin is being revised to add models and update the parts information. Please discard Corporate Bulletin Number 07-08-59-008 (Section 08 - Body and Accessories).
Condition
Some customers may comment on a rattle noise coming from the sunroof area when driving over bumps. This condition may occur with the sunshade in the closed, half open or open position.
Cause
This condition may be caused by a bowed sunshade assembly. The bow may cause the sunshade to drag on the water management tray. Also, this same bow may contact the rear of the water management tray and any vibration from the sunshade will be transmitted into the tray, which then rattle against the metal roof.
Correction
Verify that the rattle noise is coming from the sunshade and install the following:
| • | Close cell foam above the water management tray |
| • | Flocking tape under the rear water management tray outer area (not needed if the rattle occurs only in the closed position) |
| • | New sunshade assembly (not needed if the rattle occurs only in the closed position) |
While verifying the customer's comments, press up on the sunshade. If noise does not go away, then the concern is not with the sunshade assembly and this bulletin does not apply. If the noise is only coming from the headliner/sunshade when the sunshade is in the closed position, then perform Steps 1, 2, 3 & 4 and then proceed to Step 11.
- Cycle the sunroof window to the vent position.
- Slide the sunshade to the full rearward position.
- From inside the vehicle, remove the sunroof window screw on both sides.
- Lift the sunroof window from the opening.
- Close the sunshade to within a hand's width of full closure.
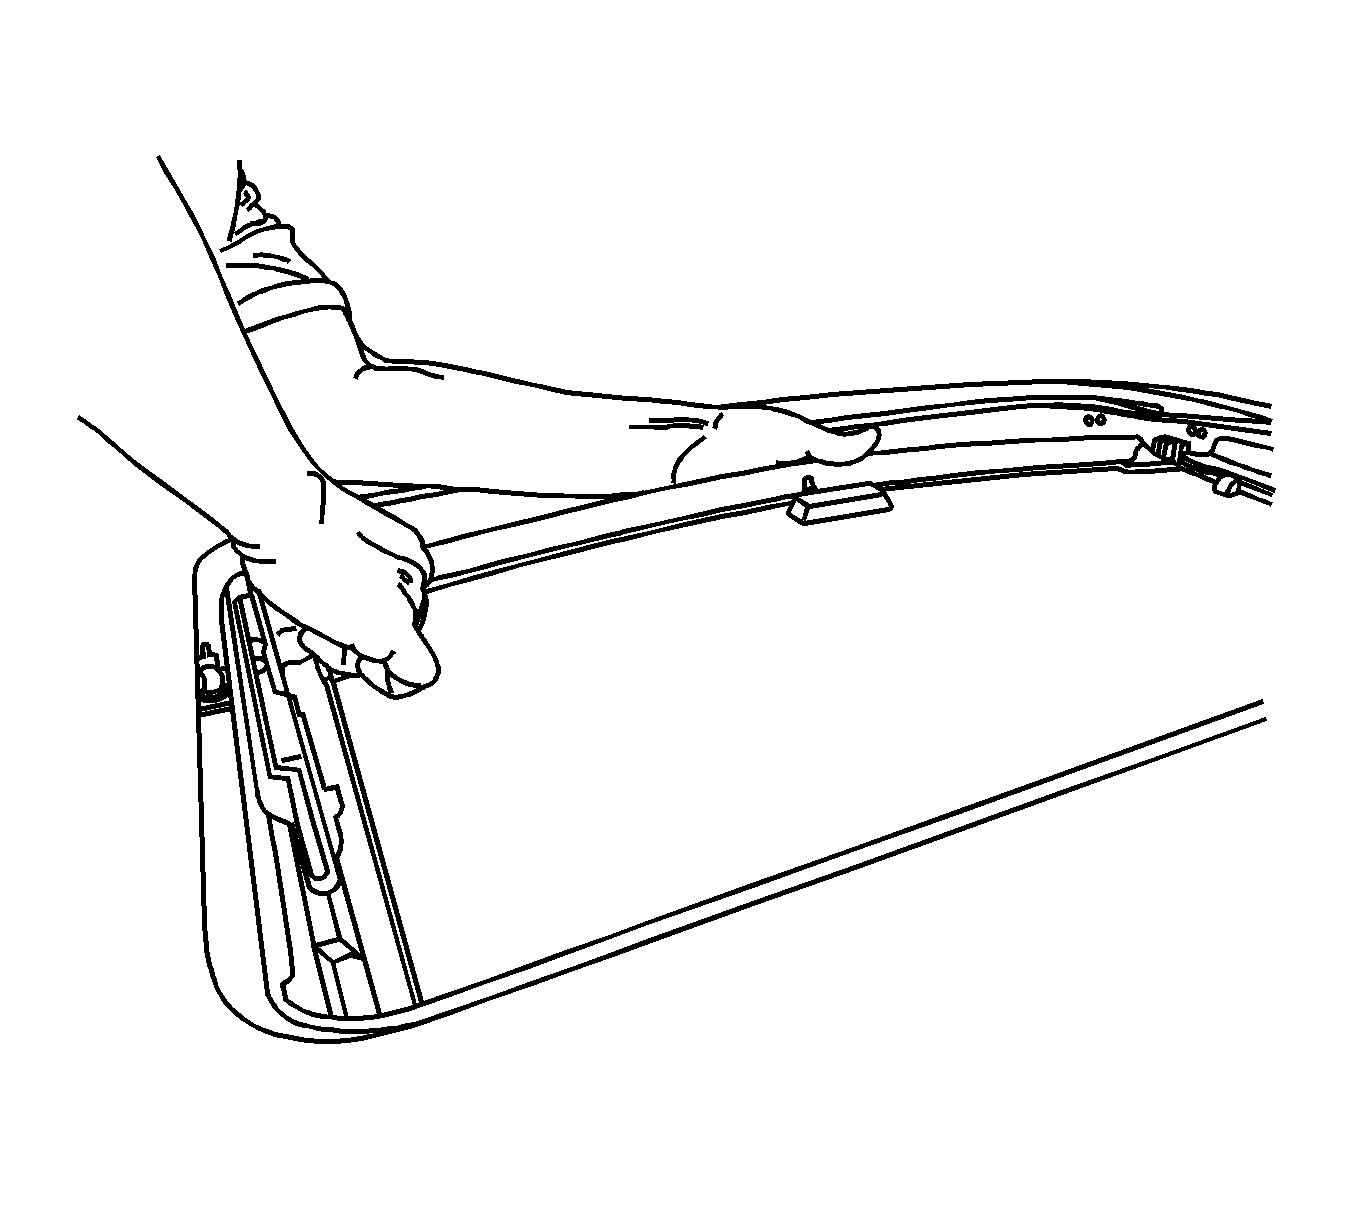
- From the top of the vehicle, push the sunshade toward the far side of the sunroof window track assembly.
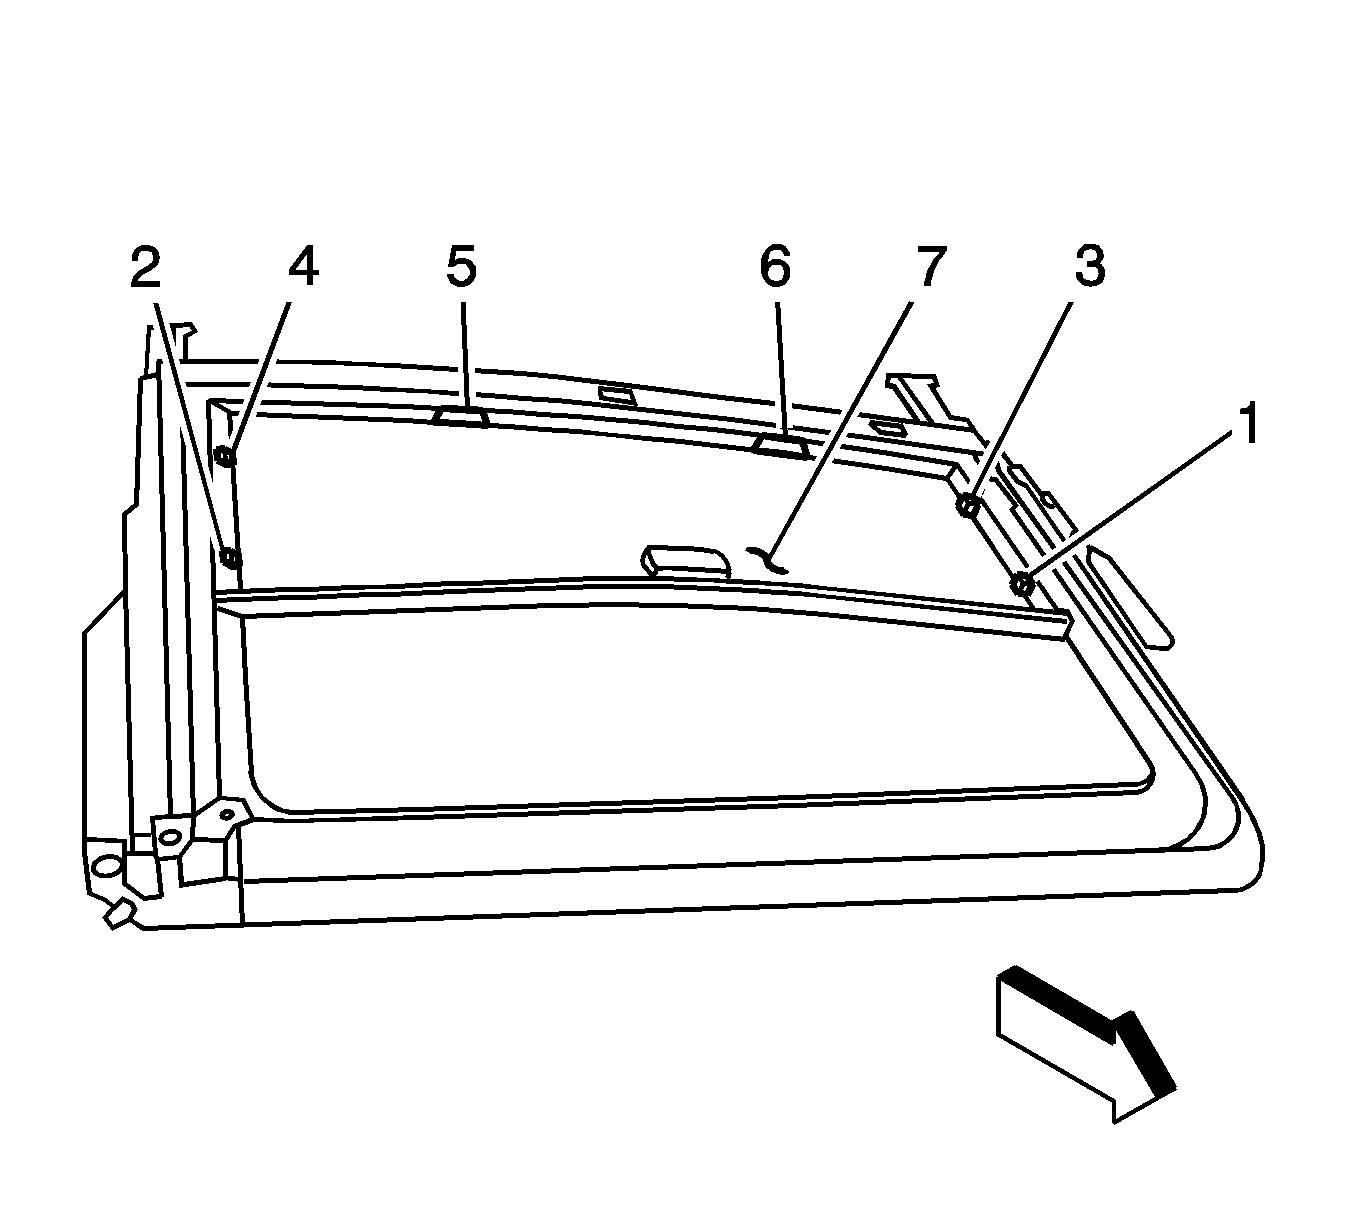
- Carefully arch the sunshade upward at the center of the forward edge and lift upward on the forward edge of the sunshade until the front sunshade guide is released from the track assembly.
- Slightly rotate the sunshade assembly in a direction of the tab that was removed. Remove the remaining three tabs from the sunshade track guide.
- Transfer the four sunshade guides from the original sunshade to the new sunshade.
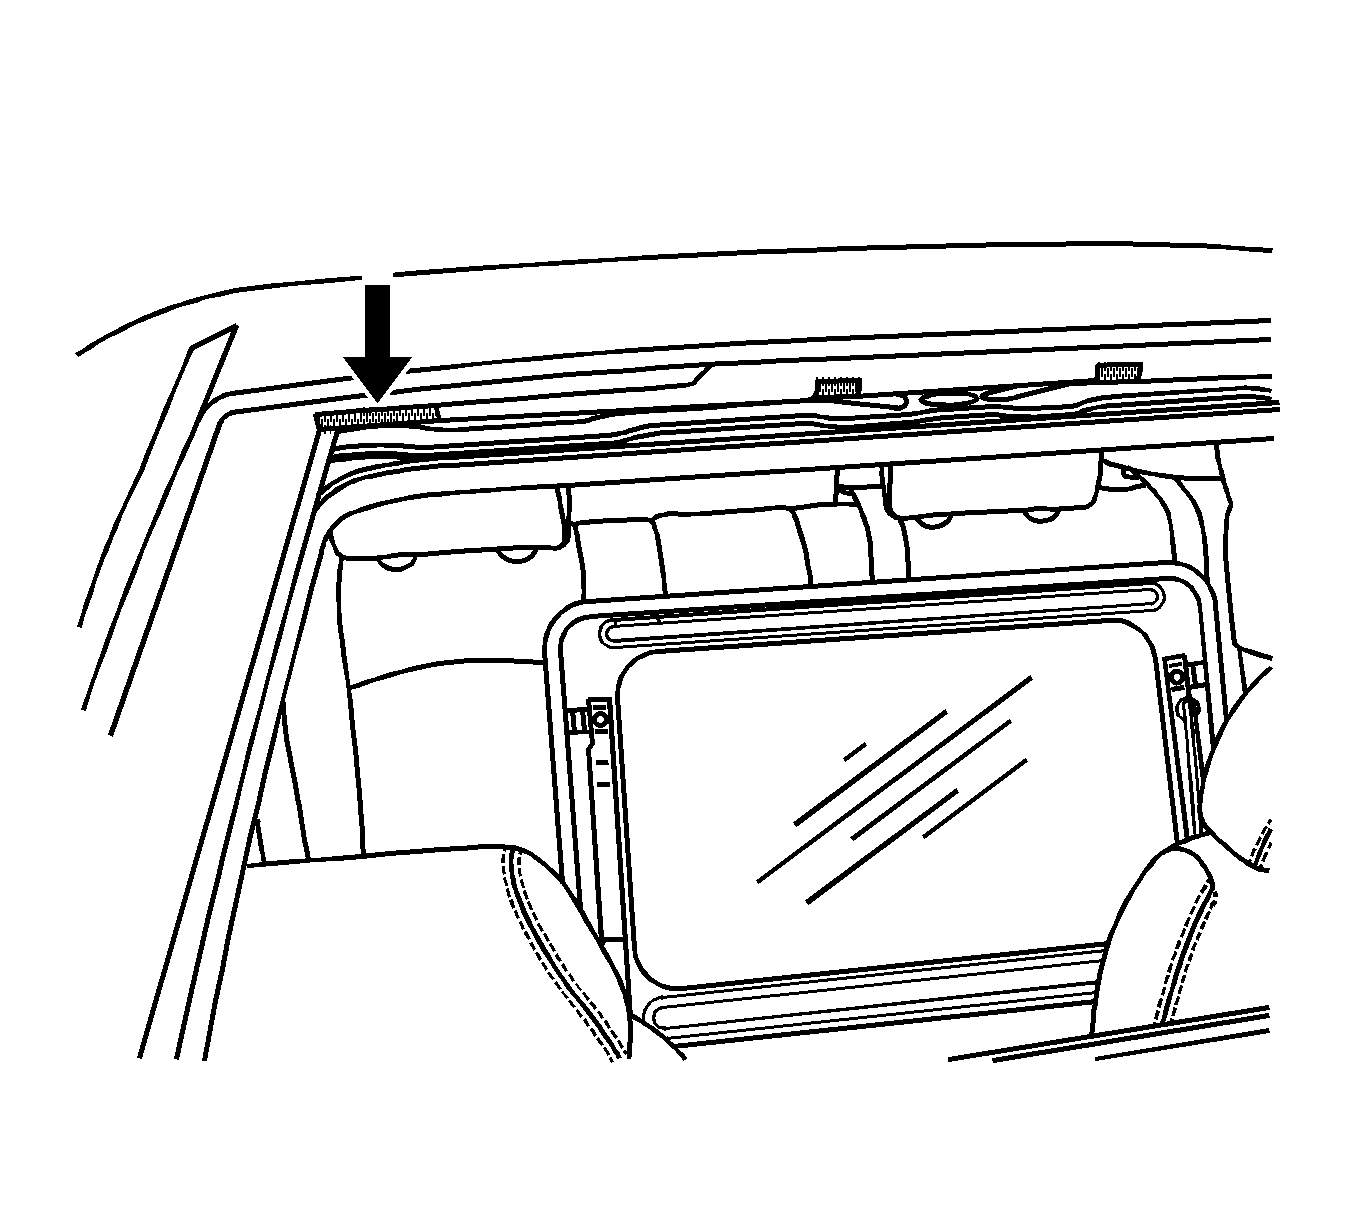
- Cut two pieces of flocking tape 63.5 mm (2-1/2 in) long and place one piece of tape on each underside of the rear water management tray, towards the outer edges. Make sure the flocking tape wraps up the front of the tray and also up the back of the tray. (Similar to the current tape already on the tray in the middle).
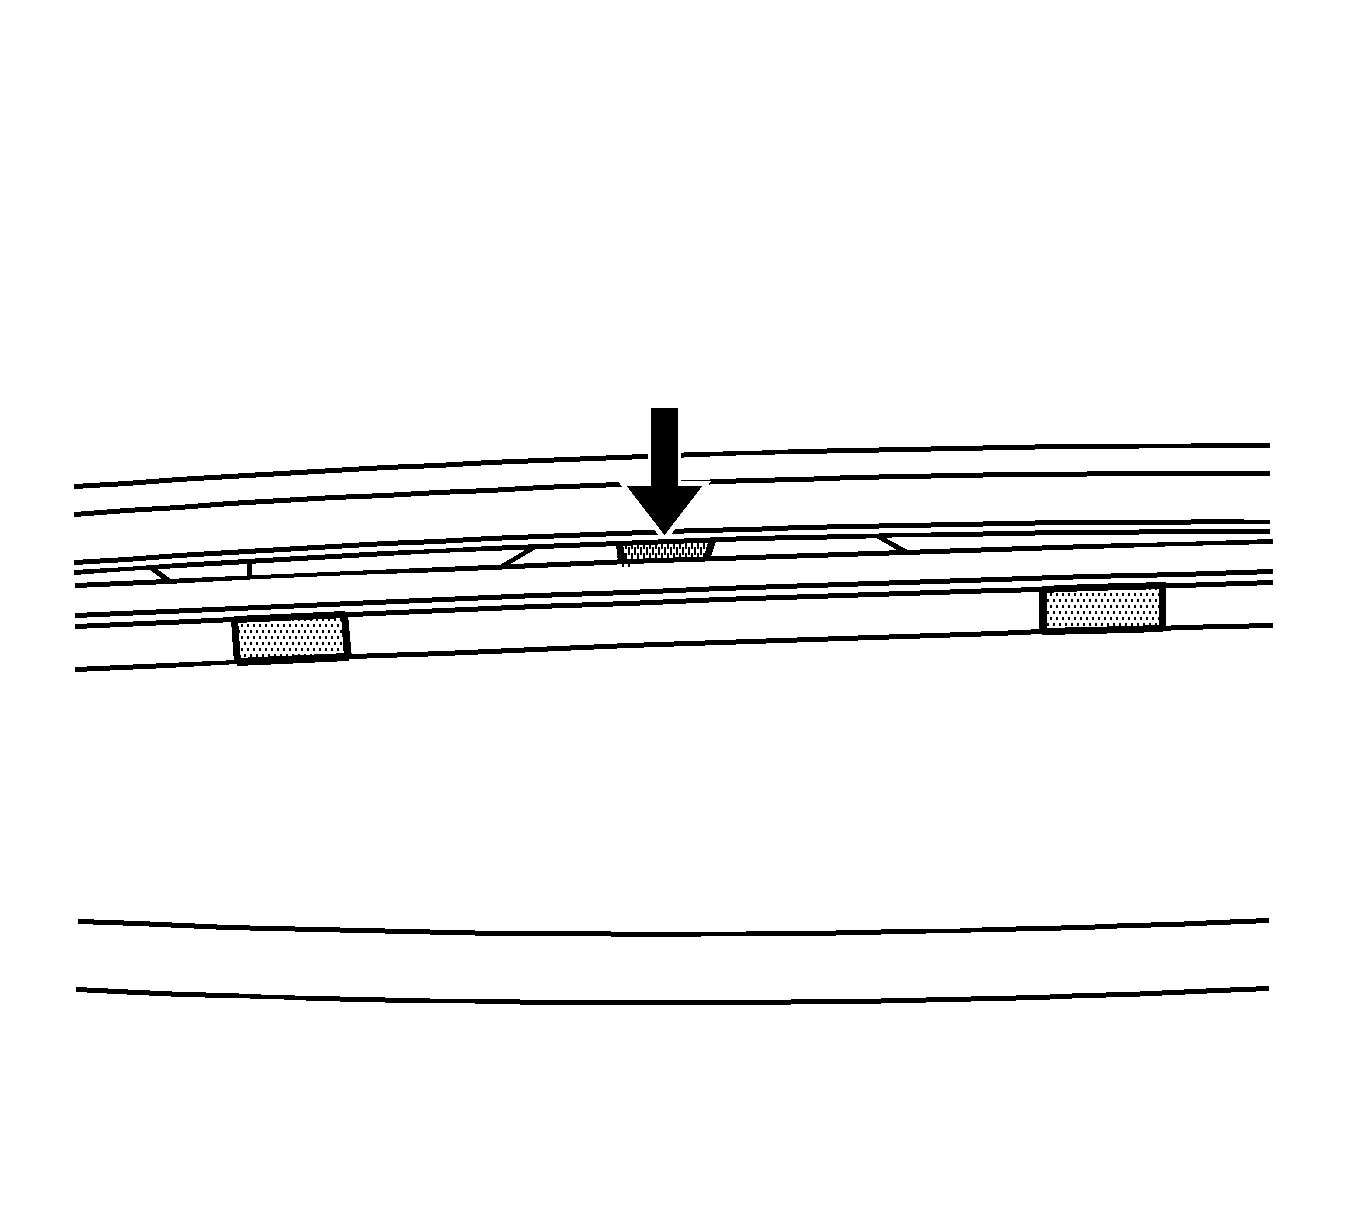
- Install a piece of 12.7 mm long x 15.9 mm x 3.2 mm thick (1/2 in long x 5/8 in x 1/8 in thick) of closed cell foam (Adhesive Back Shin Stock) between the rear water management tray and roof in the center of the rear opening. Position the foam under the roof so it is not visible from above. If the sunshade was not removed, proceed to Step 16.
- Position the sunshade assembly as shown in the illustration above. Place the left rear sunshade guide in the left side track first and then place the right rear sunshade guide in the right track assembly. Lightly push down on the guide's top spring feature, allowing the guides to seat in the track.
- Push the sunshade rearward and rotate the sunshade clockwise to install the right front sunshade guide in the track. Position the sunshade to allow access at the front of the shade to grab onto -- the left front sunshade shoe will be out of the track at this time.
- Carefully arch the sunshade upward at the center of the forward edge until the left front guide can positioned and seated into the left track.
- While seated inside the vehicle with the sunshade in the closed position, verify that the front of the sunshade is not bent upward. If it is bent, grab the middle of the front of the sunshade and carefully pull down to adjust the shade.
- Install the sunroof glass. Refer to Sunroof Window Height and Opening Fit Adjustment in SI.
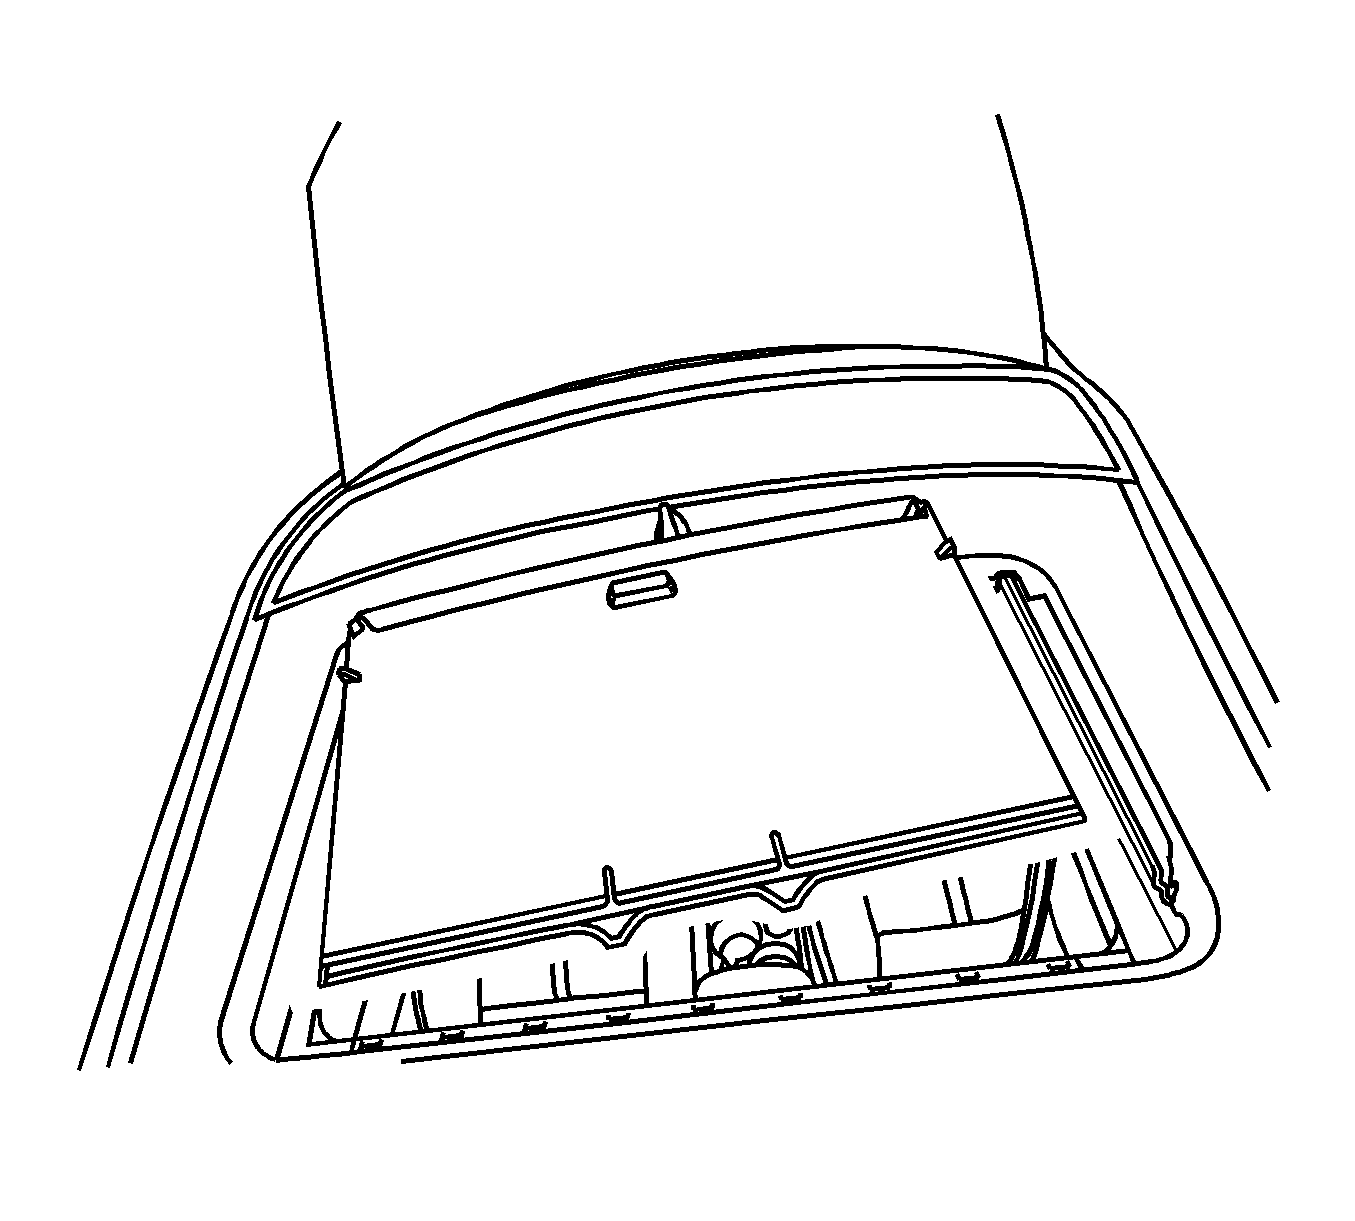
Important: DO NOT BEND THE REAR EDGE OF THE SUNSHADE ASSEMBLY.
Parts Information
Purchase flocking tape and adhesive back shim stock from Kent-Automotive.
| • | 1-888-YES-KENT (Technical Service) |
| • | 1-800-654-6333 (Customer Service) |
| • | www.kent-automotive.com |
Part Number | Description | Vehicle |
|---|---|---|
15289710 | Sunshade (19I) (22I) (85I) w/o Louvers Titanium | Saturn Aura, Pontiac G6 |
15289711 | Sunshade, Sun RF (w/o Louvers) Gray | Chevrolet Malibu, Pontiac G6 |
15289712 | Sunshade (70I) Neutral | Saturn Aura, Chevrolet Malibu, Pontiac G6 |
P40100 | Adhesive Back Shim Stock | Saturn Aura, Chevrolet Malibu, Pontiac G6 |
KT 13486 | BRS Tape (Flocking Tape) | Saturn Aura, Chevrolet Malibu, Pontiac G6 |
Warranty Information
For vehicles repaired under warranty, use:
Labor Operation | Description | Labor Time |
|---|---|---|
B2900 | Sunshade, Sunroof Sliding Glass Panel - R&R or Replace | Use Published Labor Operation Time |
