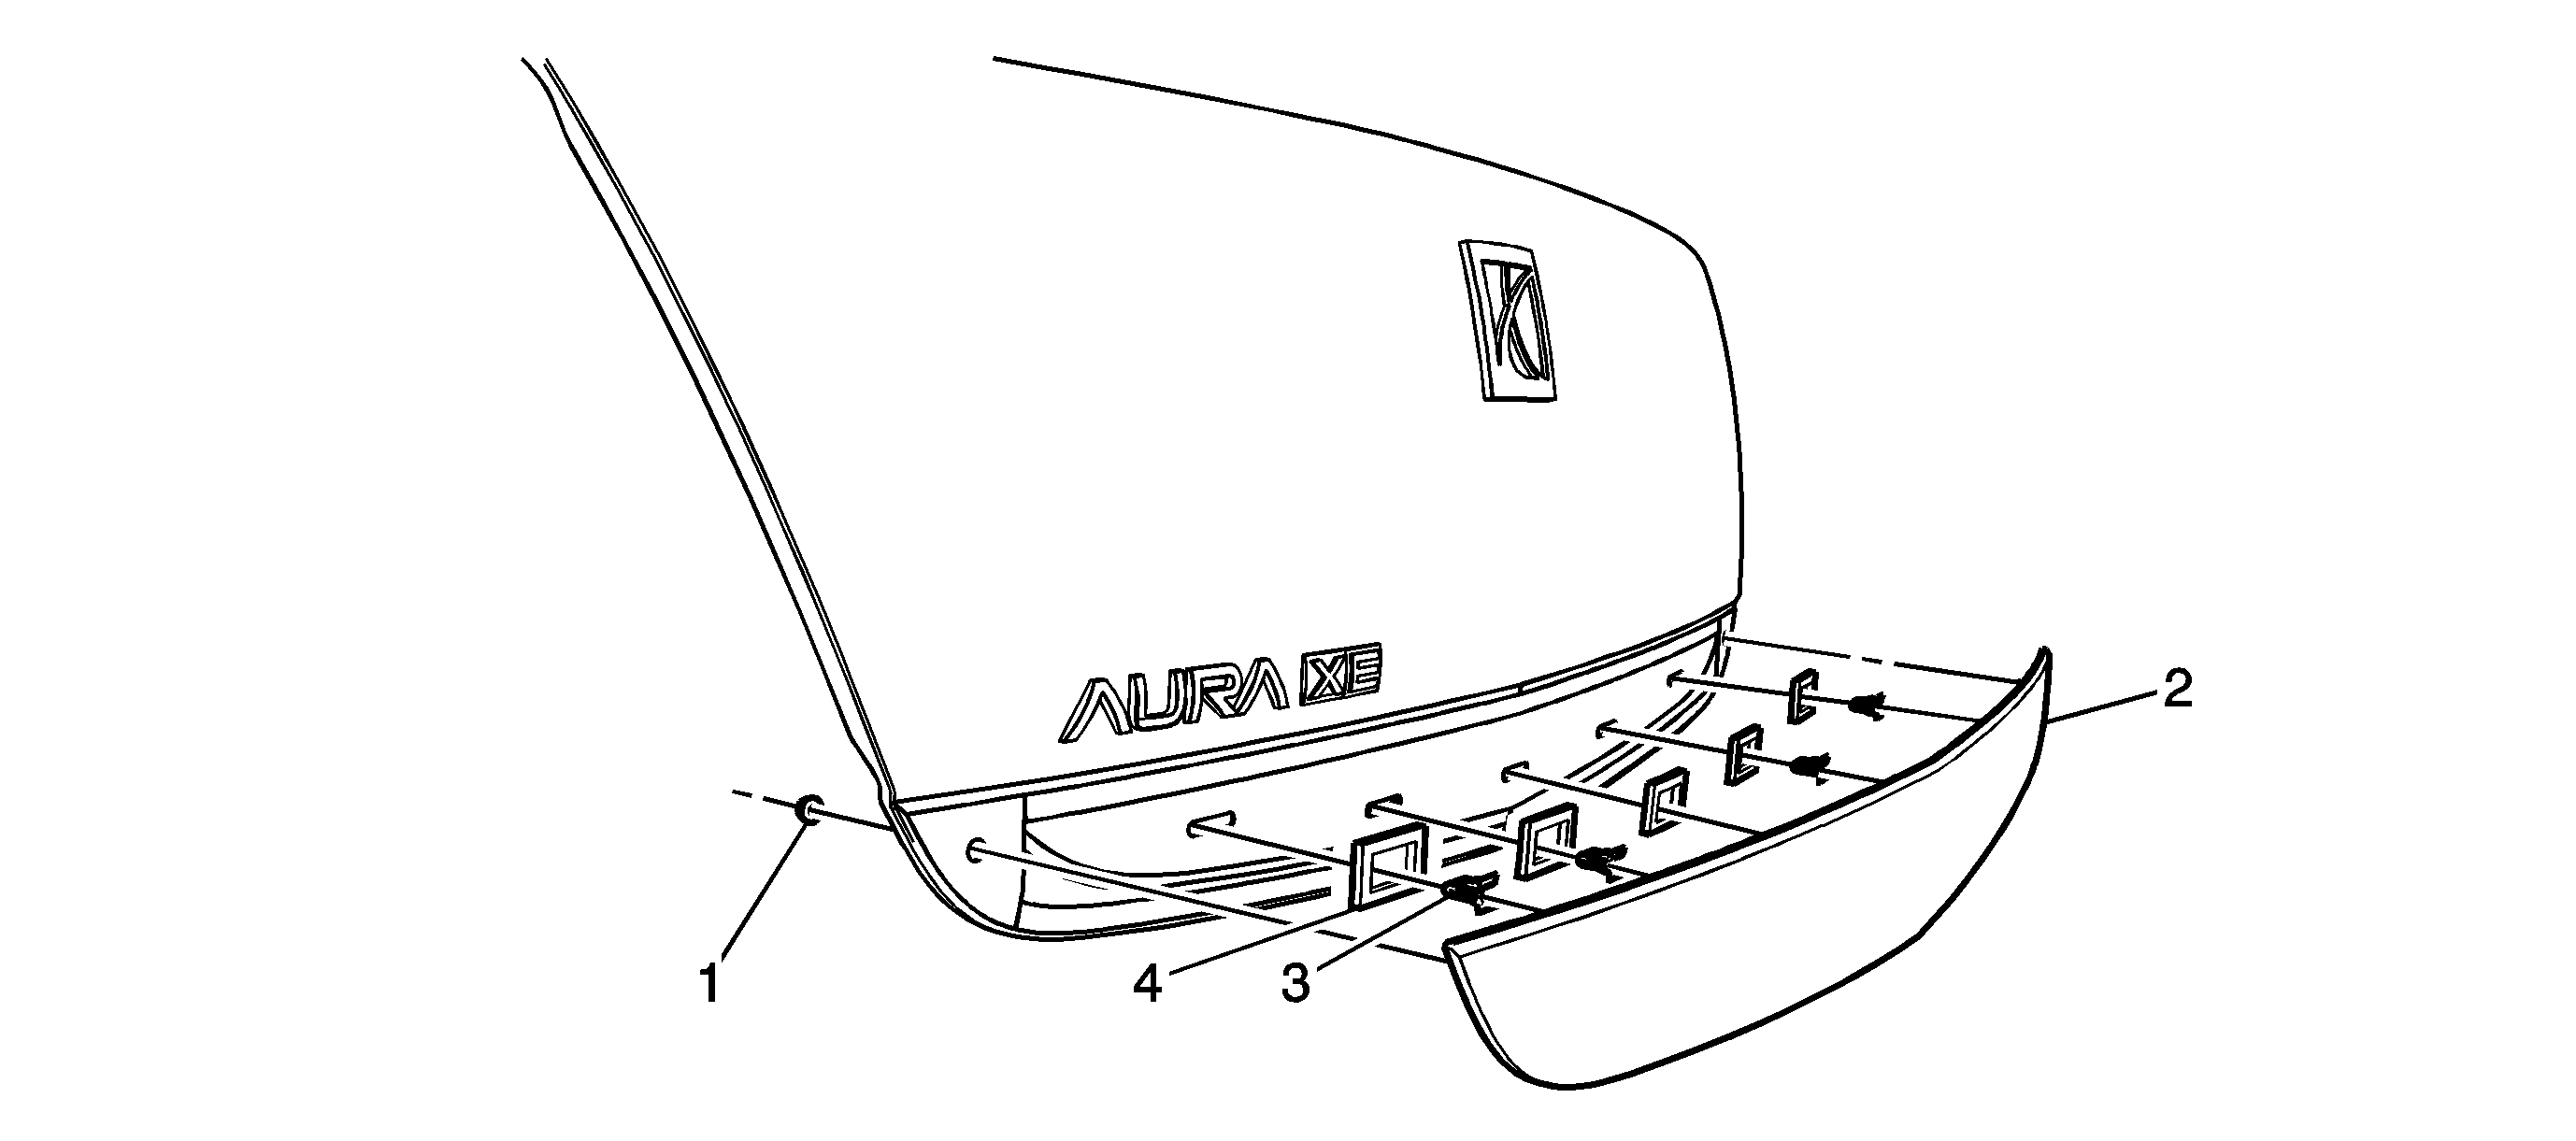
Callout
| Component Name
|
Preliminary Procedures
- Open the rear compartment lid.
- Remove the 2 outer cap nuts from the lower molding from inside the rear compartment lid.
- Use a
J 25070
Heat Gun or equivalent to remove the old molding assembly.
- Clean all adhesive from the rear compartment lid, wipe the surface dry with a clean lint-free towel prior to installing the new molding assembly.
- Remove the lower molding from the rear compartment lid by pulling one edge outward and then working across to the opposite edge.
Special ToolJ 25070
|
1
| Outer Cap Nut (Qty: 2)
Caution: Refer to Fastener Caution in the Preface section.
Tighten
1.8 N·m (16 lb in). |
2
| Rear Compartment Lid Lower Applique
Procedure
- When removing protective liners from adhesive tape, be careful not to touch tape with hands and do not allow tape to come in contact with dirt or any foreign matter prior to adhesion.
- Upon installation of the new lower molding, position the outer pins to the alignment holes at the outer edges of the rear compartment lid.
- Secure the retention clips beginning at the center working outward.
|
3
| Retention Clip (Qty: 4)
|
4
| Foam Gasket (Qty: 5)
Tip
Ensure the foam gaskets are in place over the retention clips prior to installation. |

