GM Service Manual Online
For 1990-2009 cars only

Air Conditioning Compressor and Condenser Hose Replacement LAT
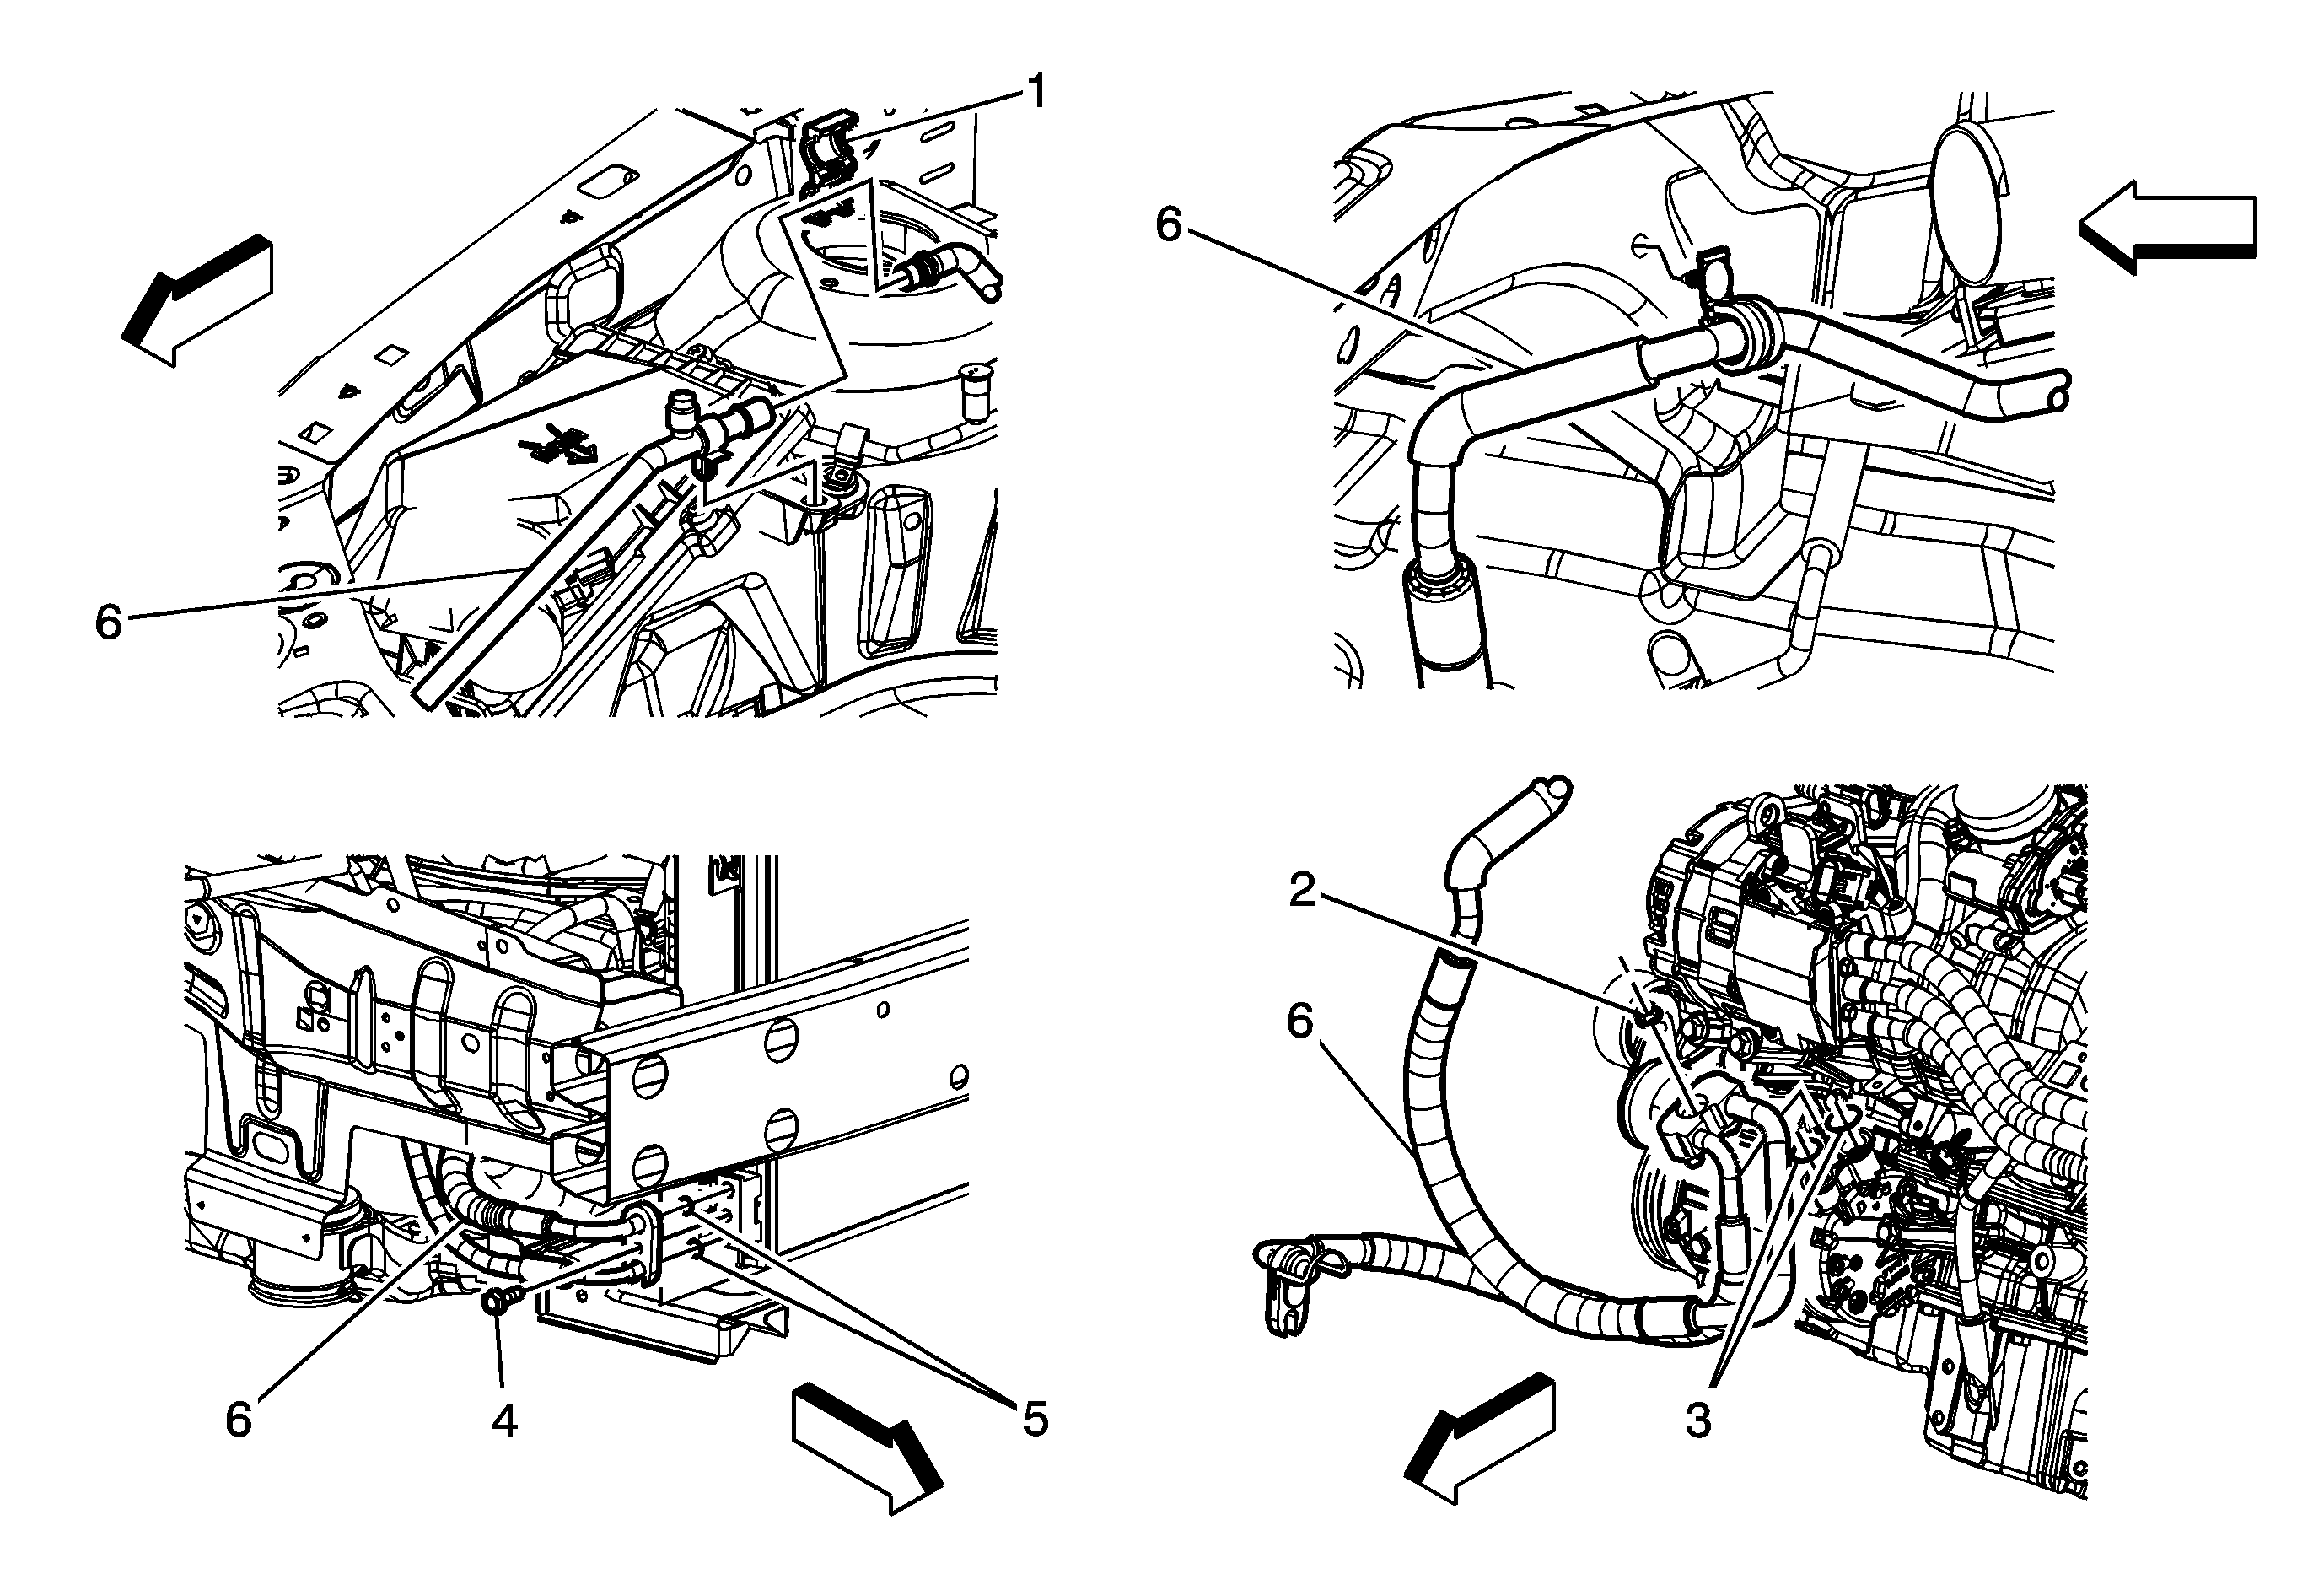

Object Number: 2003743  Size: MF

Callout

Component Name

Preliminary Procedure

  1. Recover the refrigerant. Refer to Refrigerant Recovery and Recharging.
  2. Remove the air cleaner intake duct fro the air cleaner assembly. Refer to Air Cleaner Assembly Replacement.
  3. Raise and support the vehicle. Refer to Lifting and Jacking the Vehicle.
  4. Remove the right front fender liner. Refer to Front Fender Liner Replacement.

1

A/C Compressor and Condenser Connector

Procedure

  1. Insert 2 small screwdrivers into the 2 slots of the compressor hose and suction line connector and release locking tabs.
  2. Remove the A/C compressor hose from the evaporator hose assembly and discard O-rings. Refer to O-Ring Replacement.

2

A/C Compressor Hose Nut

Caution: Refer to Fastener Caution in the Preface section.

Procedure

Remove the A/C compressor hose from the A/C compressor and cap hose.

Tighten
20 N·m (15 lb ft)

3

Sealing Washer

Procedure

Remove and discard the sealing washers. Refer to Sealing Washer Replacement.

4

A/C Compressor Hose Bolt

Tighten
20 N·m (15 lb ft)

5

Sealing Washer

Procedure

Remove and discard the sealing washers. Refer to Sealing Washer Replacement.

6

A/C Compressor Hose Assembly

Procedure

  1. Note the routing of the A/C compressor hose to ensure proper routing.
  2. Using the J 39400 leak test A/C compressor hose connections.

Special Tools

J 39400 Electronic Halogen Leak Detector

Air Conditioning Compressor and Condenser Hose Replacement LE5
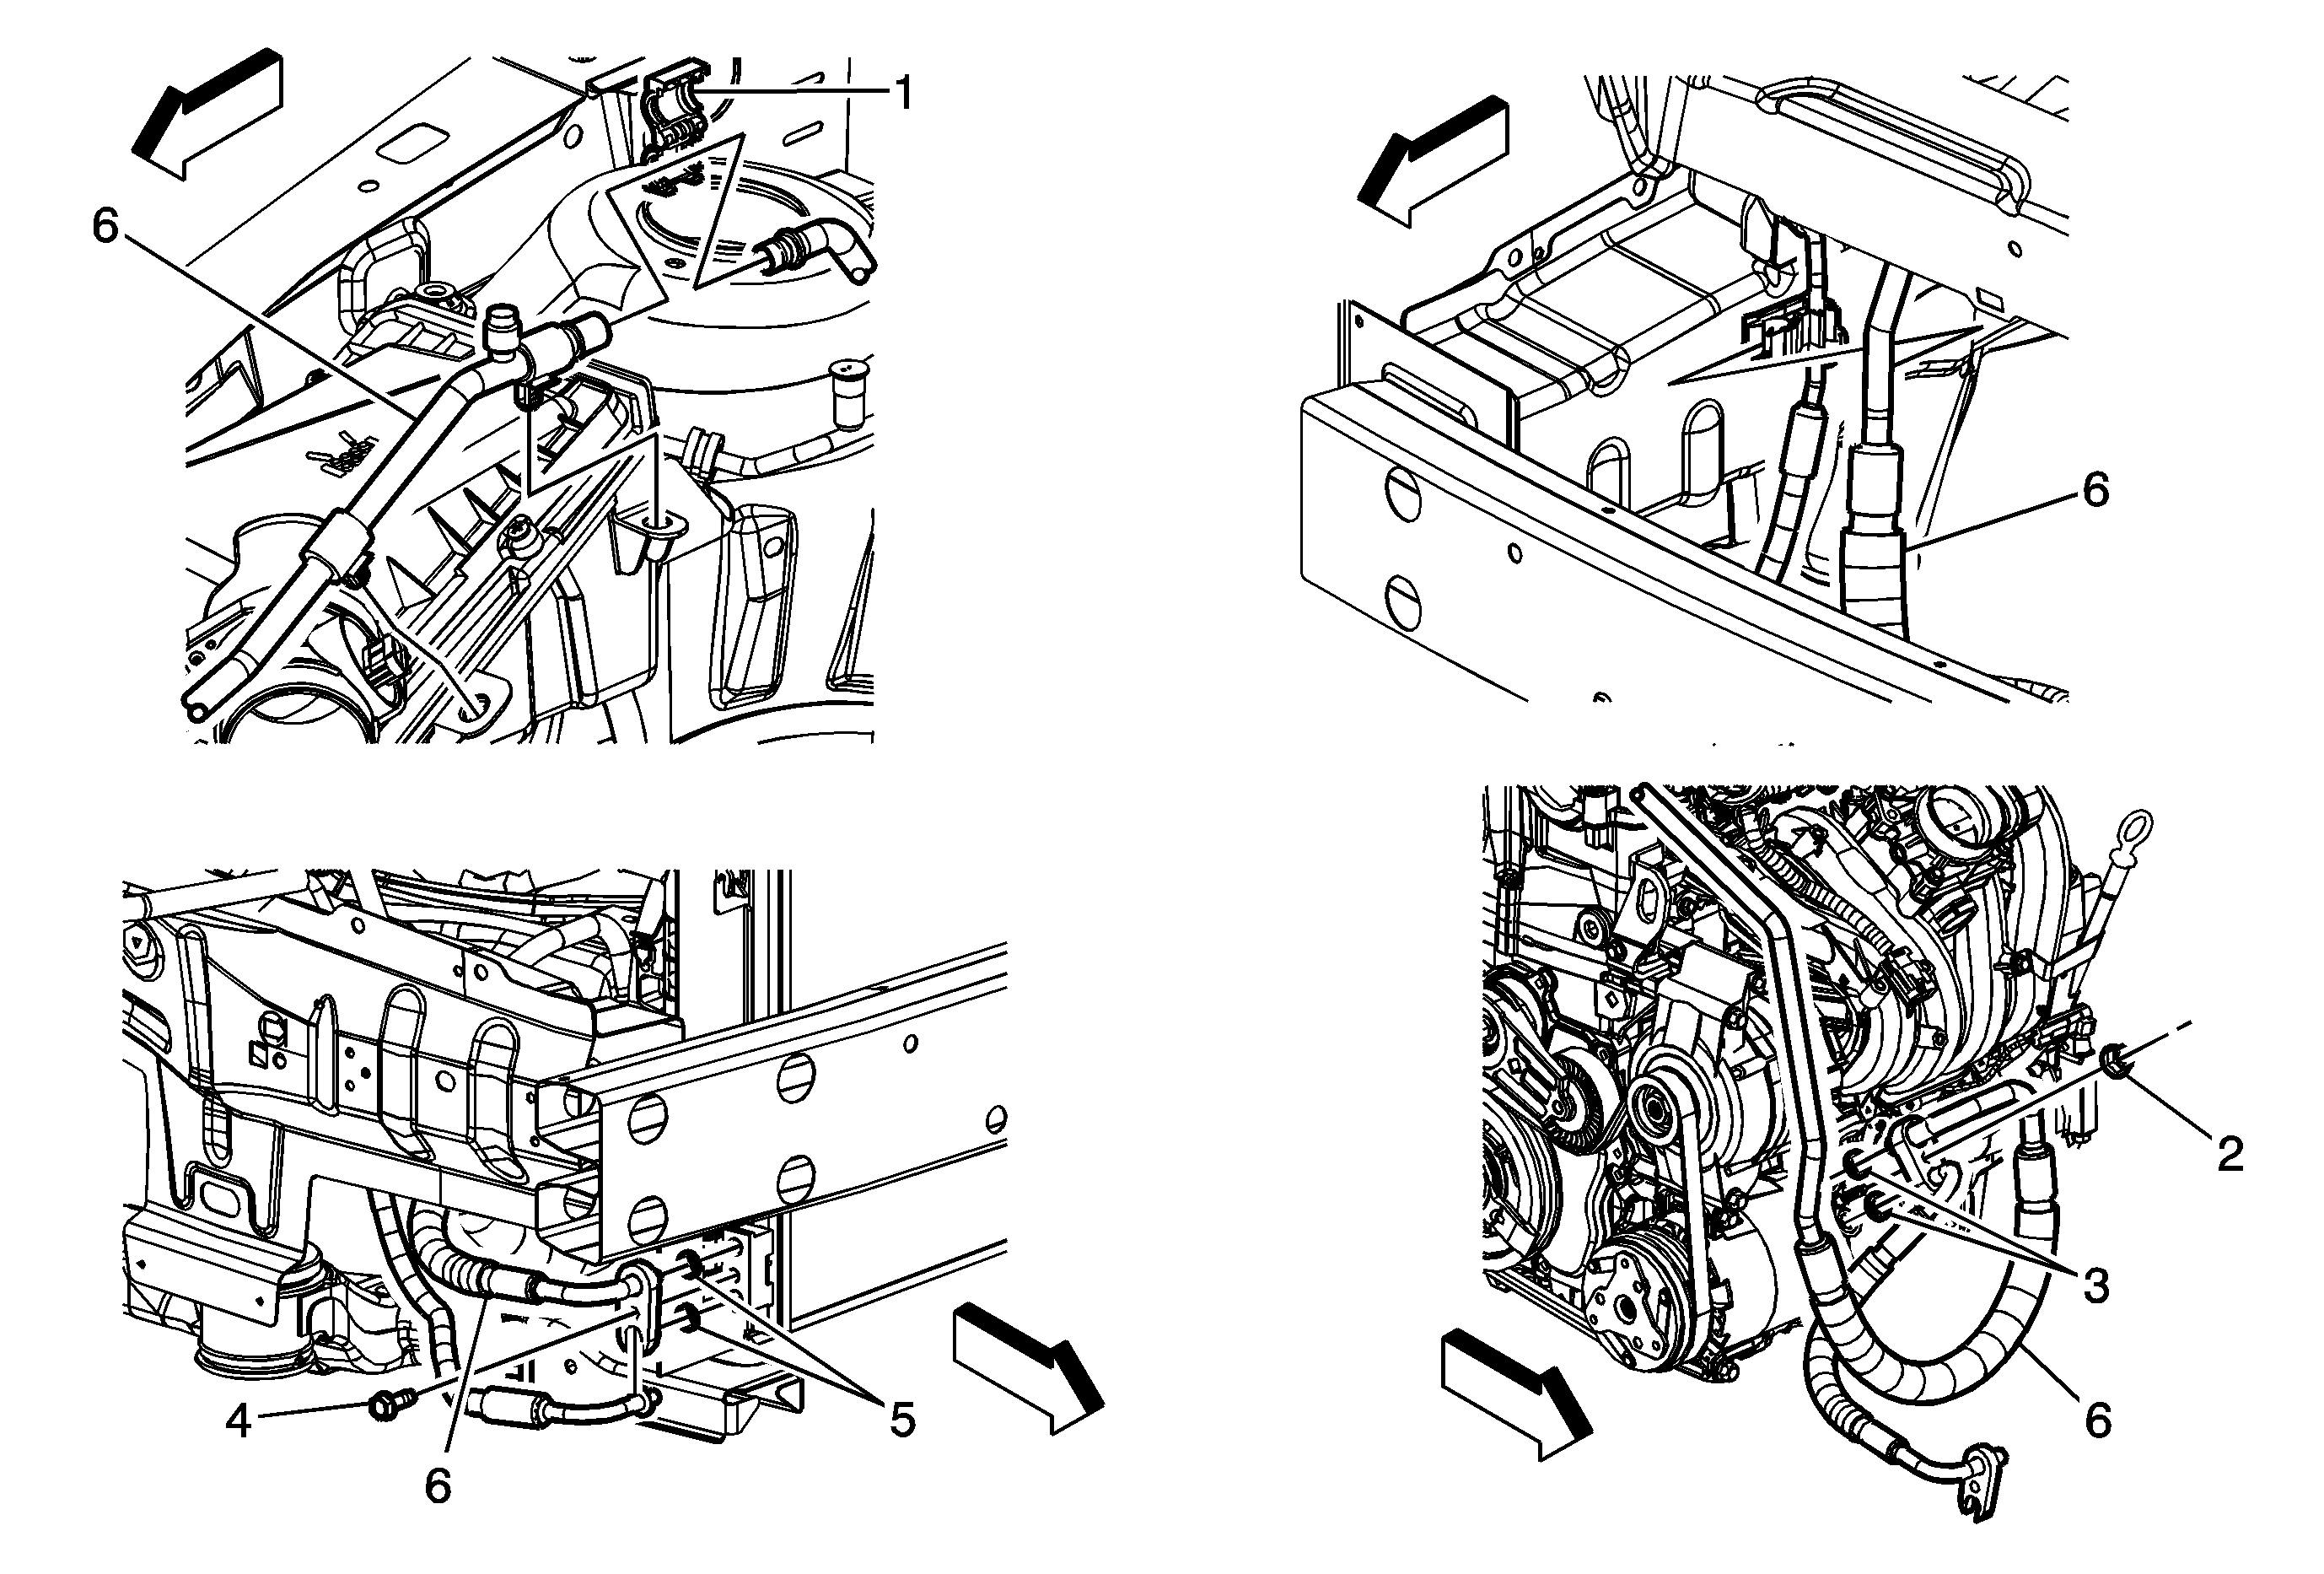

Object Number: 2003741  Size: MF

Callout

Component Name

Preliminary Procedure

  1. Recover the refrigerant. Refer to Refrigerant Recovery and Recharging.
  2. Remove the air cleaner intake duct fro the air cleaner assembly. Refer to Air Cleaner Assembly Replacement.
  3. Raise and support the vehicle. Refer to Lifting and Jacking the Vehicle.
  4. Remove the right front fender liner. Refer to Front Fender Liner Replacement.

1

A/C Compressor and Condenser Connector

Procedure

  1. Insert 2 small screwdrivers into the 2 slots of the compressor hose and suction line connector and release locking tabs.
  2. Remove the A/C compressor hose from the evaporator hose assembly and discard O-rings. Refer to O-Ring Replacement.

2

A/C Compressor Hose Nut

Caution: Refer to Fastener Caution in the Preface section.

Procedure

Remove the A/C compressor hose from the A/C compressor and cap hose.

Tighten
20 N·m (15 lb ft)

3

Sealing Washer

Procedure

Remove and discard sealing washers. Refer to Sealing Washer Replacement.

4

A/C Compressor Hose Bolt

Tighten
20 N·m (15 lb ft)

5

Sealing Washer

Procedure

Remove and discard sealing washers. Refer to Sealing Washer Replacement.

6

A/C Compressor Hose Assembly

Procedure

  1. Note the routing of the A/C compressor hose to ensure proper routing.
  2. Using the J 39400 leak test A/C compressor hose connections.

Special Tools

J 39400 Electronic Halogen Leak Detector

Air Conditioning Compressor and Condenser Hose Replacement LY7
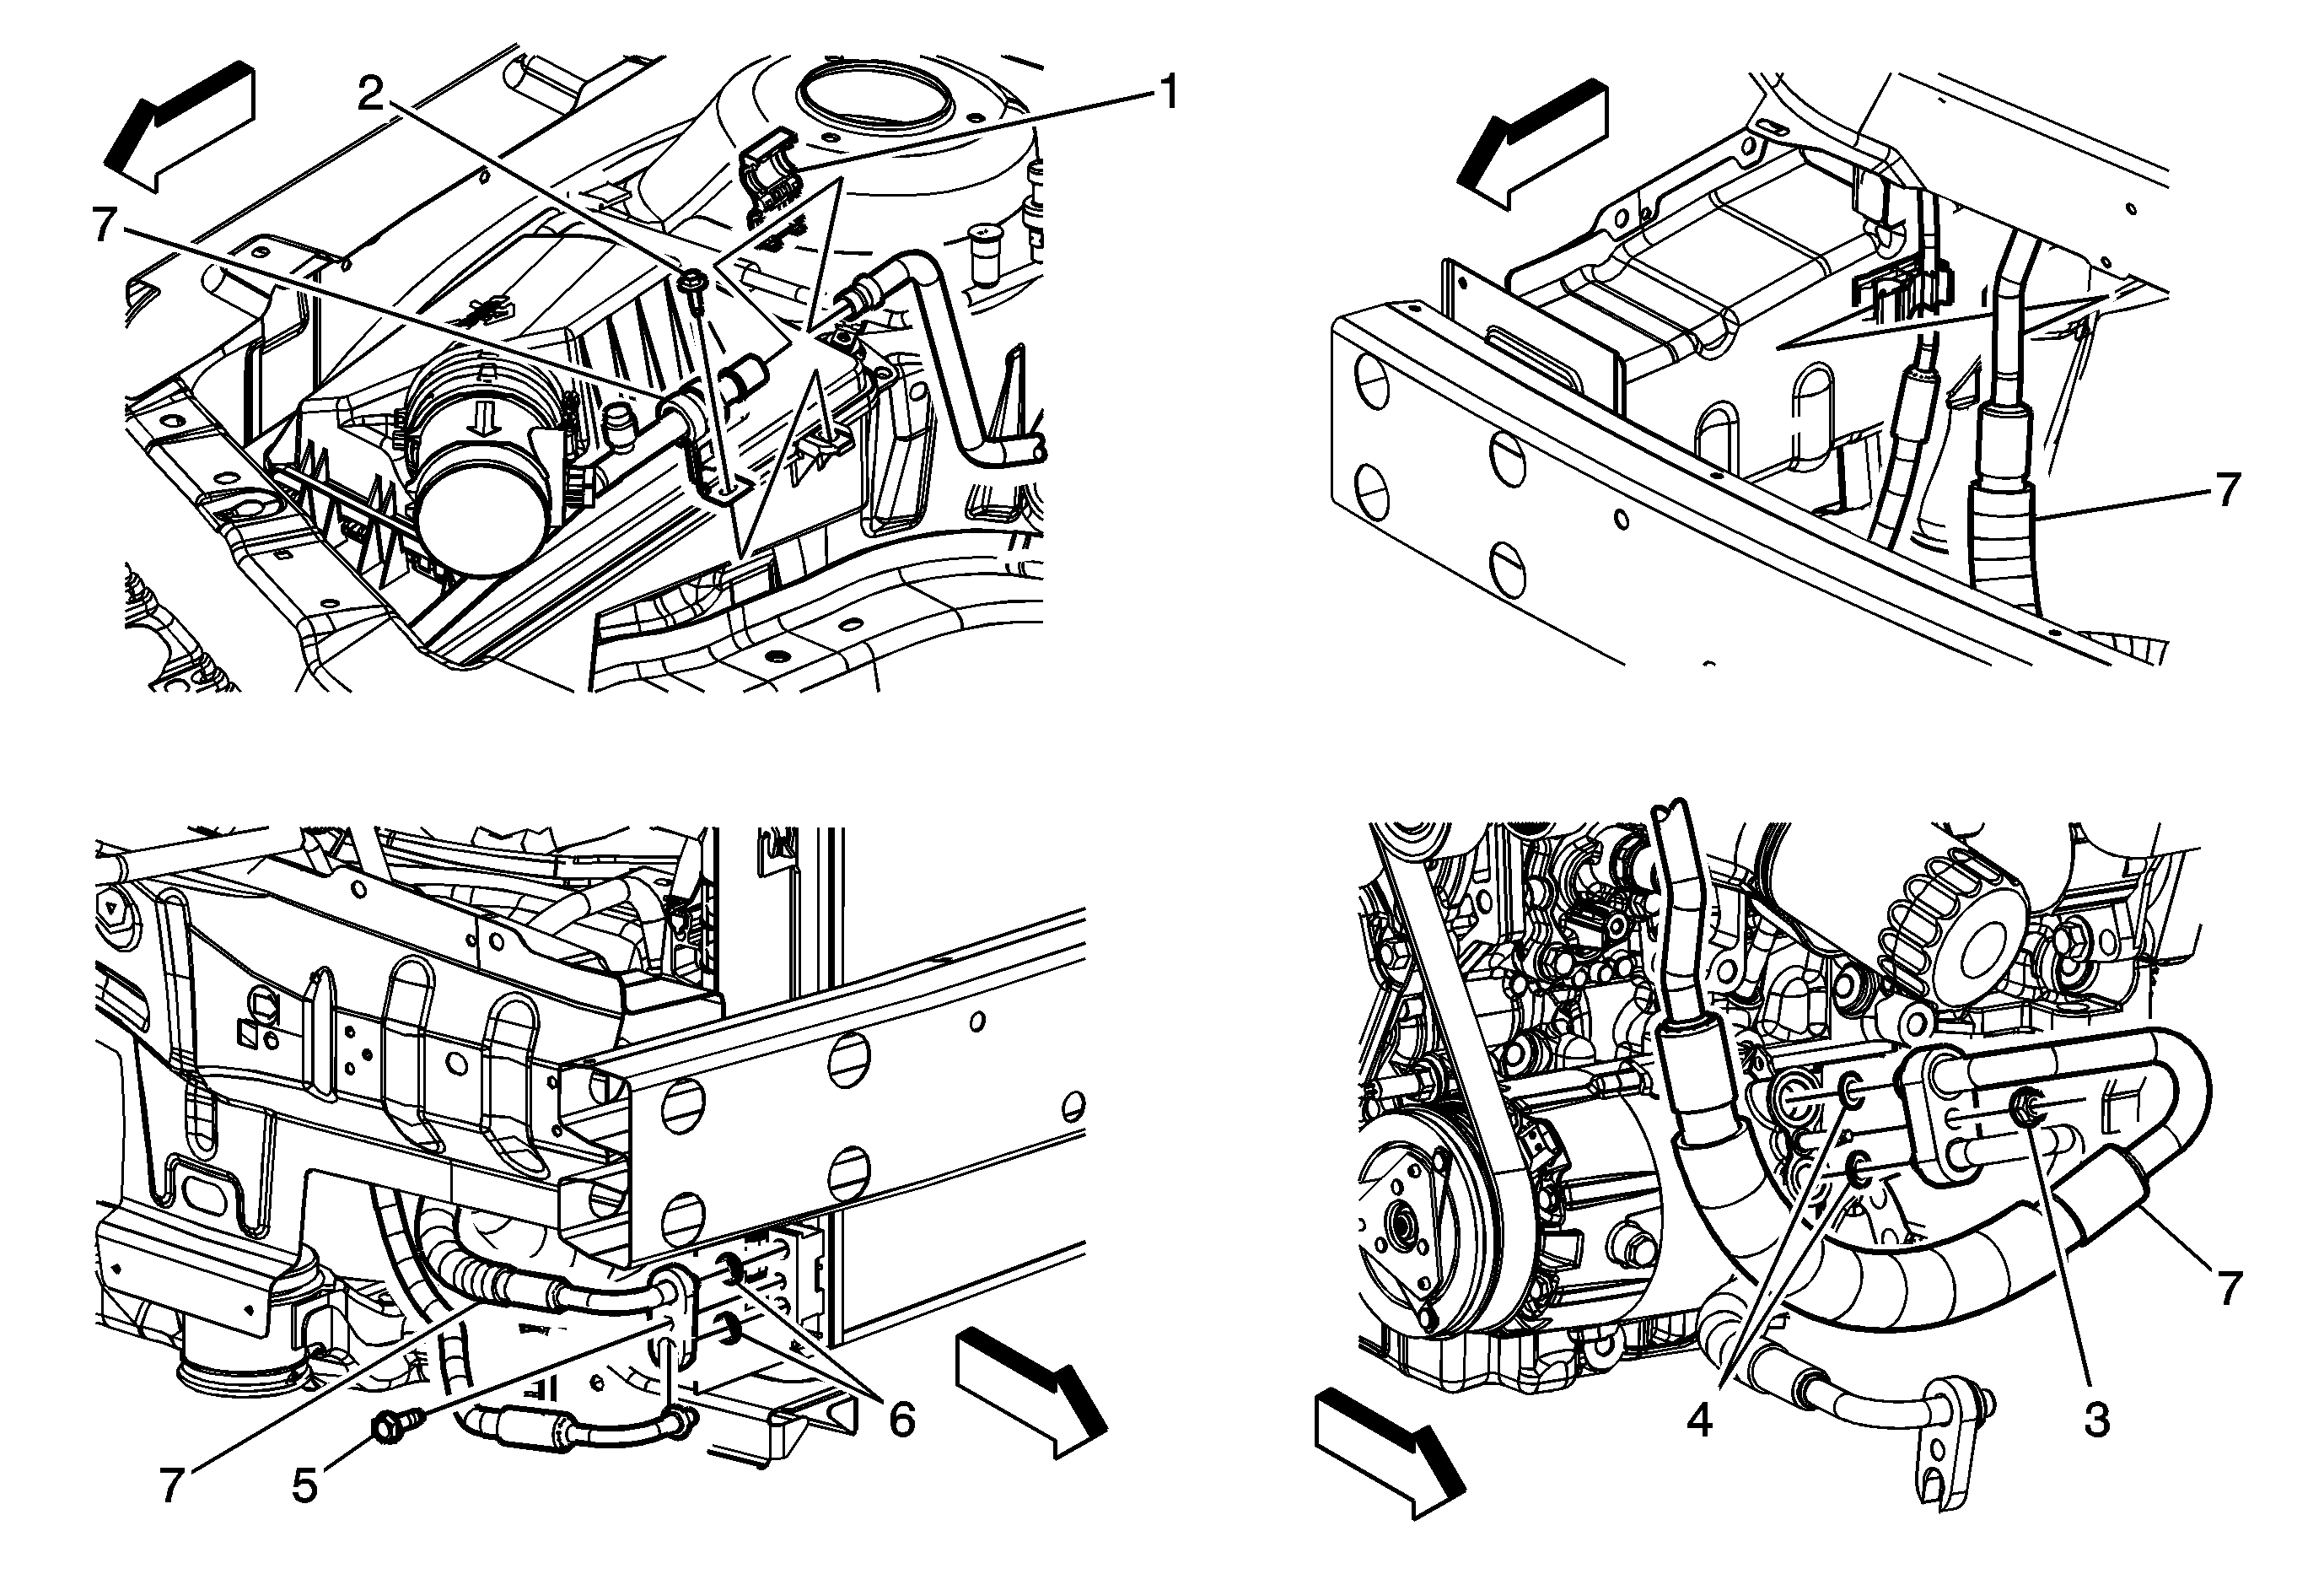

Object Number: 2003739  Size: MF

Callout

Component Name

Preliminary Procedures

  1. Recover the refrigerant. Refer to Refrigerant Recovery and Recharging.
  2. Remove the air cleaner intake duct from the air cleaner assembly. Refer to Air Cleaner Inlet Duct Replacement.
  3. Raise and support the vehicle. Refer to Lifting and Jacking the Vehicle.
  4. Remove the right front fender liner. Refer to Front Fender Liner Replacement.

1

A/C Compressor and Condenser Connector

Procedure

  1. Insert 2 small screwdrivers into the 2 slots of the compressor hose and suction line connector and release locking tabs.
  2. Remove the A/C compressor hose from the evaporator hose assembly and discard O-rings. Refer to O-Ring Replacement.

2

A/C Compressor Hose Clip Bracket Bolt

Caution: Refer to Fastener Caution in the Preface section.

Tighten
10 N·m (89 lb in)

3

A/C Compressor Hose Nut

Procedure

Remove the A/C compressor hose from the A/C compressor and cap hose.

Tighten
20 N·m (15 lb ft)

4

Sealing Washer

Procedure

Remove and discard the sealing washers. Refer to Sealing Washer Replacement.

5

A/C Compressor Hose Bolt

Tighten
20 N·m (15 lb ft)

6

Sealing Washer

Procedure

Remove and discard the sealing washers. Refer to Sealing Washer Replacement.

7

A/C Compressor Hose Assembly

Procedure

  1. Note the routing of the A/C compressor hose to ensure proper routing.
  2. Using the J 39400 leak test A/C compressor hose connections.

Special Tools

J 39400 Electronic Halogen Leak Detector