Removal Procedure
- Open the hood.
Caution: Refer to Battery Disconnect Caution in the Preface section.
- Disconnect the battery.
- Raise the vehicle all the way.

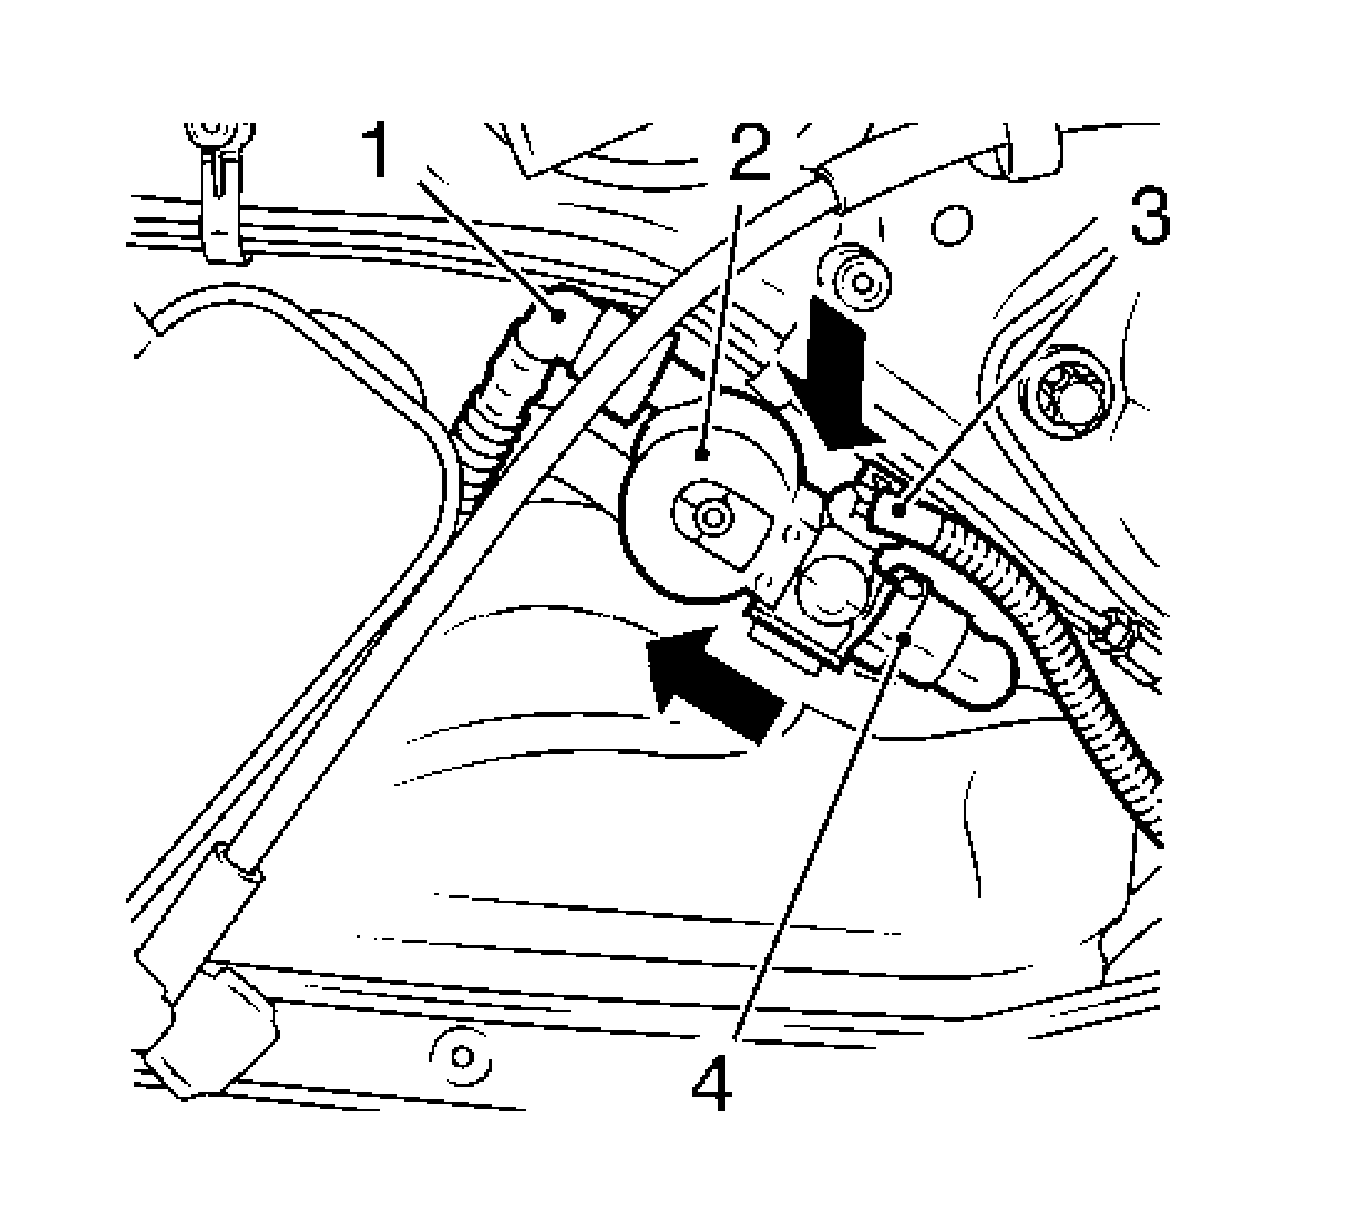
- Remove the rear purge valve (2).
| • | Remove the vent line from carbon canister to the rear purge valve (4). |
| • | Disconnect the quick-release fitting. |
| • | Remove the vent line from the rear purge valve (1). |
| • | Disconnect the quick-release fitting. |
| • | Disconnect the wiring harness of the rear purge valve (3). |
| • | Disconnect the wiring harness plug. |
| • | Release the bracket and remove the rear purge valve (arrows). |
Installation Procedure
- Install the rear purge valve.
| • | Install the rear purge valve at the bracket. |
| • | Install the wiring harness at the rear purge valve. |
| • | Connect the wiring harness plug. |
| • | Install the vent line at the rear purge valve. |
| • | Connect the quick-release fitting. |
| • | Install the vent line at the carbon canister to the rear purge valve. |
| • | Connect the quick-release fitting. |
- Lower the vehicle all the way.
Notice: Refer to Fastener Notice in the Preface section.
- Install the battery.
Connect the ground clamp to ground terminal.
Tighten
Tighten the ground clamp nut to 5 N·m (44 lb in).
- For programming procedures, refer to
Control Module References
.
- Close the hood.

