Removal Procedure
Caution: The high intensity discharge system produces high voltage and current. In order to reduce the risk of severe shocks and burns, the battery negative cable must be disconnected any time service work is being performed on or around the high intensity discharge system.
Caution: The high intensity discharge system produces high voltage and current.
To reduce the risk of severe shocks and burns:
• Never open the high intensity discharge system ballast or the
arc tube assembly starter. • Never probe between the high intensity discharge system ballast
output connector and the arc tube assembly.
Caution: Refer to Halogen Bulb Caution in the Preface section.
Important: Warning, high voltage. Do not touch components in the xenon dipped beam when the dipped beam is switched on. Ignition and light switch OFF.
- Remove the bumper fascia. Refer to Front Bumper Fascia Replacement .
- Remove the fuse.
- Remove the headlamp - left side.
- Remove the xenon lamp cover.
- Remove the xenon lamp igniter.
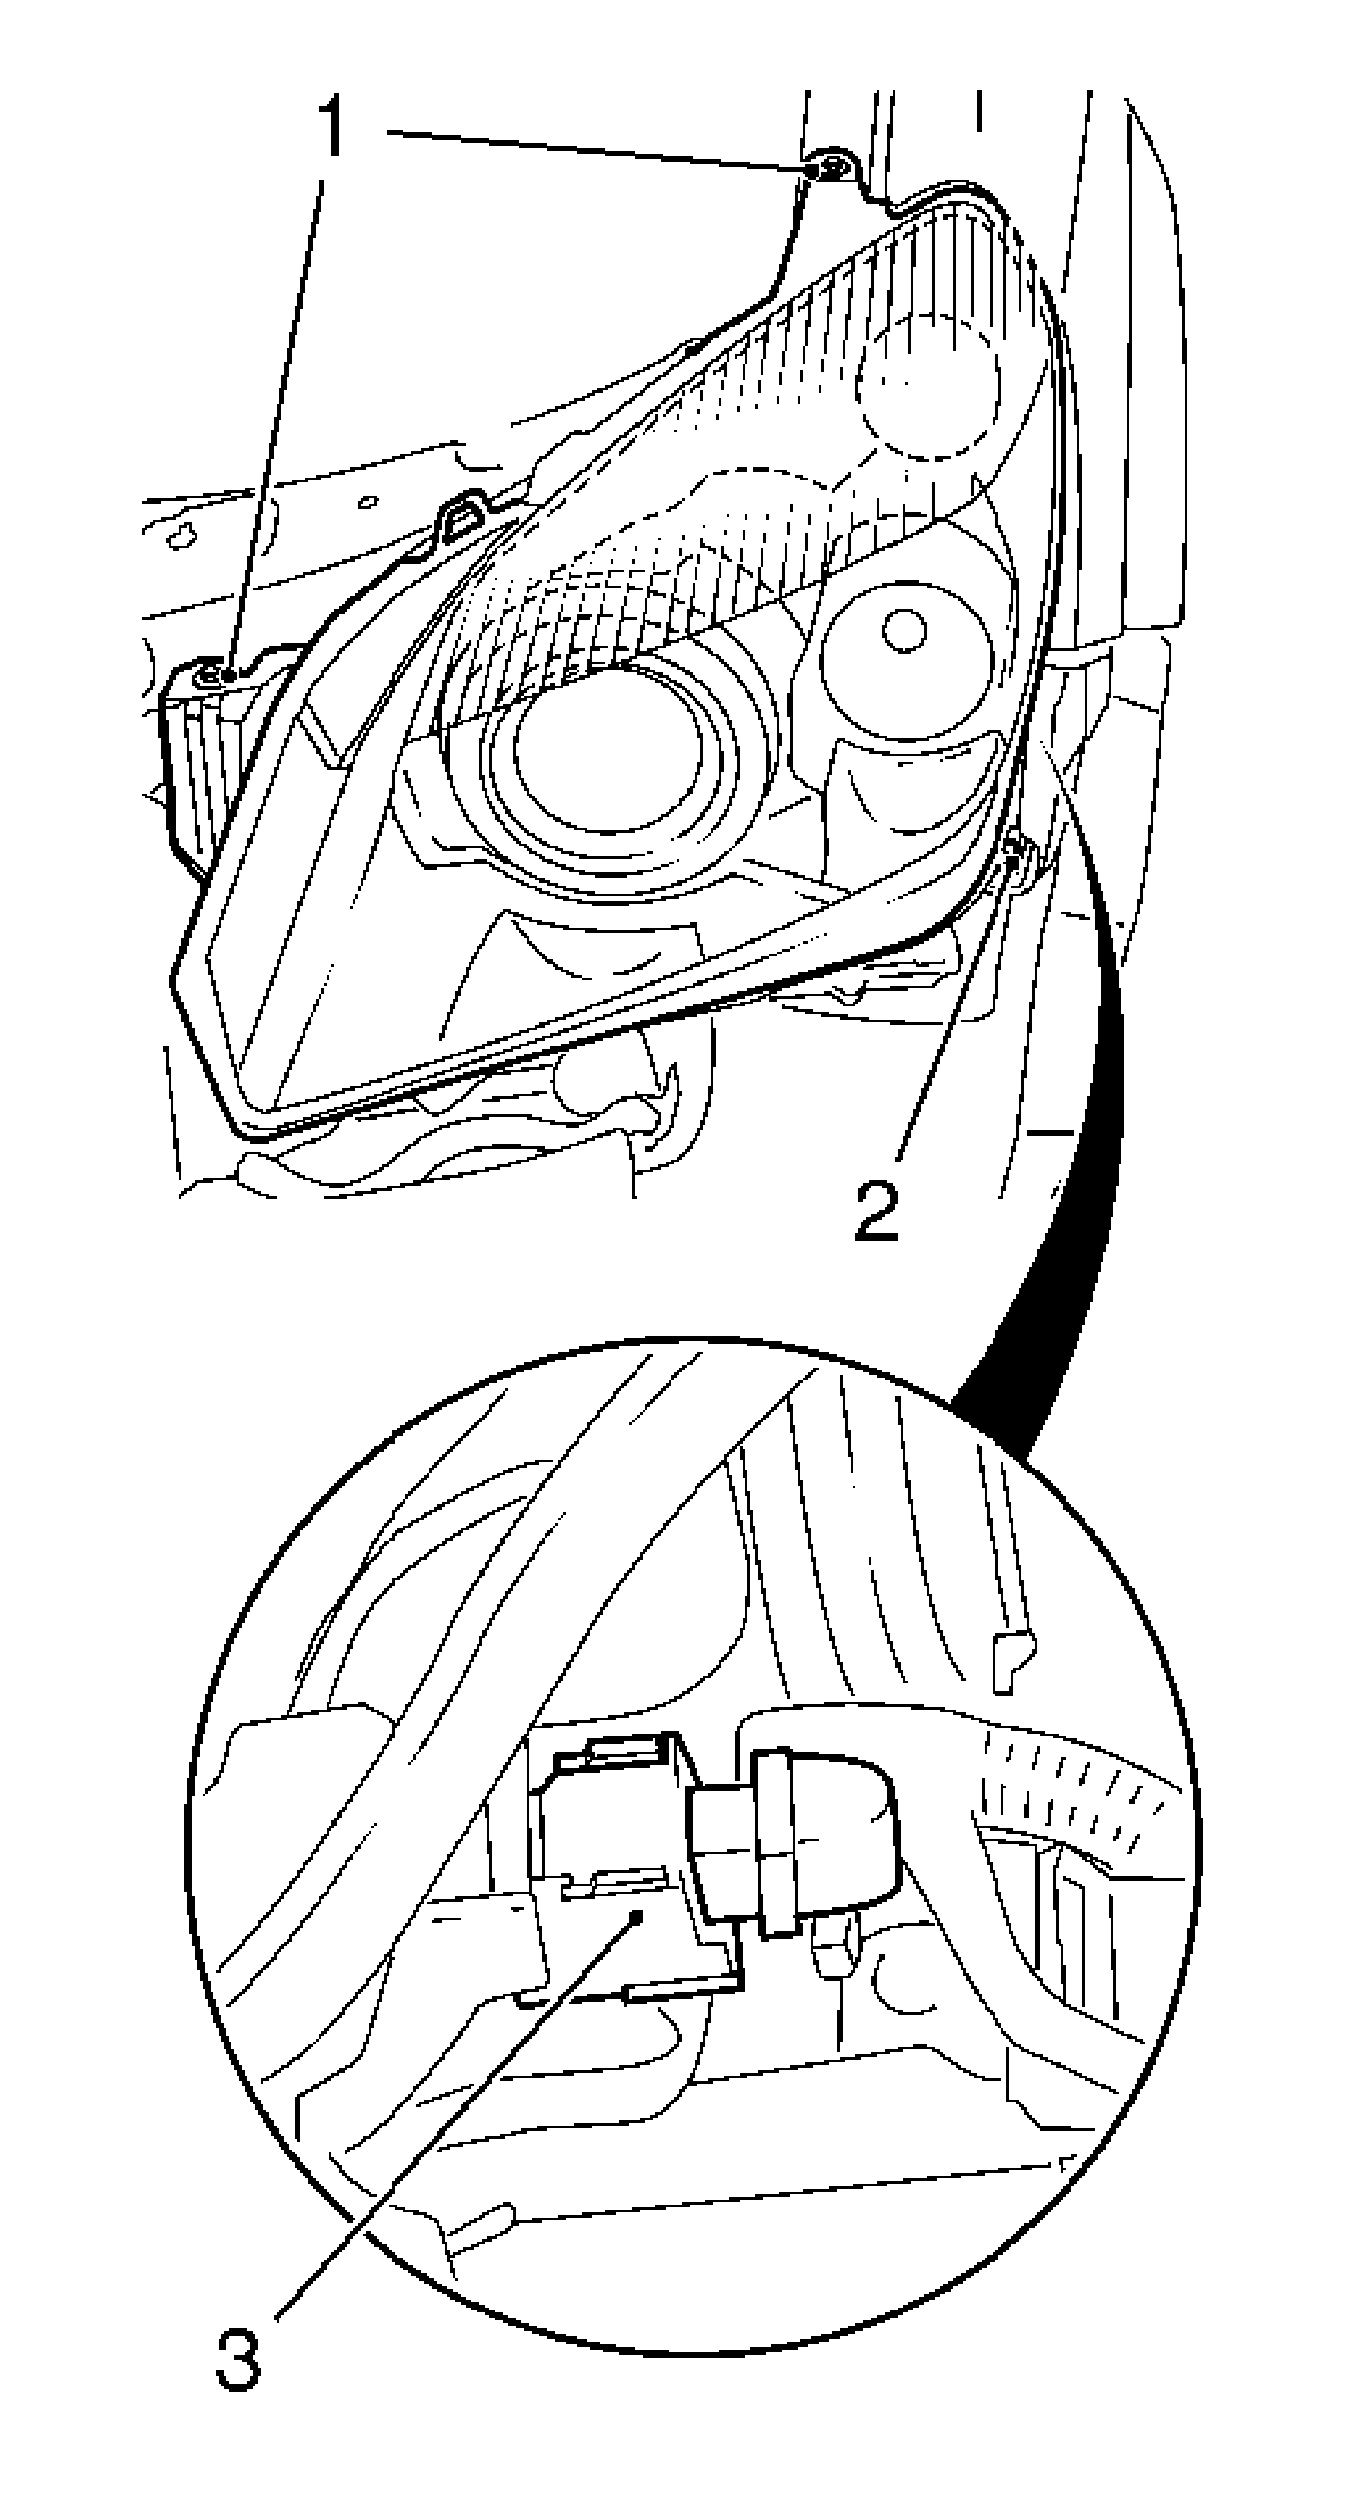
| • | Remove the 3 screws (1, 2). |
| • | Remove the front paneling connector. |
| • | Remove the headlamps. |
| • | Release the wiring harness plug (3) and disconnect. |
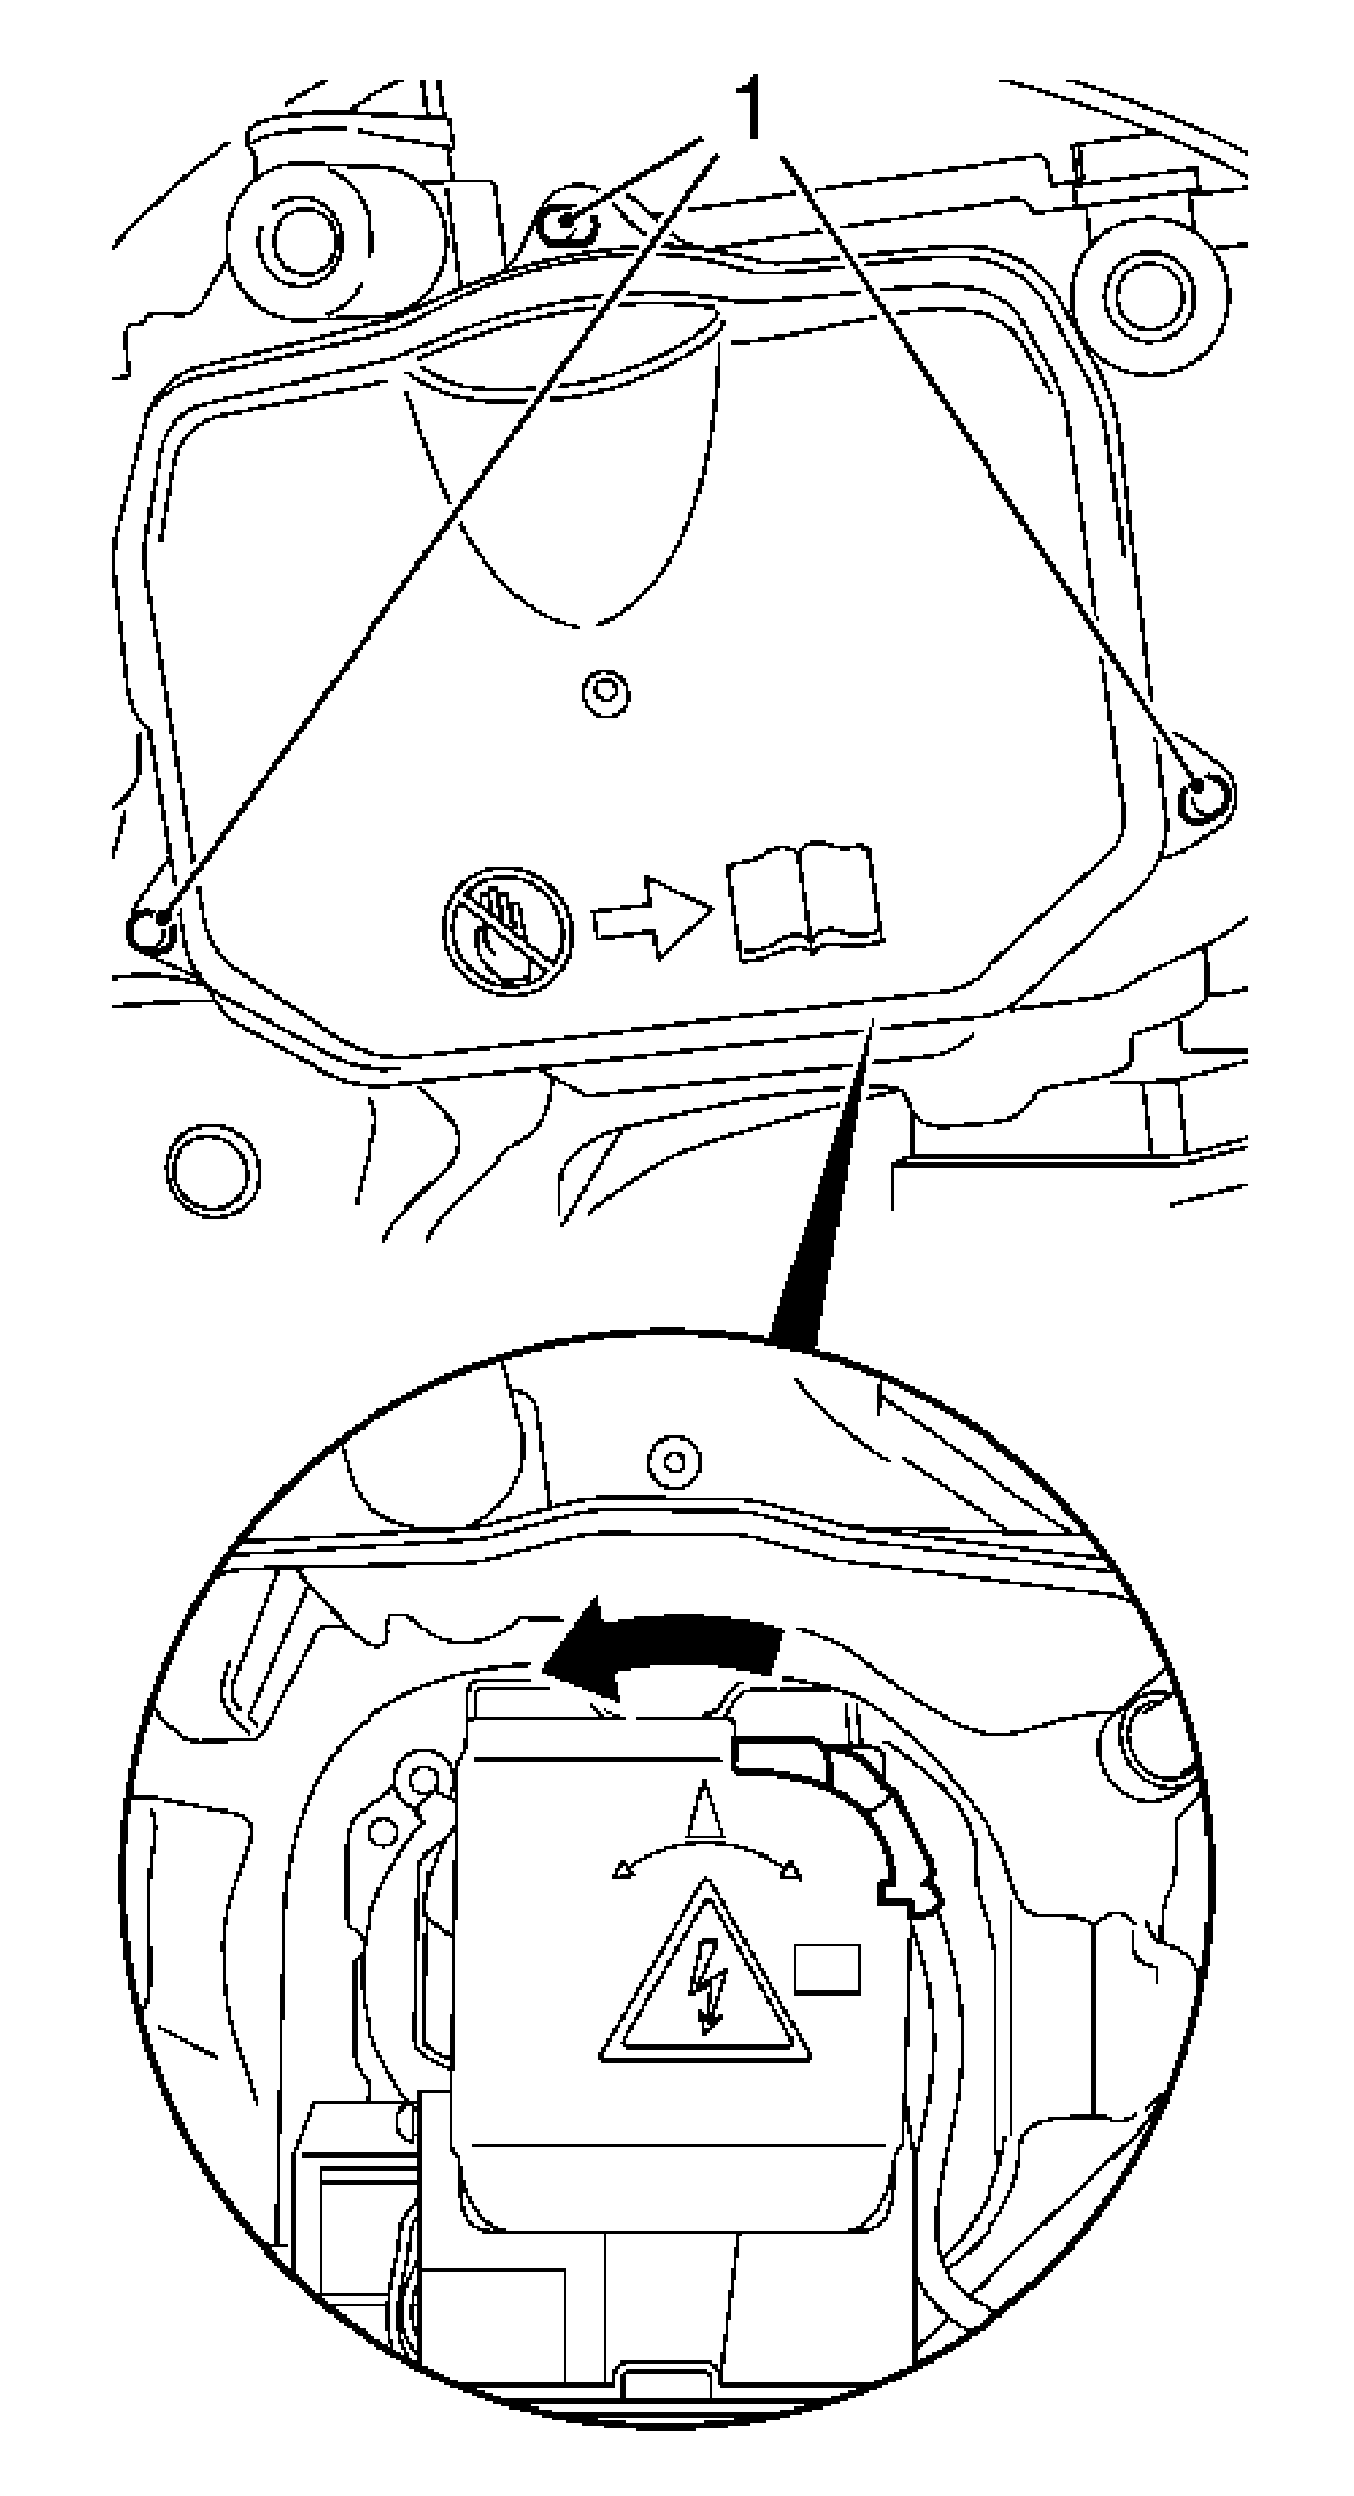
Remove the 3 bolts (1).
To unlock, turn in the direction of the arrow.
| • | Disconnect the wiring harness plug. |
| • | Remove the igniter. |
Installation Procedure
- Install the xenon lamp igniter.
- Install the xenon lamp cover.
- Install the headlamp - left side.
- Install the bumper fascia. Refer to Front Bumper Fascia Replacement .
- Insert the fuse.
- Adjust the headlamps. Refer to Headlamp Aiming .
Important: The arrow on the sticker (igniter) must be at the top on installation.
| • | To lock, turn opposite the direction of the arrow. |
| • | Connect the wiring harness plug. |
Notice: Refer to Fastener Notice in the Preface section.
Tighten
Tighten the 3 bolts to 2.5 N·m (22 lb in).
| • | Connect and lock the wiring harness plug. |
| • | Insert the front paneling connector. |
Tighten
Tighten the 3 bolts to 2.5 N·m (22 lb in).
