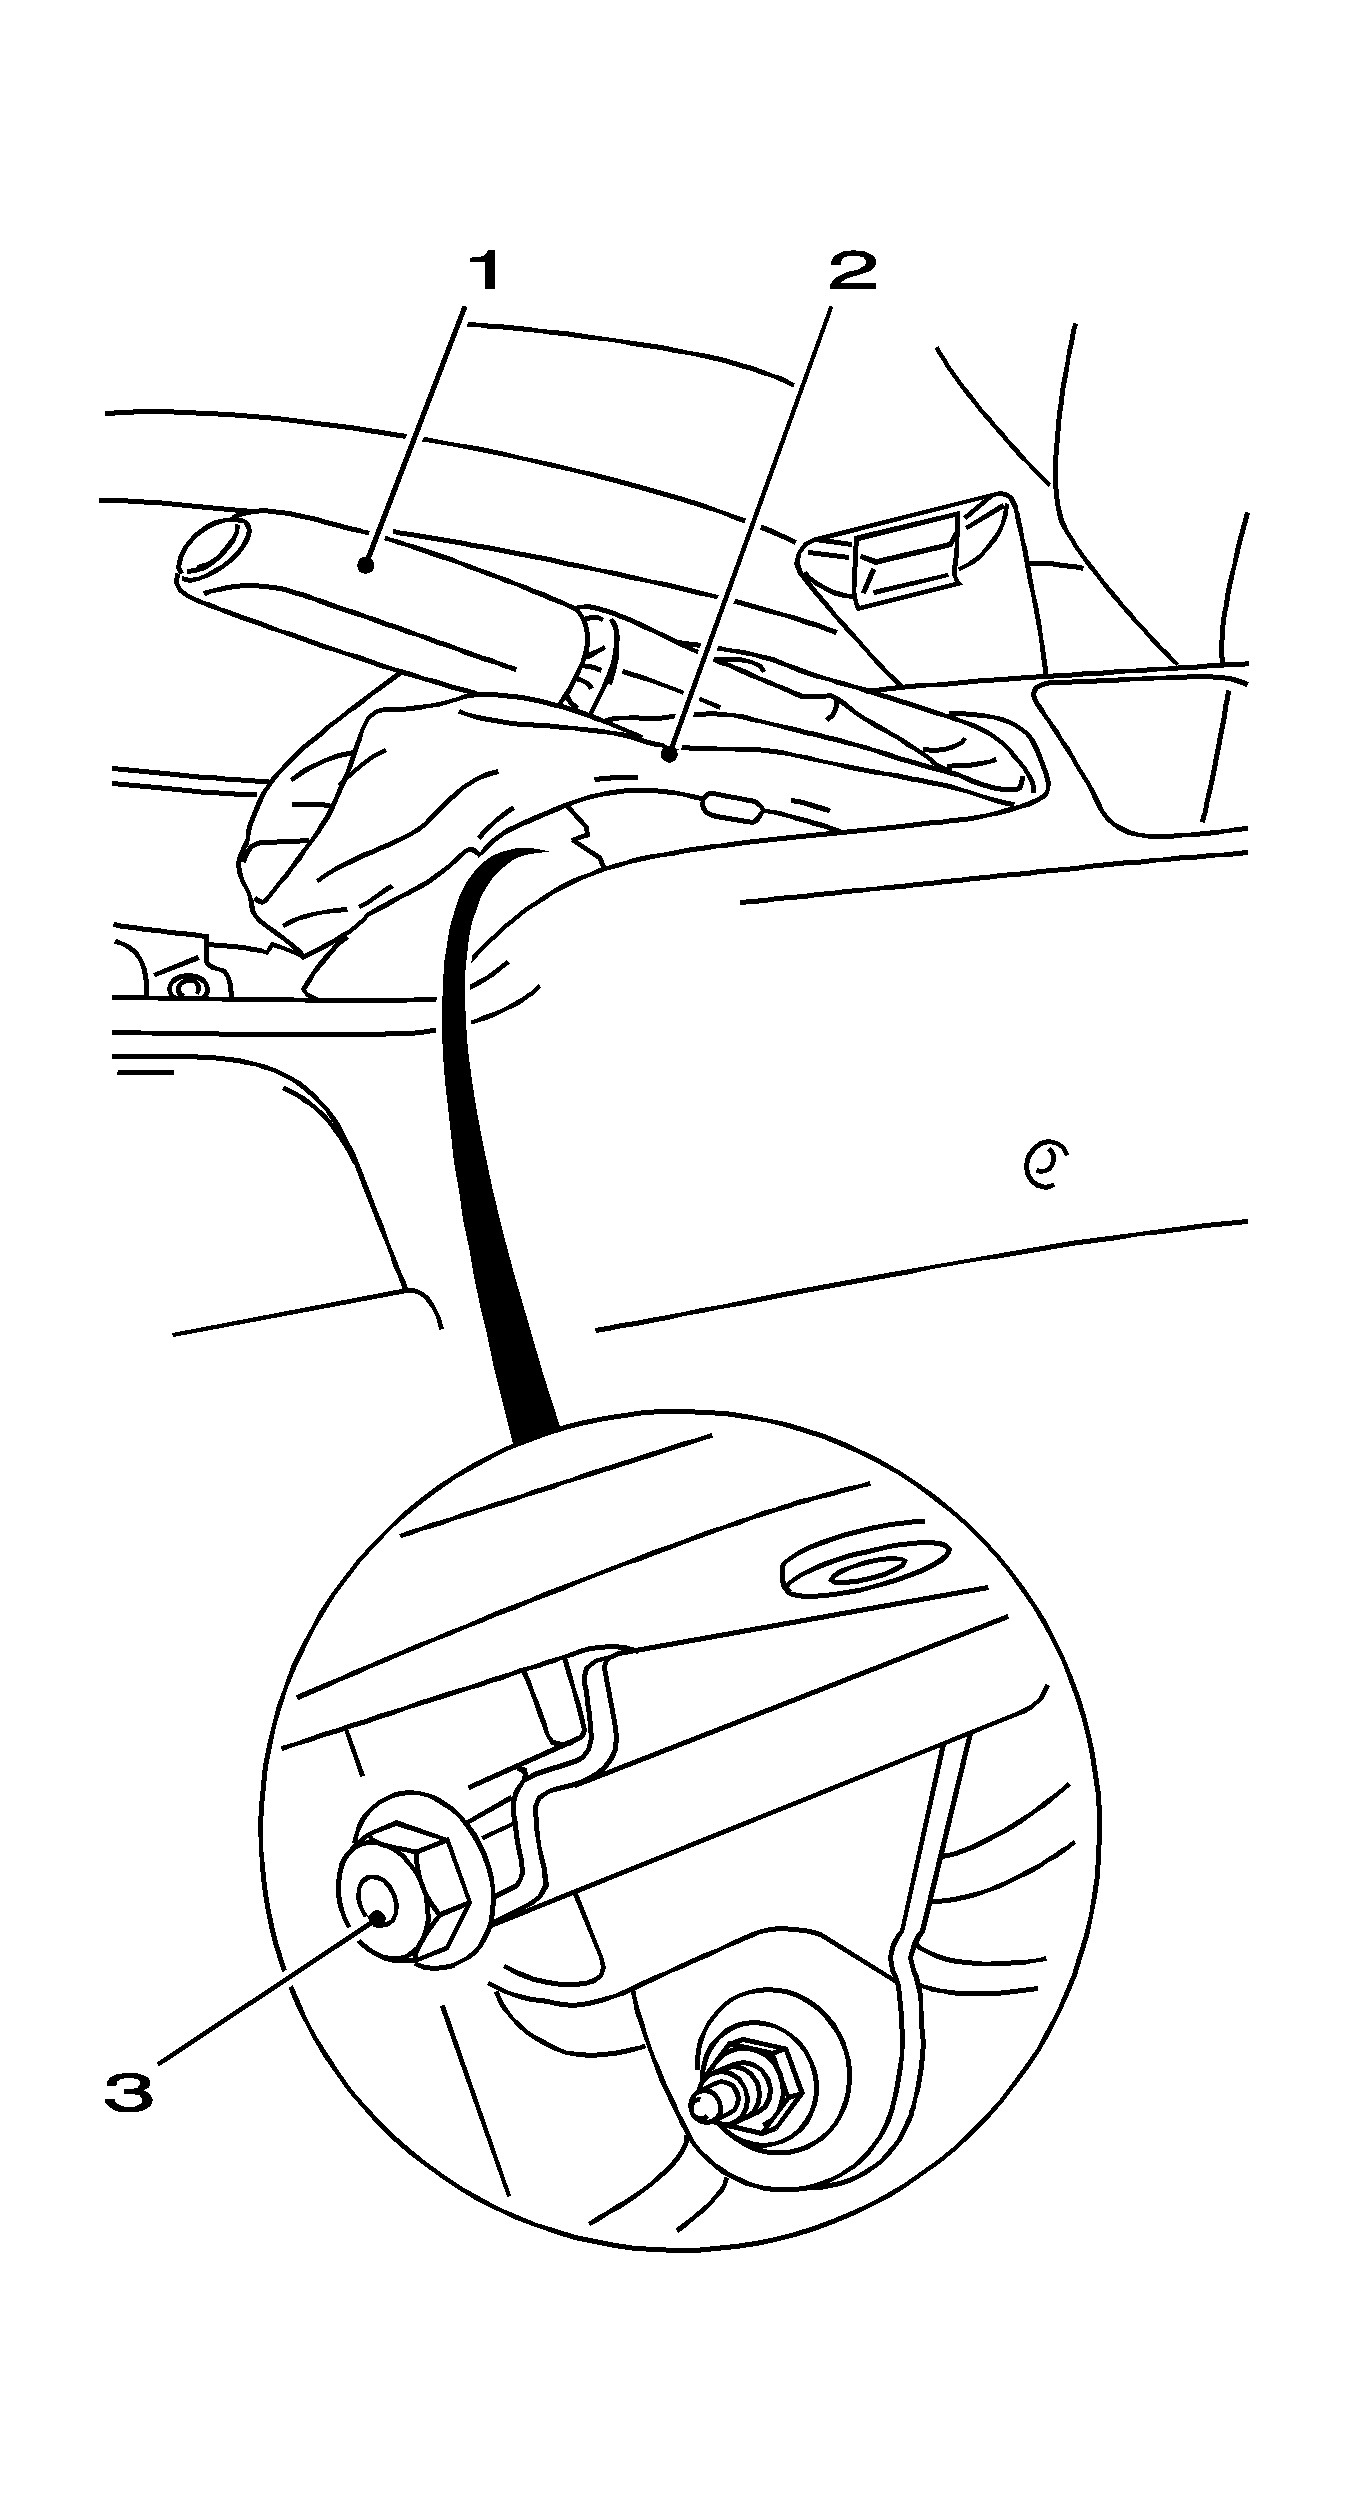
For 1990-2009 cars only
Adjustment Procedure
- Raise and support the vehicle. Refer to Lifting and Jacking the Vehicle .
- Remove the cover of the diagnostic connection.
- Remove the parking brake lever (2) from the front floor console and lift upwards.
- Release the adjusting nut (3) completely by turning it backwards.
- Position the parking brake lever (1) to position "0" (released).
- Depress the brake pedal fully at least 5 times.
- Pull the parking brake lever 5 times to the stop and release again.
- Pull the parking brake lever (1) to the 2nd notch.
- Turn the adjusting nut on the parking brake lever until the rear wheels can only be turned with difficulty.
- Pull the parking brake lever to the 3rd notch.
- Install the parking brake lever bellows to the front floor console.
- Install the cover of the diagnostic connection.
Caution: Refer to Brake Dust Caution in the Preface section.

Important: To adjust the play on the parking brake at the brake caliper - ensure that each time the brake is activated, the brake pedal returns to the original position (fully relieved of stress).
Important: The braking effect must be equal on both wheels.
Important: The wheels must be fixed at the 3rd notch.
