Removal Procedure
- Remove the cylinder head. Refer to
Cylinder Head Replacement.
- Remove the oil pan. Refer to
Oil Pan Replacement.
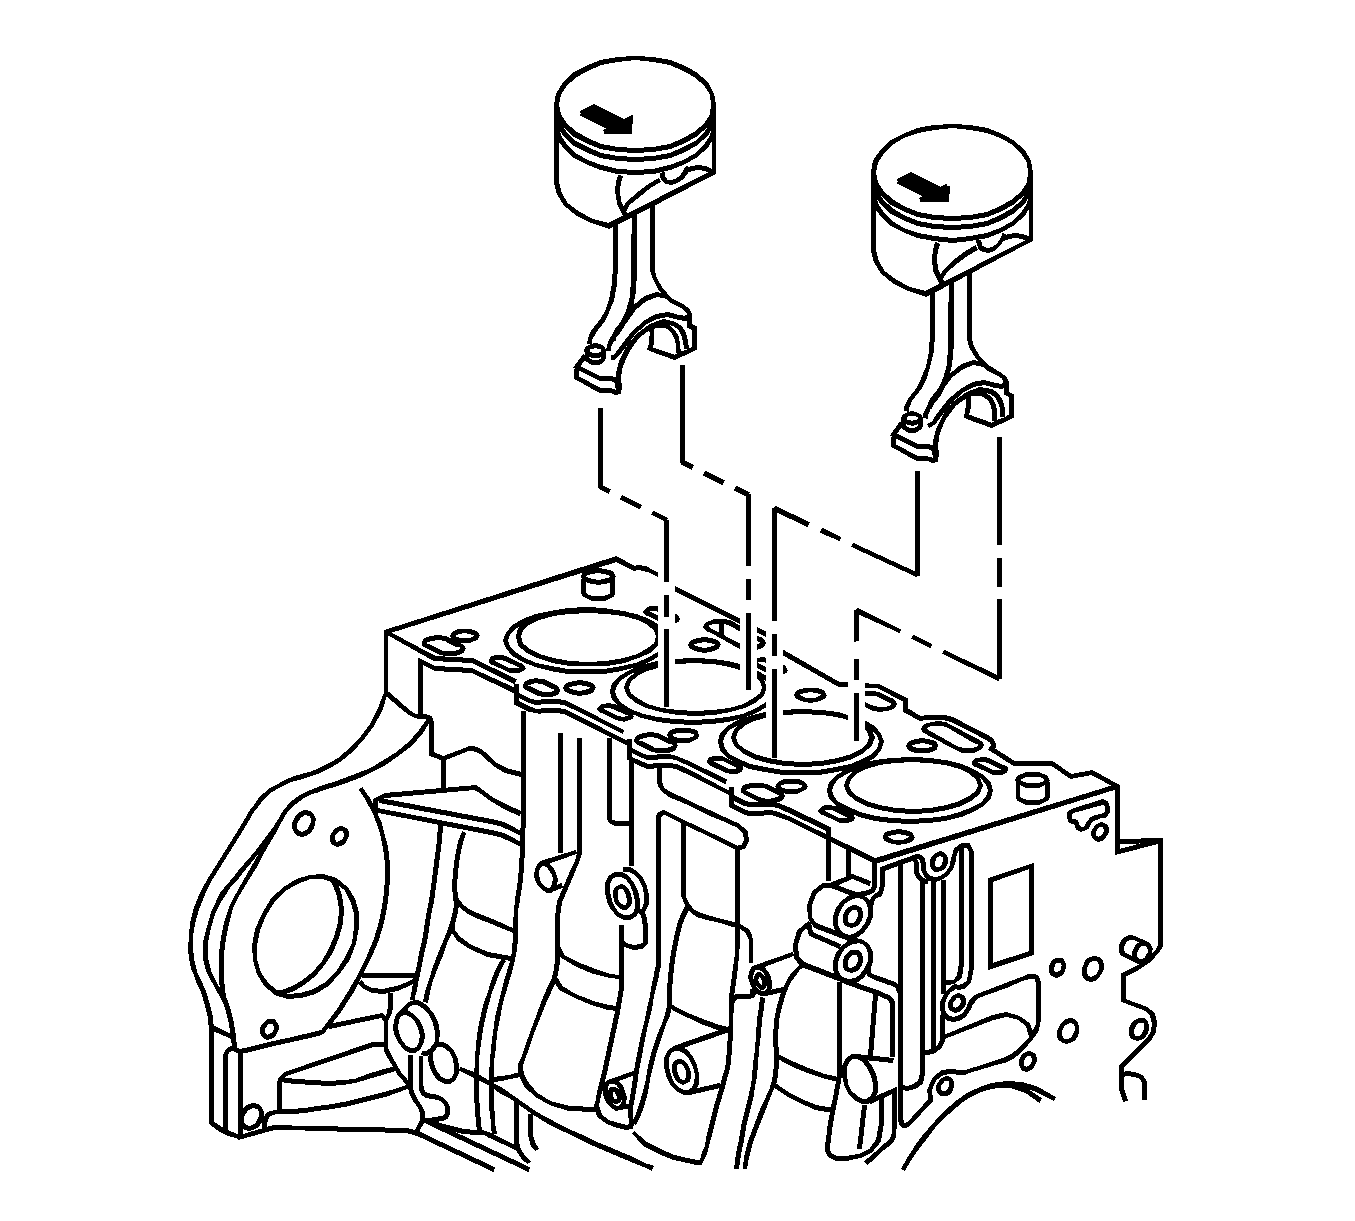
- Install the torsional vibration damper bolt into the crankshaft and set pistons 1 and 4 to bottom dead center (BDC) in the direction of engine rotation.
Note: Note cylinder sequence.
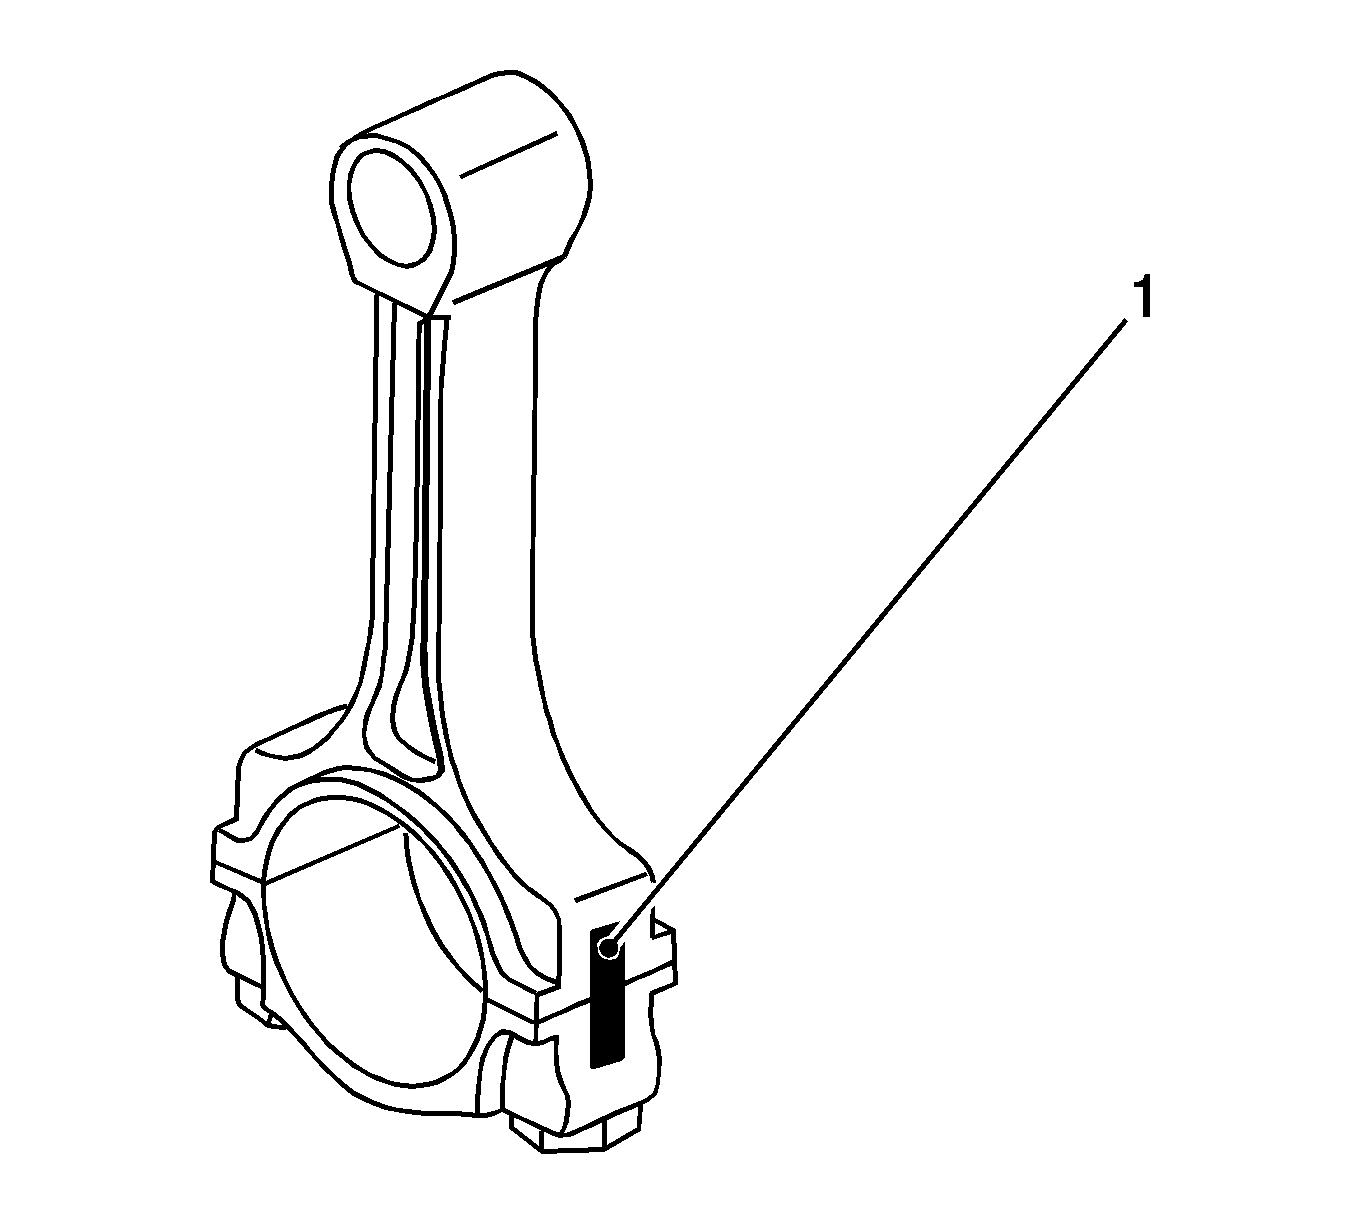
- Identify the con-rod with con-rod bearing cover (1).
- Remove pistons 1 and 4.
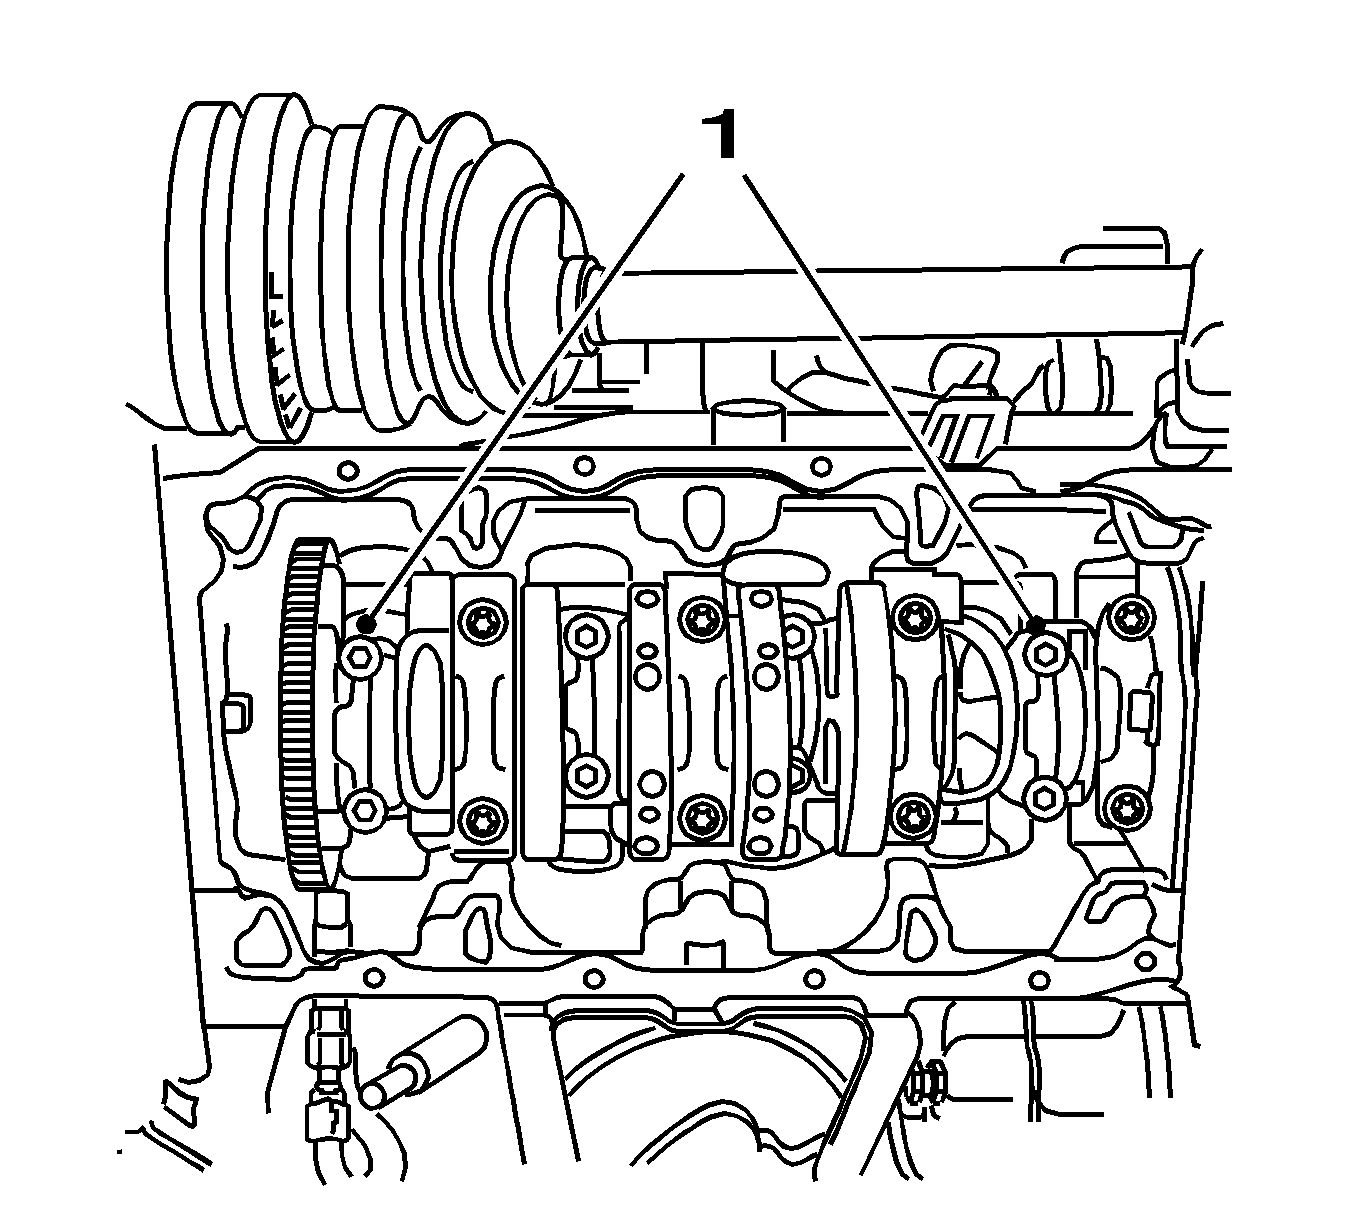
| • | Remove the 2 con-rod bearing caps (1). |
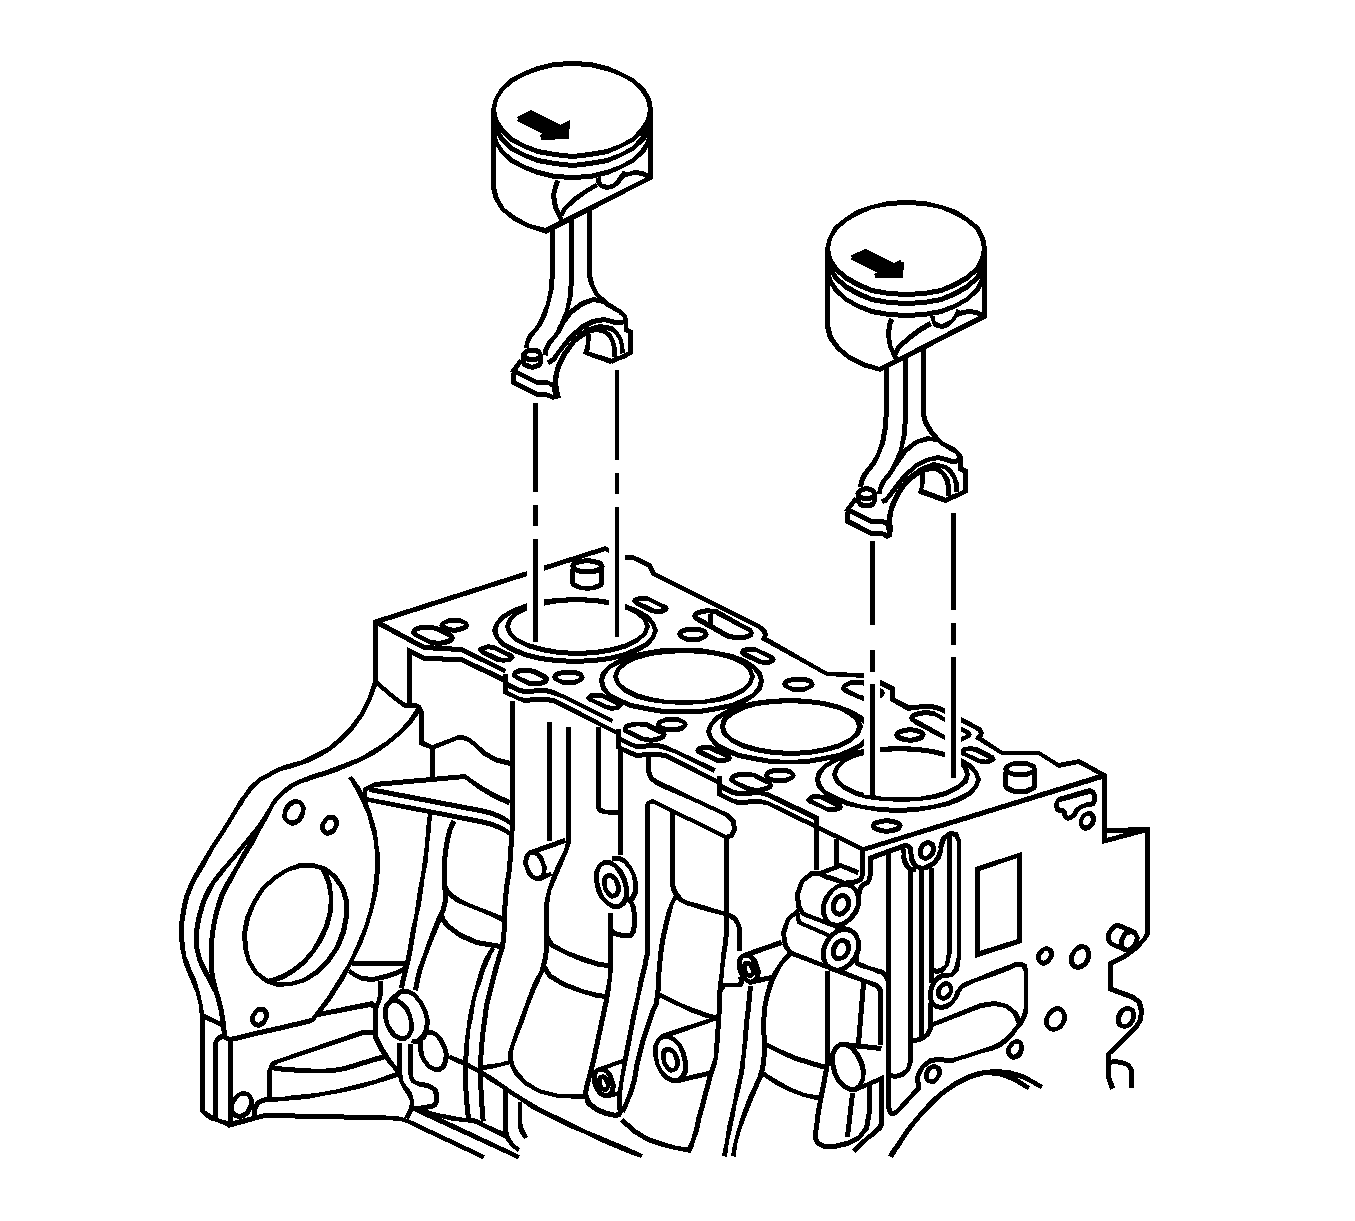
- Push the 2 pistons with con-rods out of the cylinder bore.
- Lower the vehicle.
Note: The shear surfaces of the con-rod and the con-rod bearing cover form a unique fit and must not be swapped or damaged. Do not lay down on the shear surfaces.
- Remove pistons 1 and 4.
- Raise the vehicle.
- Turn the crankshaft on the torsional vibration balancer through 180 degrees in the direction of rotation of engine.
Note: Note cylinder sequence.
- Identify the con-rod with con-rod bearing cover (1).
- Remove pistons 2 and 3.
| • | Remove the 2 con-rod bearing caps (1). |
- Push the 2 pistons with con-rods out of the cylinder bore.
- Lower the vehicle.
Note:
| • | The shear surfaces of the con-rod and the con-rod bearing cover form a unique fit and must not be swapped or damaged. Do not lay down on the shear surfaces. |
| • | Clean and visually inspect all components. |
- Remove pistons 2 and 3.
Note: Observe correct fitting position, observe alignment.
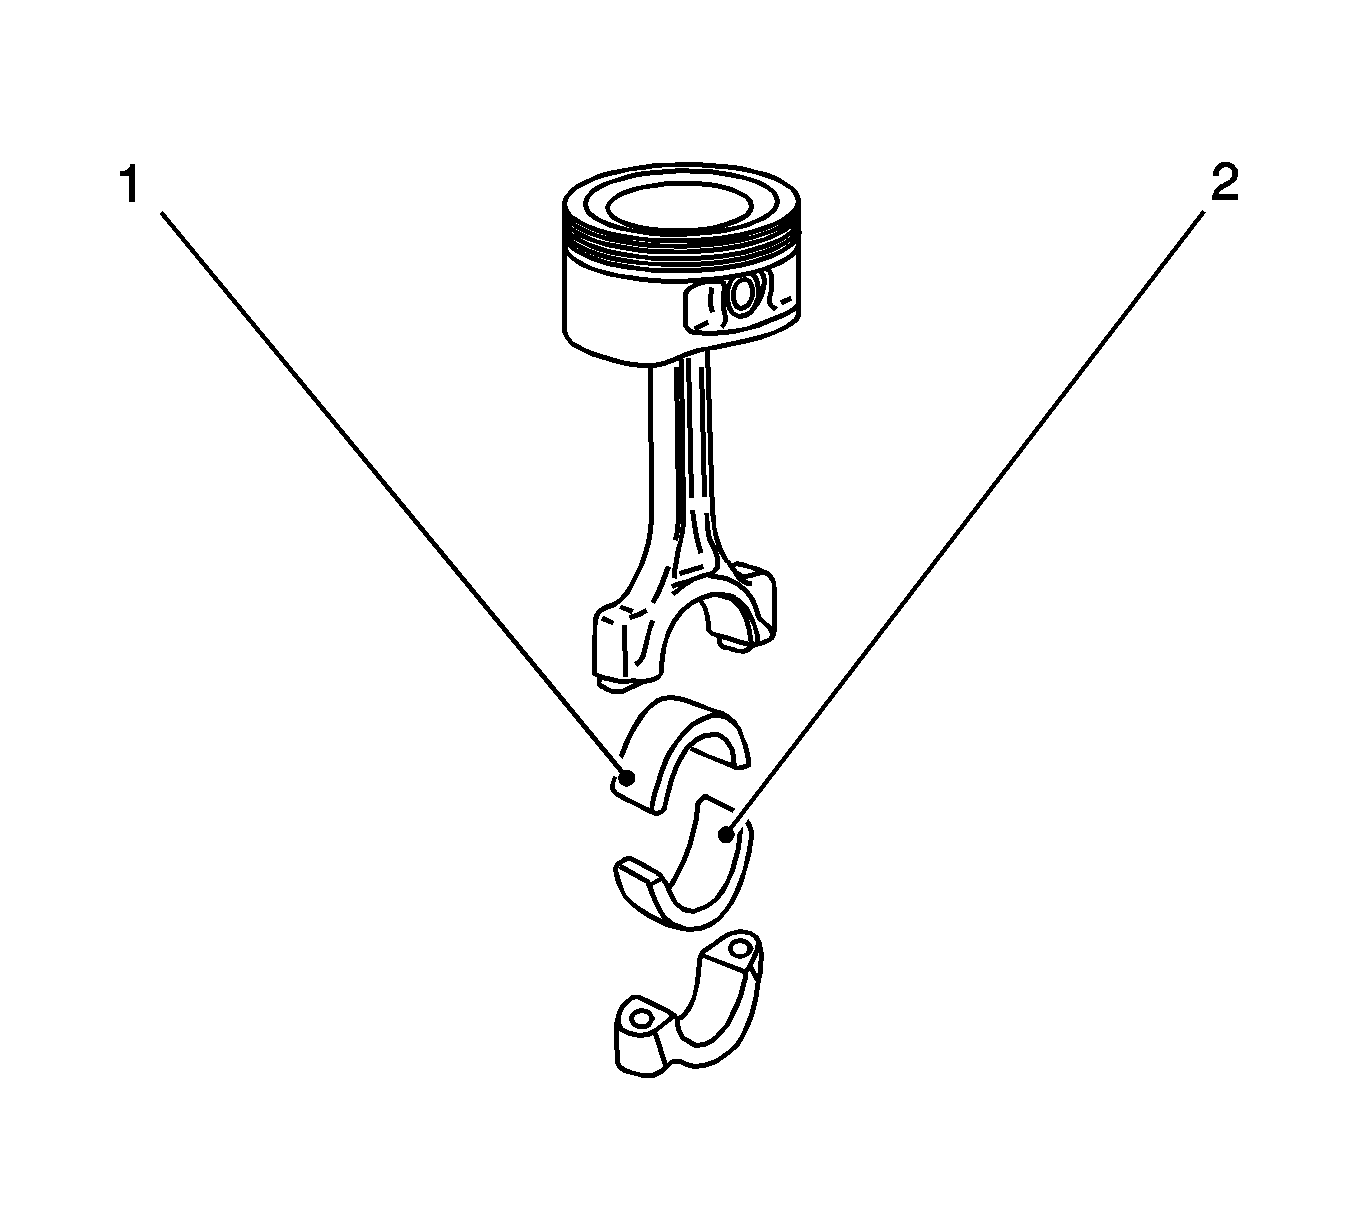
- Remove the con-rod bearing mounting clips (1, 2).
Visually inspect the components.
Measurement Procedure
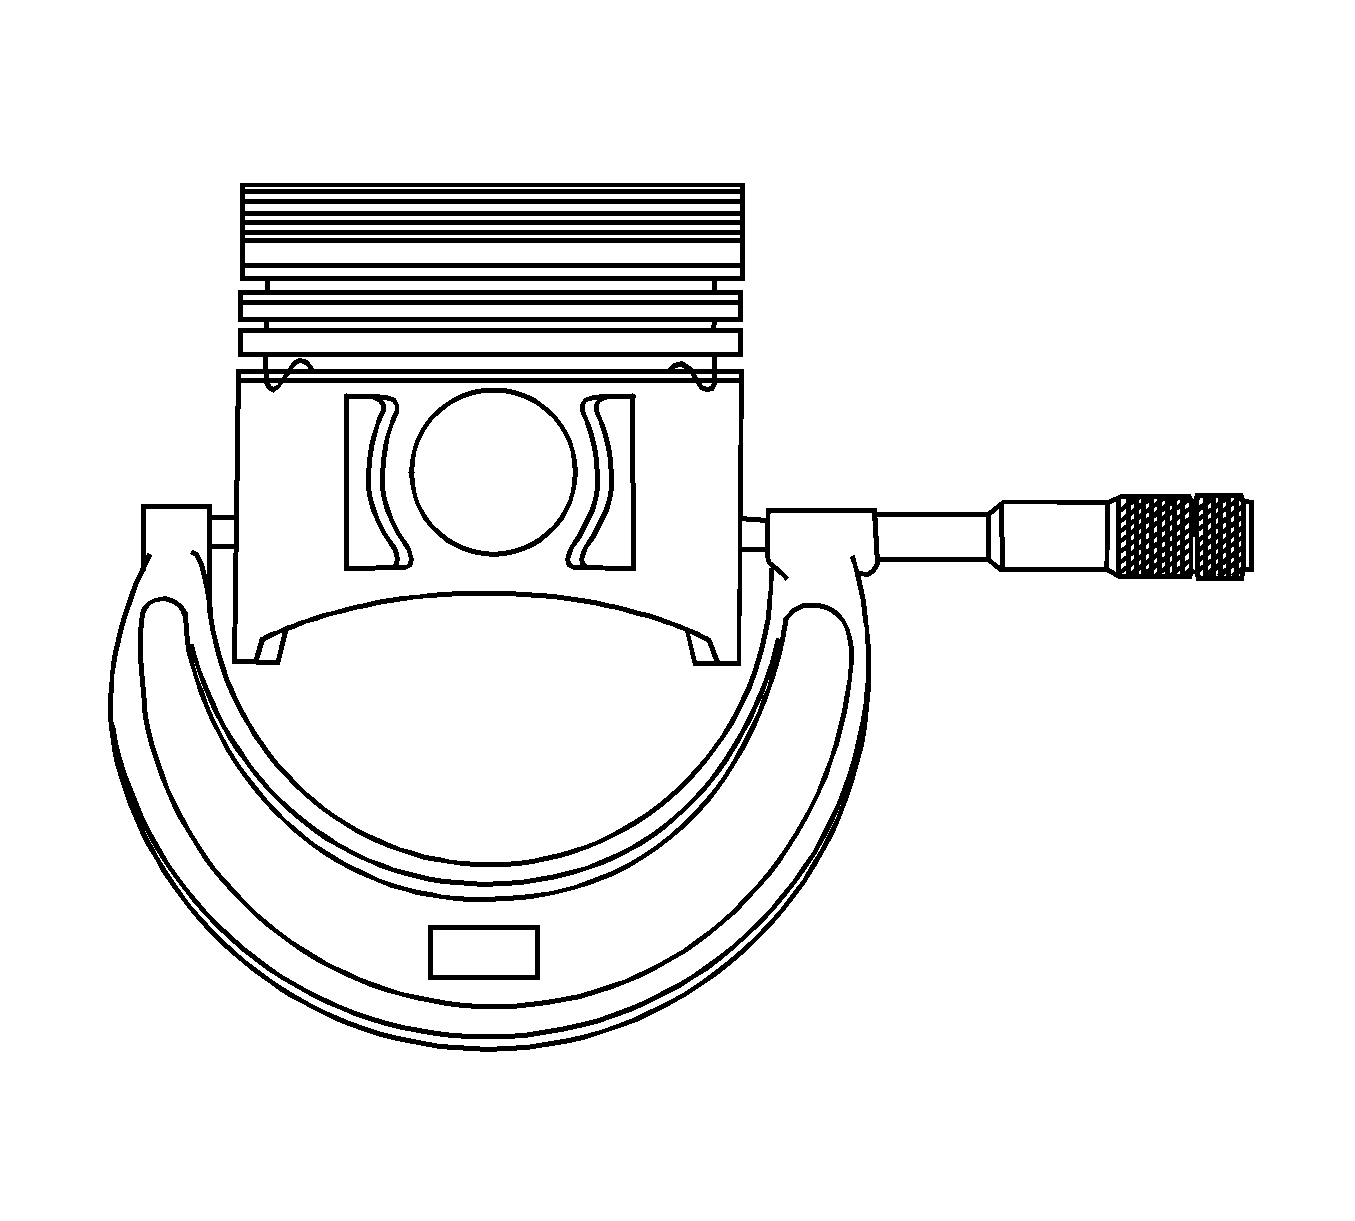
- Measure the pistons.
| • | Measure the 4 piston diameters with the micrometer gauge. |
| • | Place the micrometer at 90 degrees offset to the piston pin axis and 14.5 mm from the lower edge. |

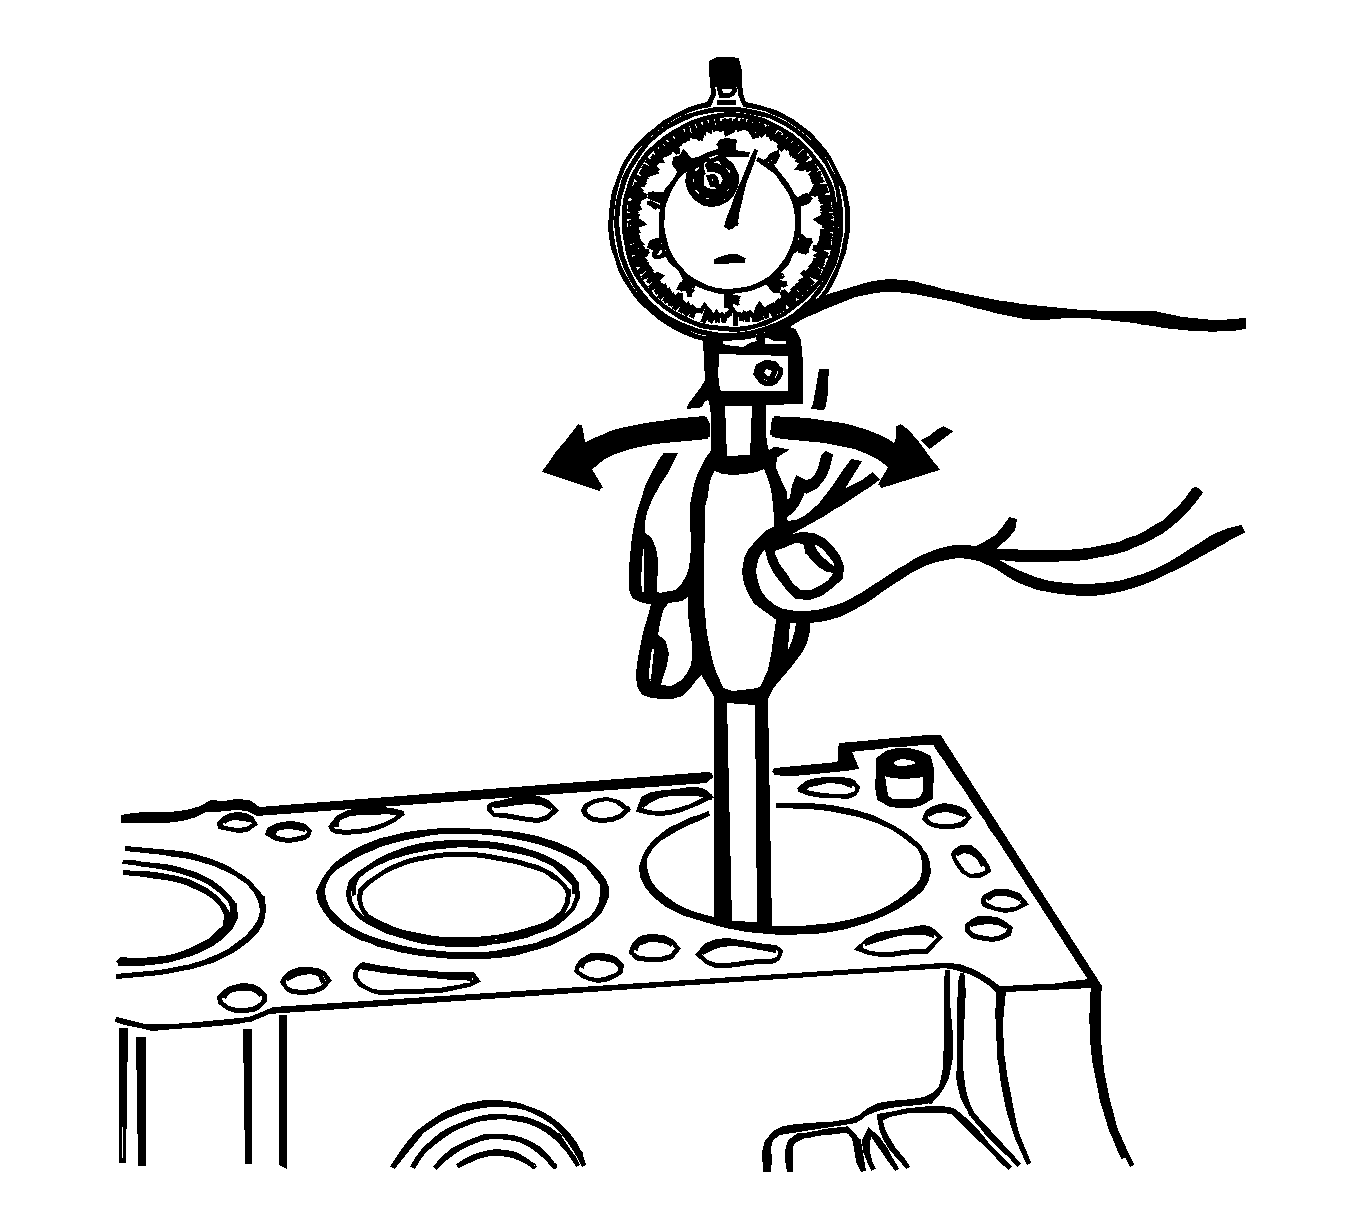
- Position the internal measuring device.
| • | Assemble the internal measuring device so that span is greater than size of piston. |
| • | Attach the dial gauge to the internal measuring device. |
| • | Adjust the internal measuring device to the size of the piston. |

Note: The needle turning point corresponds to the actual piston measurement.
- Determine the turning point, zero scale.
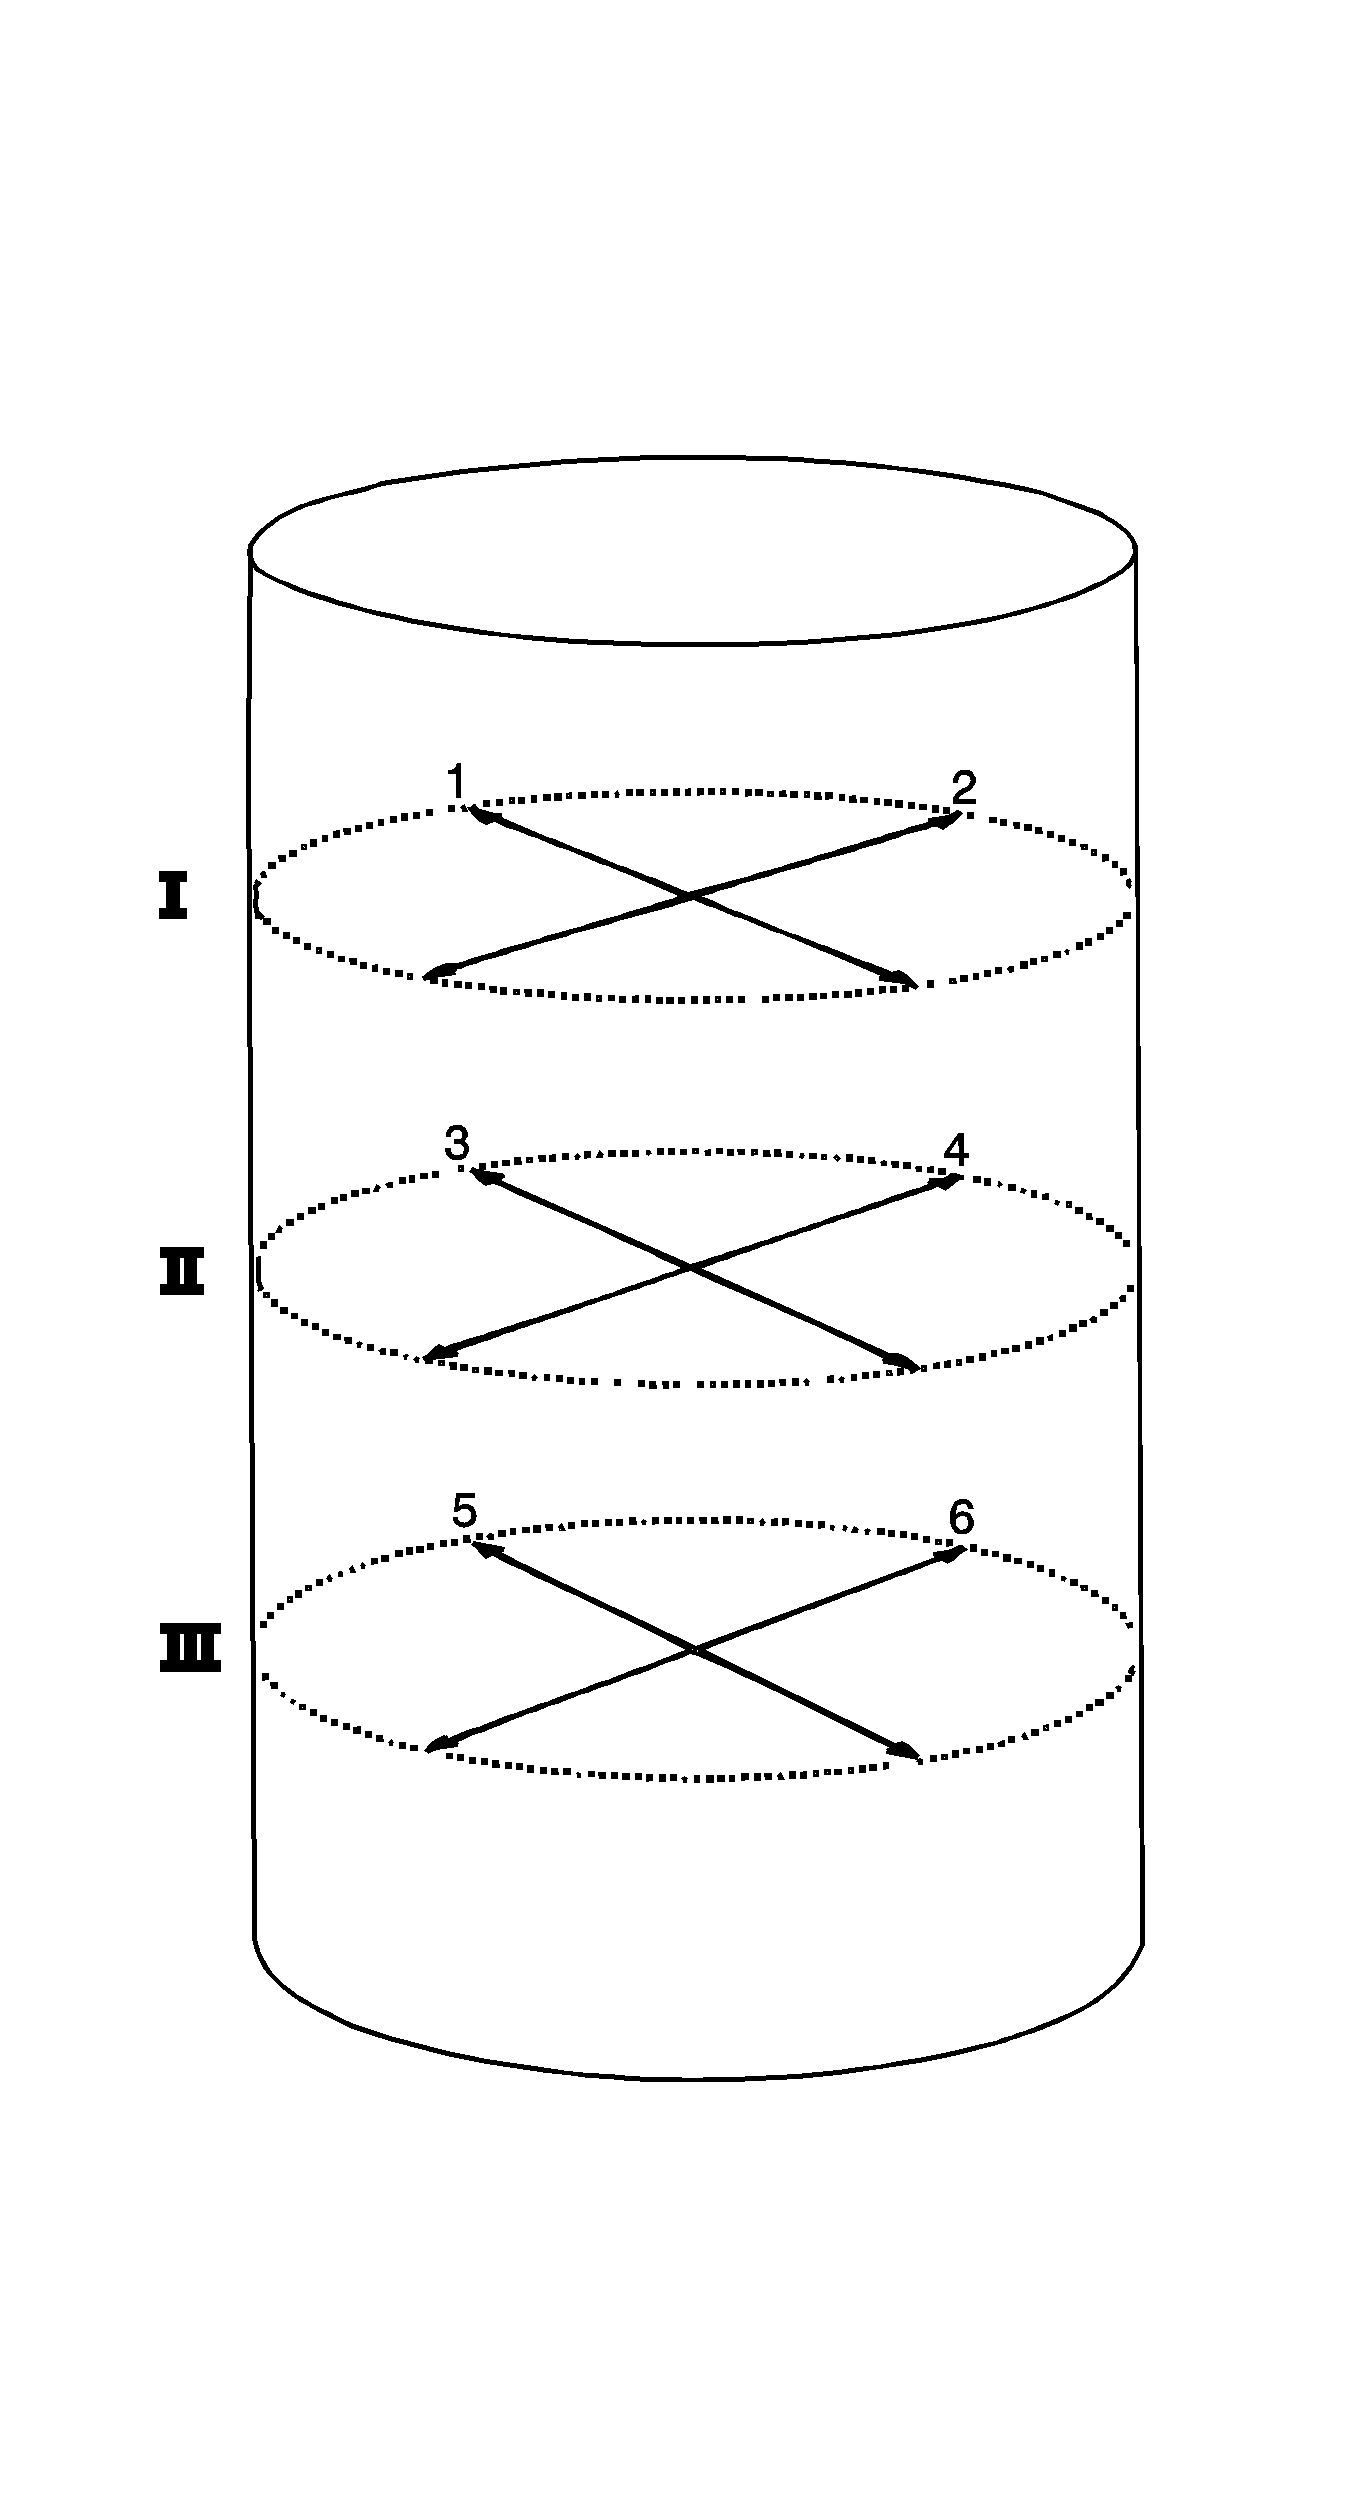
- Measure the cylinder bores.
| • | Insert the internal measuring device into cylinder bores. |
| • | Measure crosswise in 3 planes. |
| • | Tip back and forth to determine the needle turning point. |
| • | The difference between "Scale zero" and the turning point of the needle is the value of the running play. |
- Nominal/actual value comparison
| • | The wear is determined on the basis of the largest measurement of the measurements 1 to 6. |
| • | Piston size + permissible clearance = cylinder diameter at this measuring point. |
| • | Maximum measuring plane dimension - smallest measuring plane dimension = cylinder ovality of this measuring plane. |
- Remove the internal measuring device.
Installation Procedure
- Install the con-rod bearing clips.
| • | In the con-rod and con-rod bearing cover. |
| • | Wet the con-rod bearing clips with engine oil. |
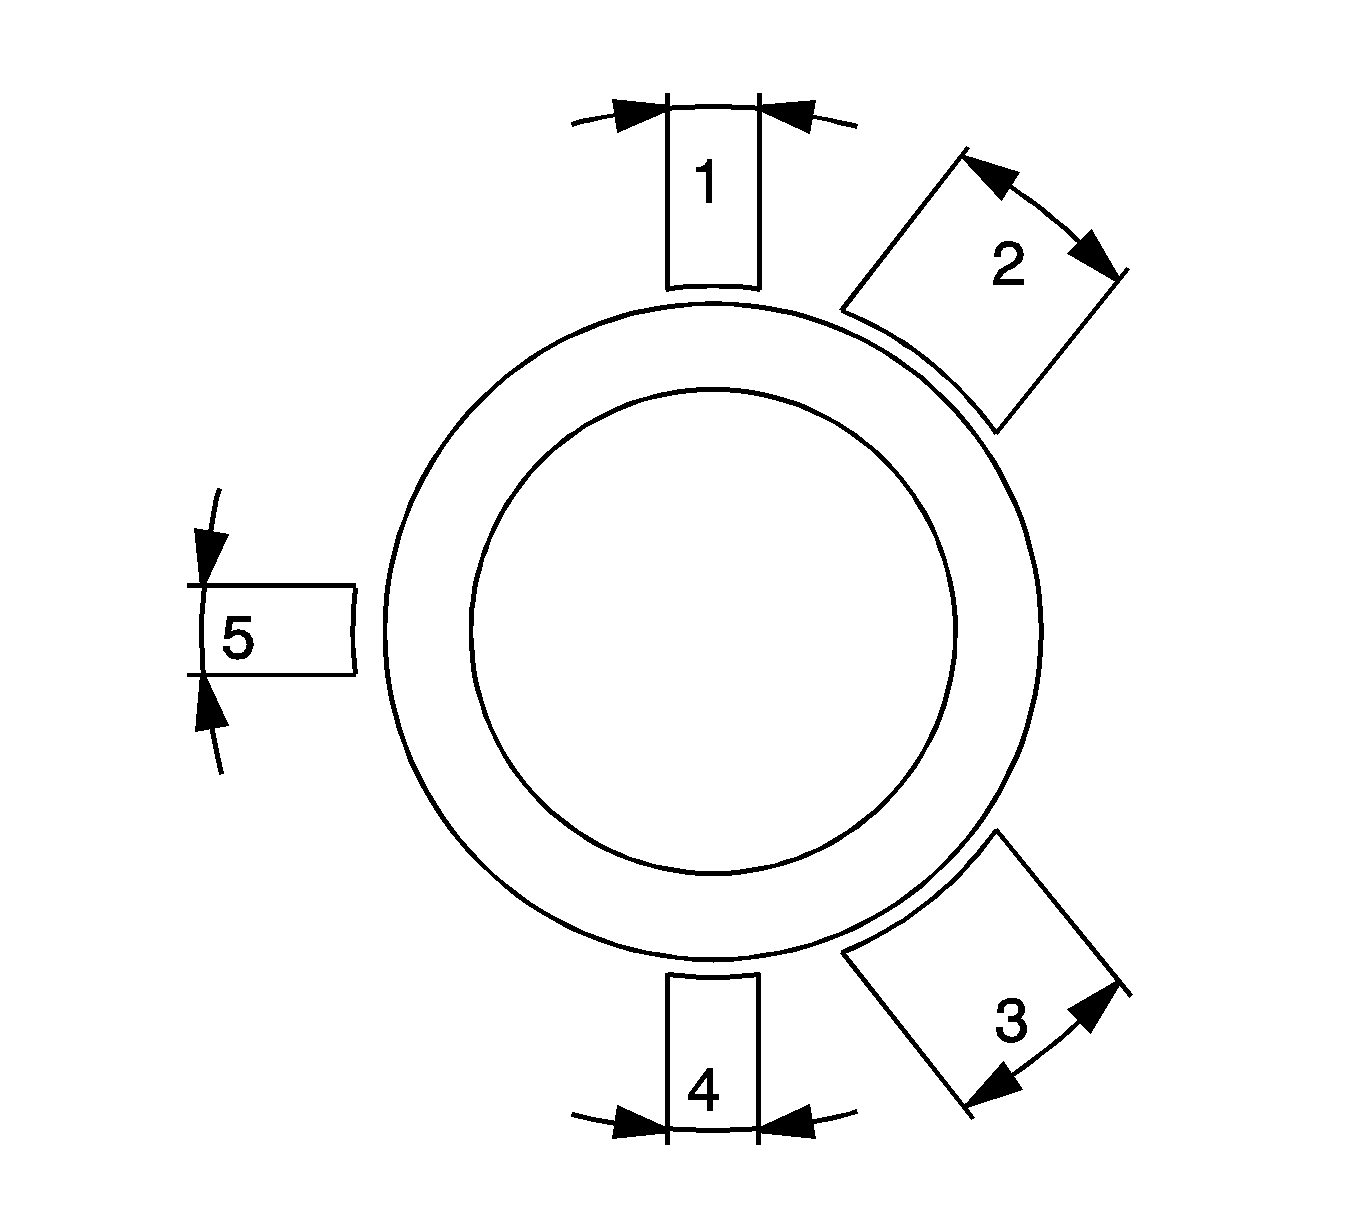
- Set the piston ring joint, piston 2.
| • | First piston ring (right-hand ring) in position (1) |
| • | Second piston ring (minute ring) in position (4) |
| • | Interim ring of oil scraper ring in position (5), steel band rings of oil scraper ring in position (2 and/or 3) |
- Install piston 2.
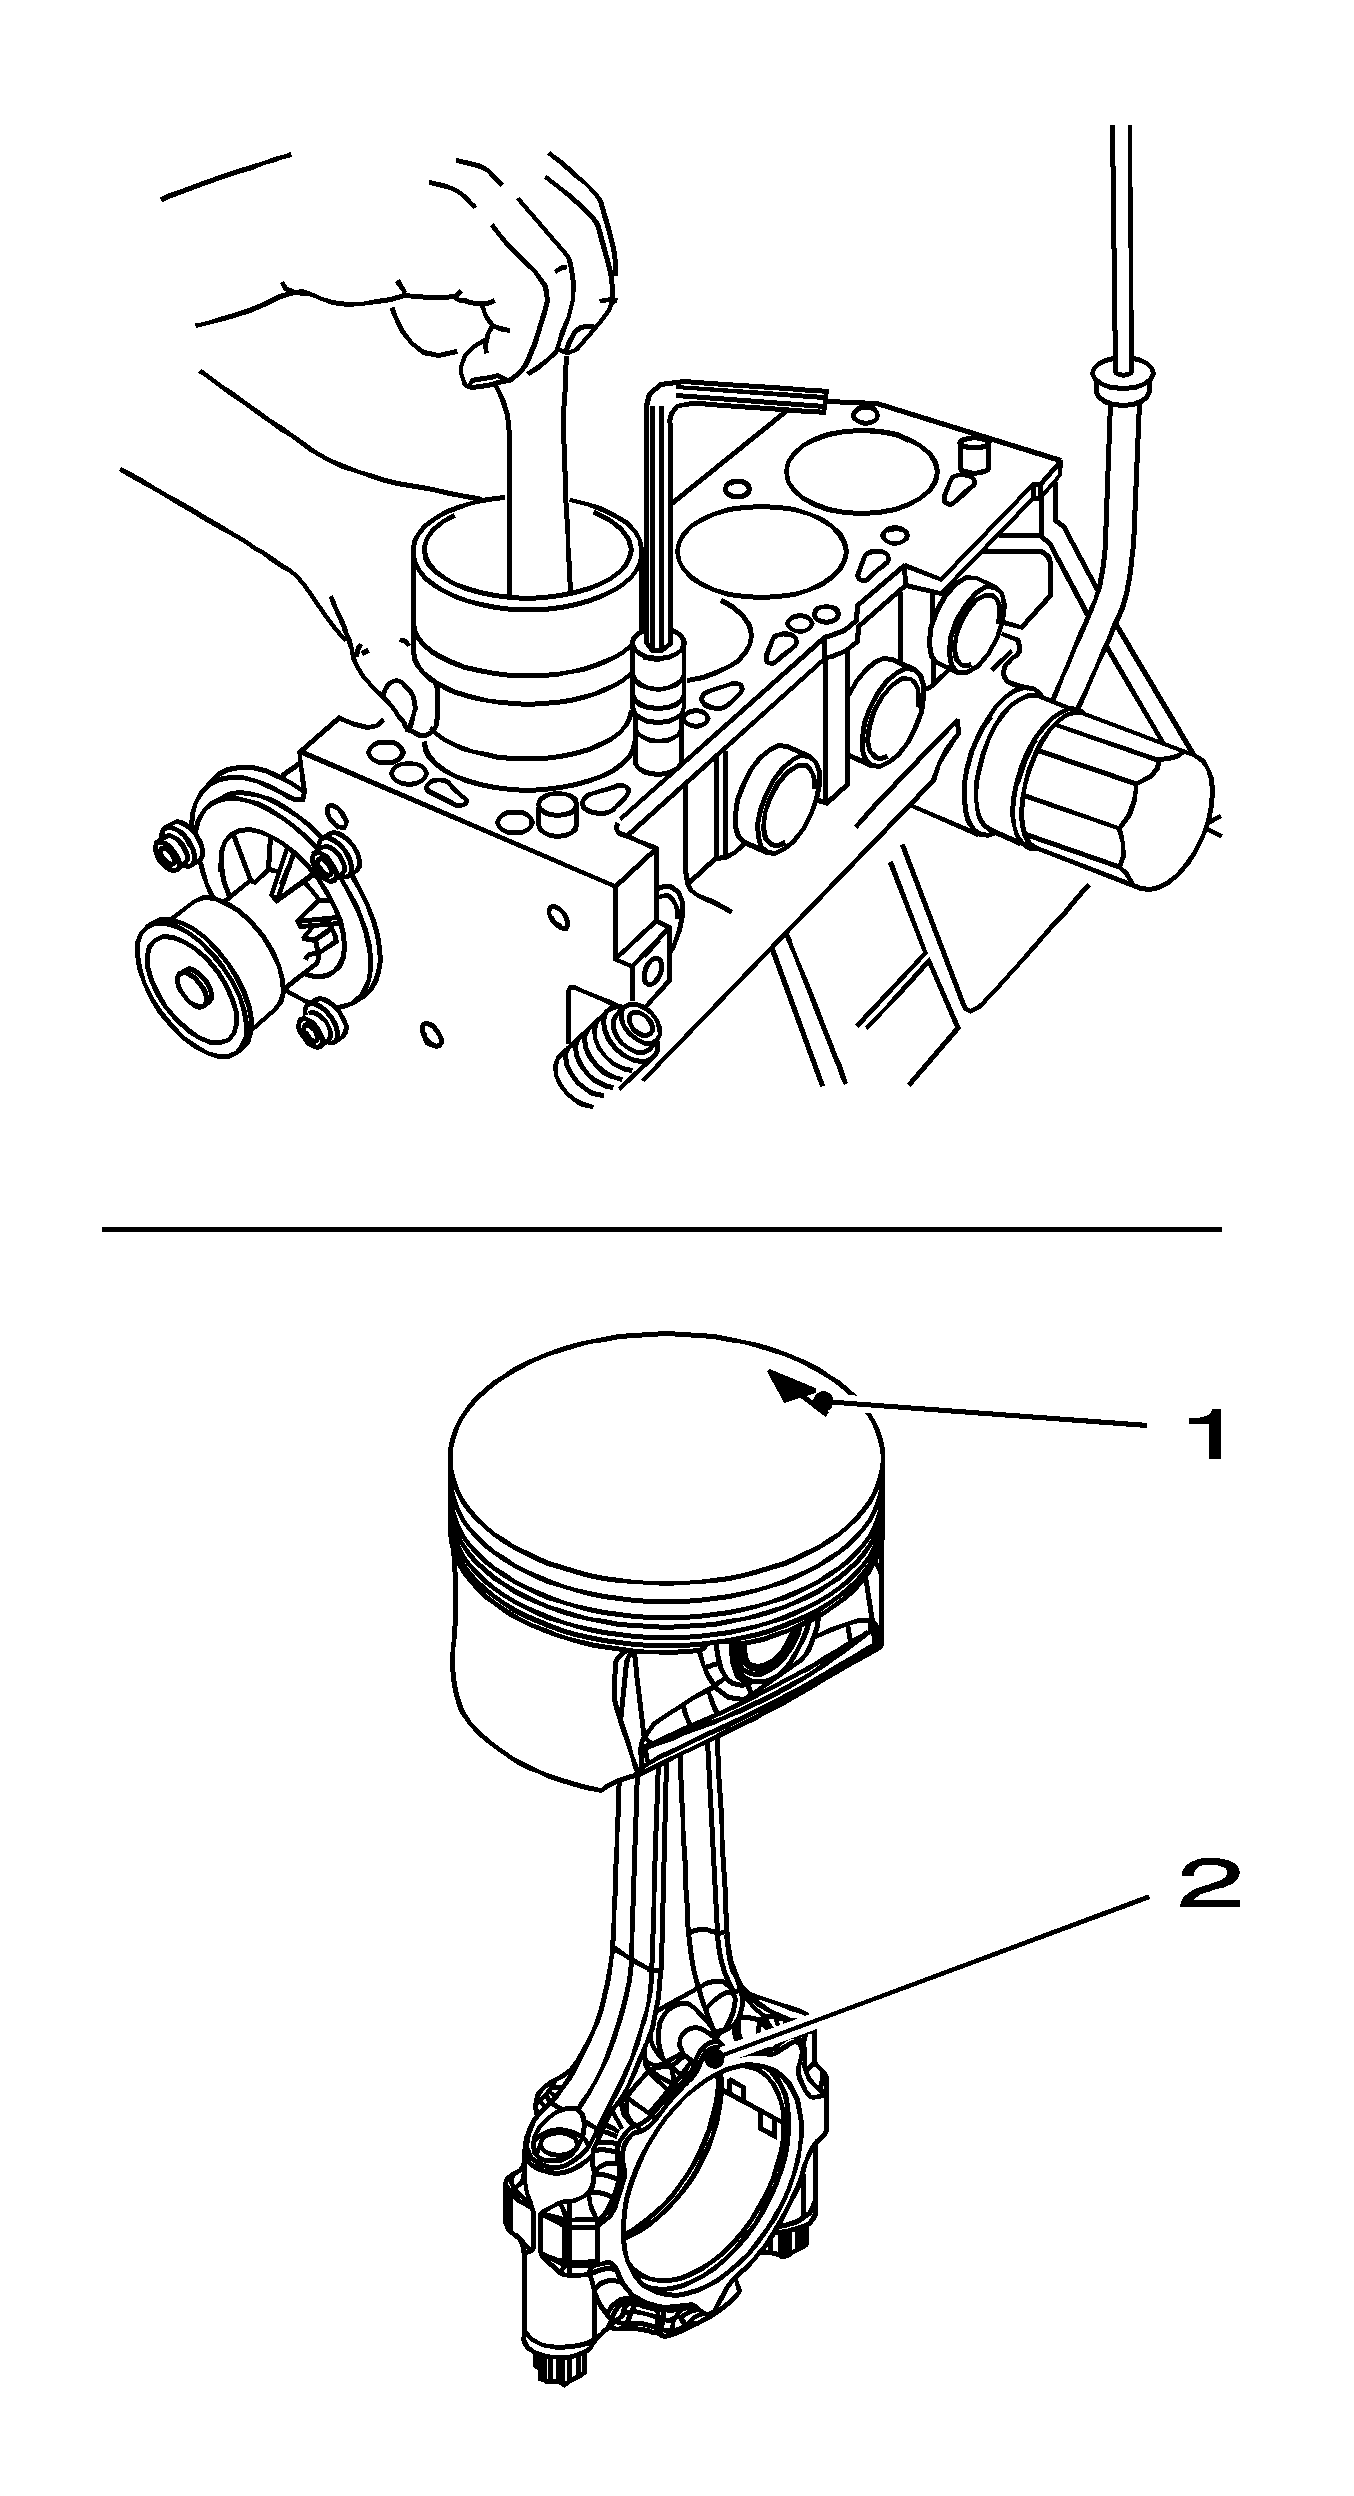
| • | Wet the piston and cylinder bore with engine oil. |
| | Note: Arrow (1) on piston head points to the engine timing side, bead (2) on con-rod points to the transmission side of the engine.
|
| • | Force the piston rings together with the piston ring tensioning belt. |
- Set the piston ring joint, piston 3.
| • | First piston ring (right-hand ring) in position (1) |
| • | Second piston ring (minute ring) in position (4) |
| • | Interim ring of oil scraper ring in position (5), steel band rings of oil scraper ring in position (2 and/or 3) |
- Piston 3, install
| • | Wet the piston and cylinder bore with engine oil. |
| | Note: Arrow (1) on piston head points to engine timing side, bead (2) on con-rod points to transmission side of engine.
|
| • | Force piston rings together with piston ring tensioning belt. |
- Raise the vehicle.
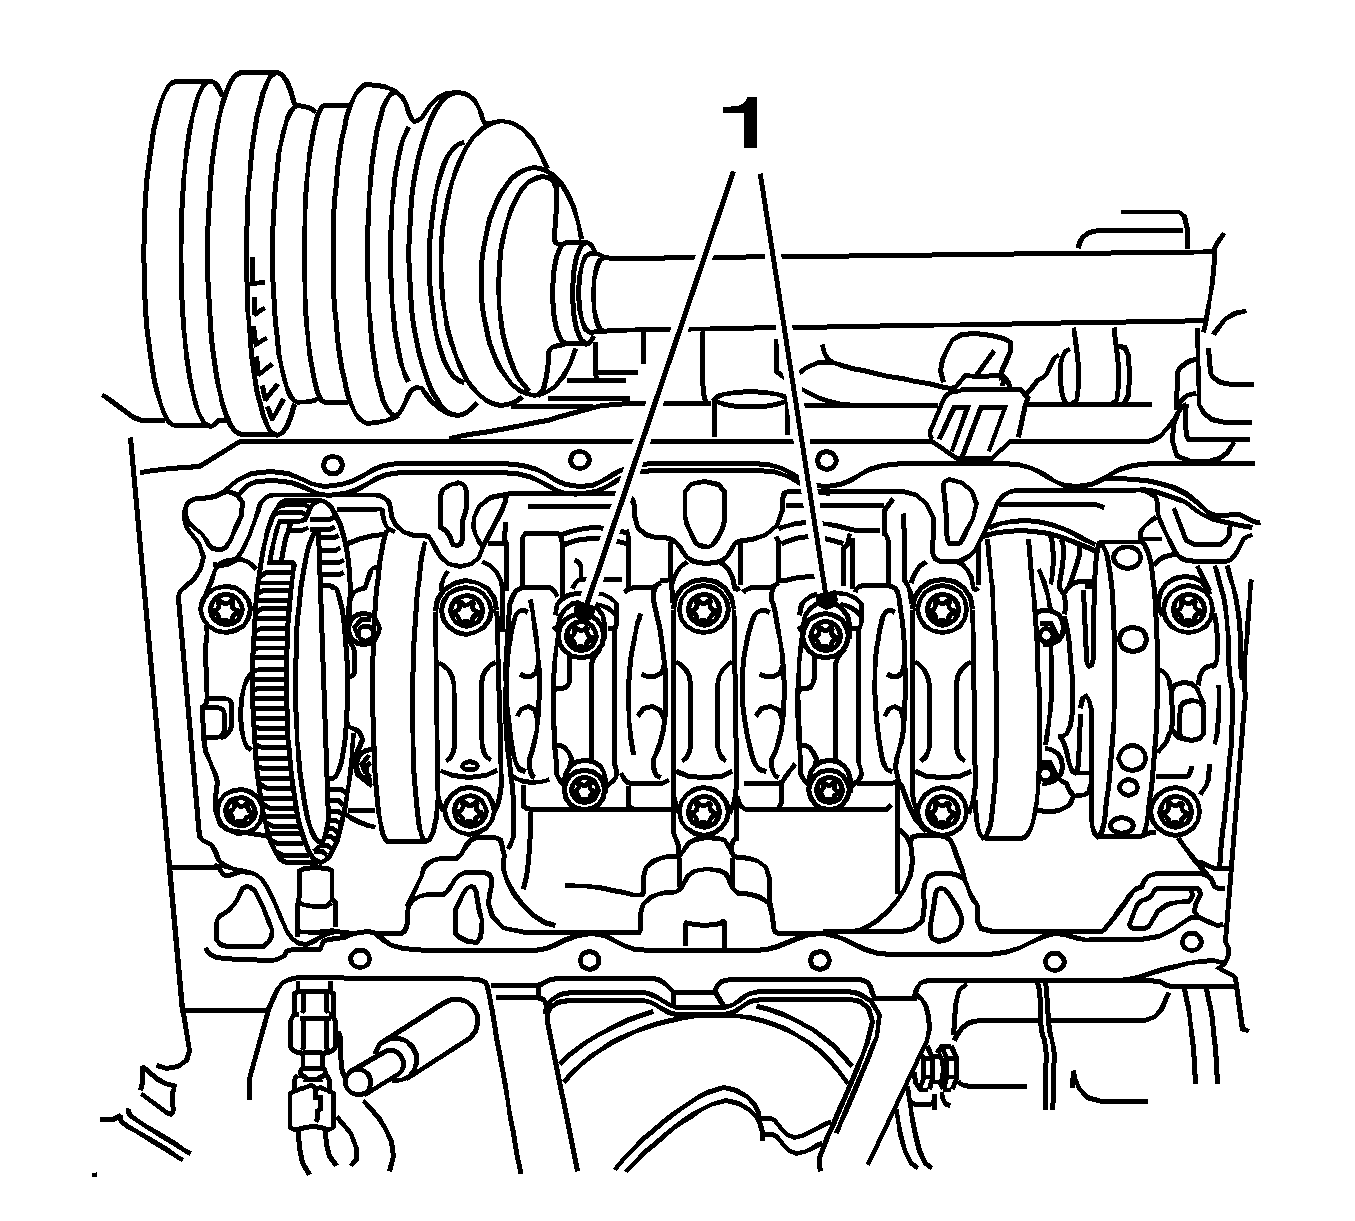
- Install con-rod bearing covers 2 and 3 (1).
| • | Wet the con-rod bearing journal with engine oil. |
Caution: Refer to Fastener Caution in the Preface section.
Tighten
Tighten the 4 bolts to 35 N·m (26 lb ft) plus 45 degrees plus 15 degrees.
- Turn the crankshaft on the torsional vibration balancer through 180 degrees in the direction of rotation of engine.
- Lower the vehicle.
- Set the piston ring joint, piston 1.
| • | First piston ring (right-hand ring) in position (1) |
| • | Second piston ring (minute ring) in position (4) |
| • | Interim ring of oil scraper ring in position (5), steel band rings of oil scraper ring in position (2 and/or 3) |
- Piston 1, install
| • | Wet the piston and cylinder bore with engine oil. |
| | Note: Arrow (1) on piston head points to engine timing side, bead (2) on con-rod points to transmission side of engine.
|
| • | Force the piston rings together with the piston ring tensioning belt. |
- Set the piston ring joint, piston 4.
| • | First piston ring (right-hand ring) in position (1) |
| • | Second piston ring (minute ring) in position (4) |
| • | Interim ring of oil scraper ring in position (5), steel band rings of oil scraper ring in position (2 and/or 3) |
- Piston 4, install
| • | Wet the piston and cylinder bore with engine oil. |
| | Note: Arrow (1) on piston head points to the engine timing side, bead (2) on con-rod points to the transmission side of engine.
|
| • | Force the piston rings together with the piston ring tensioning belt. |
- Raise the vehicle.
Note: Inspect markings on parts.
- Install con-rod bearing covers 1 and 4 (1).
| • | Wet the con-rod bearing journal with engine oil. |
Tighten
Tighten the 4 bolts to 35 N·m (26 lb ft) plus 45 degrees plus 15 degrees.
| • | Set the crankshaft in the direction of the engine rotation to 60 degrees before OT. |
- Install the oil pan. Refer to
Oil Pan Replacement.
- Install the cylinder head. Refer to
Cylinder Head Replacement.
