- Install the connecting rod bearing clips in the connecting rod and connecting rod bearing cover.
- Apply engine oil to the connecting rod bearing clips.
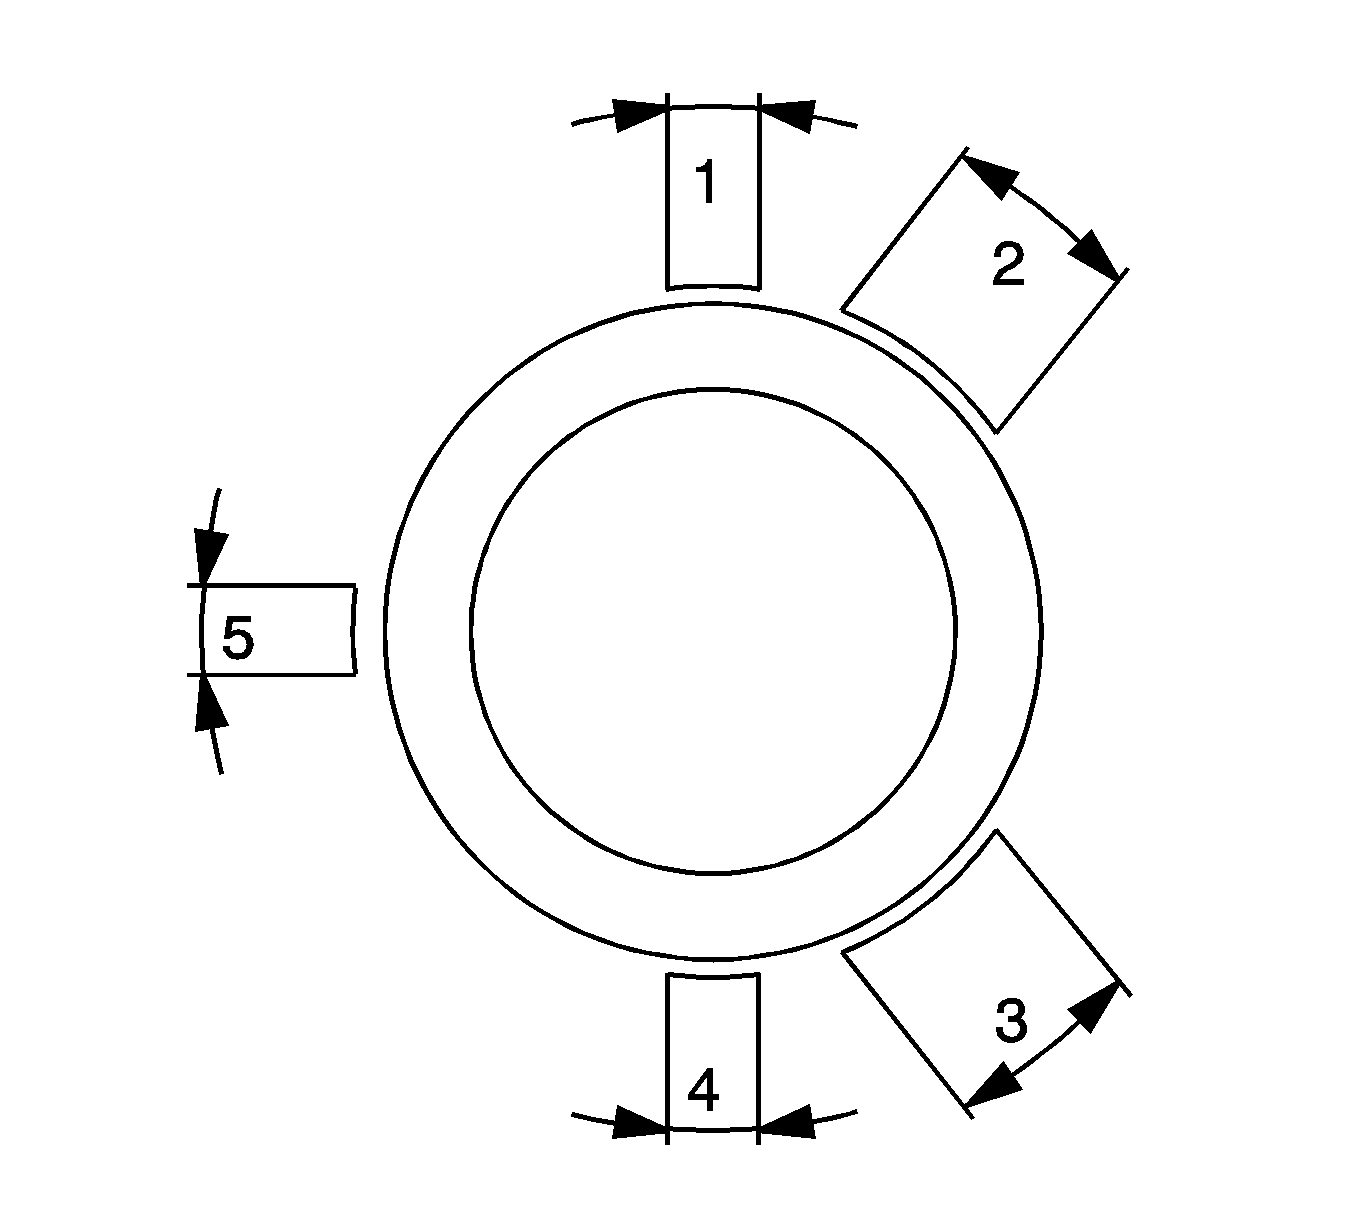
- Set the piston ring joint, piston 2.
| • | First piston ring, right-hand ring, in position (1) |
| • | Second piston ring, minute ring, in position (4) |
| • | Interim ring of oil scraper ring in position (5), steel band rings of oil scraper ring in position (2 and/or 3) |

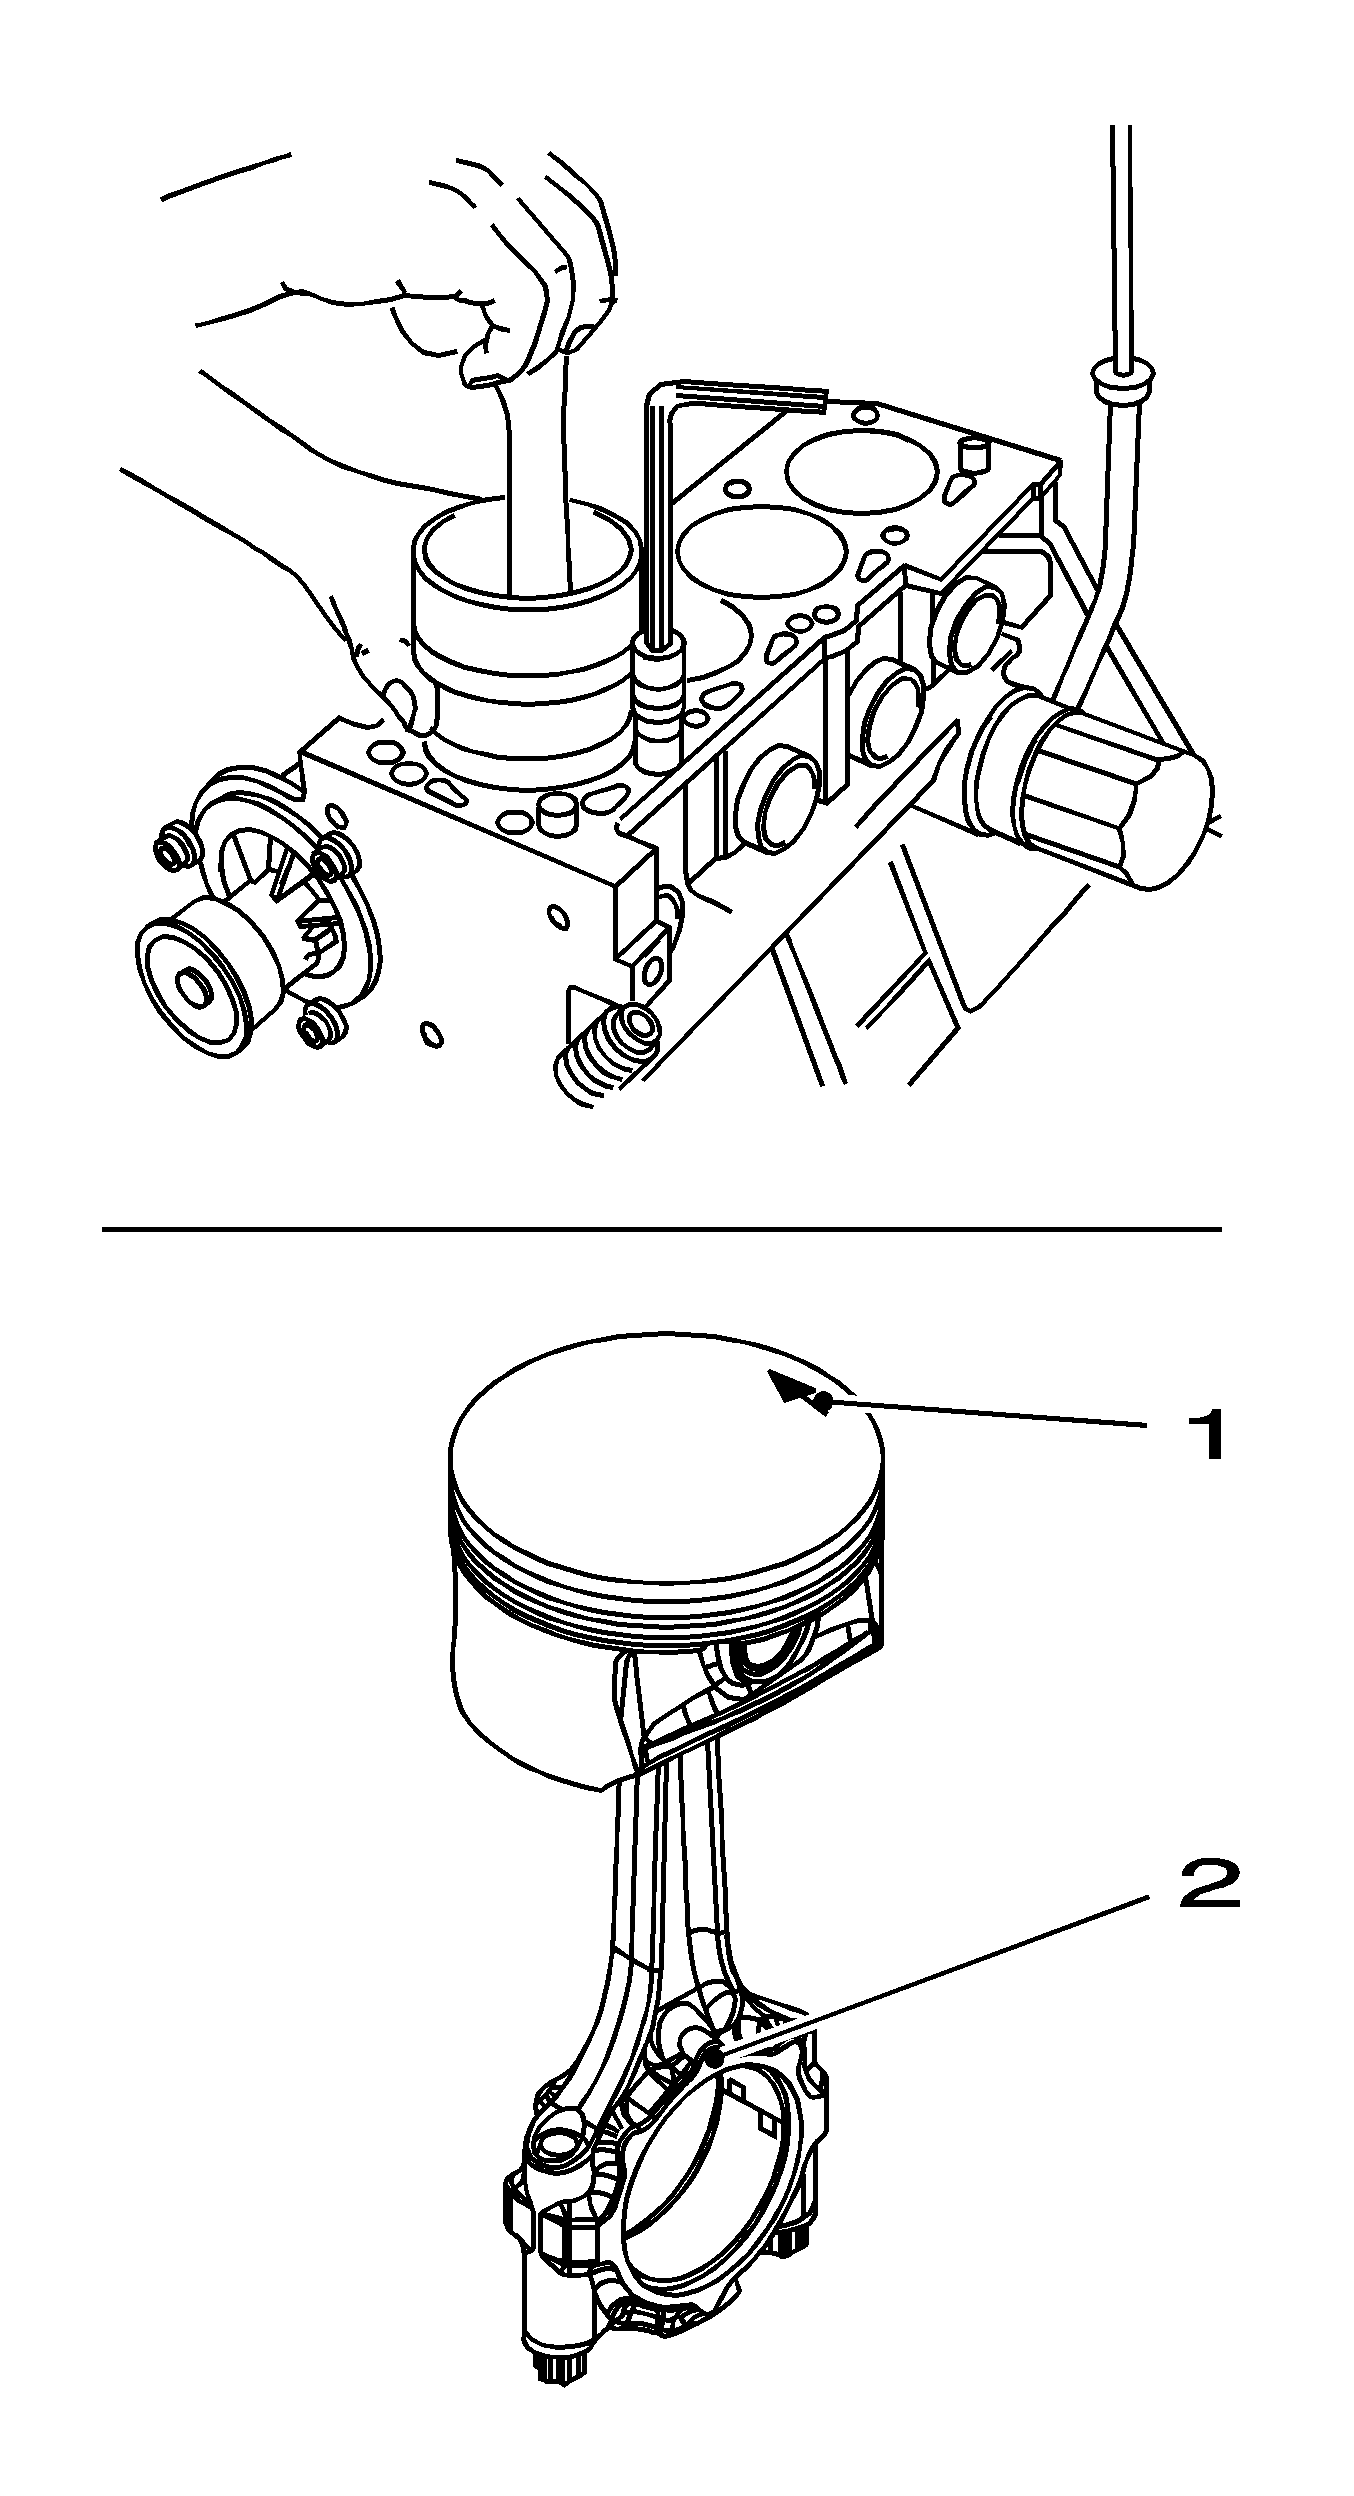
- Install piston 2.
| • | Apply engine oil to the piston and cylinder bore. |
| | Note: The arrow (1) on the piston head points to the engine timing side. The bead (2) on the connecting rod points to the transmission side of the engine.
|
| • | Force the piston rings together with the piston ring tensioning belt. |

- Set the piston ring joint, piston 3.
| • | First piston ring, right-hand ring, in position (1) |
| • | Second piston ring, minute ring, in position (4) |
| • | Interim ring of oil scraper ring in position (5), steel band rings of oil scraper ring in position (2 and/or 3) |

- Install piston 3.
| • | Apply engine oil to the piston and cylinder bore. |
| | Note: The arrow (1) on the piston head points to the engine timing side. The bead (2) on the connecting rod points to the transmission side of the engine.
|
| • | Force the piston rings together with the piston ring tensioning belt. |

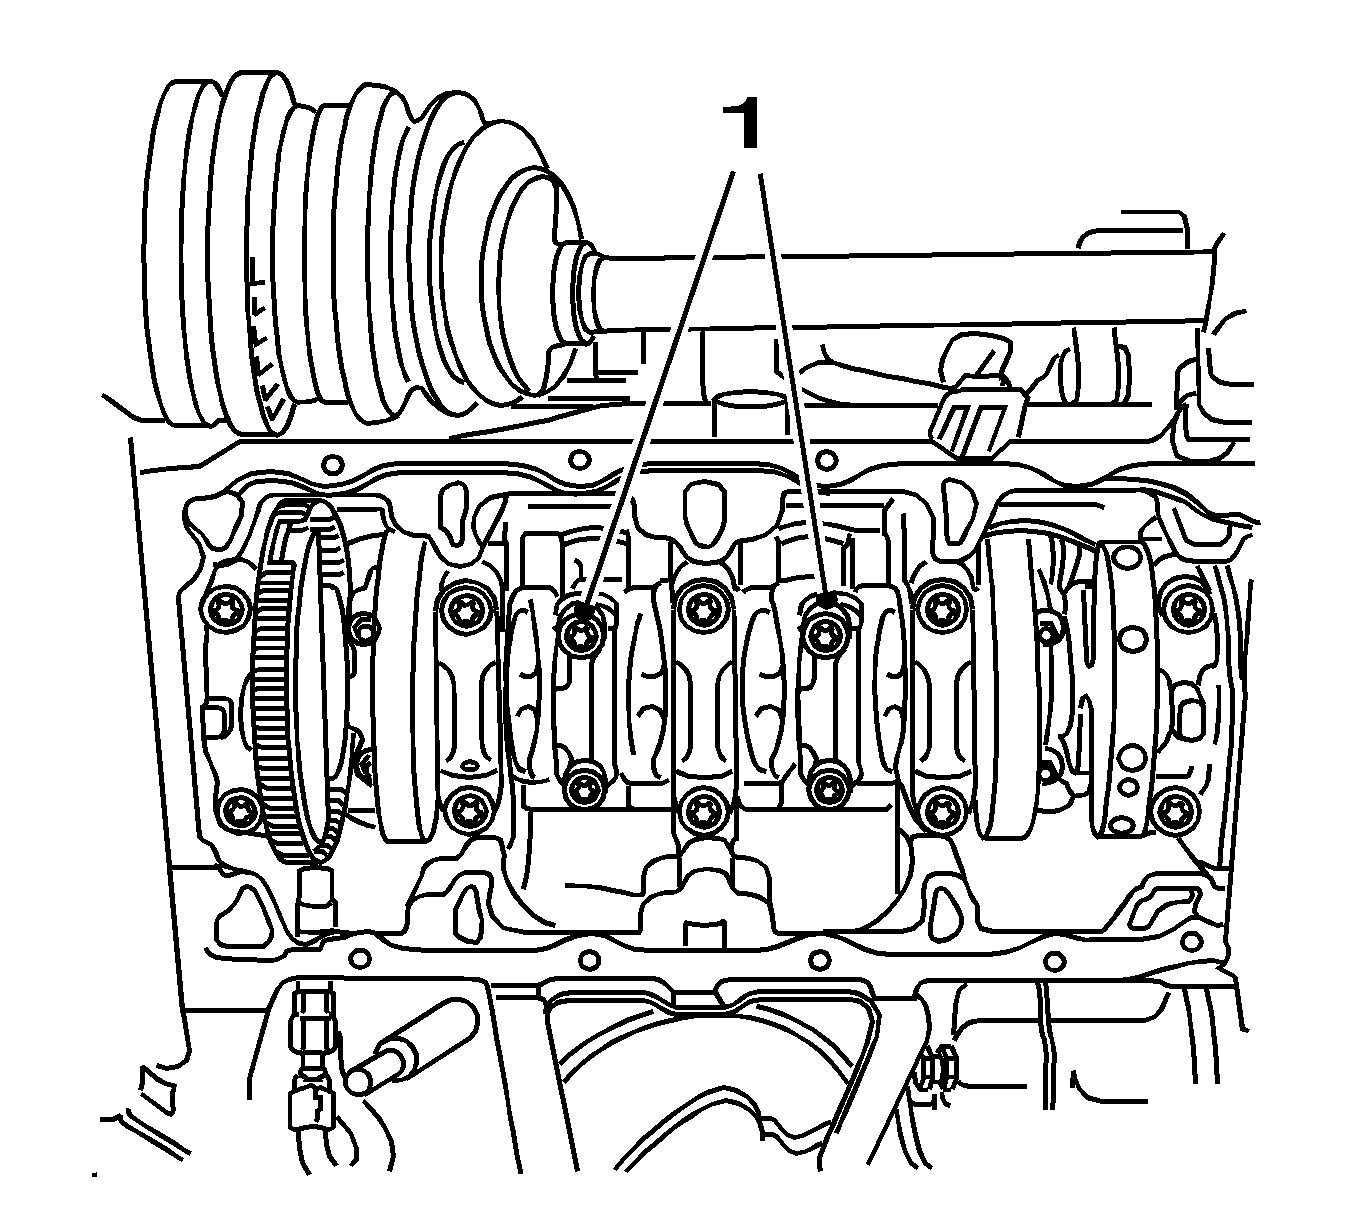
- Install connecting rod bearing covers 2 and 3 (1).
- Apply engine oil to the connecting rod bearing journal.
Caution: Refer to Fastener Caution in the Preface section.
- Install the bolts. Tighten the 4 bolts to
35 N·m (26 lb ft) plus
45 degrees plus
15 degrees.
- Turn the crankshaft on the torsional vibration balancer through 180 degrees in the direction of engine rotation.

- Set the piston ring joint, piston 1.
| • | First piston ring, right-hand ring, in position (1) |
| • | Second piston ring, minute ring, in position (4) |
| • | Interim ring of oil scraper ring in position (5), steel band rings of oil scraper ring in position (2 and/or 3) |

- Install piston 1.
| • | Apply engine oil to the piston and cylinder bore. |
| | Note: The arrow (1) on the piston head points to the engine timing side. The bead (2) on the connecting rod points to the transmission side of the engine.
|
| • | Force the piston rings together with the piston ring tensioning belt. |

- Set the piston ring joint, piston 4.
| • | First piston ring, right-hand ring, in position (1) |
| • | Second piston ring, minute ring, in position (4) |
| • | Interim ring of oil scraper ring in position (5), steel band rings of oil scraper ring in position (2 and/or 3) |

- Install piston 4.
| • | Apply engine oil to the piston and cylinder bore. |
| | Note: The arrow (1) on the piston head points to the engine timing side. The bead (2) on the connecting rod points to the transmission side of the engine.
|
| • | Force the piston rings together with the piston ring tensioning belt. |

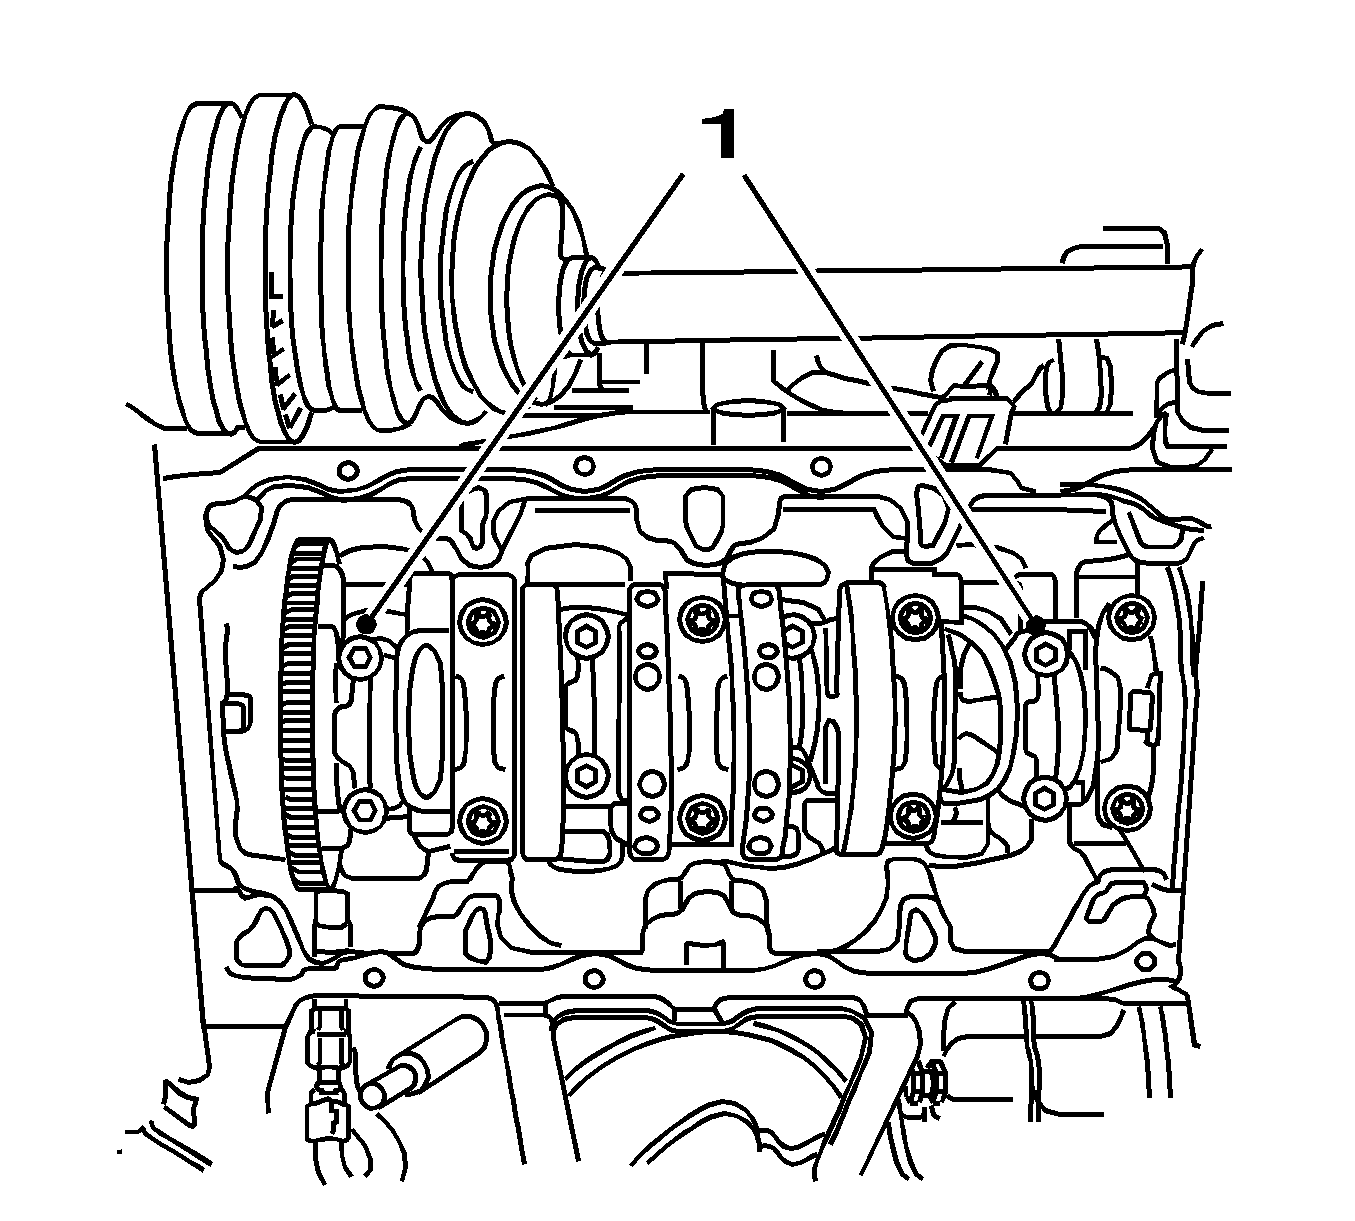
Note: Inspect markings on the components.
- Install connecting rod bearing covers 1 and 4 (1).
- Apply engine oil to the connecting rod bearing journal.
- Install the bolts. Tighten the 4 bolts to
35 N·m (26 lb ft) plus
45 degreesplus
15 degrees.
- Set the crankshaft in the engine rotation direction to 60 degrees before OT.


