Removal Procedure
- Turn the steering wheel to stop.
| • | Turn the steering wheel and front wheels to straight-ahead position. |
| • | Remove the ignition key. |
| • | Engage the steering lock. |
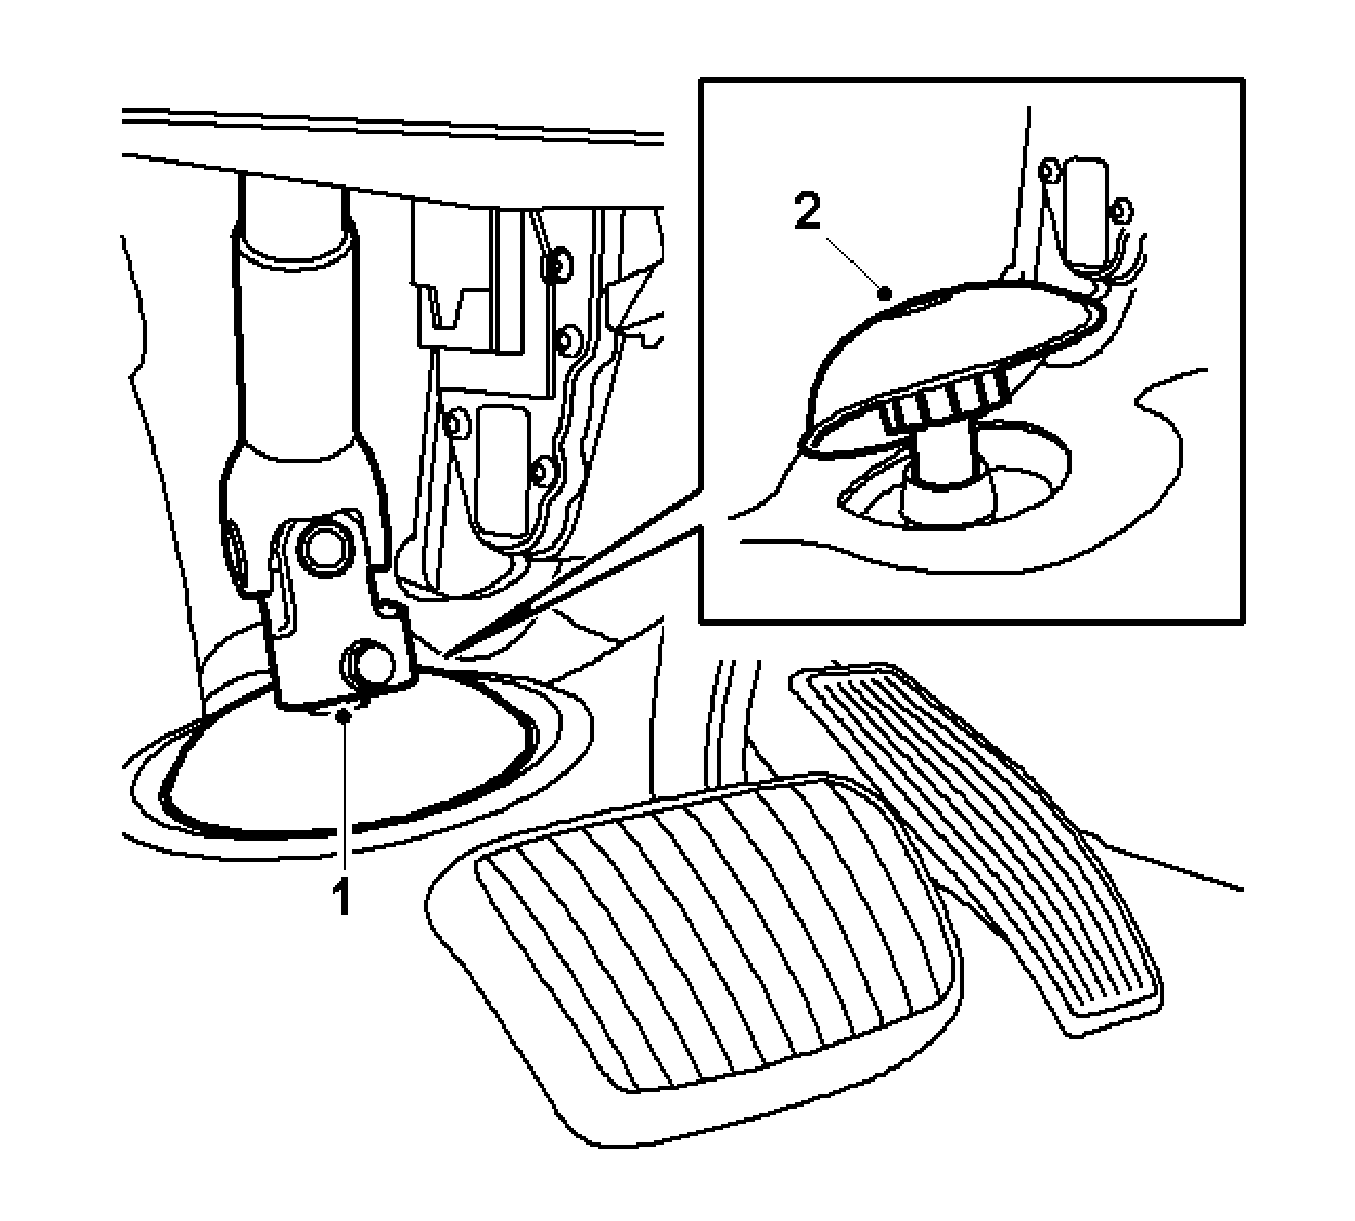
Note: The screw is accessible from the vehicle interior.
- Remove the steering gear from steering gear.
| • | Remove the clamping screw (1) of intermediate shaft. |
| • | Remove the intermediate shaft from steering wheel. |
- Remove the rubber sleeve from steering gear (2).
- Raise the vehicle.
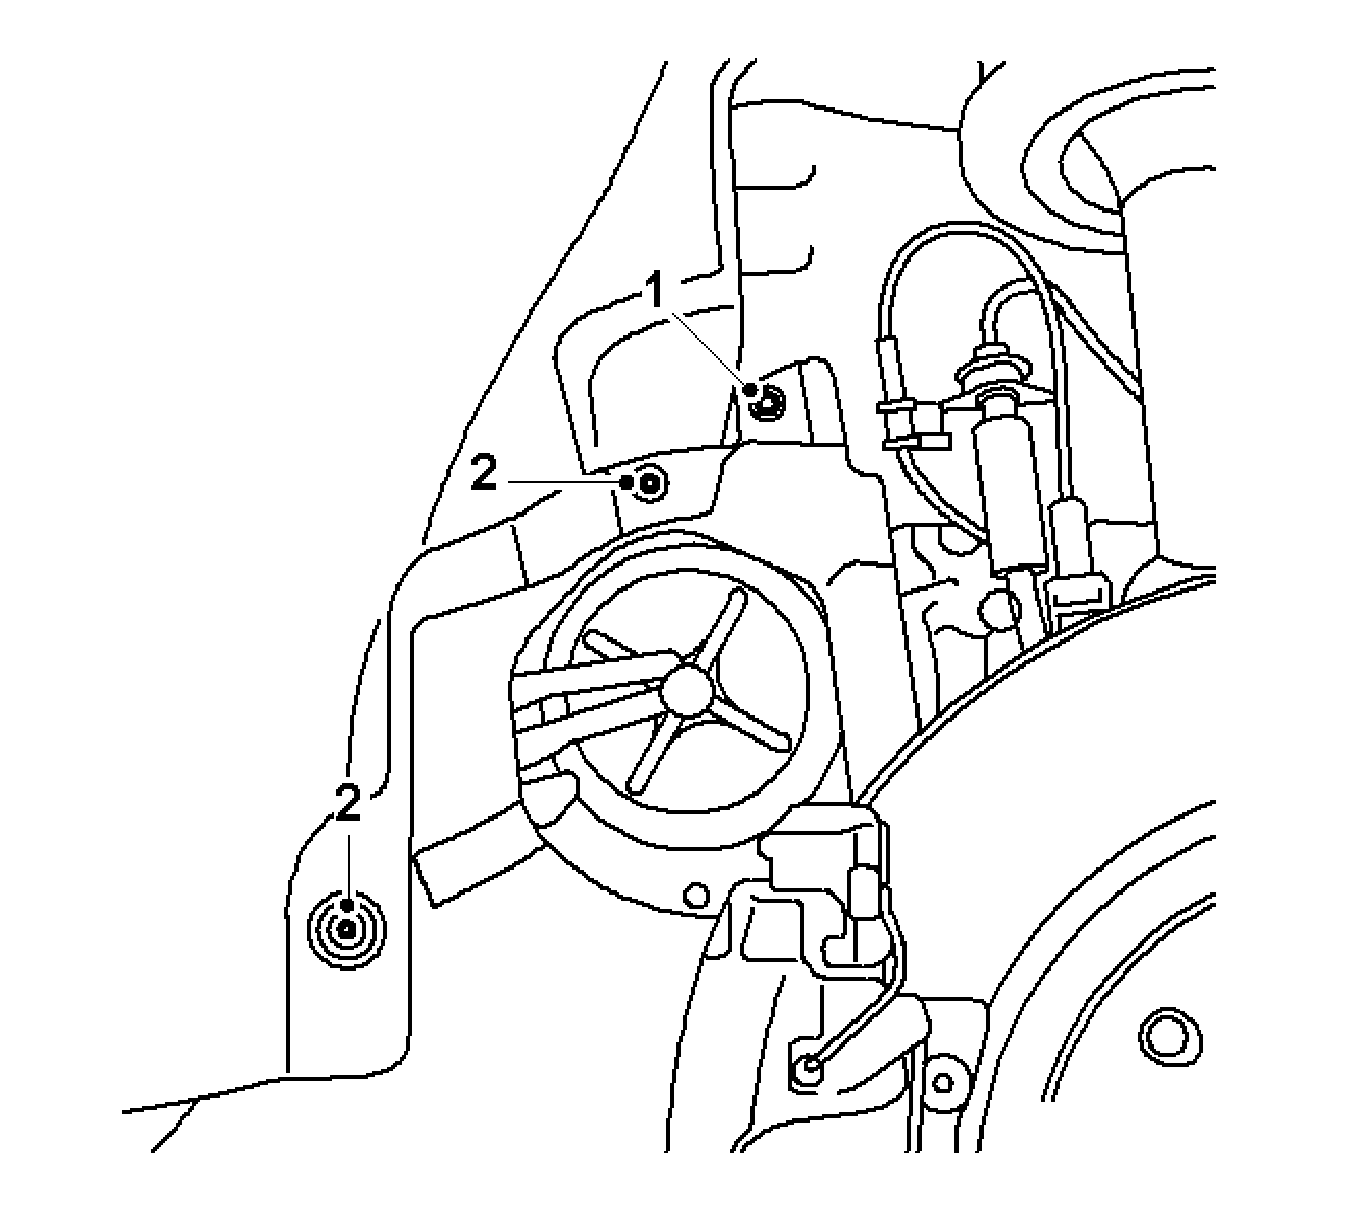
- Release the left and right engine compartment covers.
| • | Remove the 4 body blind rivet (2). |
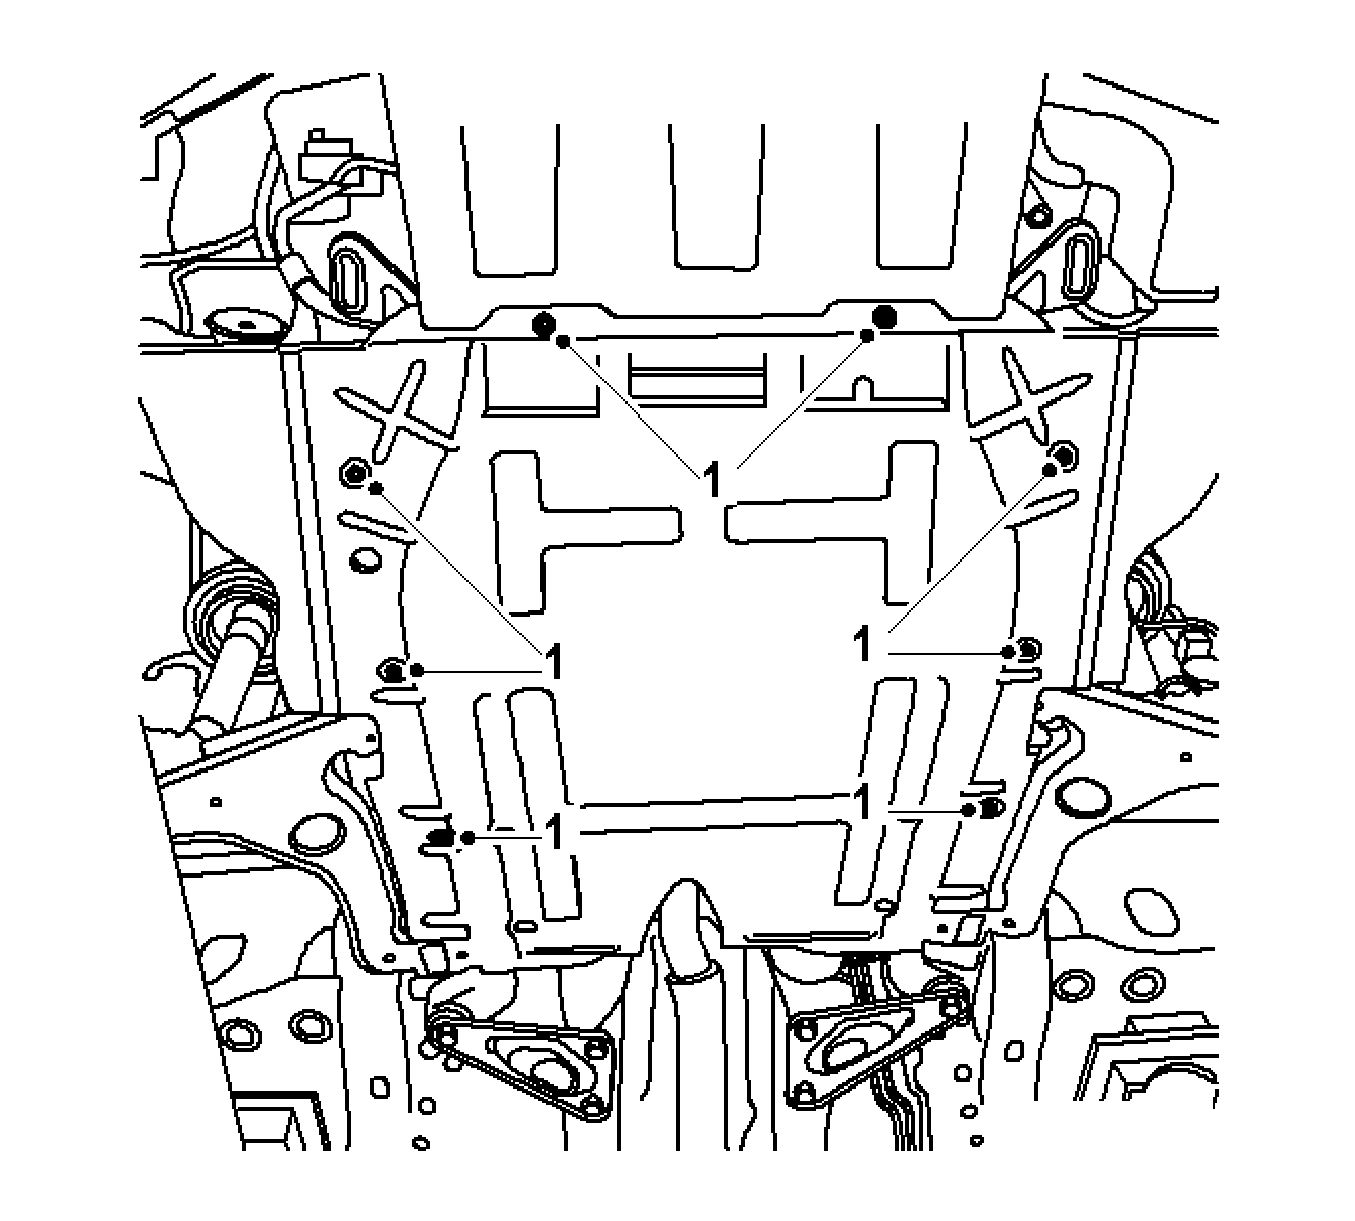
- Remove the lower engine compartment cover.
Remove the 8 bolts (1).
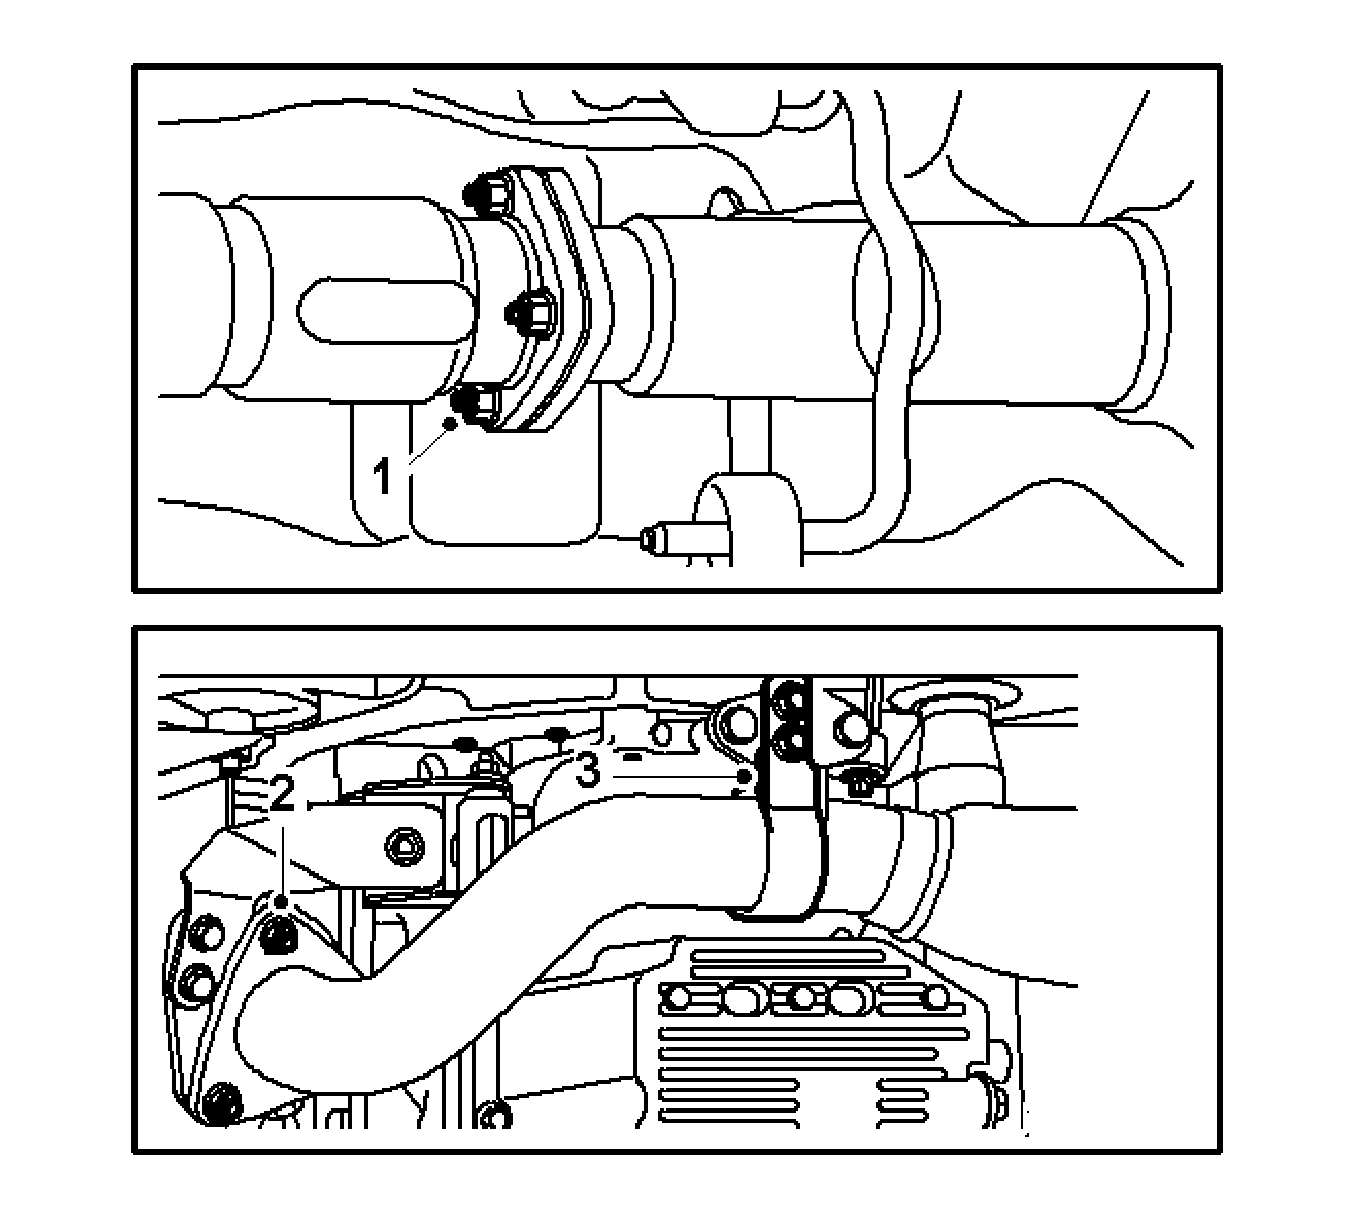
Note: The flexible part of the pipe must not be bent by more than 5 degrees.
- Remove the exhaust primary pipe.
| • | Remove 3 nuts to connection of primary pipe on the particle filter/rear catalytic converter (1). |
| • | Remove 3 nuts to connection of pipe on the front catalytic converter (2). |
| • | Remove the bracket for sump (3). |
| • | Remove the exhaust pipe. |
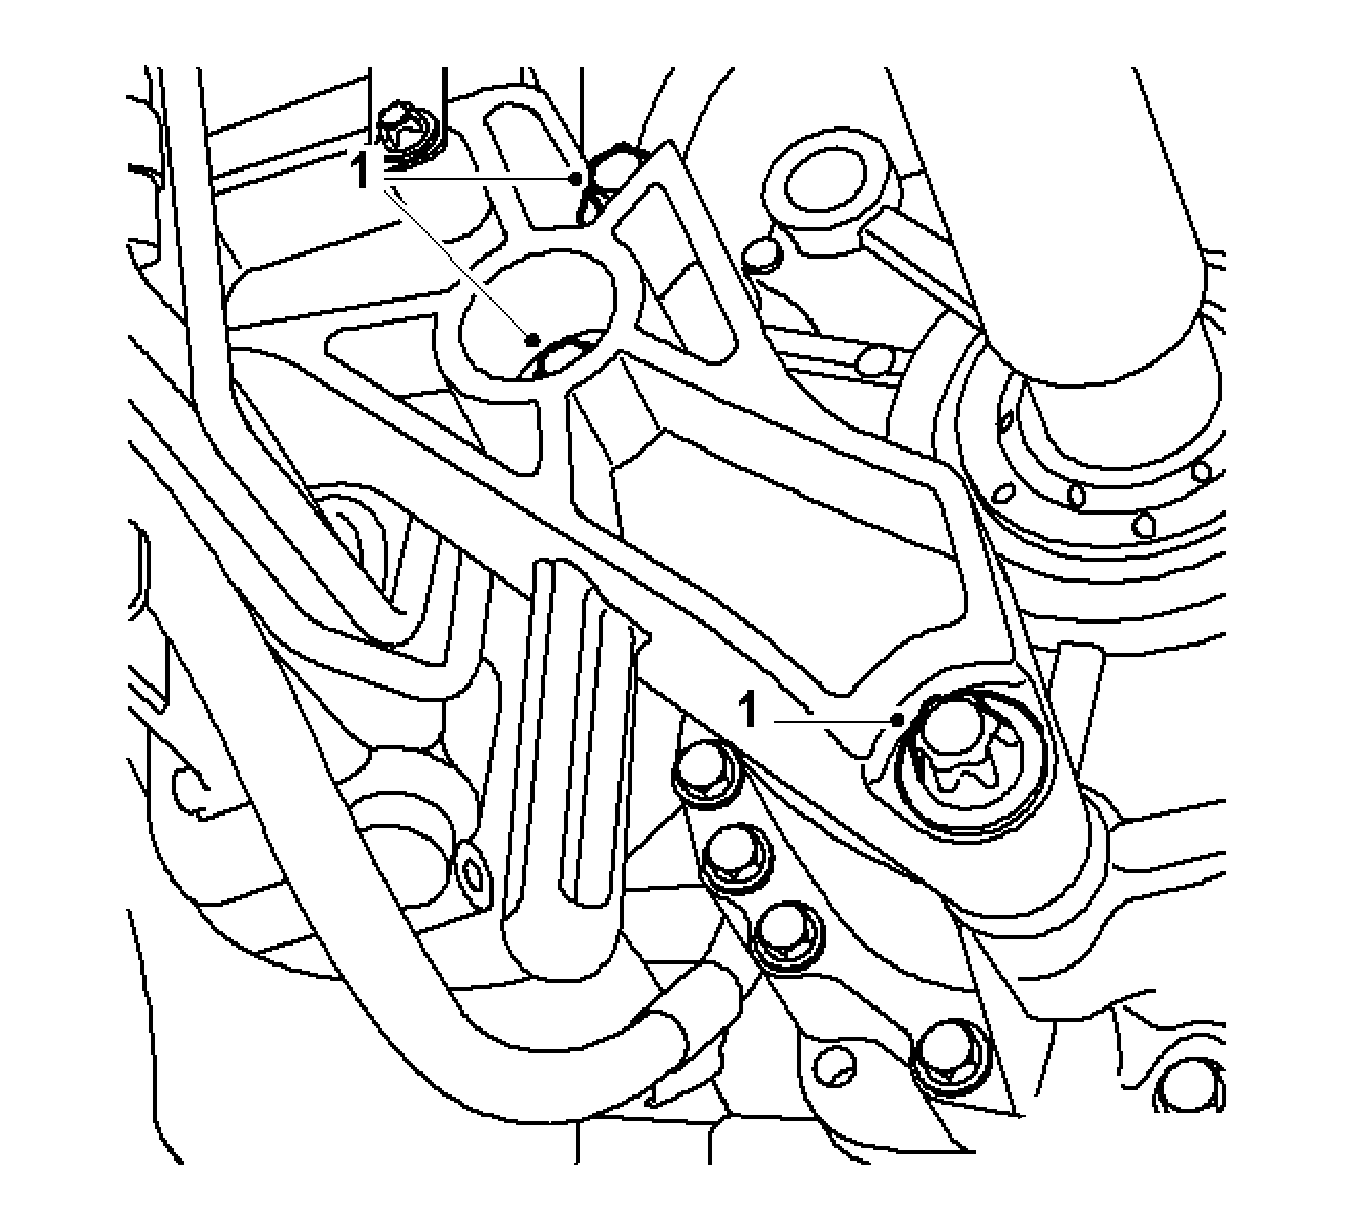
- Remove the lower rear engine support from the transmission (1).
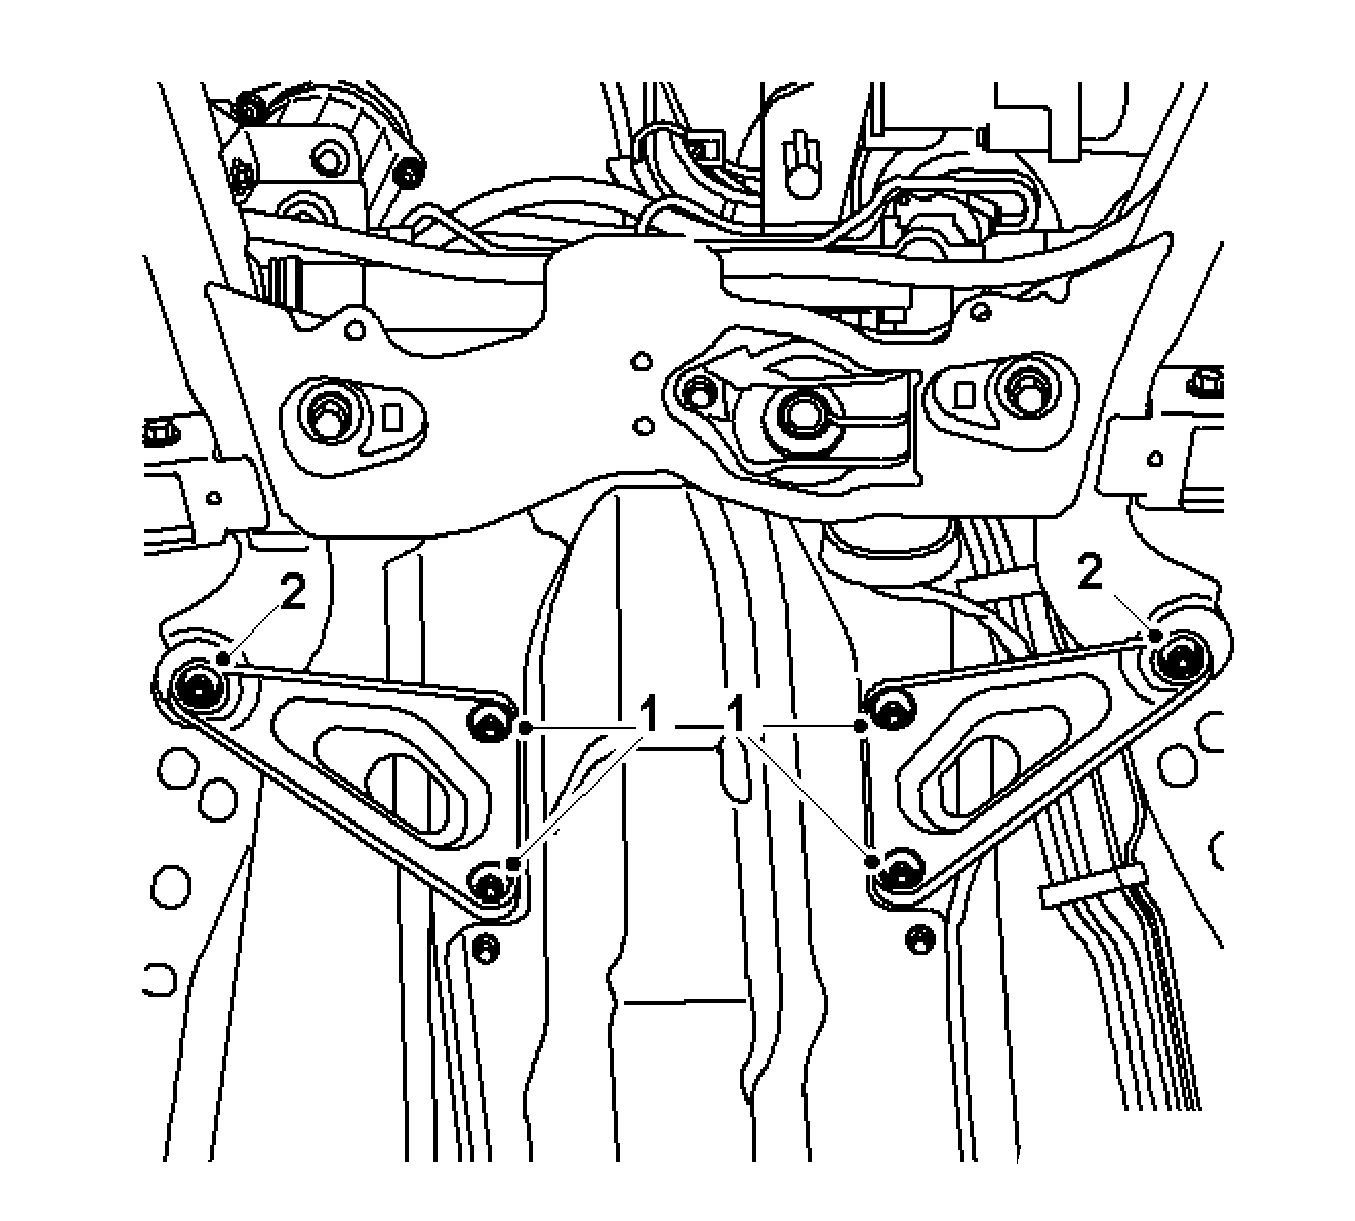
- Remove the triangular plate.
Remove the 6 bolts (1, 2).
- Place the vehicle lift beneath the front axle housing.
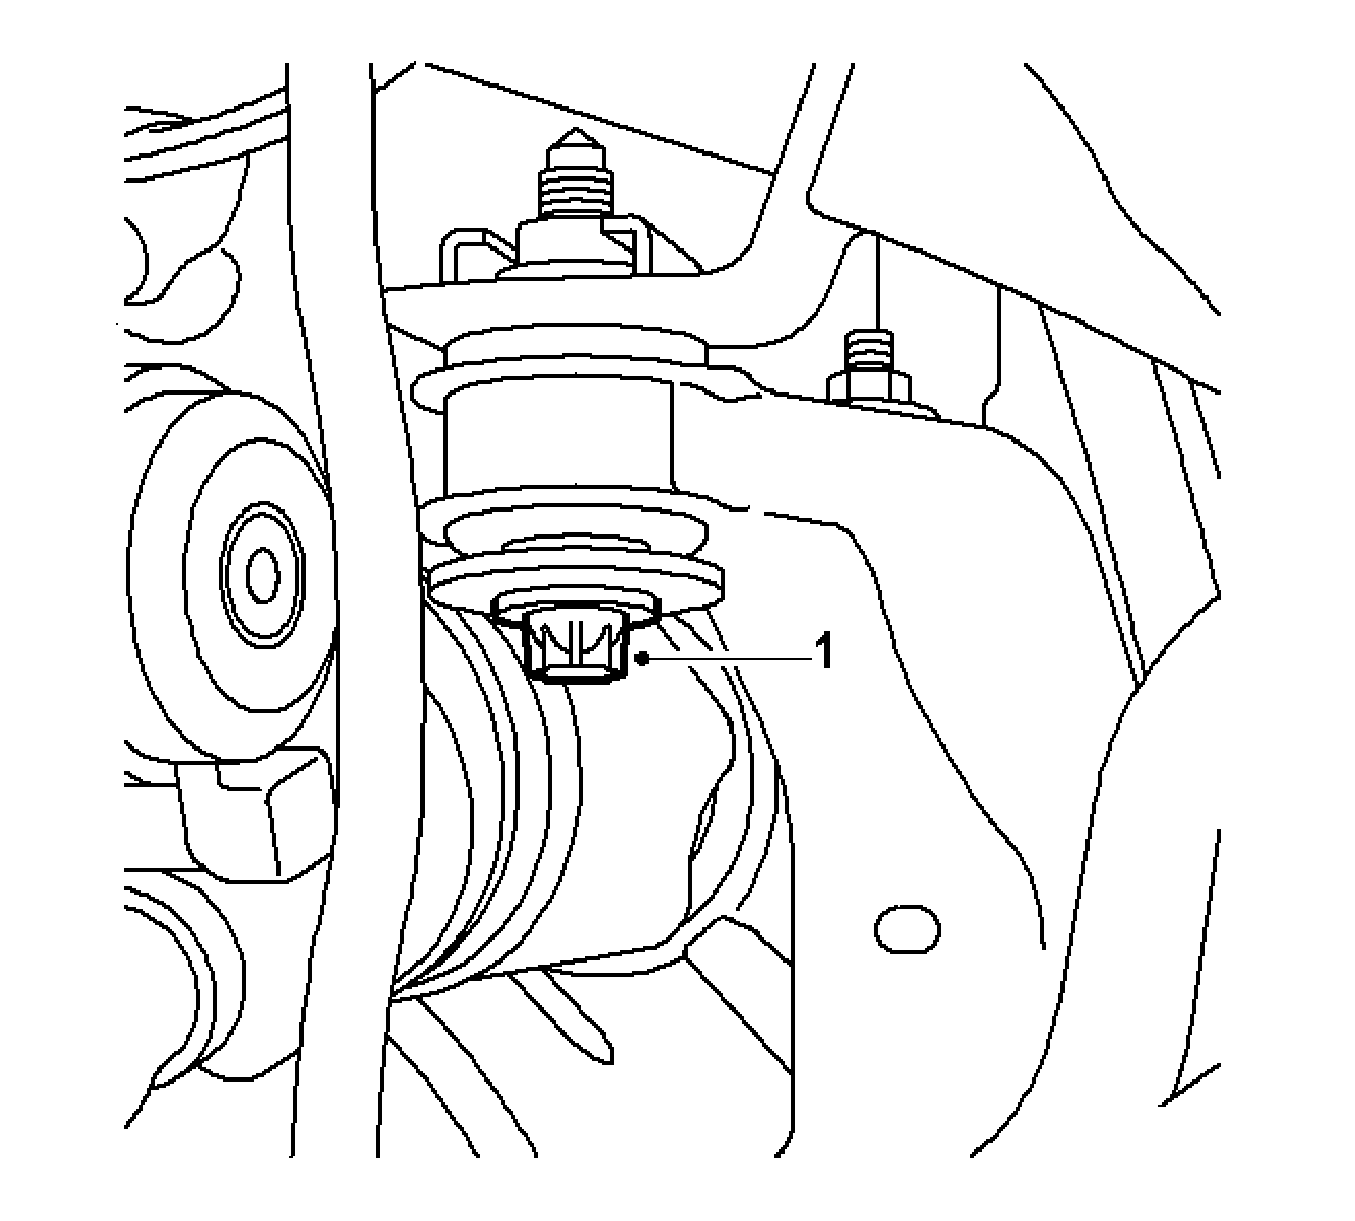
- Remove the 2 center bolts from axle housing (1).
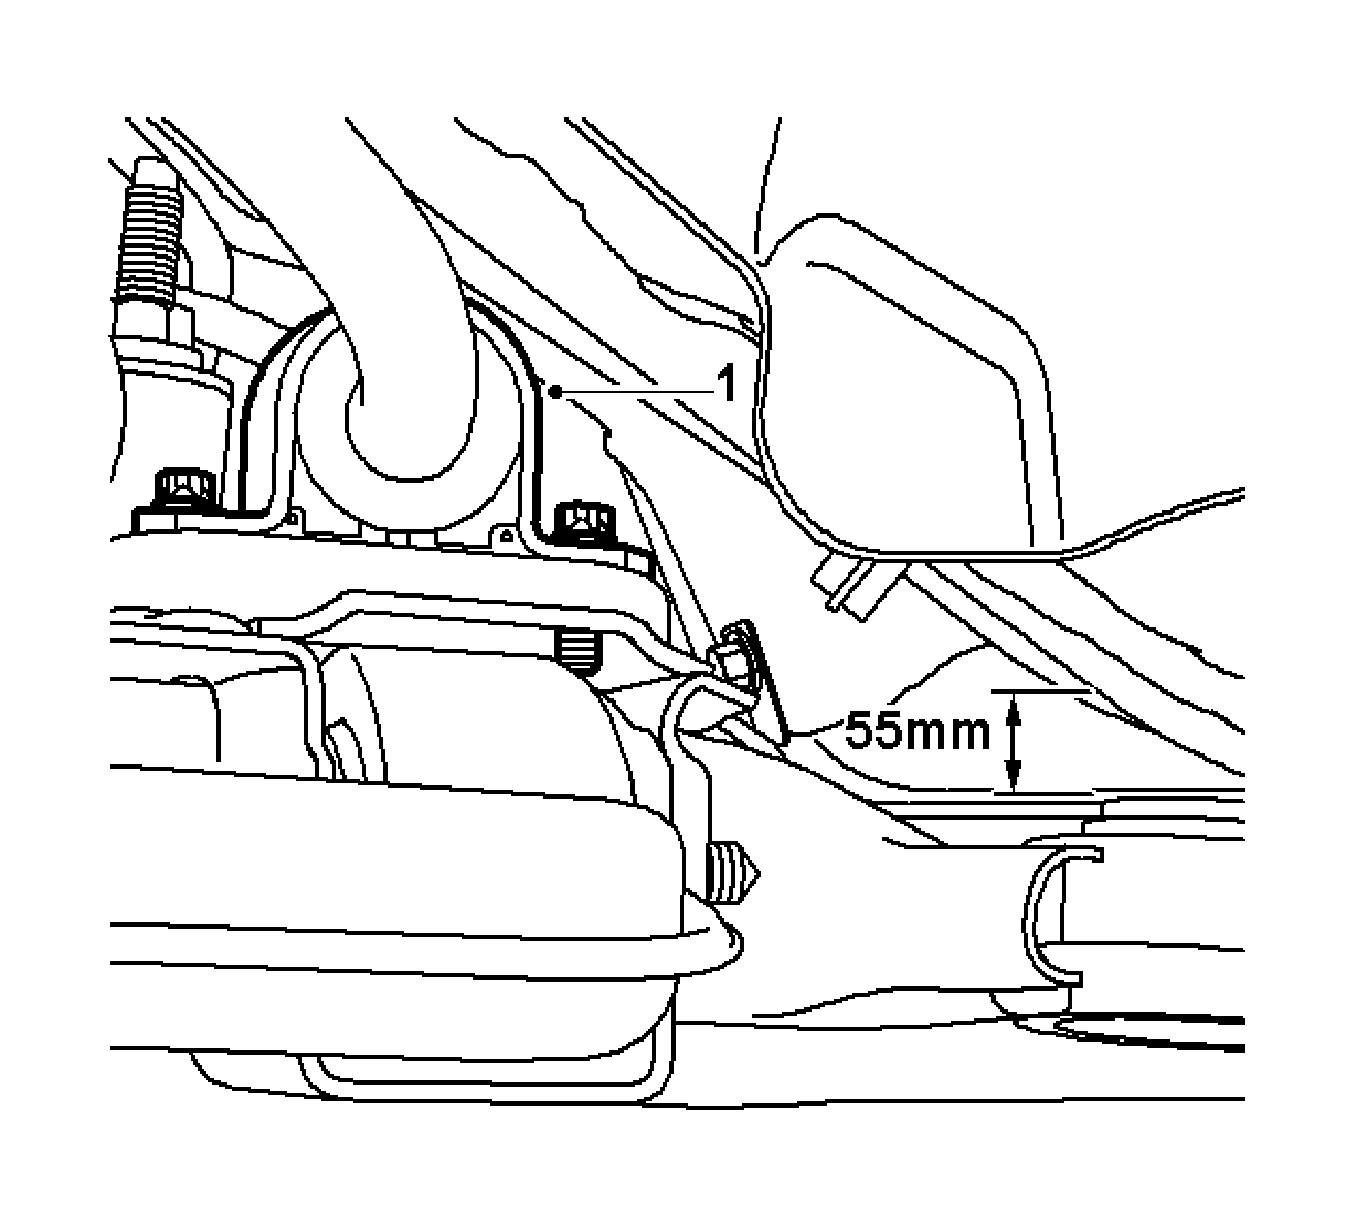
Note: Lower as little as possible, maximum 55 mm (2 in).
- Lower the front axle housing.
- Remove the 2 shells for the rubber insulators (1).
- Remove the 2 rubber insulators from stabilizer.
Installation Procedure
Note:
| • | Before adjustment, apply lubricating grease US P/N 12345579 (Canadian P/N 10953481) to the inner surface of the rubber insulator. |
| • | The slot in the insulator must point forward. |
- Lubricate and adjust the new rubber insulators.
Caution: Refer to Fastener Caution in the Preface section.
- Install shells for the rubber insulators. Tighten the bolt to
20 N·m (15 lb ft).
- Raise the front axle housing.

- Install bolts, front axle housing.
Install the triangular plate, then loosely install new screws.
| • | Tighten the 2 bolts (2) for front axle housing to
90 N·m (67 lb ft) plus 45 degrees plus 15 degrees. |
| • | Tighten the 4 bolts (1) for triangular support to vehicle underbody
65 N·m (48 lb ft). |

- Loosely fit center bolts, front axle housing. Tighten the 2 bolt (1) for front axle housing to
90 N·m (67 lb ft) plus 45 degrees plus 15 degrees.
- Release the vehicle lift.
- Place the lower rear engine support on the transmission. Tighten the bolt to
80 N·m (59 lb ft).
Note:
| • | Use new seals and new nuts. |
| • | The flexible part of the pipe must not be bent by more than 5 degrees. |
- Install the exhaust primary pipe.
| • | Lubricate the bolt screws with screw paste, then adjust the pipe between the front and rear catalytic converters. |
| • | Adapt bracket for sump and tighten the bolts to
25 N·m (18 lb ft). |
- Install the lower engine compartment cover. Tighten the 8 bolts to
5 N·m (44 lb in).
- Install the left and right engine compartment covers.
| • | Insert the 2 body blind rivet. |
| • | Tighten the 2 bolts to
5 N·m (44 lb in). |
- Release the vehicle.
- Place the rubber sleeve on the steering gear.
Note: Before inserting the clamping screw, make sure that the steering shaft slot is flush with the intermediate shaft hole.
- Push the intermediate shaft onto the steering gear shaft.
Note: Clean thread and screw in bolt with locking compound.
- Install clamping screw on intermediate shaft and tighten to
24 N·m (17 lb ft).


