Front Side Door Outside Handle Housing Replacement Sedan
Removal Procedure
- Remove the front side door trim panel. Refer to
Front Side Door Trim Panel Replacement.
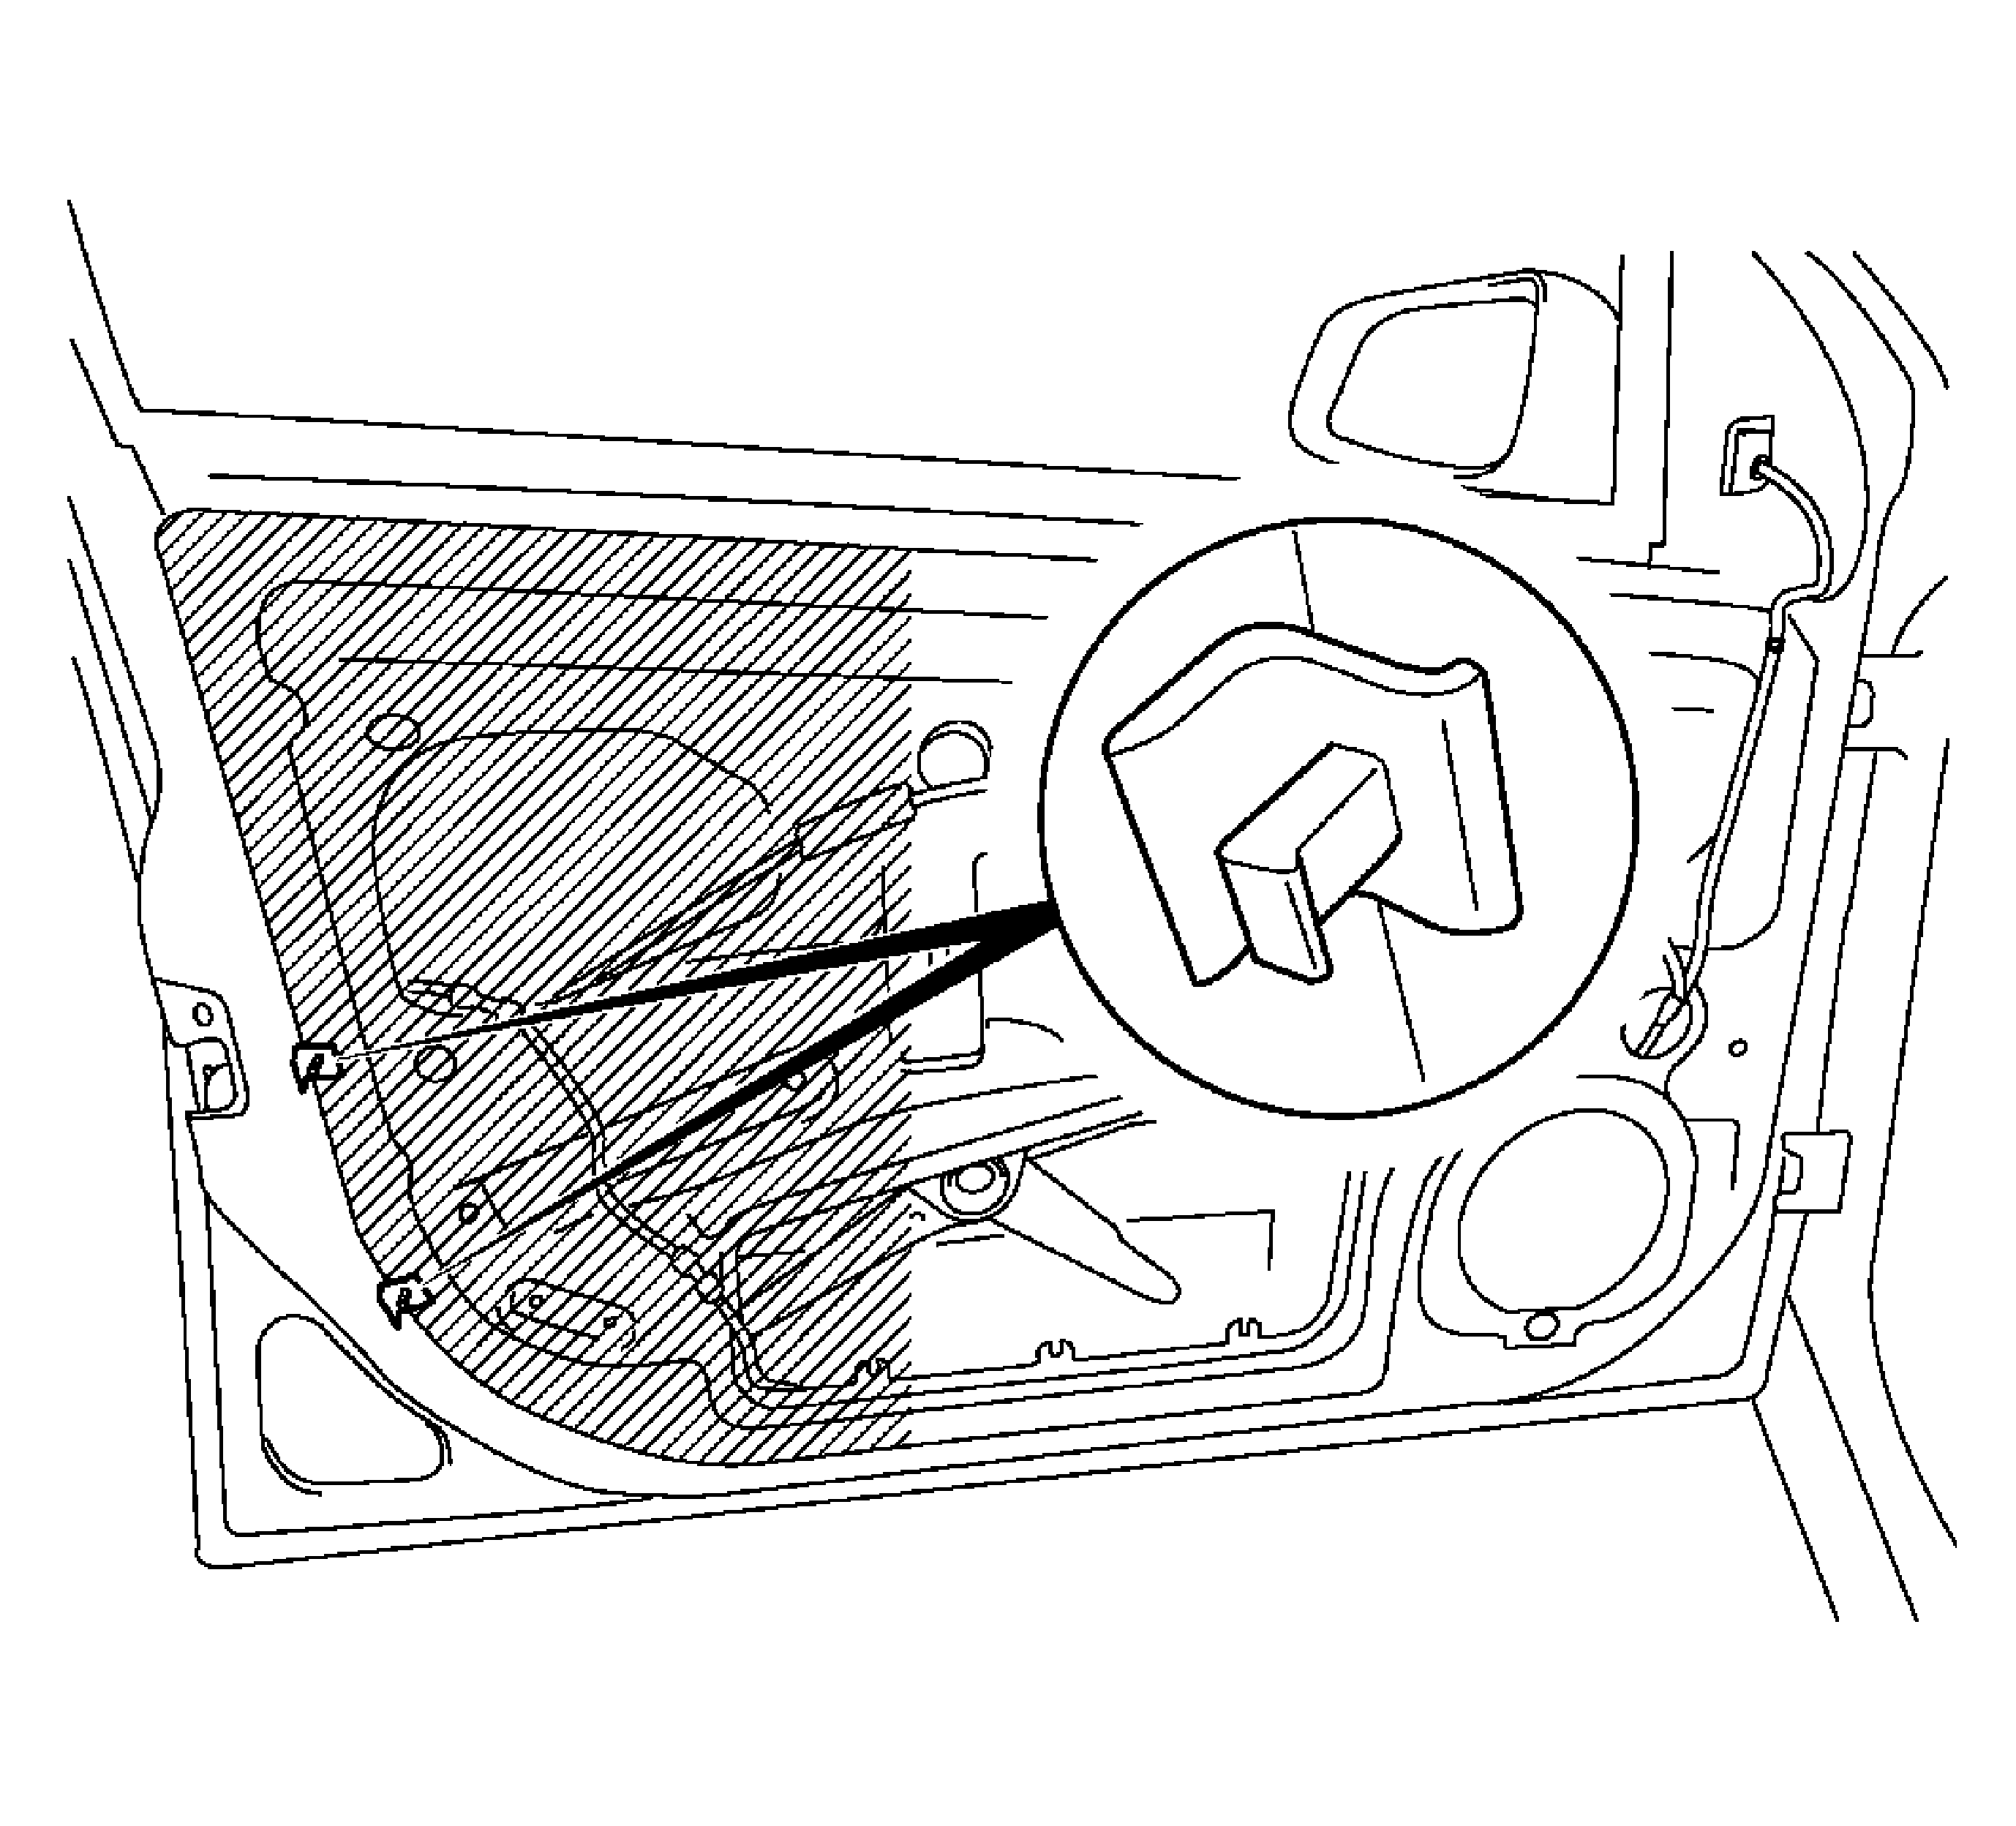
- Partly loosen the water vapor barrier.
| • | Remove the 2 front door retainer base inner paneling. |
| • | Loosen the water vapor barrier in the area of the handle. |
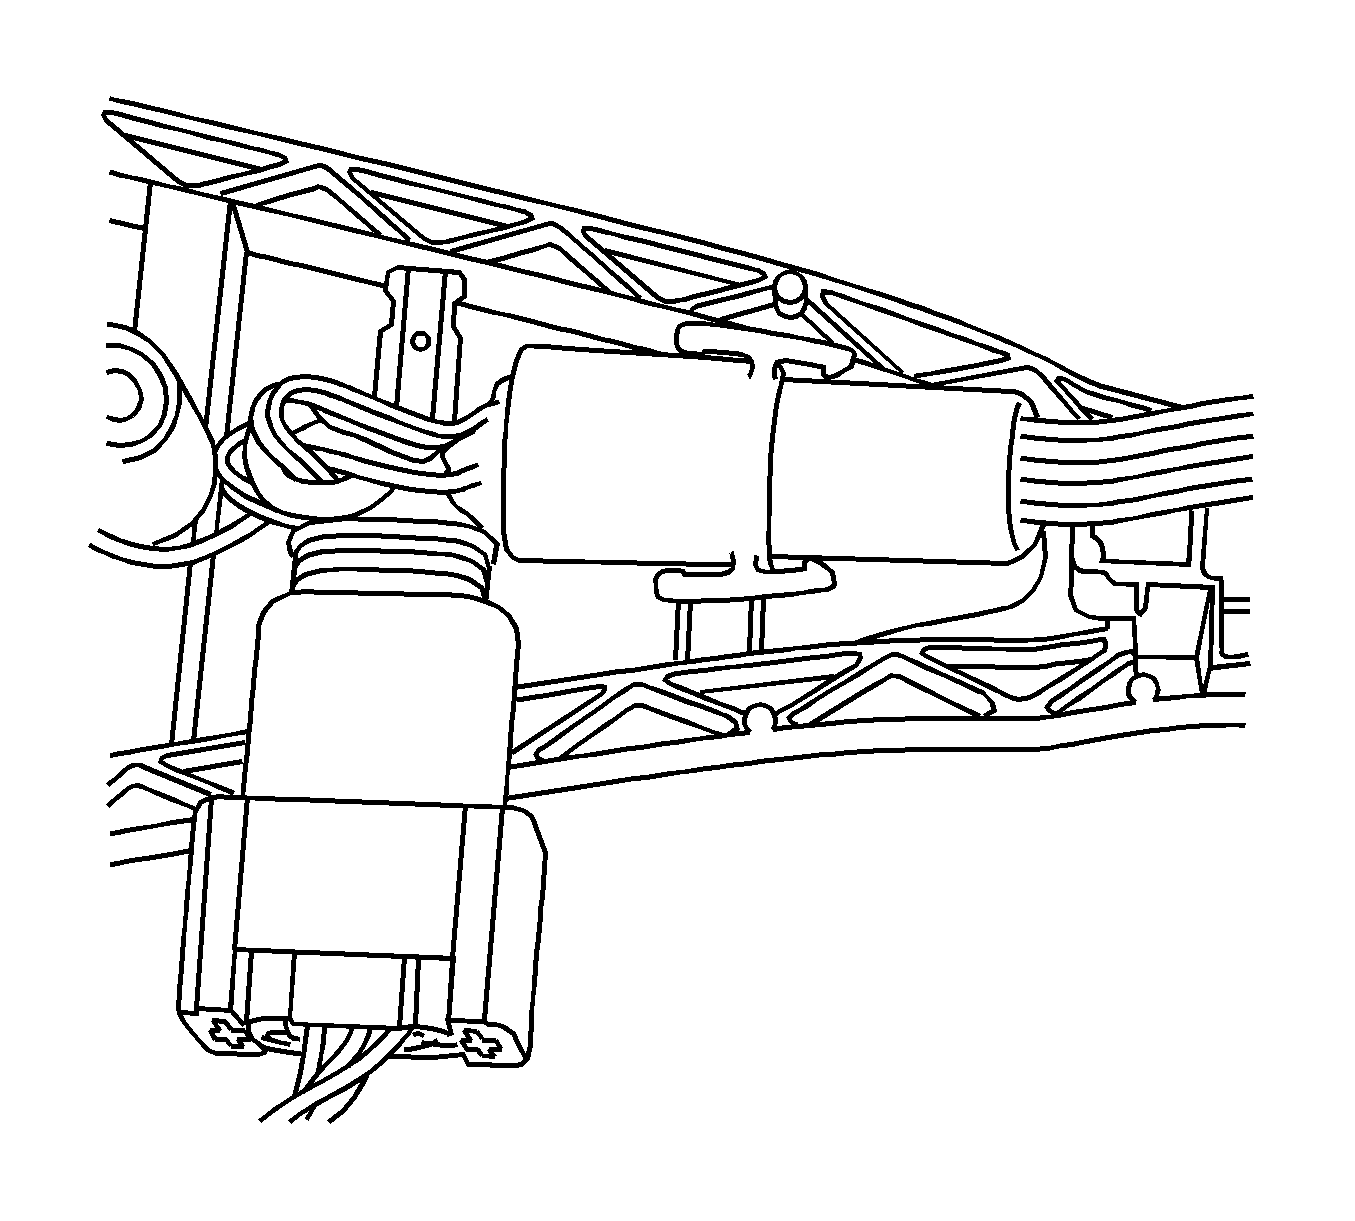
- Disconnect the wiring harness plug with vehicles with open and start.
Disconnect the 2 wiring harness plugs.
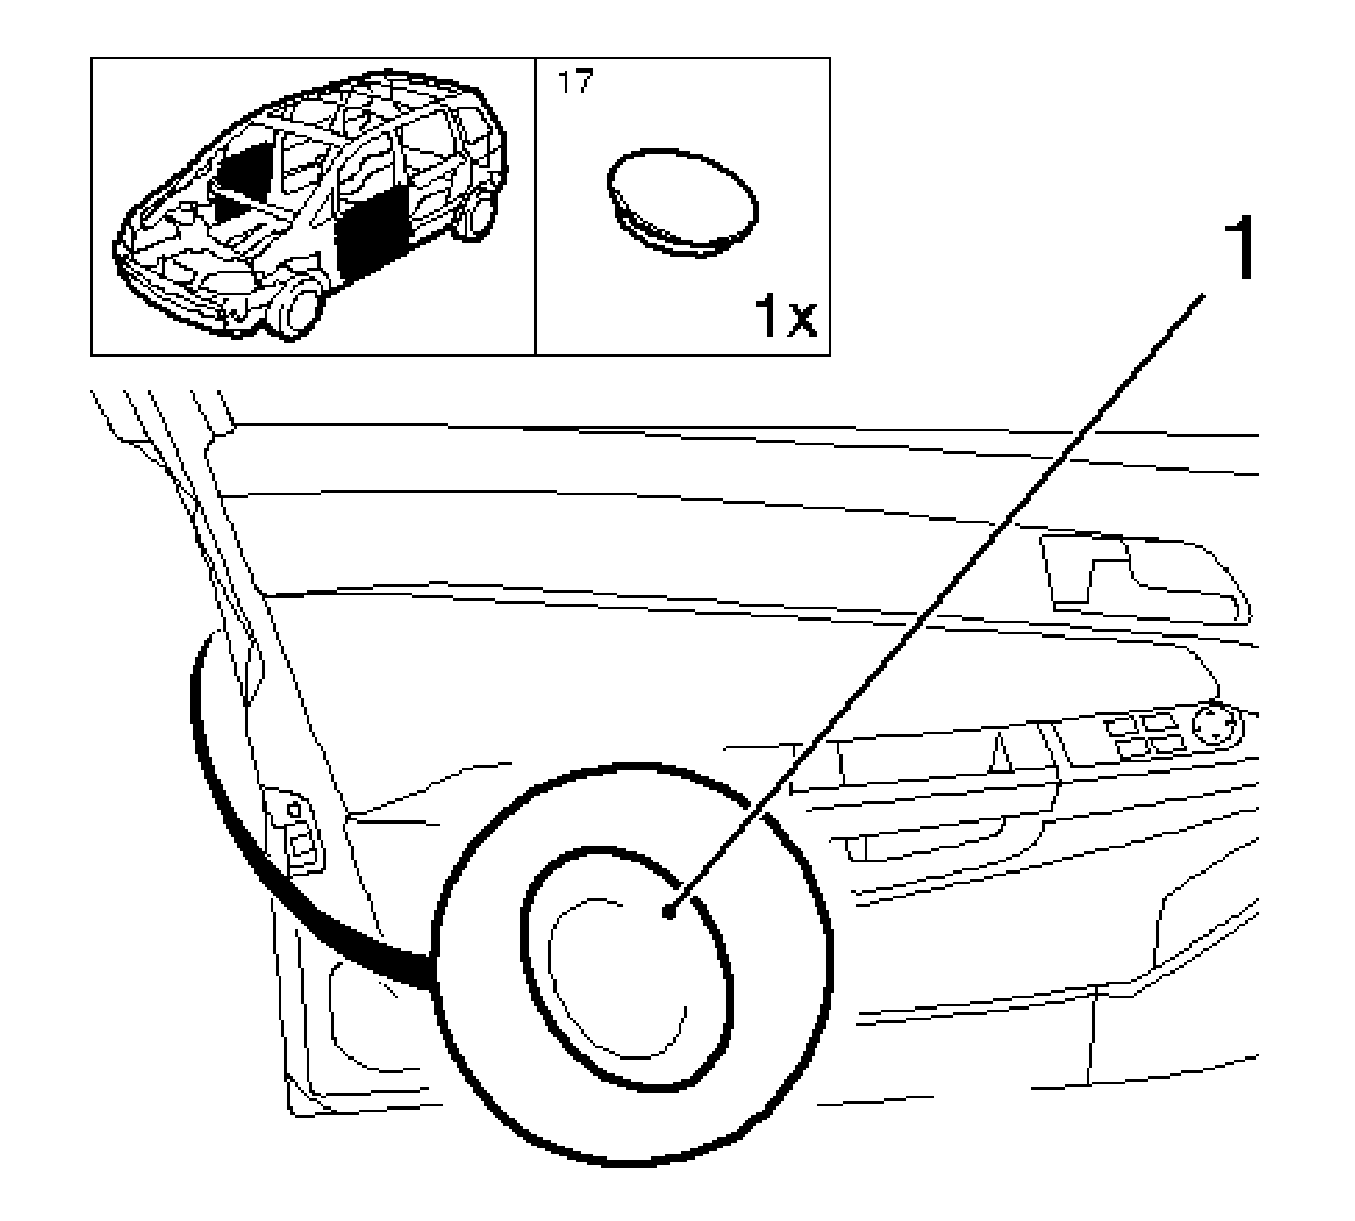
- Remove the front door access panel.
Remove the panel (1) with a plastic wedge.
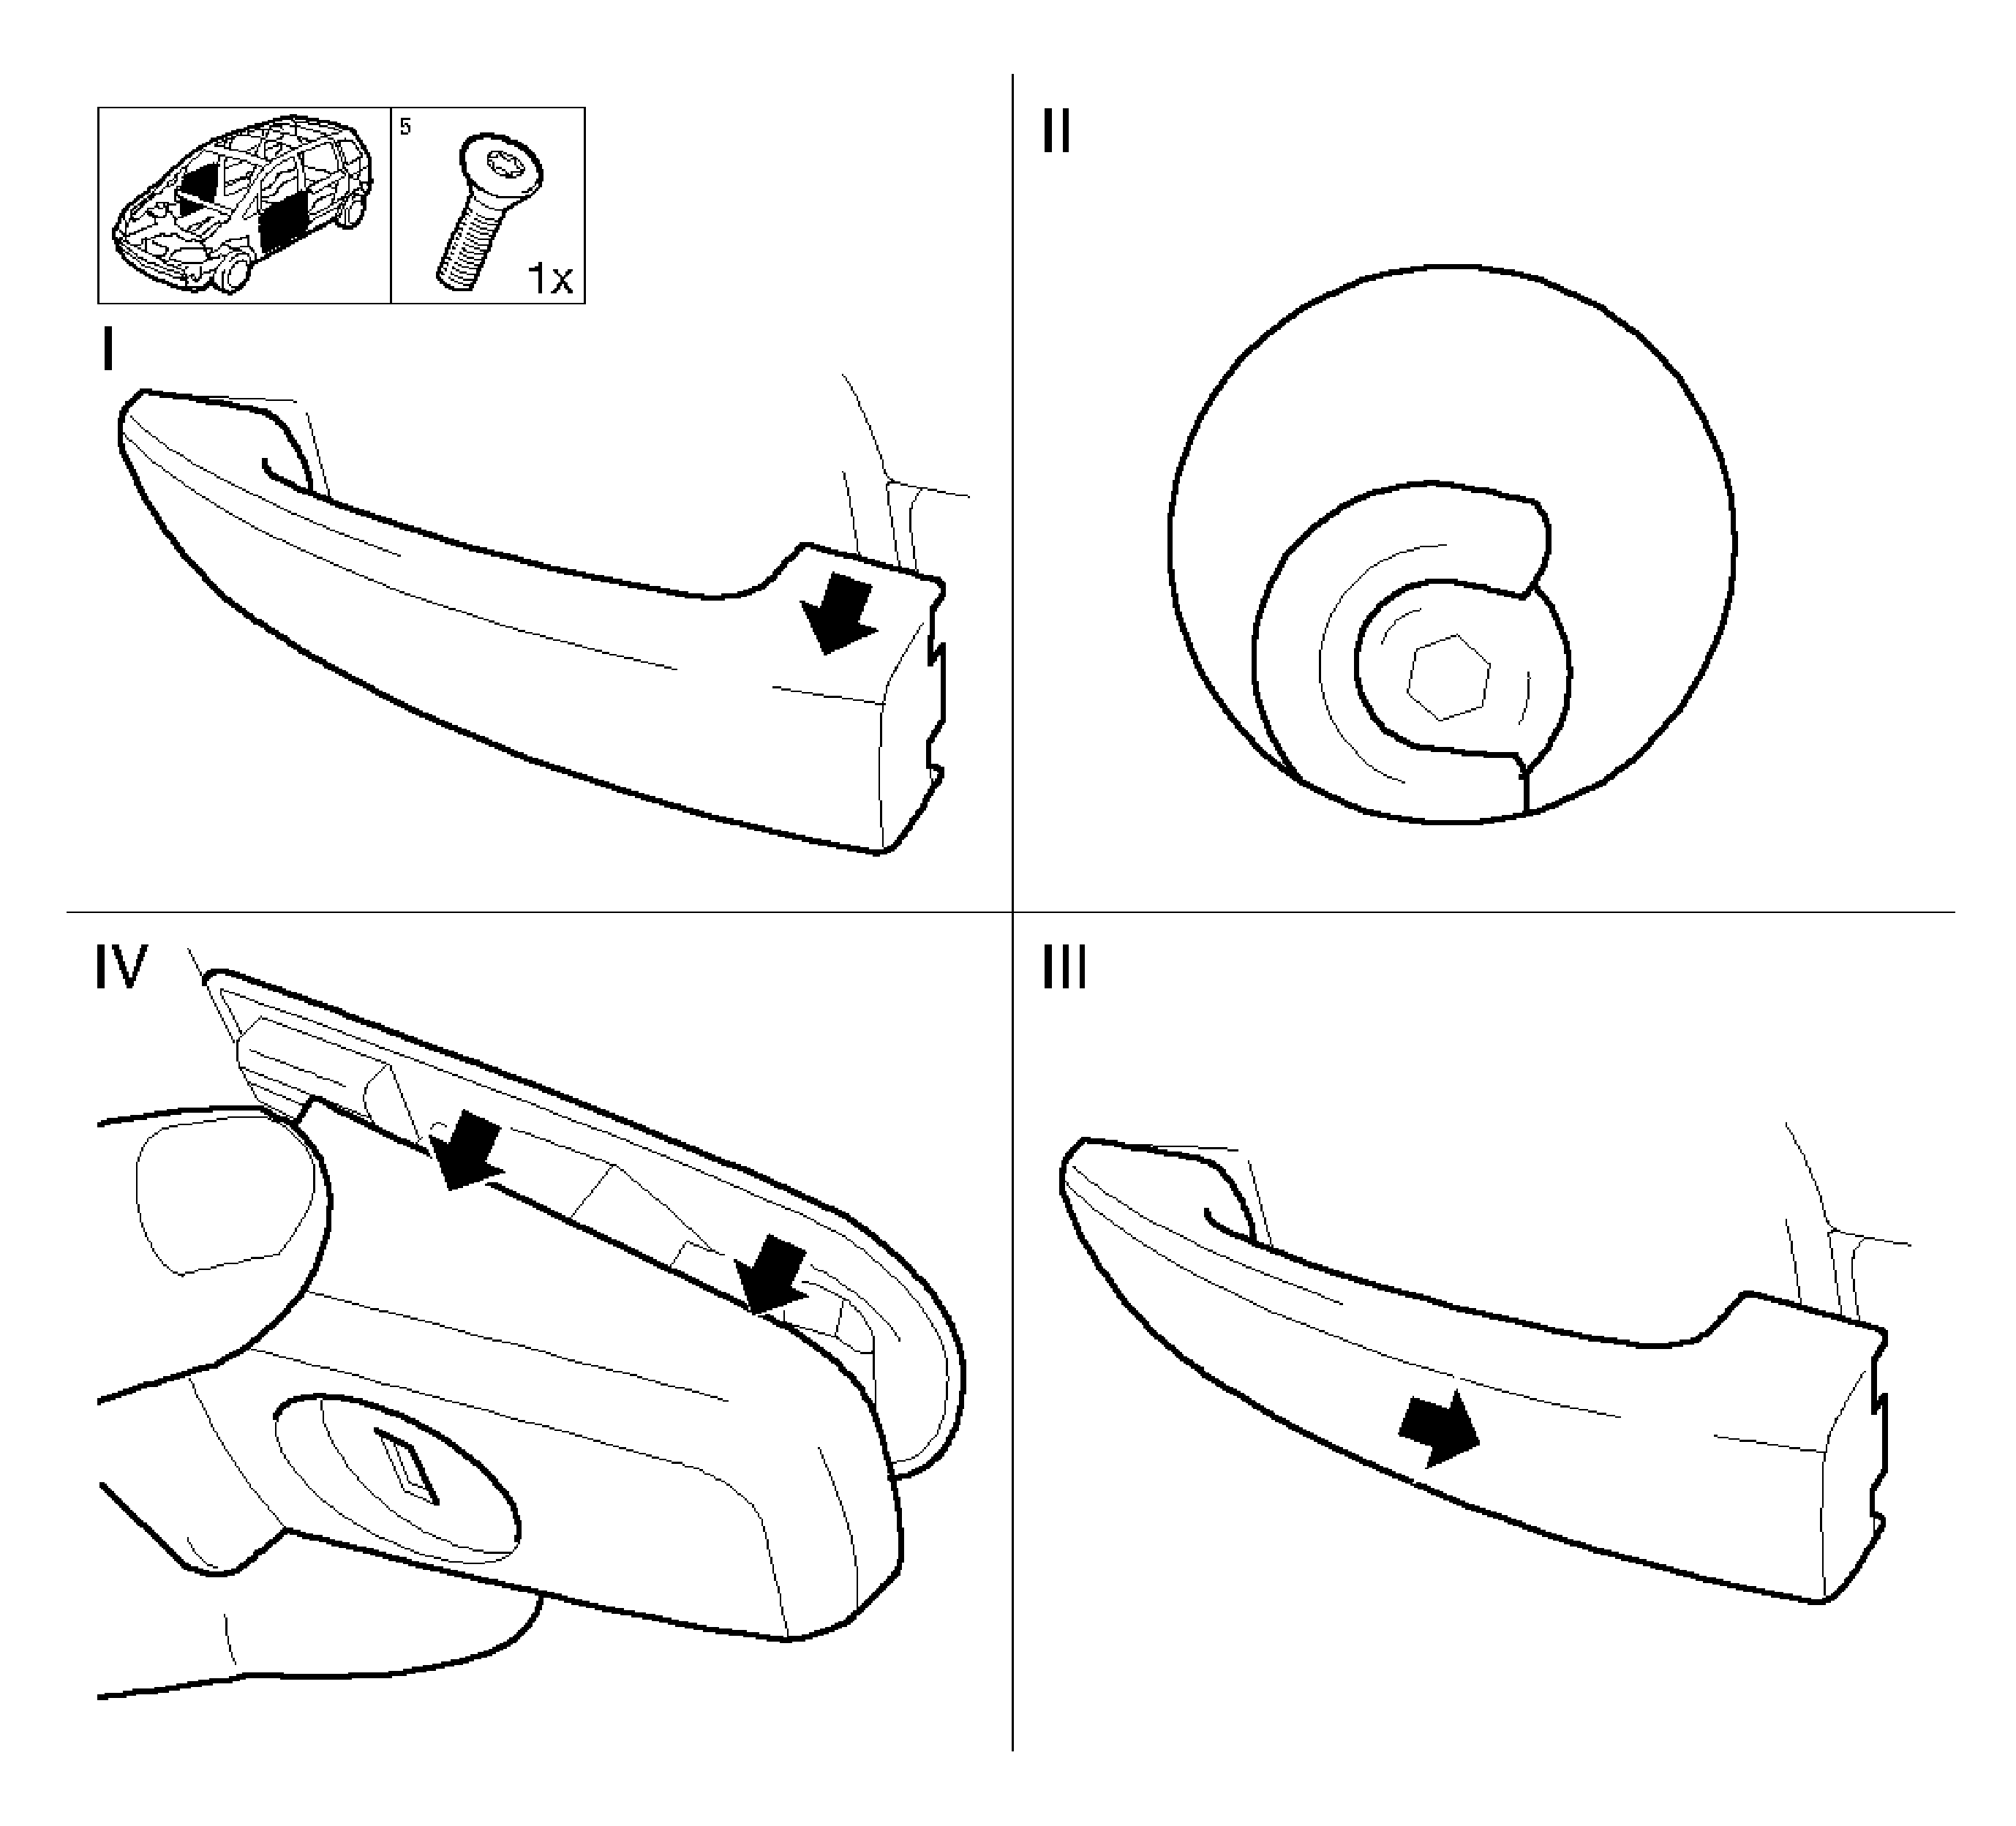
- Remove the fixed handle part of the front door with the lock cylinder.
| • | Pull out and hold the moveable handle part (I). |
| | Note: The moveable handle part must now be secured in pulled position.
|
| • | Turn the bolt (II) left until it stops. |
| • | Remove the fixed handle part with the lock cylinder (IV). |
Note: Disconnect the 2 wiring harness plugs with vehicles with open and start.
- Remove the door handle.
Pull back the moveable handle part (III) to remove.
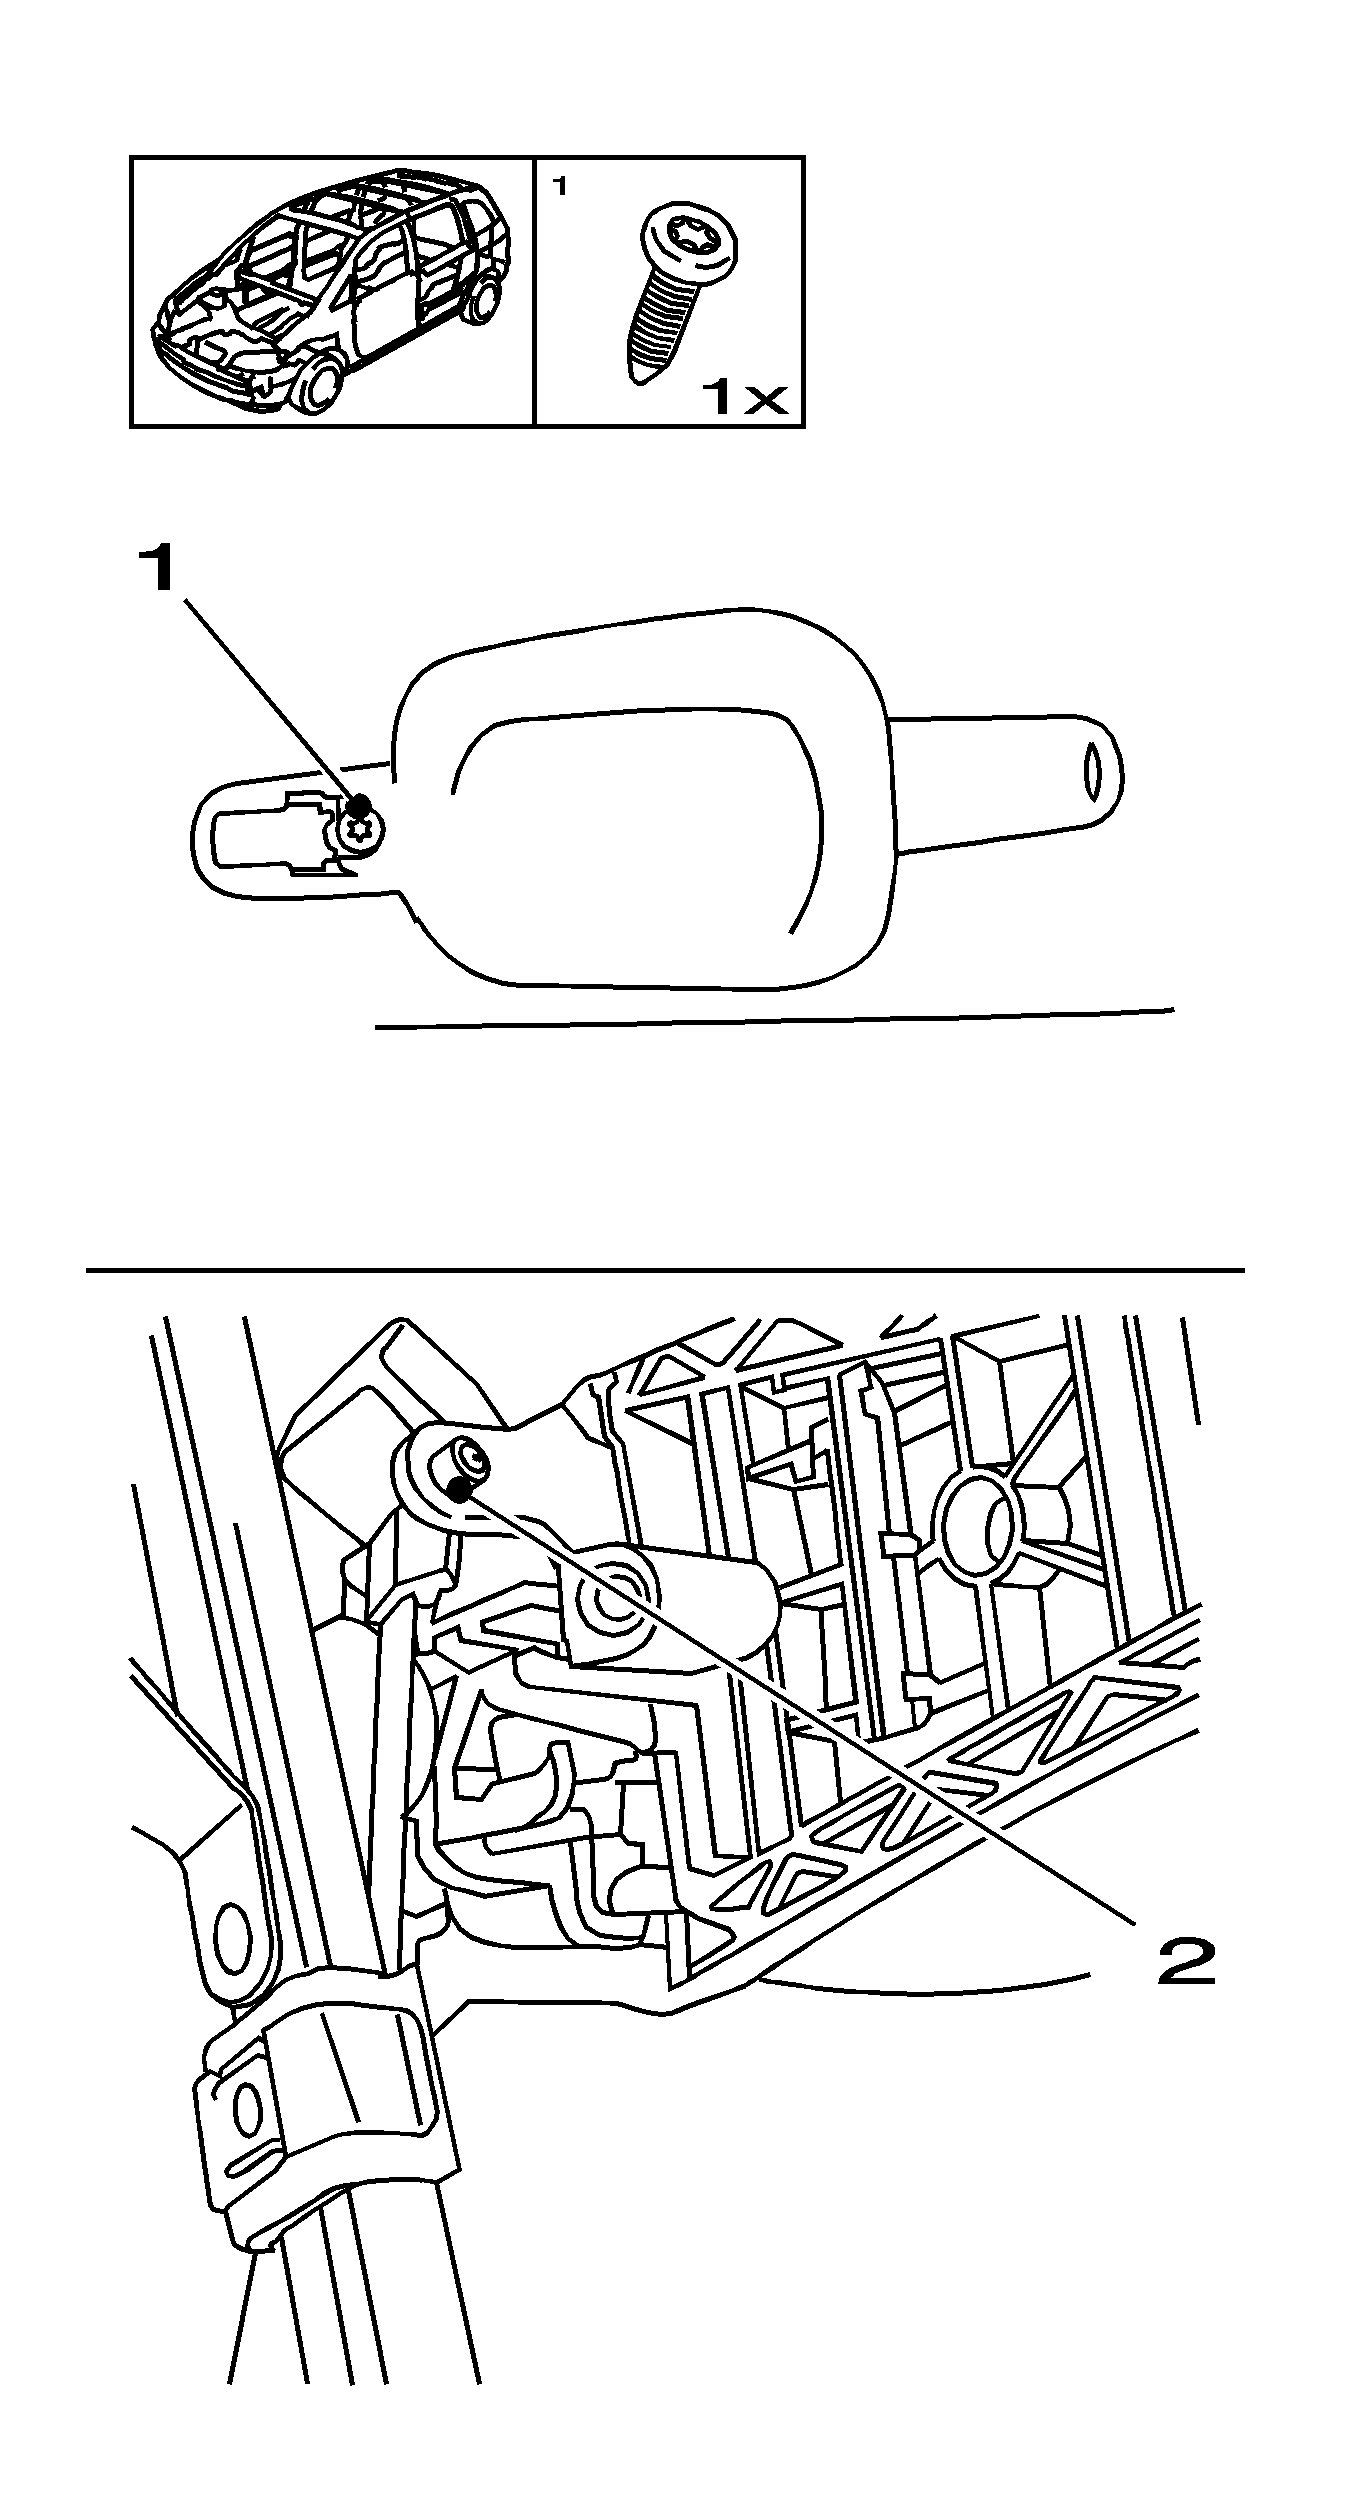
- Remove the bracket for the door outer handle.
| • | Remove the linkage (2). |
Installation Procedure
Caution: Refer to Fastener Caution in the Preface section.
- Install the bracket for the door outer handle.
Tighten
Tighten the bolt to 3 N·m (26 lb in).
- Install the door handle.
Install the moveable handle part into door panel.
- Install the front door fixed handle part with lock cylinder.
| | Note: Hold the moveable handle part in place while turning bolt.
|
| • | Install the fixed handle part with lock cylinder. |
| • | Turn the bolt right until it stops. |
- Install the front door access panel.
- Connect the wiring harness plug with vehicles with open and start.
Connect the 2 wiring harness plugs.
- Install the water vapor barrier.
Install the 2 front door retainer base inner paneling.
- Install the front side door trim panel. Refer to
Front Side Door Trim Panel Replacement.
Front Side Door Outside Handle Housing Replacement Coupe
Removal Procedure
- Remove the front side door trim panel. Refer to
Front Side Door Trim Panel Replacement.
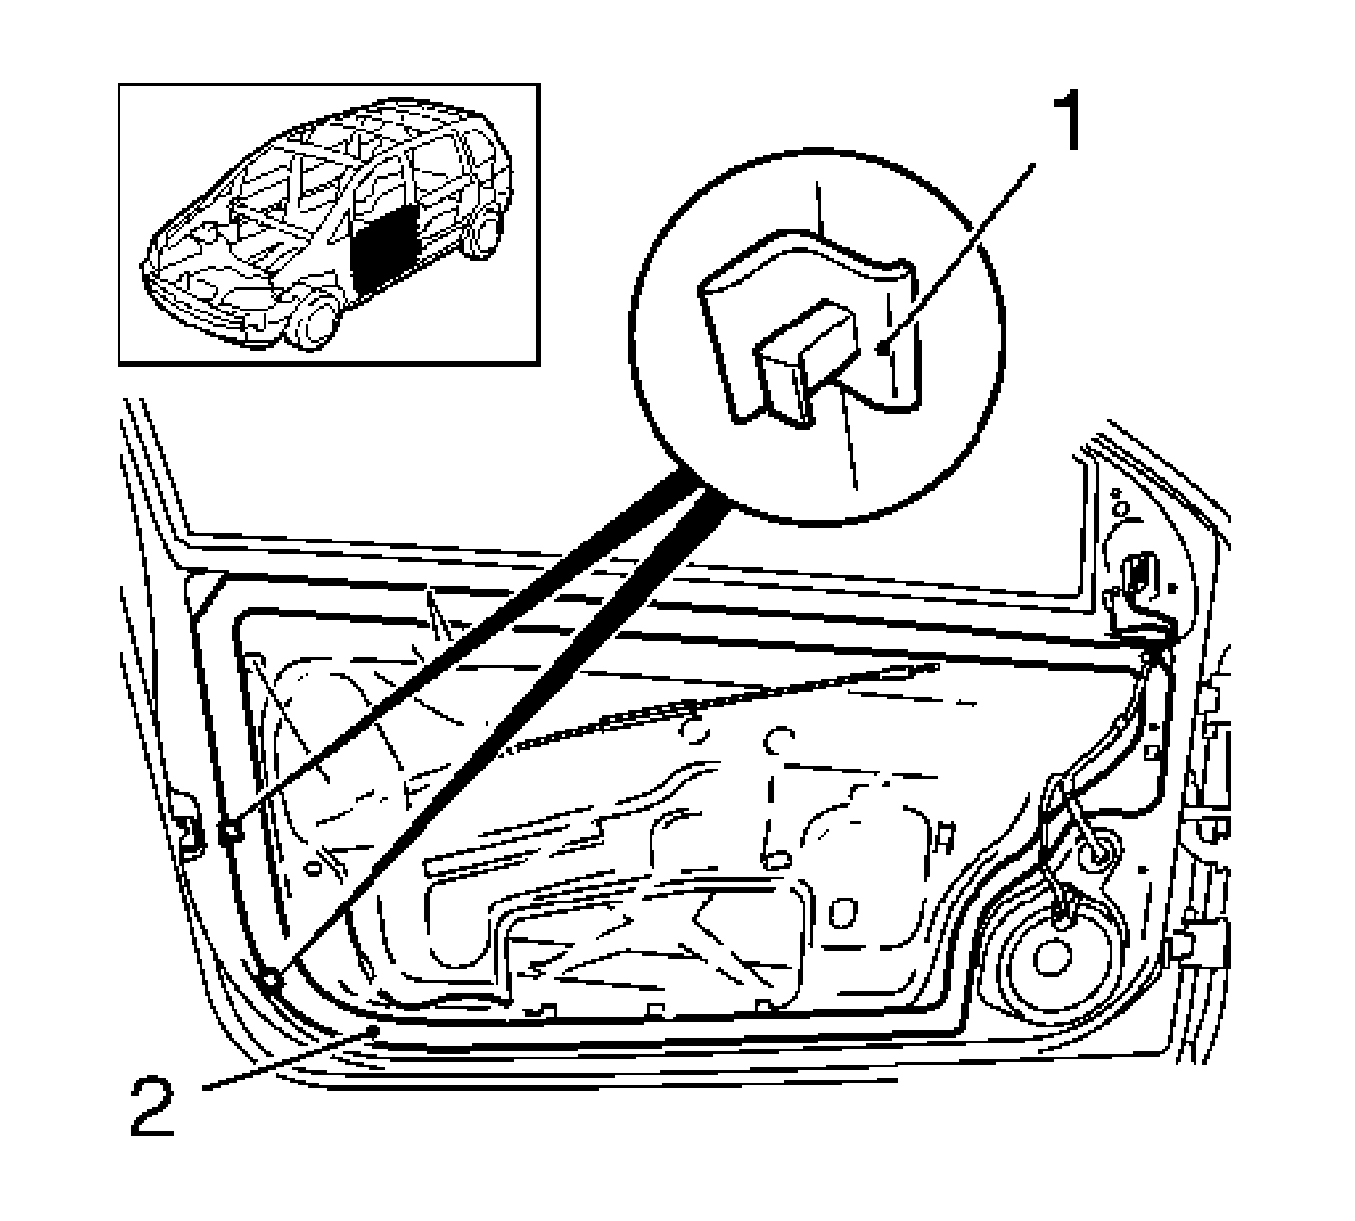
- Partly loosen the water vapor barrier (2).
| • | Remove the 2 holding angles (1). |

- Remove the outside door handle assembly (1) aperture rubber grommet.
- Remove the fixed handle part of the front door with lock cylinder.

- Remove the door handle.
| • | Pull out and hold the moveable handle part (I). |
| | Note: The moveable handle part must now be secured in pulled position.
|
| • | Turn the TORX bolt (II) to the left as far as the stop. |
| • | Remove the fixed handle part (IV). |
| • | Pull the moving part of the handle (III) to the rear and remove. |

- Remove the door handle bracket.
| • | Remove the 2 door lock linkages (2). |
Installation Procedure
Caution: Refer to Fastener Caution in the Preface section.
- Install the door handle bracket.
Install the 2 door lock linkages.
Tighten
Tighten the bolt to 2.5 N·m (22 lb in).
- Install the door handle.
| • | Insert and engage the movable handle part door panel and door handle cage. |
| • | Install the fixed rear handle part. |
| | Note: Hold the movable handle part during the screwing procedure and counter hold the fixed handle part.
|
| • | Turn the bolt clockwise until it stops. |
Note: Hold the outside handle in open position.
- Install front door fixed handle part with lock cylinder.
- Install the outside door handle assembly aperture rubber grommet.
- Fasten the water vapor barrier.
| • | Install the 2 holding angles. |
- Install the front side door trim panel. Refer to
Front Side Door Trim Panel Replacement


