Rear Washer Hose Replacement Coupe
Removal Procedure
- Remove the luggage shade from the liftgate.
Disconnect the 2 retaining cords.
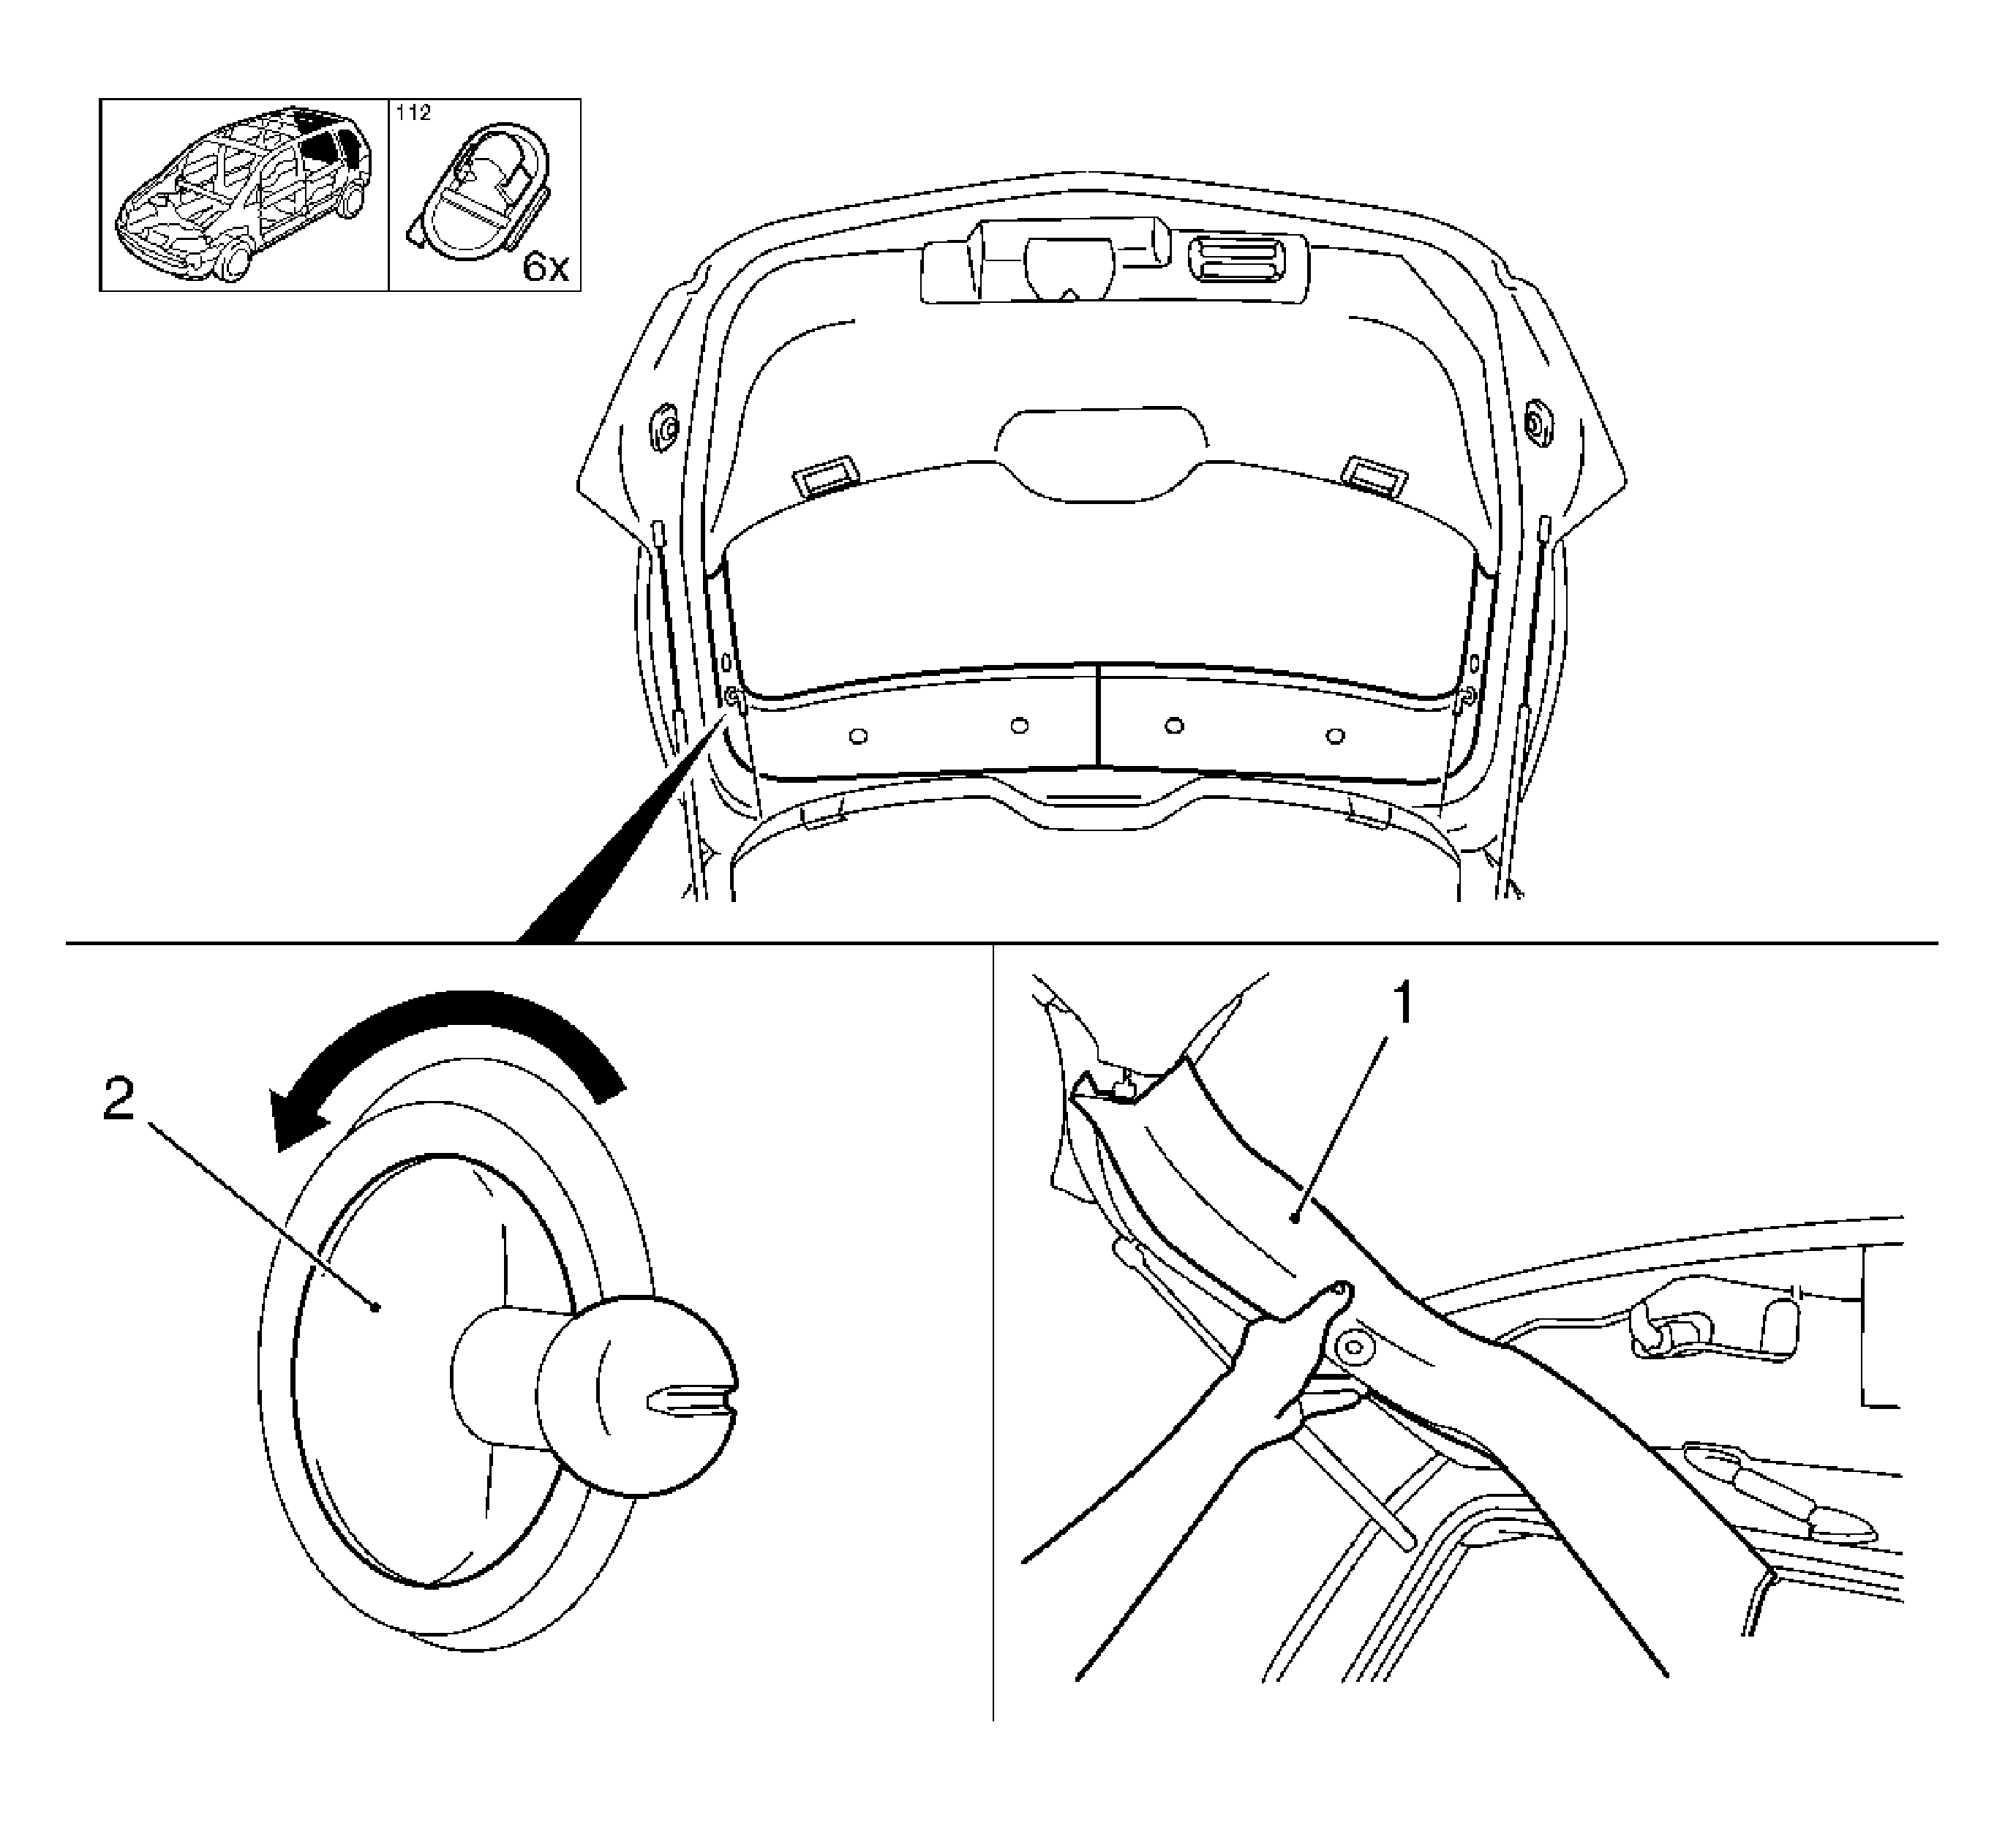
- Remove the liftgate garnish moldings (1) on the upper left and right.
| • | Remove the 2 luggage shade brackets (2). |
- Remove the rear quarter lower trim panel. Refer to
Quarter Lower Rear Trim Panel Replacement
.
- Lower the headlining. Refer to
Headlining Trim Panel Replacement
.
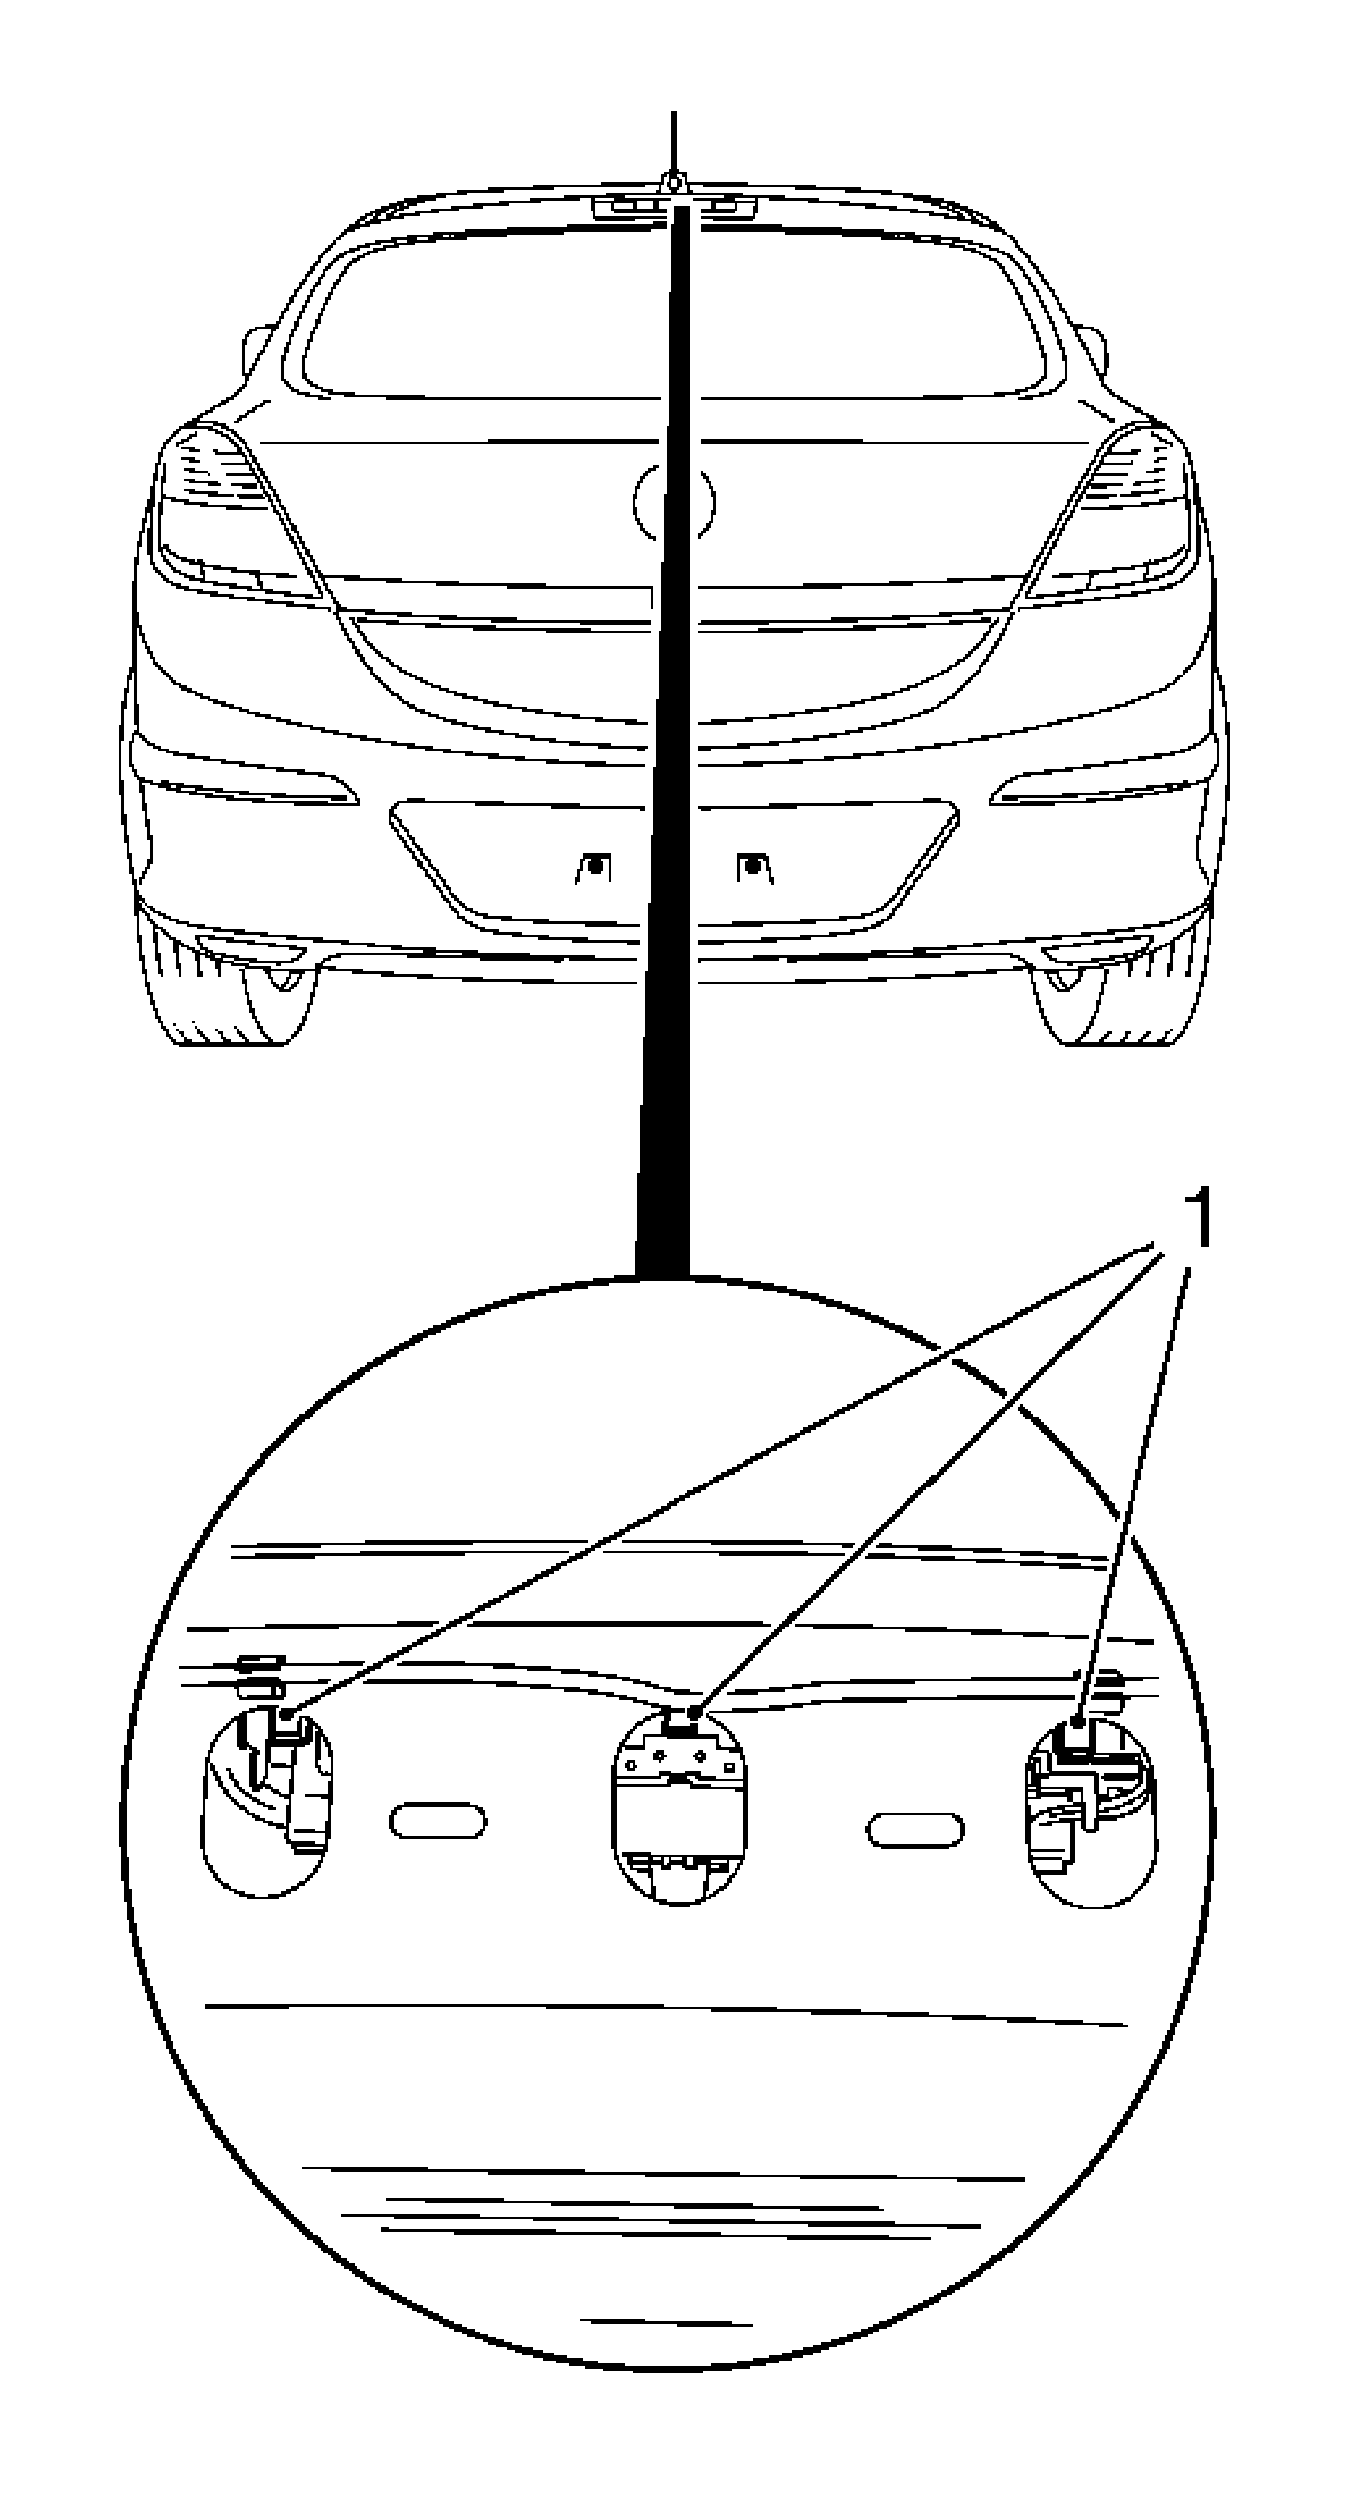
- Release the high mounted stop lamp.
Release the 3 retainers (1).
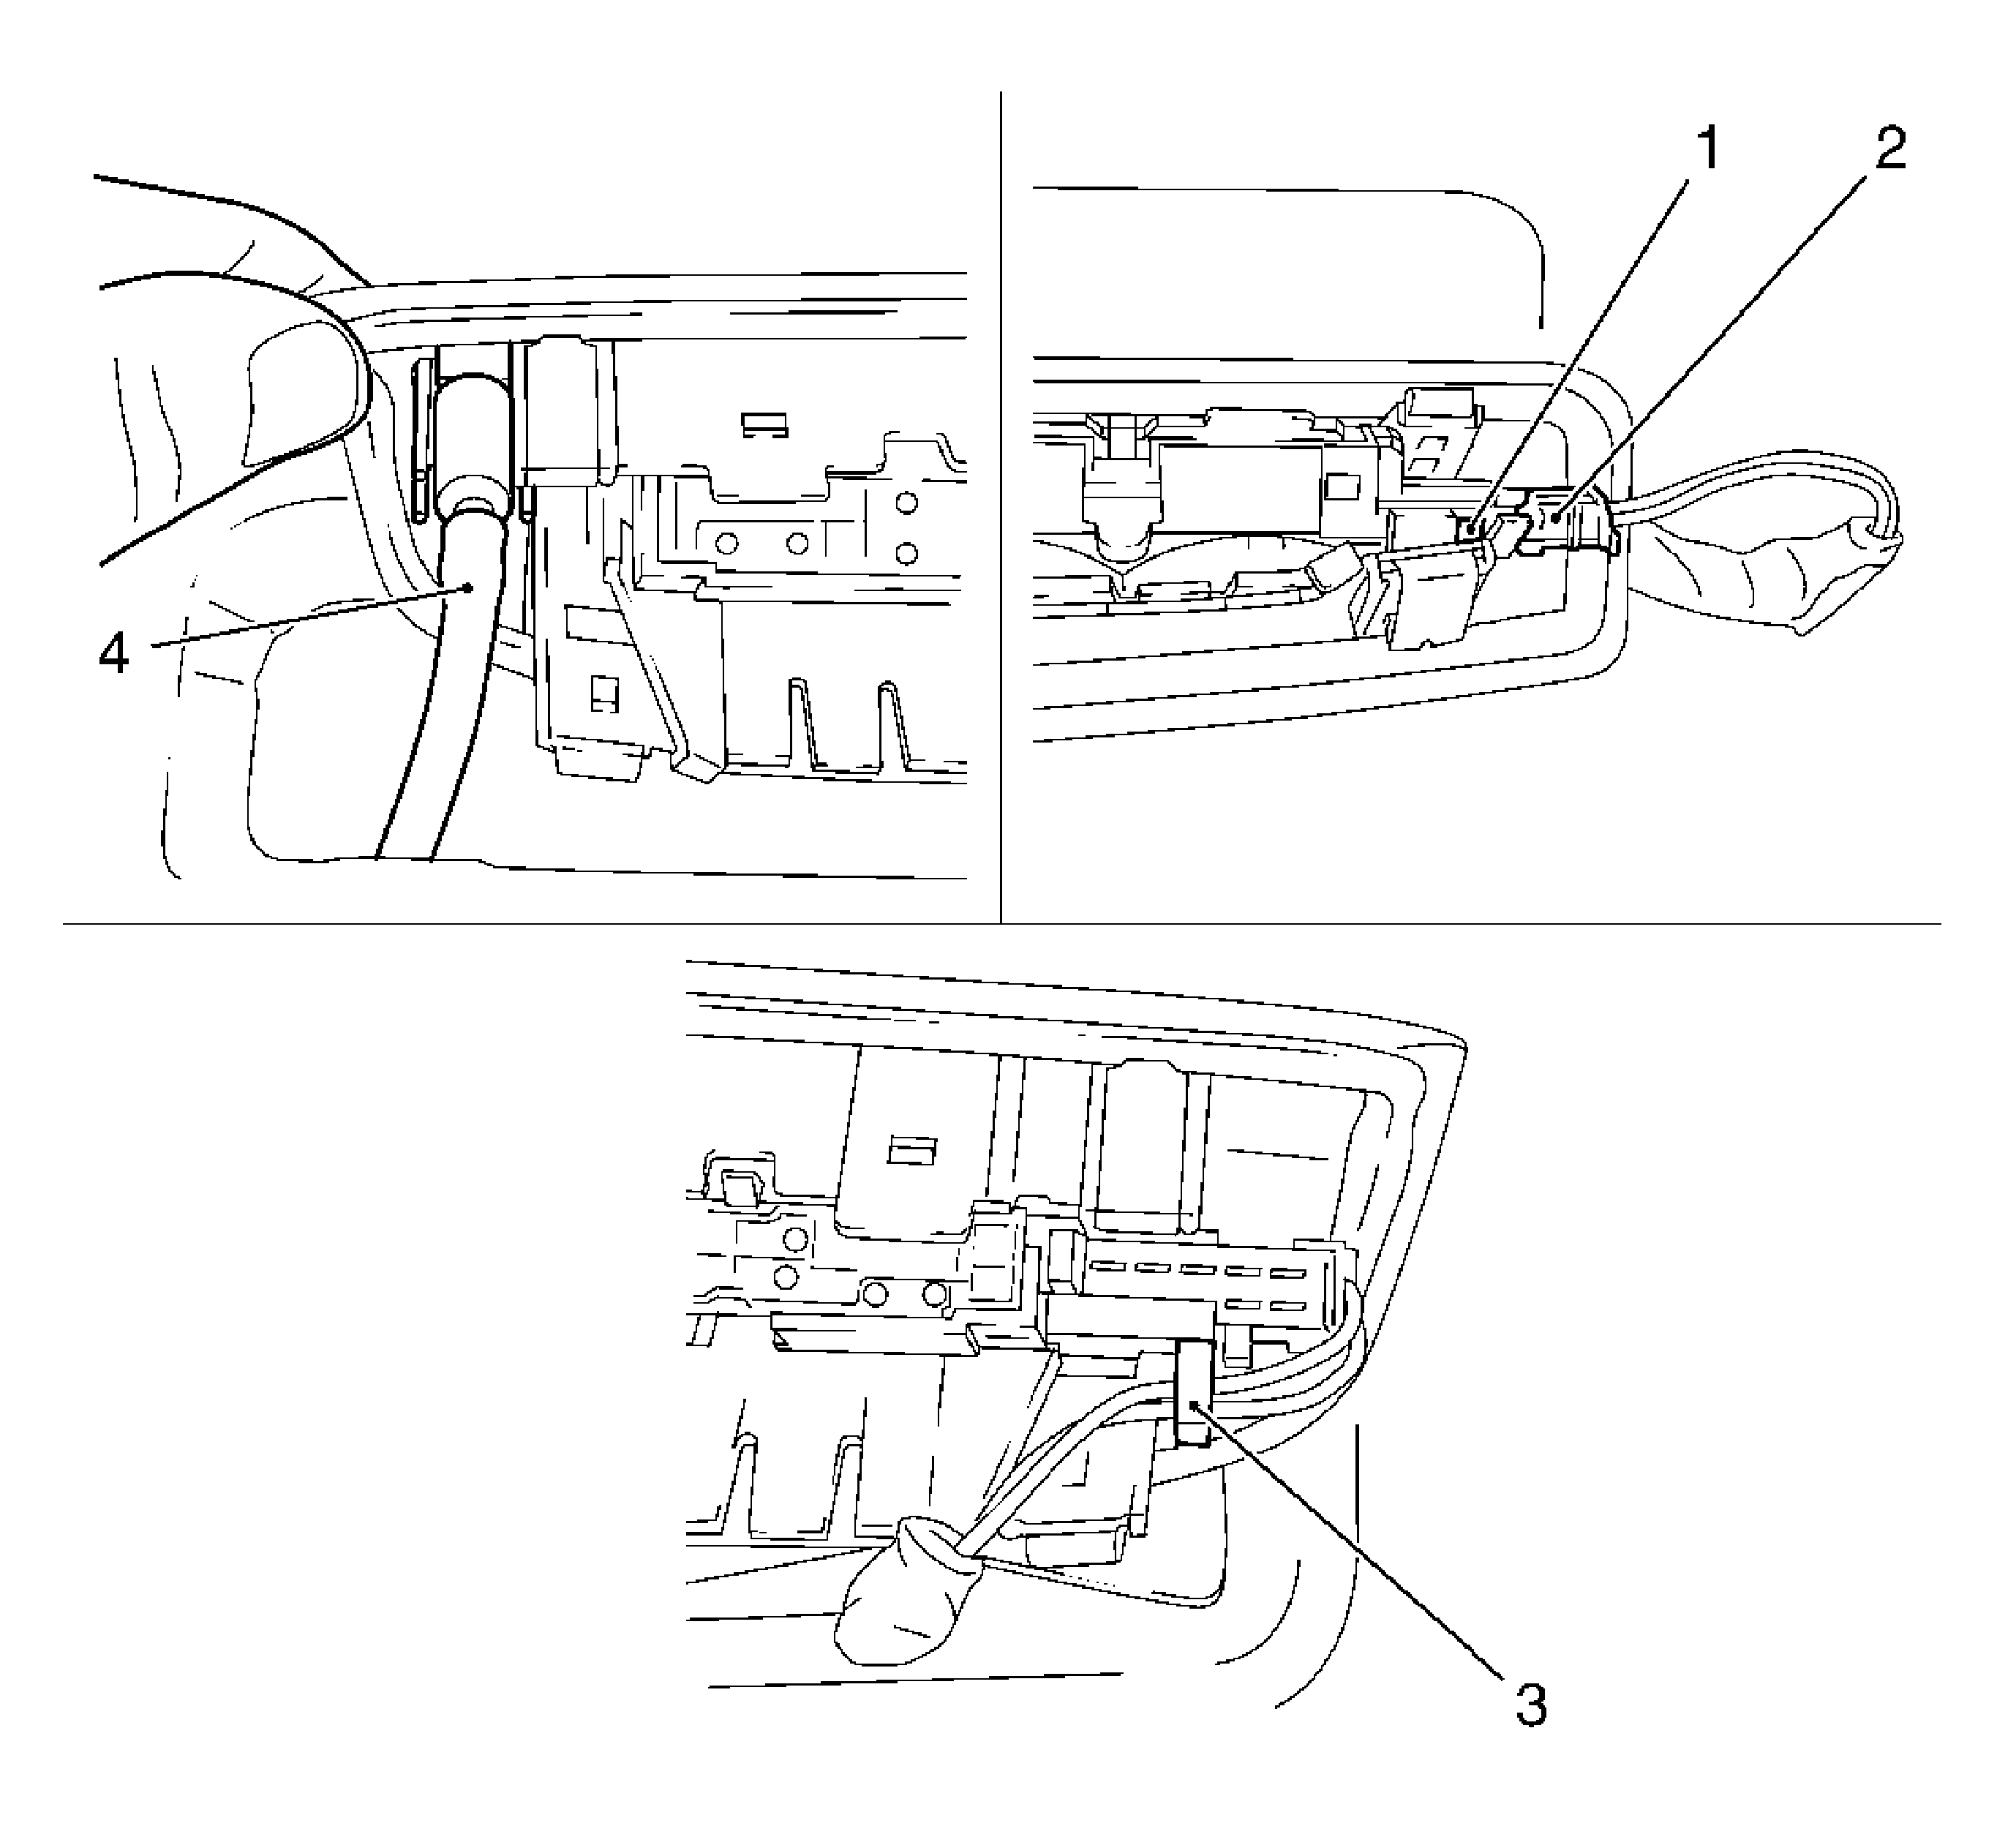
- Remove the high mounted stop lamp.
| • | Remove the hose from the stop lamp (4). |
| • | Disconnect the wiring harness (3). |
| • | Release the wiring harness plug (1, 2) and disconnect. |
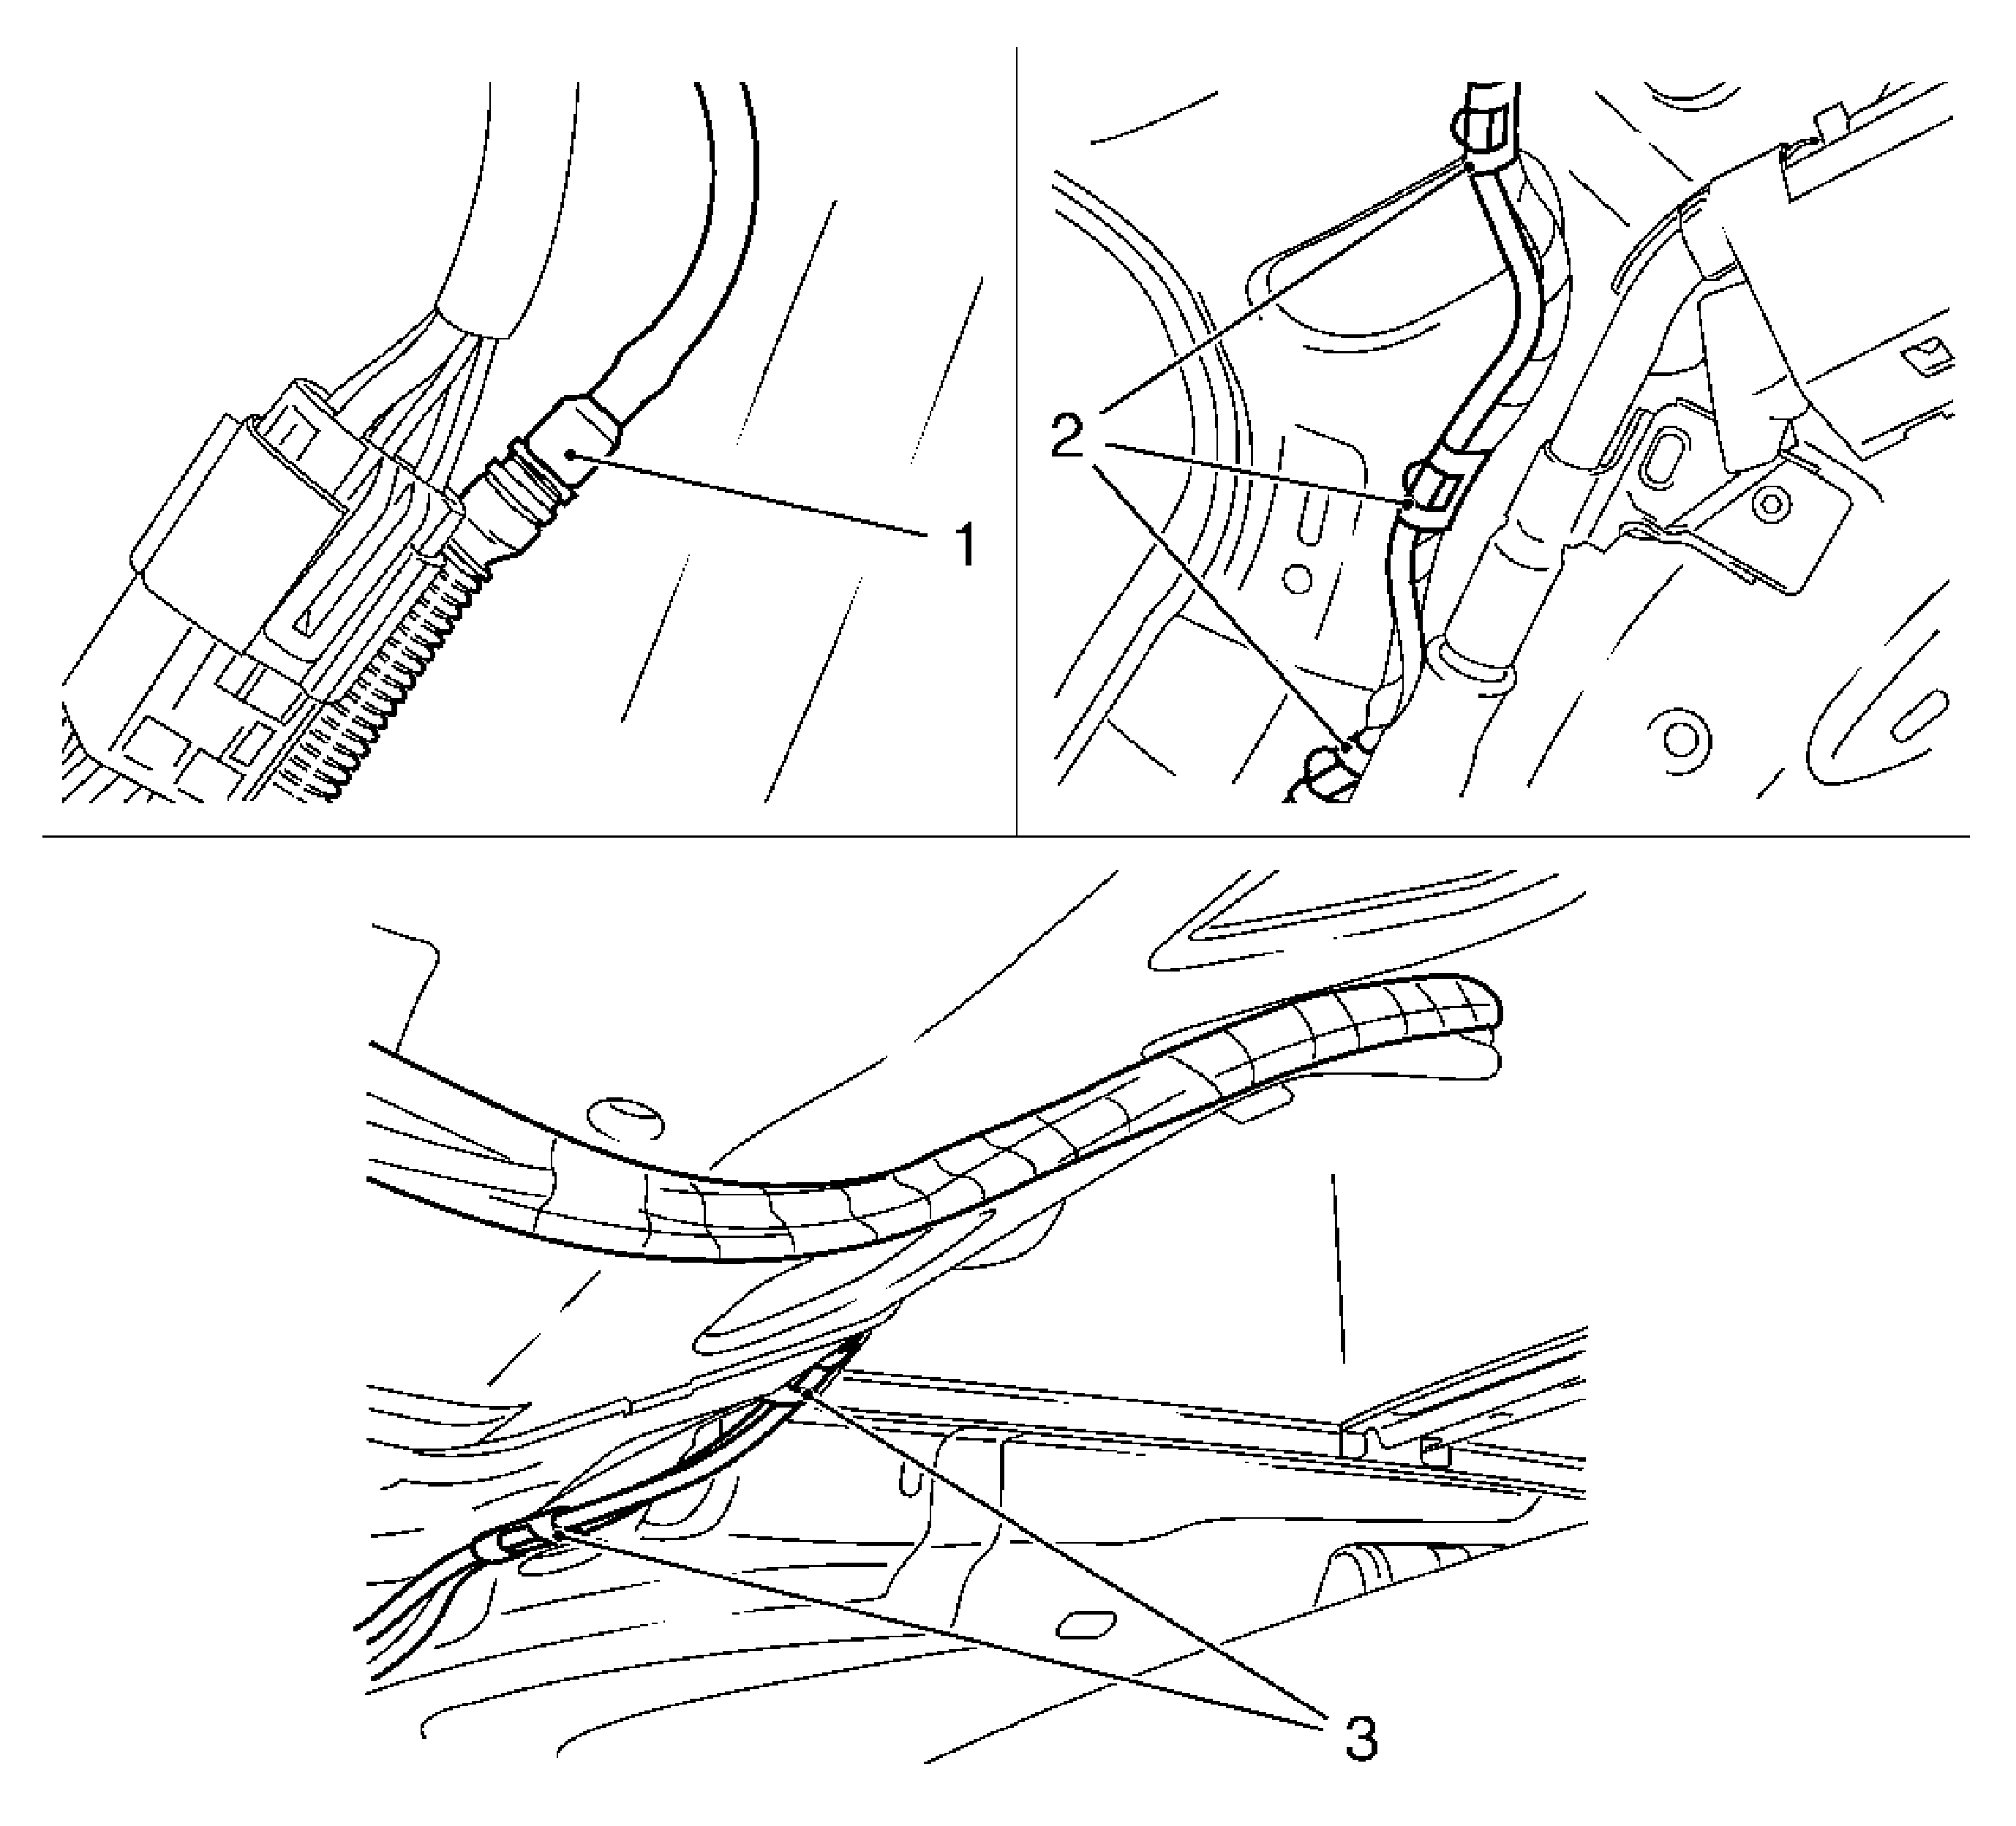
- Disconnect and remove the hose.
| • | Disconnect the hose at the center pillar (1). |
| • | Release the 5 clips (2, 3). |
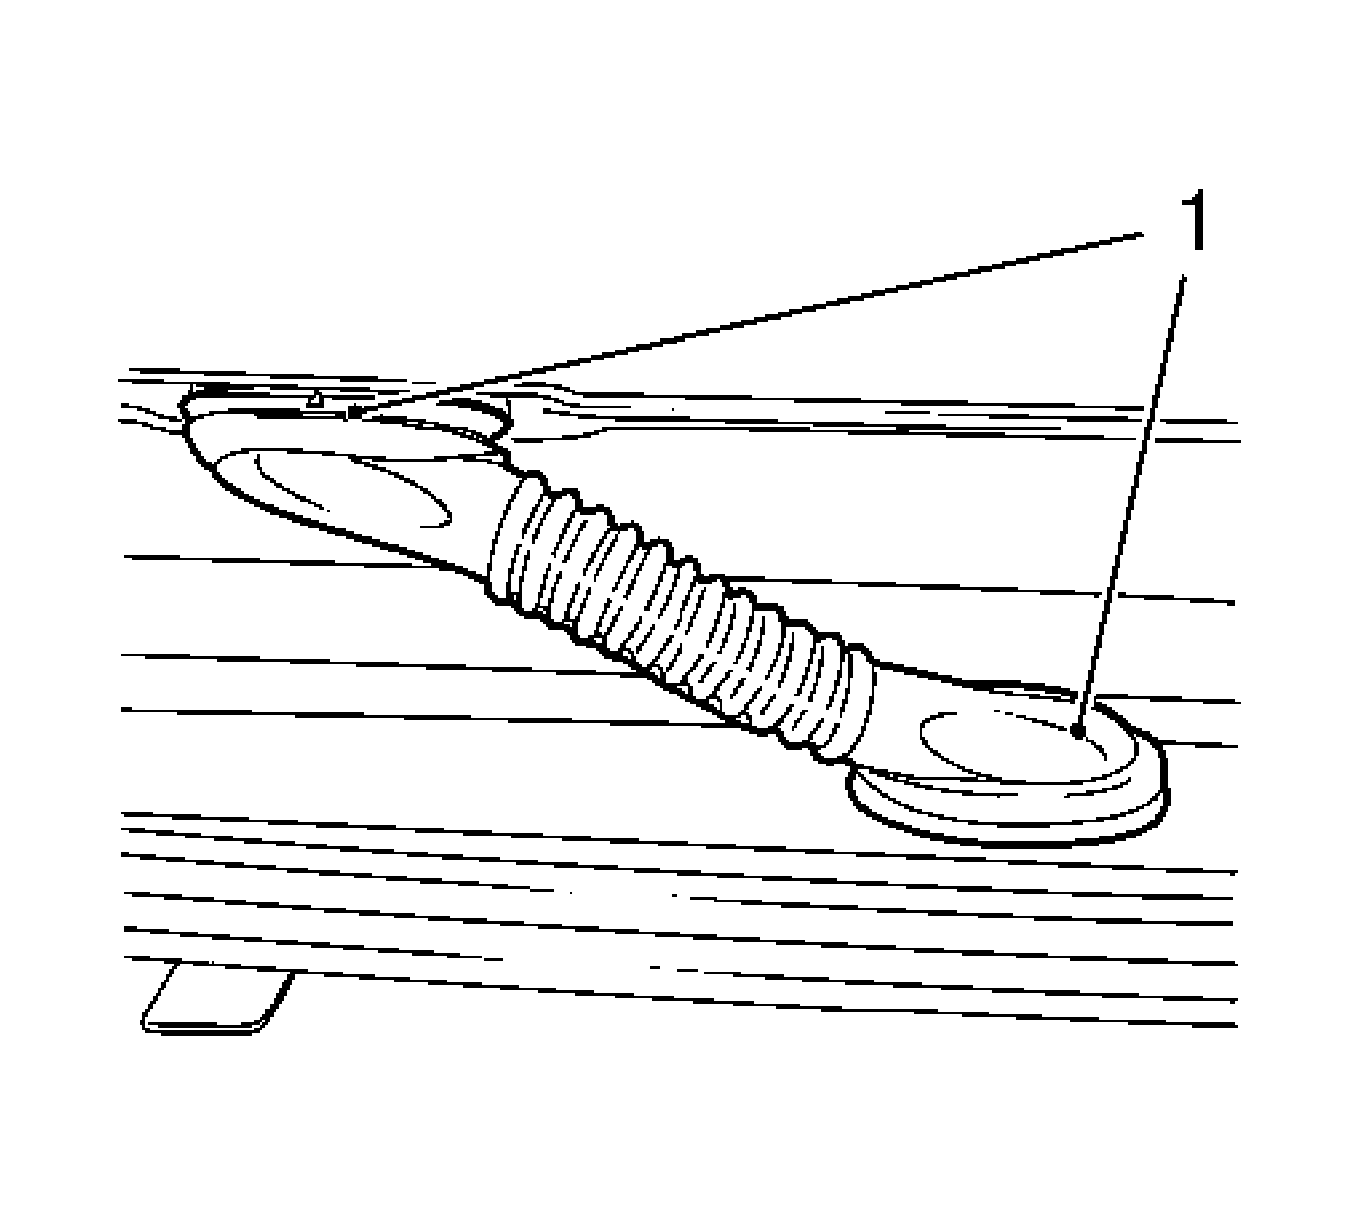
- Remove the boot at the liftgate.
Disconnect the 2 retaining lugs (1).
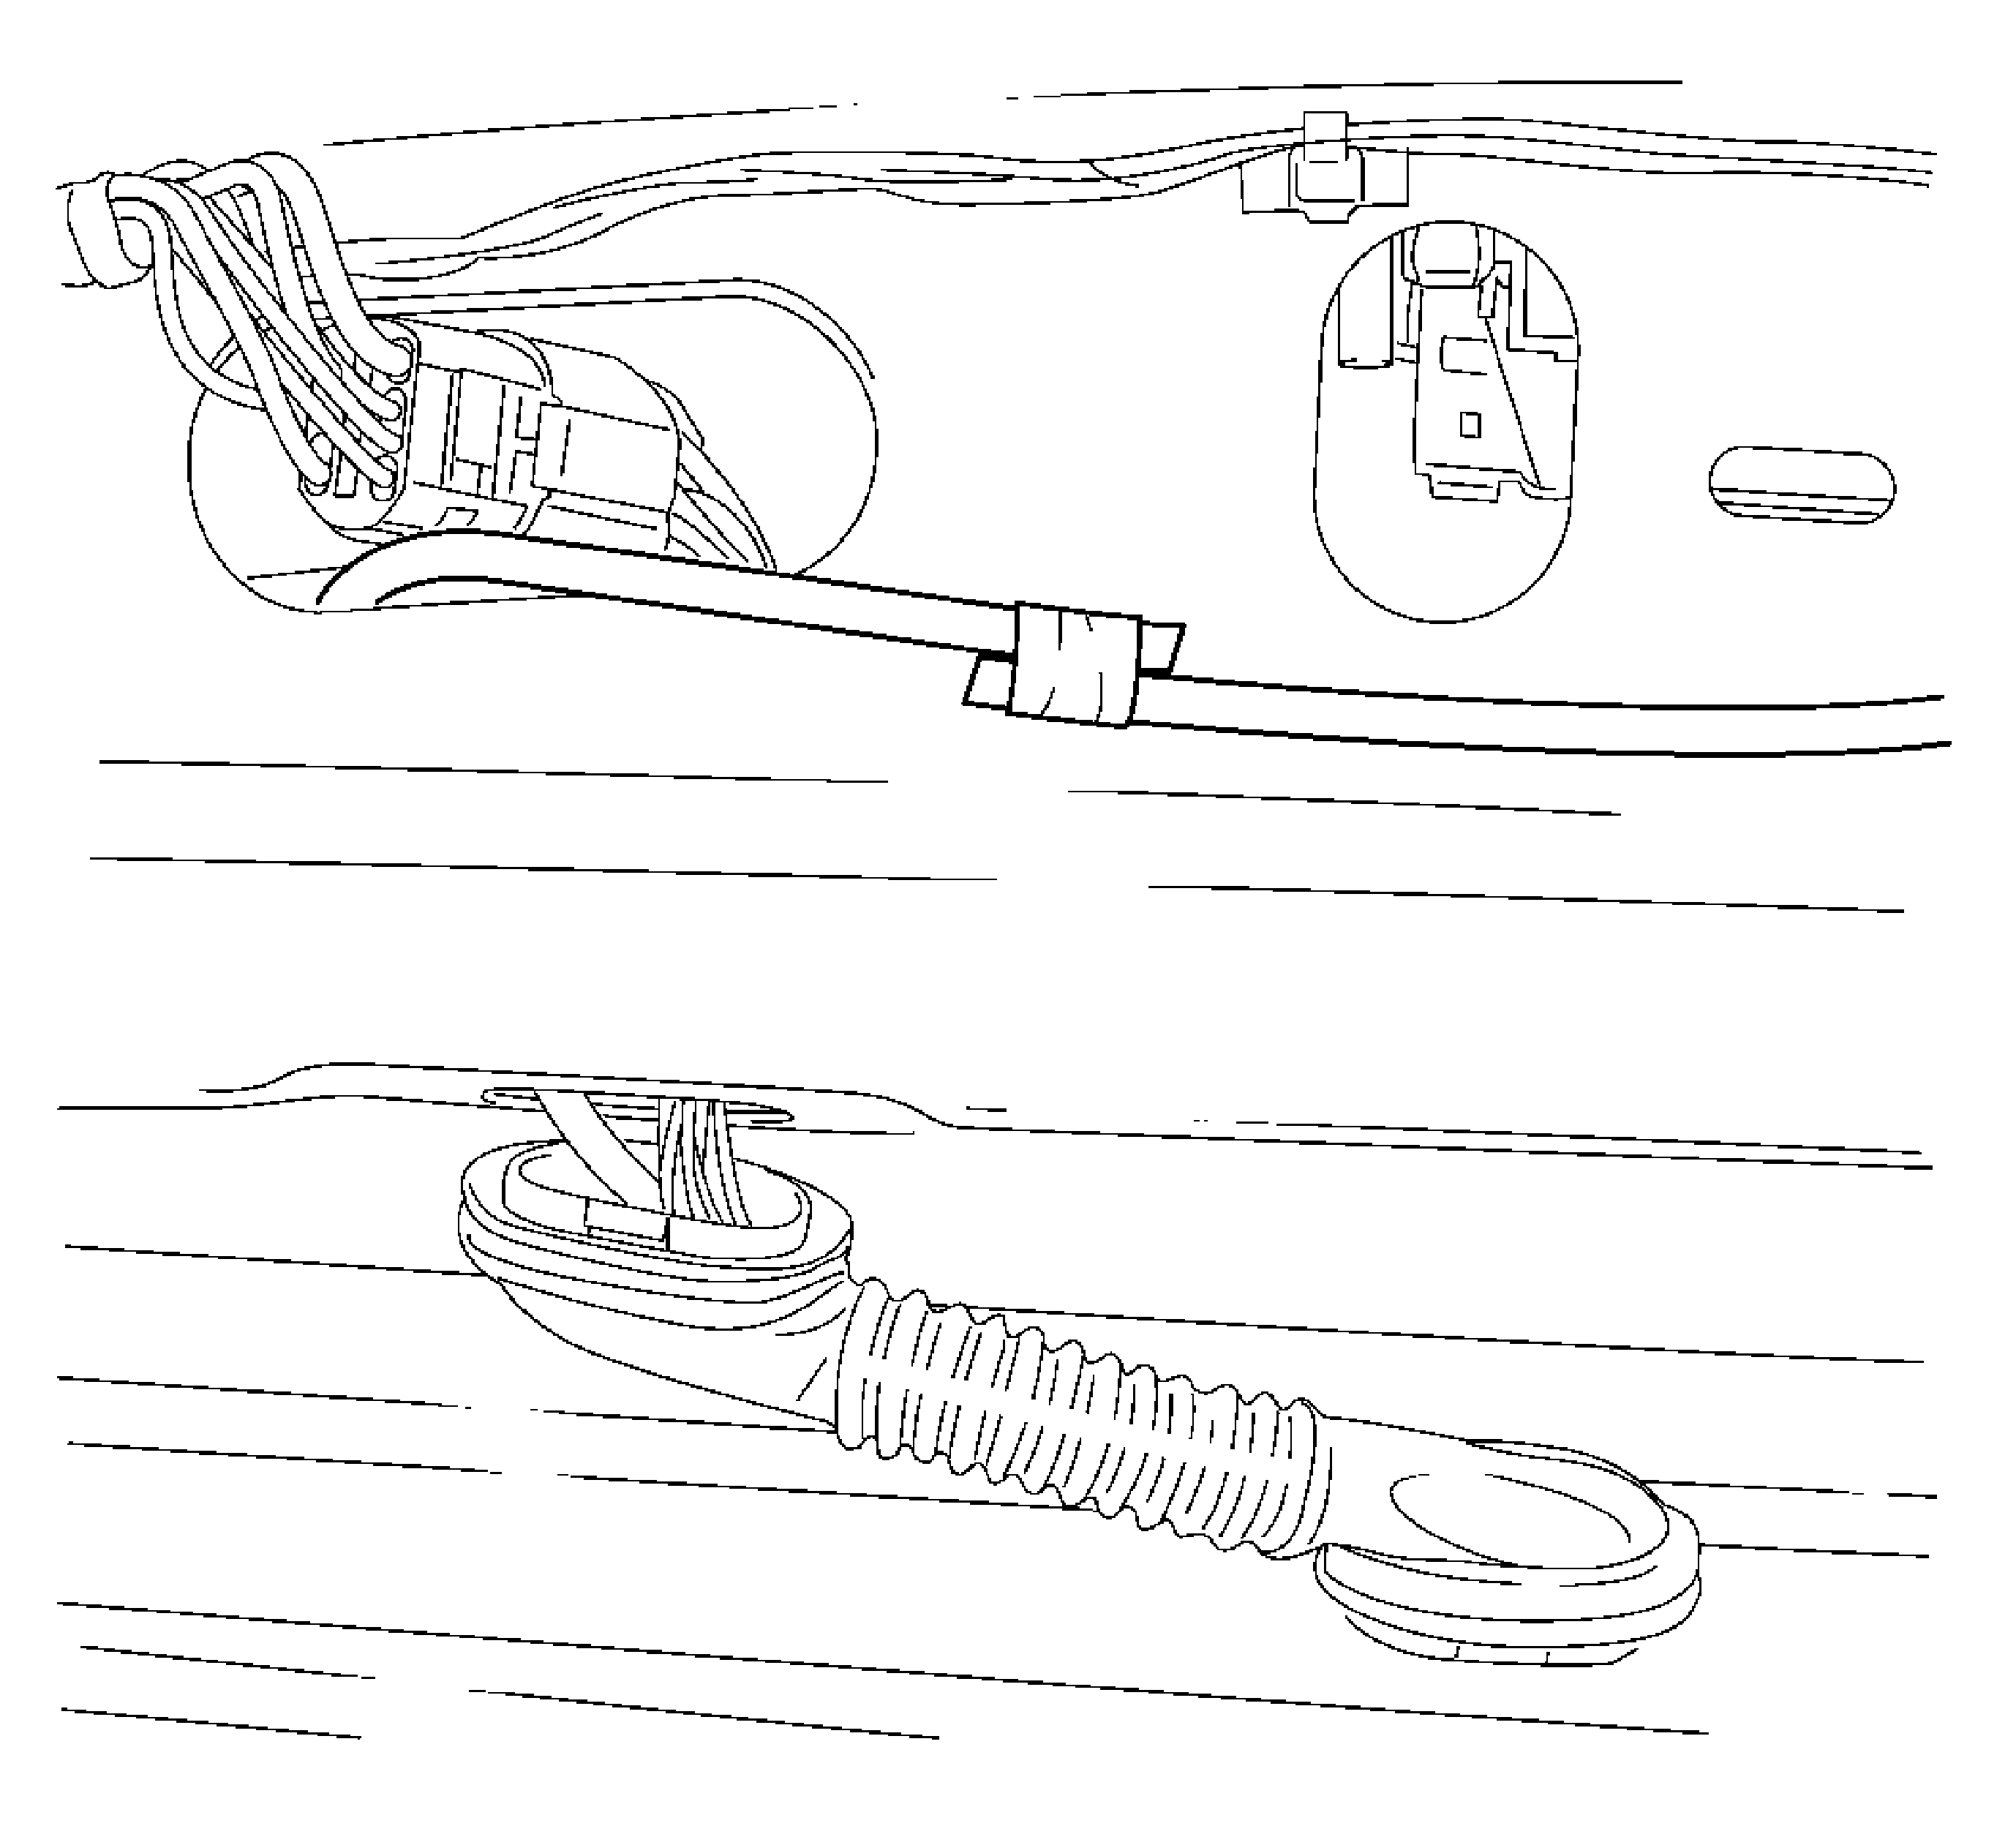
- Remove the hose.
| • | Secure the new hose to the old hose with adhesive tape. |
Installation Procedure
- Install the hose.
| • | Connect the hose at the center pillar. |
| • | Lock in the 2 retaining lugs. |
- Insert the high mounted stop lamp.
| • | Connect and lock the wiring harness plug. |
| • | Connect the wiring harness. |
| • | Connect the hose for the washer/wiper system. |
- Fasten the third brake light.
Important:
| • | Be careful of the wiring harness plug when installing the brake light. Install the high mounted stop lamp. Start from the right hand side. |
| • | The brake light must audibly engage. |
- Install the high mounted stop lamp.
- Install the headlining. Refer to
Headlining Trim Panel Replacement
.
- Install the rear quarter lower trim panel. Refer to
Quarter Lower Rear Trim Panel Replacement
.
- Insert the garnish moldings, left and right.
| • | Install the 2 luggage shade brackets. |
- Install the luggage shade to the liftgate.
Connect the 2 retaining cords.
Rear Washer Hose Replacement Sedan
Removal Procedure
Warning: Refer to Battery Disconnect Warning in the Preface section.
- Disconnect the battery.
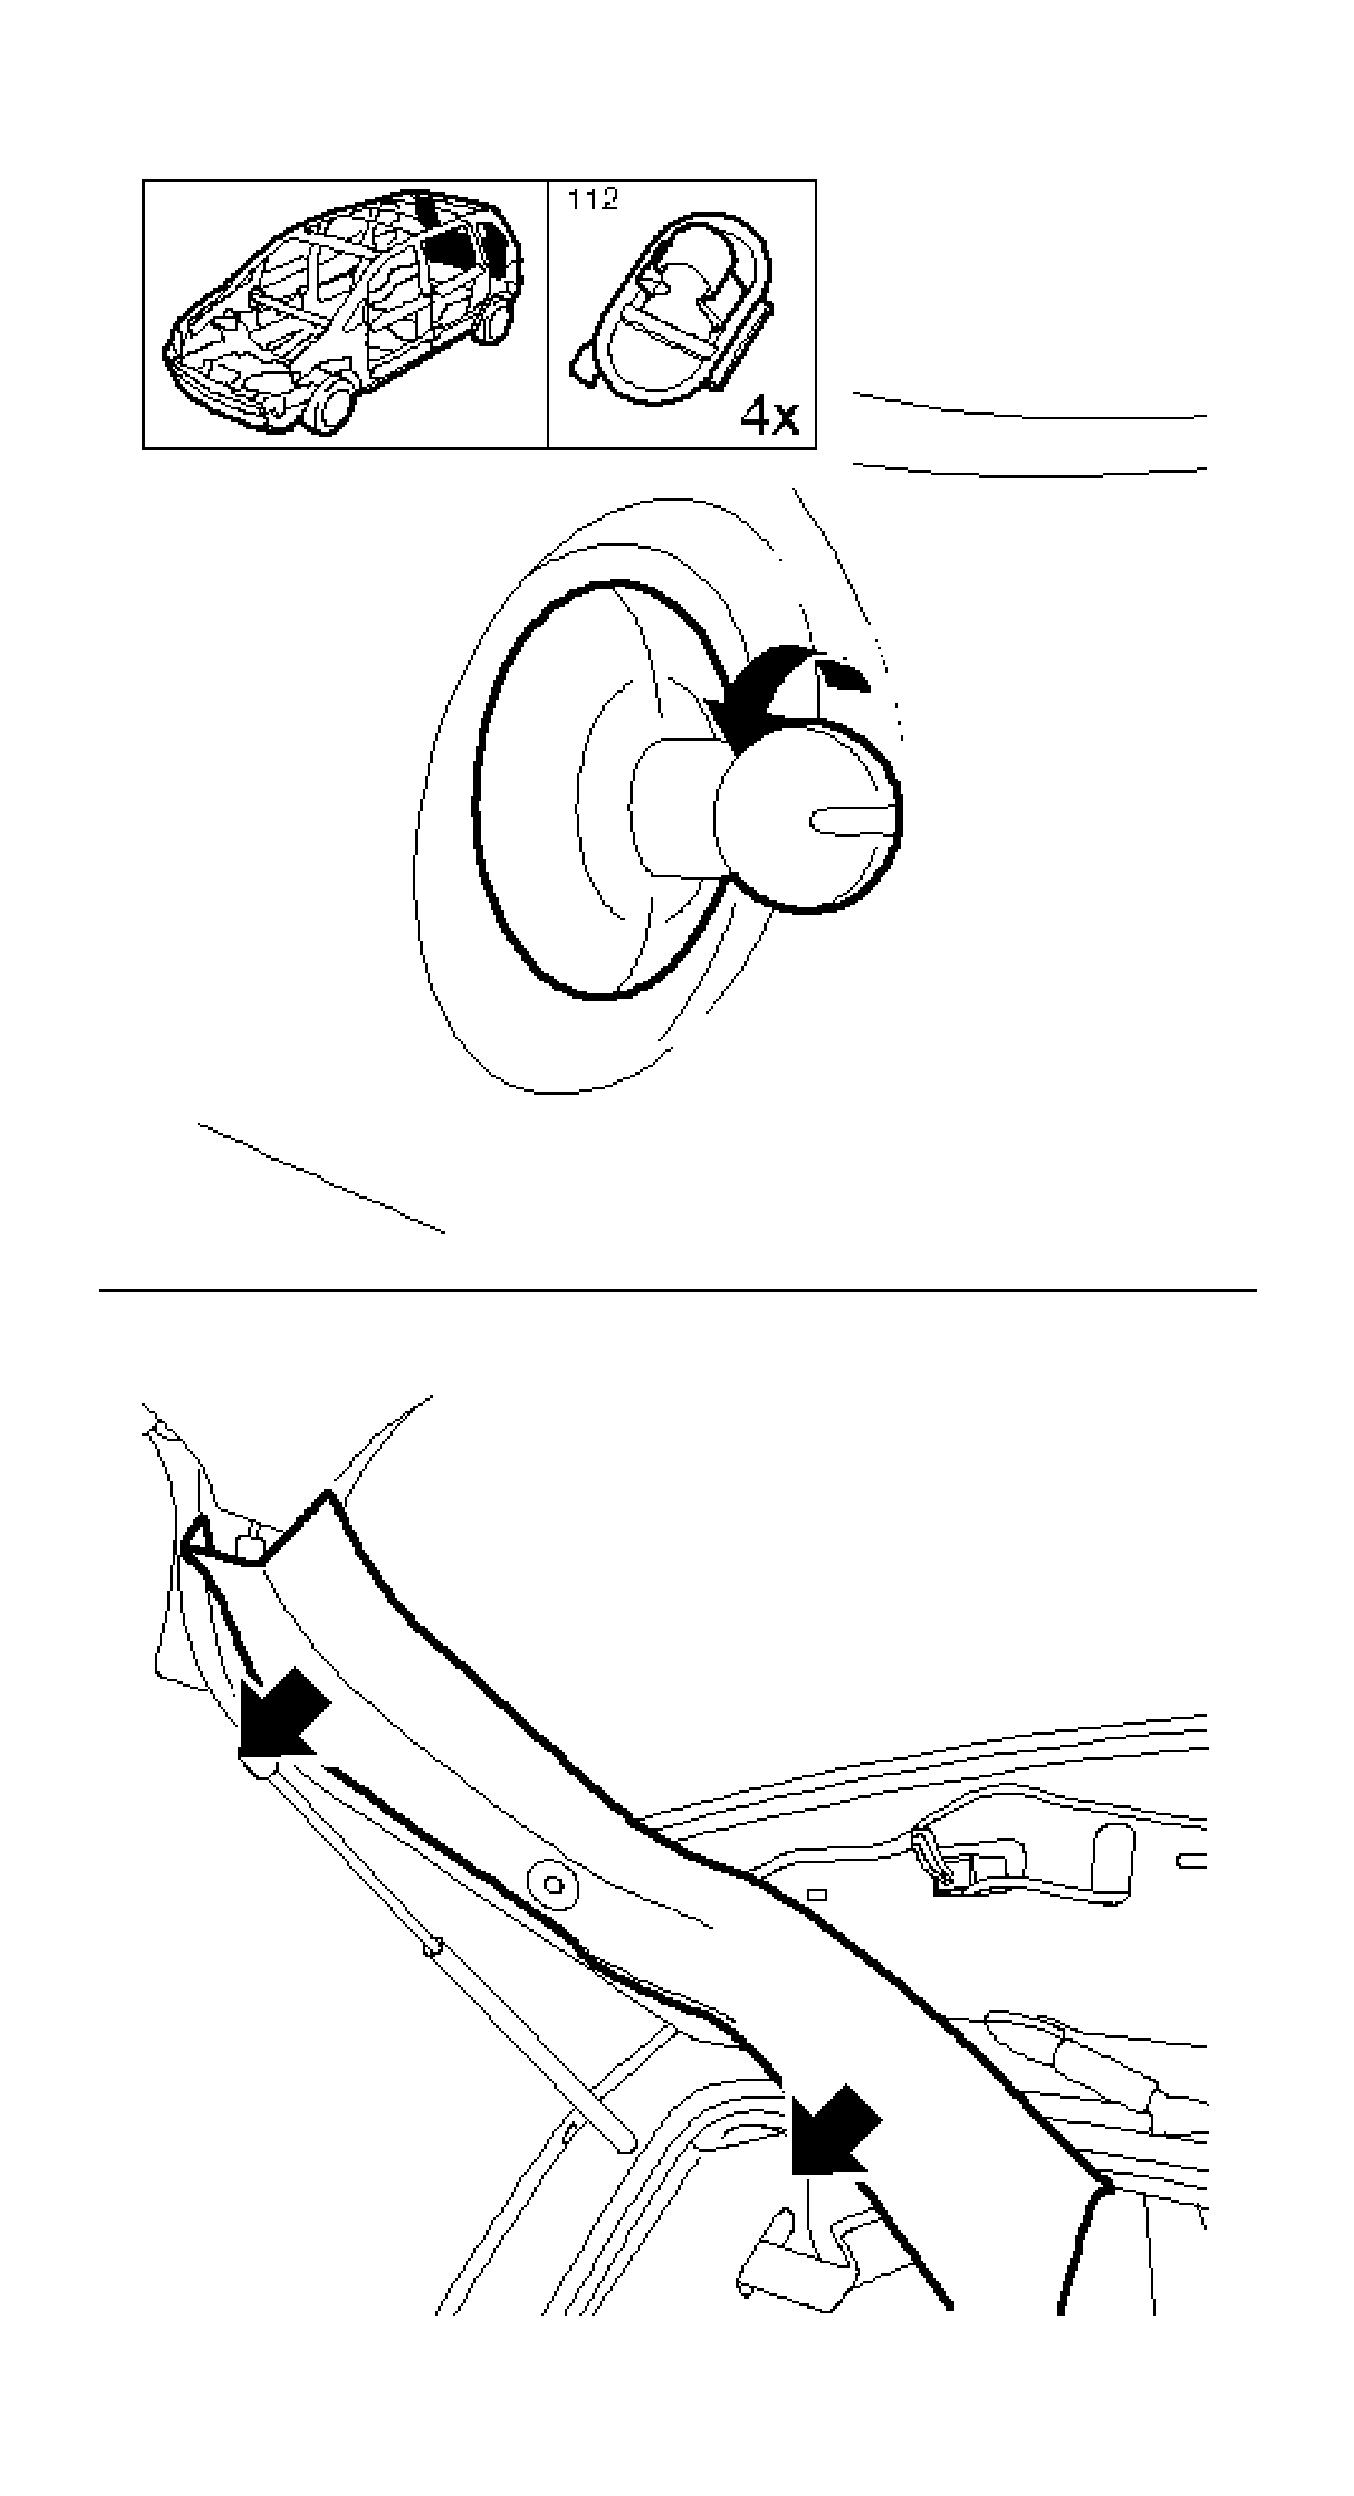
- Remove the liftgate garnish molding - left side.
| • | Remove the luggage shade bracket. |
- Remove the liftgate garnish molding - right side.
| • | Remove the luggage shade bracket. |
- Lower the headlining. Refer to
Headlining Trim Panel Replacement.
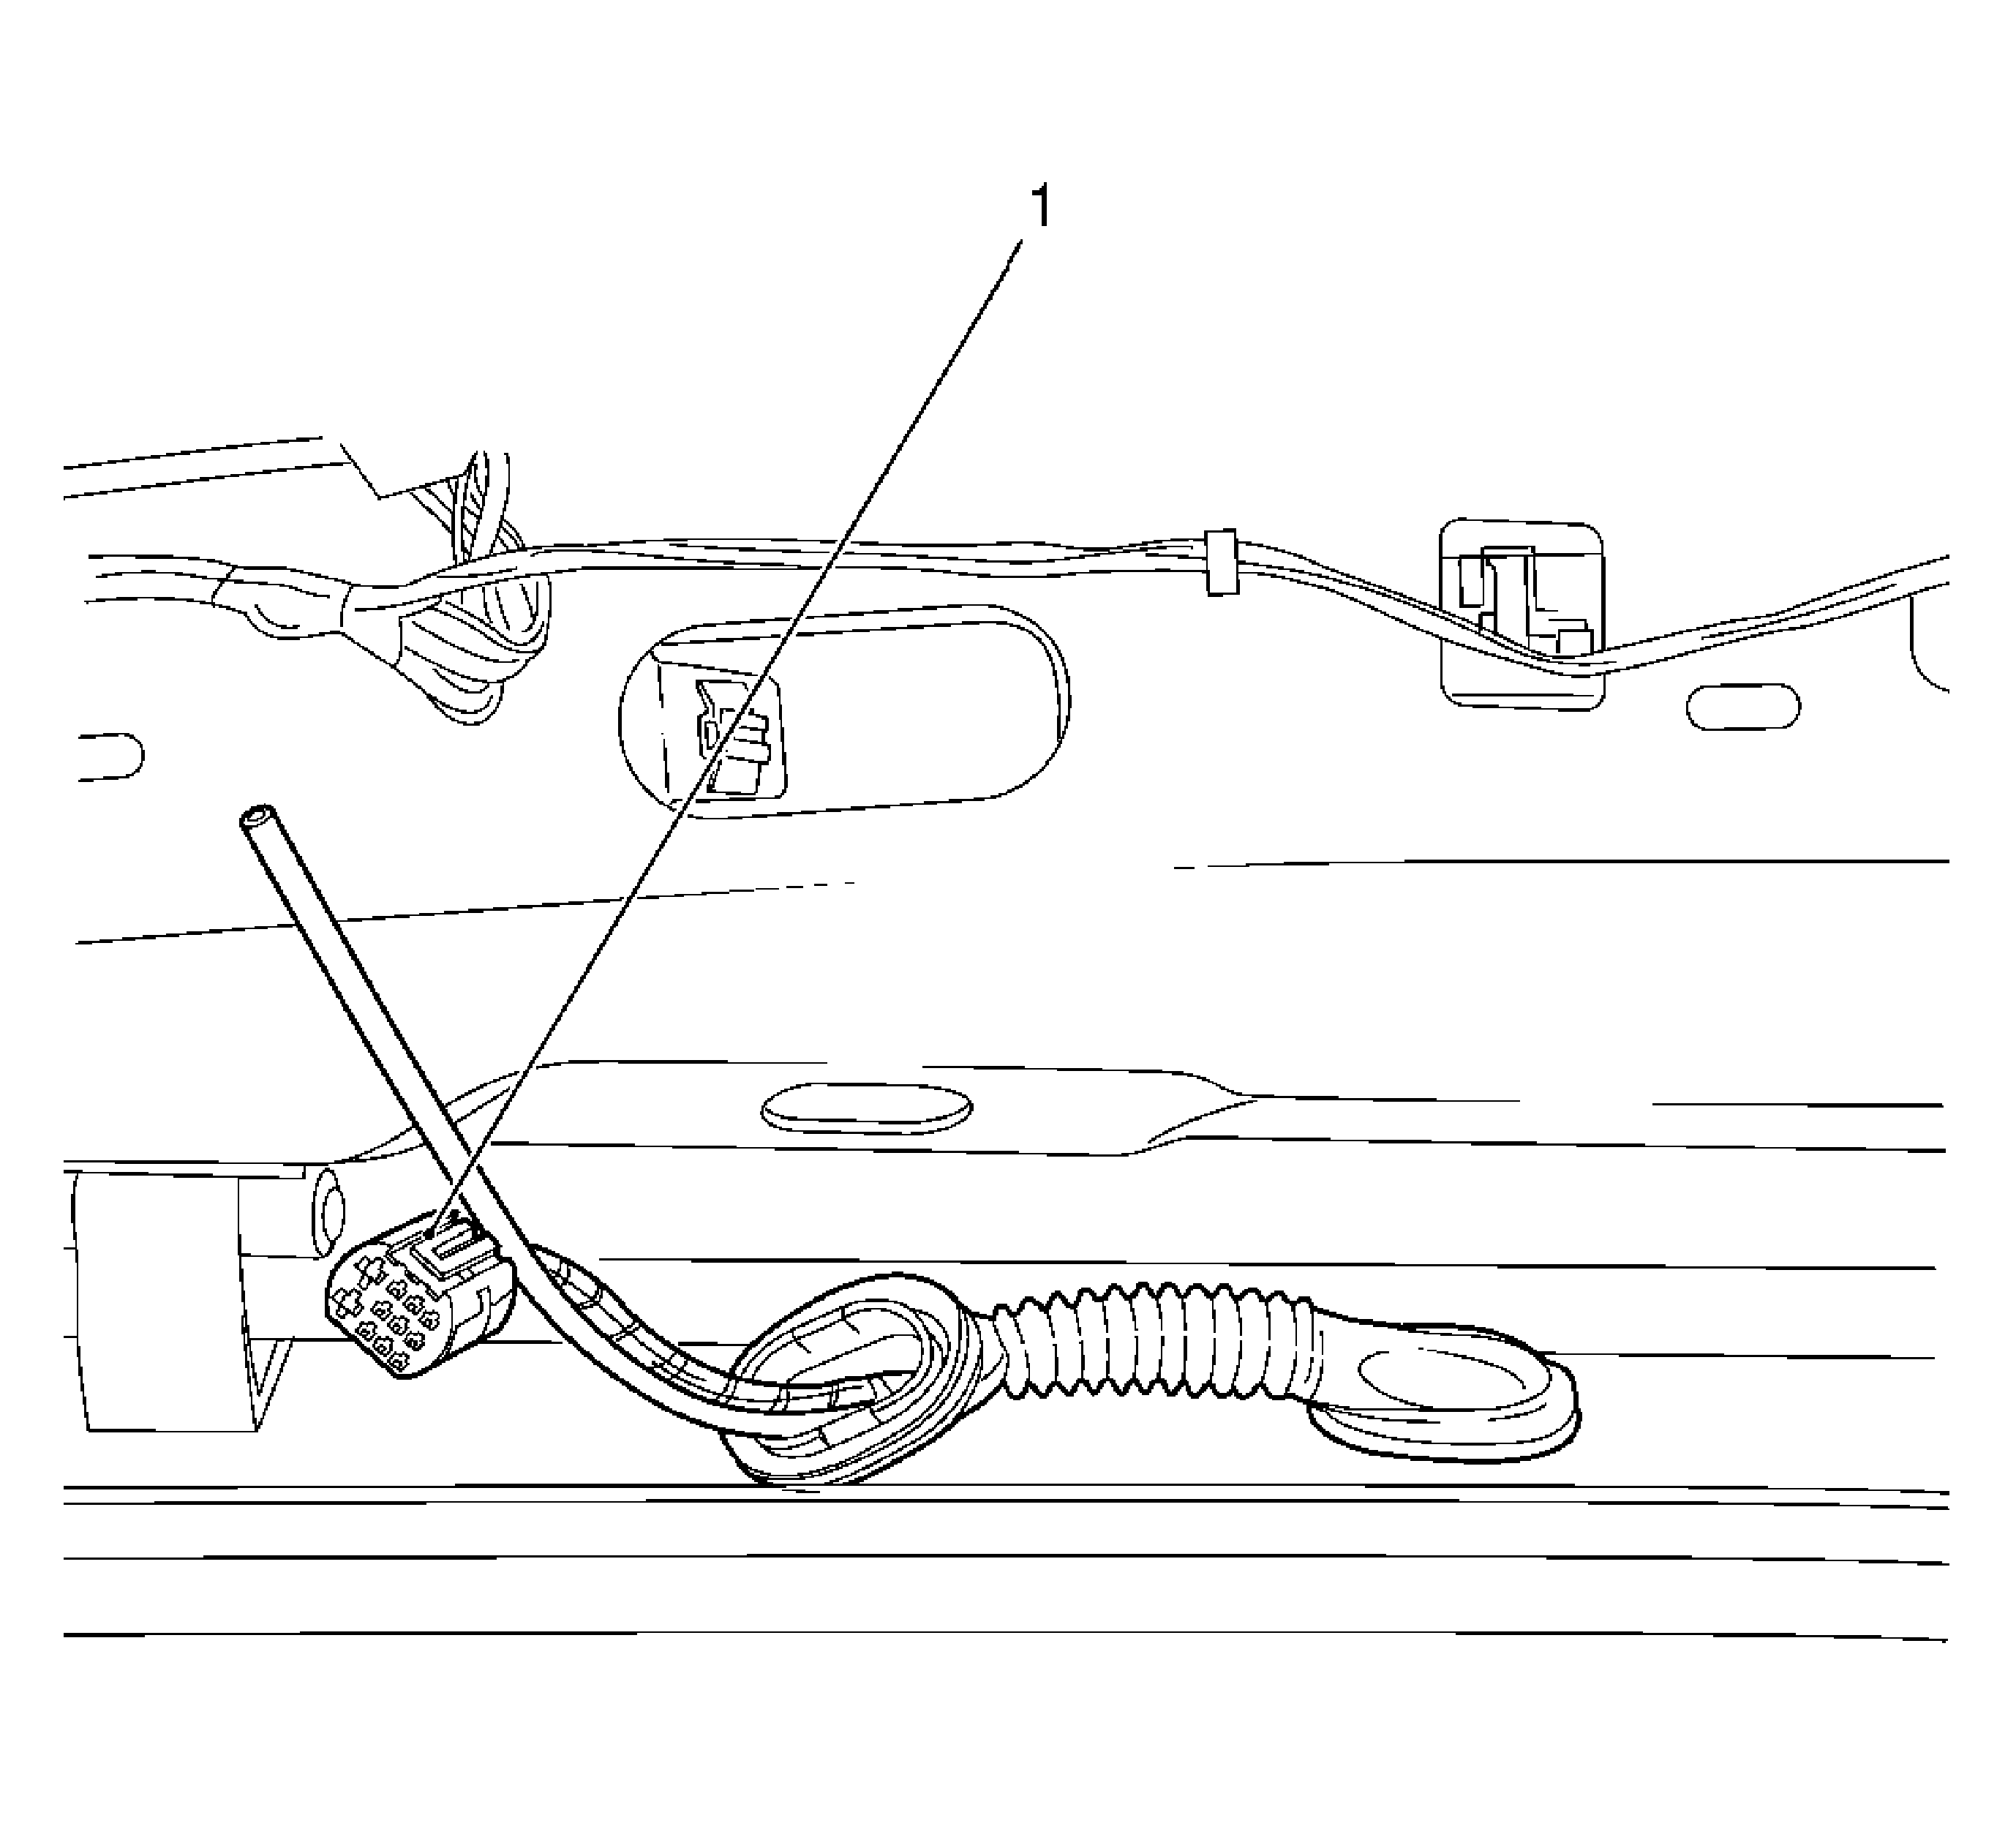
- Remove the hose up to the liftgate boot.
Disconnect the wiring harness plug (1).
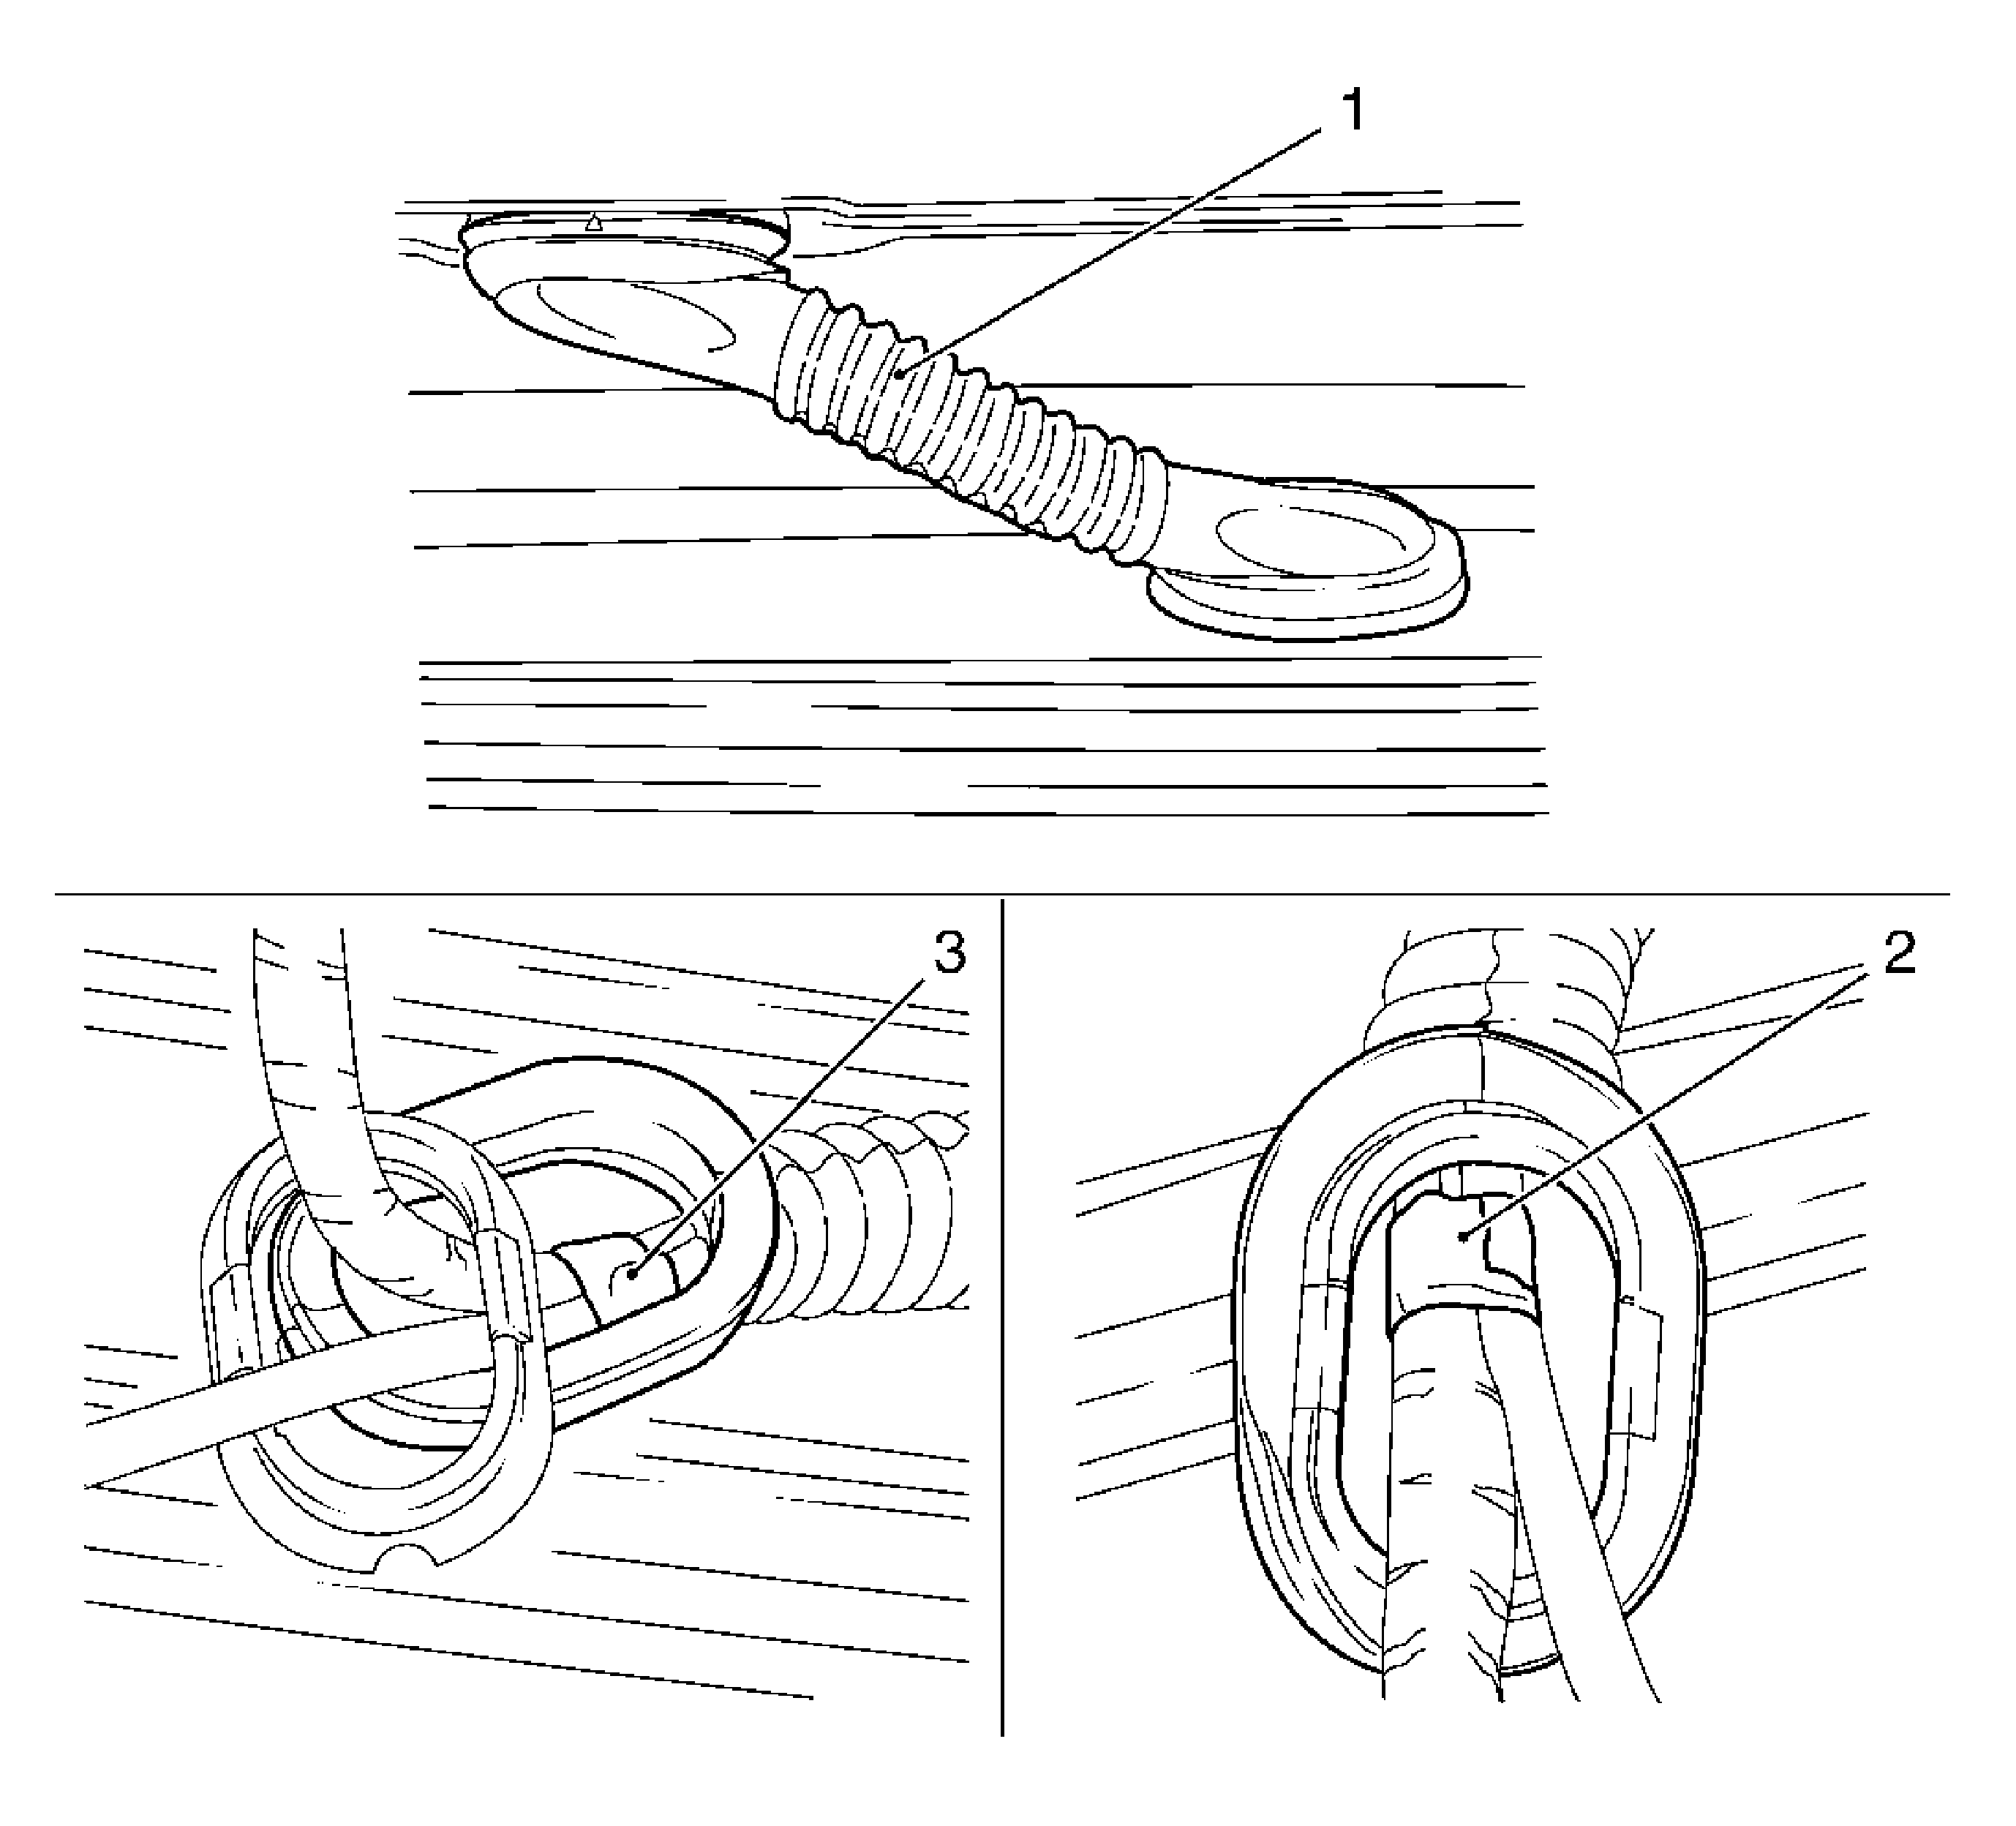
- Expose the hose.
| • | Remove the boot (1) at the liftgate. |
| • | Expose the washer/wiper system hose. |
| • | Cut the duct tape at (2, 3). |

- Disconnect and remove the hose.
| • | Disconnect the hose at the center pillar (1). |
| • | Release the 5 clips (2, 3). |
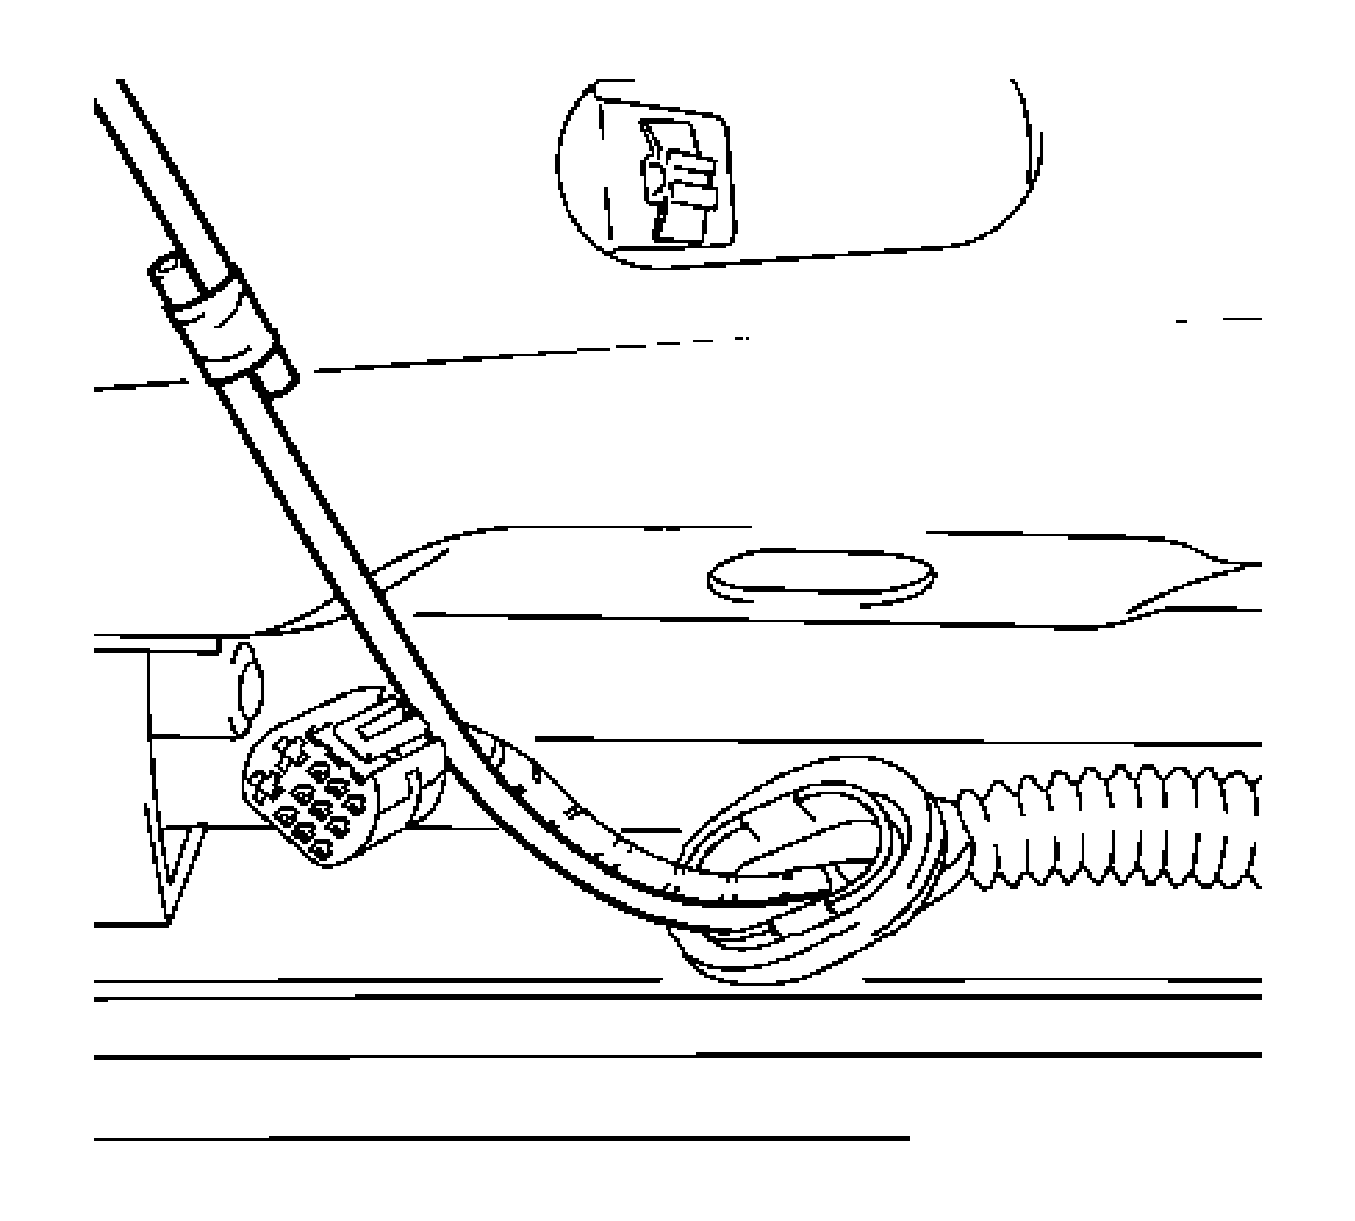
Note: Fasten new hose to old hose with adhesive tape.
- Remove the hose.
Pull the new hose with the old hose.
Installation Procedure
- Route and connect the hose.
- Install the headlining. Refer to
Headlining Trim Panel Replacement.
Caution: Refer to Fastener Caution in the Preface section.
- Install the liftgate garnish molding - right side.
| • | Fasten the luggage shade bracket. |
- Install the liftgate garnish molding - left side.
| • | Fasten the luggage shade bracket. |
- Connect the battery.
- For reprogramming procedures, refer to
Control Module References.


