Removal Procedure
- Remove the front floor console. Refer to
Front Floor Console Replacement.

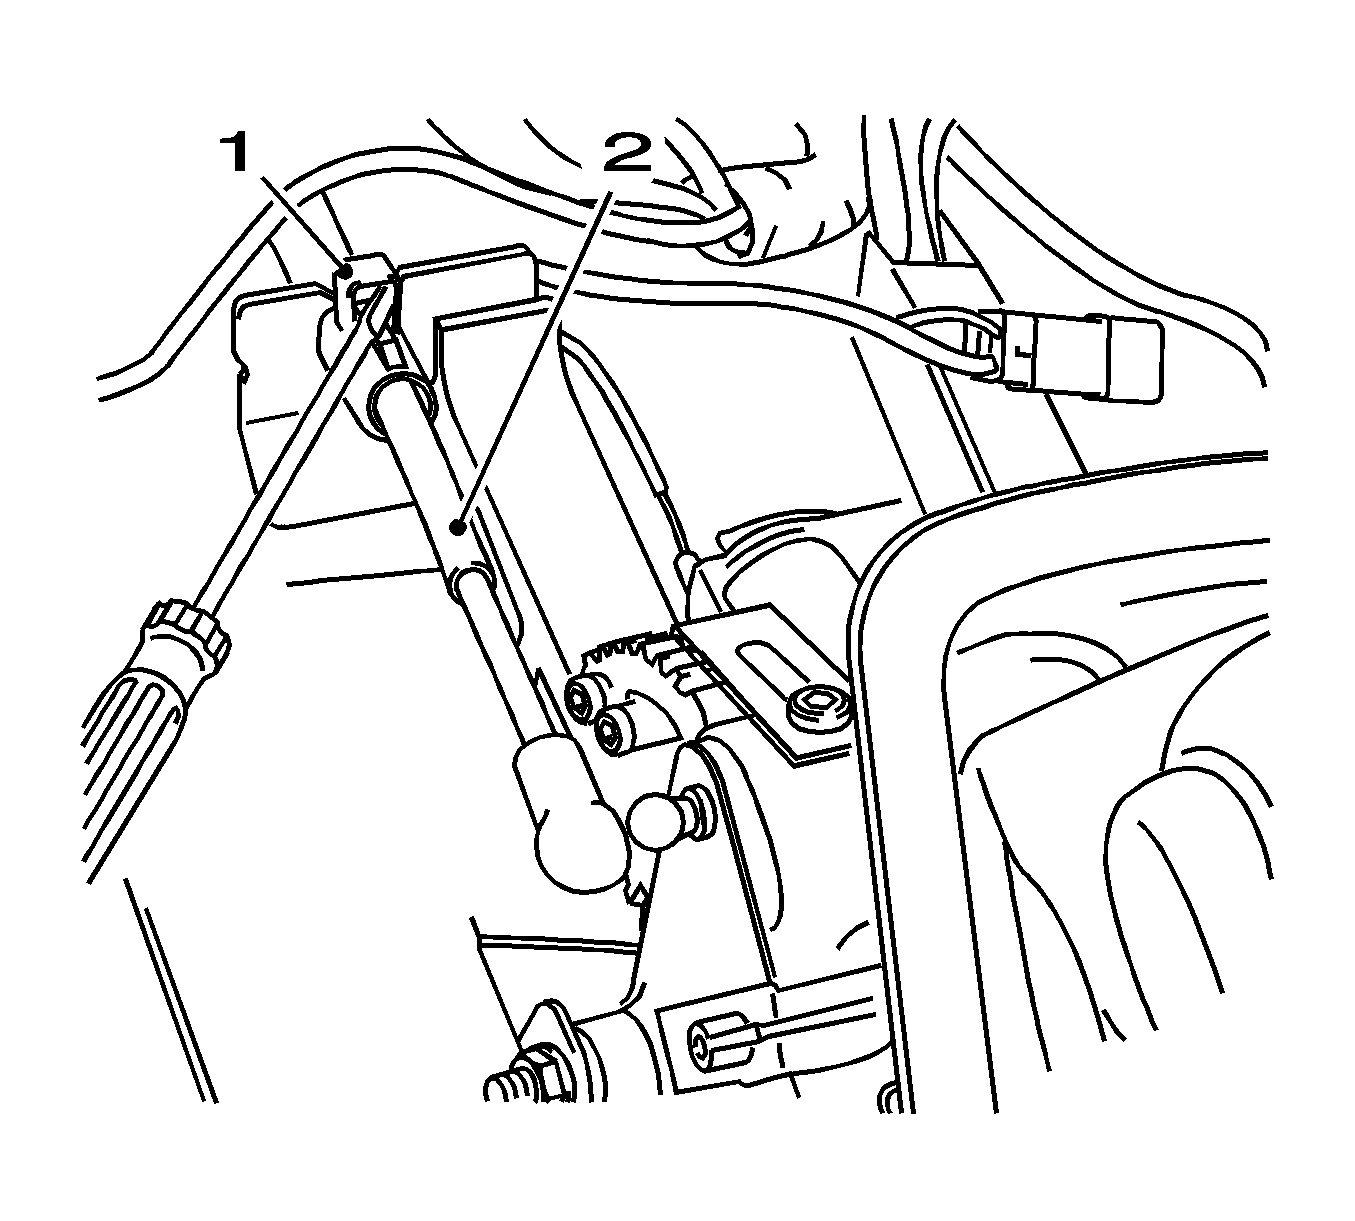
- Remove the selector linkage (2) from the selector lever.
| • | Remove the retaining clamp (1). |
| • | Disconnect the selector lever from the bracket. |

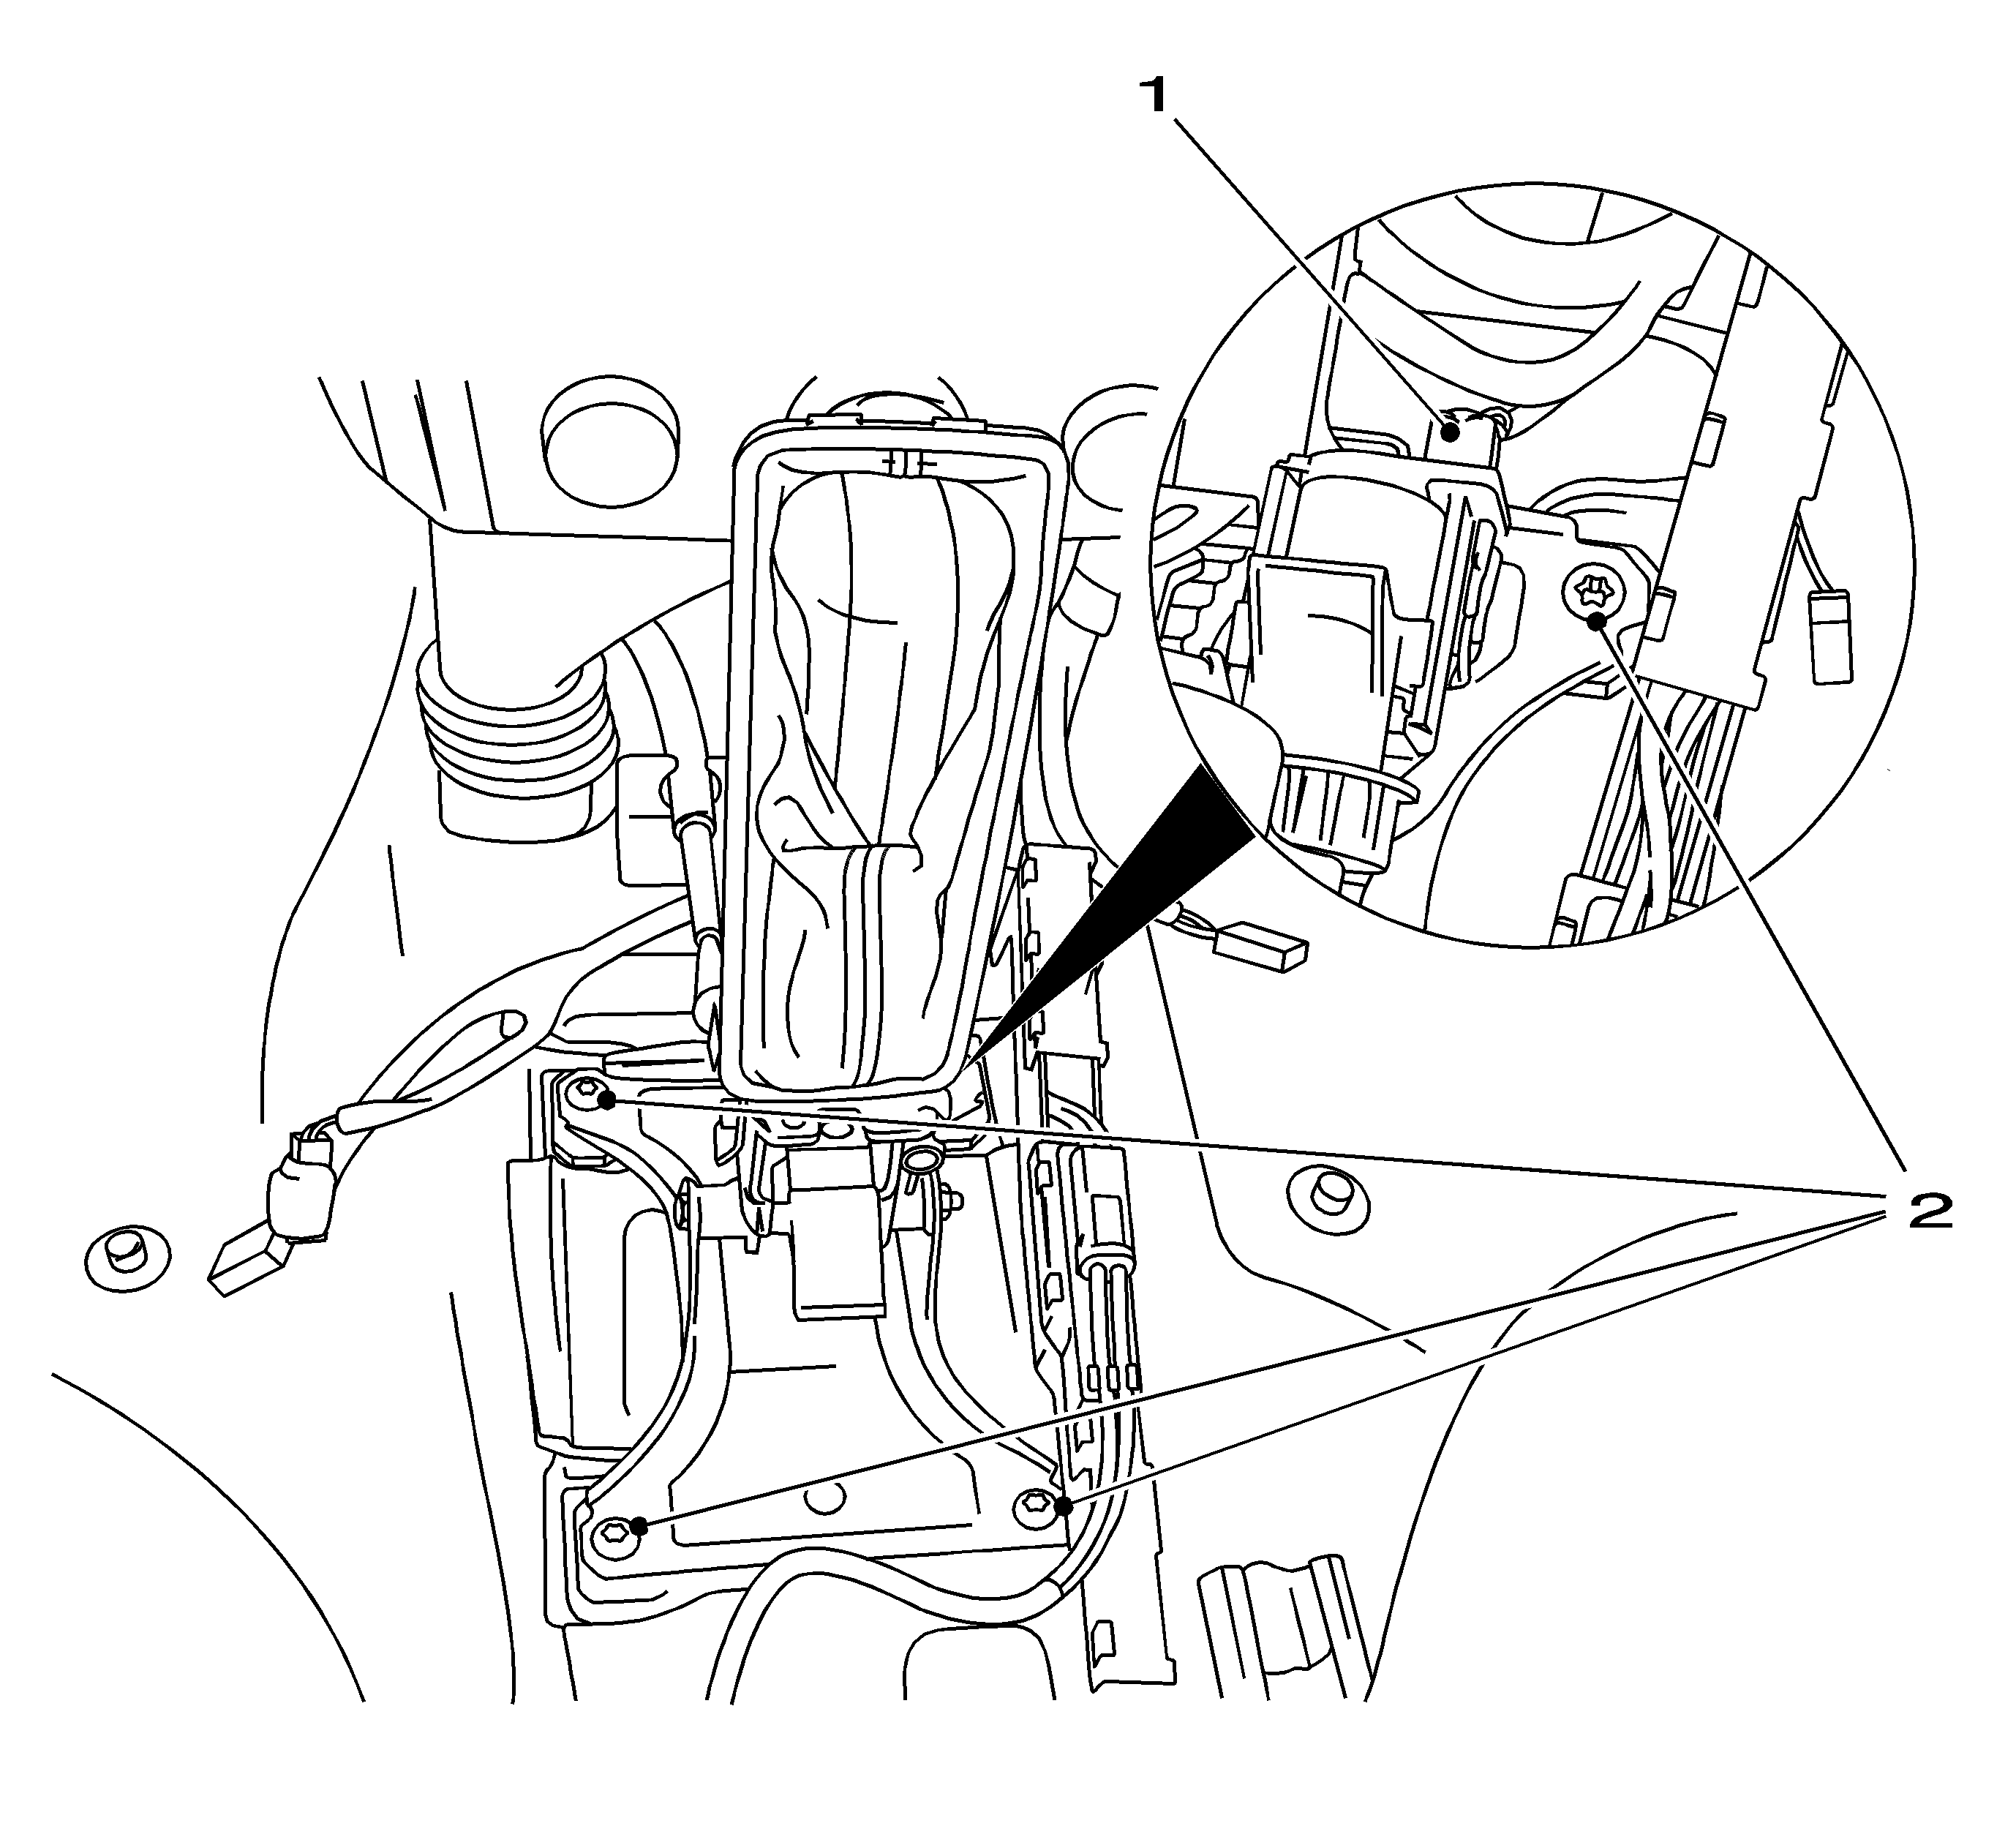
- Remove the selector lever assembly.
| • | Disconnect the wiring harness plug (1). |
| • | Remove the 4 bolts (2). |
| • | Remove the selector lever assembly. |

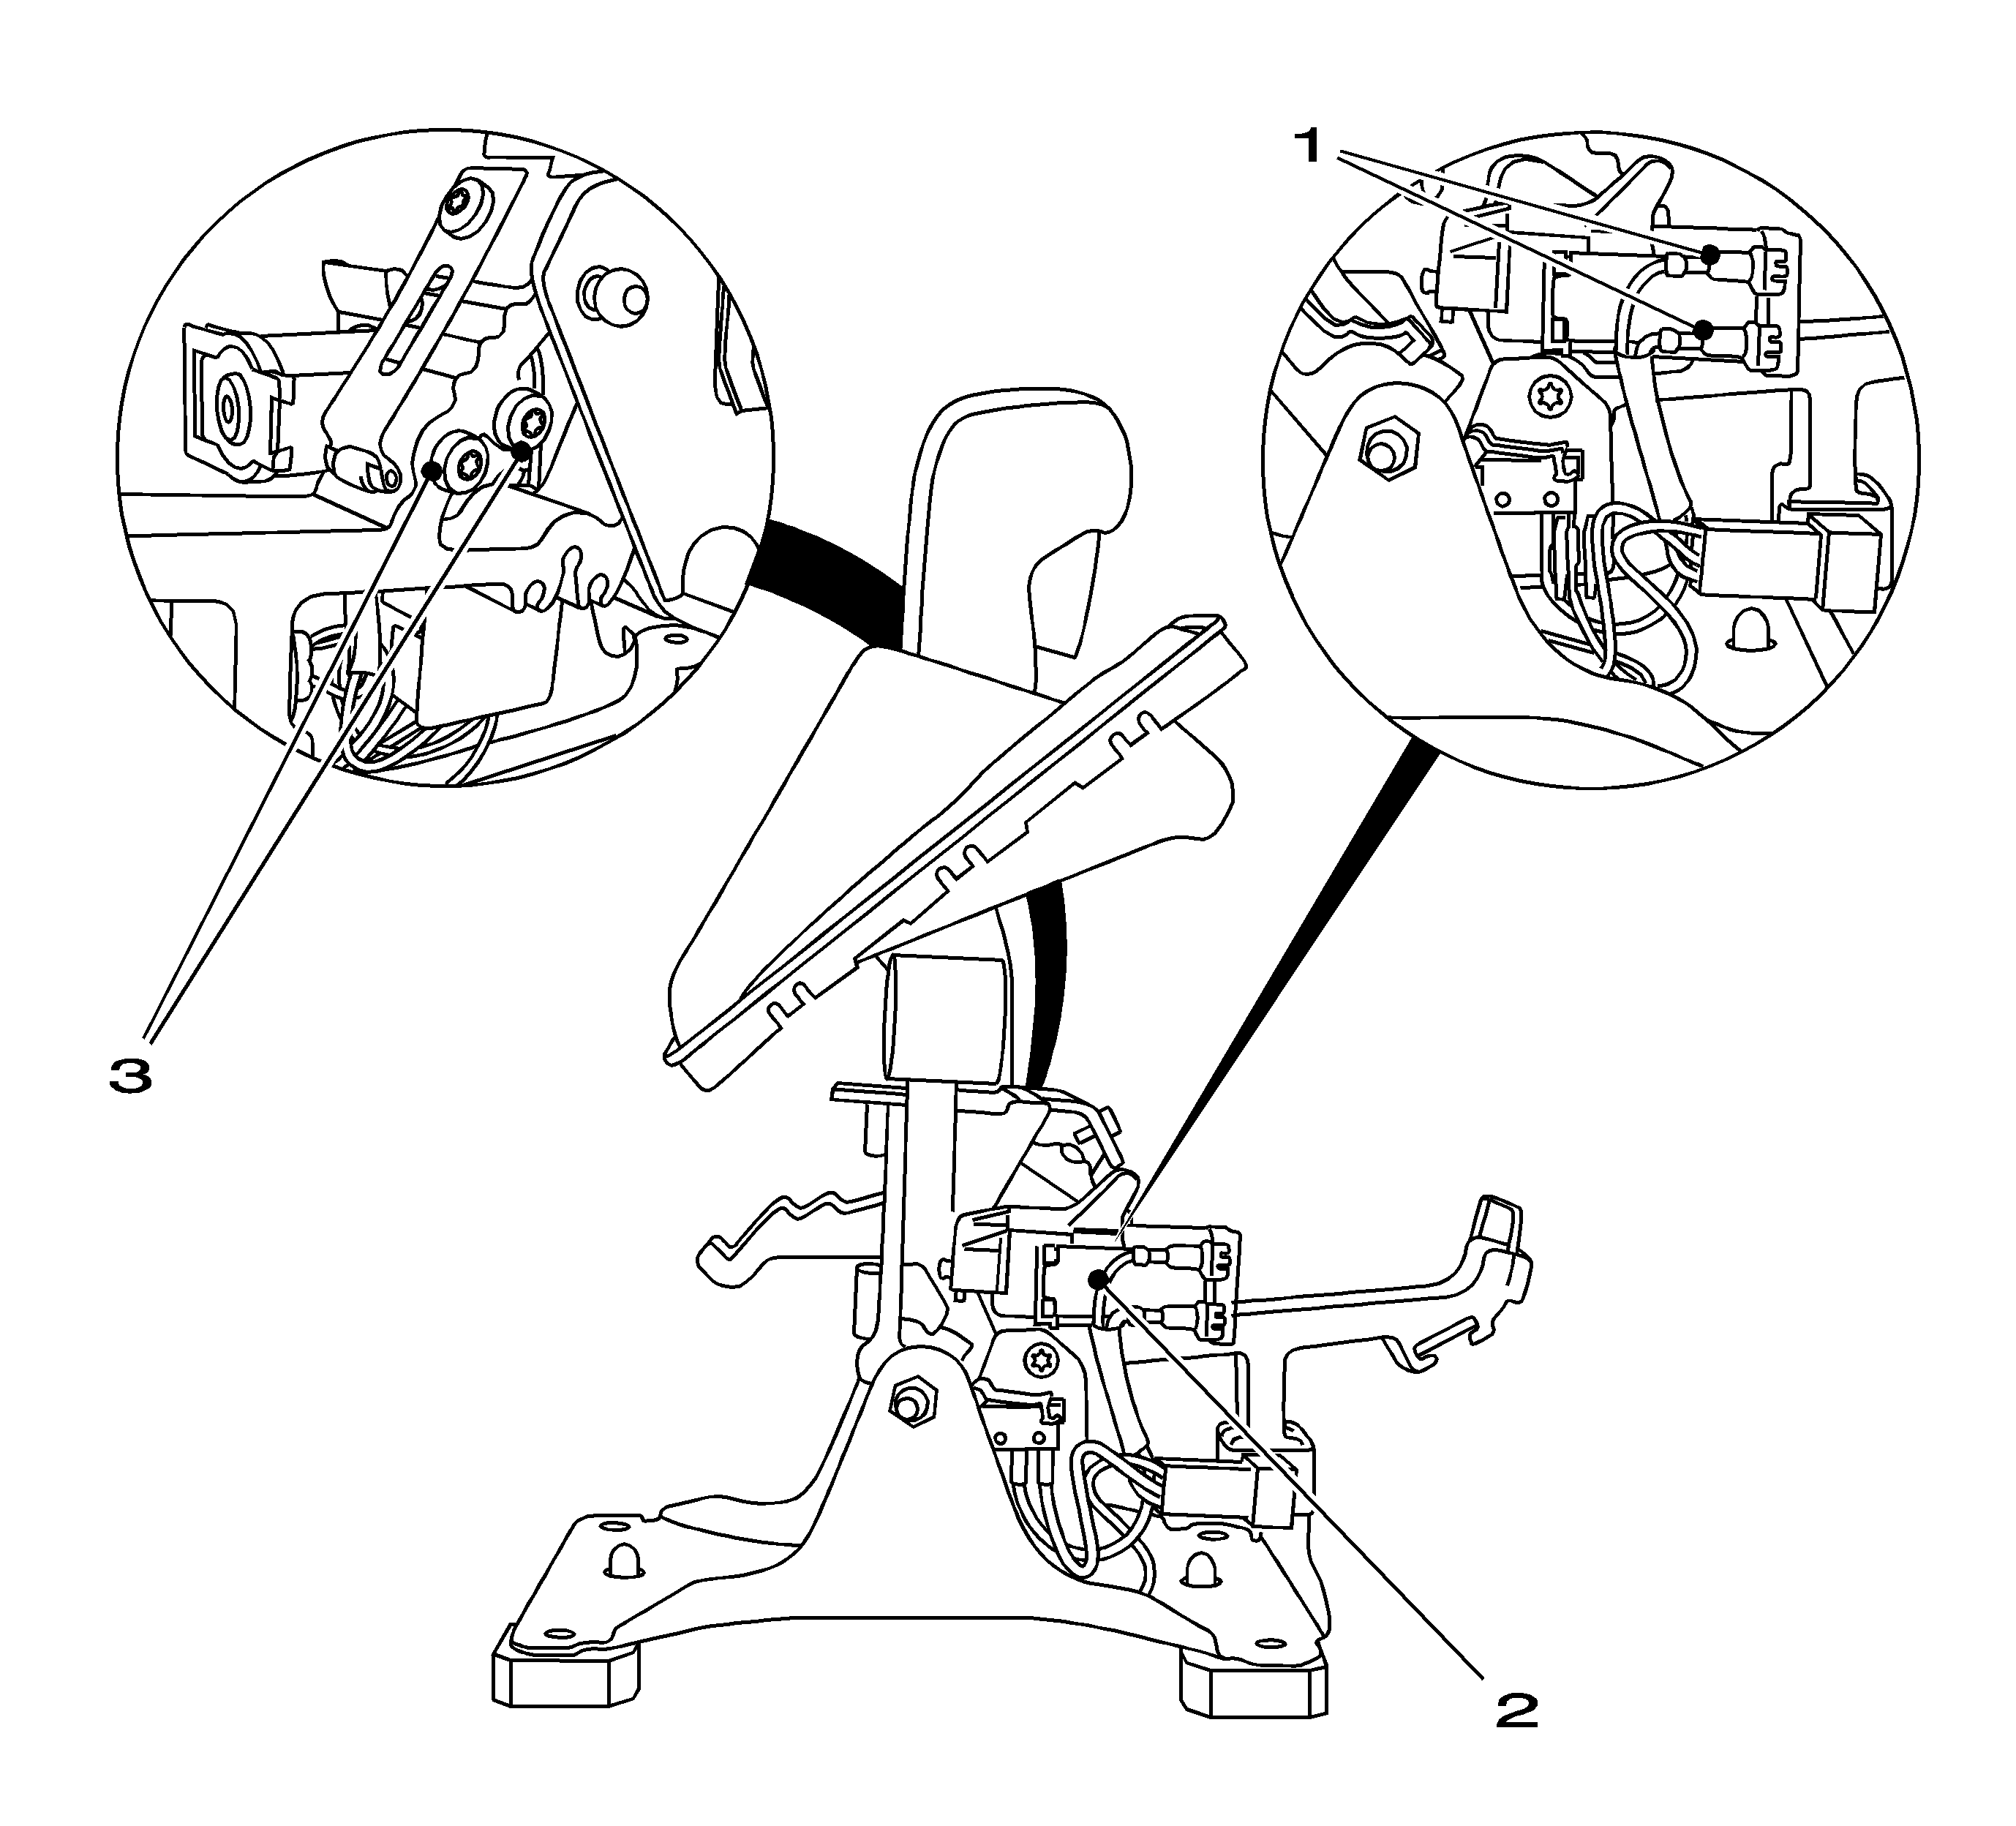
- Remove the lock control solenoid selector lever lock (2).
| | Note: Note the configuration of cables.
|
| • | Disconnect the 2 wiring plugs (1) from the lock control solenoid. |
| • | Remove the 2 bolts (3). |
| • | Remove the lock control solenoid from the selector lever lock. |
Installation Procedure
Caution: Refer to Fastener Caution in the Preface section.

Note: Note the configuration of cables.
- Install the lock control solenoid for the selector lever lock (2).
| • | Insert the lock control solenoid for the selector lever lock. |
Tighten
Tighten the 2 bolts (3) to 4 N·m (35 lb in).
| • | Connect the 2 wiring plugs (1) to the lock control solenoid. |

- Install the selector lever assembly.
| • | Insert the selector lever assembly. |
Tighten
Tighten 4 bolts (2) 5 N·m (44 lb in).
| • | Connect the wiring harness plug (1). |

- Install the selector linkage (2) to the selector lever.
| • | Install the selector lever to the bracket. |
| • | Install the retaining clamp (1). |
- Install the front floor console. Refer to
Front Floor Console Replacement.
- Check the selector lever safety functions.
- For reprogramming procedures, refer to
Control Module References.


