Cleaning and Inspection Procedure
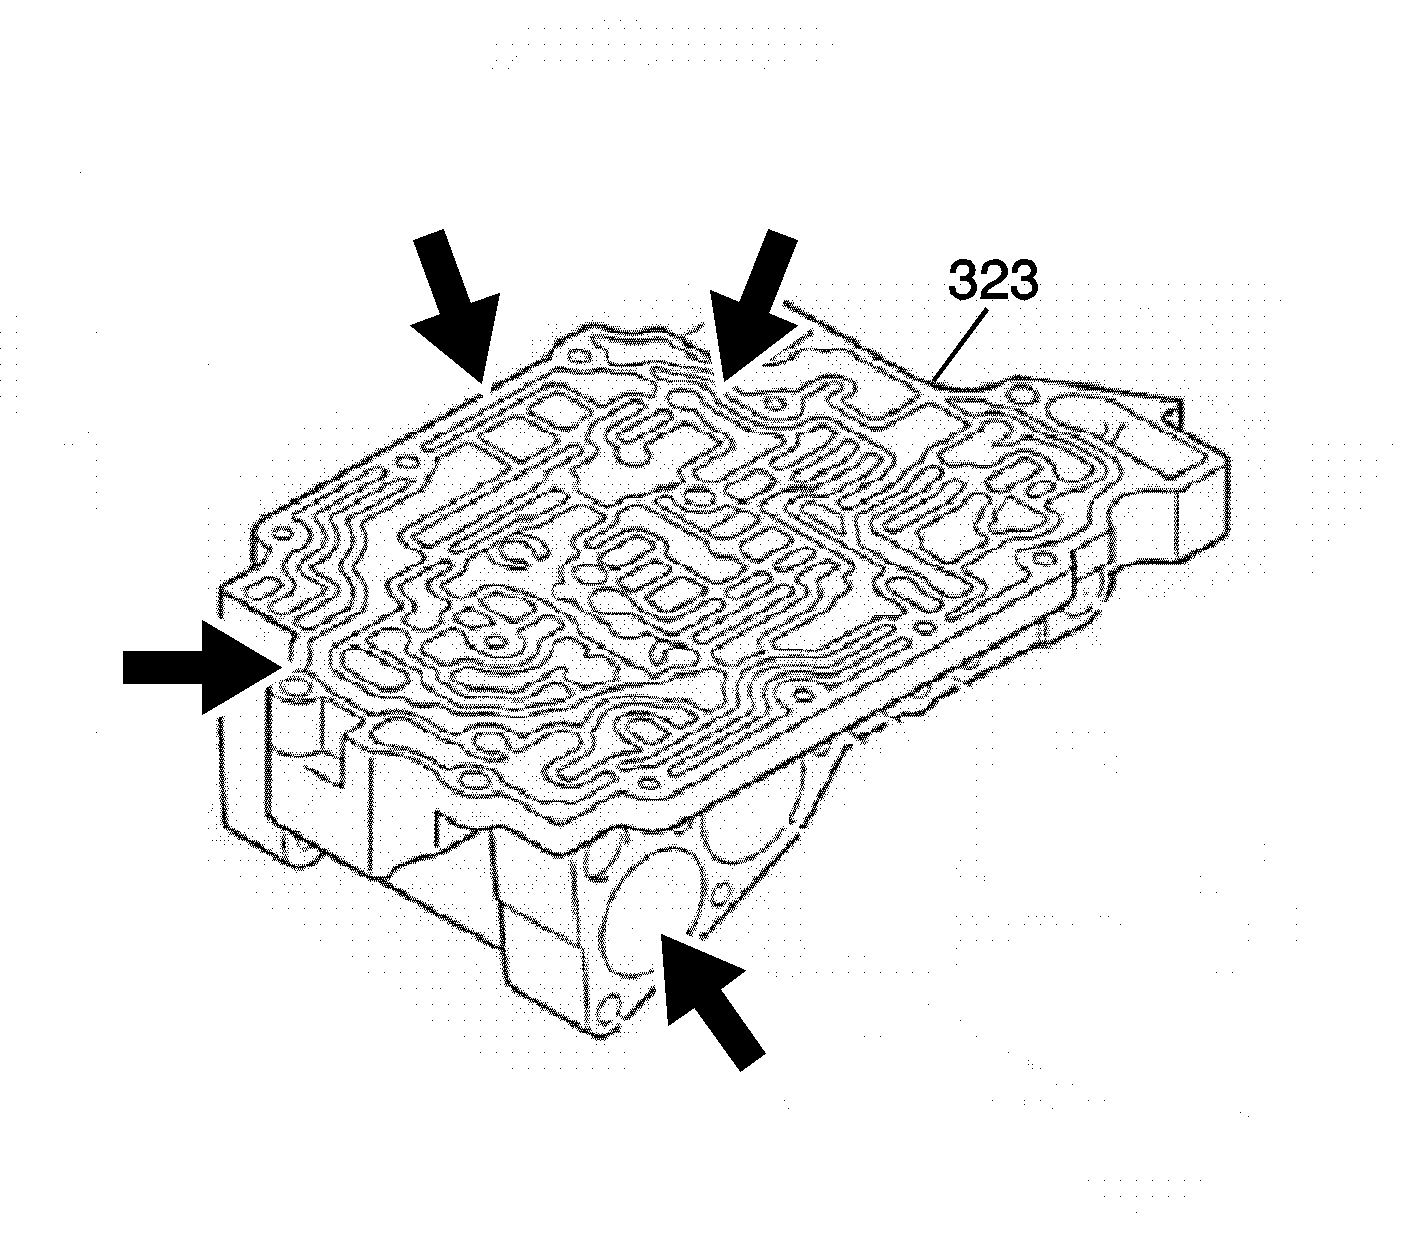
- Inspect the rear control valve body (323) for the following conditions:
| • | Damaged machined surfaces |
- Clean all the valves, springs, bushings, and the rear control valve body (323) in solvent.
- Dry all the parts using compressed air.
Installation Procedure
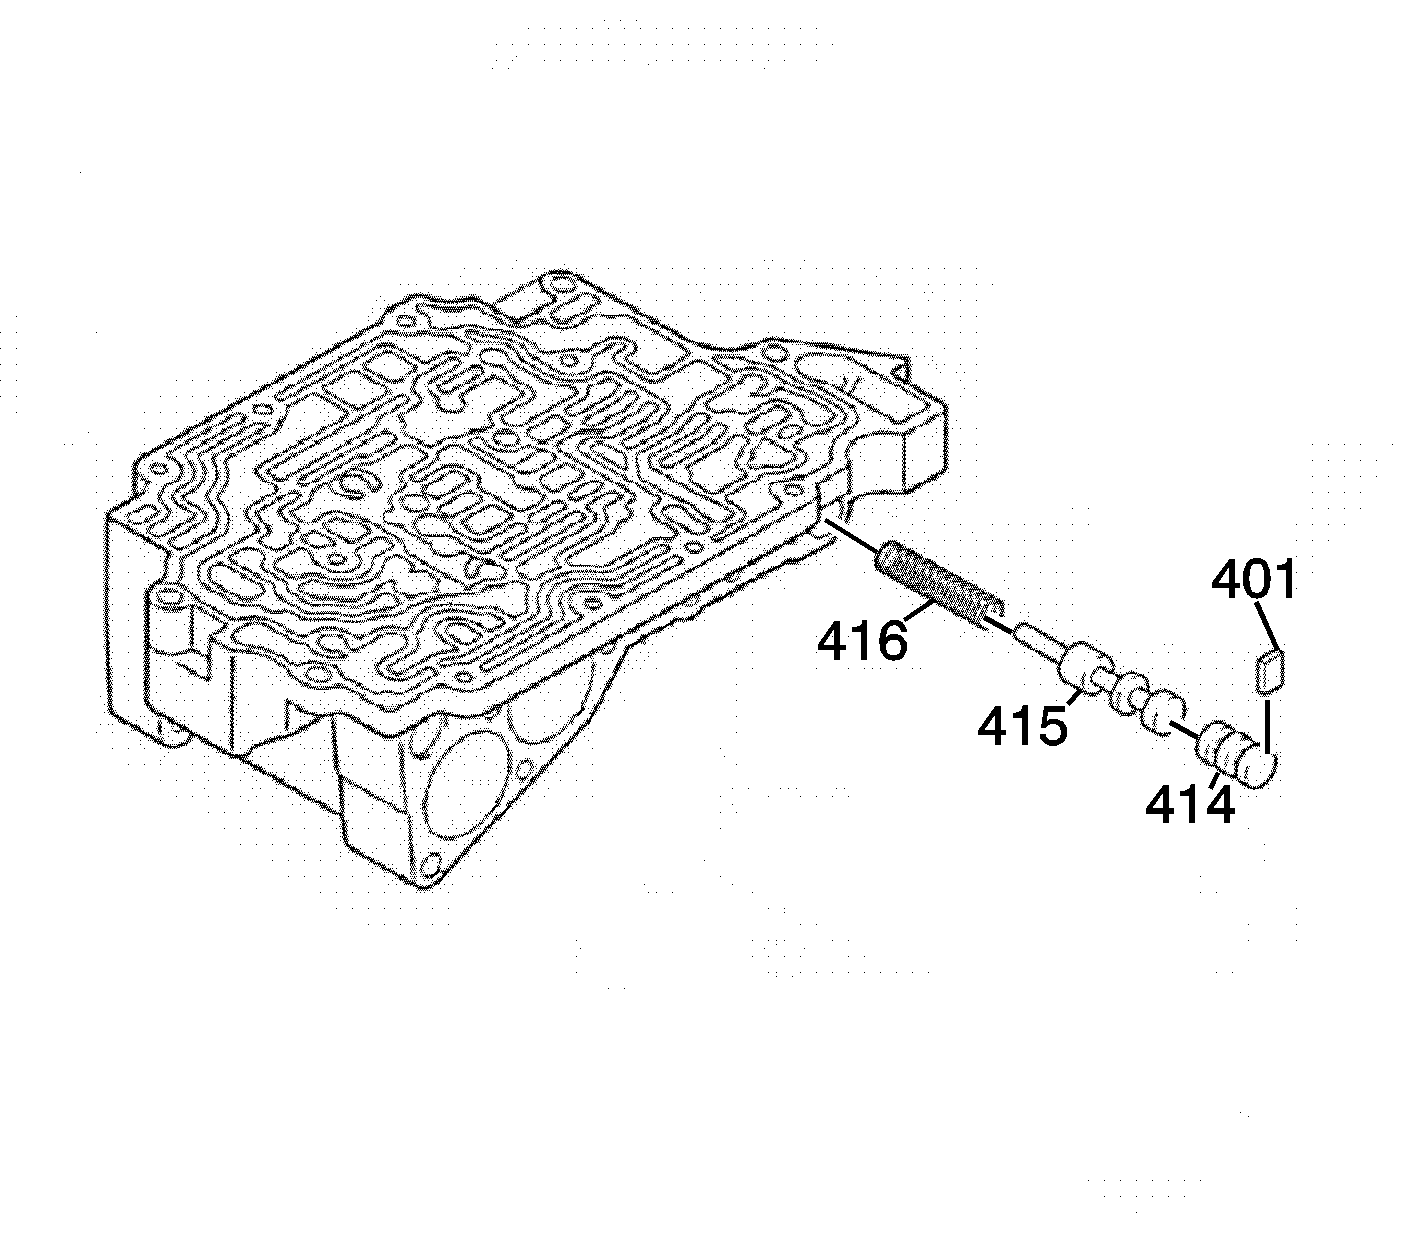
- Install the secondary regulator valve spring (416) and the secondary regulator valve (415).
- Install the solenoid modulator valve bore plug (414) and the sleeve/bore plug retainer (401).
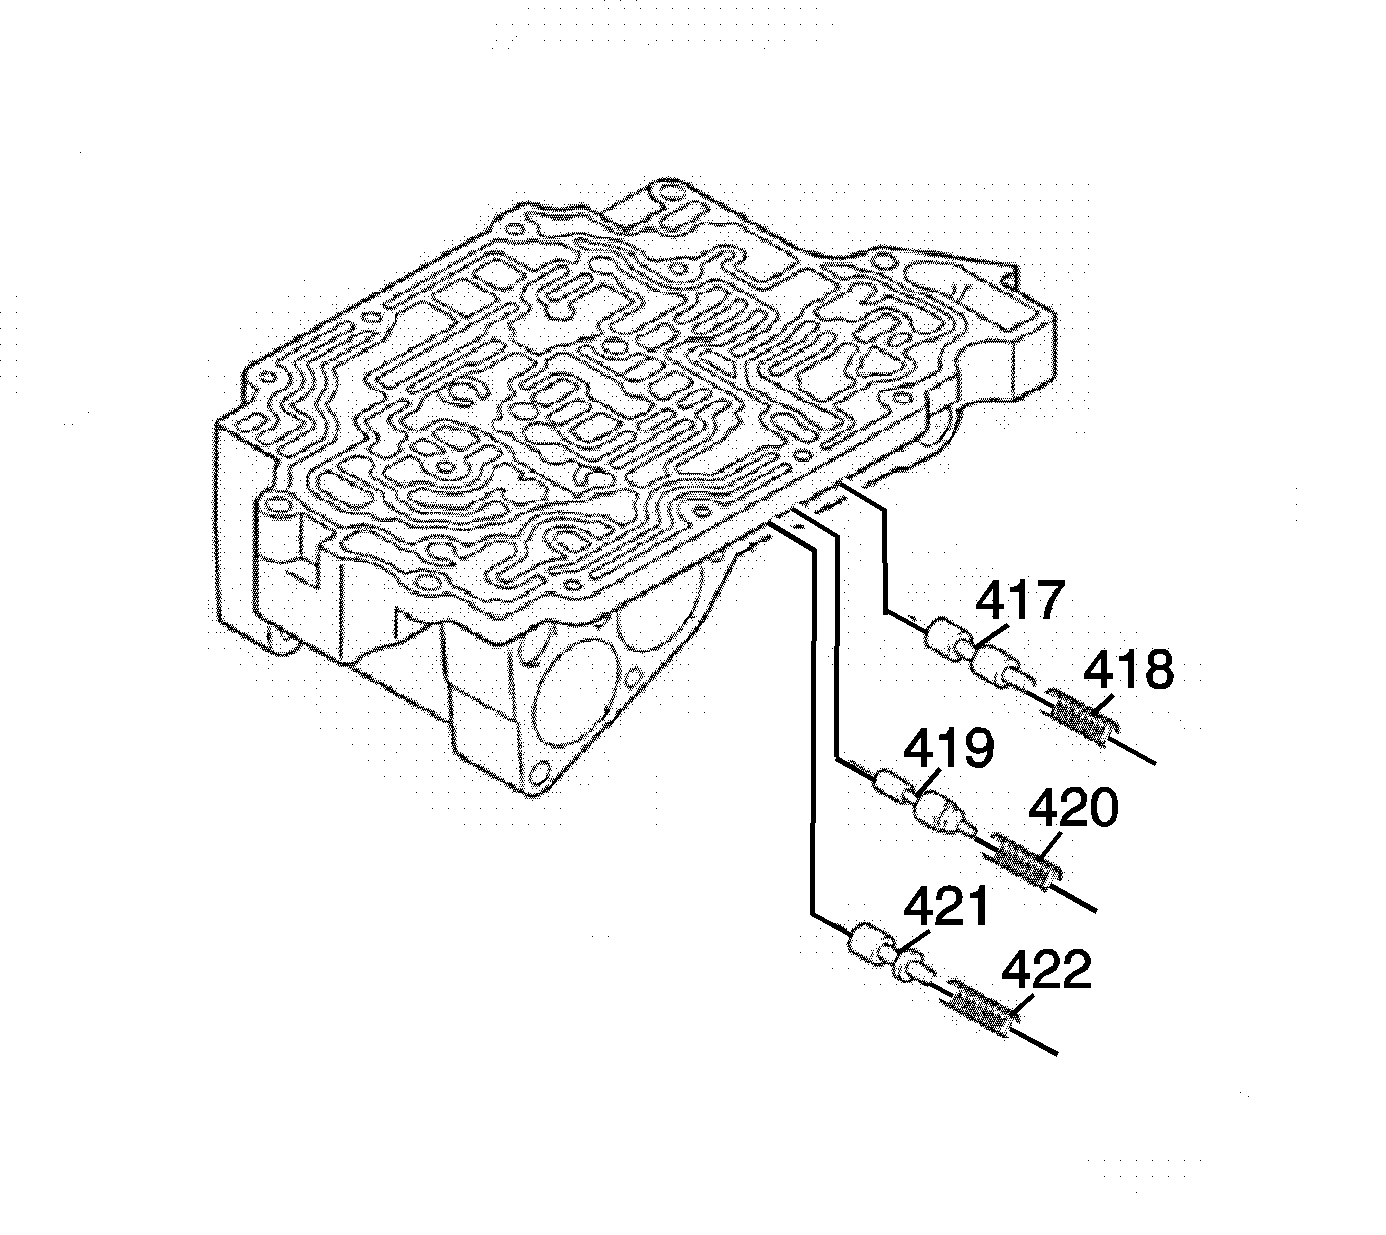
- Install the B-1 modulator control valve (417) and the B-1 modulator control valve spring (418).
- Install the low modulator valve (419) and the low modulator valve spring (420).
- Install the solenoid modulator valve (421) and the solenoid modulator valve spring (422).
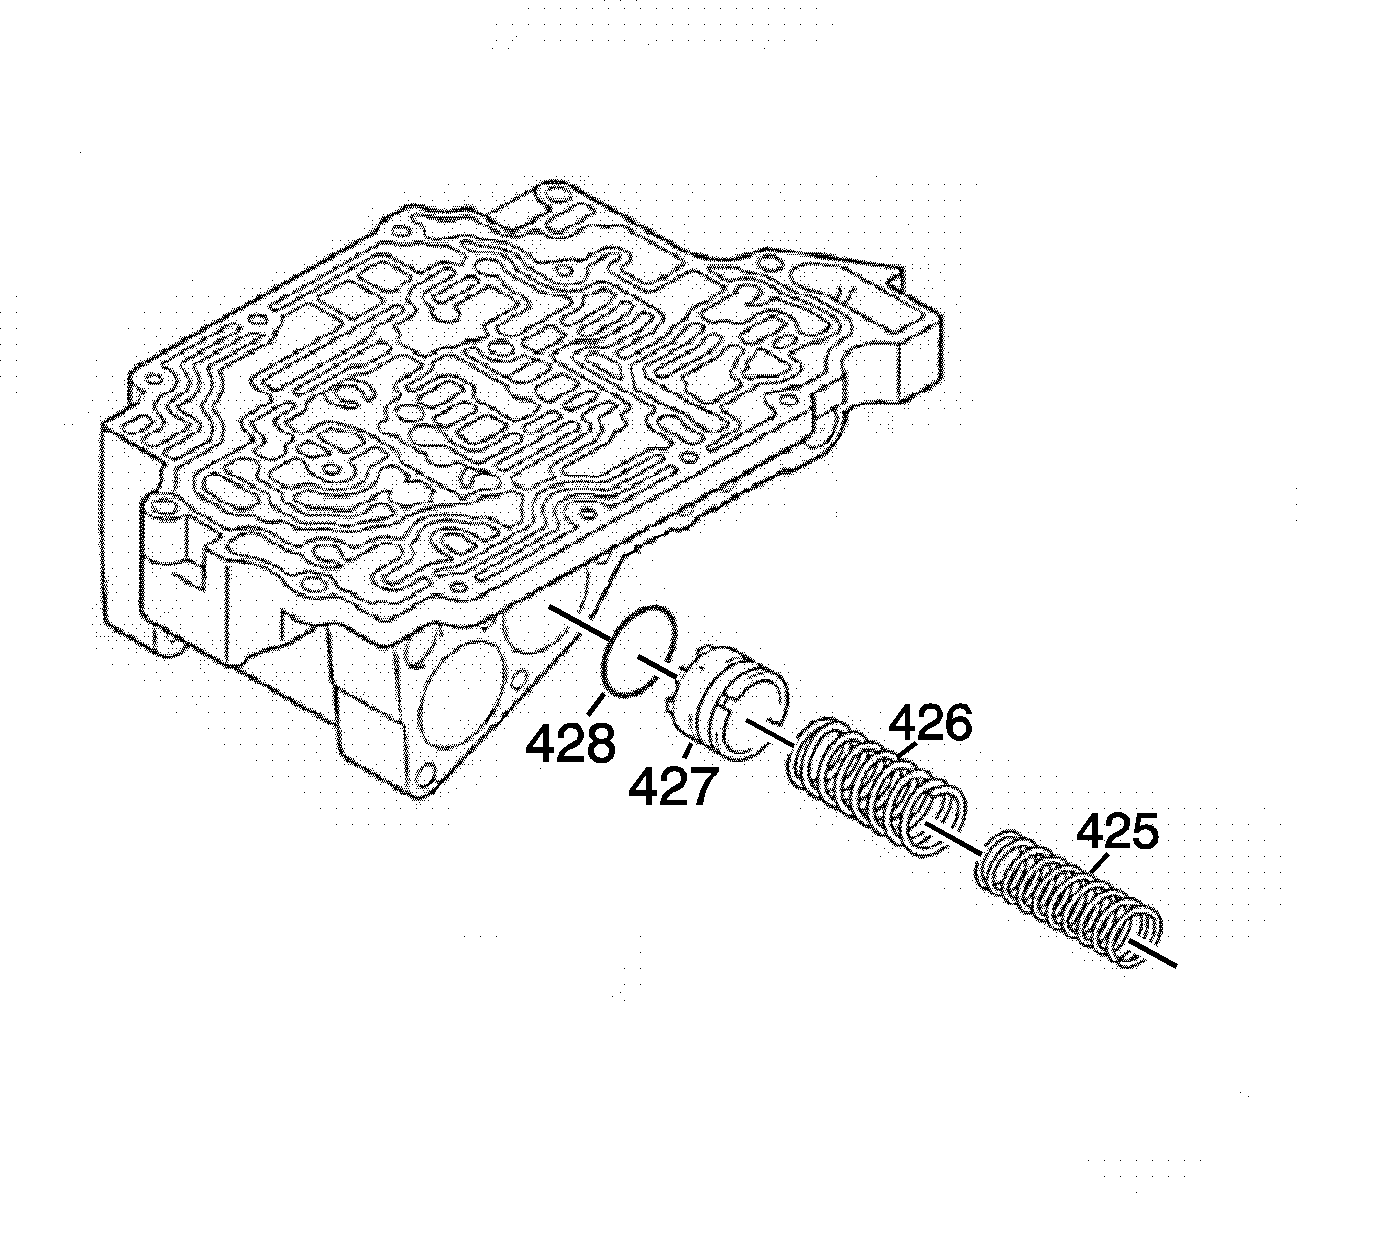
- Install the C-2 accumulator O-ring seal (428) and the C-2 accumulator piston (427).
- Install the C-2 accumulator outer spring (426) and the C-2 accumulator inner spring (425).
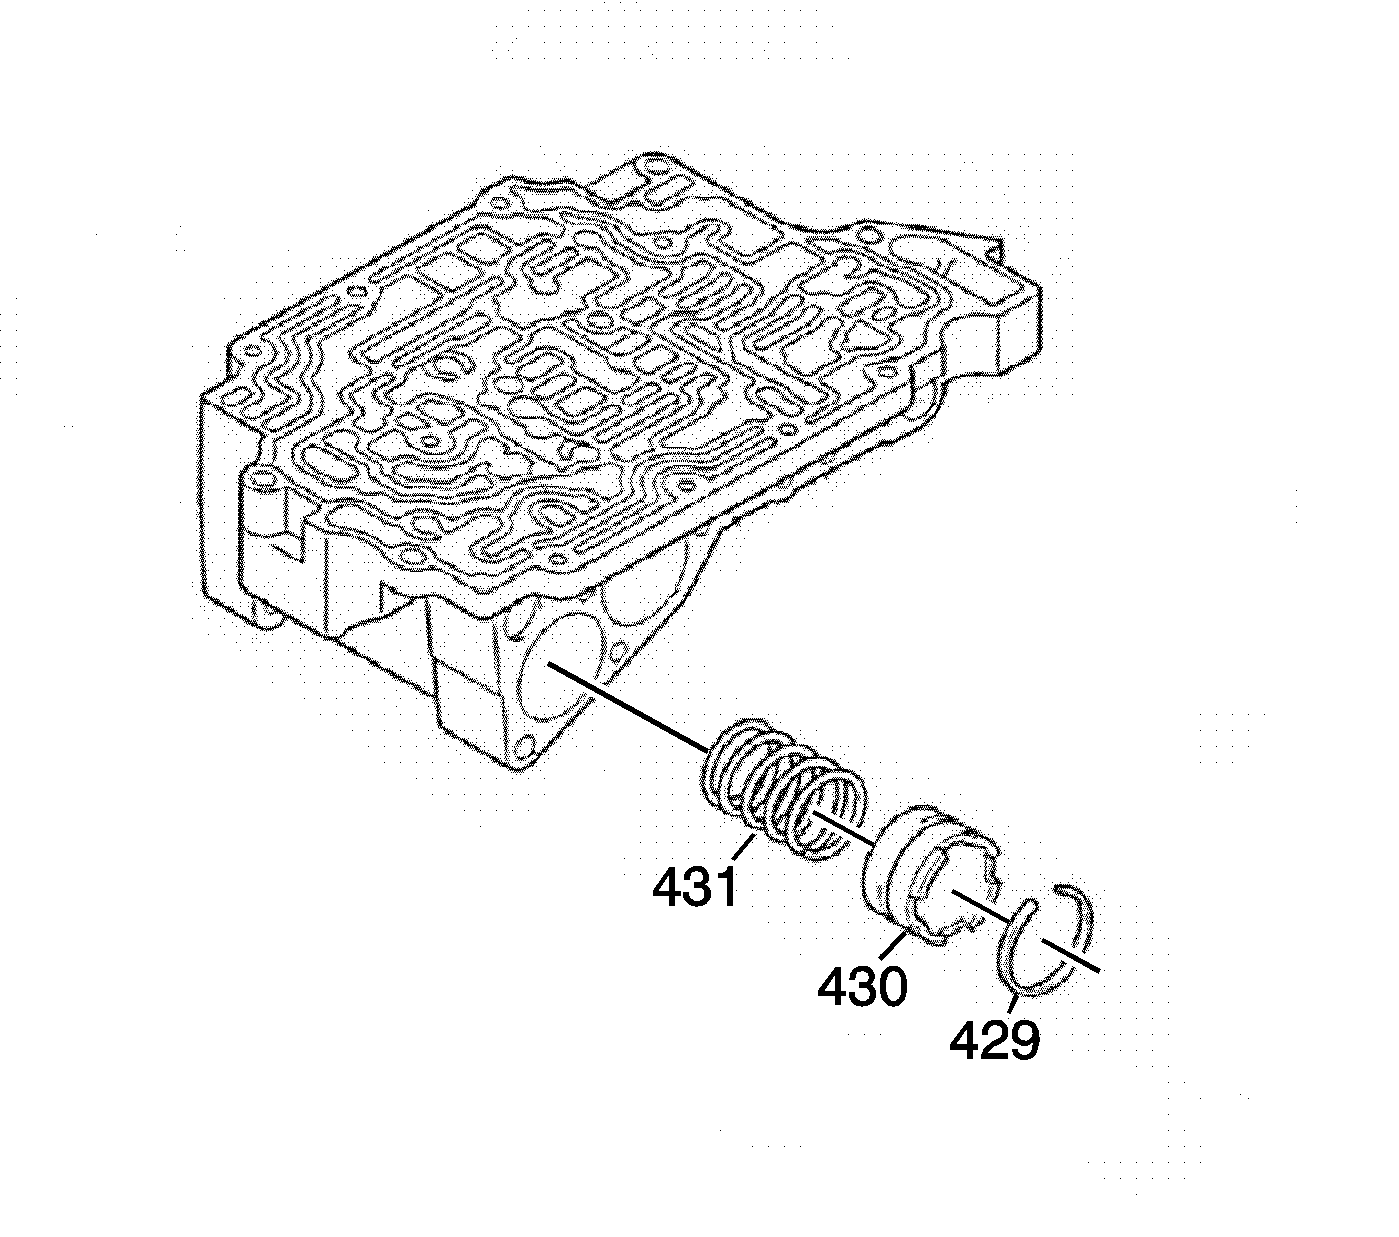
- Install the B-1 accumulator spring (431) and the B-1 accumulator piston (430).
- Install the B-1 accumulator split seal ring (429).
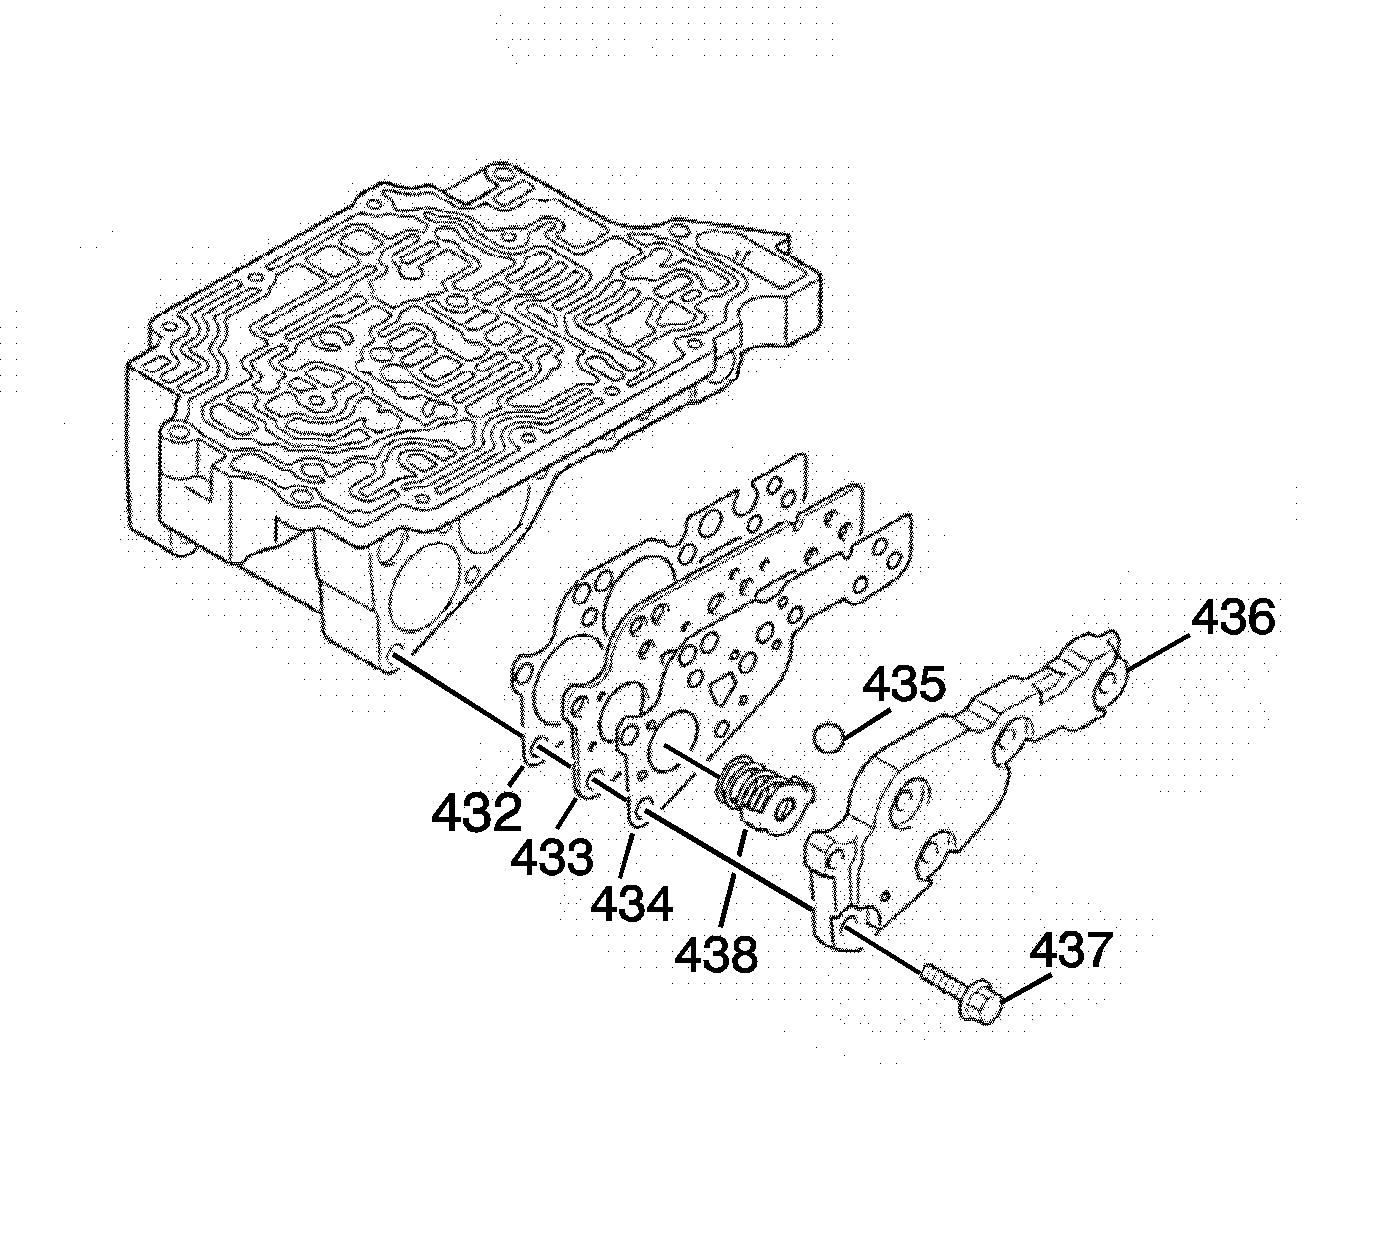
- Install the rear valve body cover No.1 gasket (432), plate (433) and plate gasket (434).
- Install the rear valve body cover No.1 check ball (435) and the B-1 accumulator counter spring (438).
- Install the rear valve body cover No.1 (436).
- Install the rear valve body cover No.1 bolts (437).
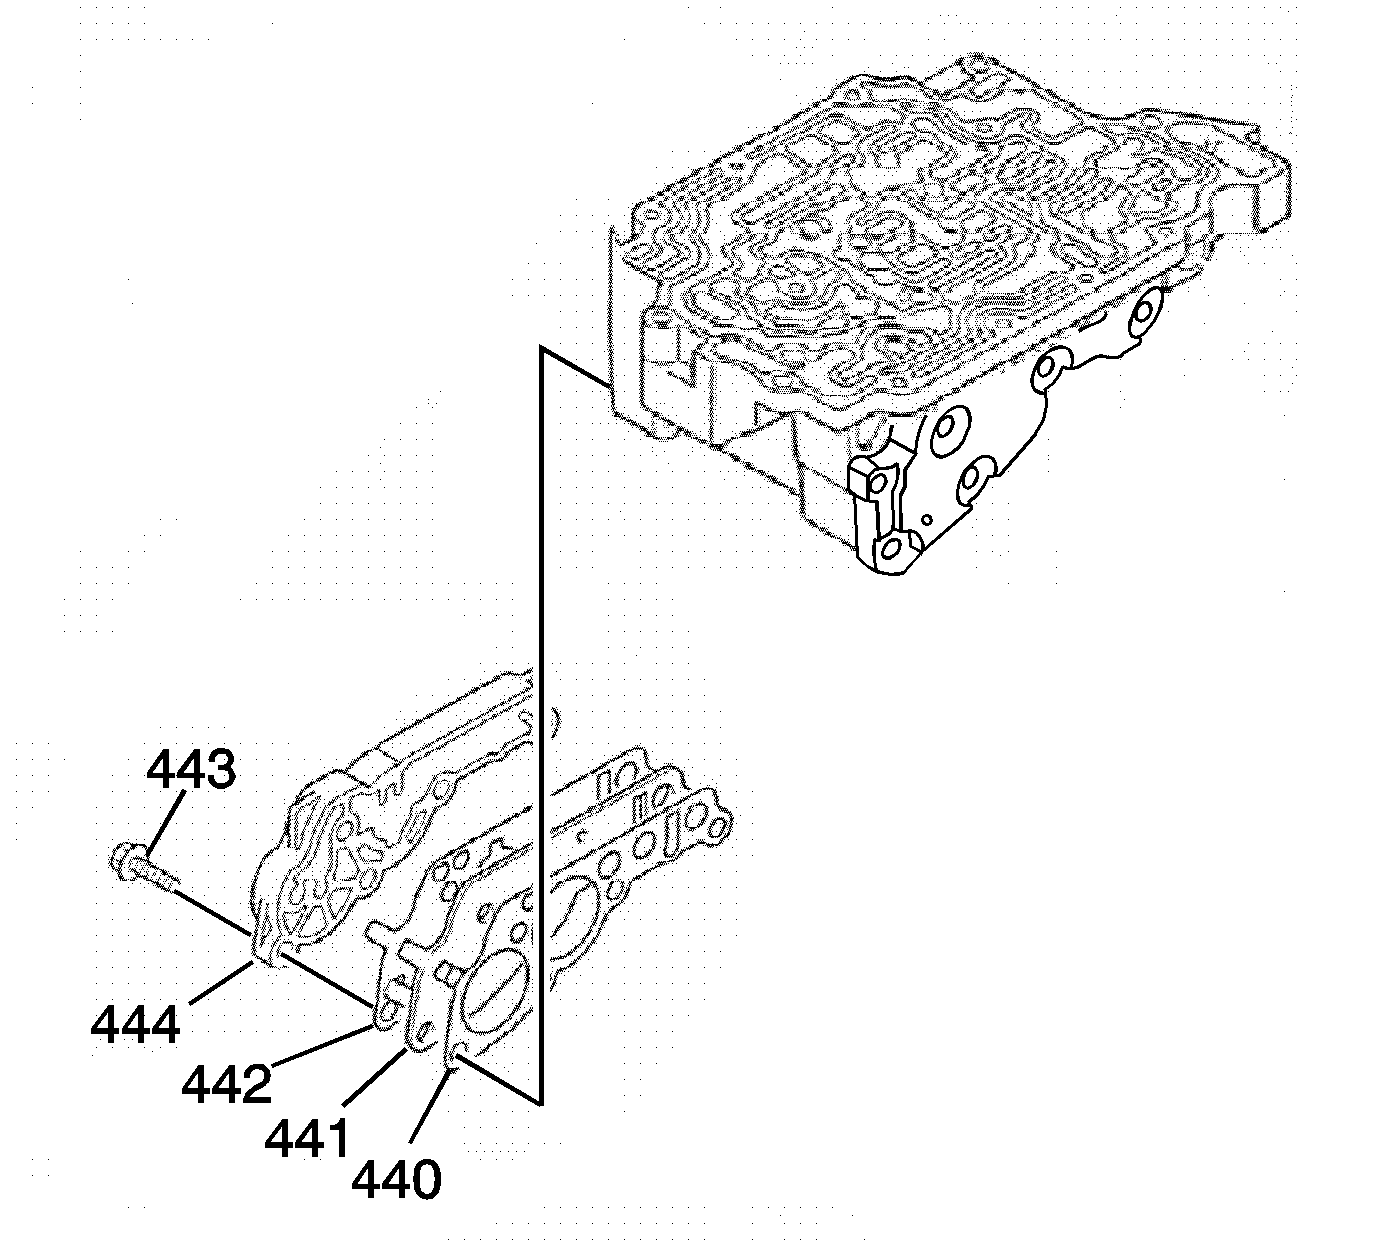
- Install the rear valve body cover No.2 gasket (440), plate (441) and plate gasket (442).
- Install the rear valve body cover No.2 (444).
- Install the rear valve body cover No.2 bolts (443).
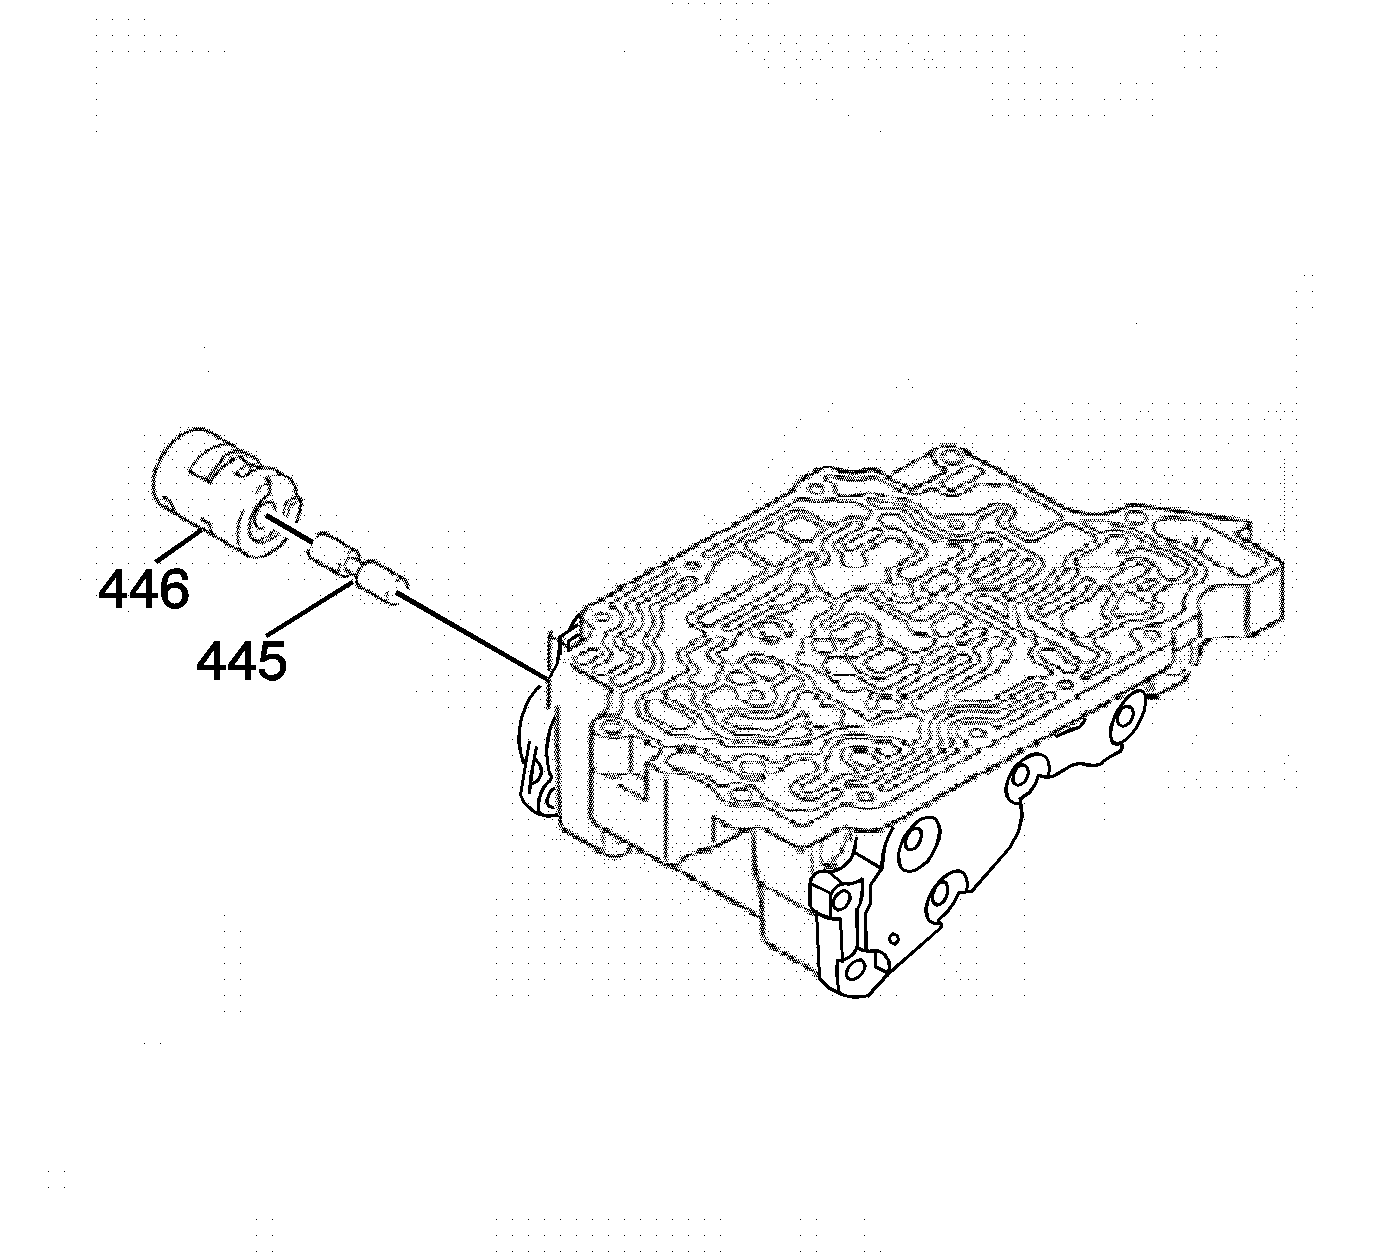
- Install the C-1 control valve (445).
- Install the C-1 control valve sleeve (446).
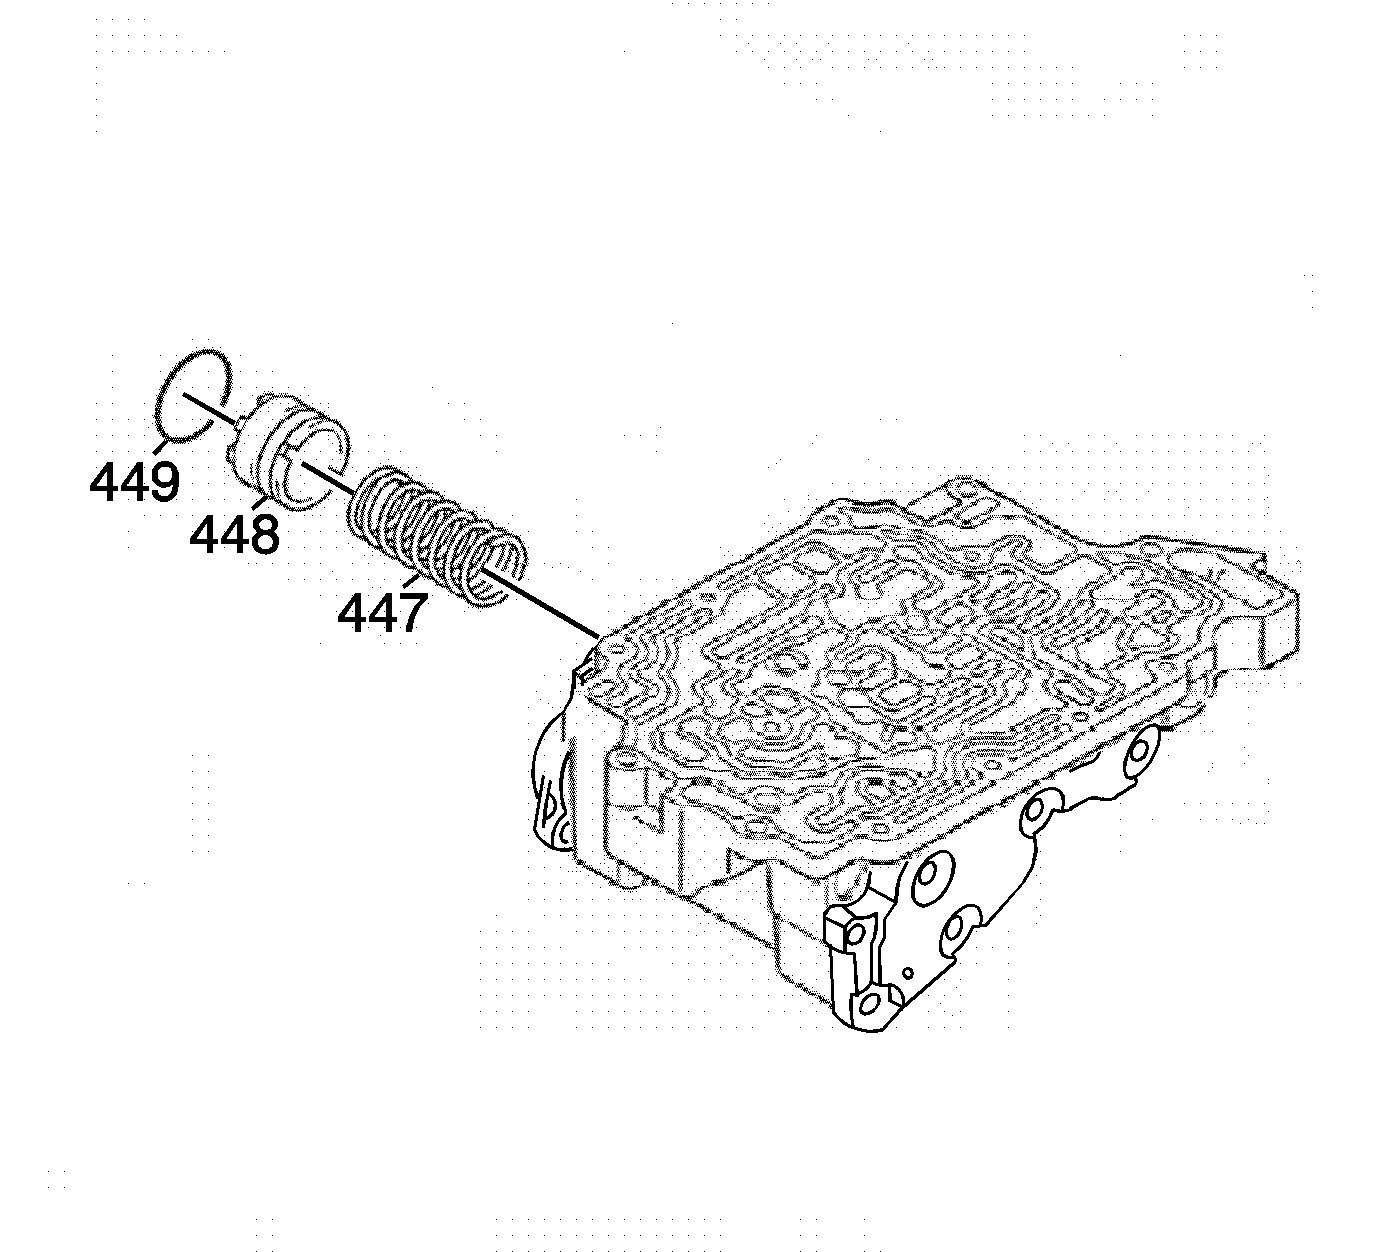
- Install the C-0 accumulator spring (447).
- Install the C-0 accumulator piston (448).
- Install the C-0 accumulator O-ring seal (449).
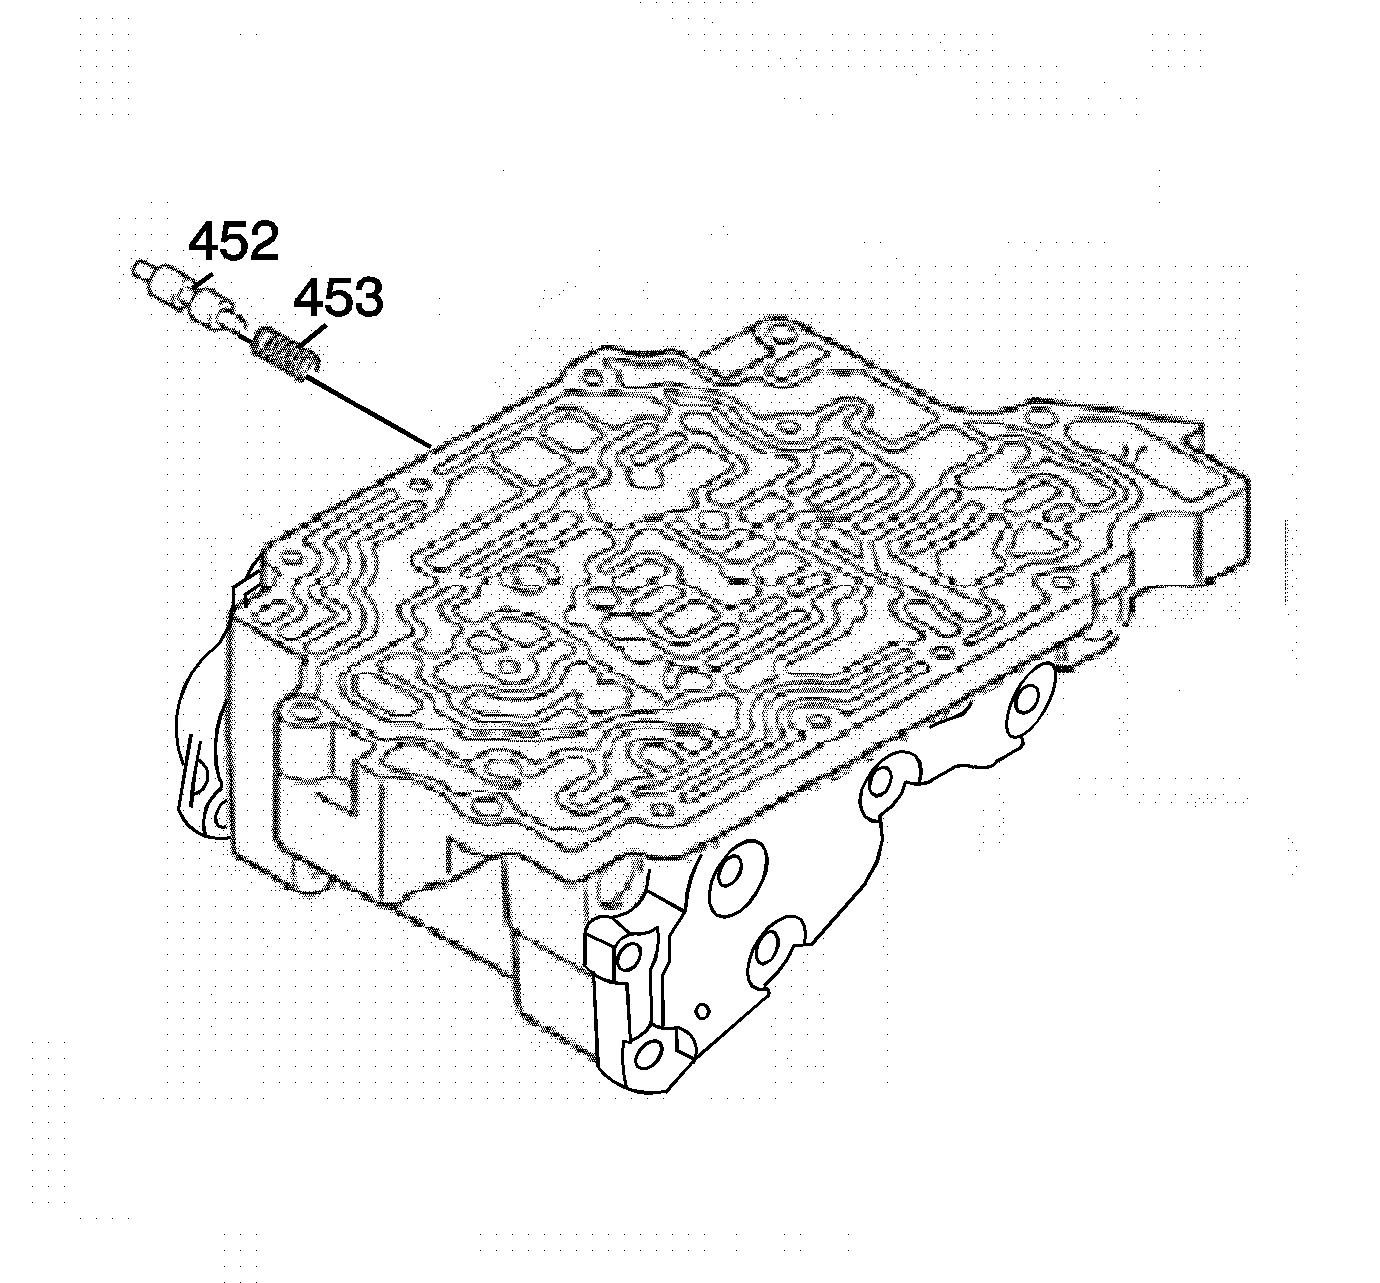
- Install the 2-3 timing valve spring (453).
- Install the 2-3 timing valve (452).
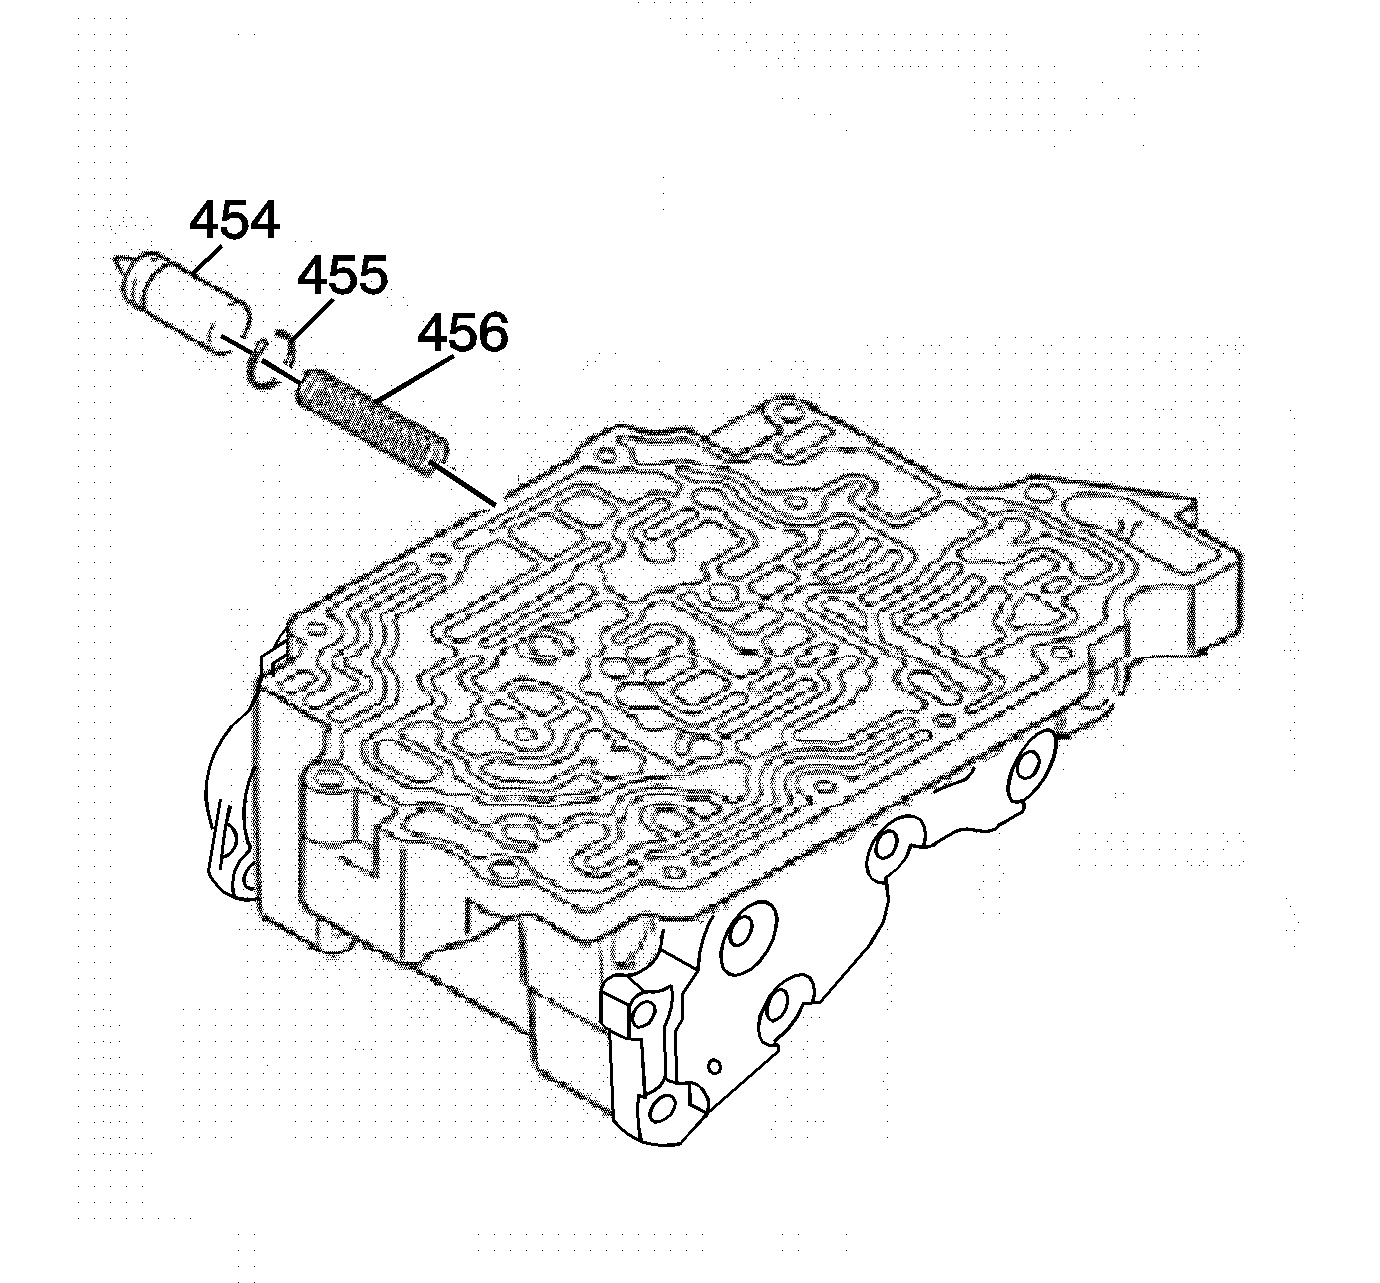
- Install the C-1 damper spring (456).
- Install the C-1 damper piston split seal ring (455).
- Install the C-1 damper piston (454).
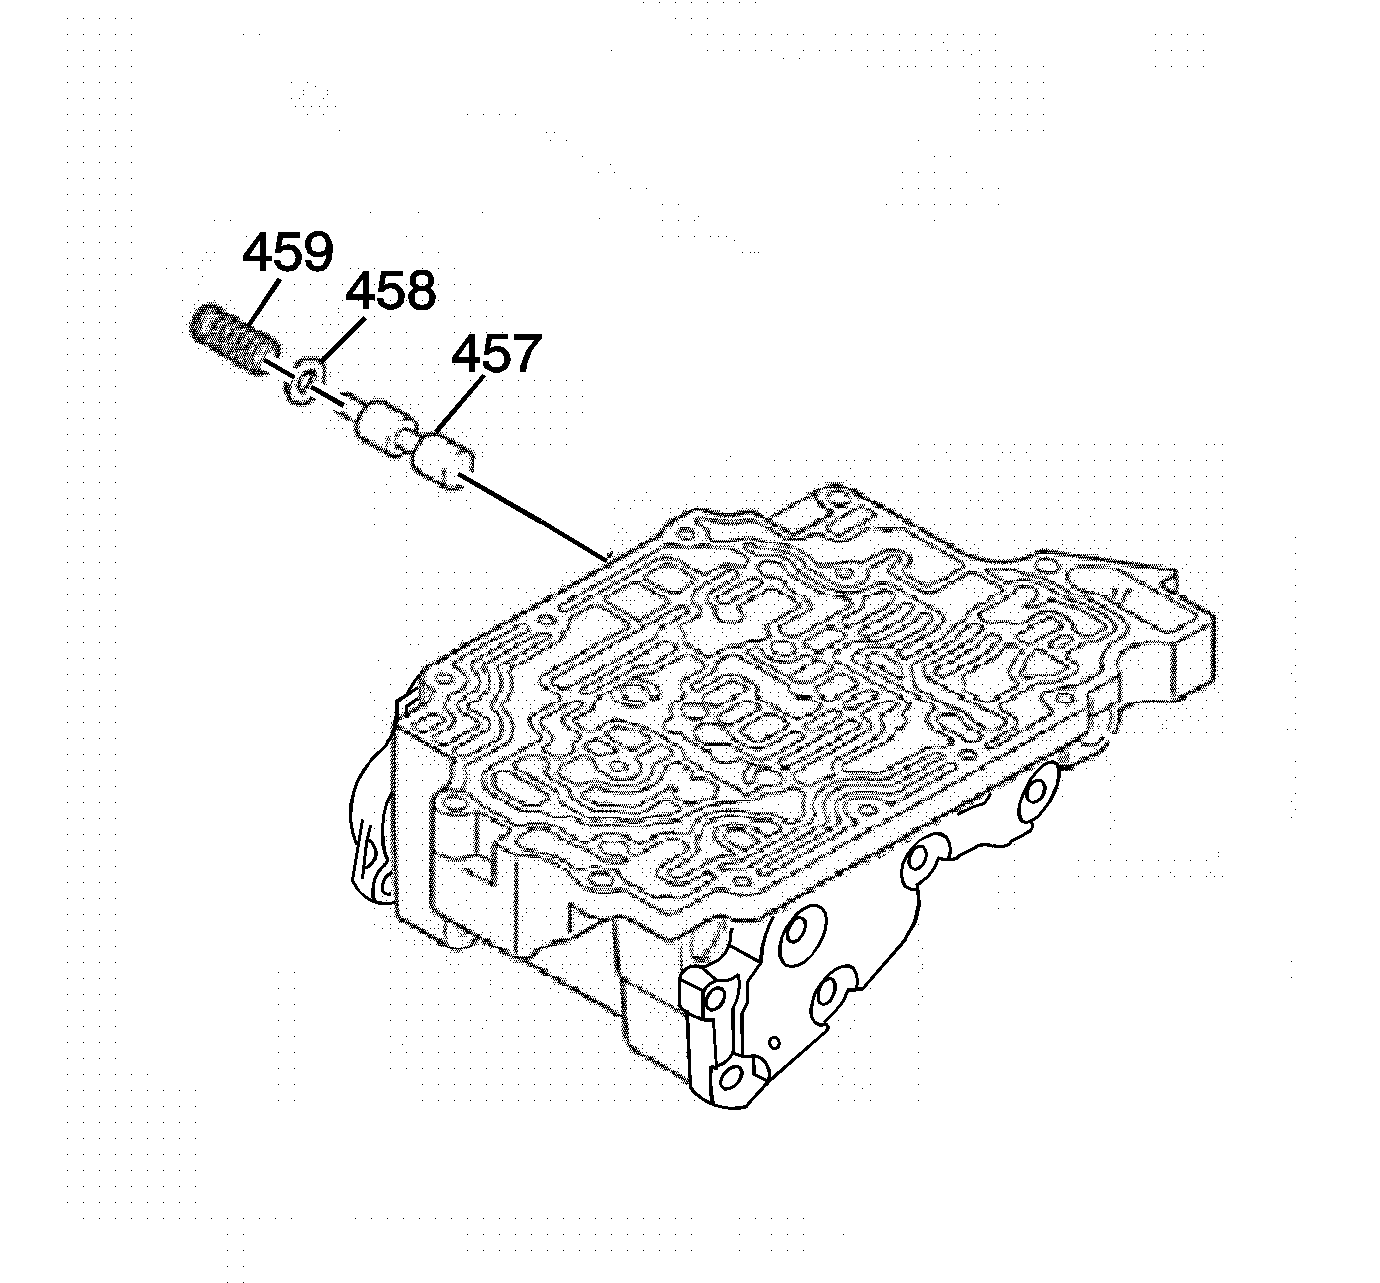
- Install the C-3 modulator valve (457).
- Install the C-3 modulator valve spring seat (458) and the C-3 modulator valve spring (459).
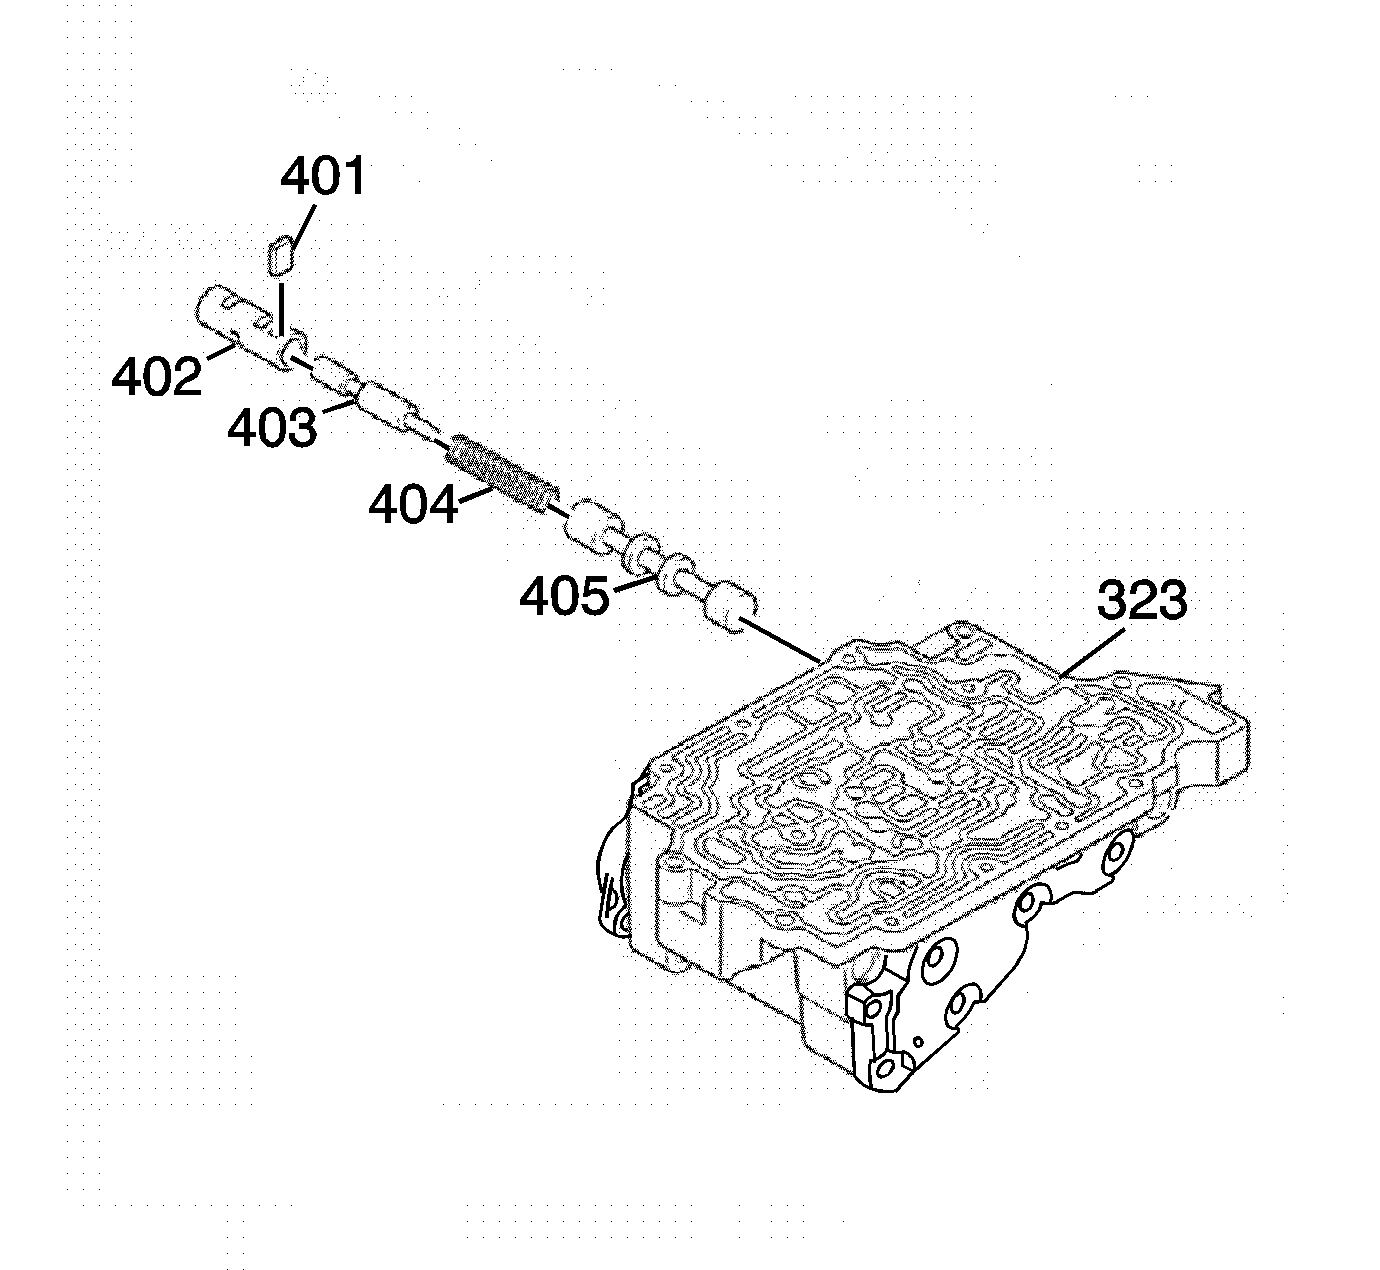
- Install the lock up relay control valve (405).
- Install the lock up relay control valve spring (404) and the lock up relay control valve plunger (403).
- Install the lockup relay control valve sleeve (402) and the sleeve/bore plug retainer (401).


