Removal Procedure
- Remove the transmission shifter opening trim. Refer to
Front Floor Console Transmission Shift Opening Trim Plate Replacement.
- Remove the front ashtray. Refer to
Front Floor Console Front Ashtray Replacement.

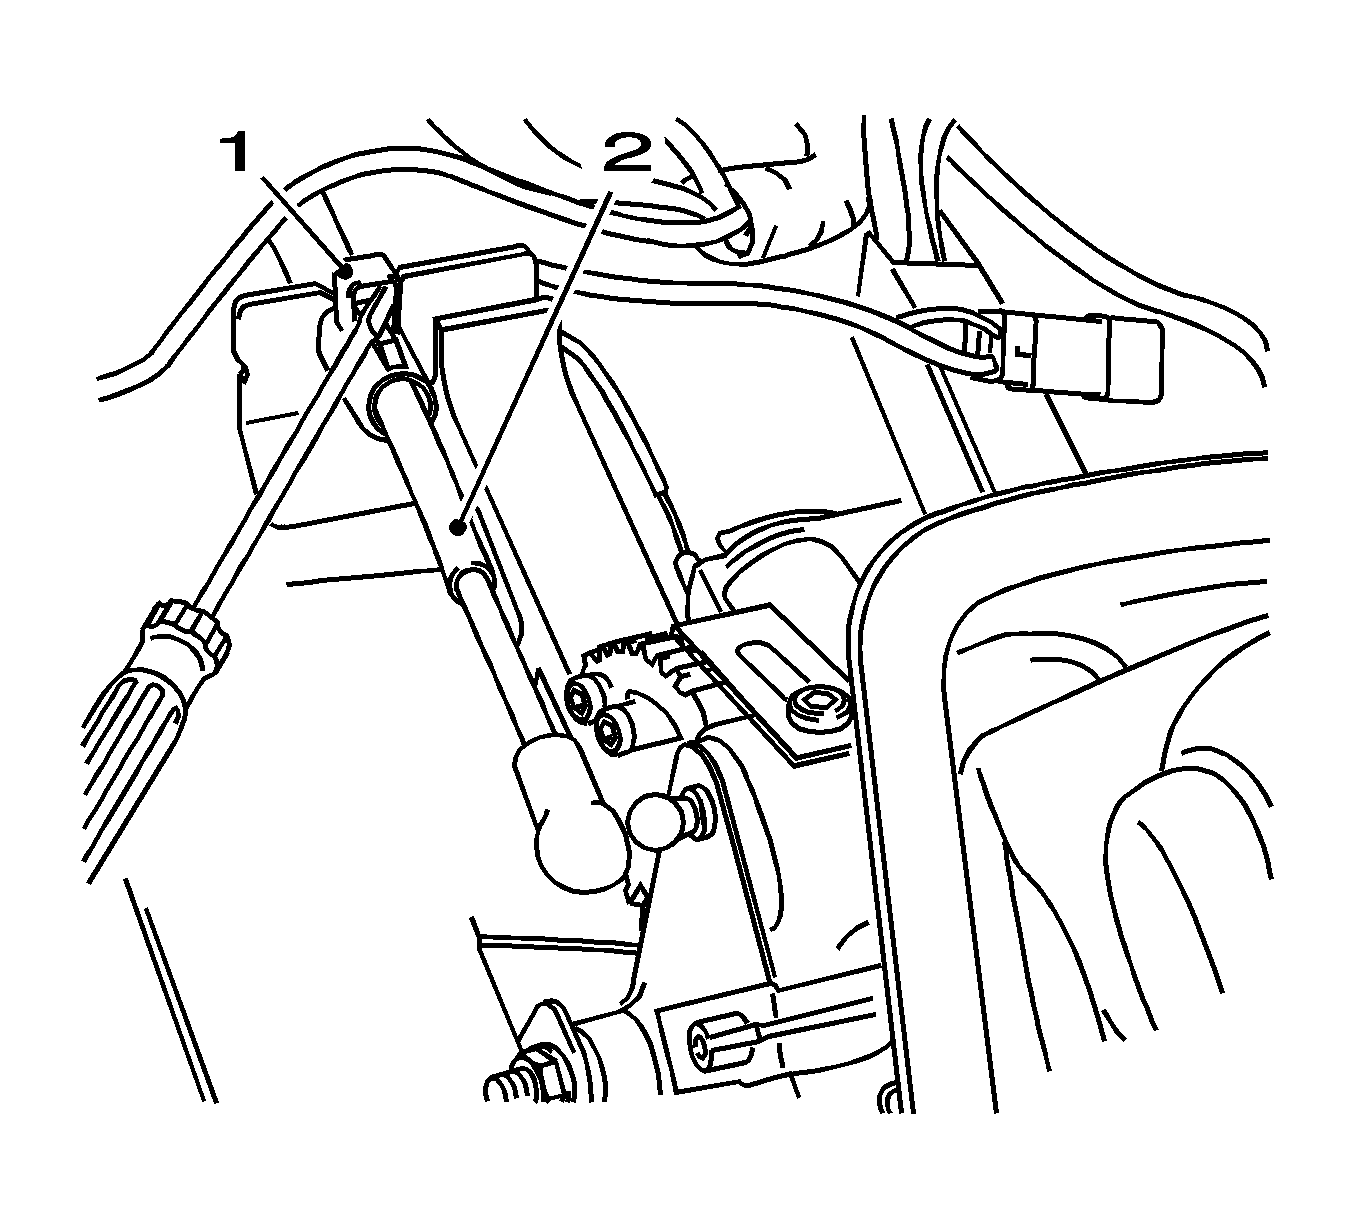
- Remove the range selector cable (2) from the range selector lever.
| • | Remove the retaining clamp (1). |
| • | Disconnect the selector lever cable from the bracket. |
Warning: Refer to Battery Disconnect Warning in the Preface section.

- Remove the battery.
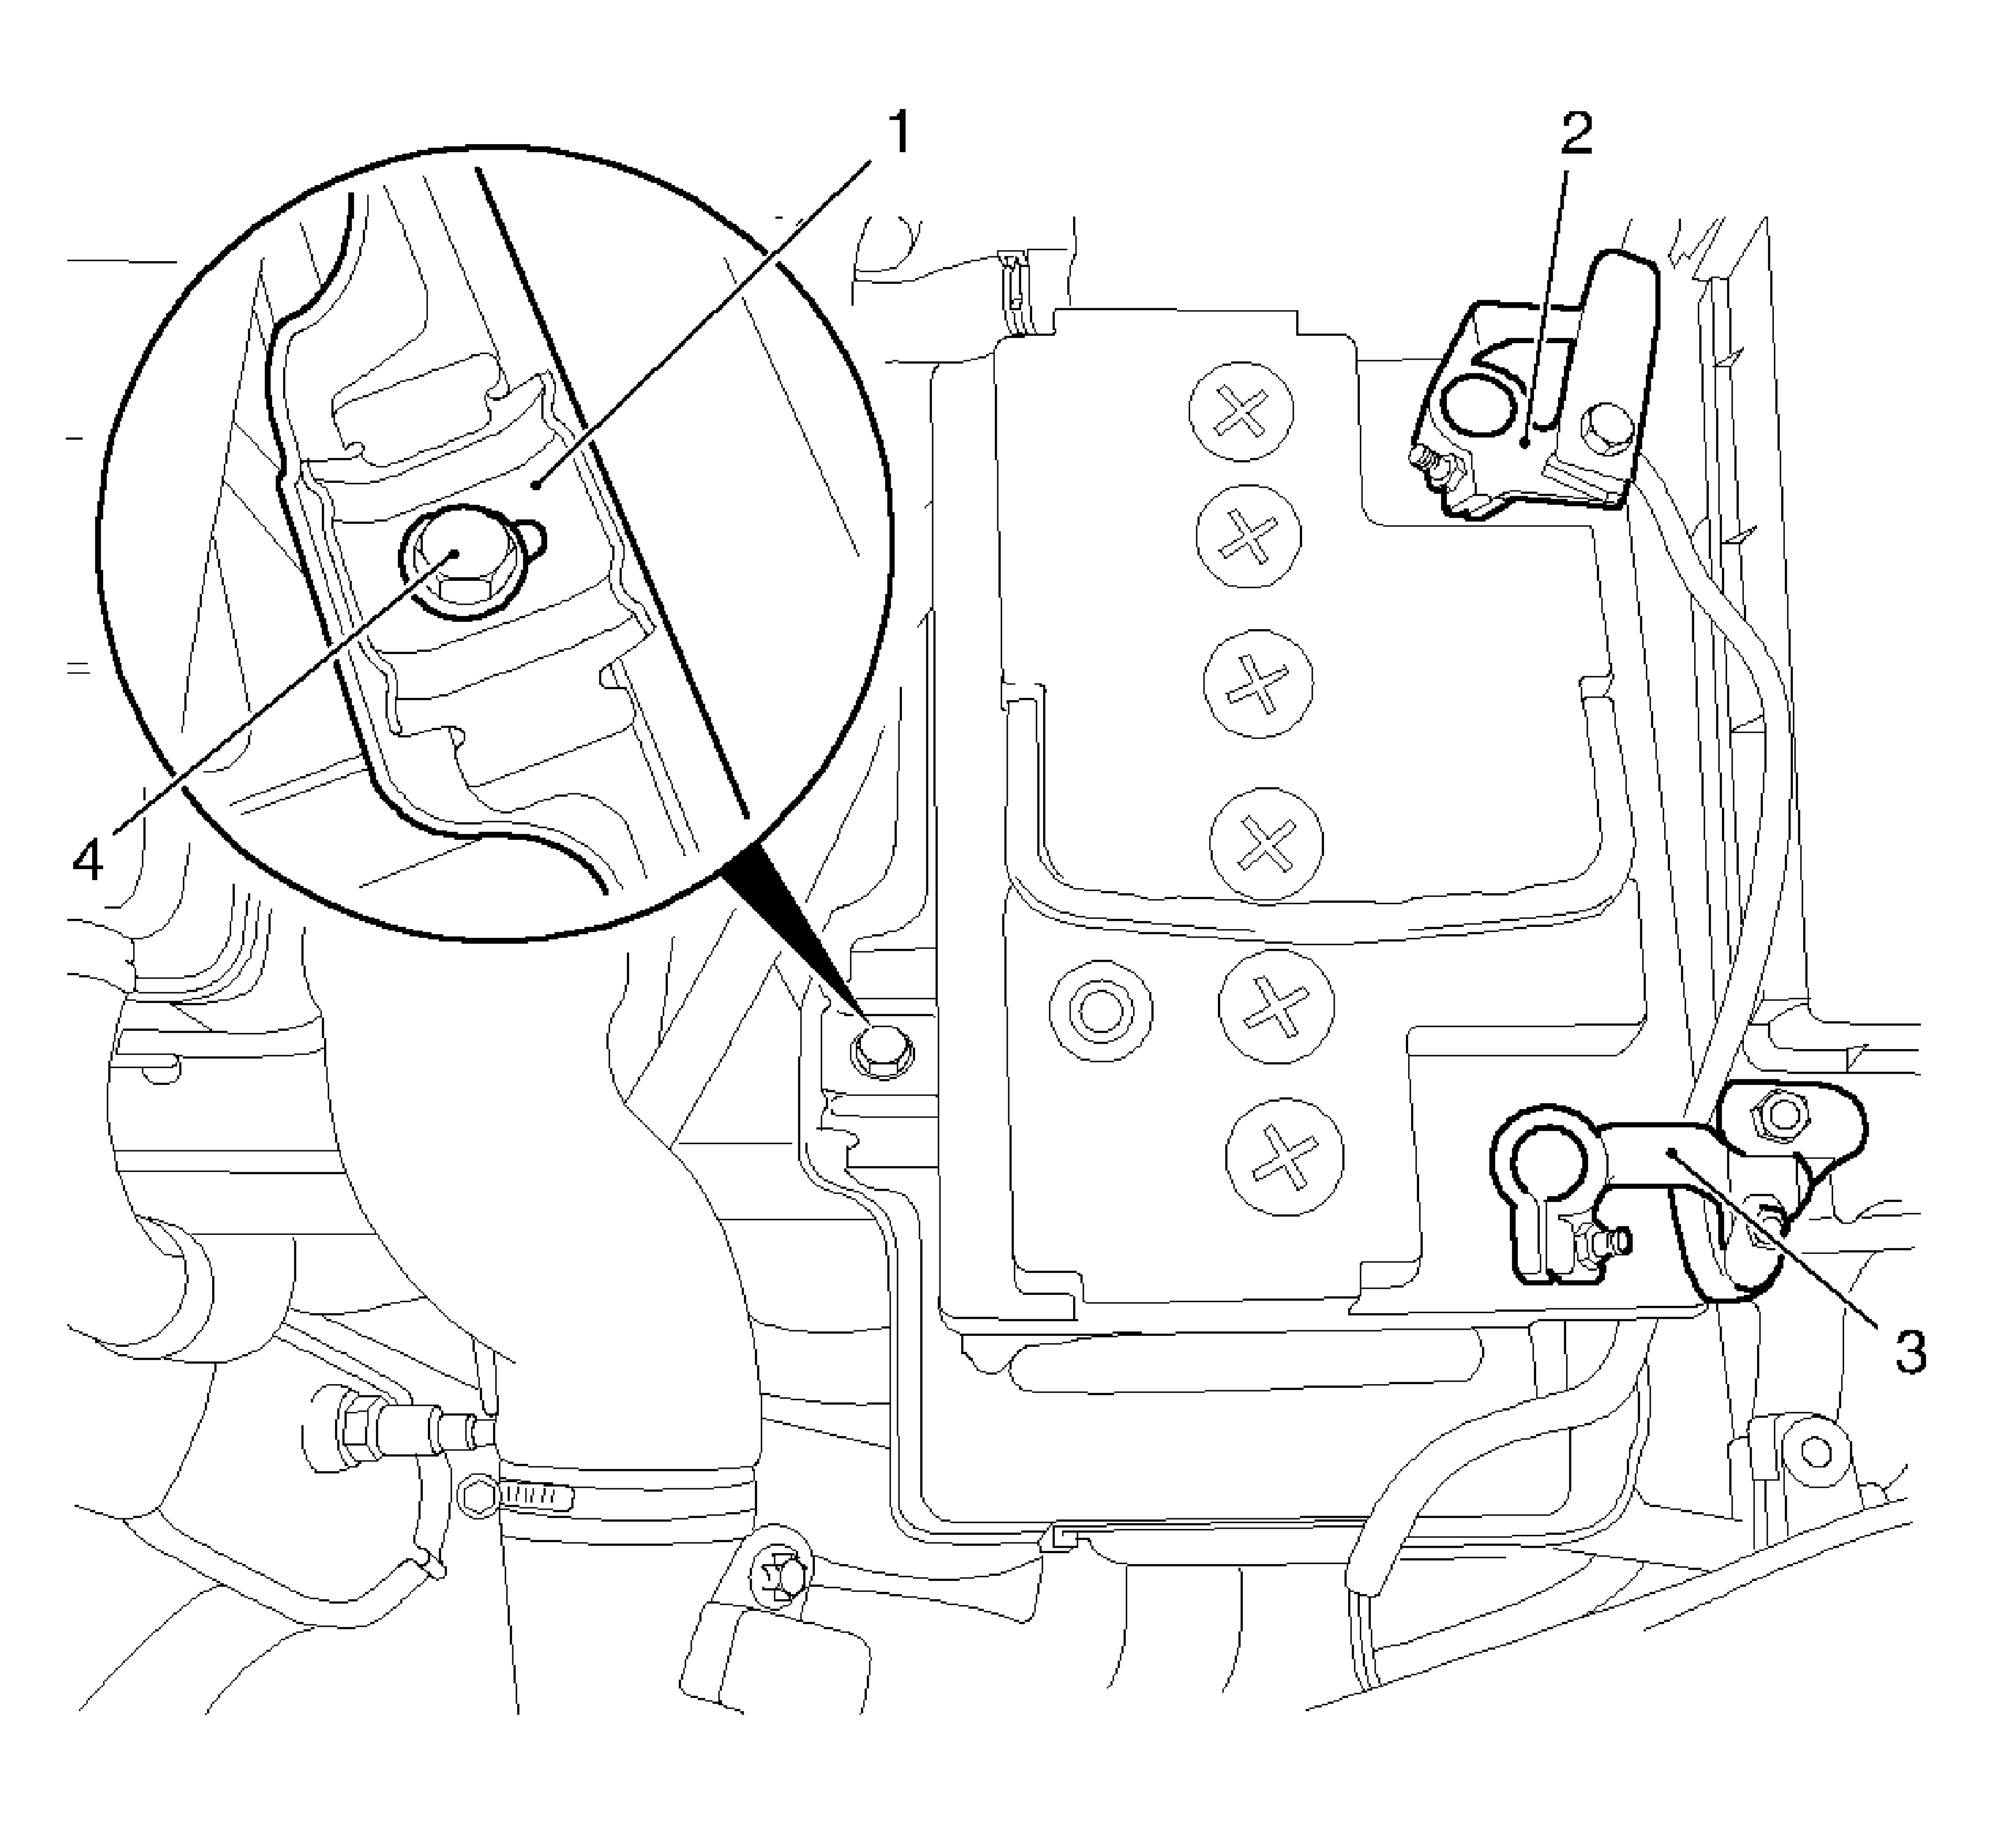
| • | Disconnect the negative cable (2) from the battery. |
| • | Disconnect the positive cable (3) from the battery. |
| • | Remove the bracket (1). |

- Remove the battery tray.
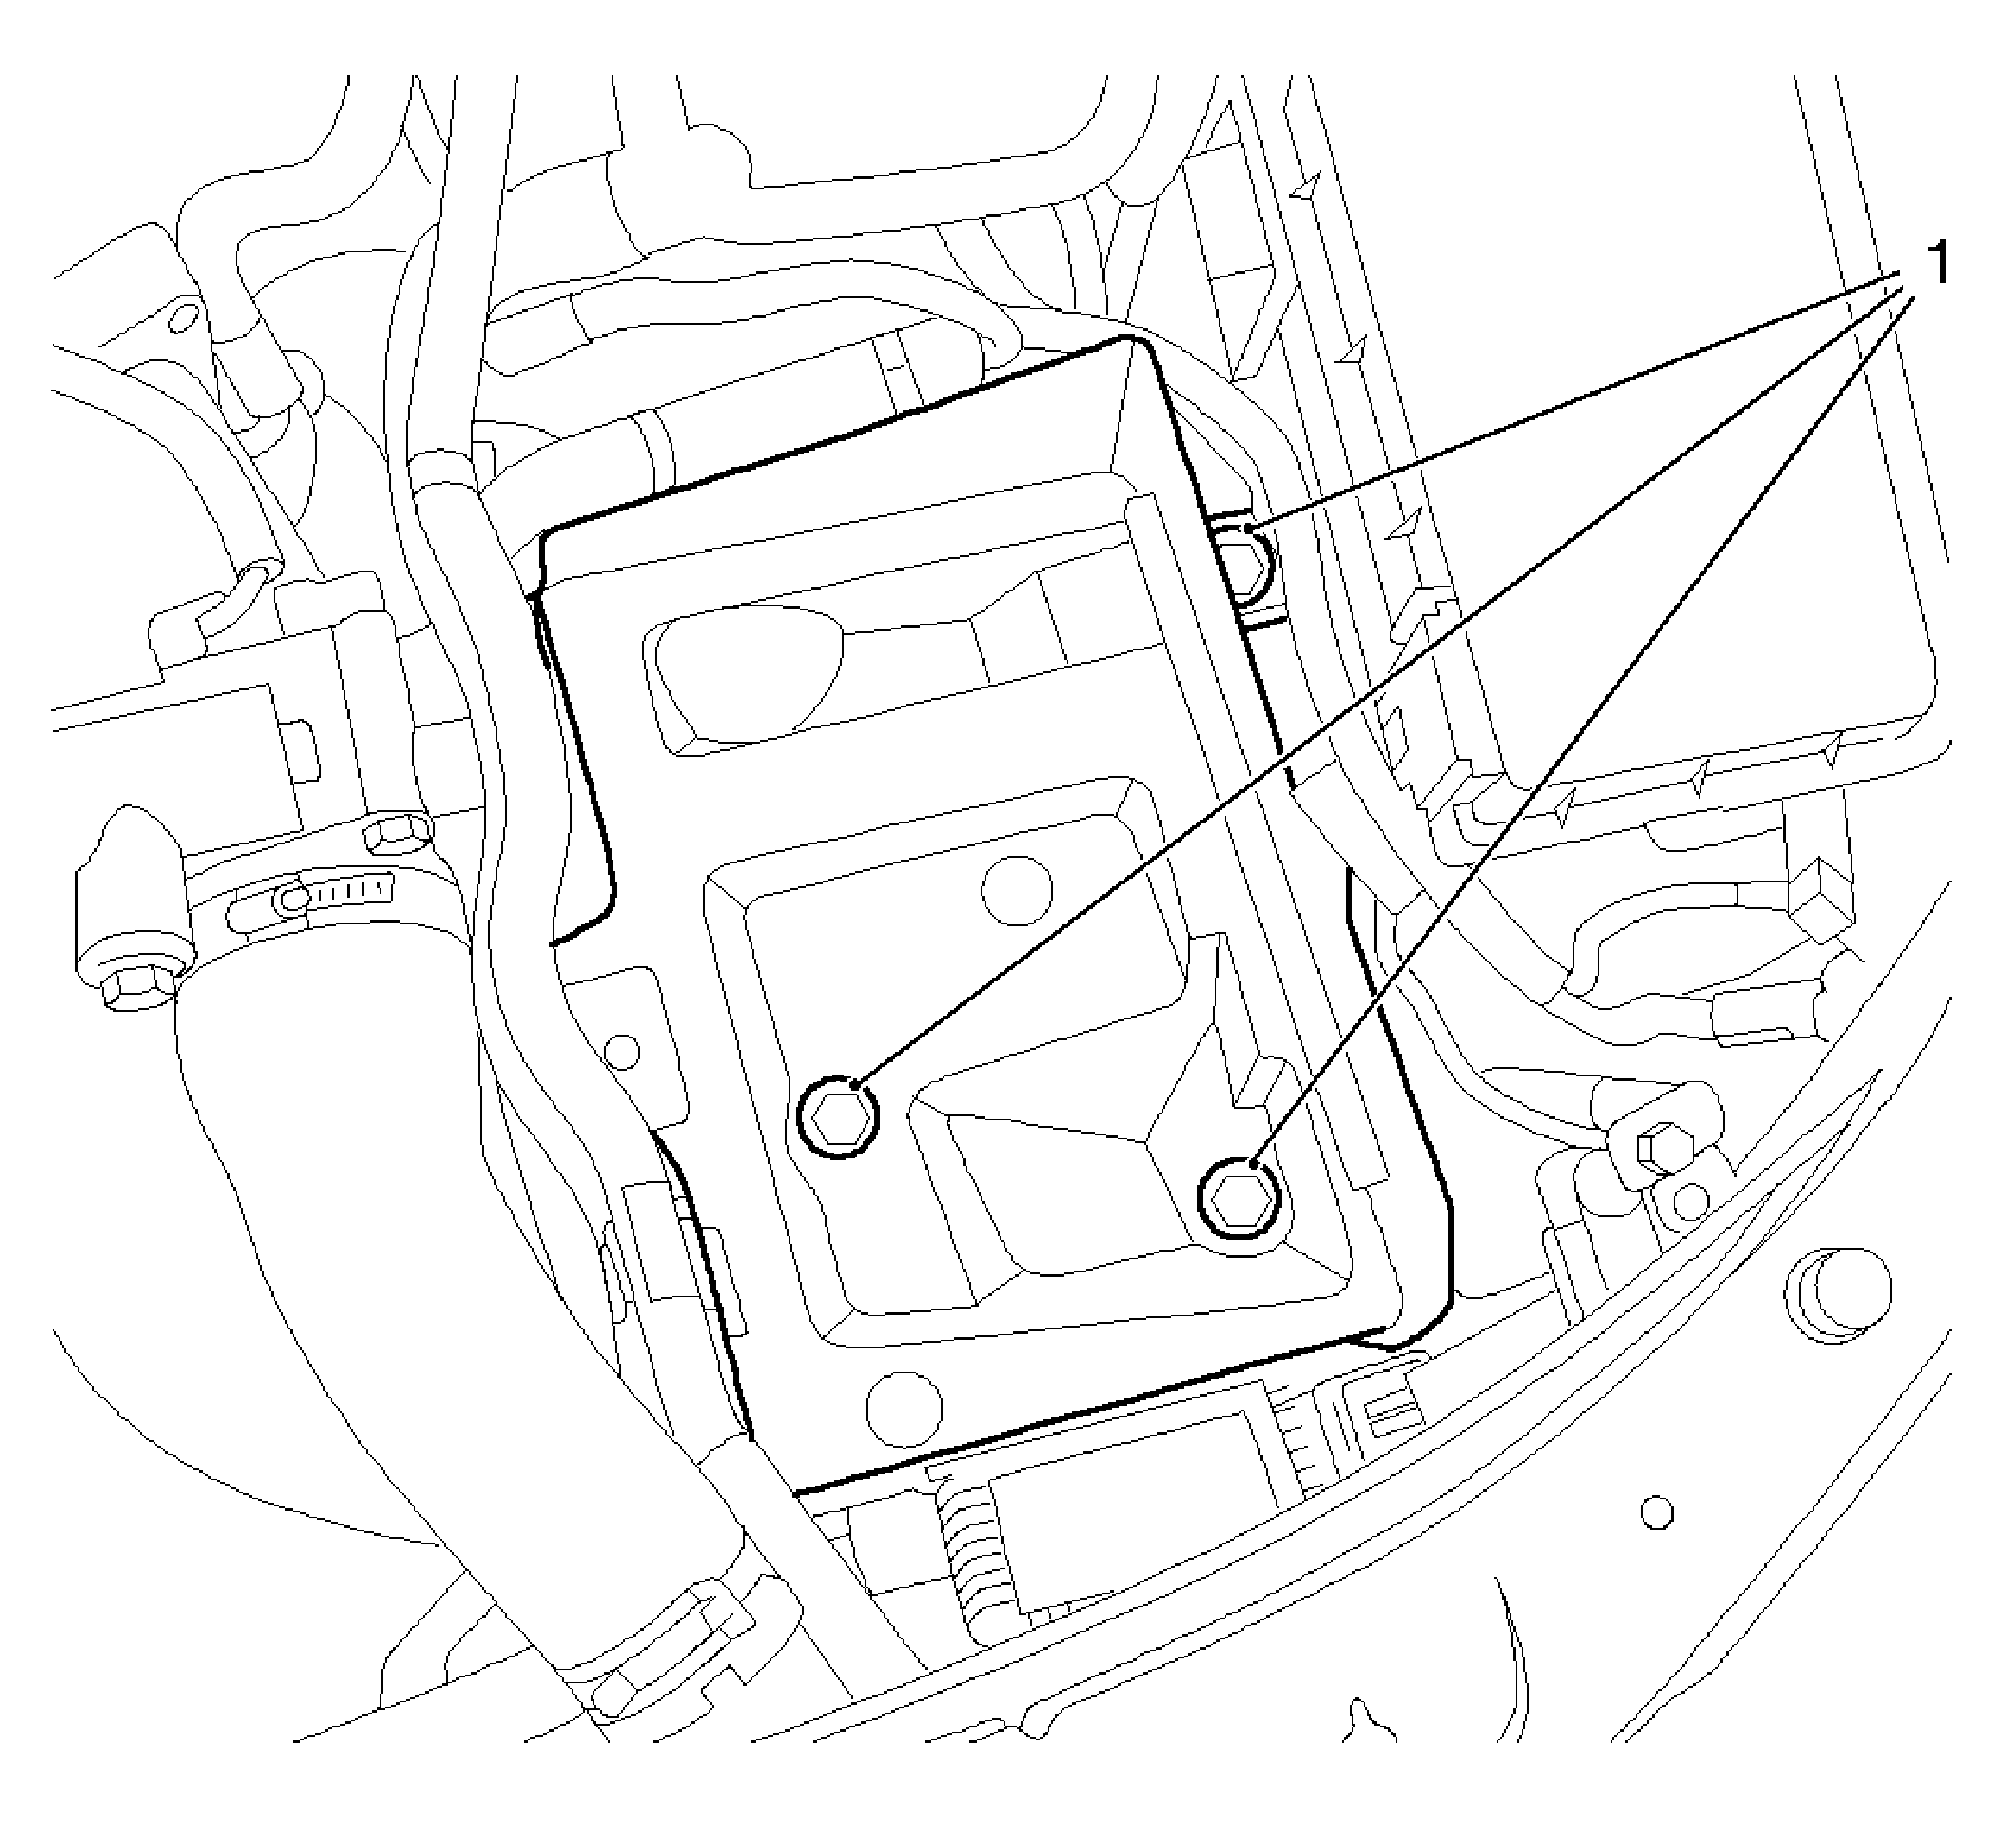
| • | Remove the 3 bolts (1). |

- Remove the range selector cable from the transmission.
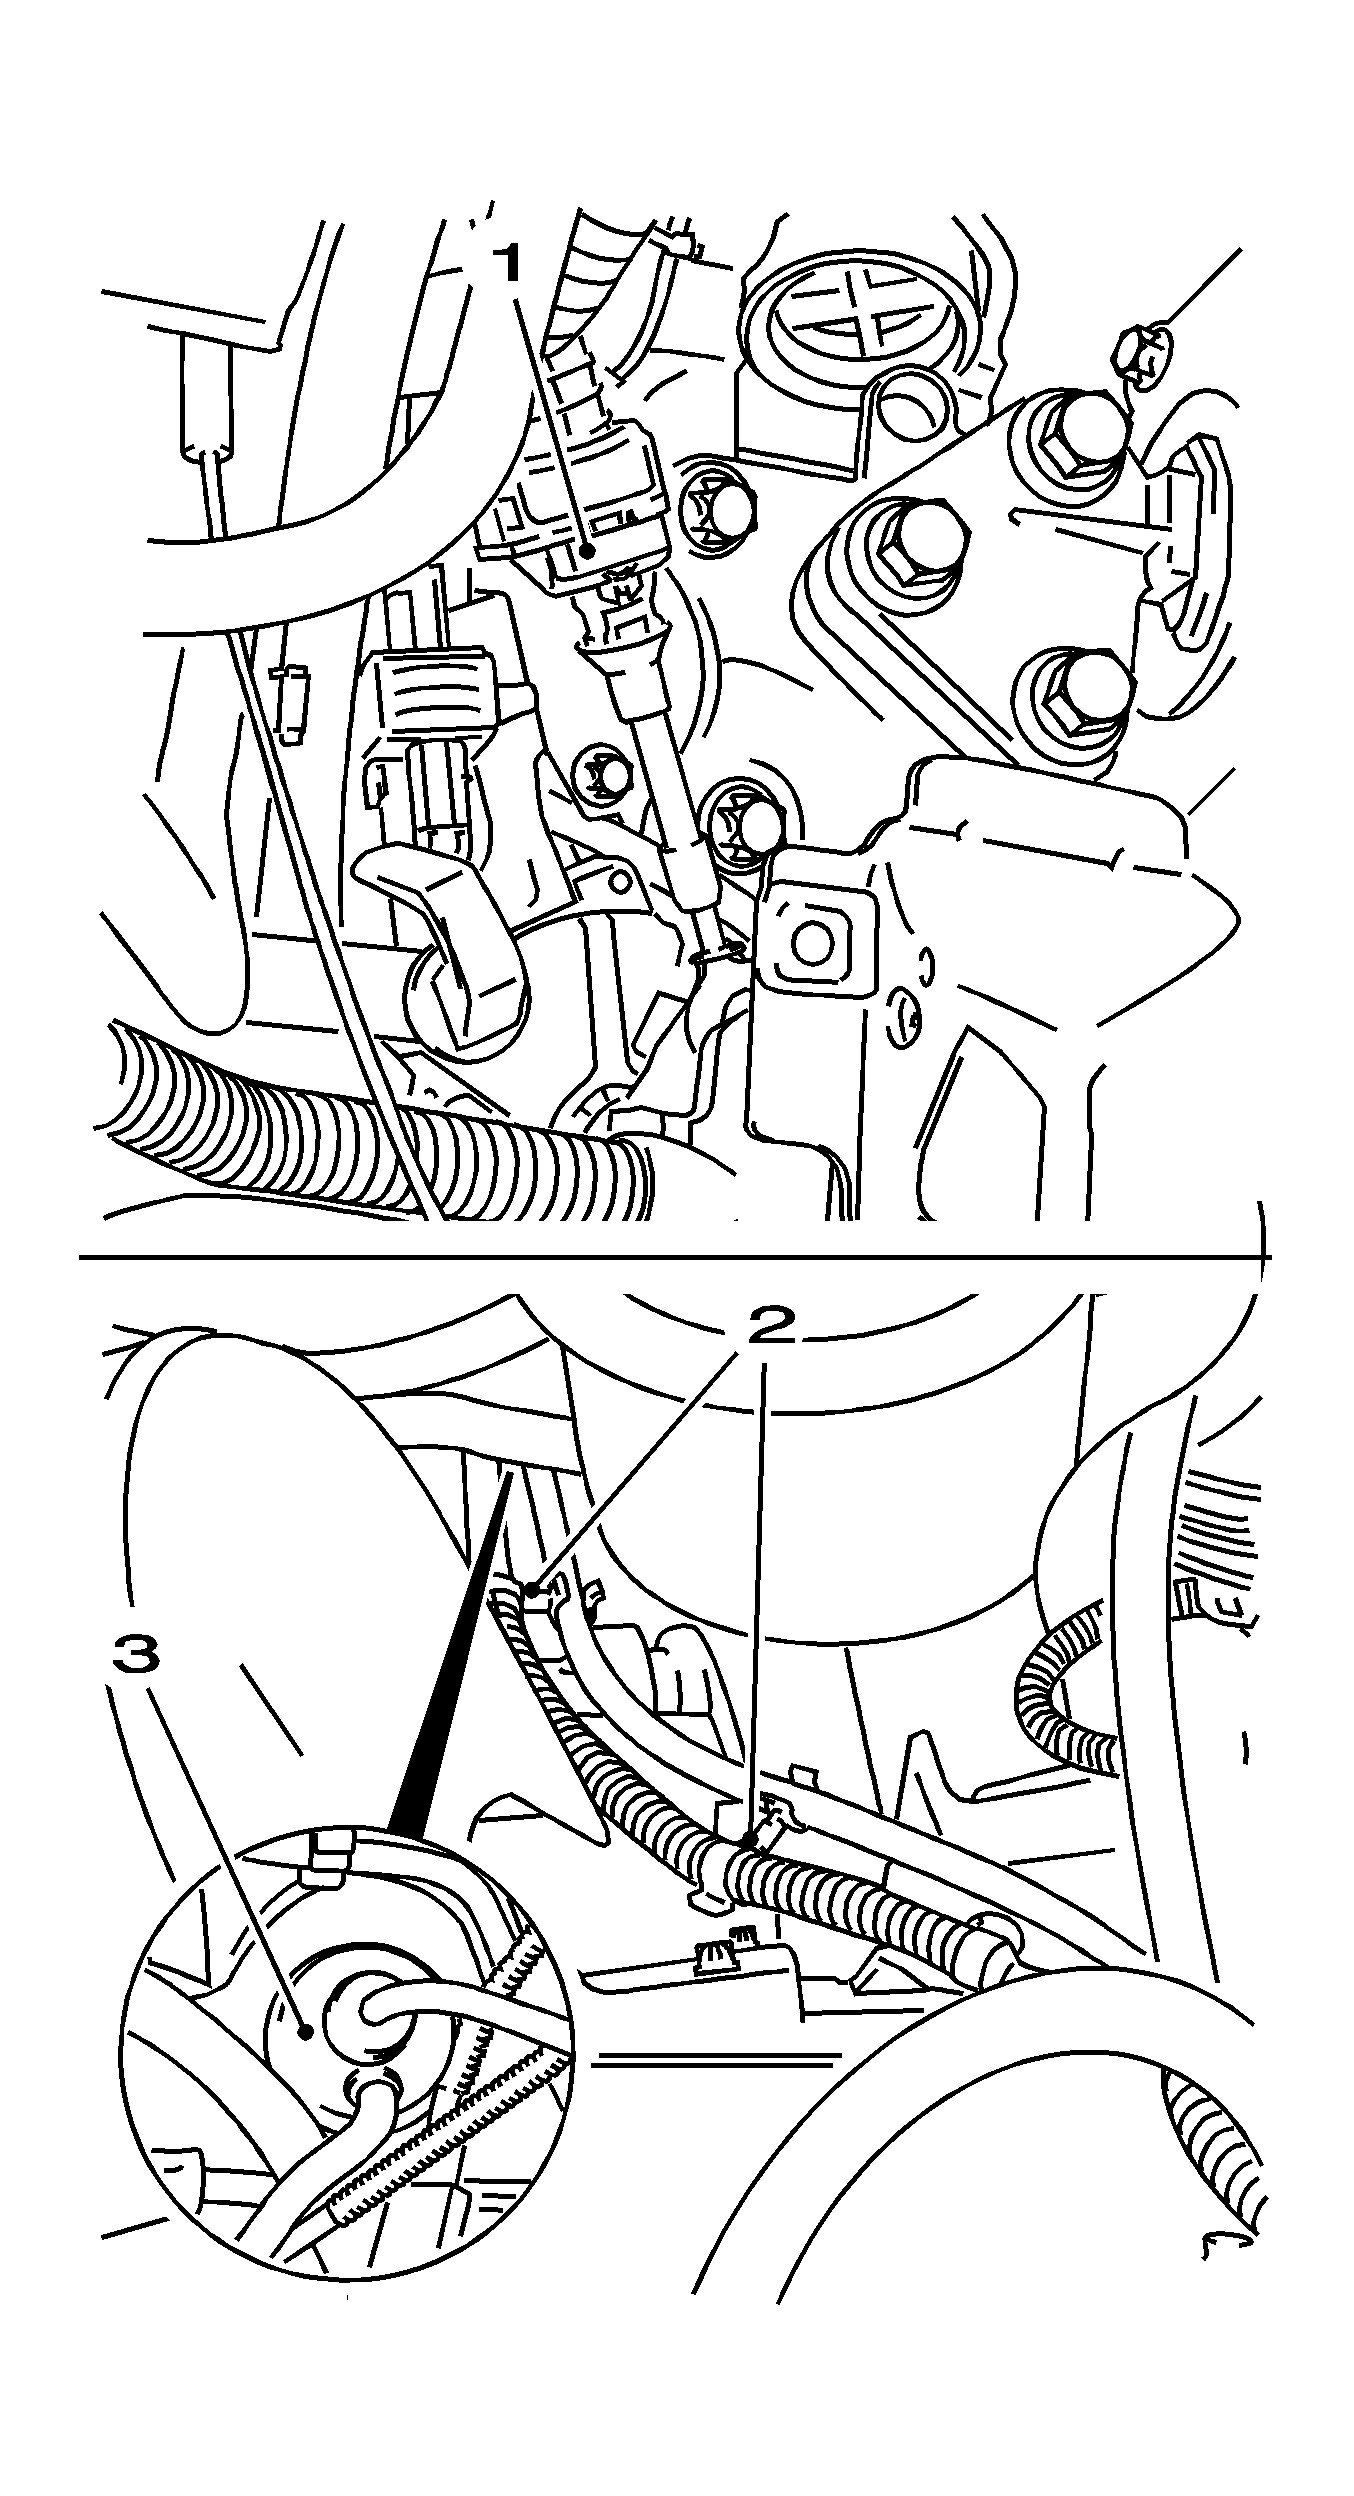
| • | Remove from the selector lever position switch. |
| • | Remove from the bracket on the transmission. |
| • | Remove the retaining clamp (1). |
- Remove the range selector cable from the wiring harness.
Release the 2 brackets (2).
Note: Do not remove rubber seal from the dash.
- Remove the range selector cable from the rubber seal (3).
Installation Procedure

Note: Do not push rubber seal (3) into the dash.
- Insert the range selector cable into the dash.
Coat the selector cable with soap solution.
- Install the range selector cable to the transmission.
| • | Install the range selector lever position switch. |
| • | Install range selector lever position switch to the bracket on the transmission. |
| • | Attach the retaining clamp (1). |
- Install the selector cable to the wiring harness.
Insert into the 2 brackets (2).

- Install the selector cable (2) to the selector lever.
| • | Install the selector lever cable to the bracket. |
| • | Install the retaining clamp (1). |
- Adjust the range selector cable. Refer to
Range Selector Lever Cable Adjustment.
- Install the front ashtray. Refer to
Front Floor Console Front Ashtray Replacement.
- Install the transmission shifter opening trim. Refer to
Front Floor Console Transmission Shift Opening Trim Plate Replacement.
Caution: Refer to Fastener Caution in the Preface section.

- Install the battery tray support.
Fasten the cable tie.
Tighten
Tighten the 3 bolts (1) to 10 N·m (89 lb in).

- Install the battery.
| • | Install the bracket (1). |
Tighten
Tighten the bolt (4) to 15 N·m (11 lb ft).
| • | Connect the positive cable (3) to the battery. |
| • | Connect the negative cable (2) to the battery. |
- For programming procedures, refer to
Control Module References.
- Inspect the selector lever for proper functions.


