For 1990-2009 cars only
Removal Procedure
- Remove the front bumper fascia. Refer to Front Bumper Fascia Replacement.
- Remove the air conditioning (A/C) condenser. Refer to Air Conditioning Condenser Replacement.
- Remove the radiator and coolant fan as an assembly. Refer to Radiator Replacement.
- Remove the battery tray assembly. Refer to Battery Tray Replacement.
- Place a drain pan under the transmission.
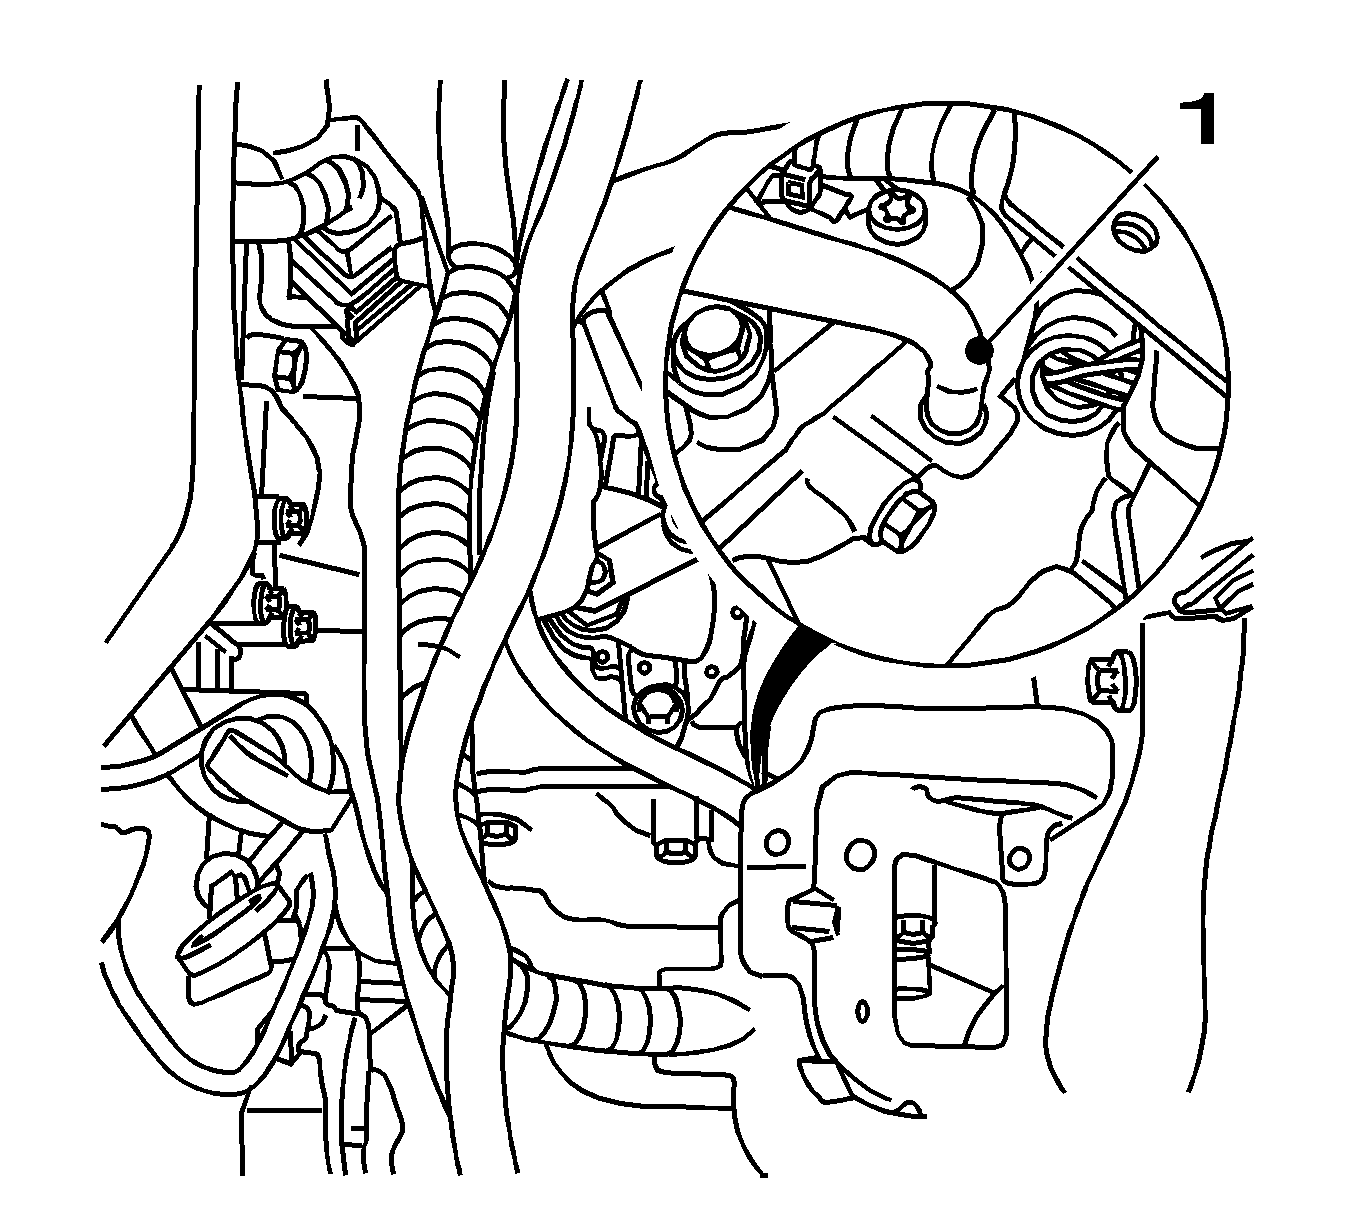
- Remove the transmission vent hose (1) from the control valve body cover.
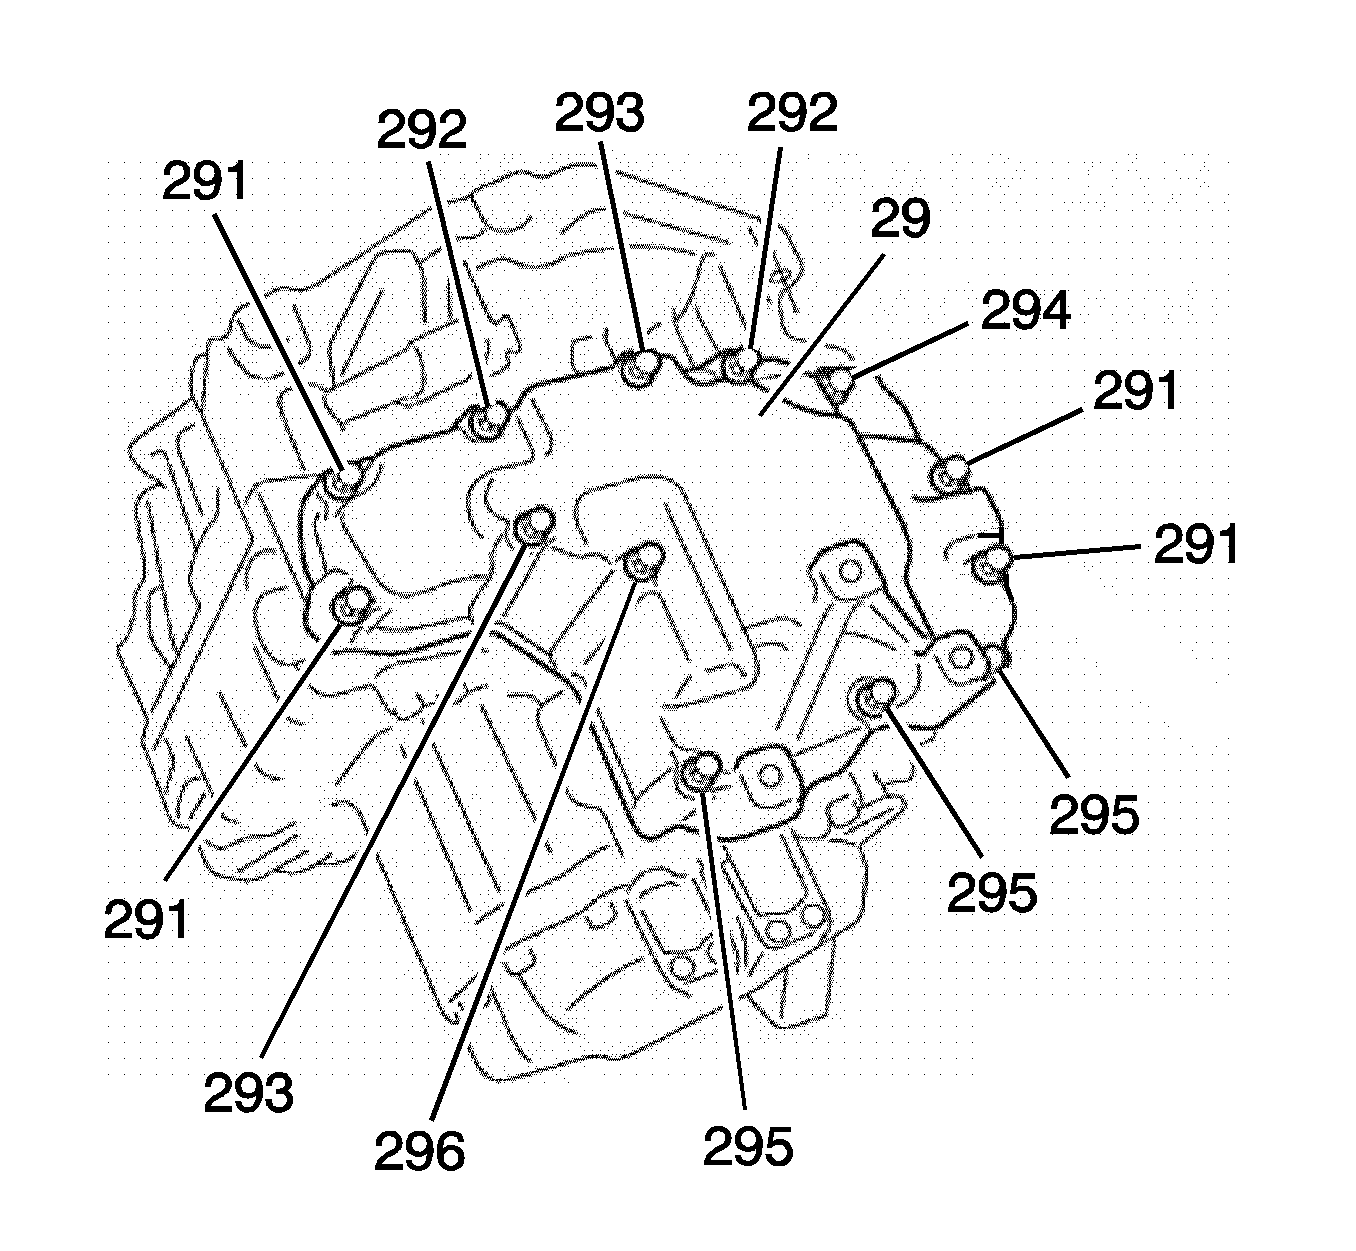
- Remove the 13 bolts and the control valve body cover (29).
- Clean the sealing surfaces.


Note: Be careful not to damage the control valve body cover and transmission case.
If needed, use a plastic hammer to loosen cover.
Installation Procedure
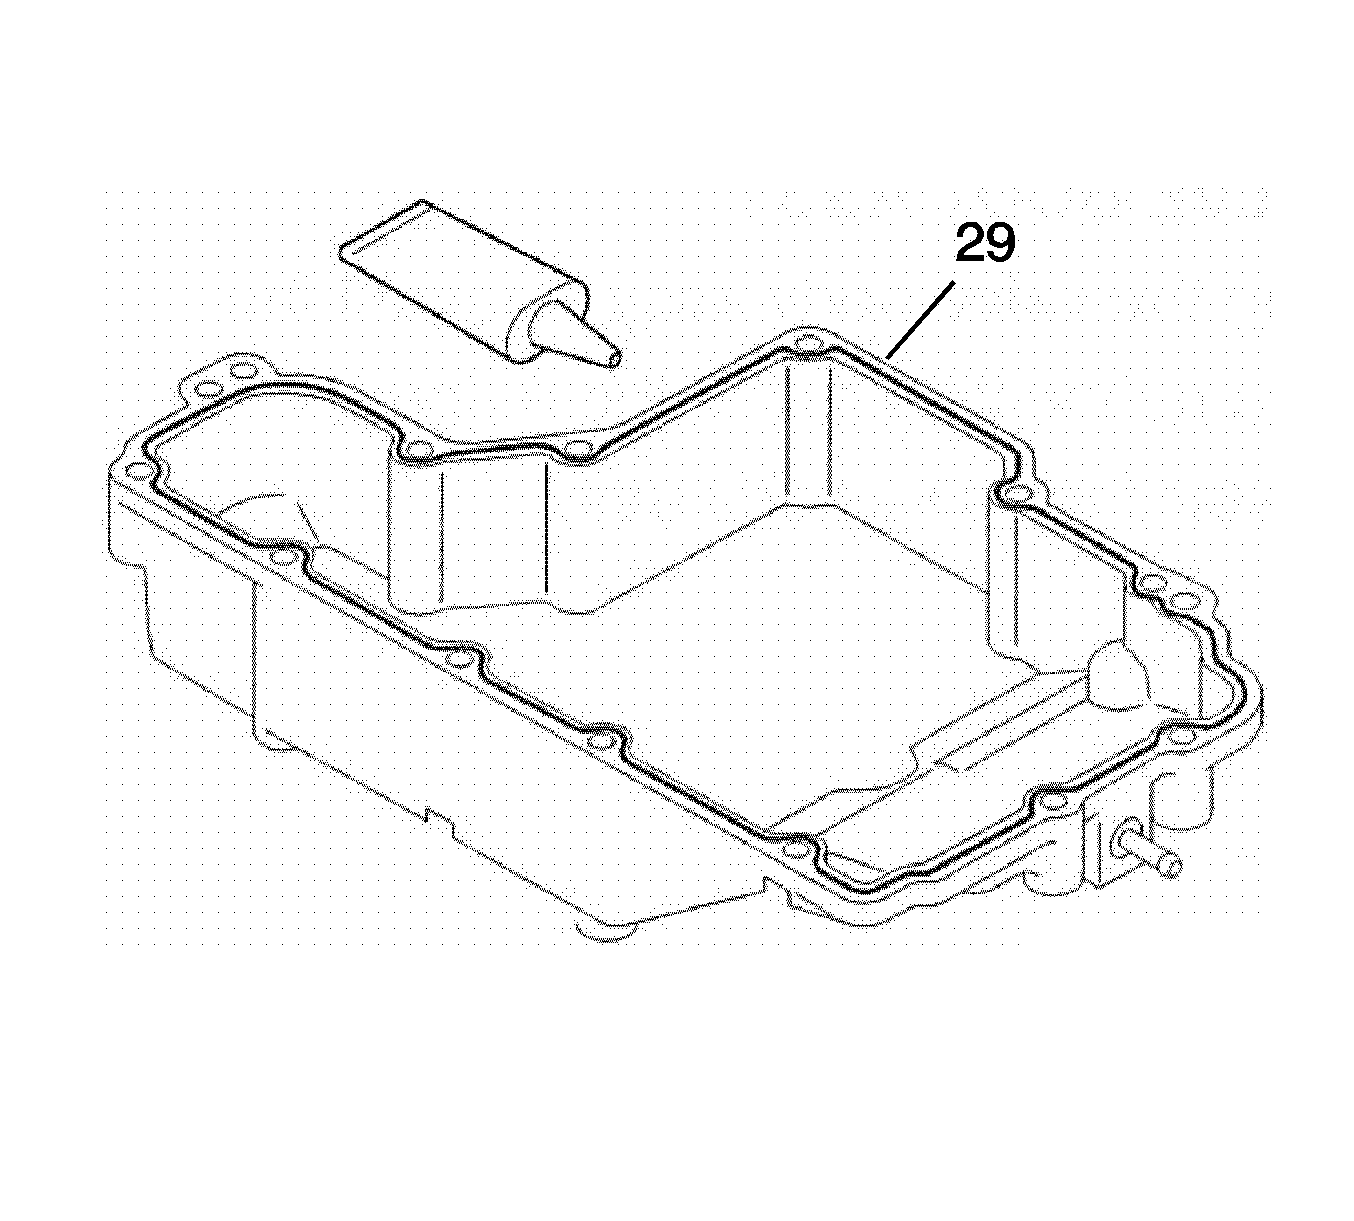
- Remove any gasket material on the contacting surfaces of the control valve body cover (29) and transmission case assembly.
- Apply a 3 mm (1/8 in) bead of GM P/N 89020326 (Canadian P/N 89021188) to the control valve body cover (29) as shown.
- Install the control valve body cover (29) onto the transmission case assembly.
- Install threadlocker GM P/N 12345382 (Canadian P/N 10953489) to the threads of the control valve body cover bolts.
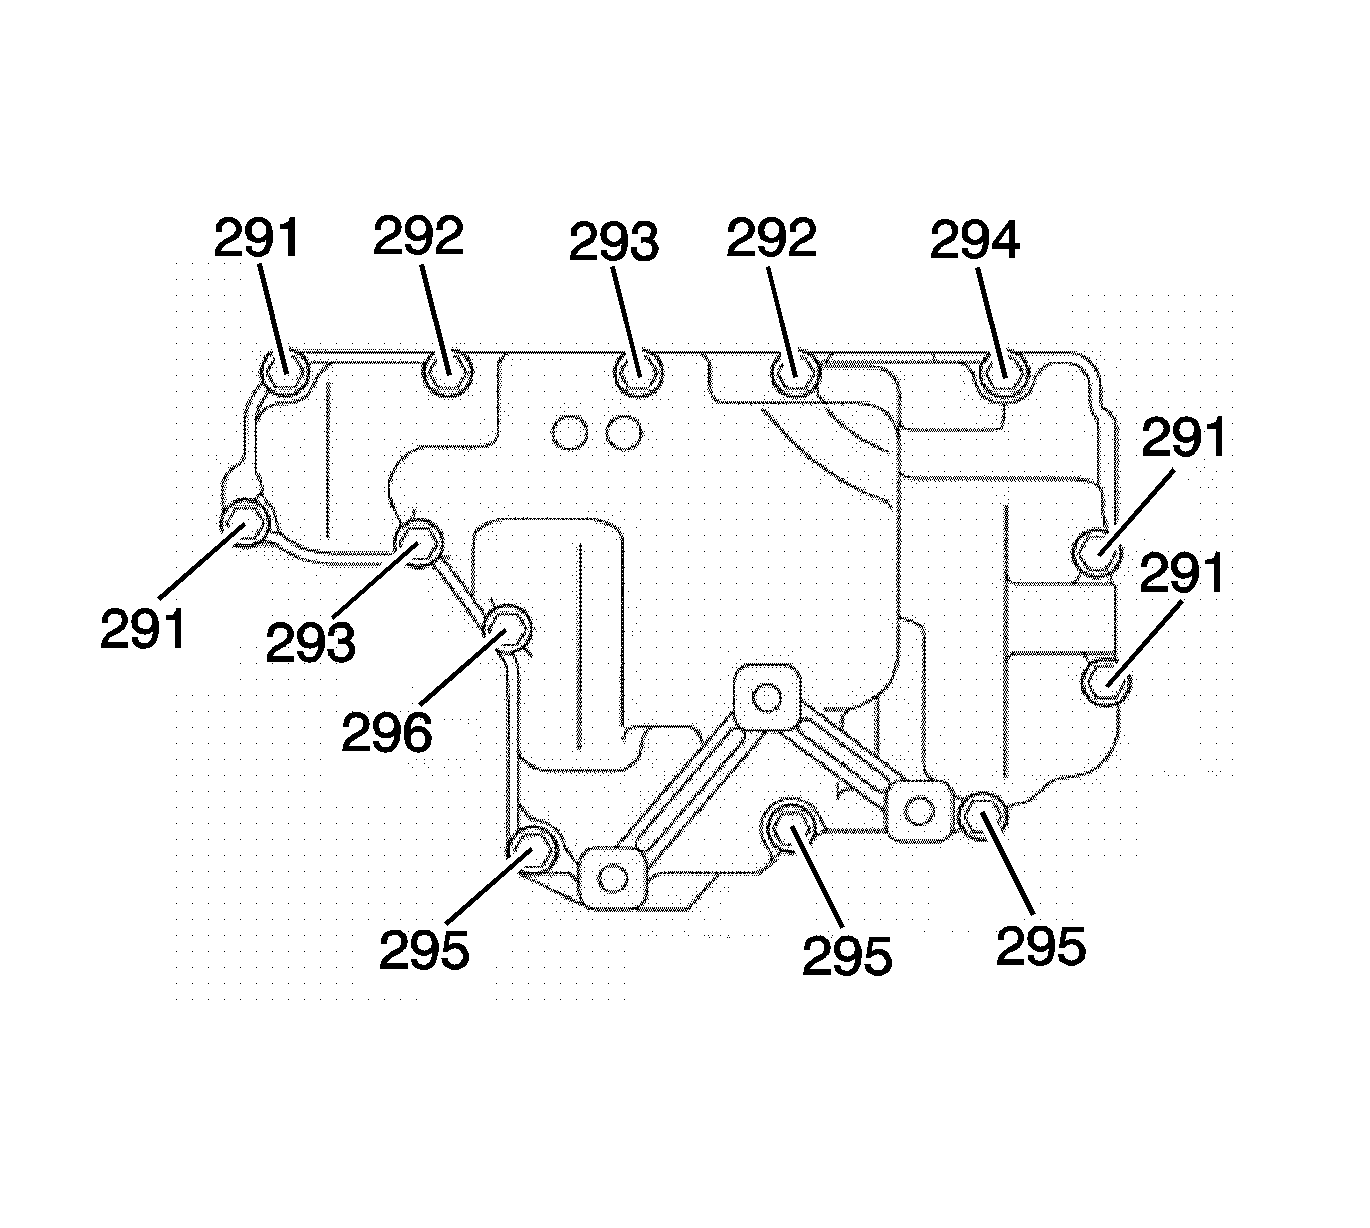
- Install the 13 control valve body cover bolts.
- Tighten the control valve body cover bolts.
- Connect the vent hose (1).
- Install the radiator and coolant fan assembly. Refer to Radiator Replacement.
- Install the A/C condenser. Refer to Air Conditioning Condenser Replacement.
- Install the front bumper fascia. Refer to Front Bumper Fascia Replacement.
- Recharge the A/C system. Refer to Refrigerant Recovery and Recharging.
- Install the battery tray assembly. Refer to Battery Tray Replacement.
- Fill the transmission. Refer to Fluid Capacity Specifications and Transmission Fluid Check.

Note: Be careful that no oil is on the contacting surfaces.
Wipe off any oil on the contacting surfaces.

Caution: Refer to Fastener Caution in the Preface section.

Tighten
Tighten the bolts to 19.6-27.4 N·m (14.46-20.21 lb ft).

