For 1990-2009 cars only
Front Side Door Check Link Replacement Sedan
Removal Procedure
- Remove the front door side panel. Refer to Front Side Door Trim Panel Replacement.
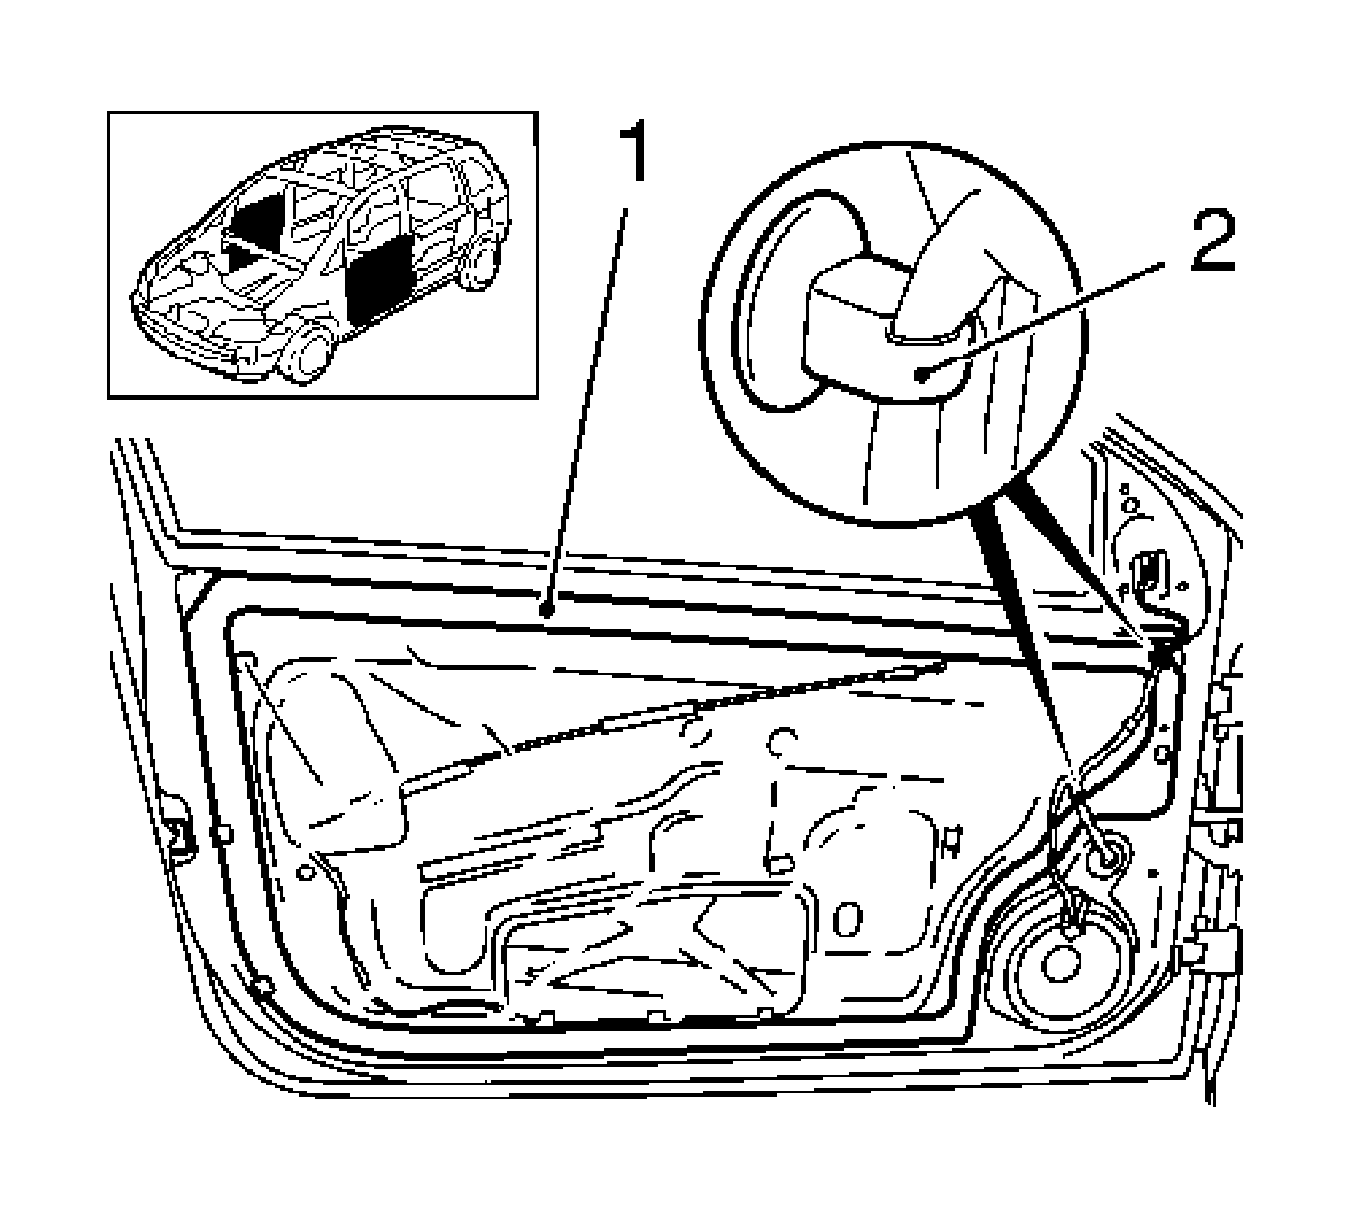
- Partially loosen the water vapor barrier (1).
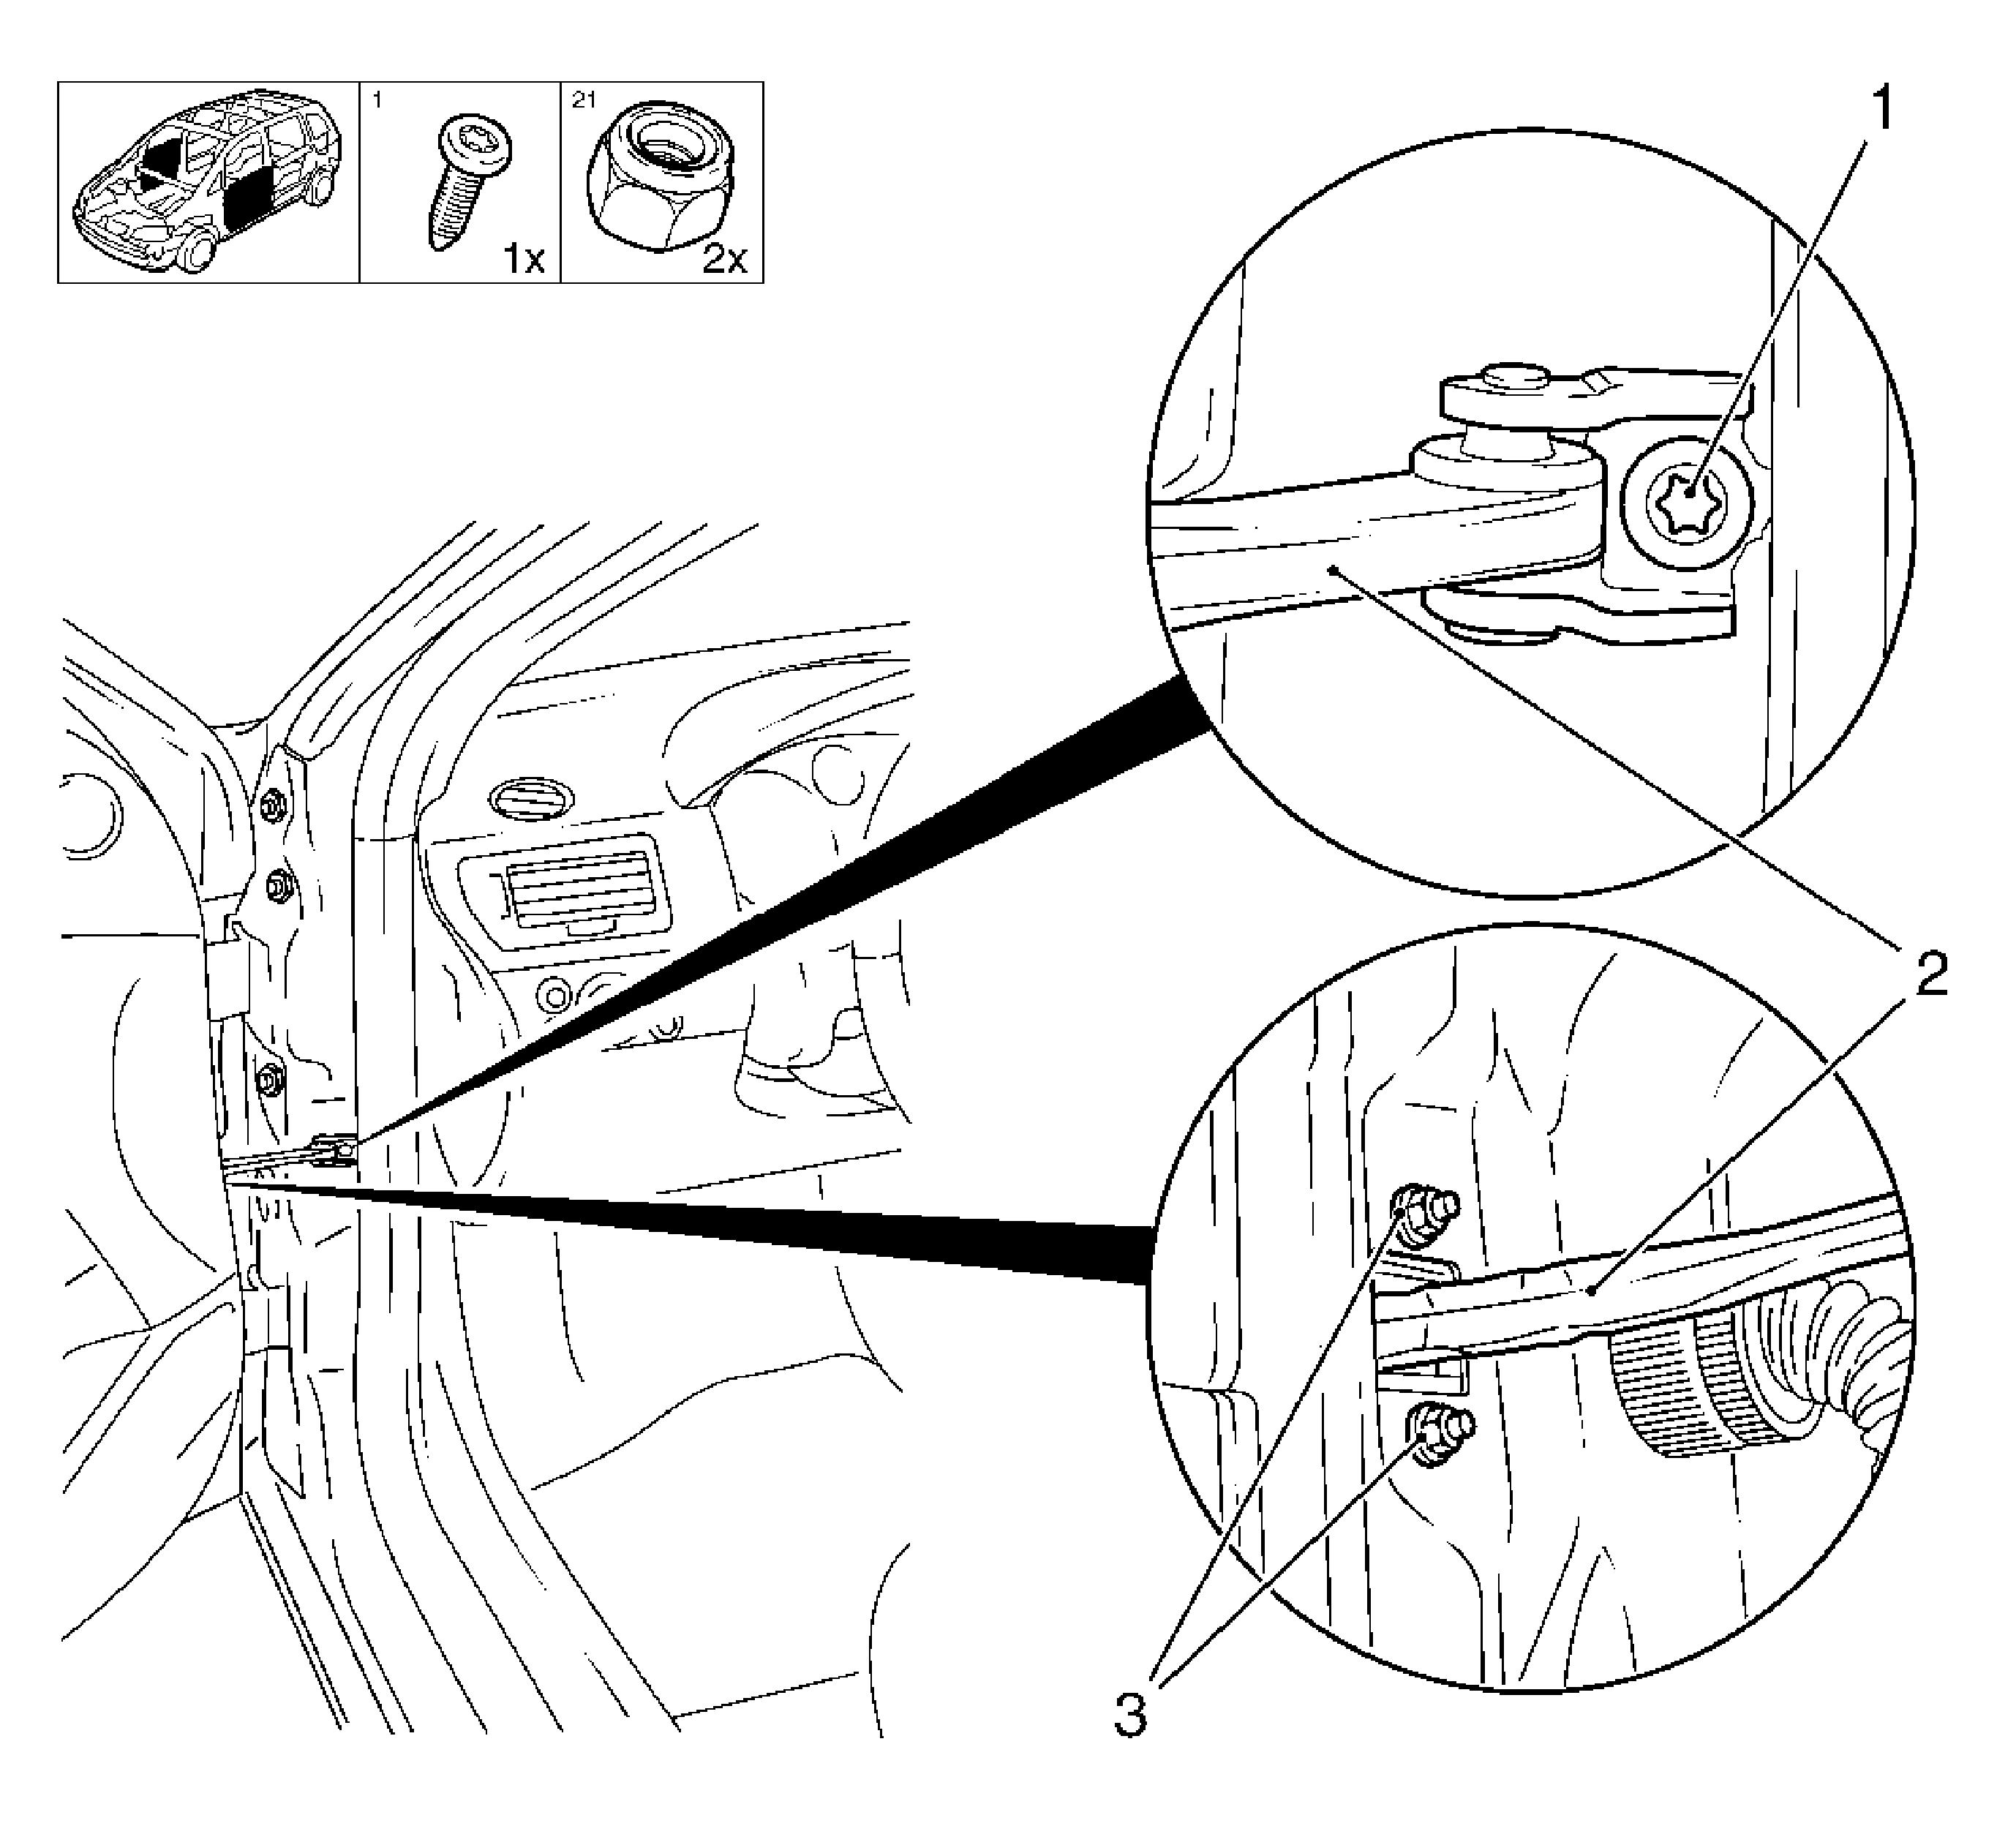
- Remove the check link (2).

Remove the 2 clips (2).

| • | Remove the bolt (1). |
| • | Remove the 2 nuts (3). |
Installation Procedure
- Install check link.
- Install the water vapor barrier.
- Install the front side door trim panel. Refer to Front Side Door Trim Panel Replacement.
Caution: Refer to Fastener Caution in the Preface section.
Tighten
| • | Tighten the 2 nuts to 8 N·m (71 lb in). |
| • | Tighten the bolt to 20 N·m (15 lb ft). |
Install the 4 clips.
Front Side Door Check Link Replacement Coupe
Removal Procedure
- Remove the front side door check link from the A-pillar.
- Remove the front side door trim panel. Refer to Front Side Door Trim Panel Replacement.
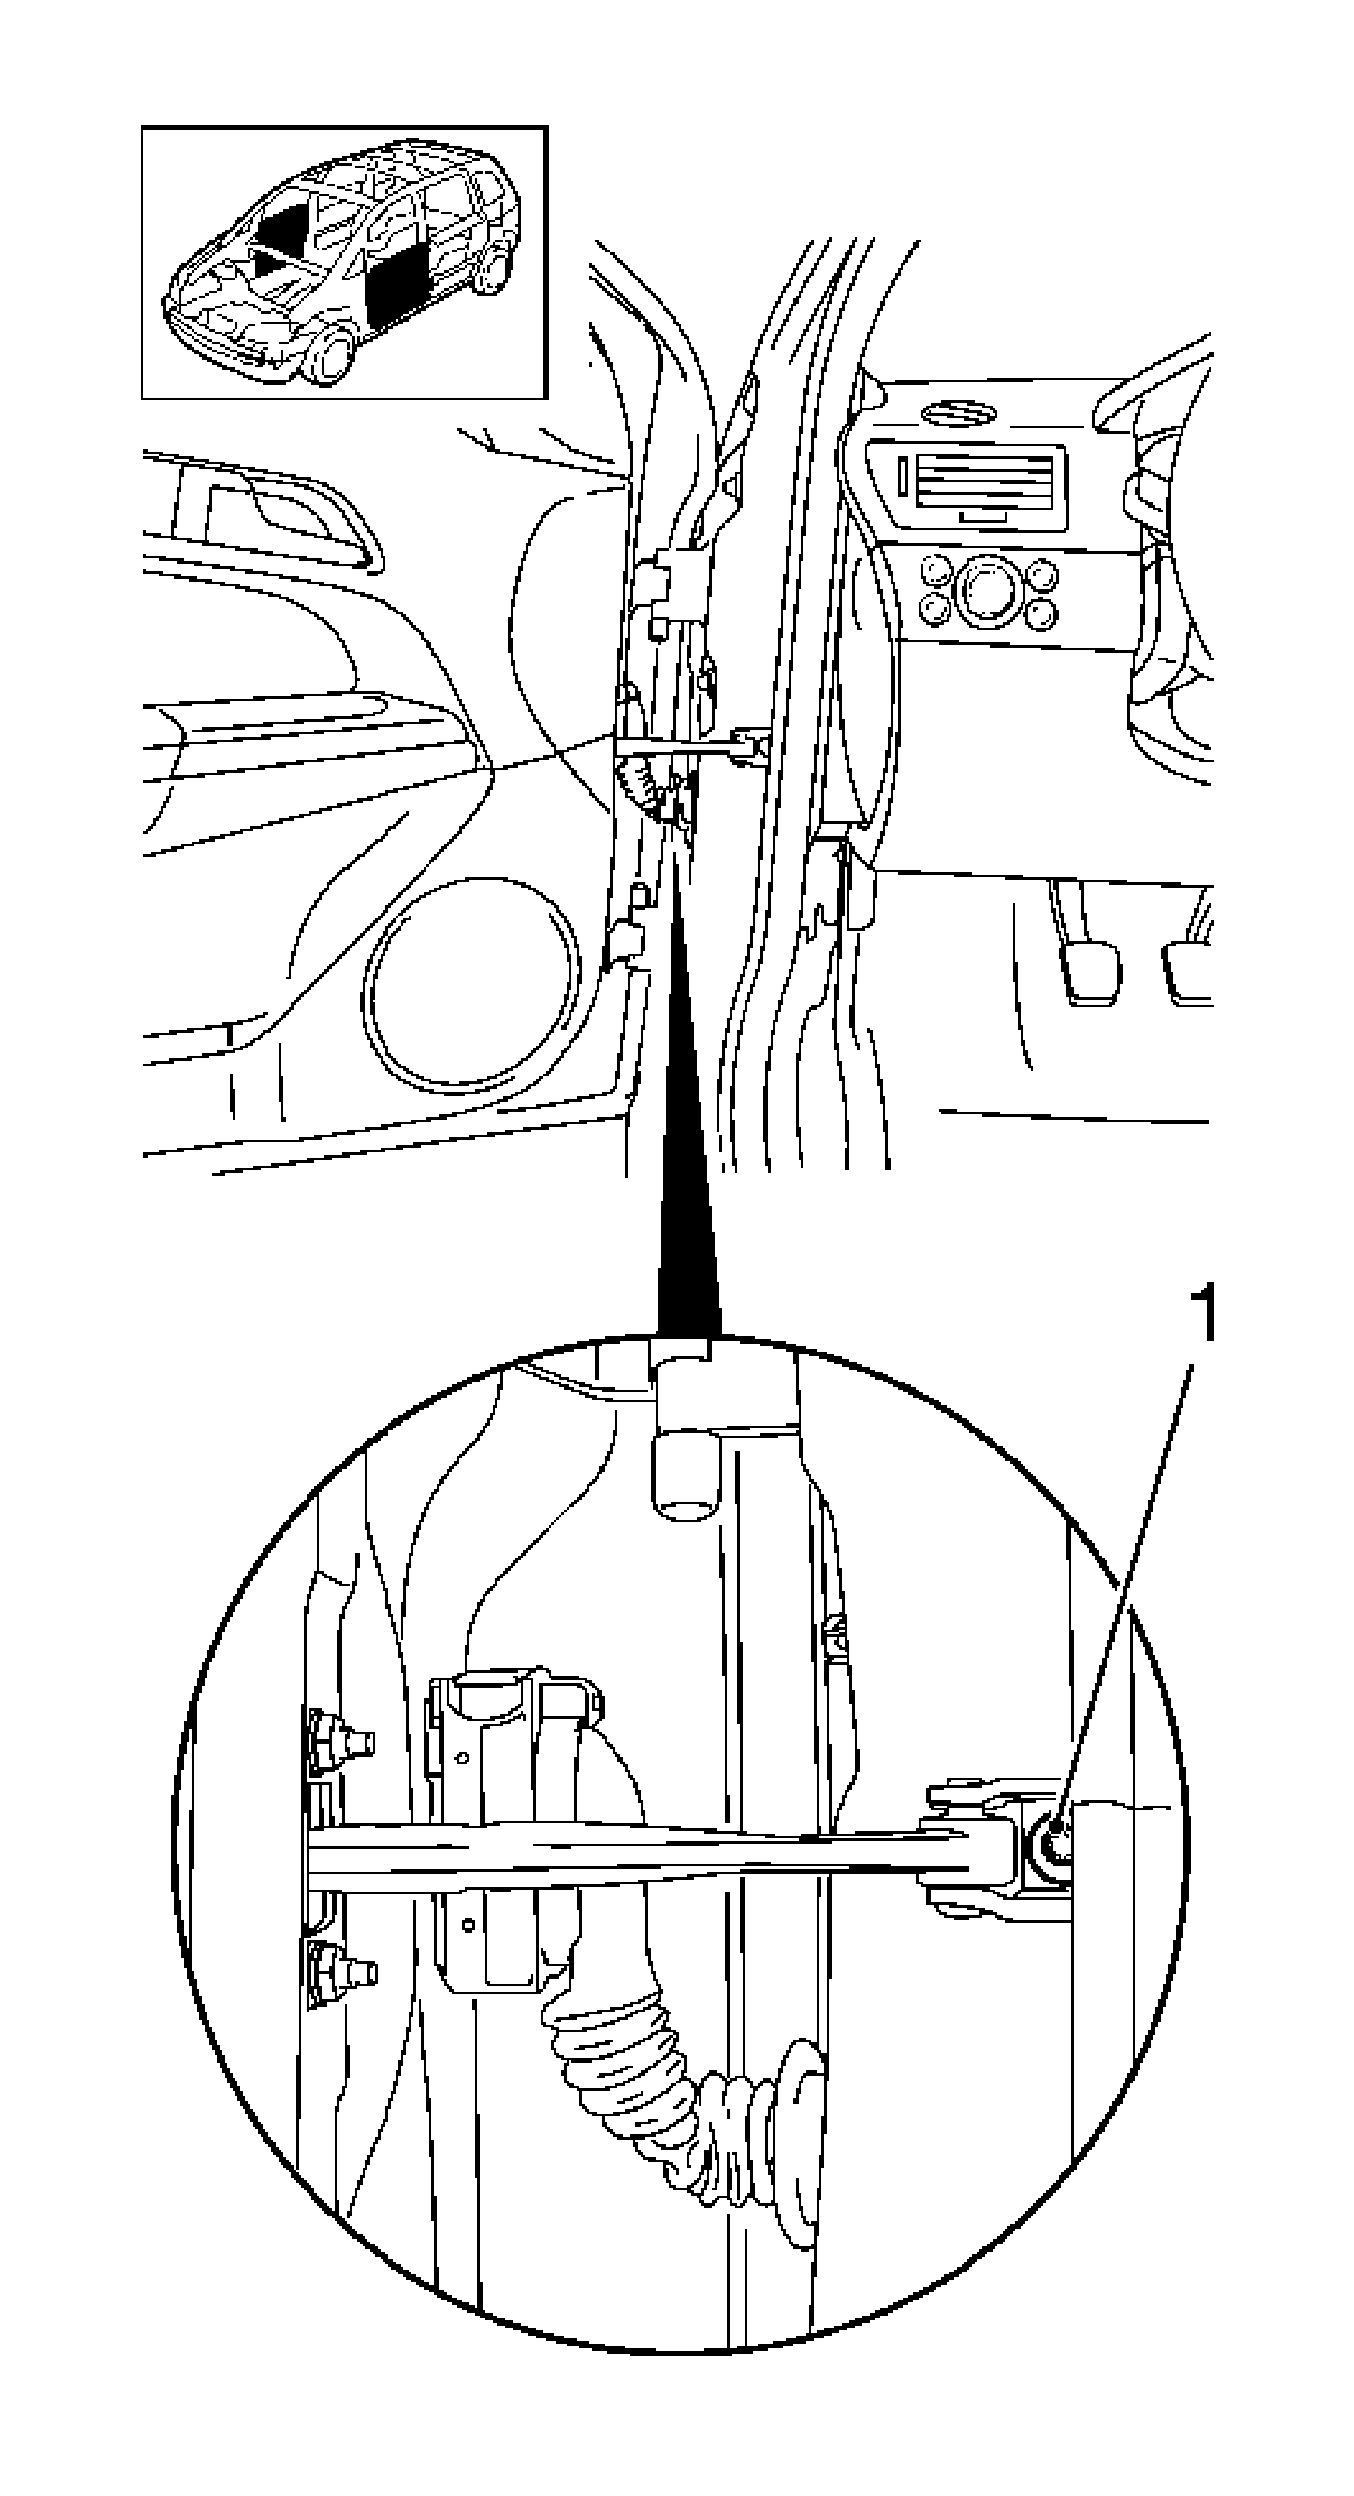
- Partially loosen the water vapor barrier (1).
- Remove the check link.

Remove the bolt (1).

| • | Remove the external mirror wiring harness. |
| • | Remove the 2 cable brackets (2). |

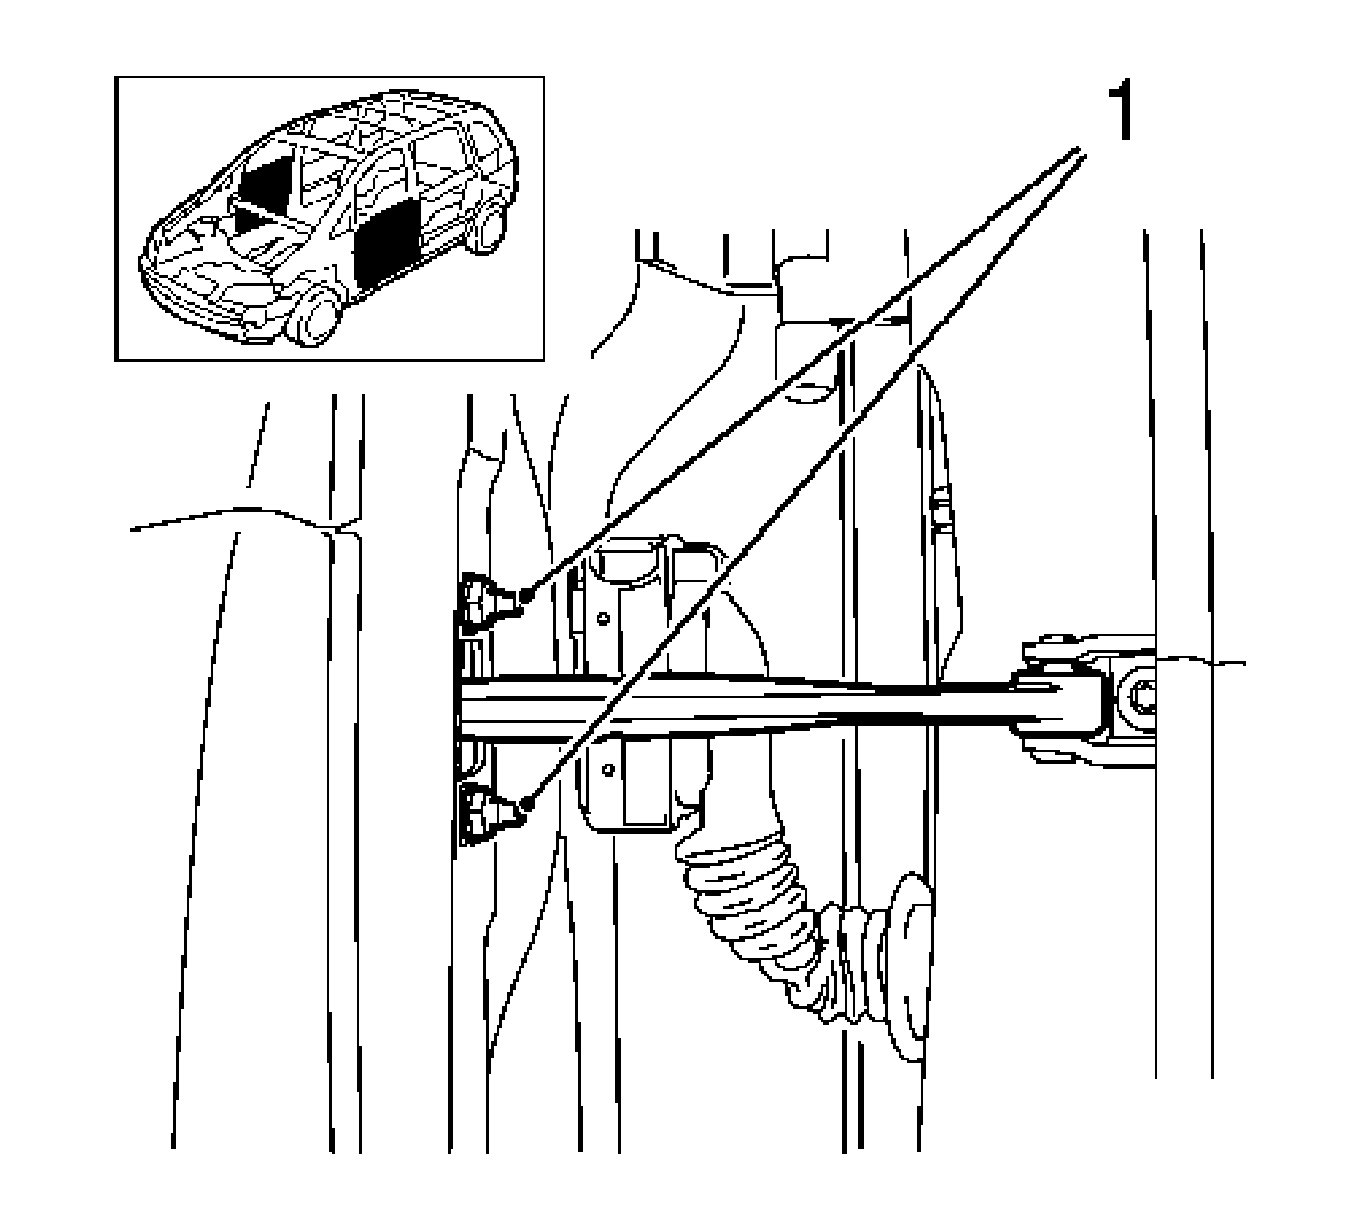
Remove the 2 nuts (1).
Installation Procedure
- Install the check link.
- Install the water vapor barrier.
- Install the front side door trim panel. Refer to Front Side Door Trim Panel Replacement.
- Install the check link to the A-pillar.
Caution: Refer to Fastener Caution in the Preface section.
Tighten
Tighten the 2 nuts to 8 N·m (71 lb in).
| • | Install the external mirror wiring harness. |
| • | Replace the 2 cable brackets. |
Tighten
Tighten the bolt to 20 N·m (15 lb ft).
