For 1990-2009 cars only
Removal Procedure
- Remove the center console. Refer to Front Floor Console Replacement .
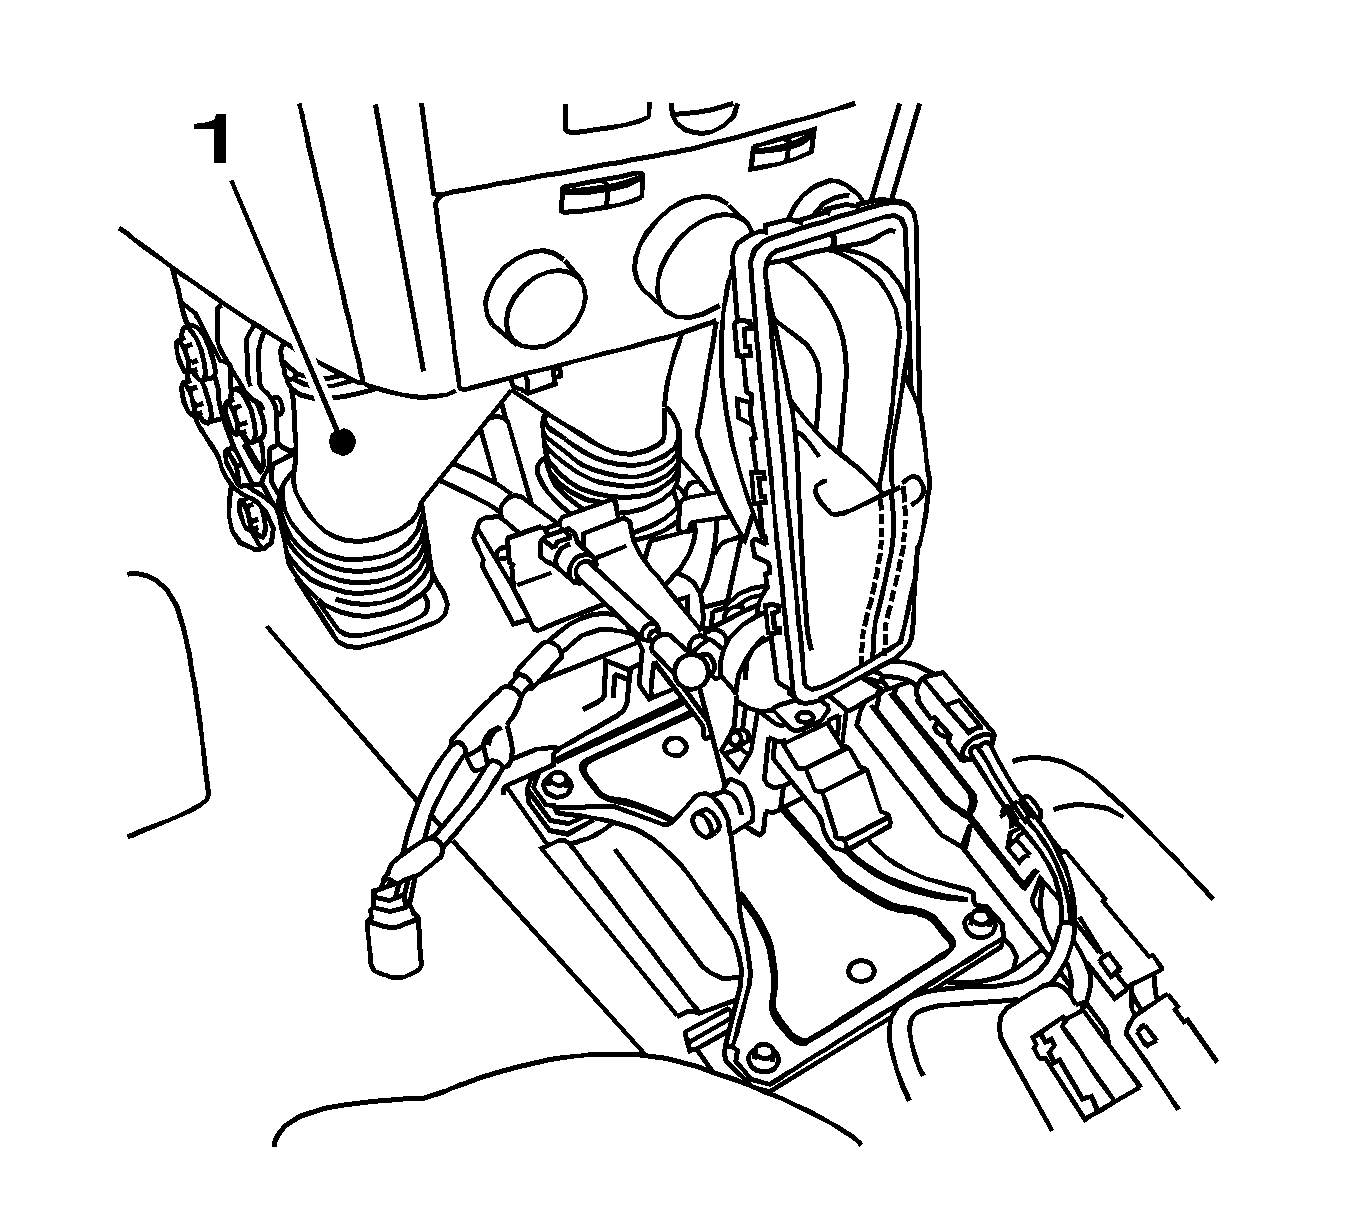
- Remove the vent duct (1).
- Open the cable ties (1).
- Remove the cable ties (2) from the bracket.
- Disconnect the wiring harness plug (3).
- Detach the wiring harness plug (4) from the transmission control module (TCM).
- Remove the TCM with bracket.
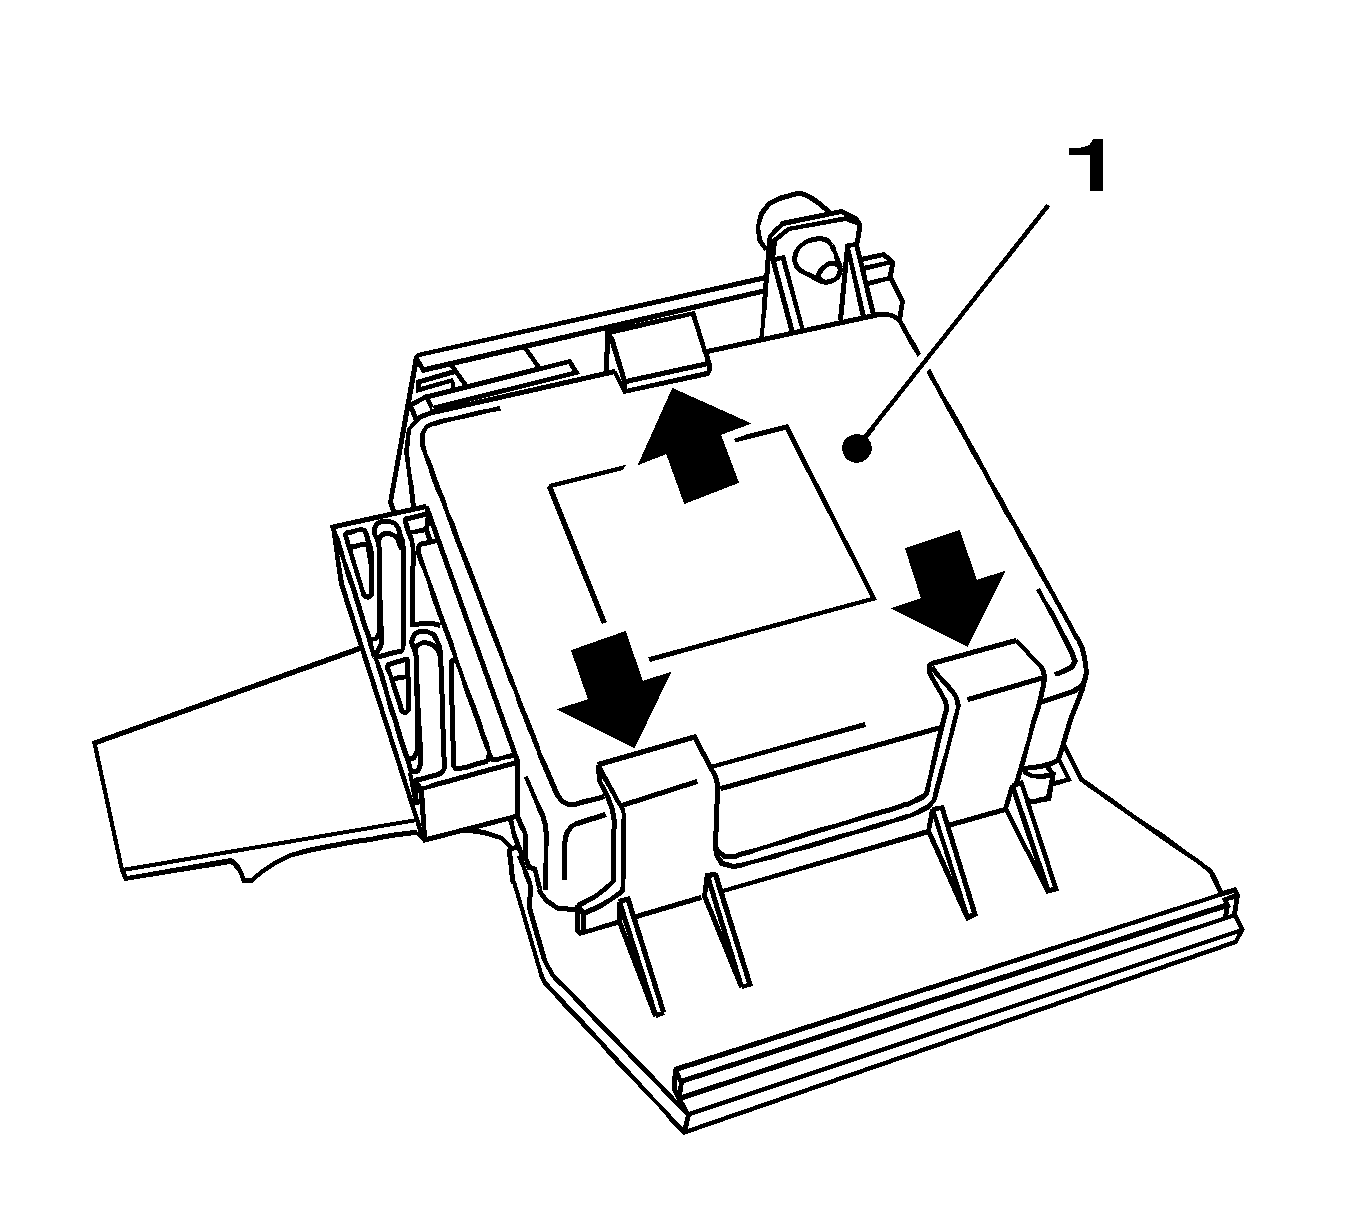
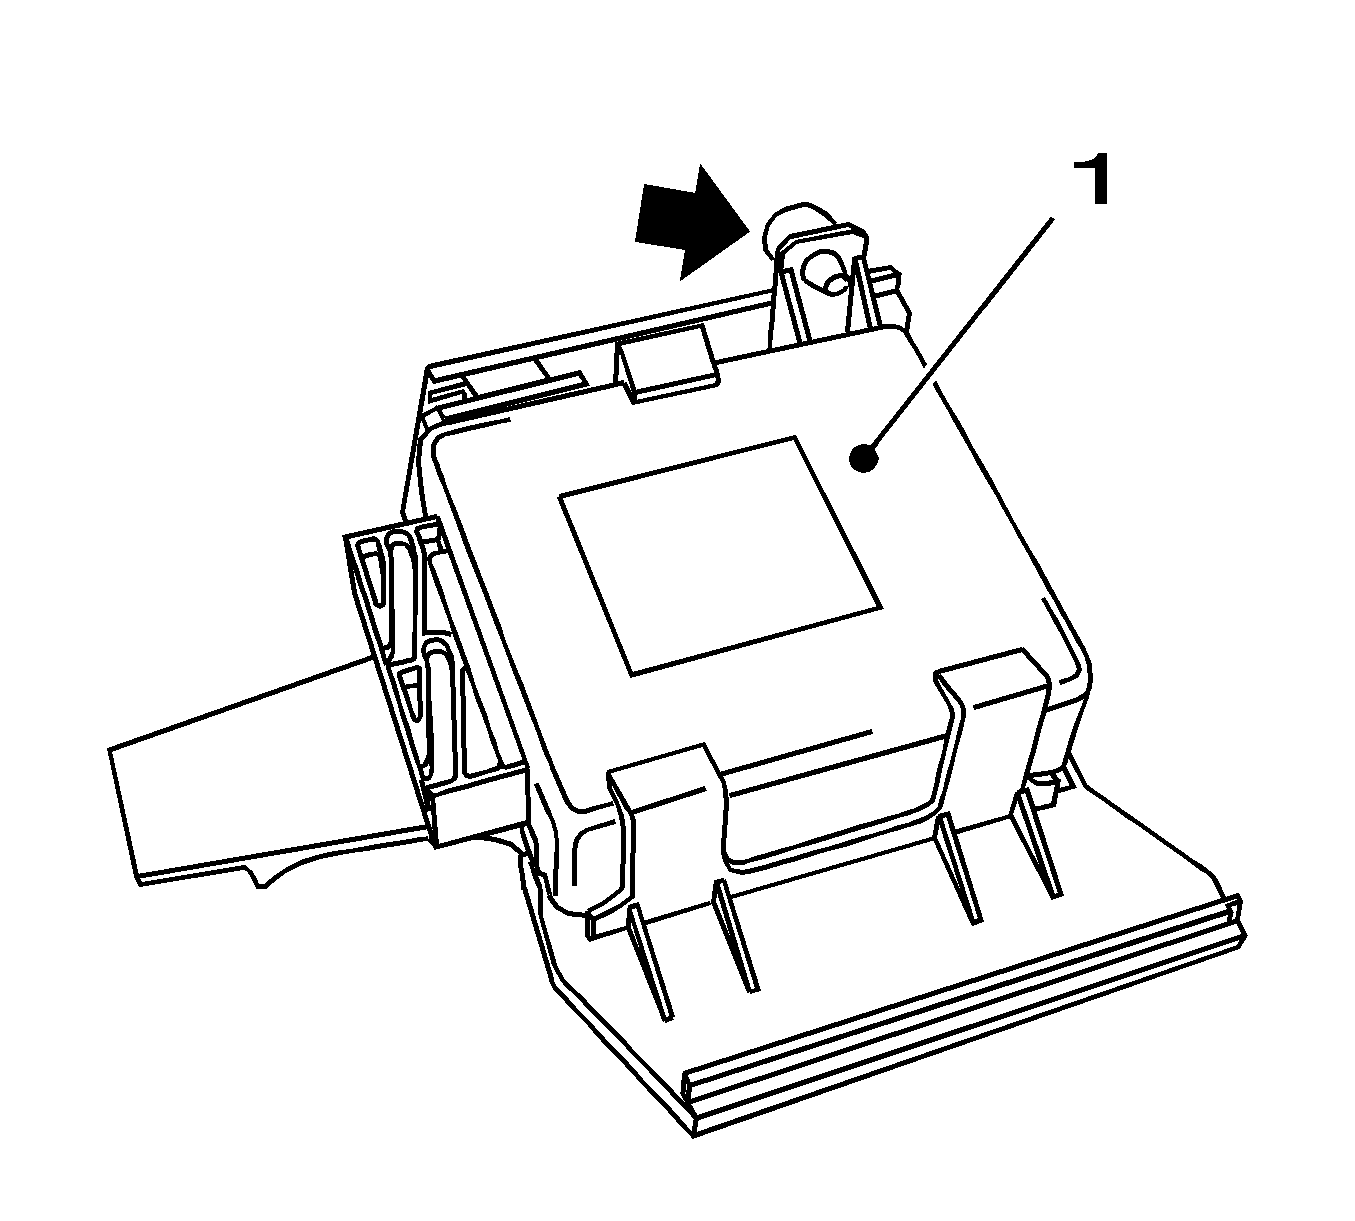
- Detach the TCM (1) from the bracket.

Important: Do not damage the wiring harness.
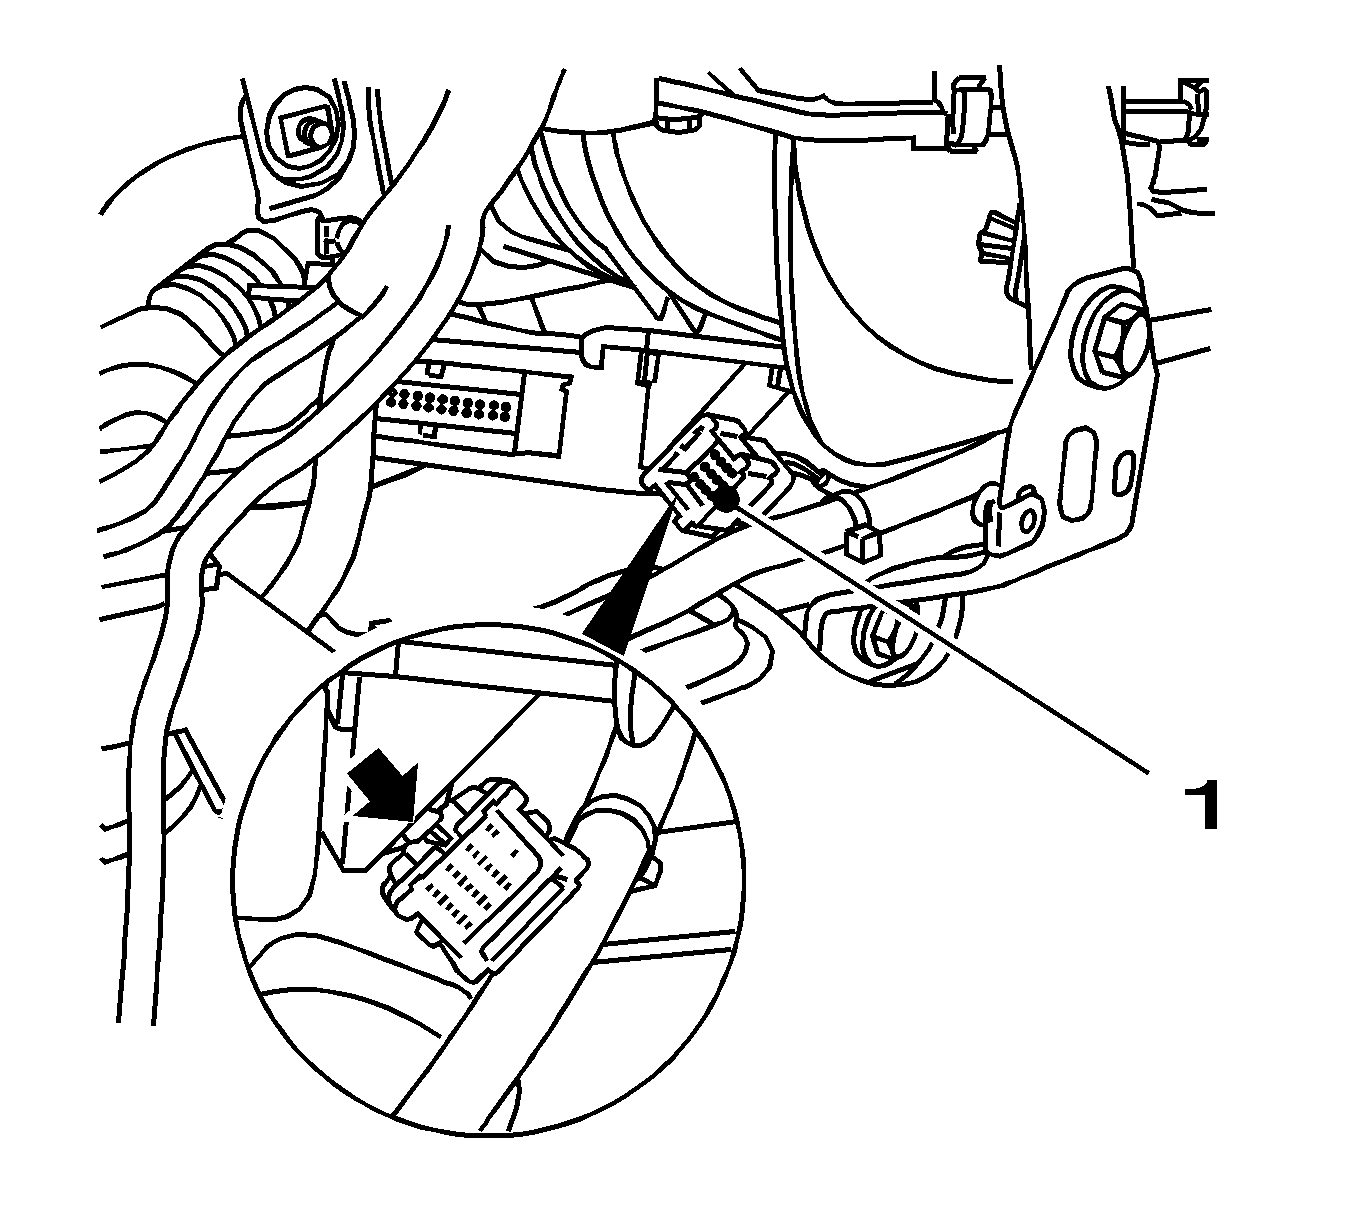
Release the wiring harness plug and disconnect.

| • | Slightly pull out the TCM with bracket. |
| • | Detach the wiring harness plug (1) from the bracket. |
| • | Release the wiring harness plug (arrow). |
| • | Remove the TCM with bracket. |

Carefully push locks (arrows) outward.
Installation Procedure
- Attach TCM (1) to the bracket.
- Attach the wiring harness plug (1) to the bracket.
- Attach the wiring harness plug (4) to the TCM.
- Connect the wiring harness plug (3).
- Attach the cable tie (2) to the bracket.
- Attach the cable tie (1).
- Install the vent duct (1).
- Install the center console. Refer to Front Floor Console Replacement .
- If a replacement TCM was installed, program the module. Refer to Control Module References .

Important: Note guides for positioning the control unit on the bracket.
Replace the cable ties (arrow).

Lock (arrow) must engage.
Connect and lock the wiring harness plug.

Important: Check for proper seating.
