Removal Procedure
- Open the sunshade.
- Lower the headlining. Refer to Headlining Trim Panel Replacement.
- Remove the front air deflector covers.
- Remove the front window. Refer to Sunroof Window Replacement - Front.
- Remove the rear window. Refer to Sunroof Window Replacement - Rear.
- Remove the rear water drain hose.
- Remove the front water drain hose actuation unit.
- Disconnect the front wiring harness assembly.
- Loosen the sunroof module assembly.
- Remove the sunroof module assembly.
- Remove the wind deflector. Refer to Sunroof Air Deflector Replacement.
- Lock the sunshade.
- Remove the rear crossmember.
- Remove the sunshade at the rails.
- Remove the sunshade.
- Remove the sunshade motor.
- Remove the sunroof motor.
- Remove the outer seal.
- Remove the inner seal.
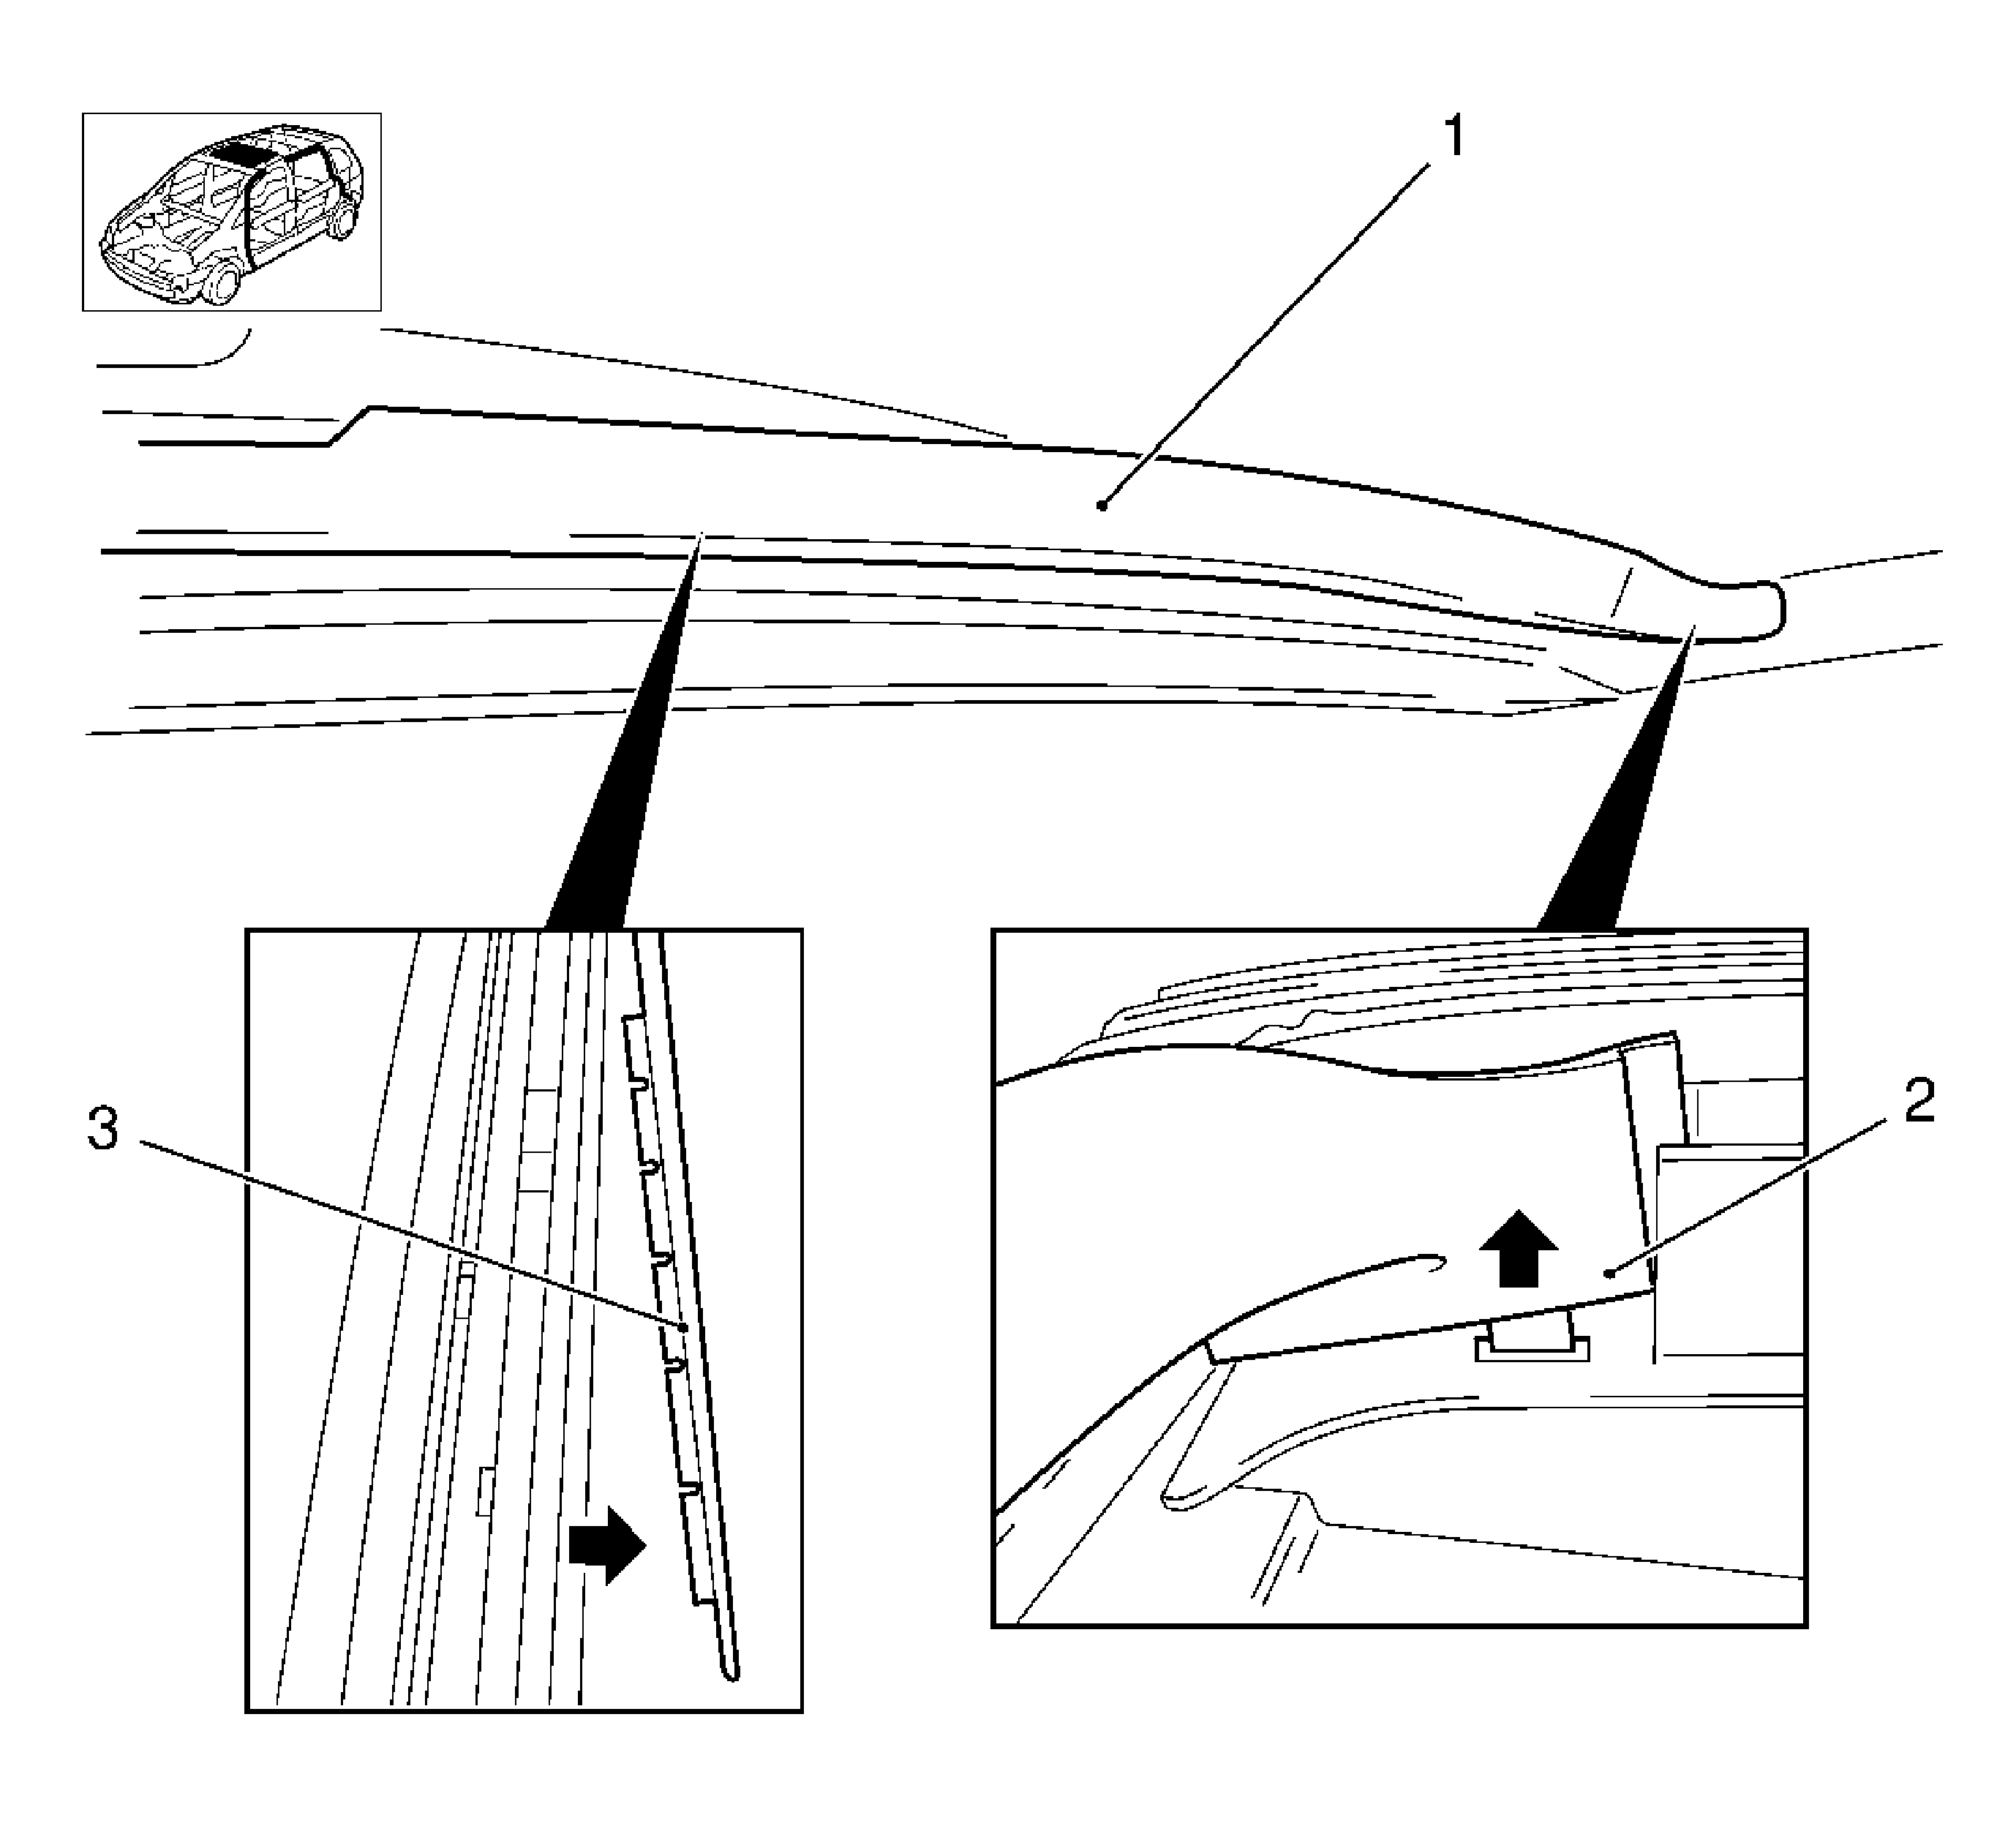
Remove the cover (1) at the back (3) and remove from the front bracket (2).
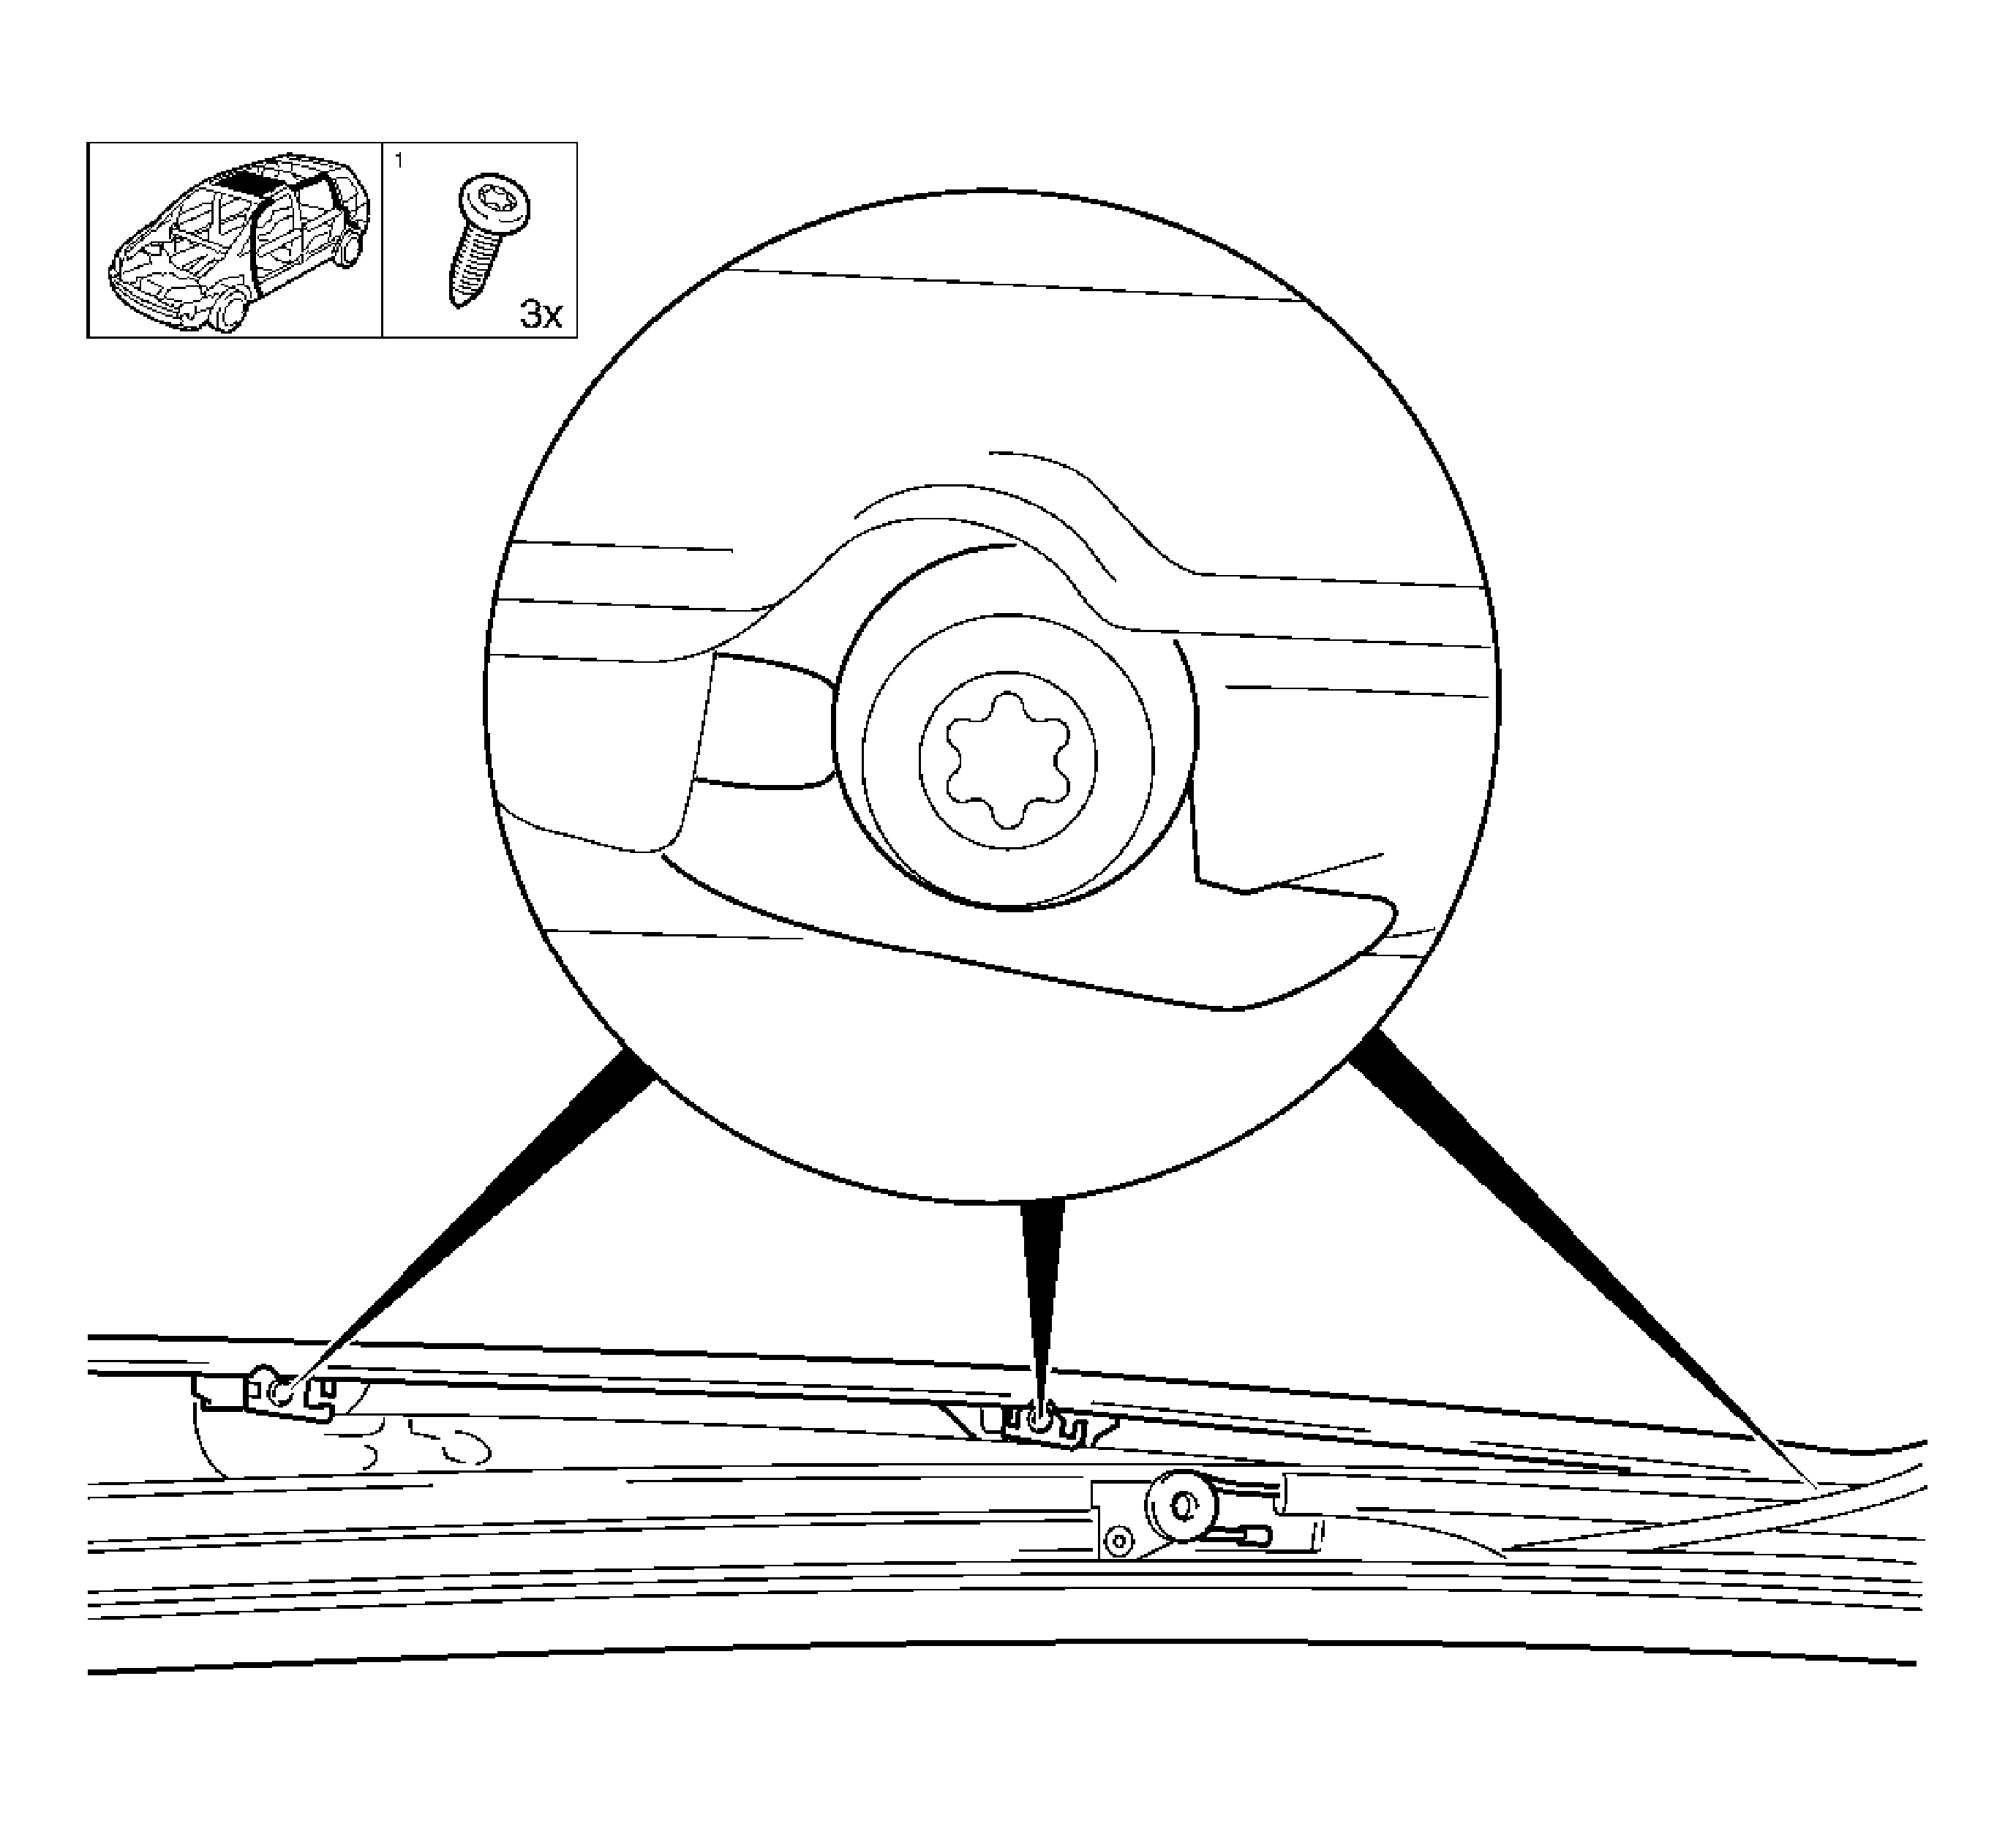
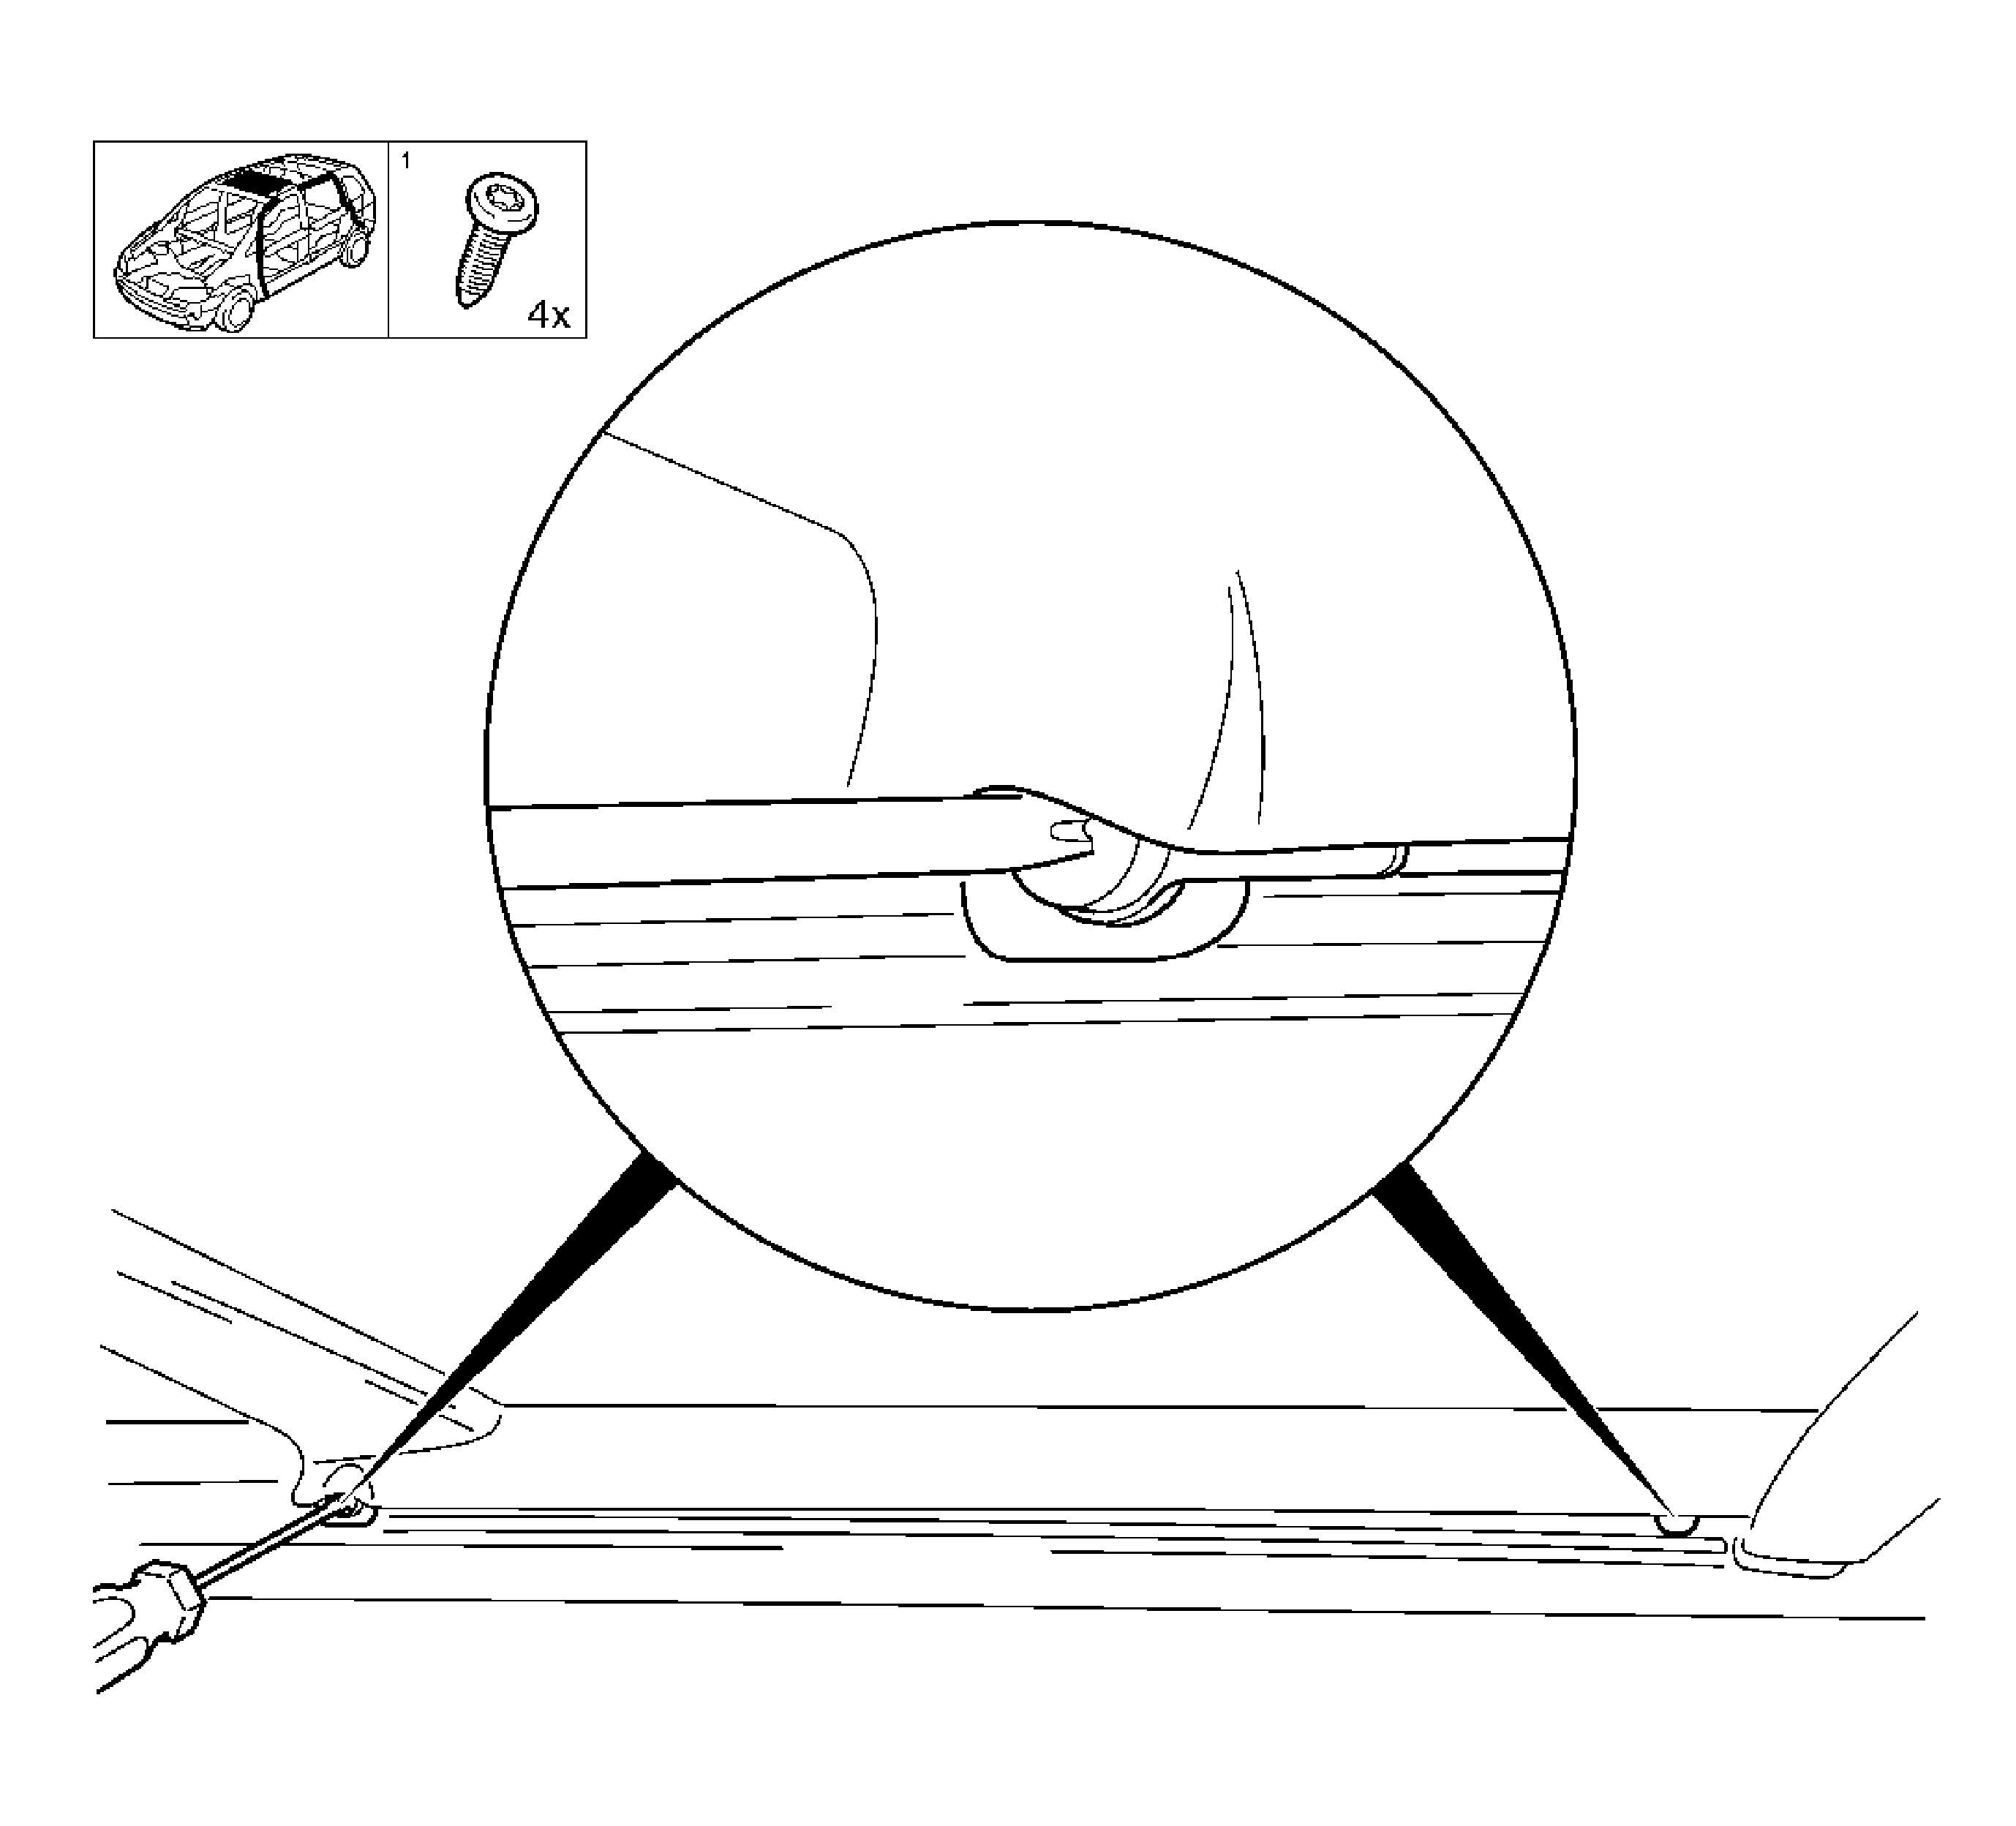
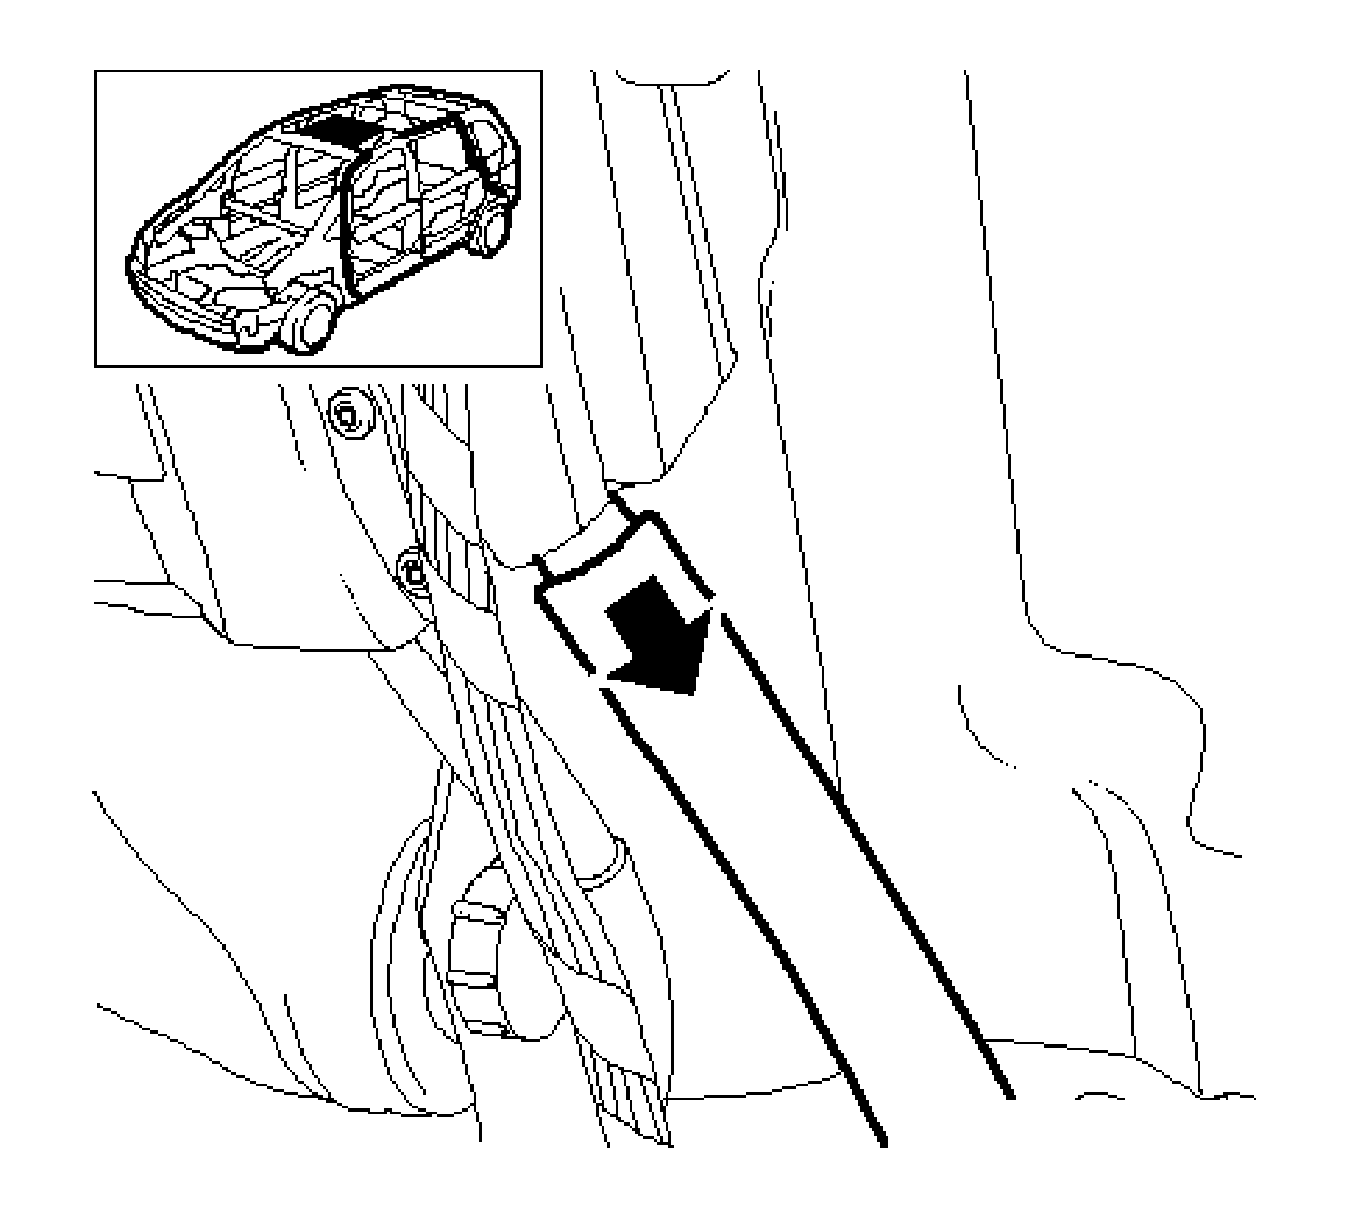
| 6.1. | Remove the water drain hose from the sunroof. |
| 6.2. | Remove the outer run-off in the direction of the vehicle interior. |
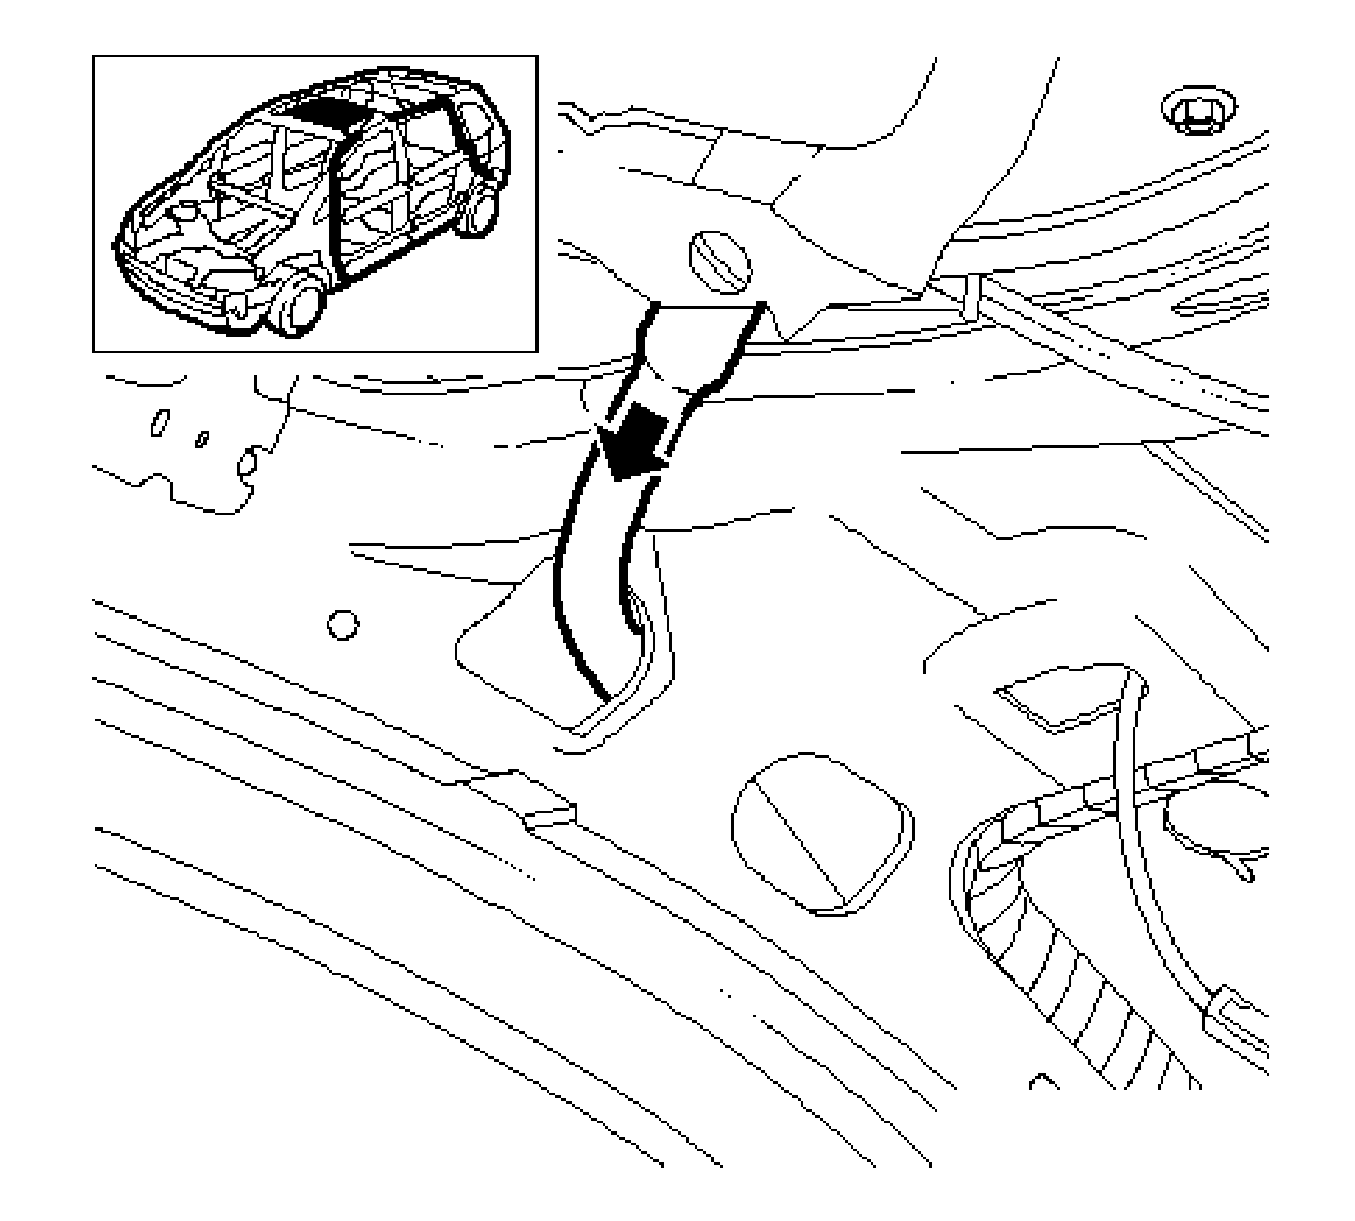
Remove the 2 hoses.
Disconnect the 2 wiring harness plugs.
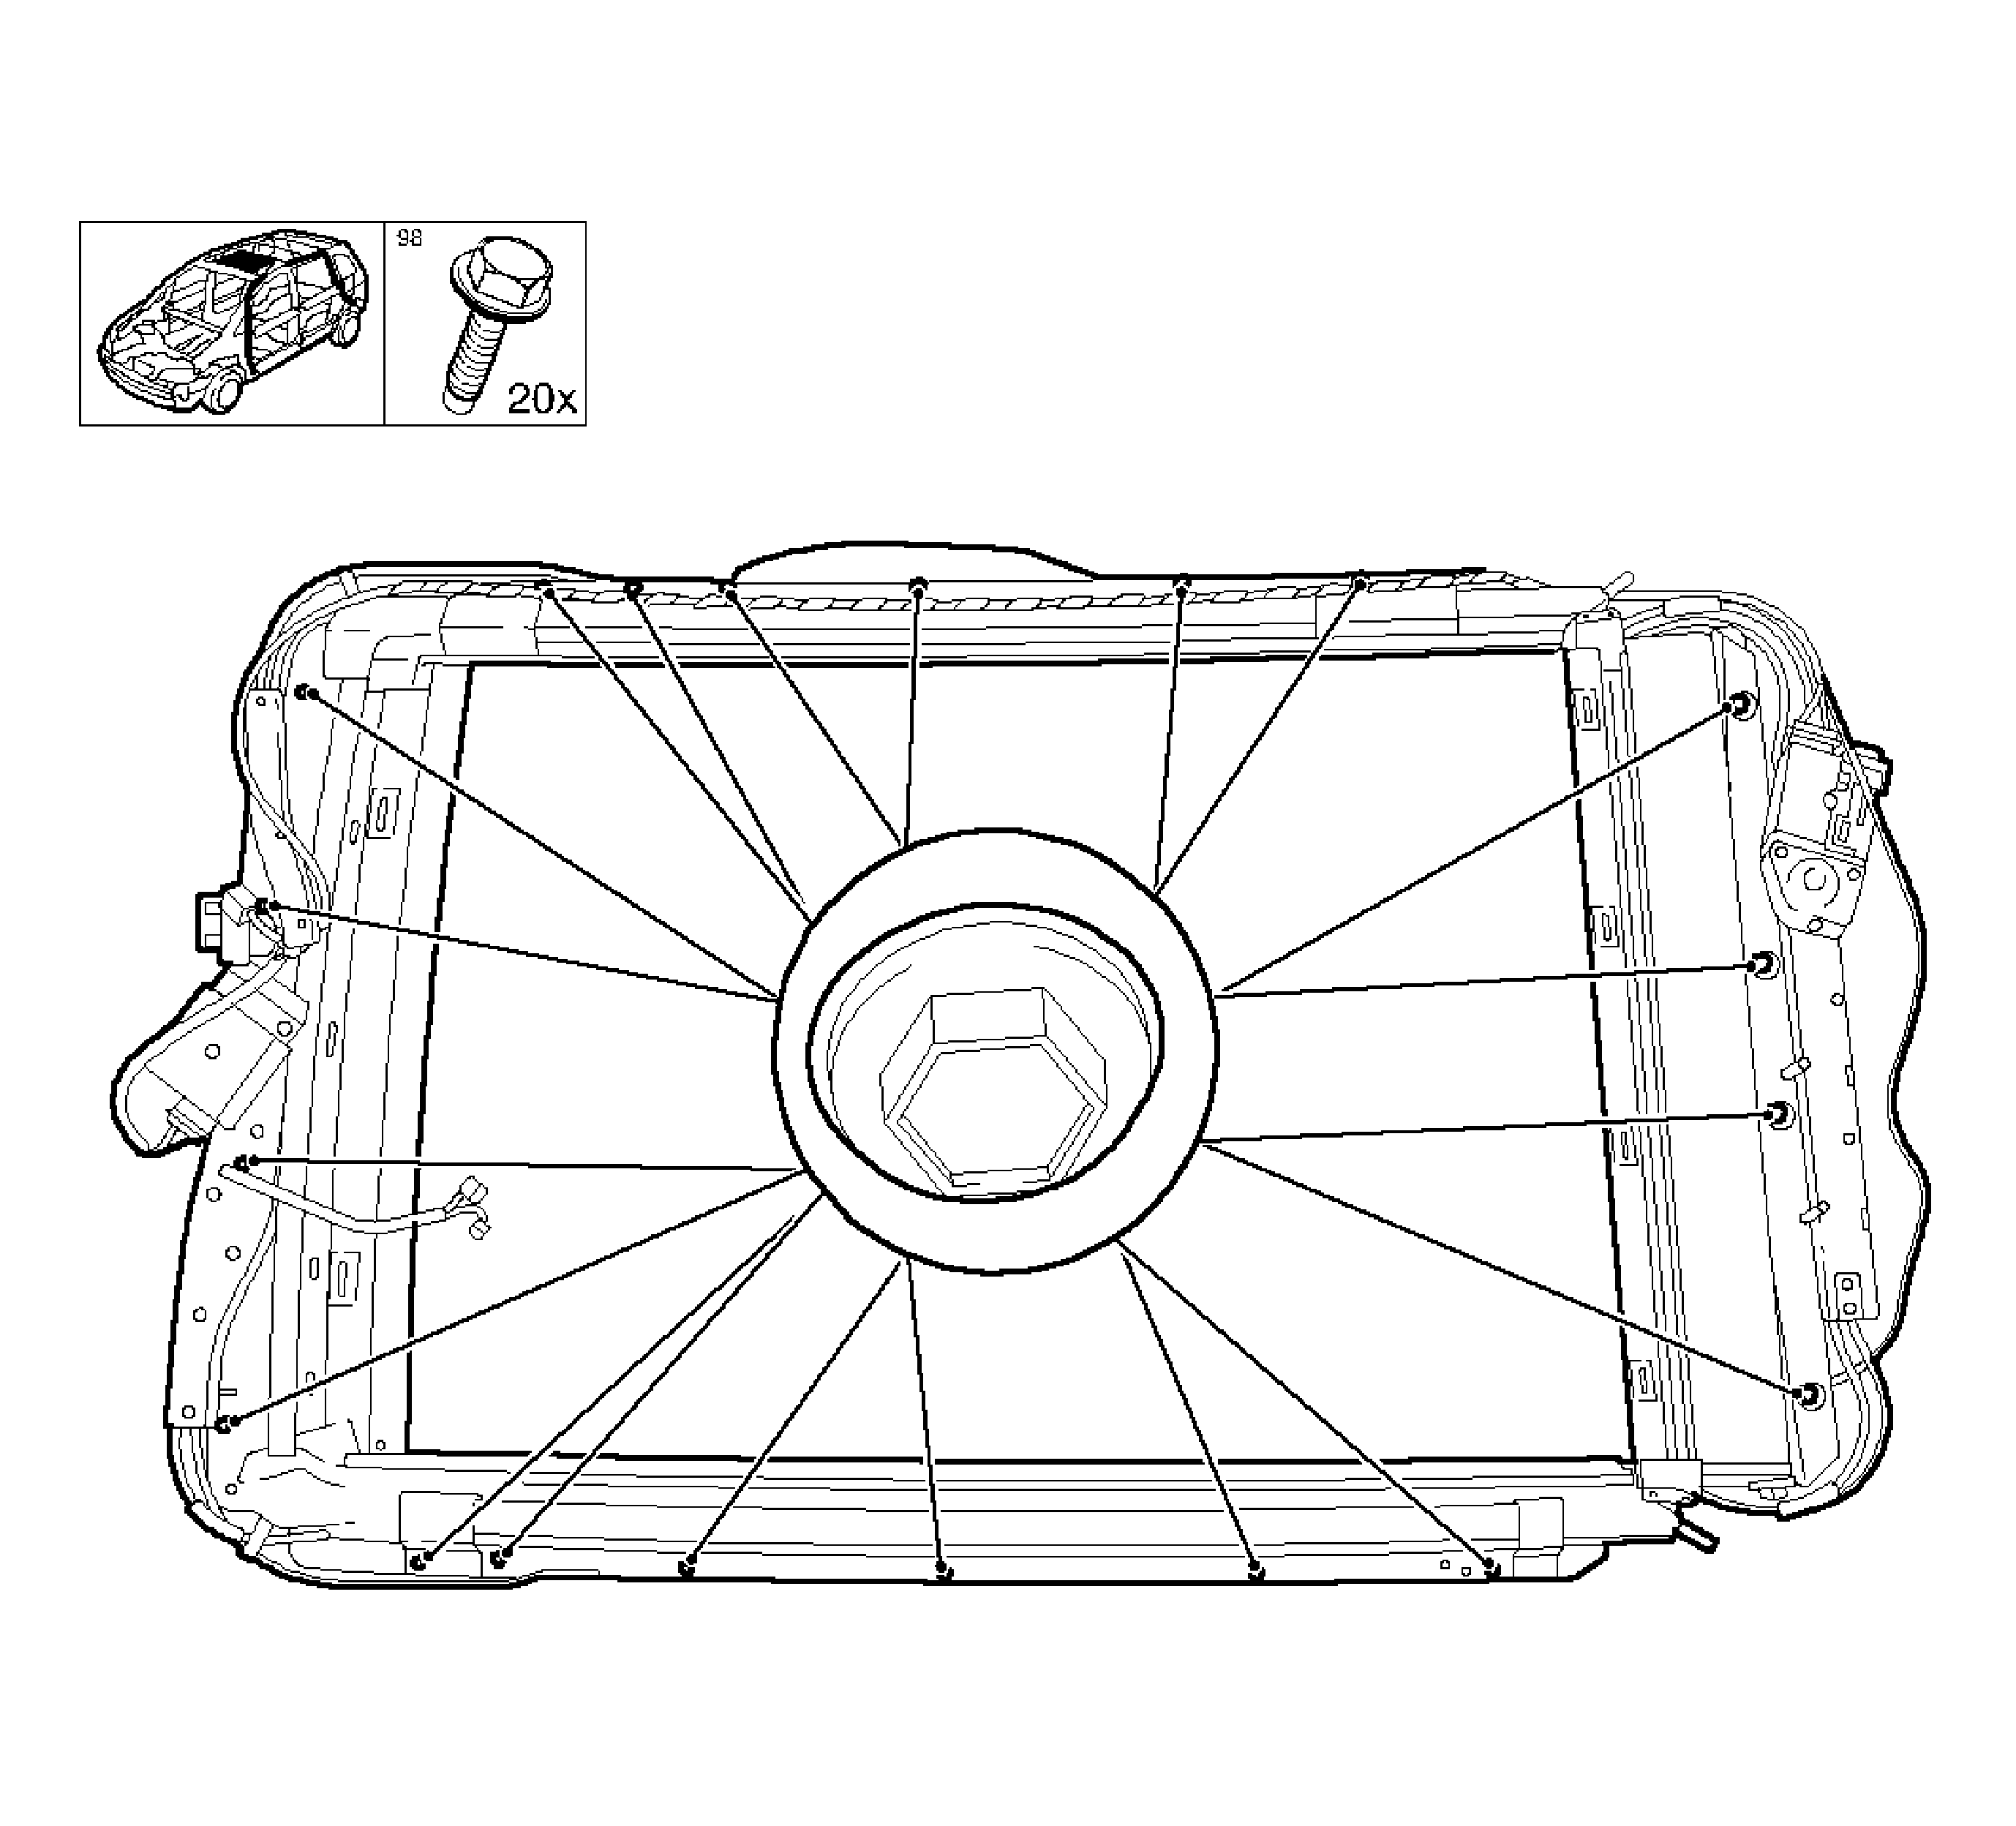
Remove the 20 screws.
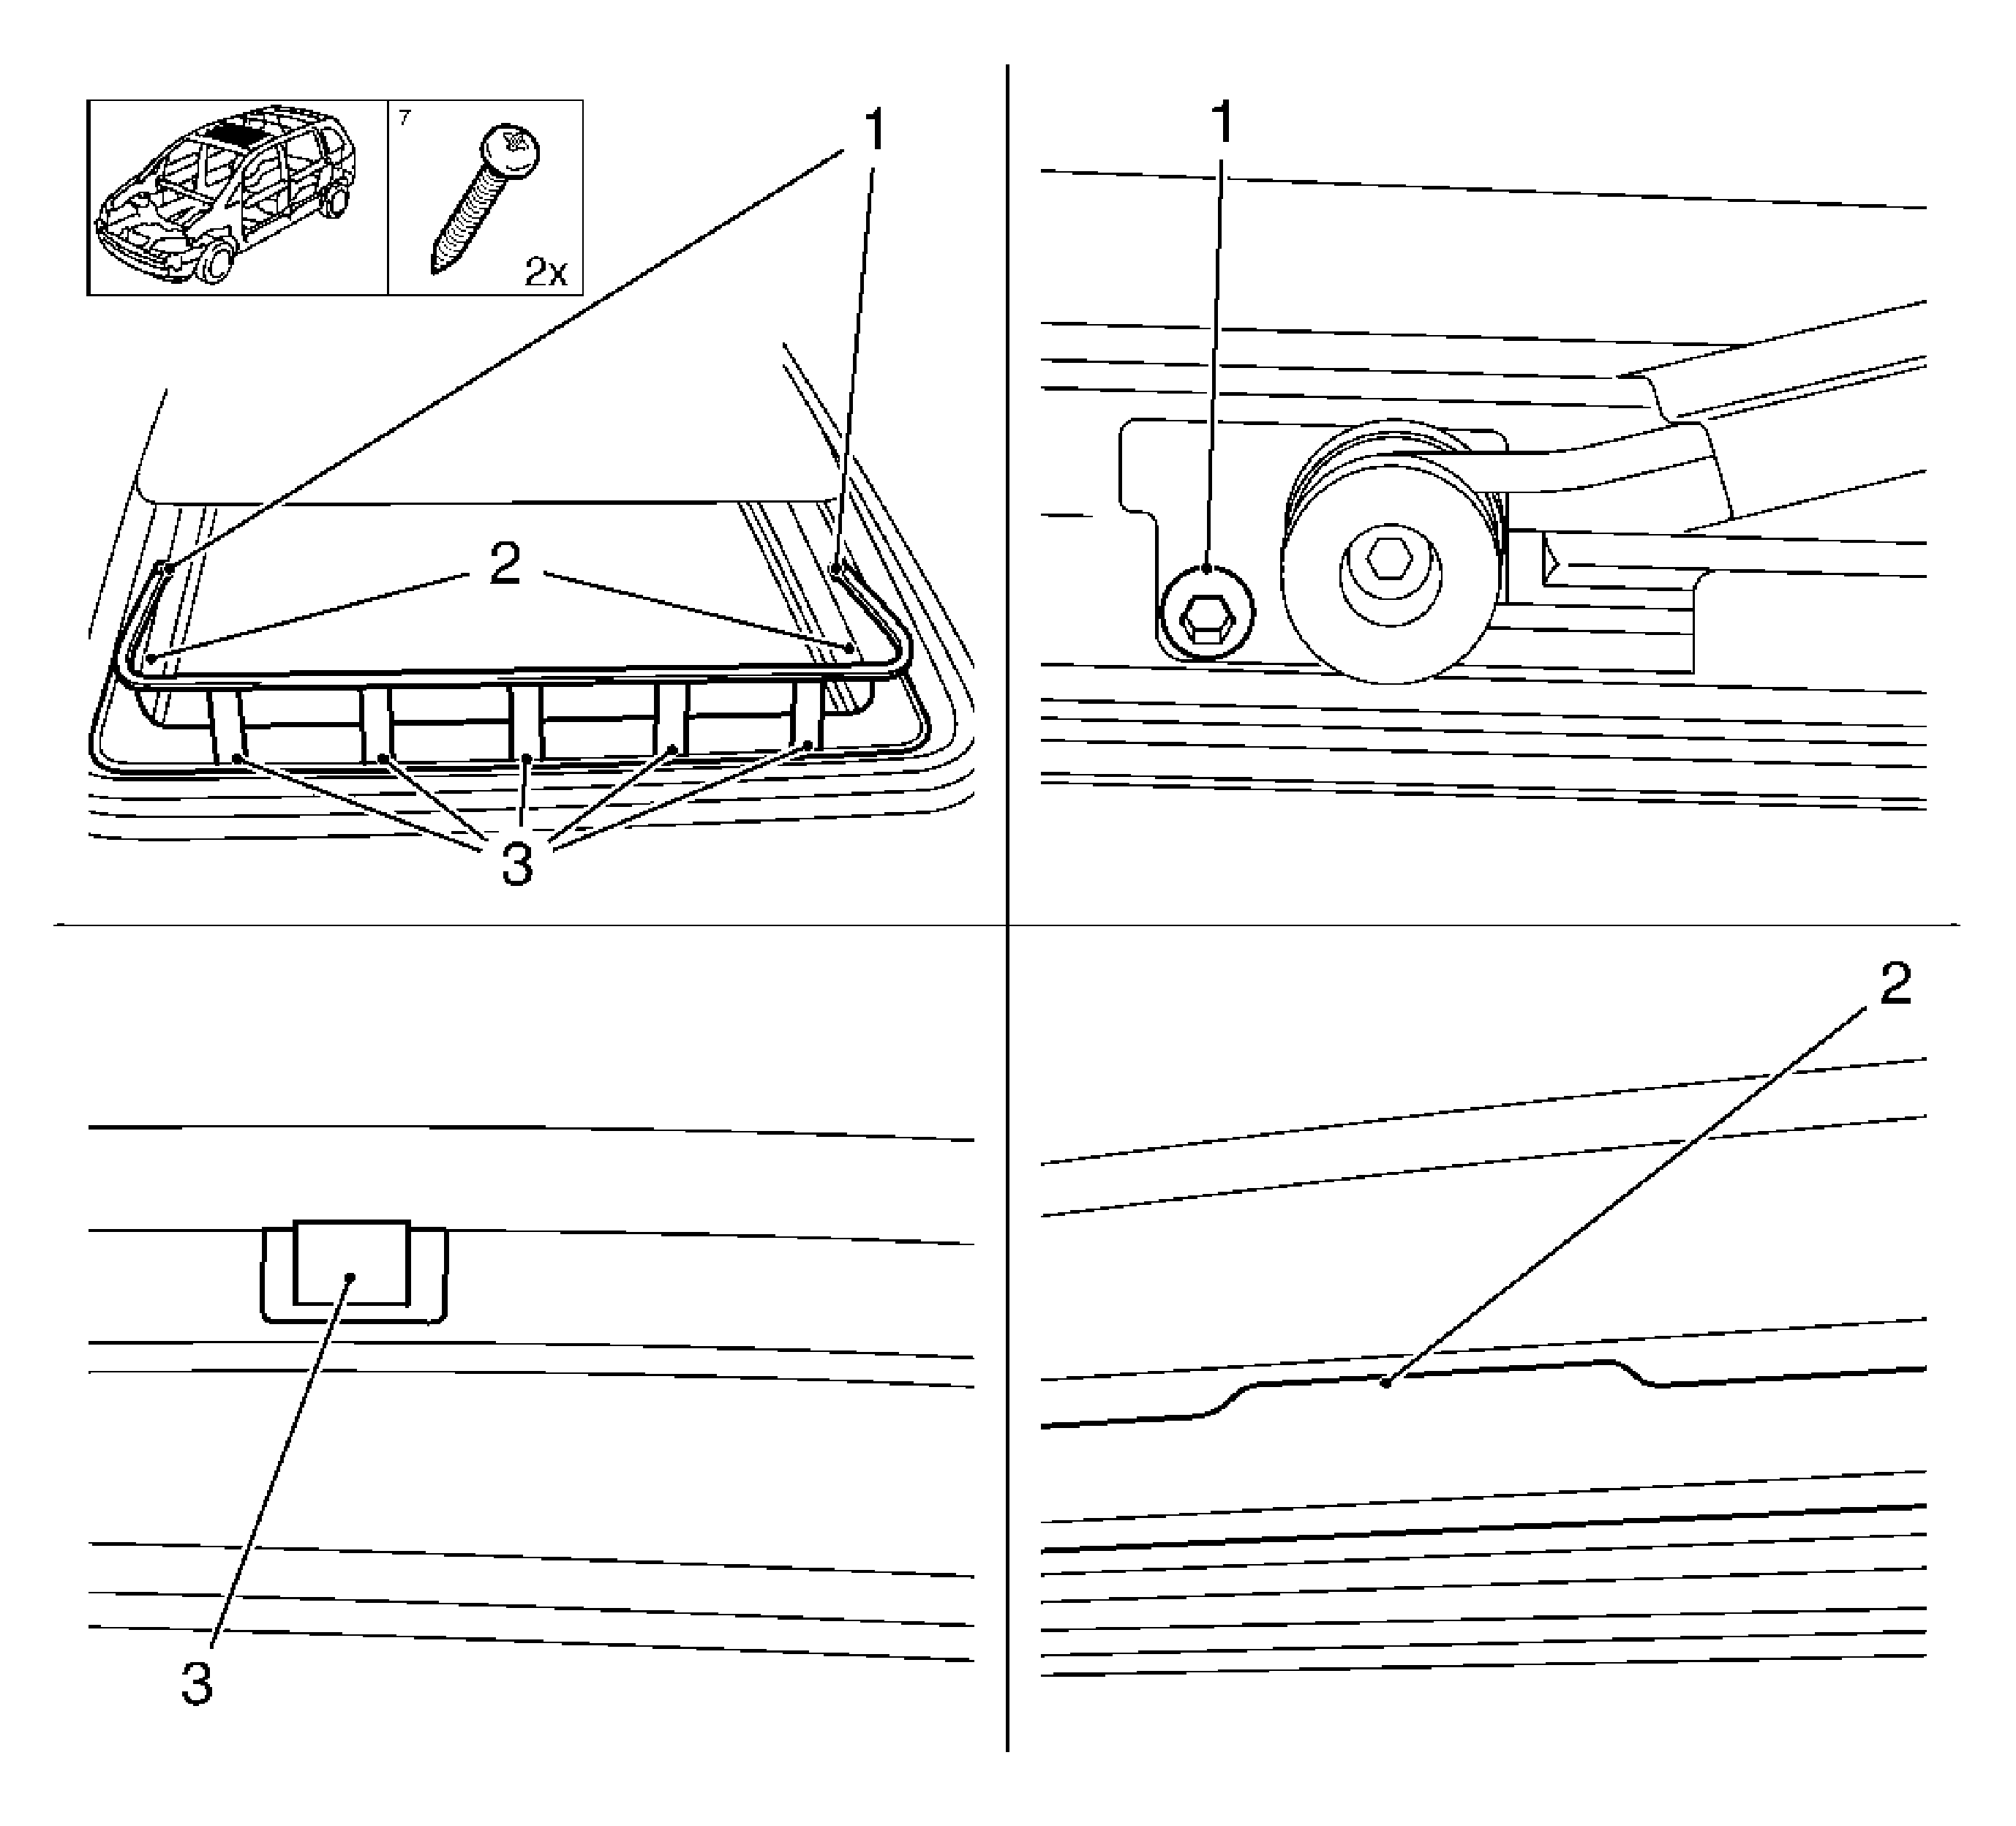
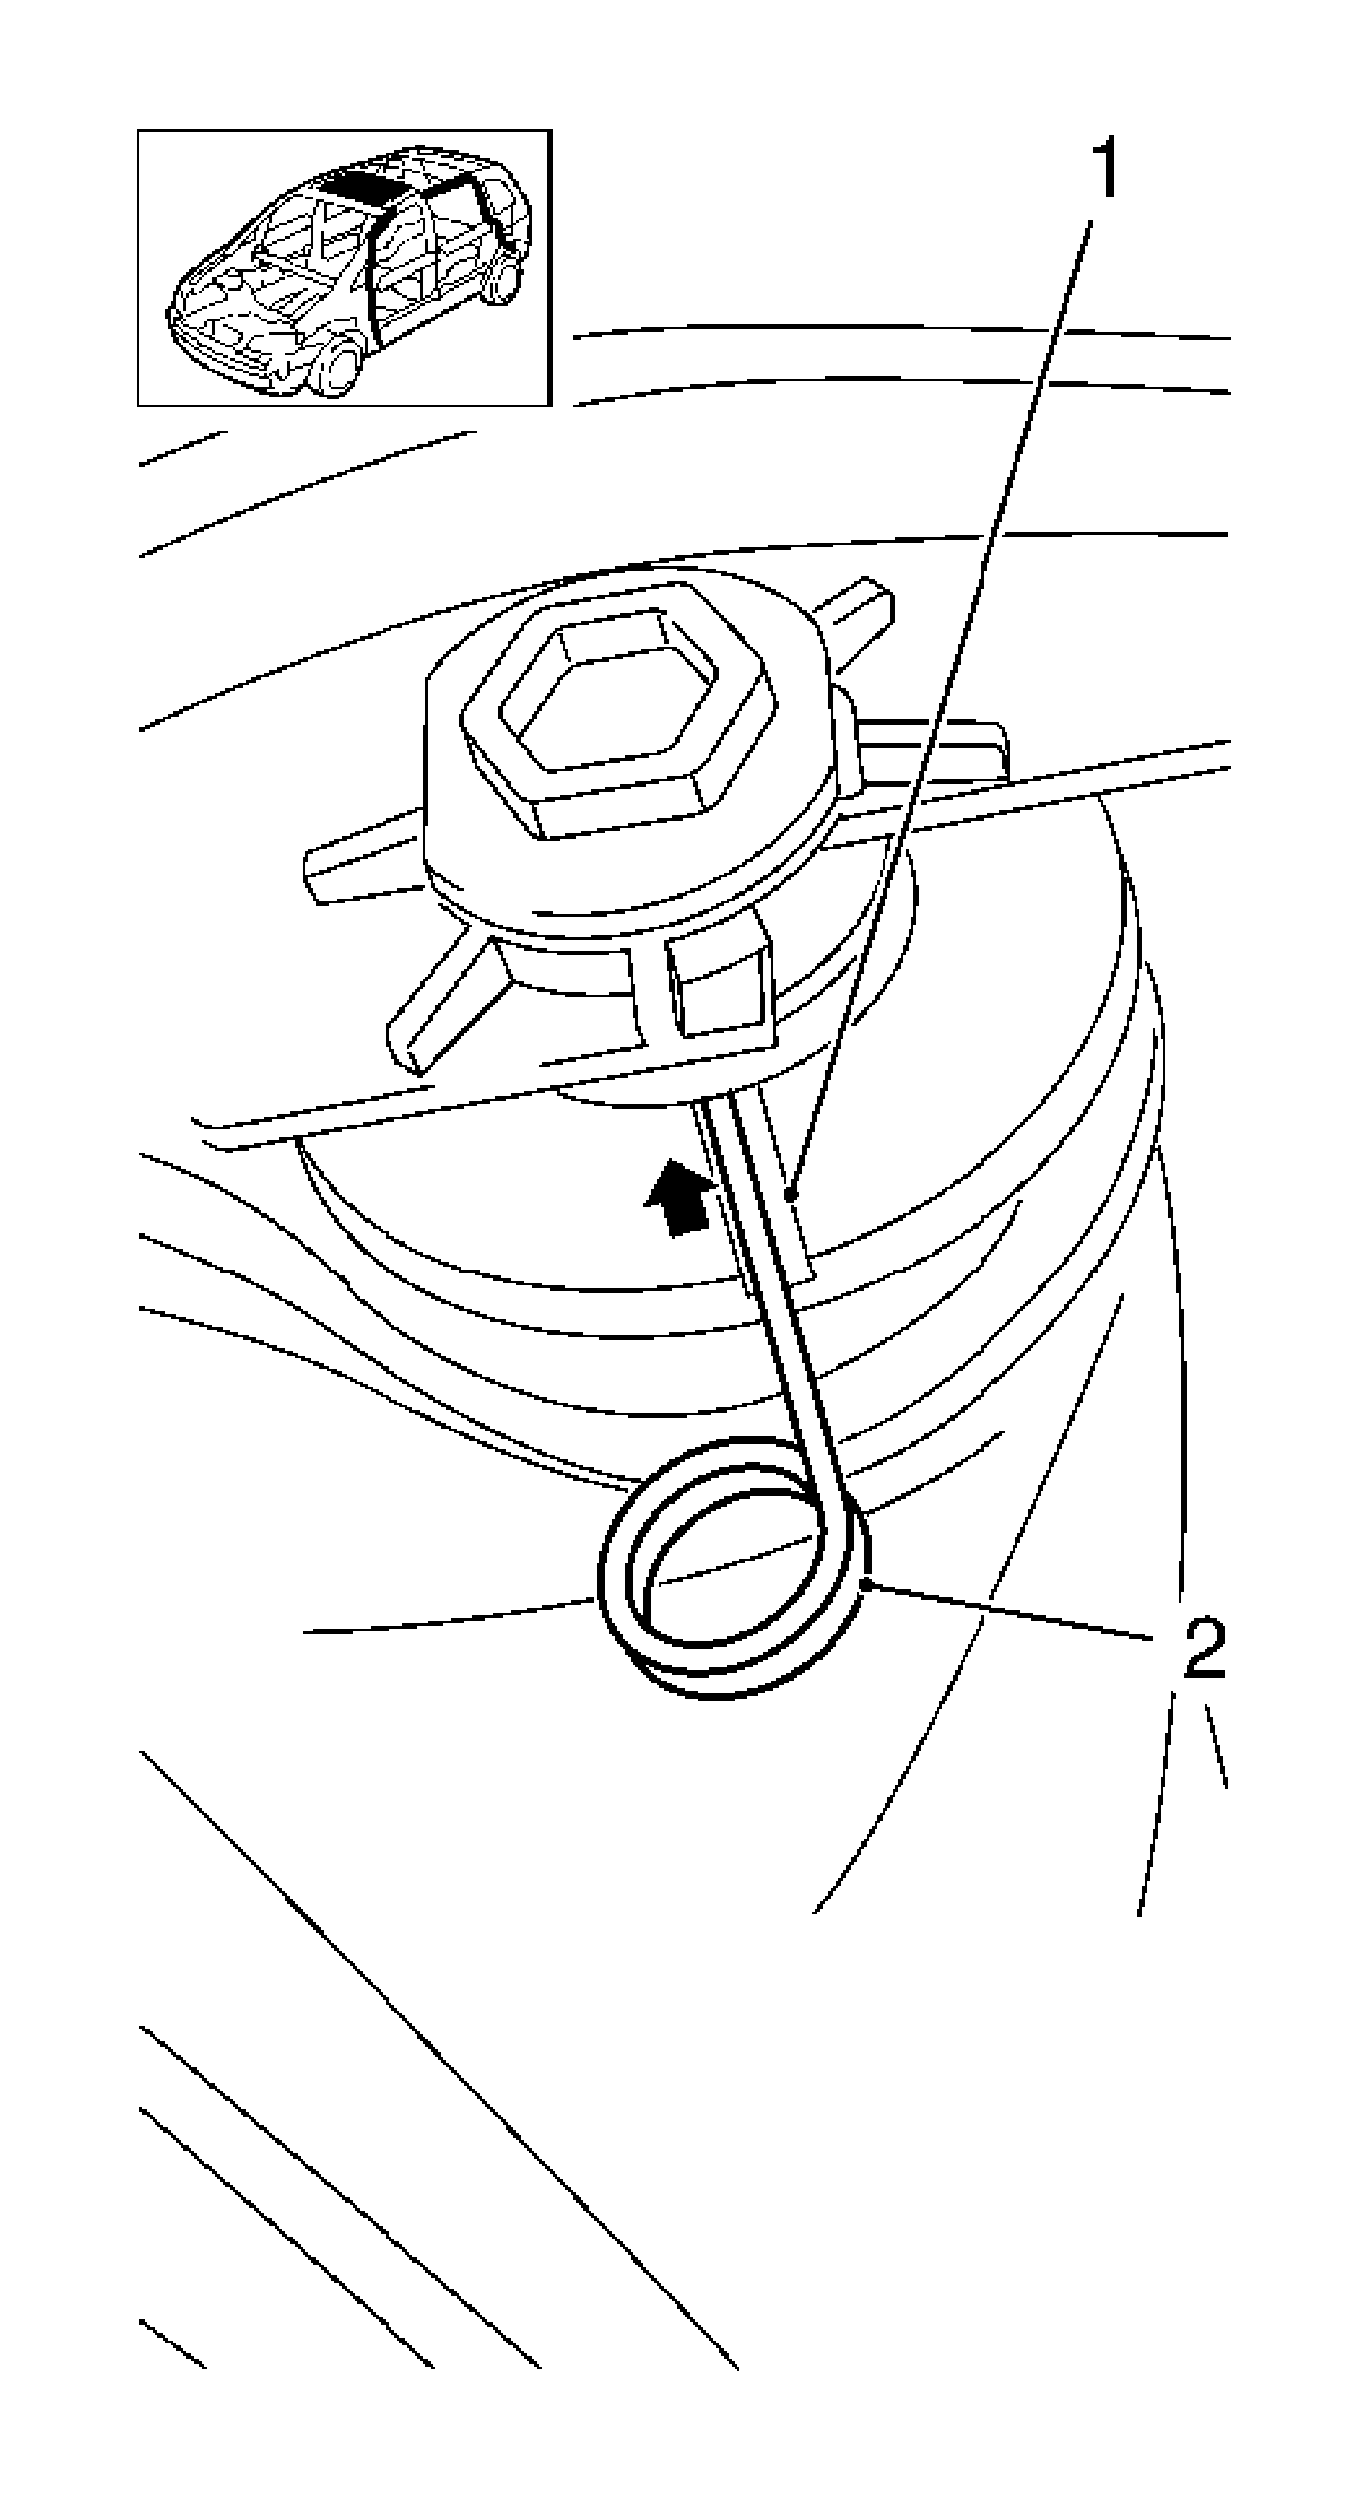
Note: The sunshade is blocked and cannot roll open.
| 12.1. | Manually roll the sunshade until the notch (1) is horizontal to the sunshade. |
| 12.2. | Place a bolt pin (2) approximately 1 mm (0.04 in) thick on the left side in the notch in order to prevent the rolling open of the sunshade spring. |
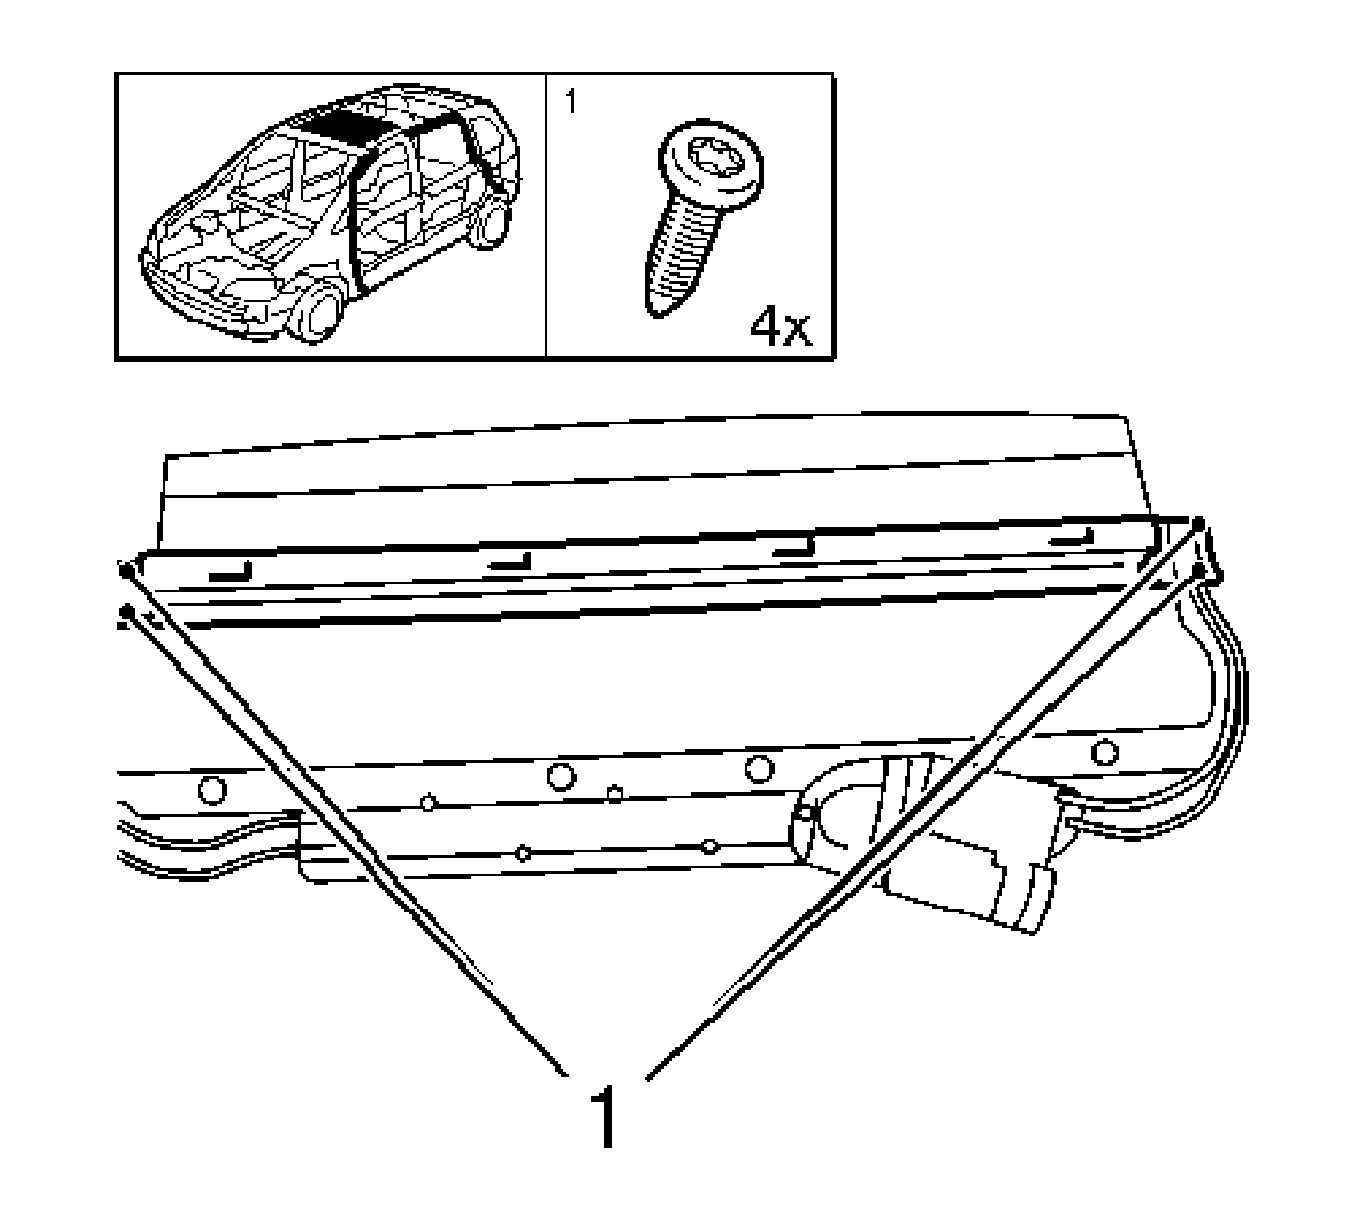
Remove the 4 bolts and remove the rear crossmember.
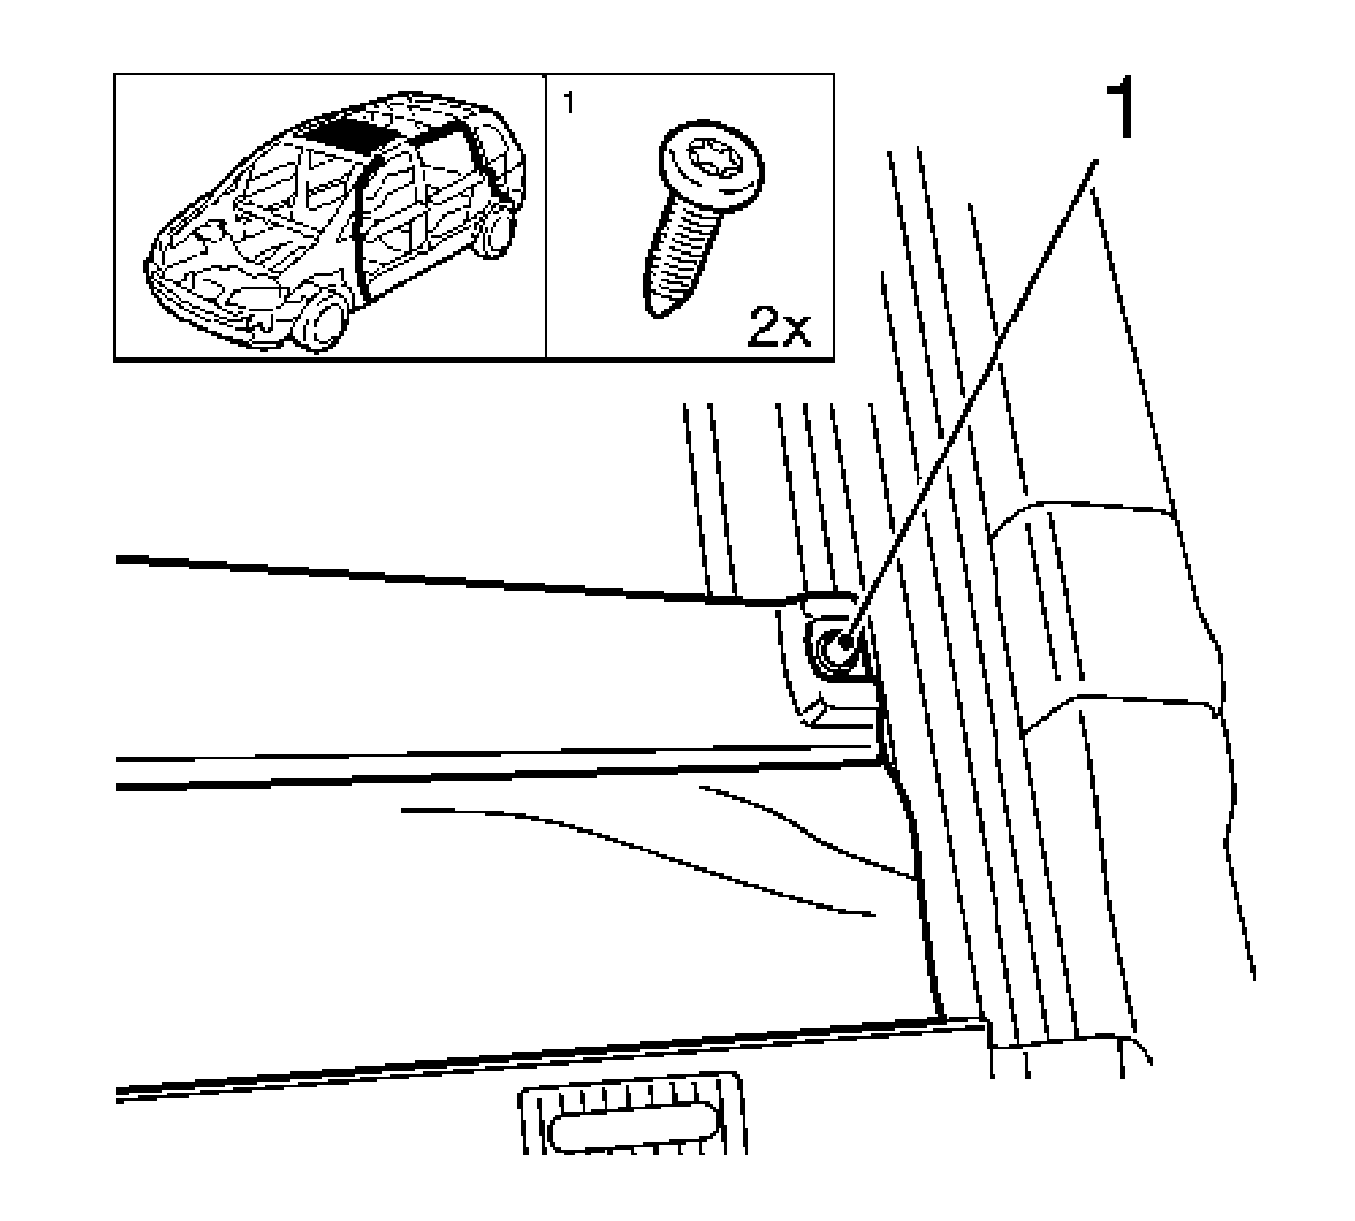
Remove the 2 bolts (1).
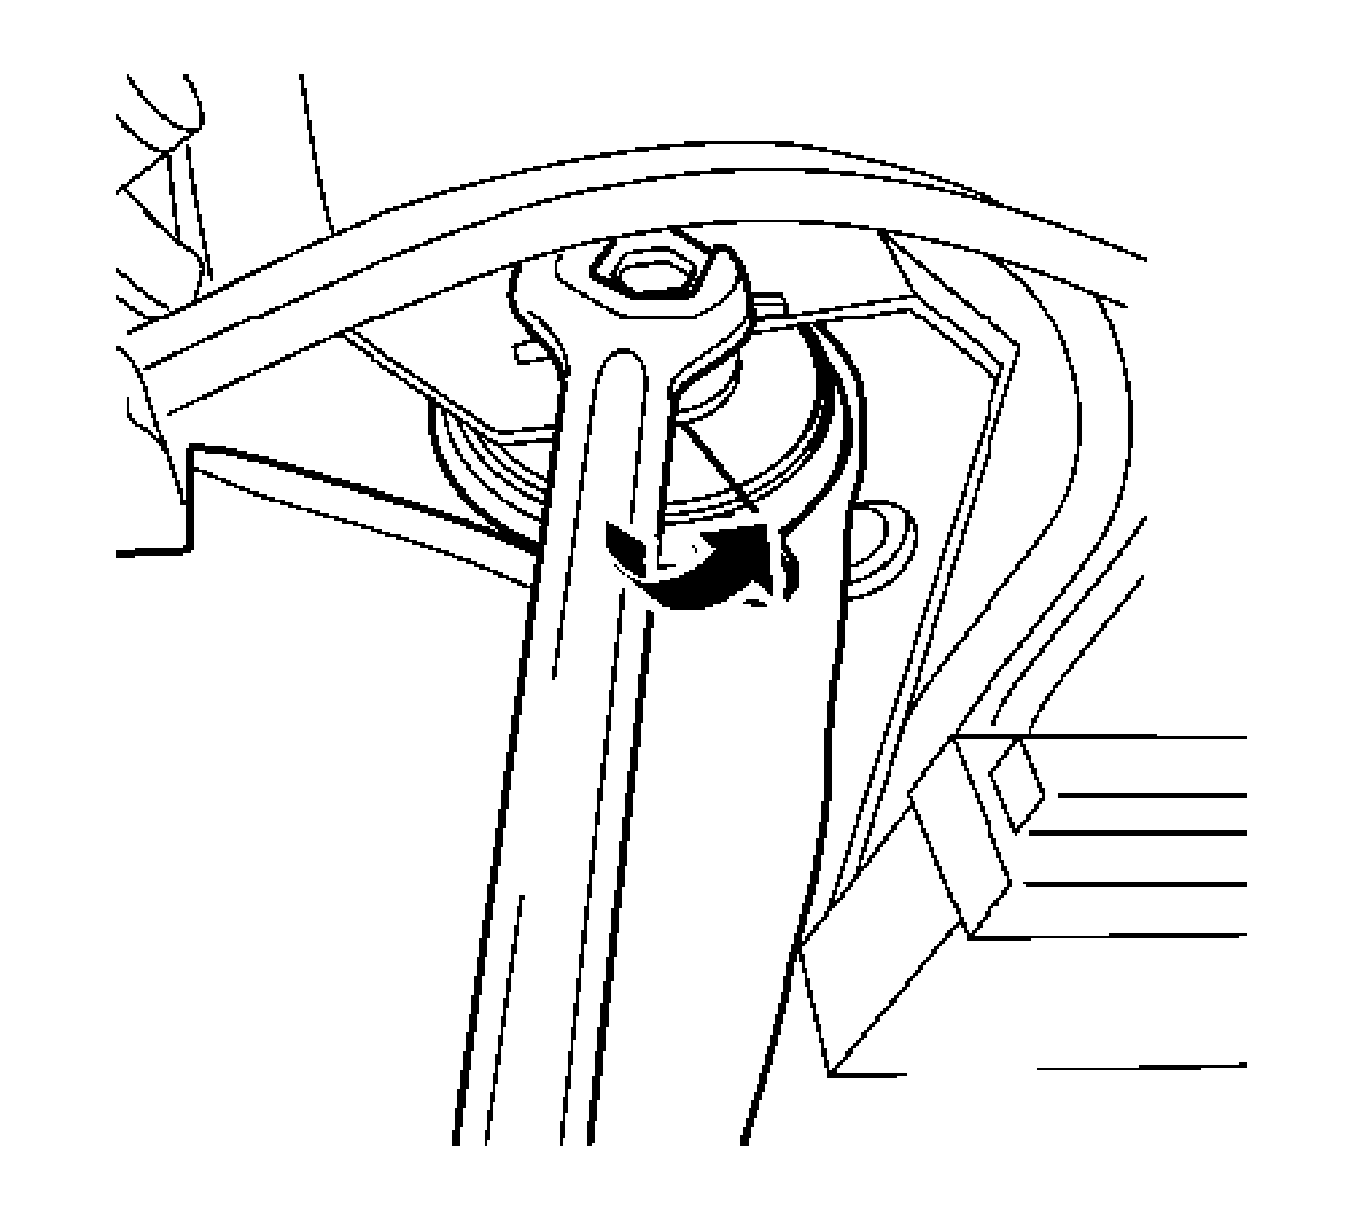
Disconnect the sunshade (90 degree rotation) and remove.
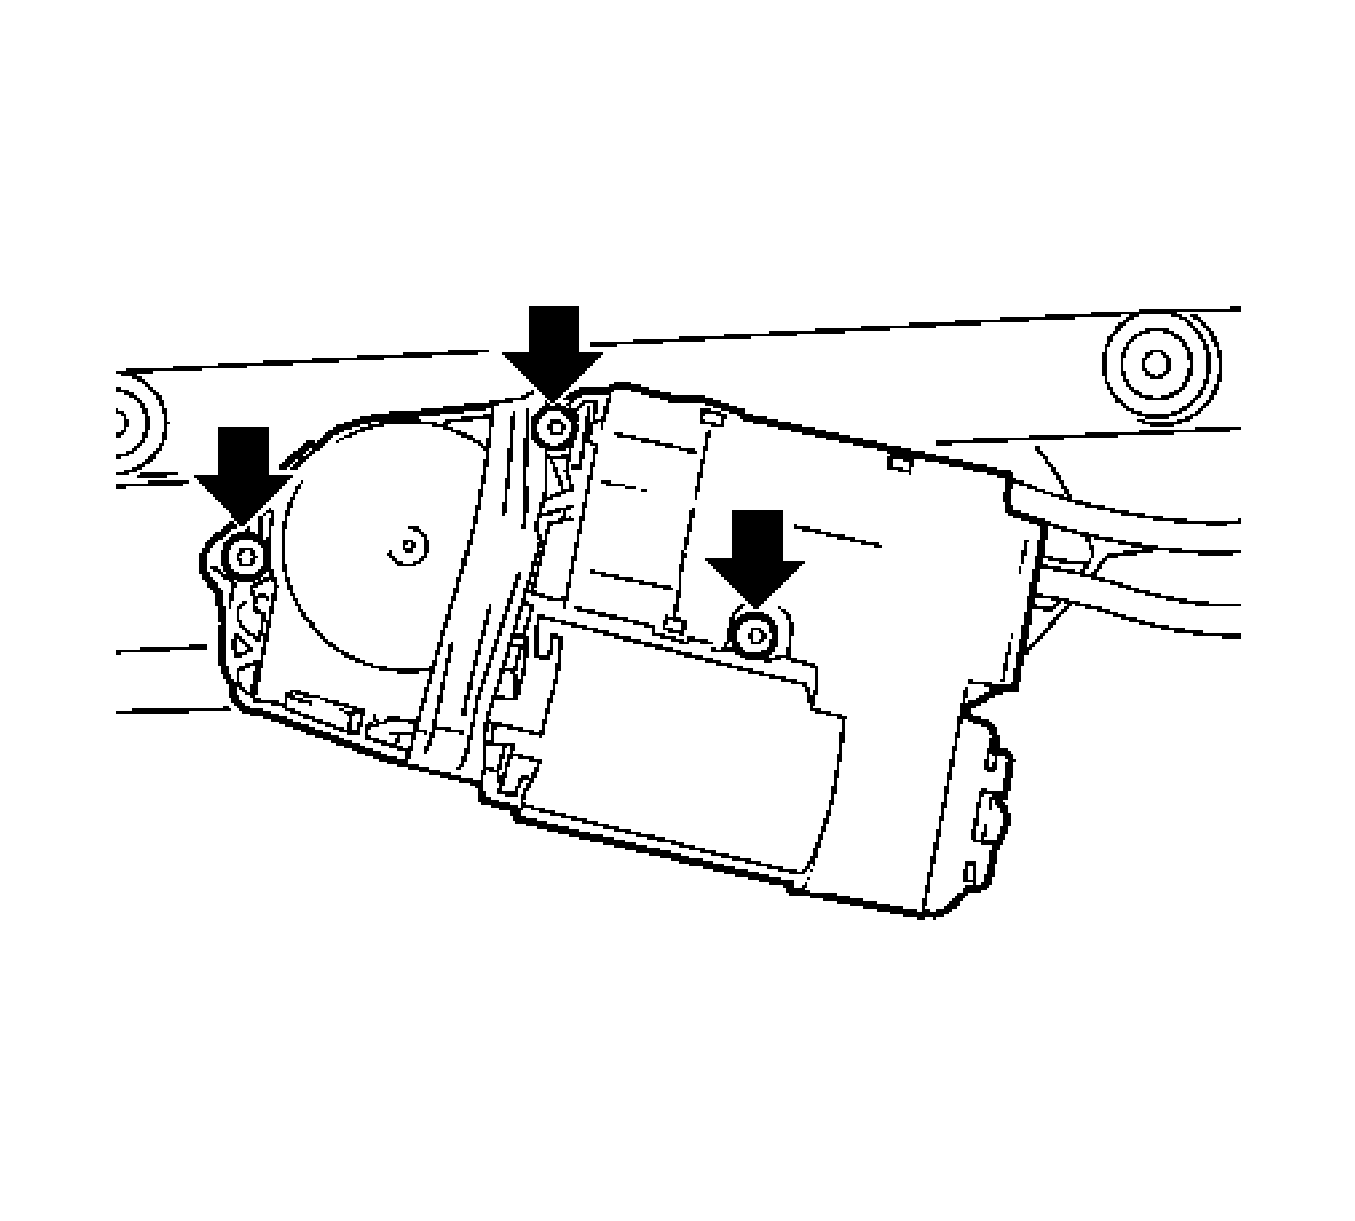
| 16.1. | Remove the 3 bolts. |
| 16.2. | Disconnect the wiring harness plug. |
| 17.1. | Remove the 3 bolts. |
| 17.2. | Disconnect the wiring harness plug. |
Remove the weatherstrip from the guide.
Installation Procedure
- Install the inner and outer seals.
- Install the sunroof motor.
- Install the sunshade motor.
- Insert the sunshade.
- Install the sunshade at the rails.
- Install the rear crossmember.
- Disconnect the sunshade.
- Install the wind deflector swing-out arm.
- Install the wind deflector.
- Insert the sunroof module assembly.
- Fasten the sunroof module assembly.
- Connect the wiring harness.
- Install the water drain hose front.
- Install the rear water drain hose.
- Insert the rear window.
- Install the rear window.
- Insert the front window.
- Install the front window.
- Close the sunroof until the rear part is in the vent position.
- Install the sunroof front window rear screws.
- Close the sunroof.
- Tighten the sunroof window rear screws.
- Open the sunroof to half open position.
- Tighten the sunroof window front screws.
- Install the air deflector covers.
- Close the sunroof.
- Close the sunshade.
- Install the headlining. Refer to Headlining Trim Panel Replacement.
- For programming procedures, refer to Control Module References.
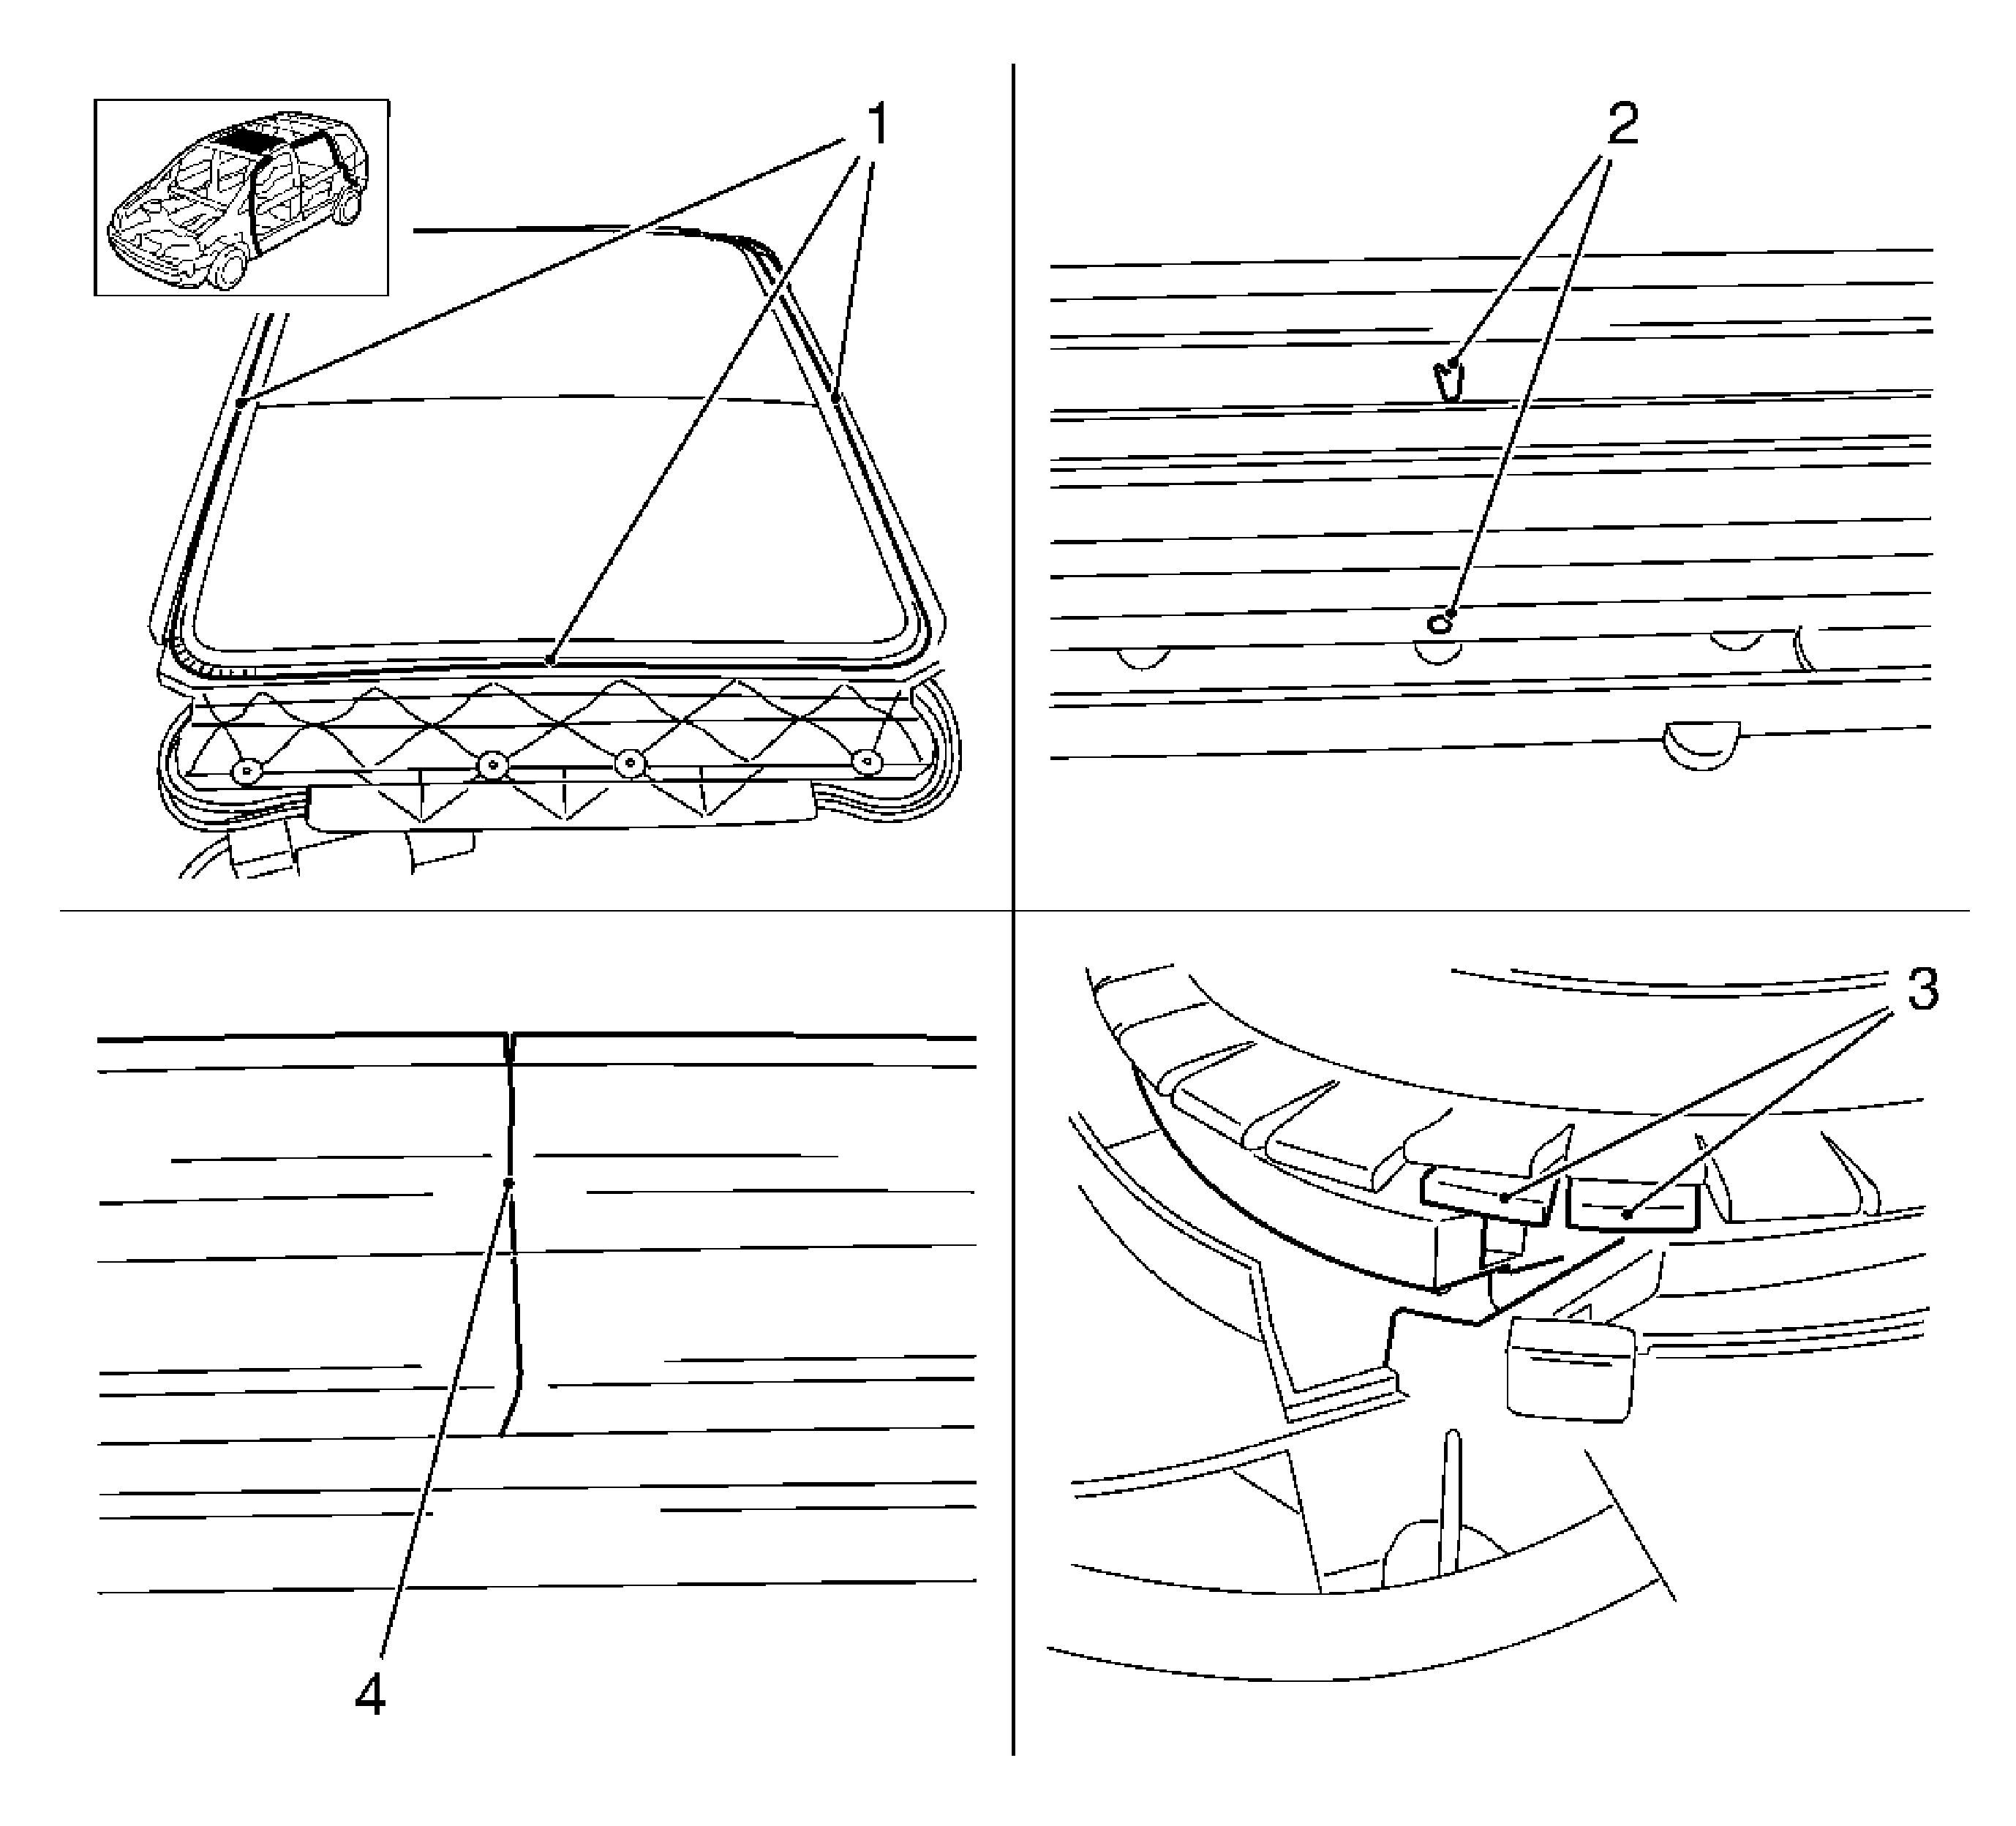
Note:
• Place the seal with the sunroof in the front area on the markings. • Cut off the seal at the lower area of the front opening of the sunroof.
| 1.1. | Insert the weatherstrip into the guide. |
| 1.2. | Cut off the extra weatherstrip and glue the end to the abutting seal (super glue). |
Caution: Refer to Fastener Caution in the Preface section.
Connect the wiring harness plug.
Tighten
Tighten the 3 bolts to 4 N·m (35 lb in).
Connect the wiring harness plug.
Tighten
Tighten the 3 bolts to 4 N·m (35 lb in).
Note: Ensure that the sunshade cover is correctly placed into the guide.
Insert the sunshade into the guide and lock into position.
Tighten
Tighten the 2 bolts to 2.5 N·m (22 lb in).
Tighten
Tighten the 4 bolts to 5 N·m (44 lb in).
Remove the pin.
Tighten
Tighten the sunshade.
Tighten
Tighten the 2 bolts to 2 N·m (18 lb in).
| 9.1. | Insert the wind deflector into the side guide. |
| 9.2. | Clamp the wind deflector. |
| 9.3. | 5 clamps. |
Tighten
Tighten the 2 bolts to 2.5 N·m (22 lb in).
Tighten
Tighten the 20 screws to 5 N·m (44 lb in).
Connect 2 wiring harness plugs.
Insert the 2 water drain hoses to the sunroof.
Insert the 2 water drain hoses to the sunroof.
Note:
• Tighten the window cover in the upper position. • Install the position window pane with the curve facing down.
Align the window gap 1.5-2 mm (0.06-0.08 in).
Align and insert the window on one side.
Note: The position disk may not rotate, since it can cause scratches in the rear window cover.
Insert the 2 long position window panes.
Tighten
Tighten the 2 screws with washers to 4 N·m (35 lb in).
Note: The position disk may not rotate, since it can cause scratches in the rear glass cover.
Insert the 4 long position window panes.
Tighten
Tighten the 4 screws with washers to 4 N·m (35 lb in).
Inspect the gap 1.5-2 mm (0.06-0.08 in).
Press the seal lightly down and tighten the 4 screws.
Tighten
Tighten the 4 screws to 4 N·m (35 lb in).
Tighten
Tighten the 2 bolts at the front to 4 N·m (35 lb in).
Tighten
Tighten the 2 bolts to 4 N·m (35 lb in).
