For 1990-2009 cars only
Removal Procedure
- Open the sunshade.
- Lower the molded headlining. Refer to Headlining Trim Panel Replacement .
- Lock the sunshade.
- Remove the rear crossmember.
- Remove the sunshade at the rails.
- Remove sunshade.

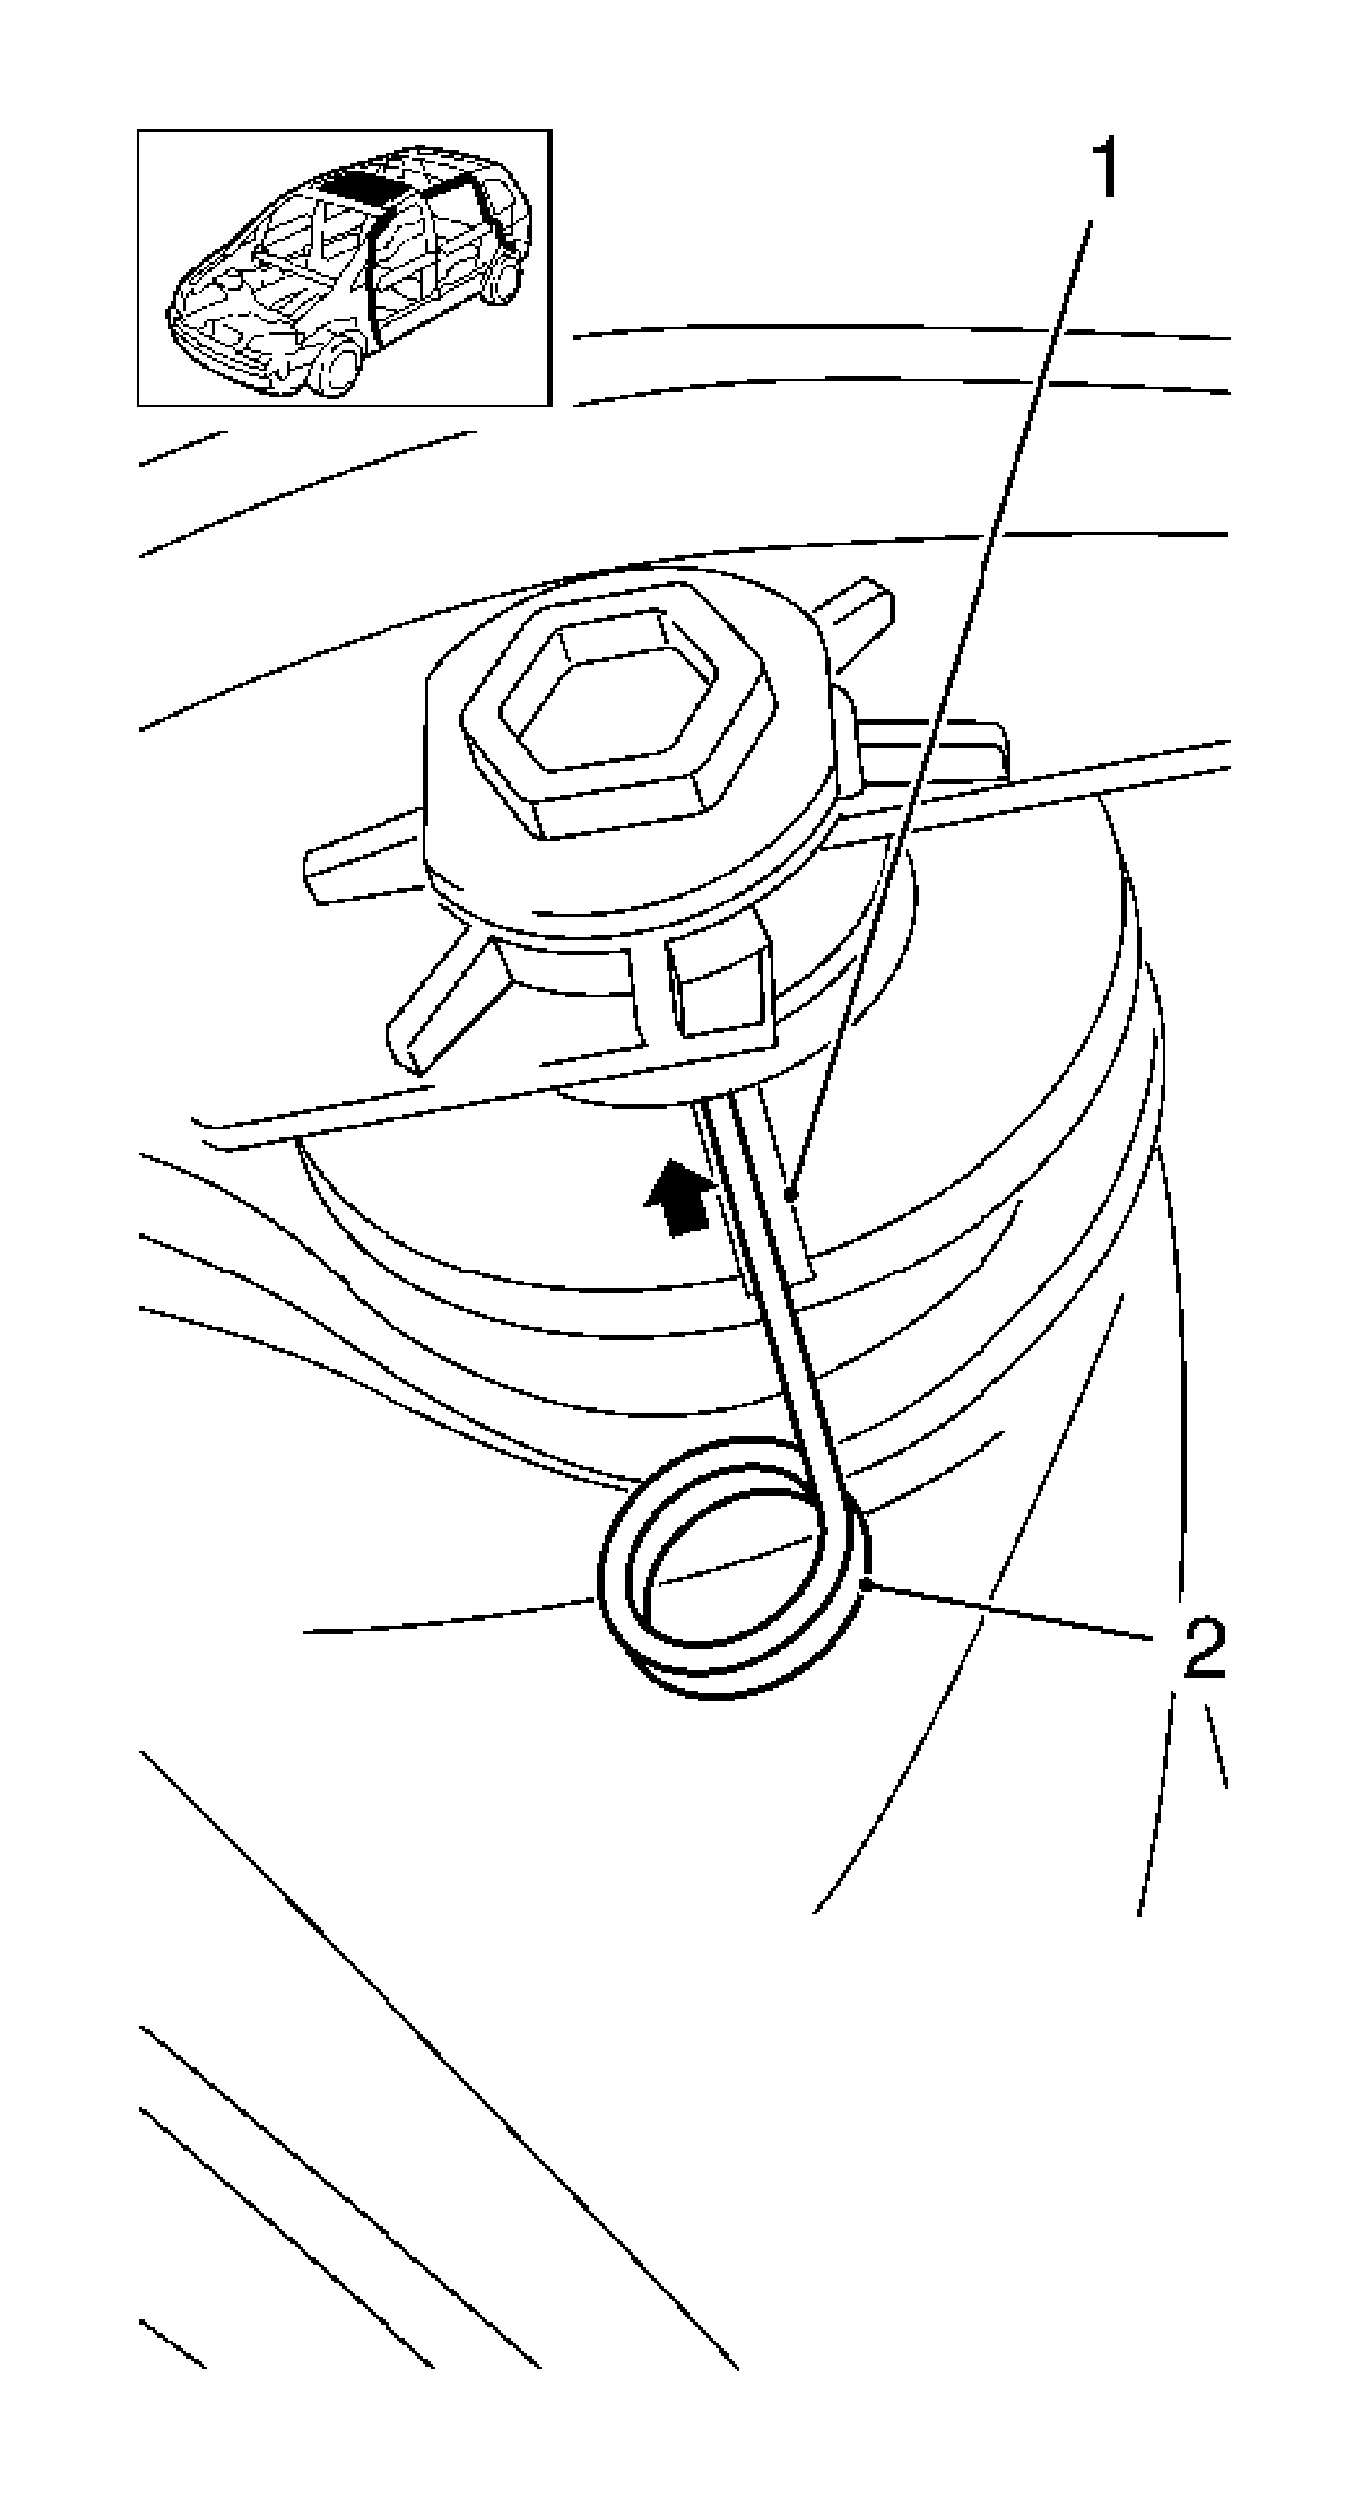
Important: The sunshade is blocked and cannot roll open.
| 3.1. | Manually roll the sunshade until the notch (1) is almost vertical to the sunshade. |
| 3.2. | Place a bolt pin (2) approximately 1 mm (0.04 in) thick on the left side in the notch in order to prevent the rolling open of the sunshade spring. |

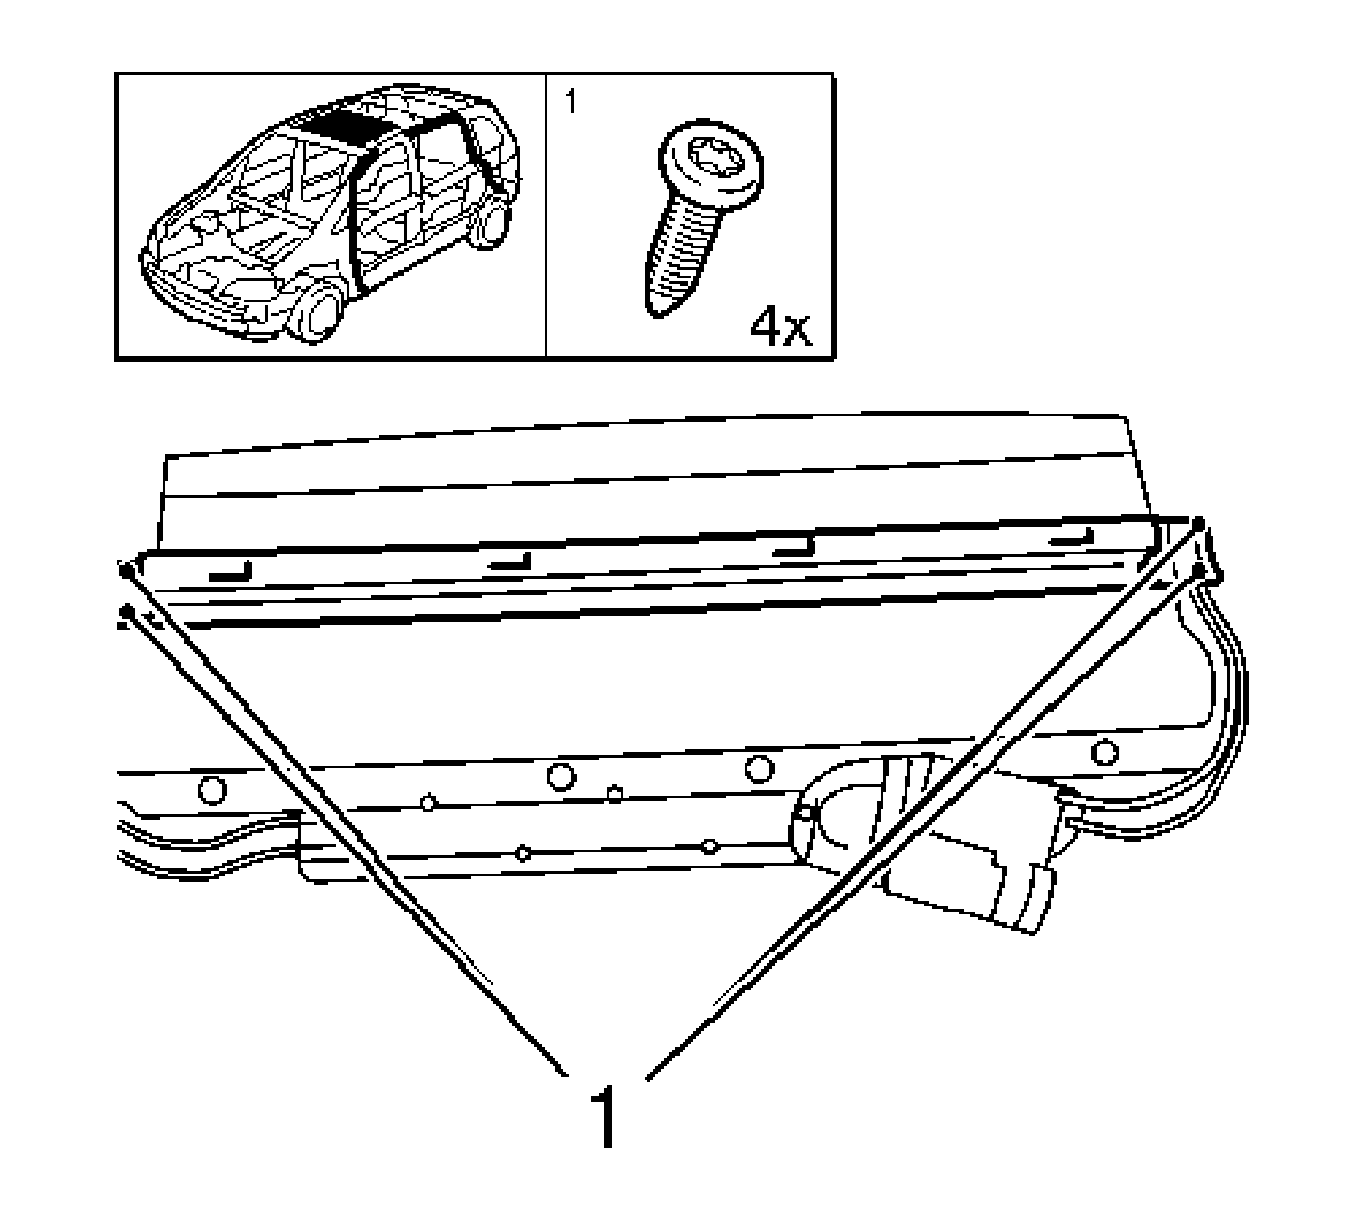
Remove the 4 bolts and remove the rear crossmember.

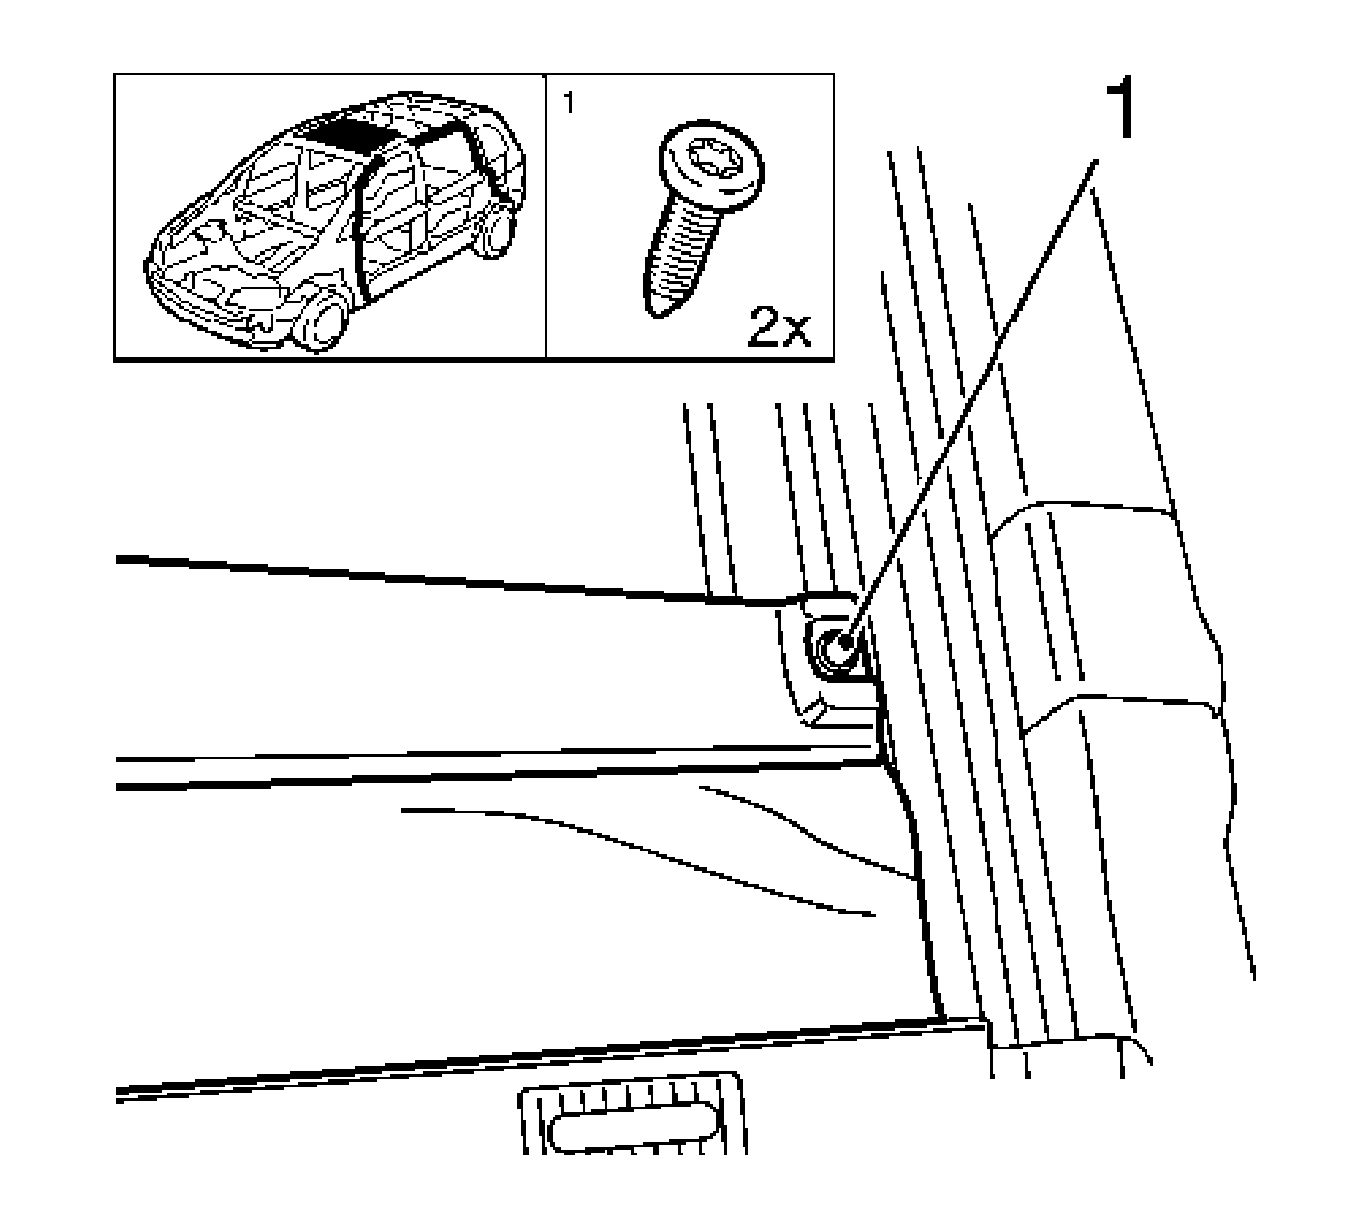
Remove the 2 bolts (1).
Disconnect the sunshade (90 degree rotation) and remove.
Installation Procedure
- Insert the sunshade.
- Install the sunshade at the rails.
- Install the rear crossmember.
- Disconnect the sunshade.
- Close the sunshade
- Install the molded headlining. Refer to Headlining Trim Panel Replacement .

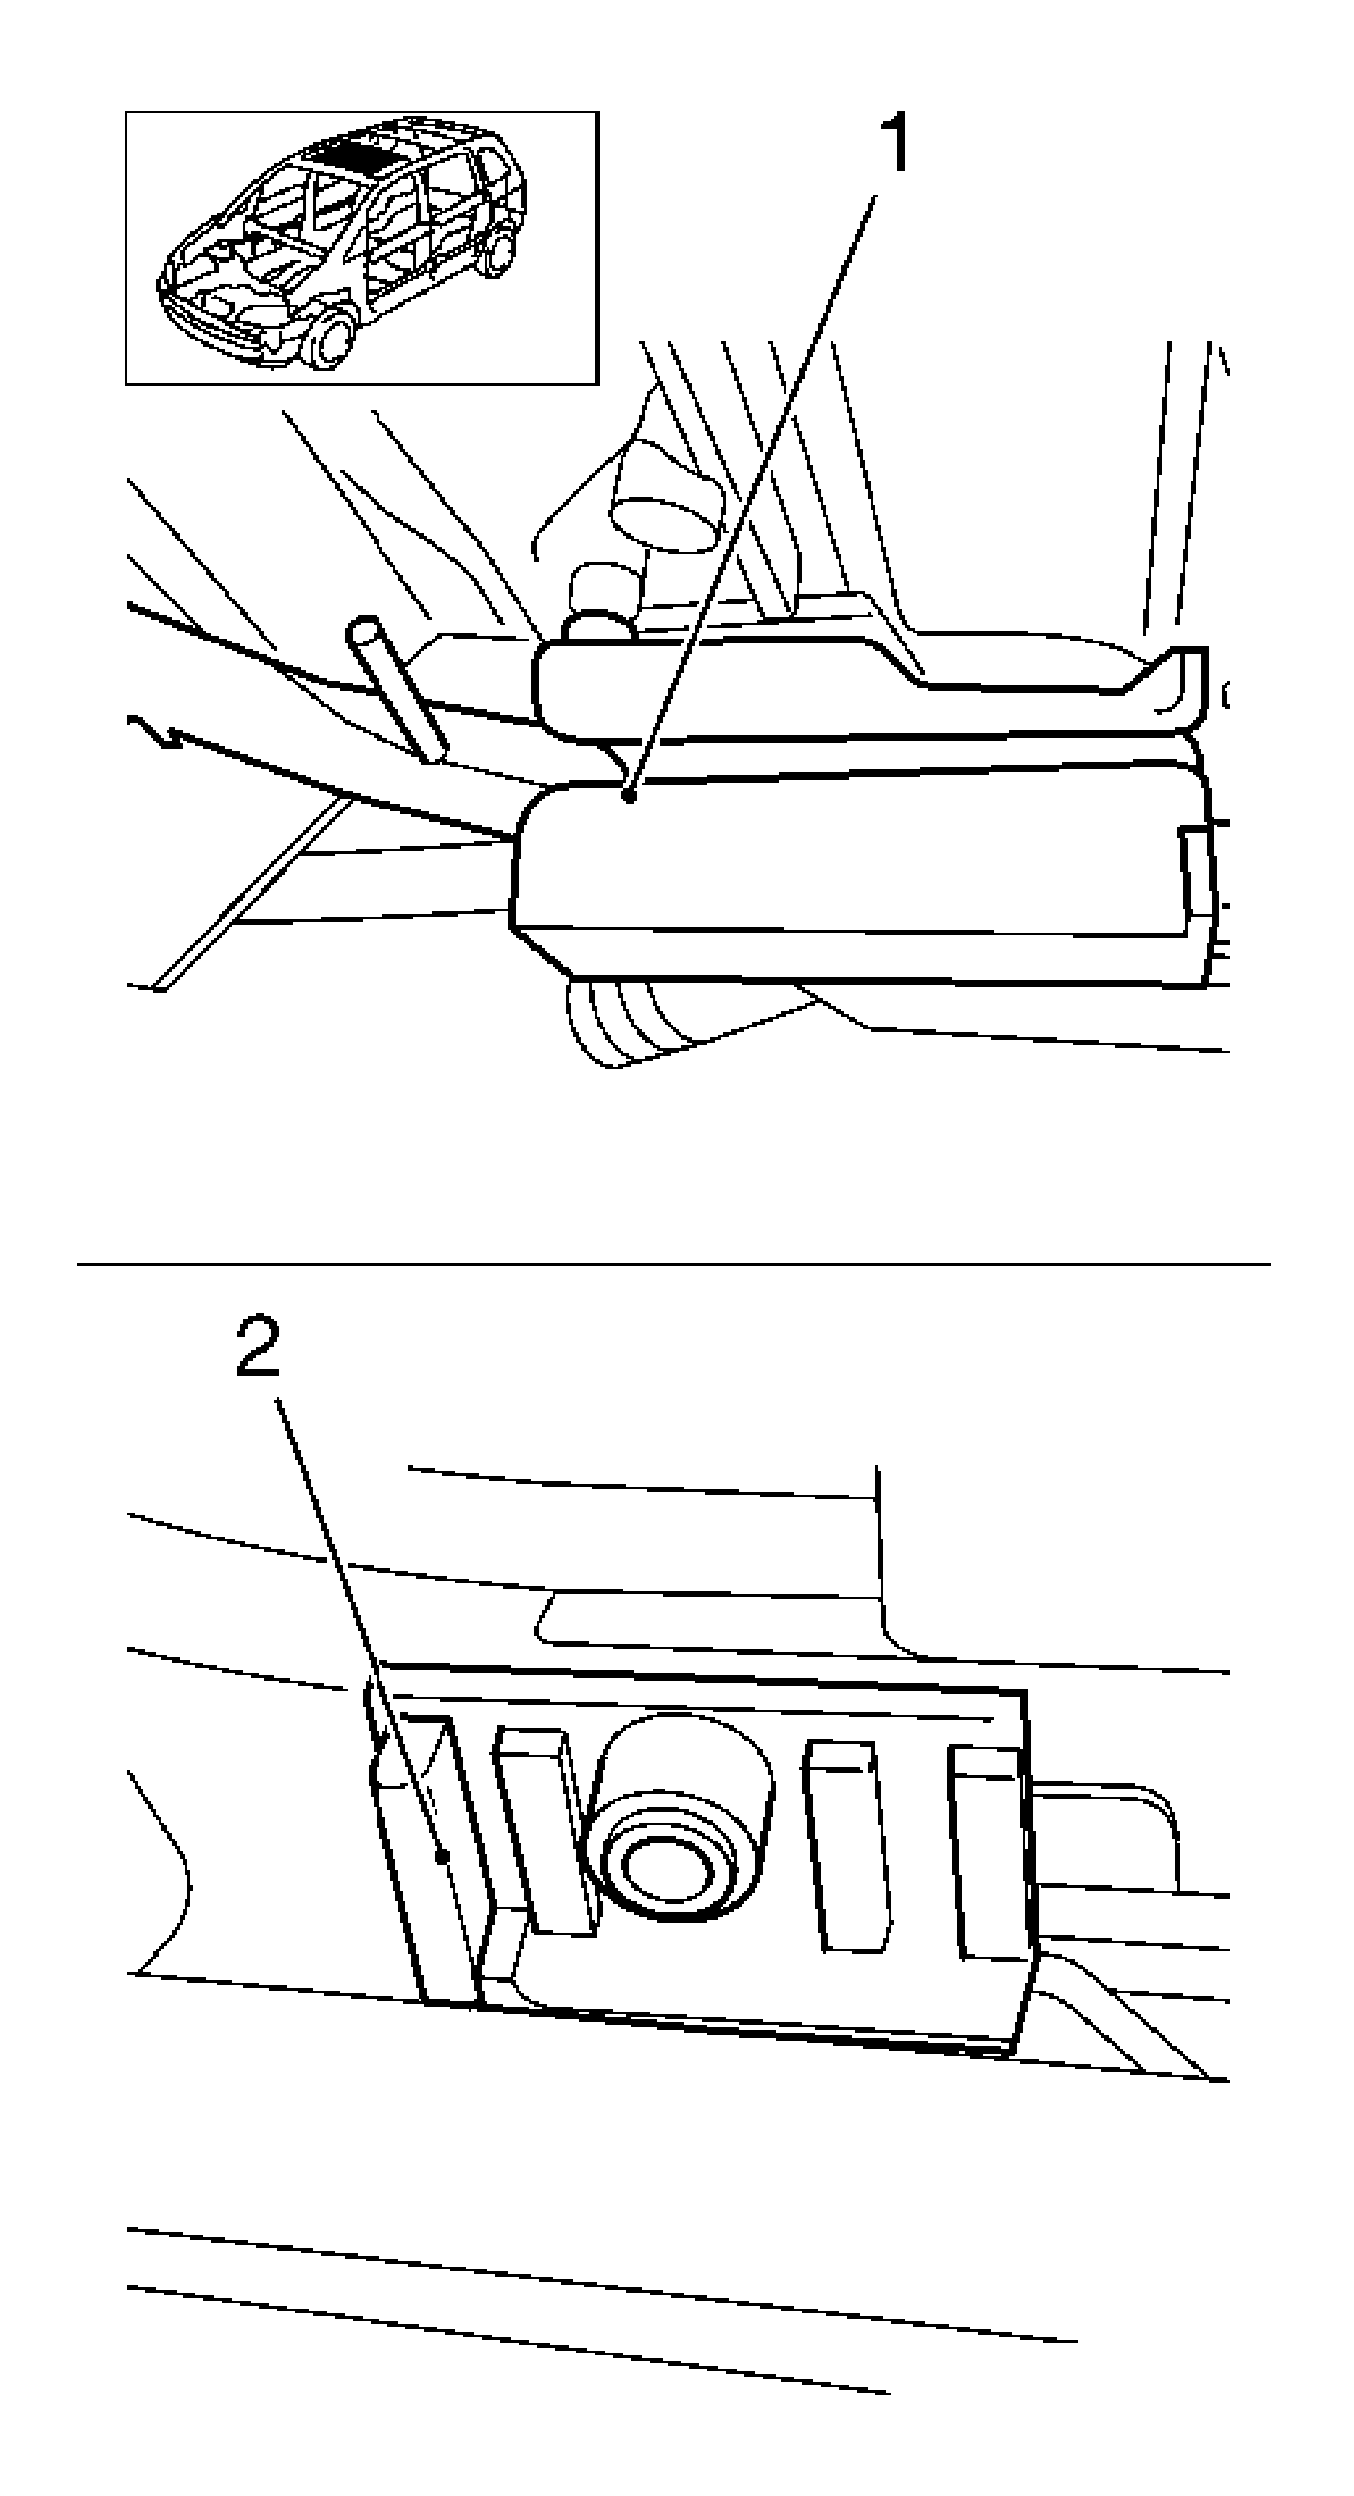
Important: Ensure that the sunshade cover is correctly placed into the guide (1)
| 1.1. | Insert the sunshade into the guide and lock into position. |
| 1.2. | Insert the sunshade in the guide rails until the stop (2). |
Tighten
Tighten the 2 bolts to 2.5 N·m (22 lb in).
Remove the pin.
Tighten
Tighten the sunshade.
