For 1990-2009 cars only
Removal Procedure
- Remove the front seat. Refer to Front Seat Replacement - Bucket.
- Remove the front floor console. Refer to Front Floor Console Replacement.
- Remove the door sill plate. Refer to Door Sill Plate Replacement.
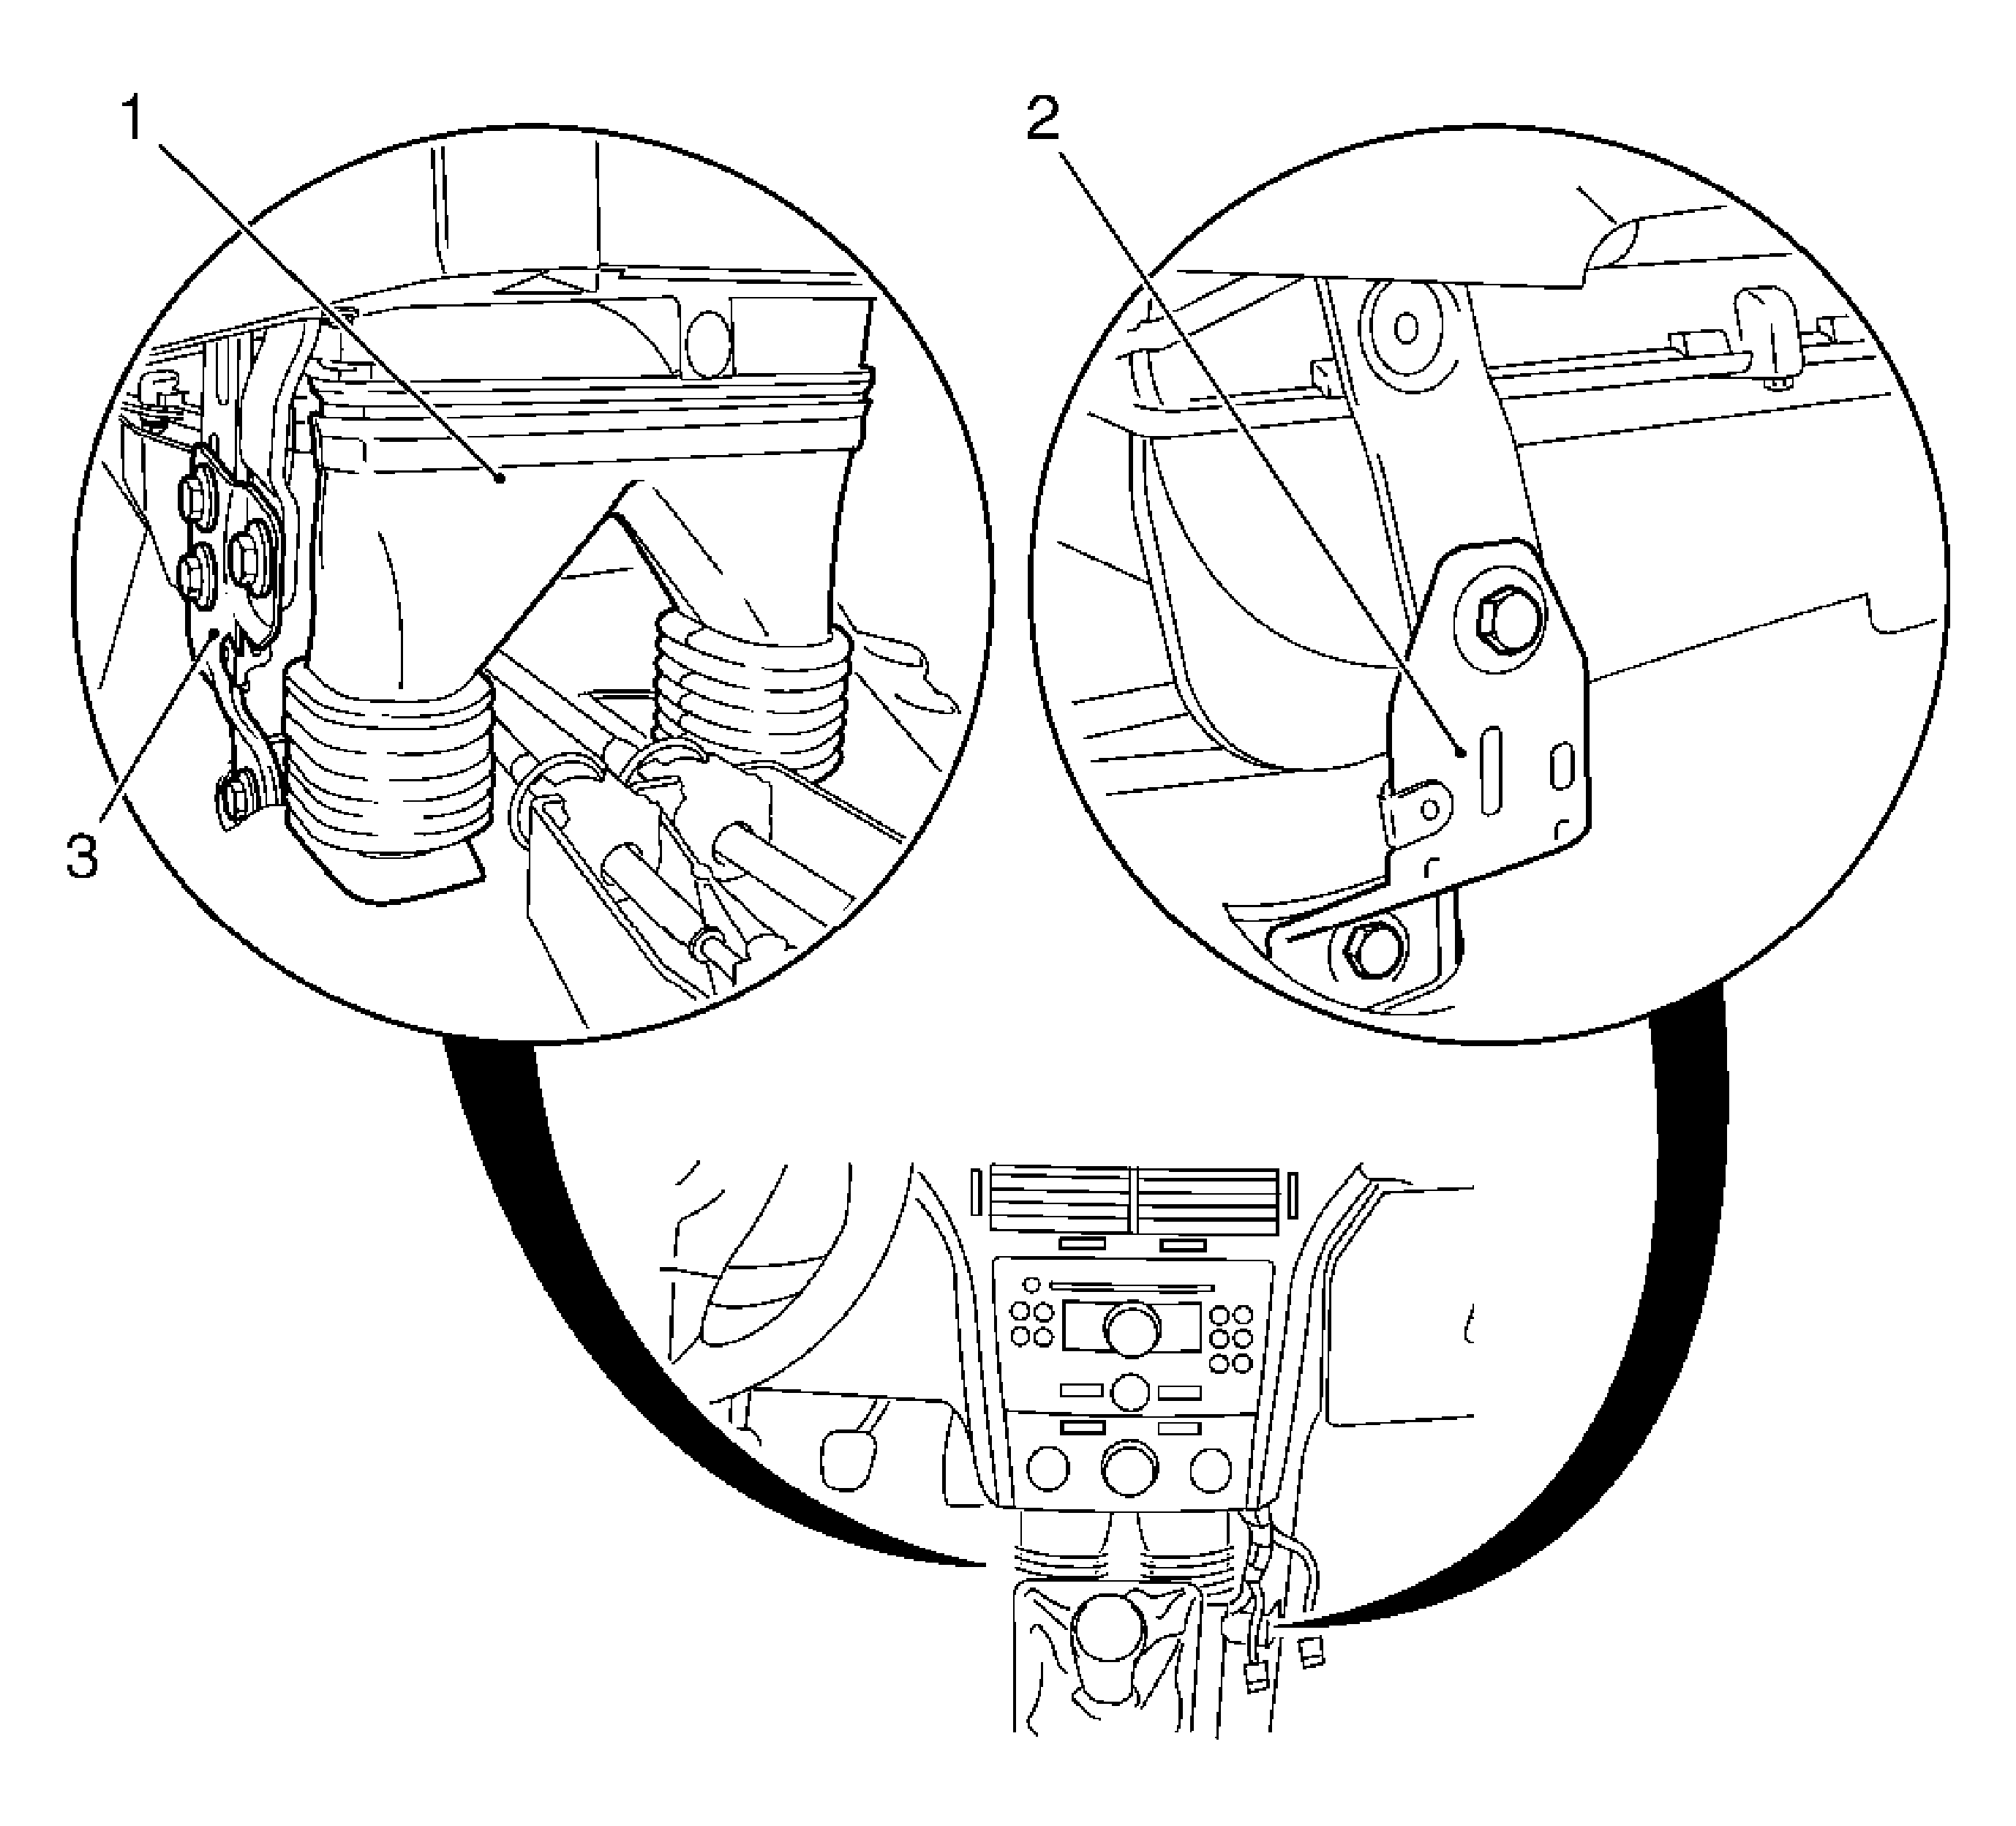
- Remove the rear floor air dust rear footwell (1).
- Remove the brace, instrument panel (I/P) padding.
- Detach and lift the floor covering at front in area or rear air duct for footwell.
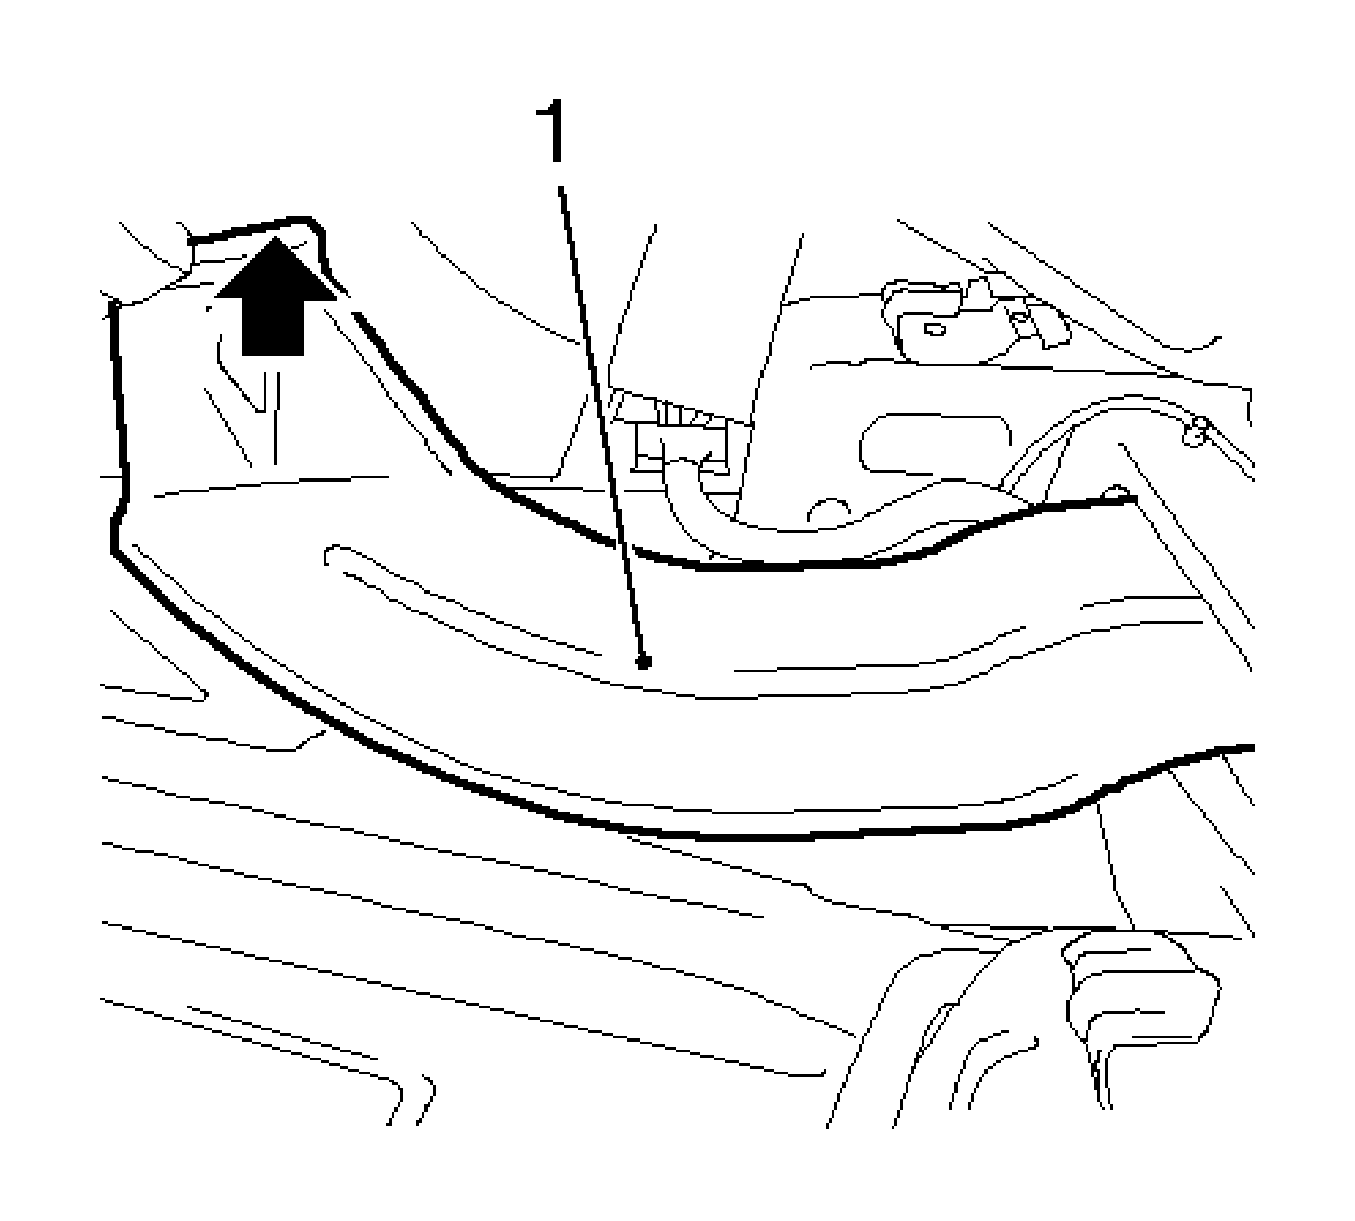
- Remove the air duct rear footwell (1).

| • | Remove the left brace (3) when replacing the left air duct for footwell. |
| • | Remove the 4 bolts. |
| • | Remove the right brace when replacing the right (2) air duct for footwell. |
| • | Remove the 2 bolts. |

Remove the air duct and withdraw to the front.
Installation Procedure
- Install the air duct footwell rear.
- Position and attach floor covering at front in area or rear air duct for footwell.
- Install brace, instrument panel padding.
- Install the left brace when replacing the left air duct for footwell.
- Install the right brace when replacing the right air duct for footwell.
- Install the air distribution rear footwell.
- Insert the air distribution footwell at top and at the bottom slide onto the air duct footwell rear.
- Install the door sill plate. Refer to Door Sill Plate Replacement.
- Install the front floor console. Refer to Front Floor Console Replacement.
- Install the front seat. Refer to Front Seat Replacement - Bucket.
Caution: Refer to Fastener Caution in the Preface section.
Tighten
Tighten the 4 bolts to 13 N·m (113 lb in).
Tighten
Tighten the 2 bolts to 13 N·m (113 lb in).
