For 1990-2009 cars only
Removal Procedure
- Disconnect the battery.
- Remove the instrument panel insulator panel.
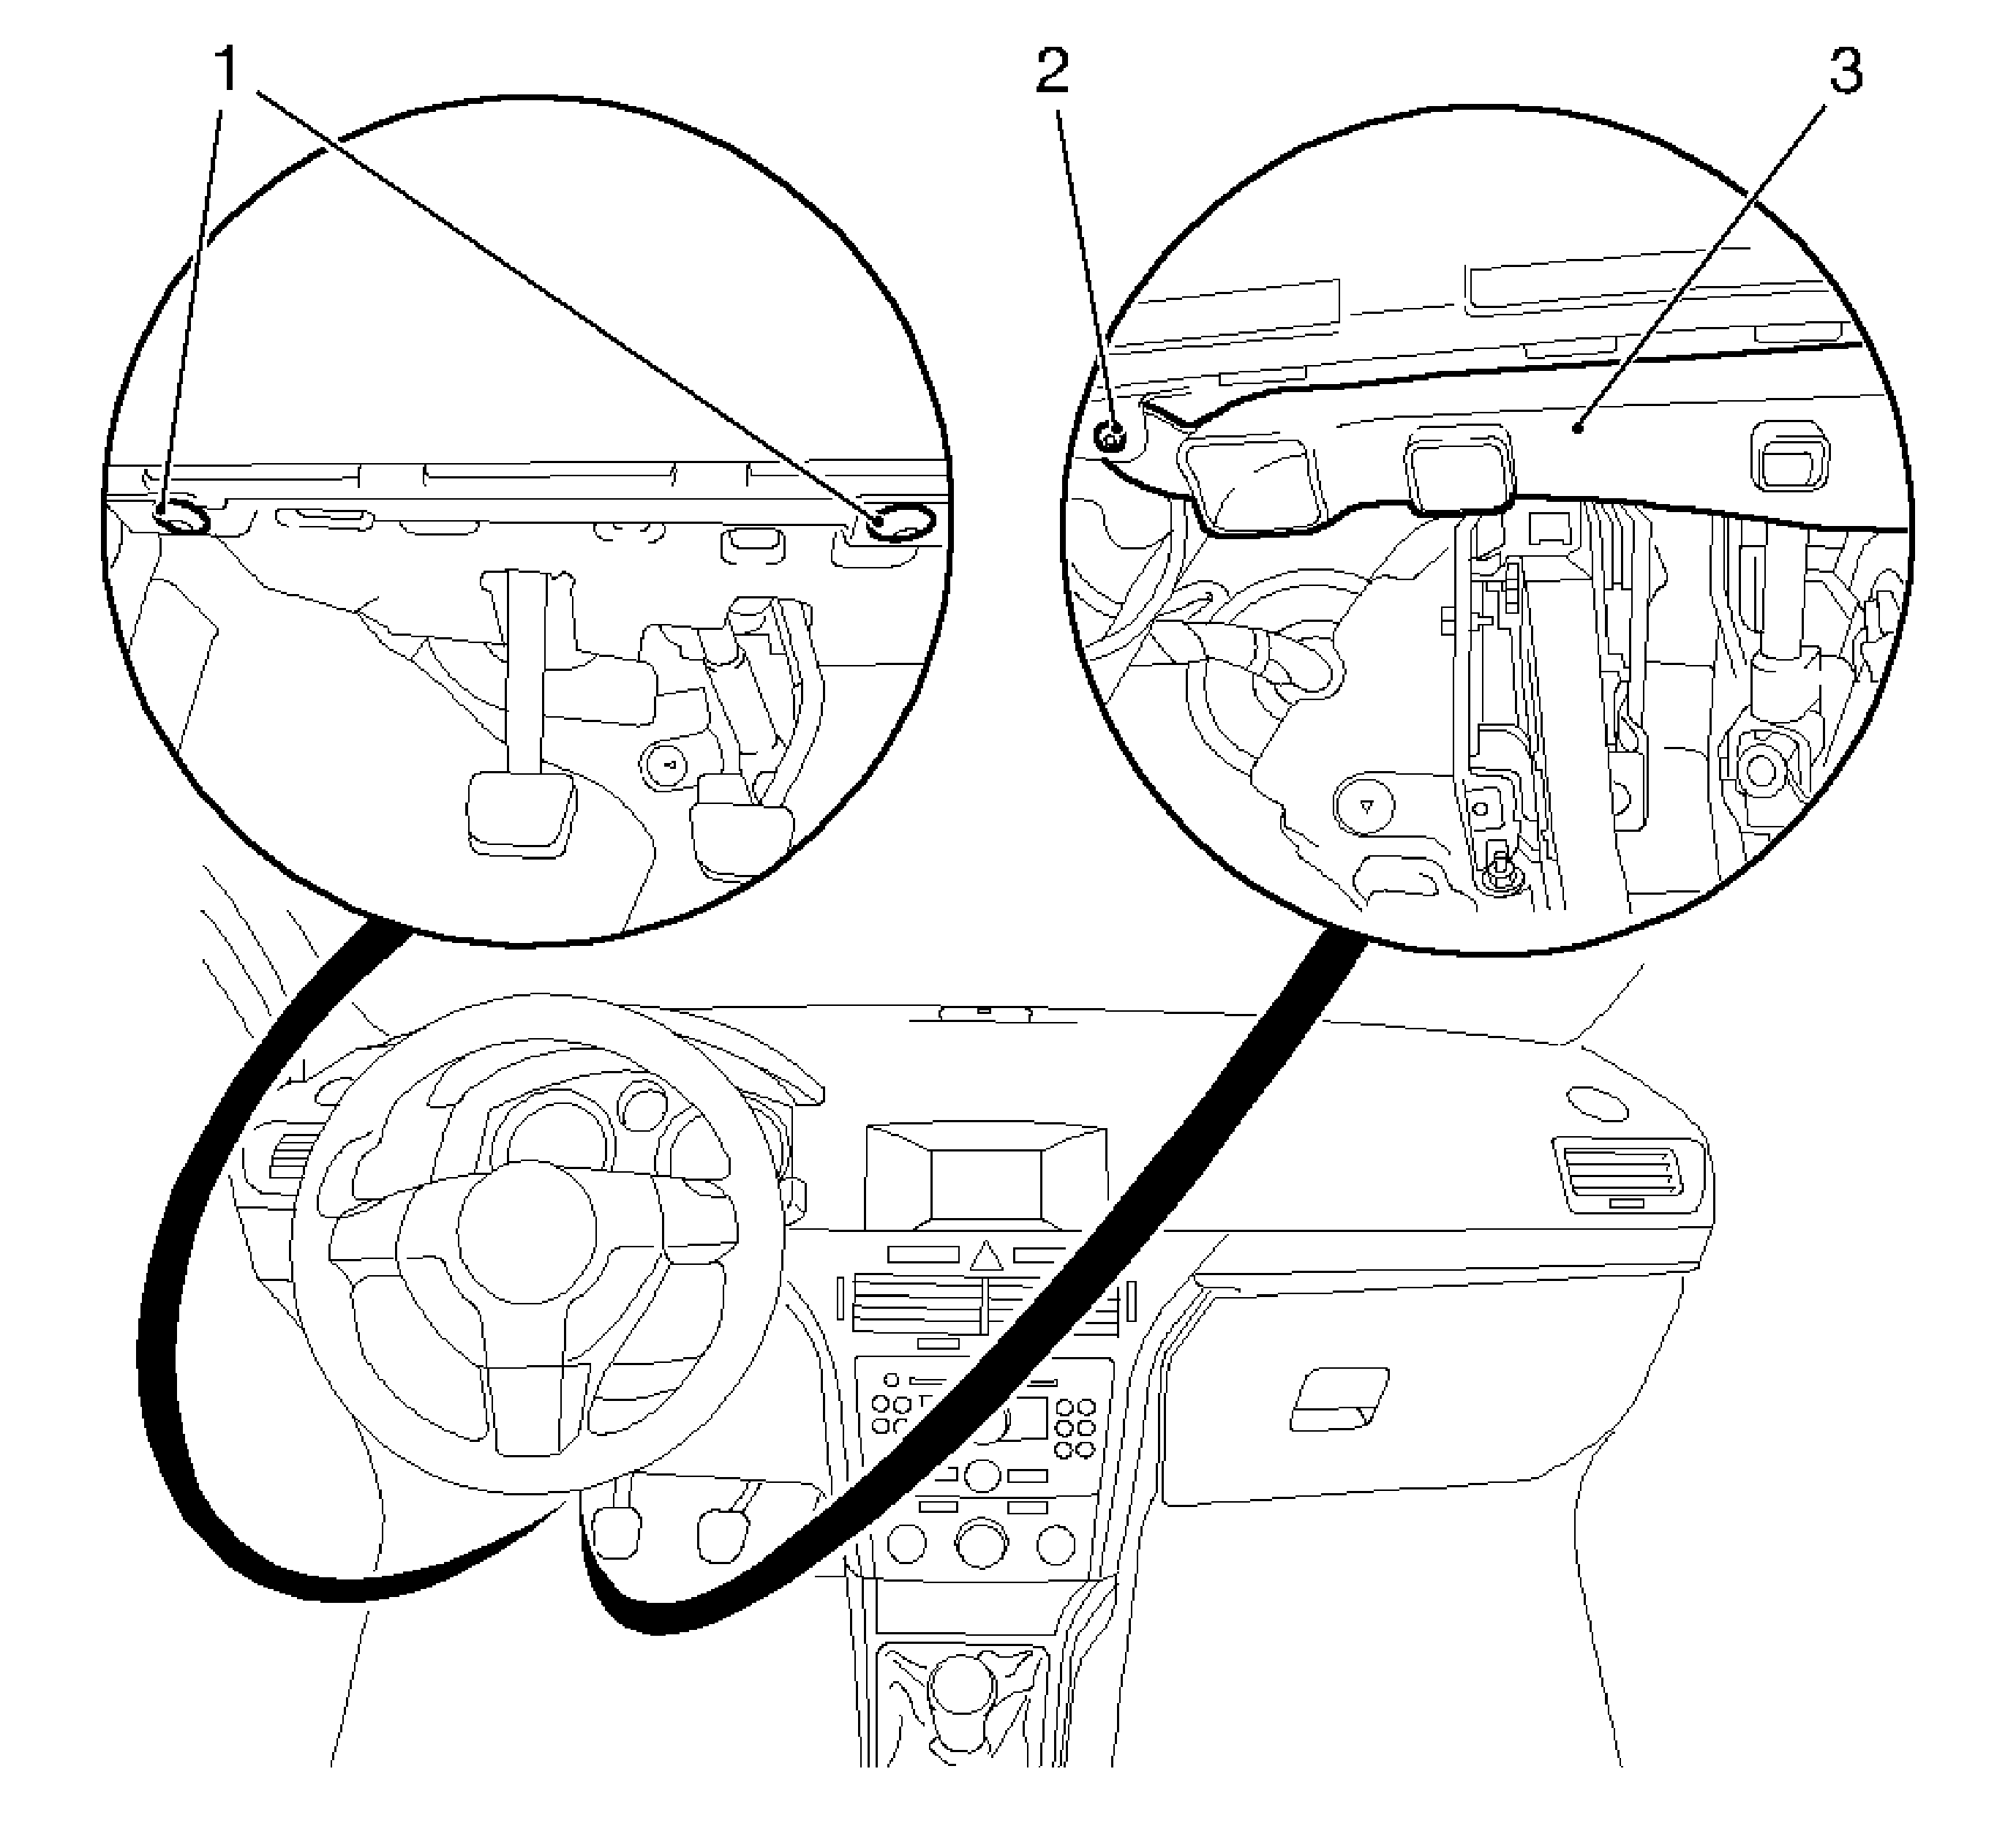
- Remove the air duct footwell (3), front passenger side.
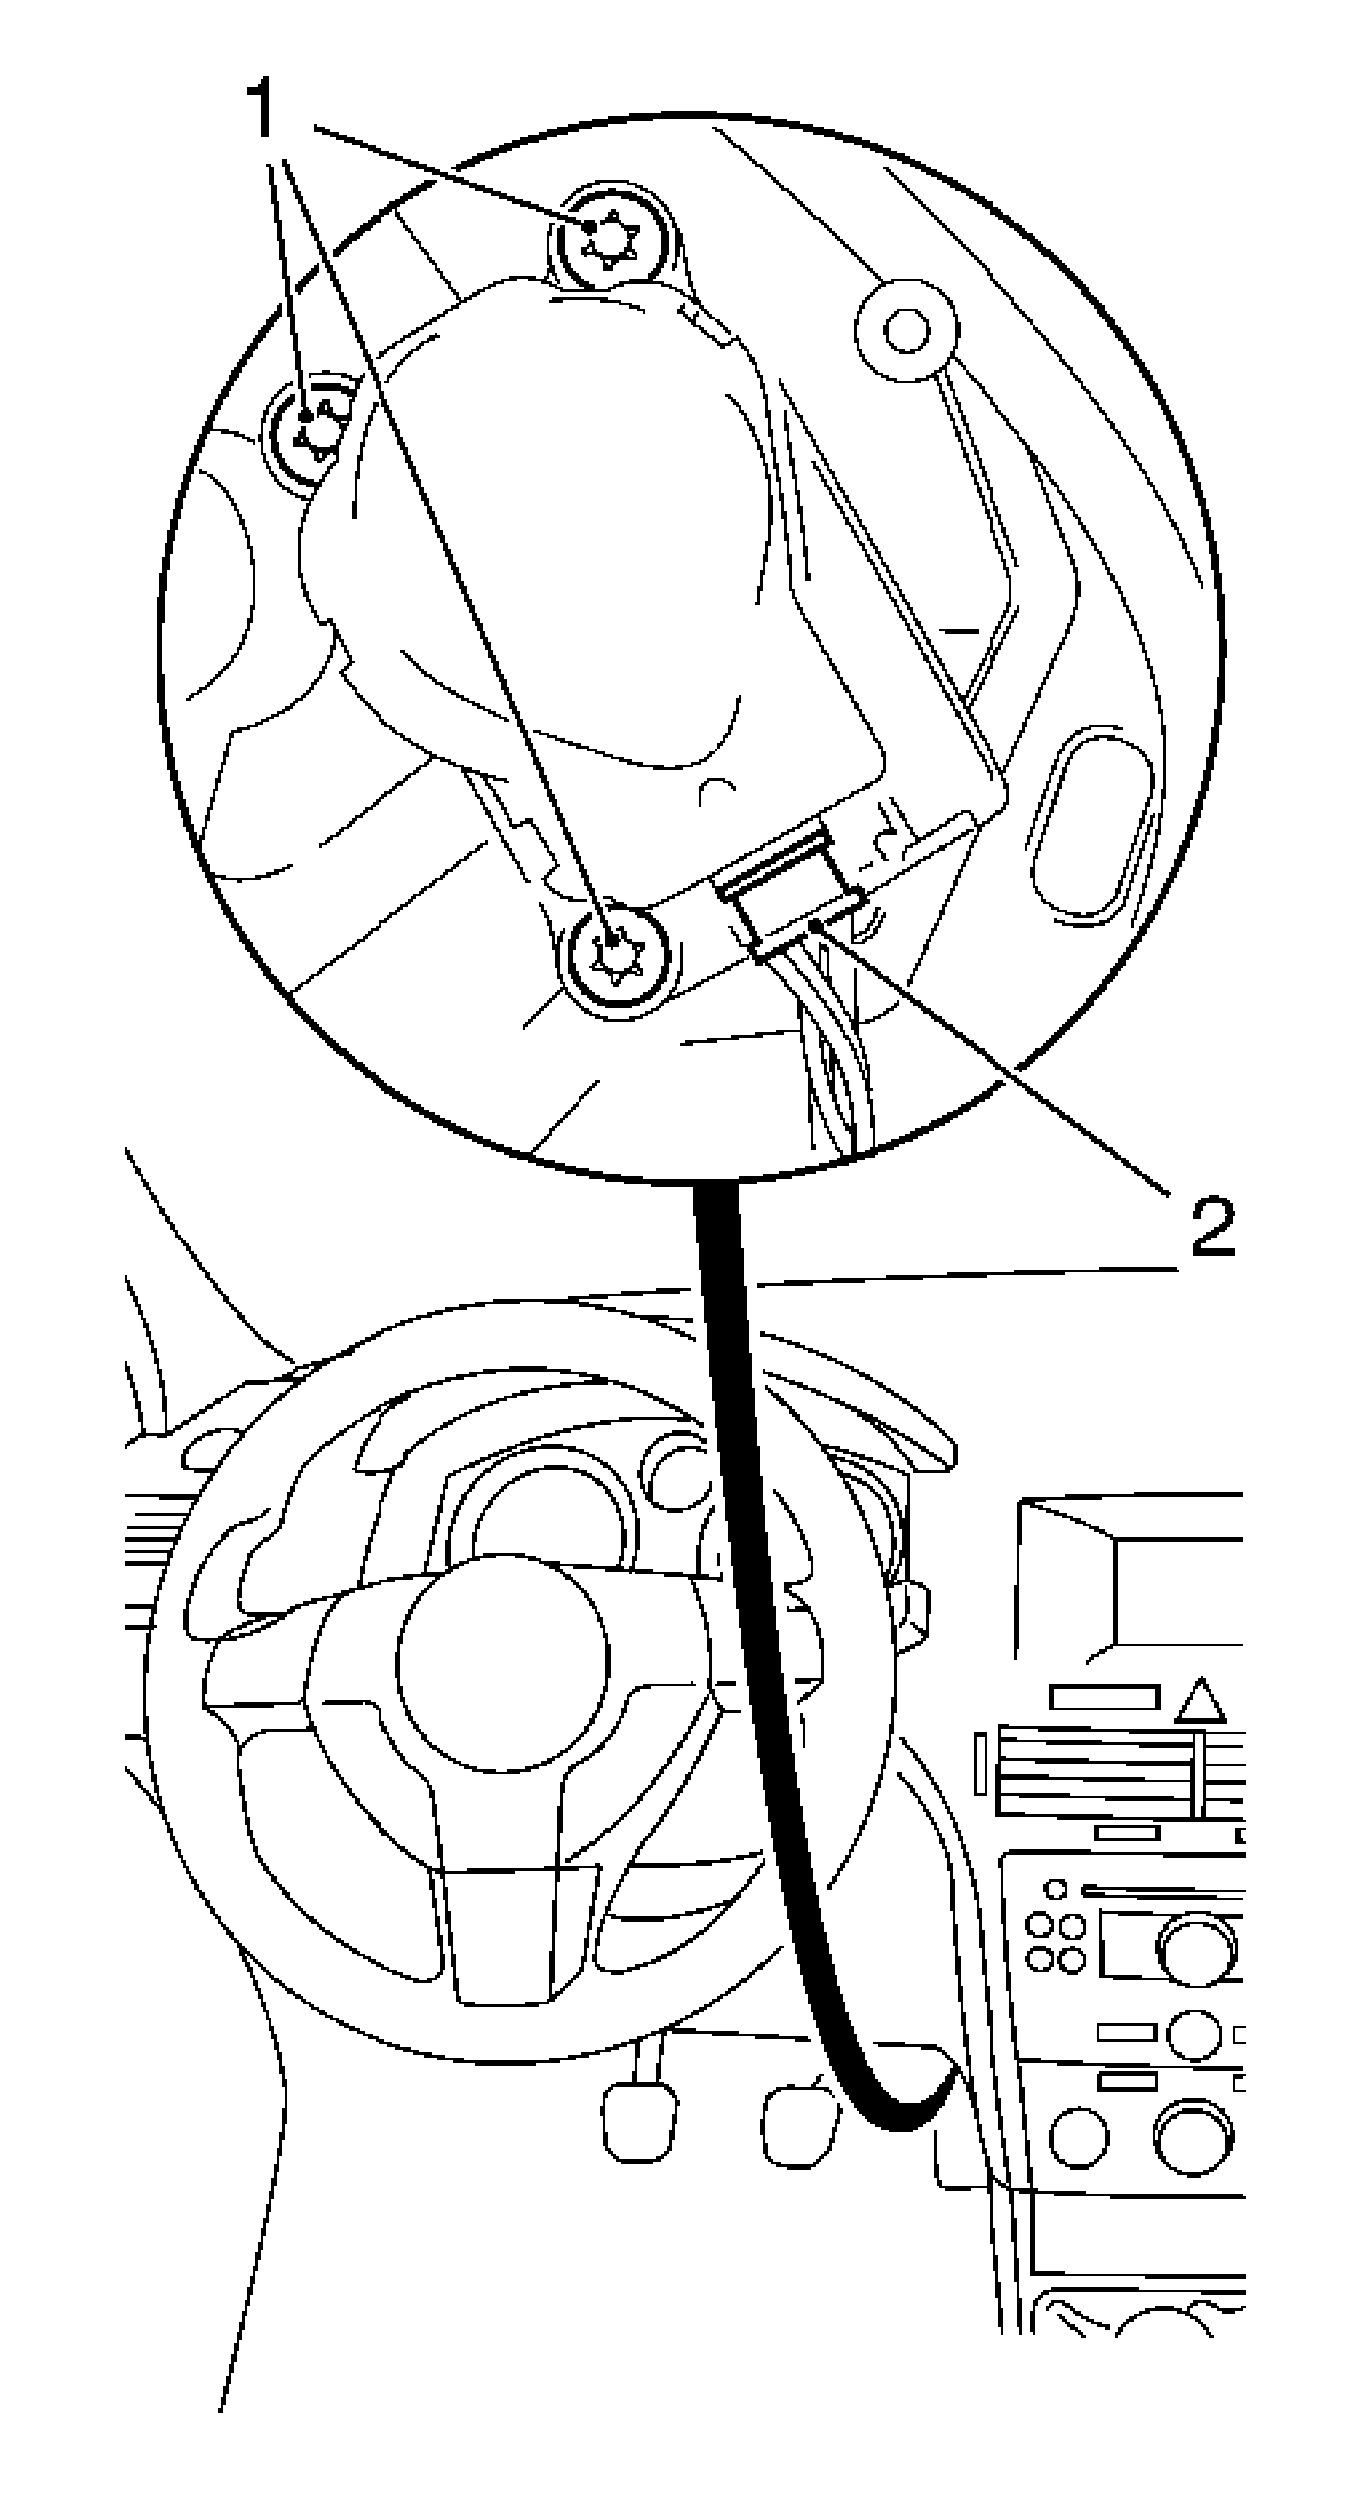
- Disconnect the wiring harness plug for the air temperature actuator (2).
- Remove the air temperature actuator.
Warning: Refer to Battery Disconnect Warning in the Preface section.
Note: Only upon replacement of the air temperature actuator.

Remove the 2 bolts (1).
Remove the push pin (2).

Release and disconnect the wiring harness plug.
Remove the 3 bolts (1).
Installation Procedure
- Install the air temperature actuator.
- Connect the wiring harness plug for the air temperature actuator on the temperature valve.
- Install the air duct to the driver side footwell.
- Install the instrument panel insulator panel.
- Connect the battery.
- For programming procedures, refer to Control Module References.
- Perform the function inspection.
Caution: Refer to Fastener Caution in the Preface section.
Note: The air temperature actuator can only be fitted in one position.
Tighten
Tighten the 3 bolts to 5 N·m (44 lb in).
Install the push pin.
Tighten
Tighten the 2 retainers.
Note: Only upon replacement of the air temperature actuator.
