Liftgate Trim Panel Replacement Coupe
Removal Procedure
- Support the luggage shade from the liftgate.
Disconnect the 2 retaining cords.
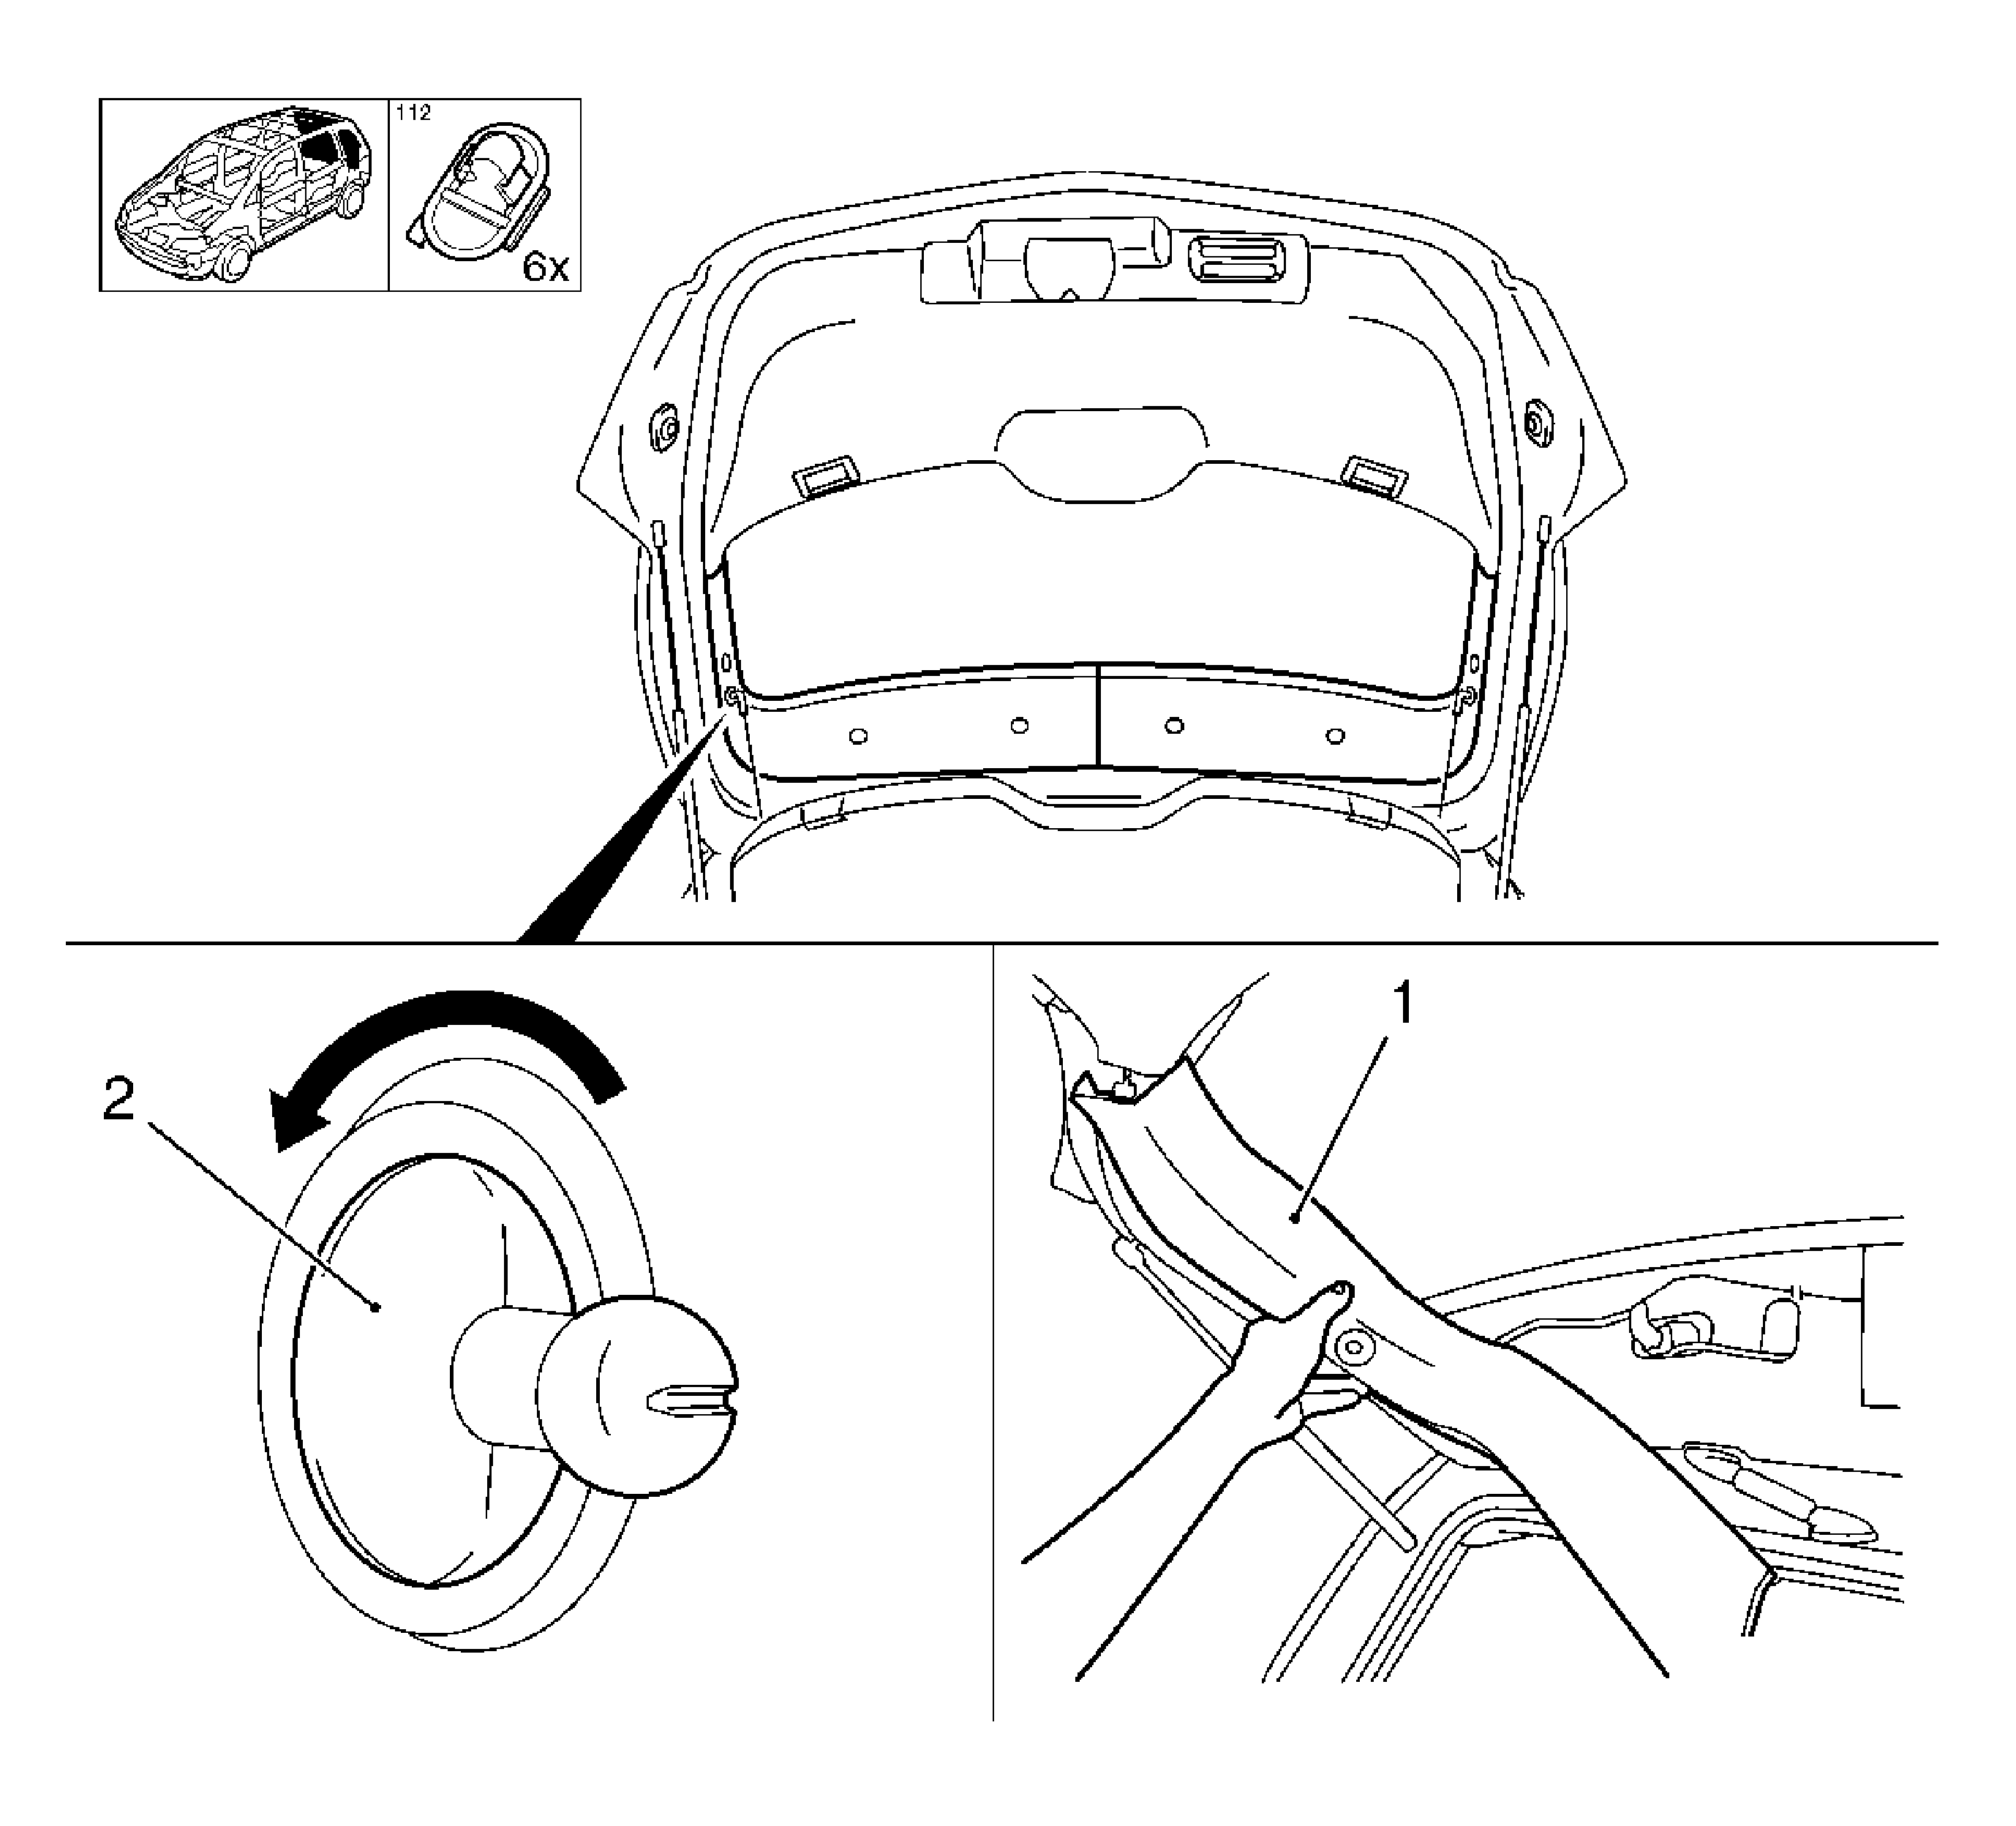
- Remove the upper right and left liftgate garnish molding (1).
| • | Remove the 2 luggage shade retainers (2). |
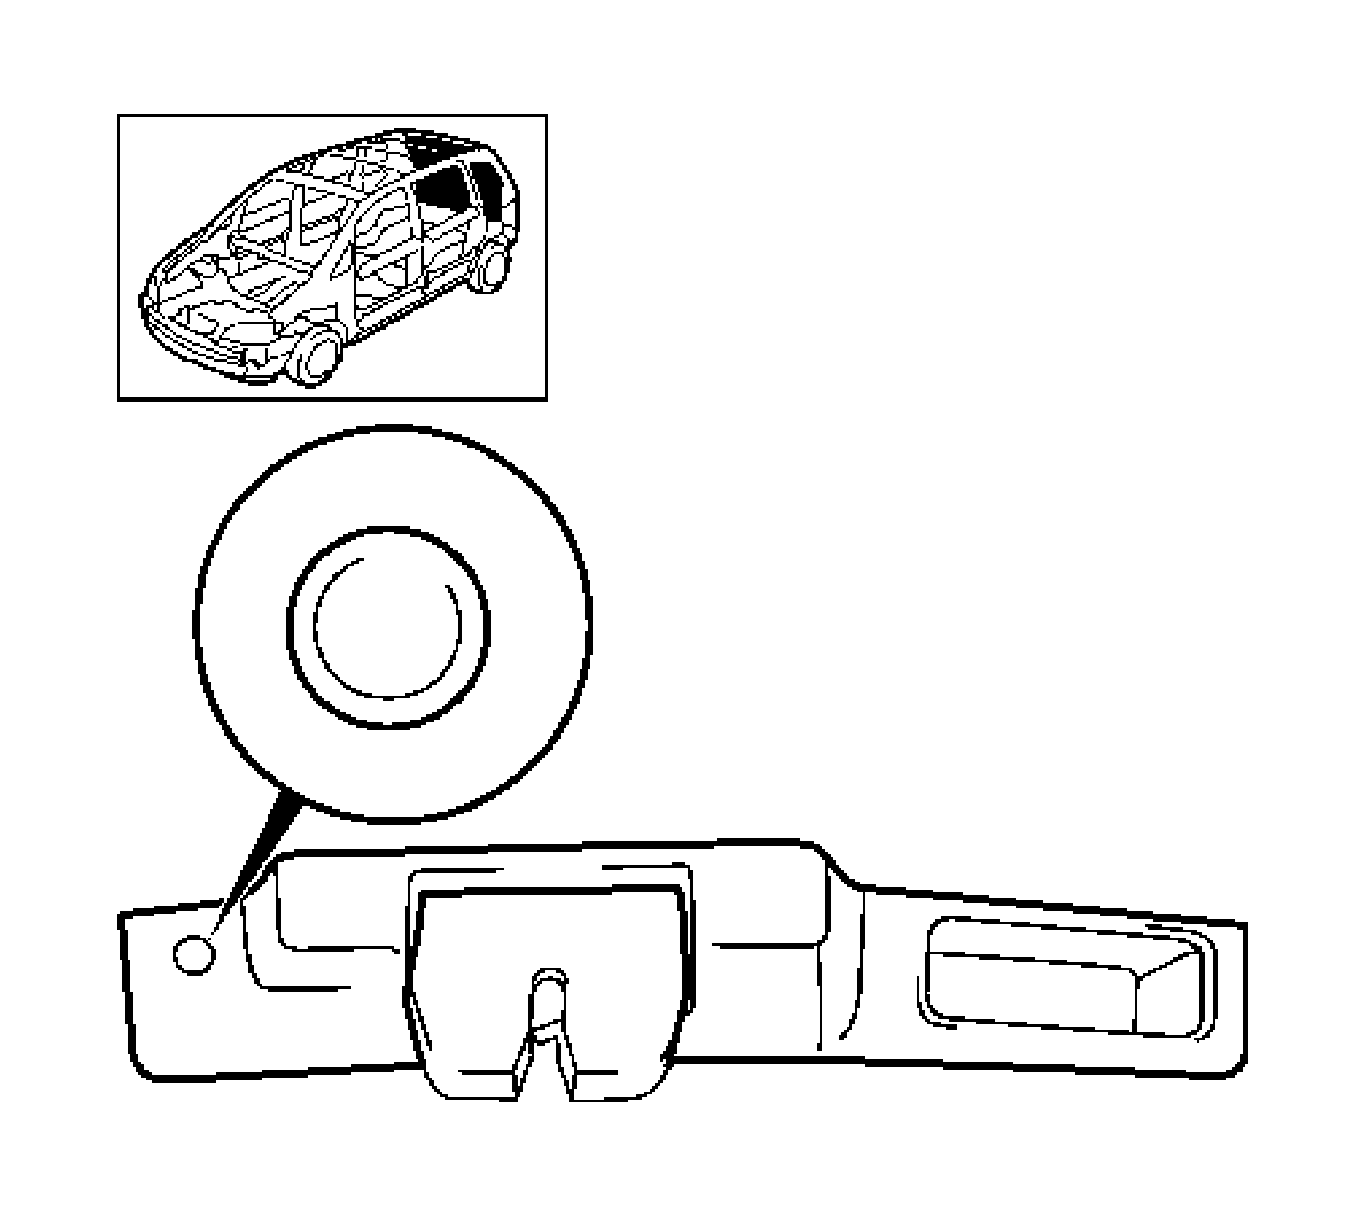
- Remove the liftgate lock cover trim panel.
| • | Remove the body-bound rivet. |
| • | Release the 3 inner handle cups. |
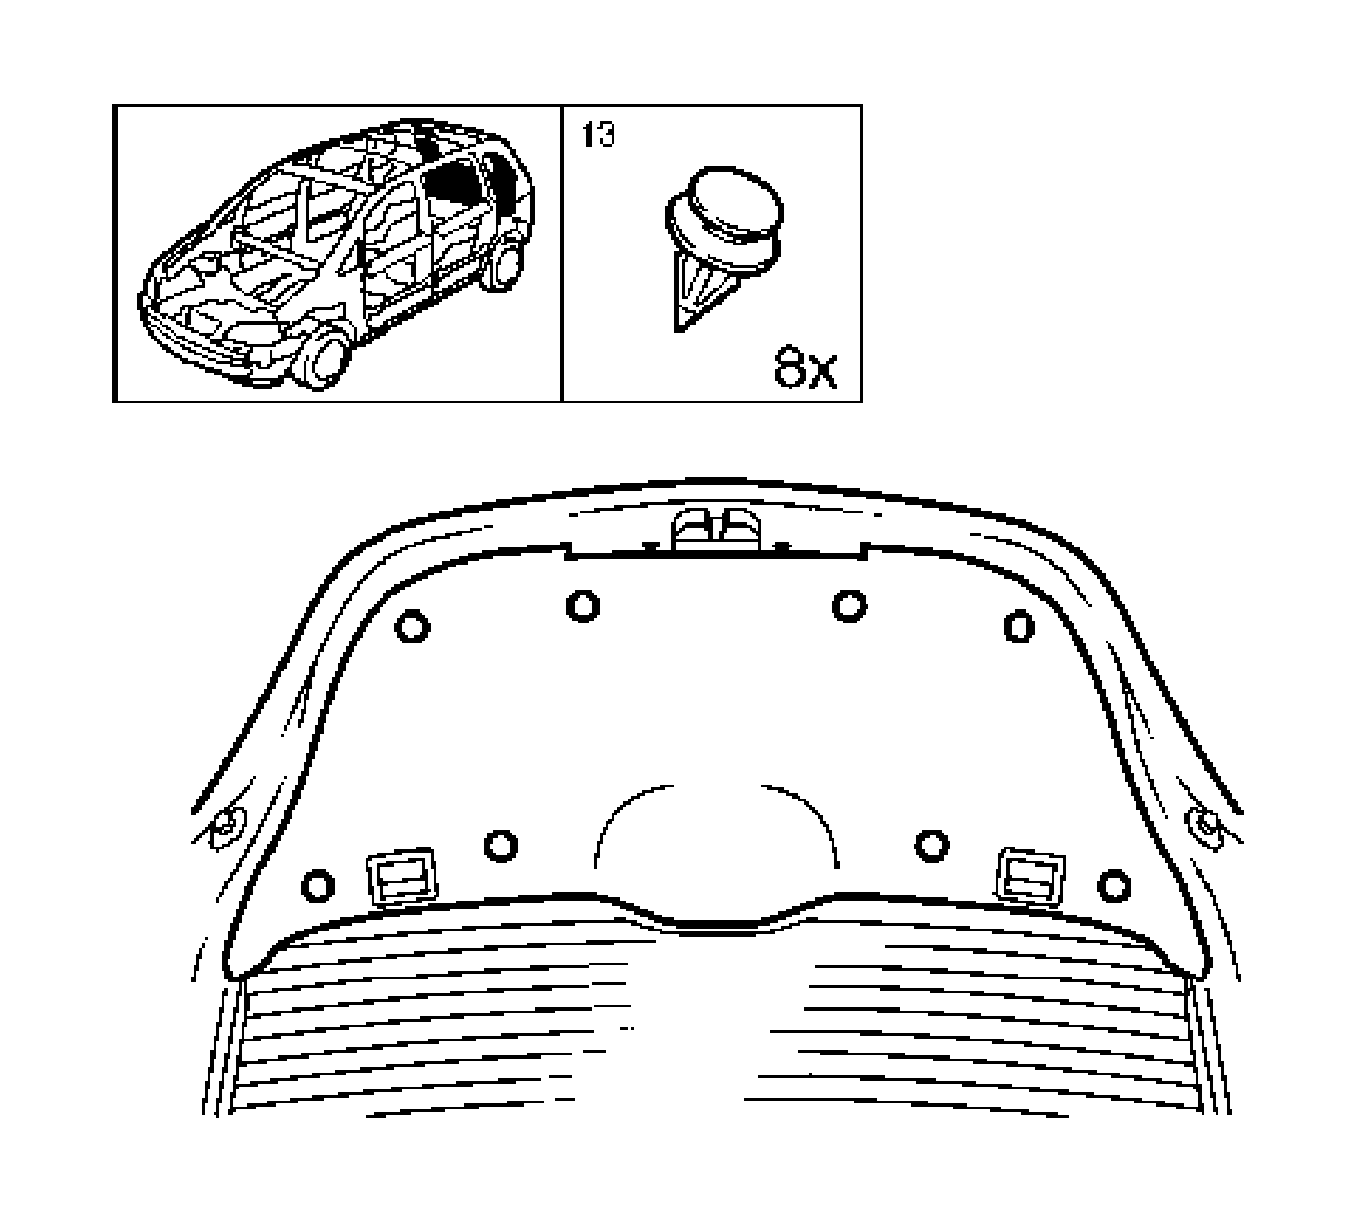
- Remove the liftgate trim panel.
Release the 8 clips (1).
Installation Procedure
- Install the liftgate trim panel.
Install the 8 clips.
- Install the liftgate lock cover trim panel.
| • | Install the 3 inner handle cups. |
| • | Install the body-bound rivet. |
- Install the upper right and left liftgate garnish moldings.
| • | Install the 2 luggage shade retainers. |
- Install the luggage shade to the liftgate.
Install the 2 retaining cords.
Liftgate Trim Panel Replacement Sedan
Removal Procedure
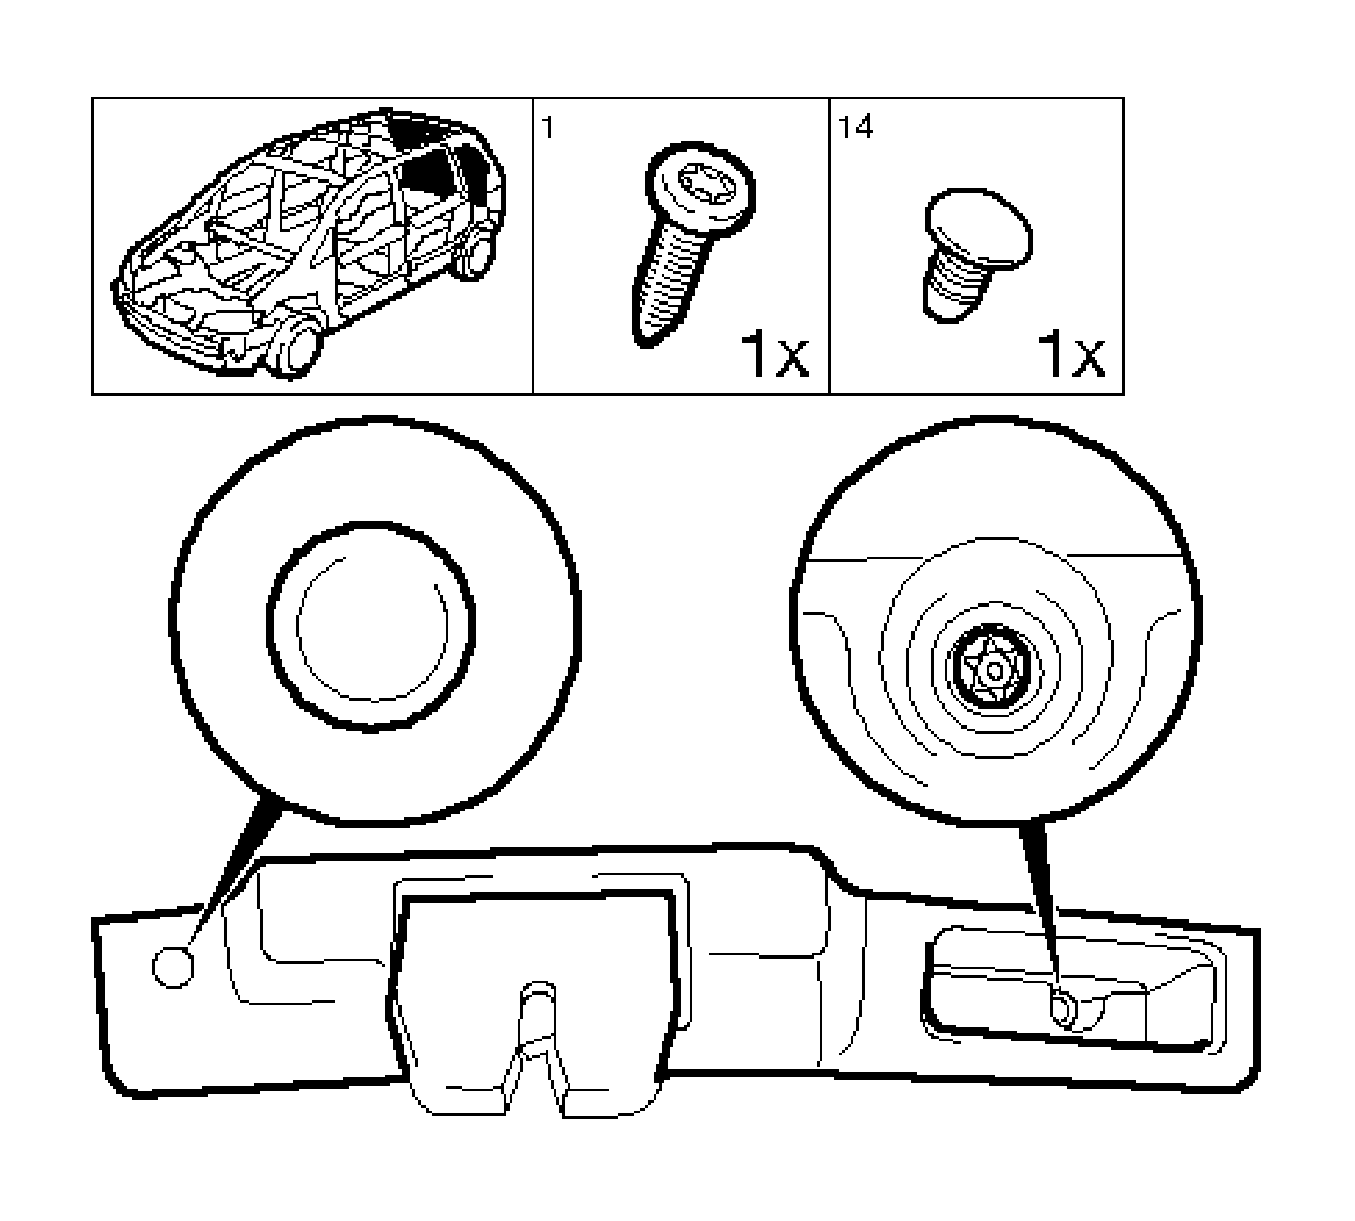
- Remove the lock cover trim panel.
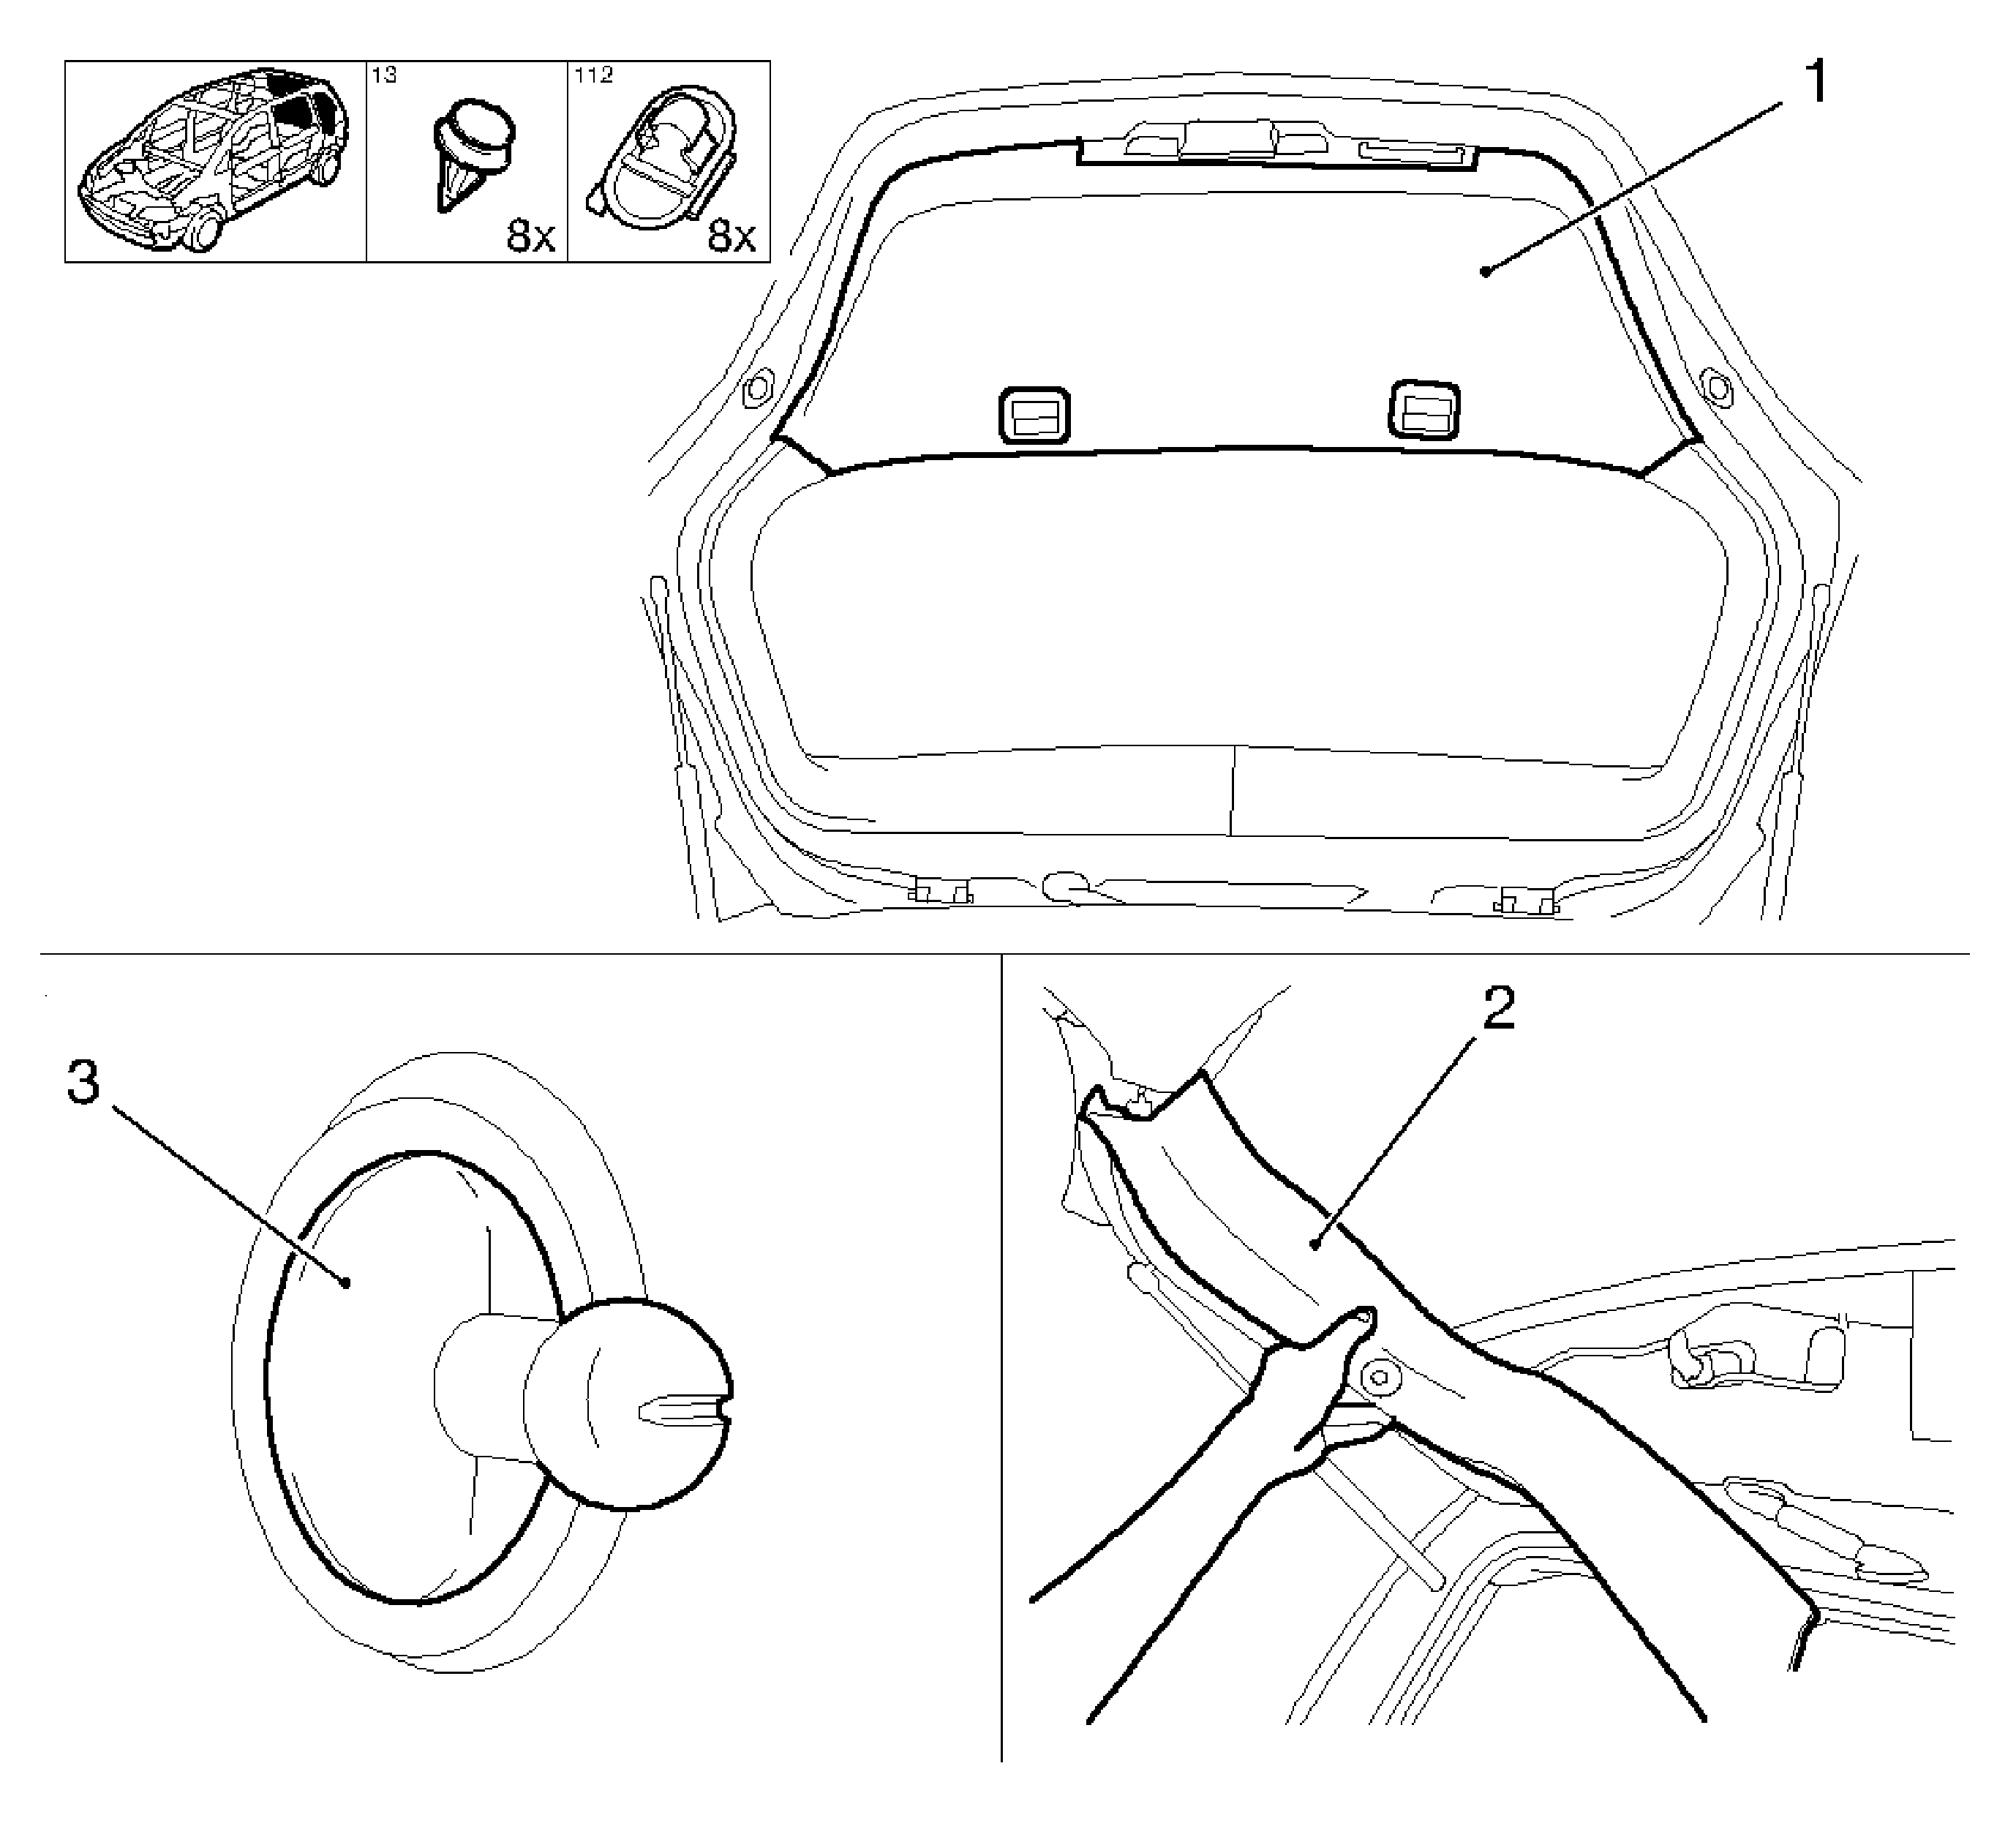
- Remove the upper garnish molding (2)--left side.
| • | Remove the luggage shade bracket (3). |
- Remove the upper garnish molding (2)--right side.
| • | Remove the luggage shade bracket (3). |
- Remove the liftgate trim panel (1).
Release the 8 clips.
Installation Procedure
- Install the liftgate trim panel.
Install the 8 clips.
- Install the upper garnish molding--left side.
Install the 4 clips.
- Install the upper garnish molding--right side.
Install the 4 clips.
Caution: Refer to Fastener Caution in the Preface section.
- Install the lock cover trim panel.
Install the clip.
Tighten
Tighten the bolt.


