For 1990-2009 cars only
Removal Procedure
- Recover the refrigerant. Refer to Refrigerant Recovery and Recharging.
- Disconnect the compressor refrigerant line.
- Raise the vehicle to full height.
- Remove the engine splash shield.
- Relieve the pressure on the ribbed V-belt and remove from the compressor. Refer to Drive Belt Replacement.
- Disconnect the wiring harness plug for the compressor.
- Disconnect and remove the compressor from the main bracket.

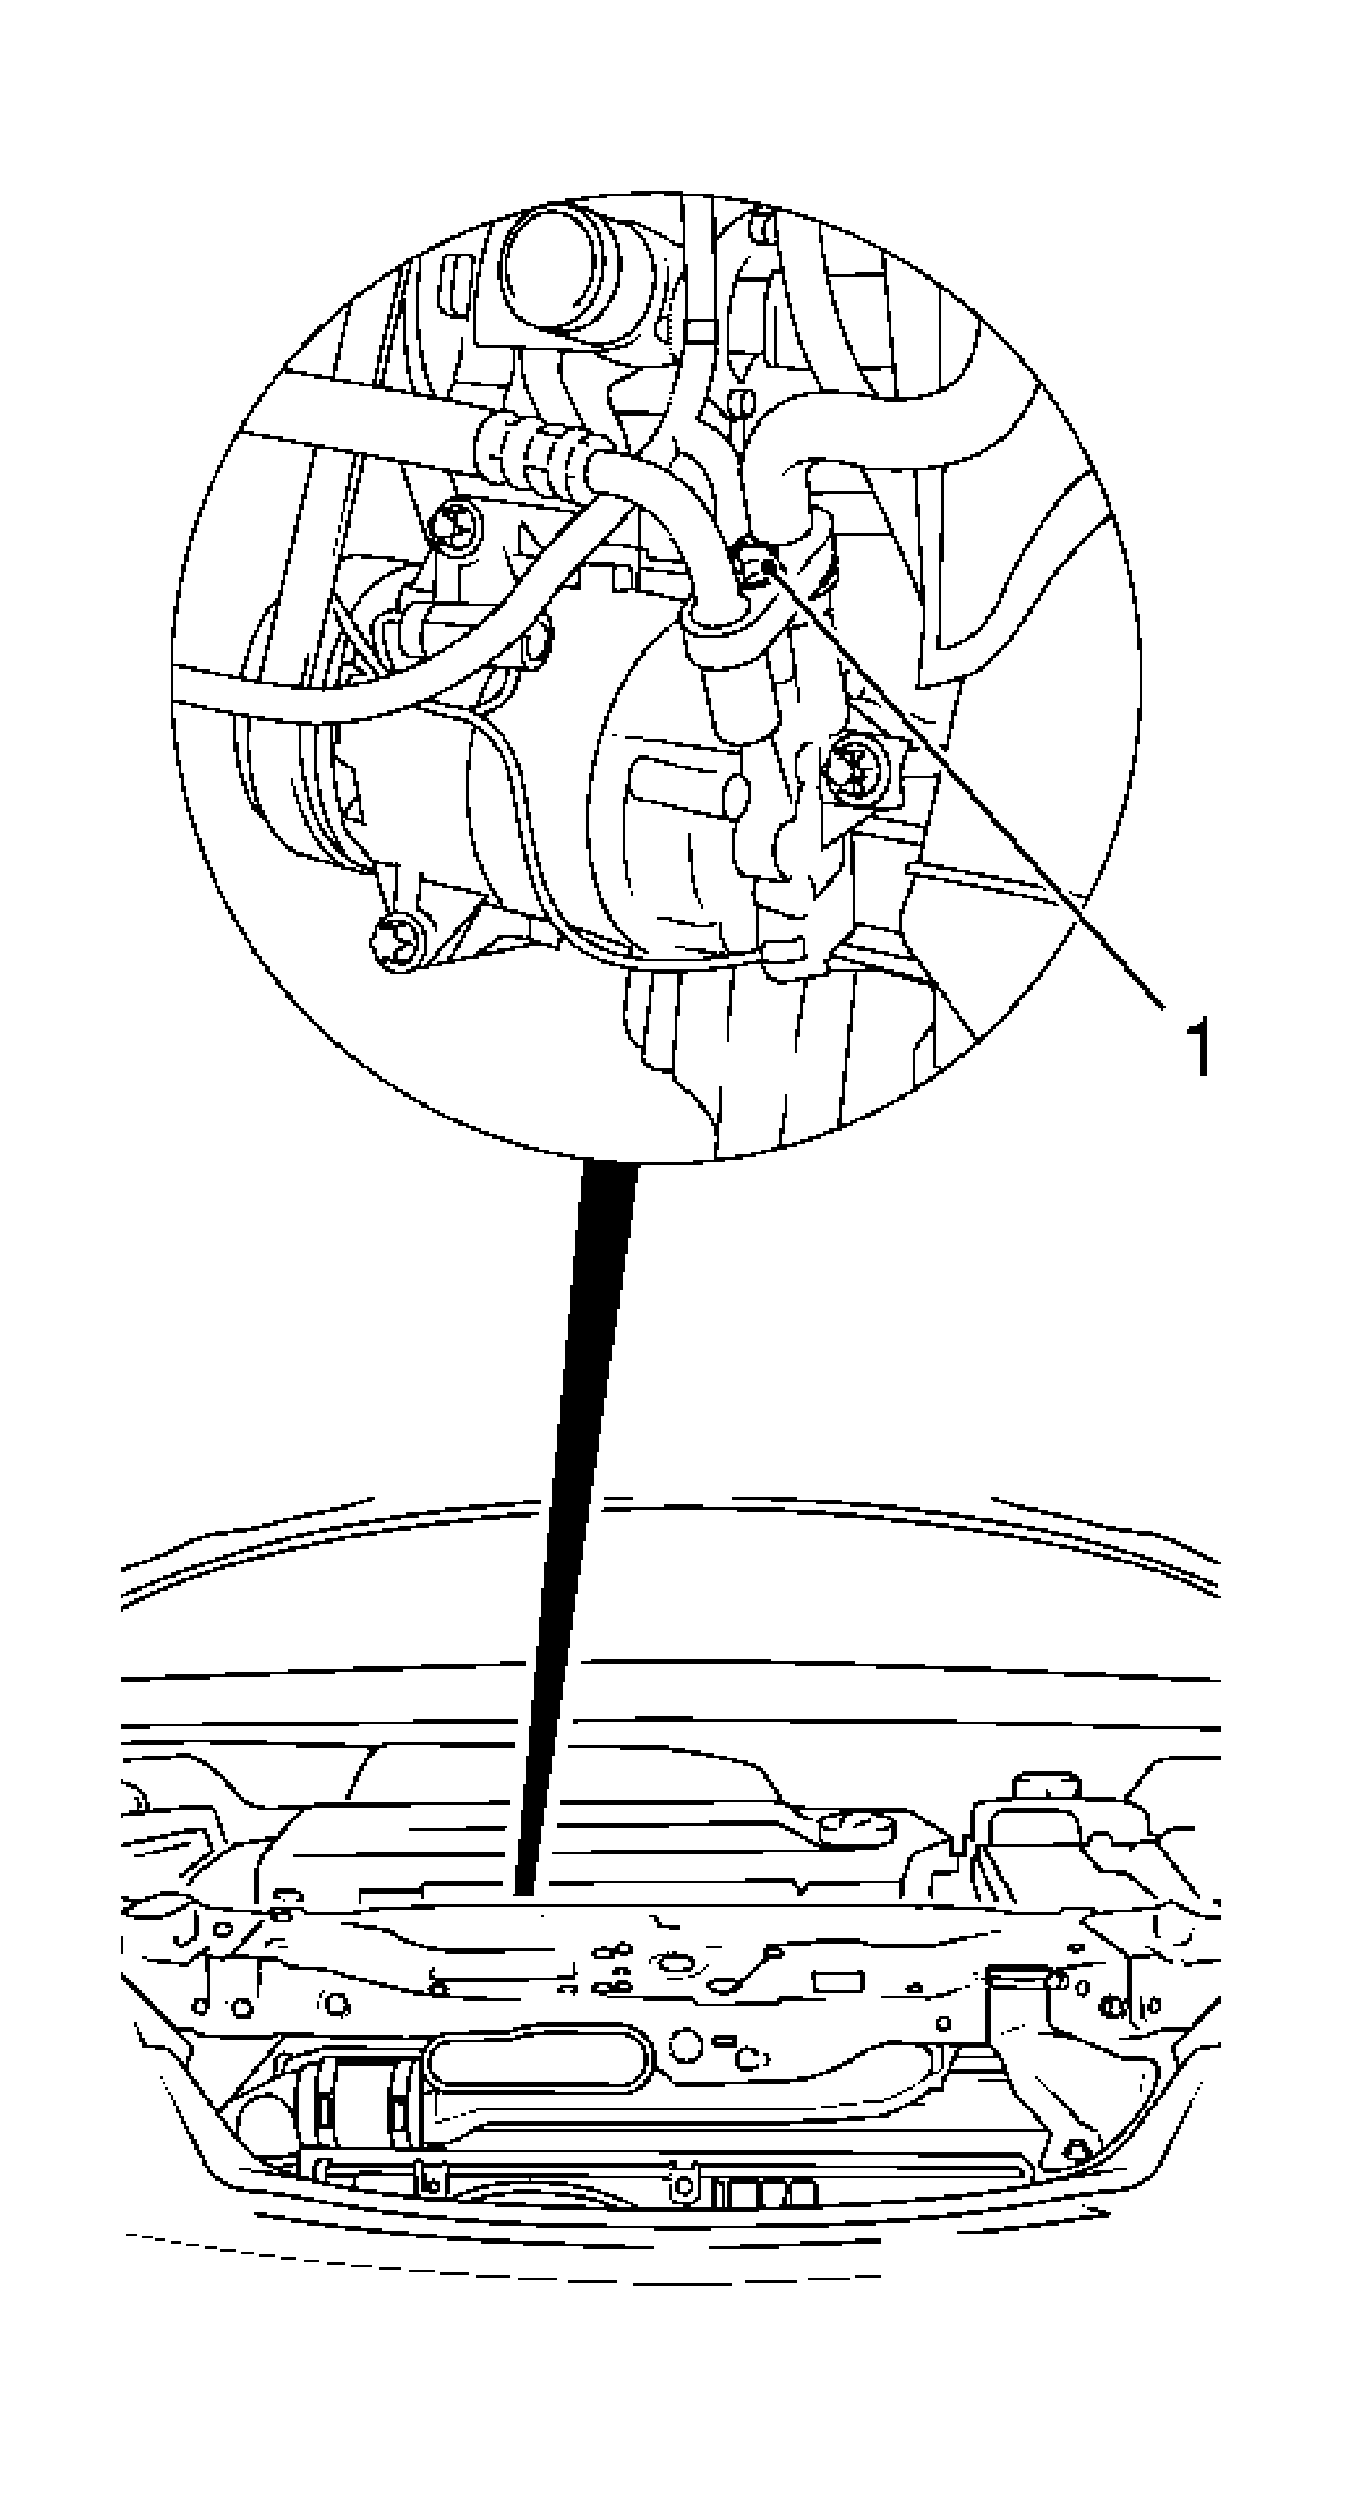
Remove the bolt (1).
| • | Remove the 4 bolts. |
| • | Open the 2 body-bound rivets. |

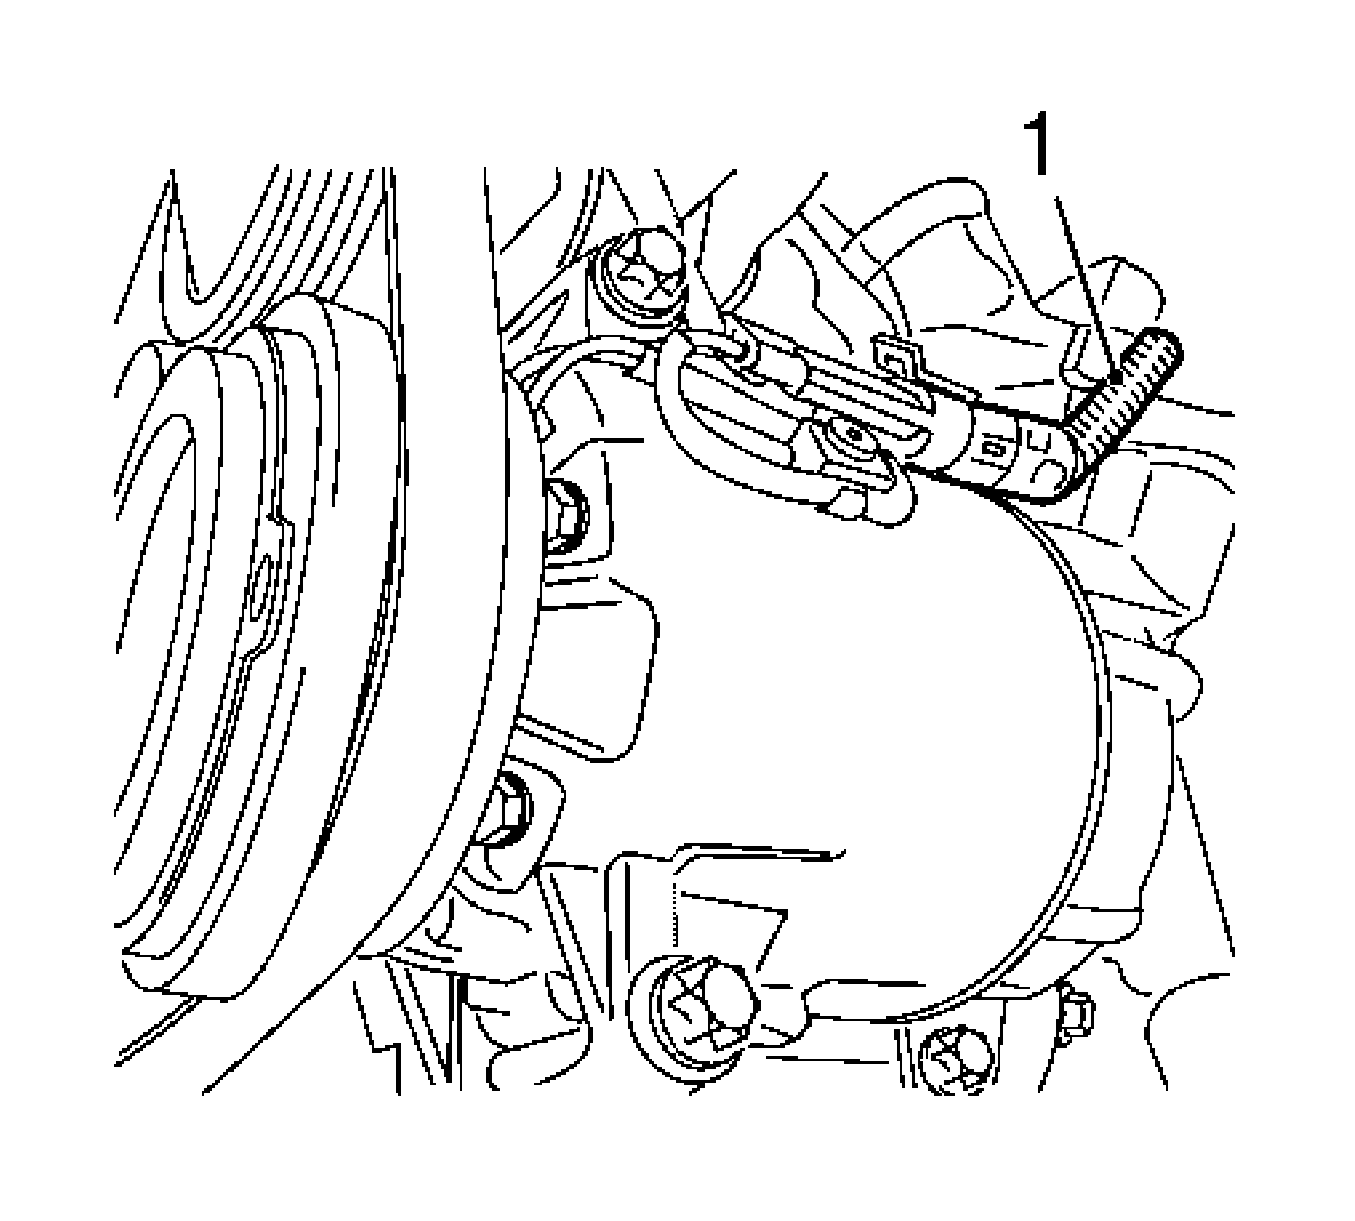
Release and disconnect the compressor wiring harness plug.

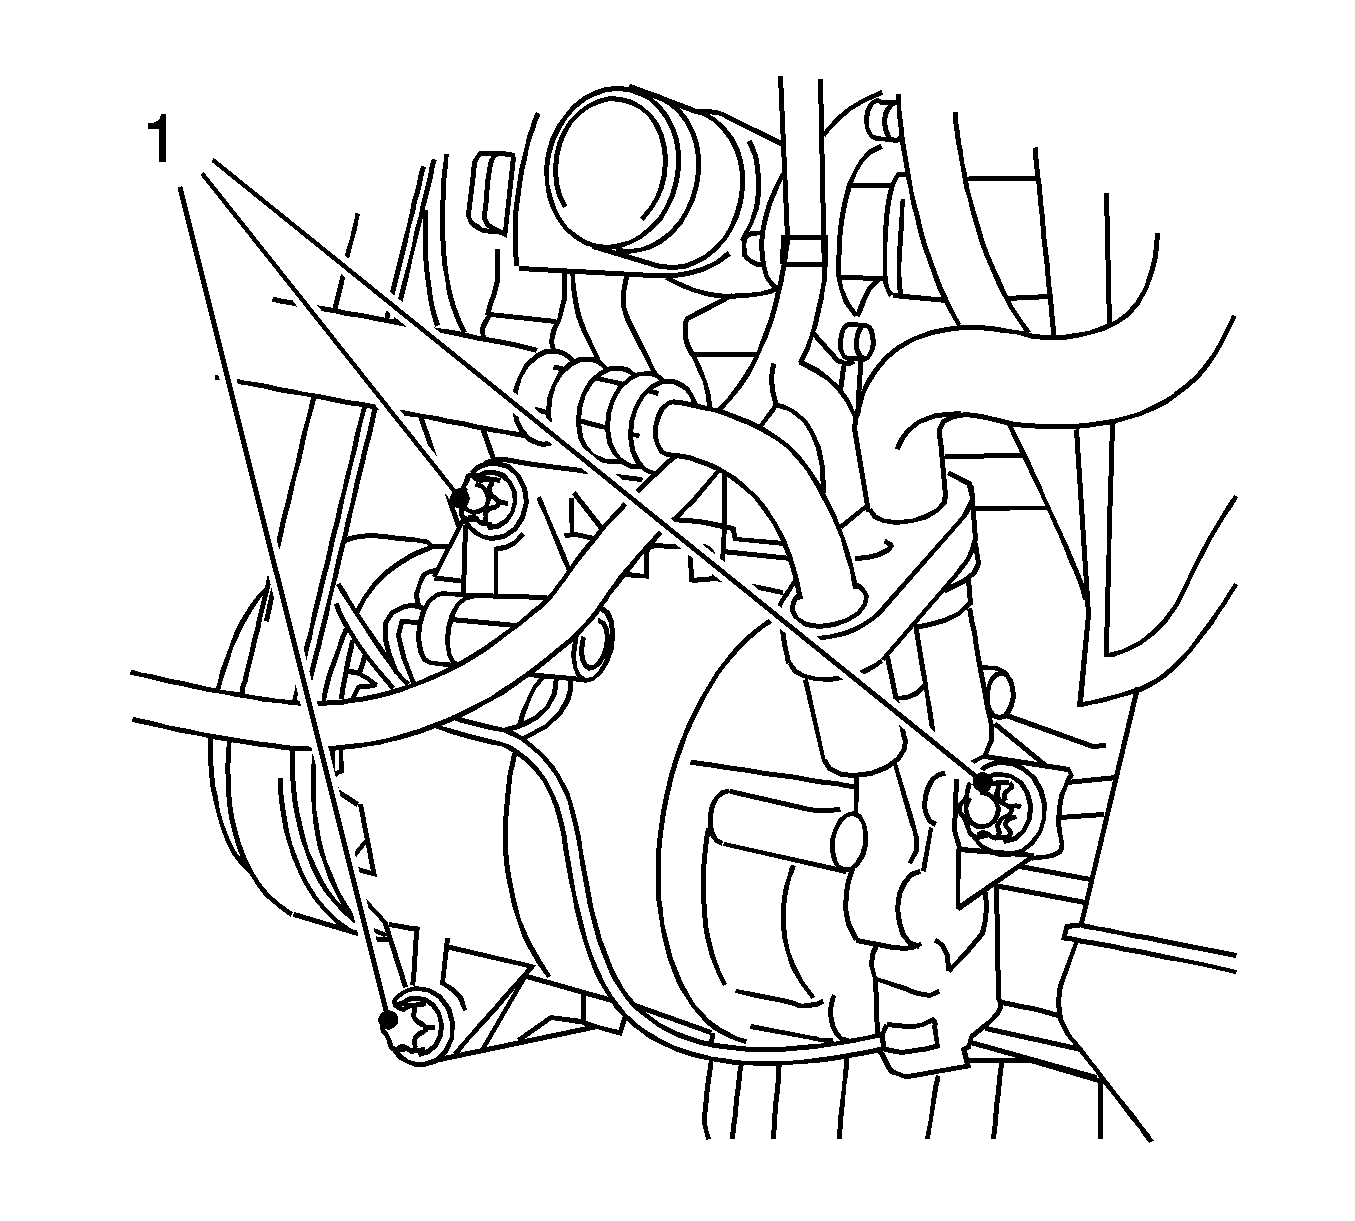
Remove the 3 bolts (1).
Installation Procedure
- Determine quantity of compressor lubricant and top up.
- Insert the compressor and attach to the main bracket.
- Position the ribbed V-belt on the compressor. Refer to Drive Belt Replacement.
- Connect the wiring harness plug for the compressor.
- Install the engine splash shield.
- Fasten the 2 body-bound rivets.
- Lower the vehicle to the ground.
- Install the refrigerant line to the compressor.
- Replace the 2 seal rings.
- Recharge the air conditioning system. Refer to Refrigerant Recovery and Recharging.
Caution: Refer to Fastener Caution in the Preface section.
Tighten
Tighten the 3 bolts to 22 N·m (16 lb ft).
Tighten
Tighten the 4 bolts to 8 N·m (70 lb in).
Tighten
Tighten the bolt to 20 N·m (15 lb ft).
