Quarter Upper Trim Panel Replacement Coupe
Removal Procedure
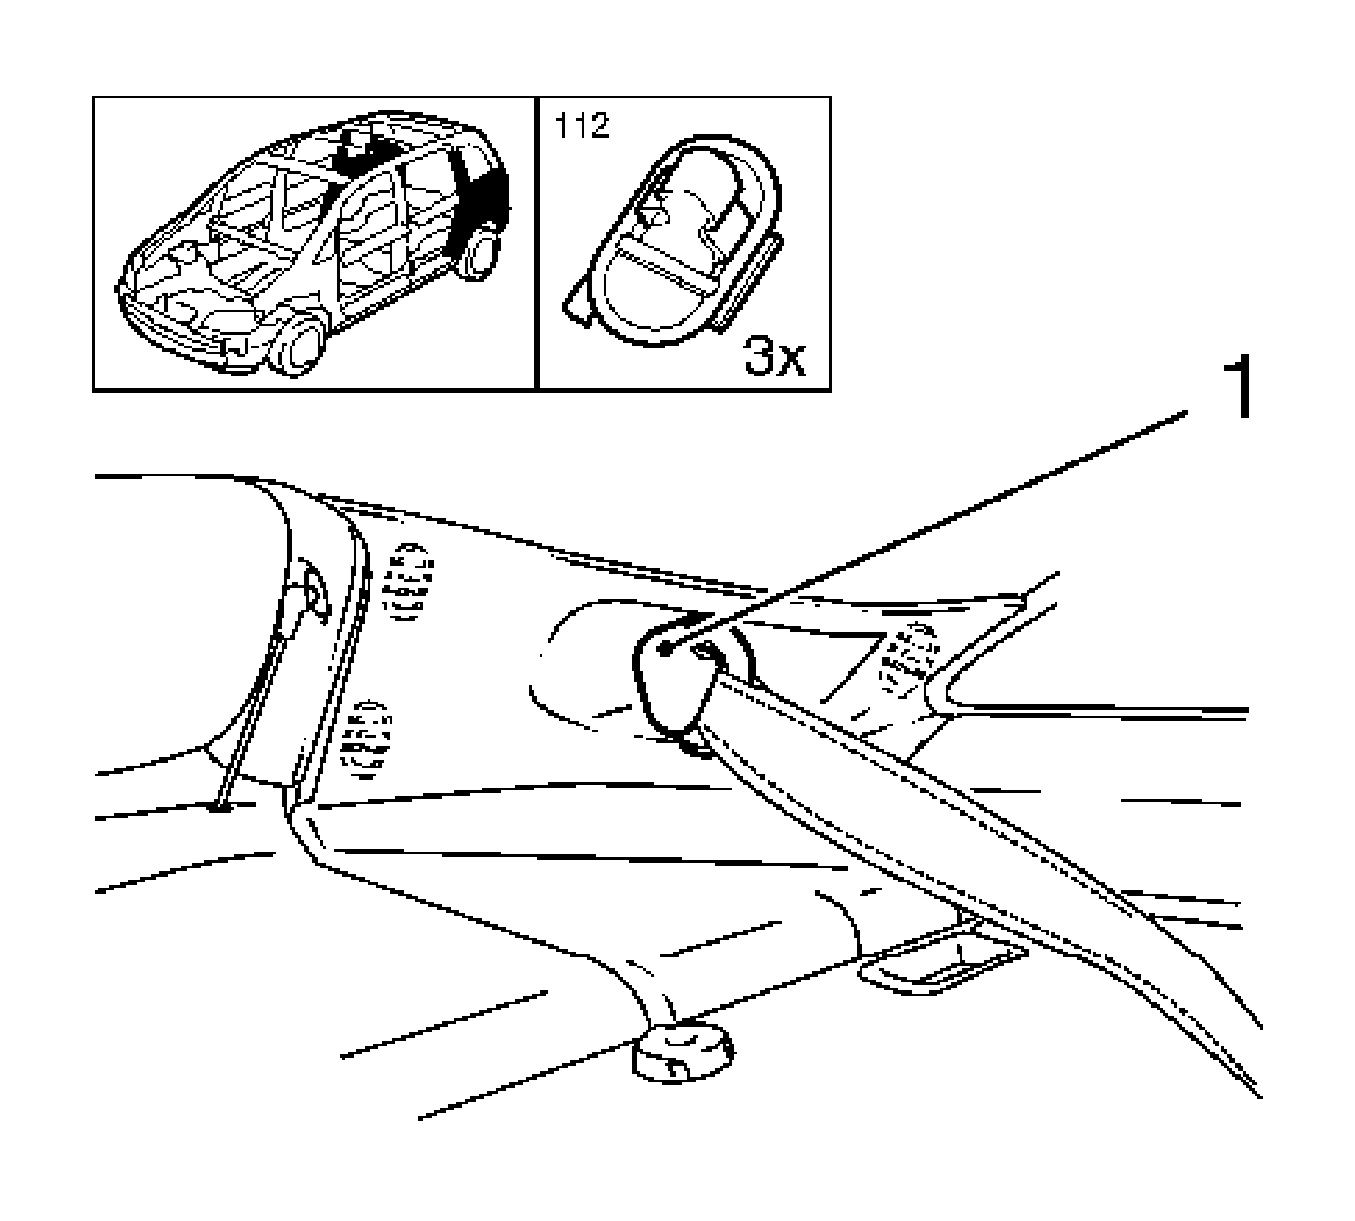
Remove the rear quarter upper trim.
| • | Remove the seat belt fastening screws. |
| • | Remove the cover cap (1). |
| • | Remove the 3 rear quarter upper trim clips. |
Installation Procedure
Install the rear quarter upper trim.
| • | Install the 3 rear quarter upper trim clips. |
Tighten
Tighten the seat belt fastening bolts to 35 N·m (26 lb ft).
Quarter Upper Trim Panel Replacement Sedan
Removal Procedure

- Remove the rear seat cushion.
| • | Unlock at the loop (1) and hang off in rear area (arrow). |
| • | Remove the rear seat upwards. |
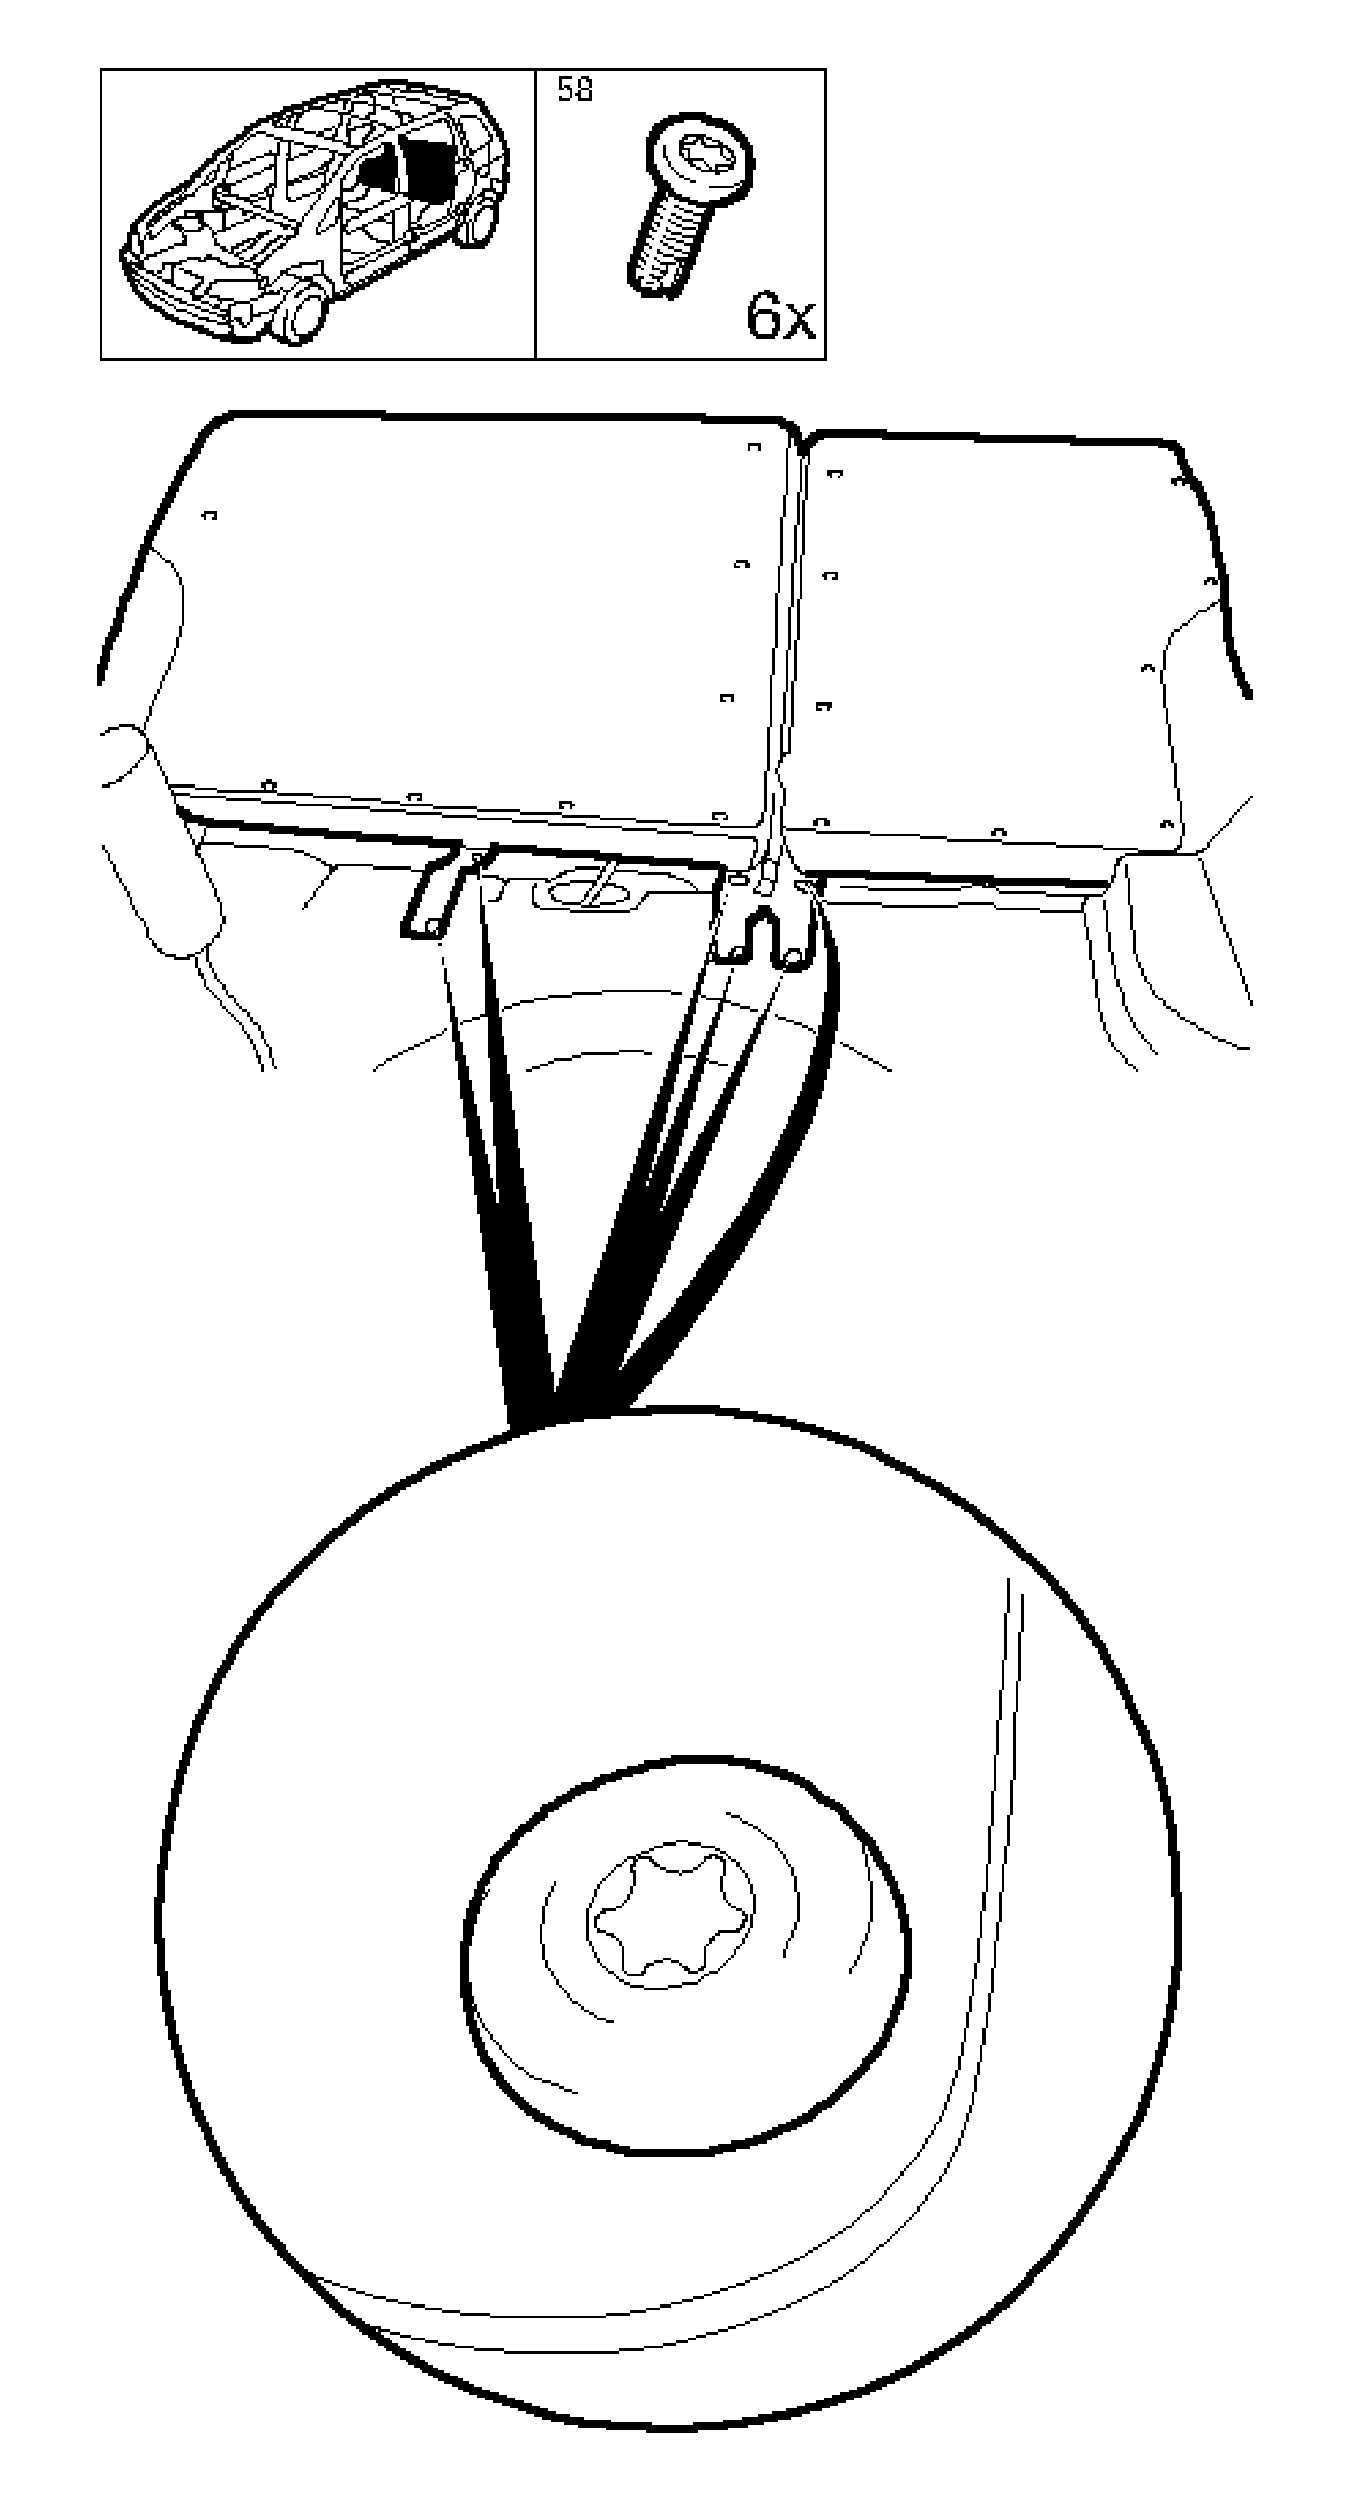
- Remove the rear seat backrest.
| • | Remove the 3 bolts at the front. |
| | Remove the 3 belt buckles. |
| • | Fold down the rear seat backrest. |
| • | Remove the 3 bolts at the back. |
Note: Second mechanic required.
- Remove the rear seat backrest.
Remove the rear seat backrest from the side guide.
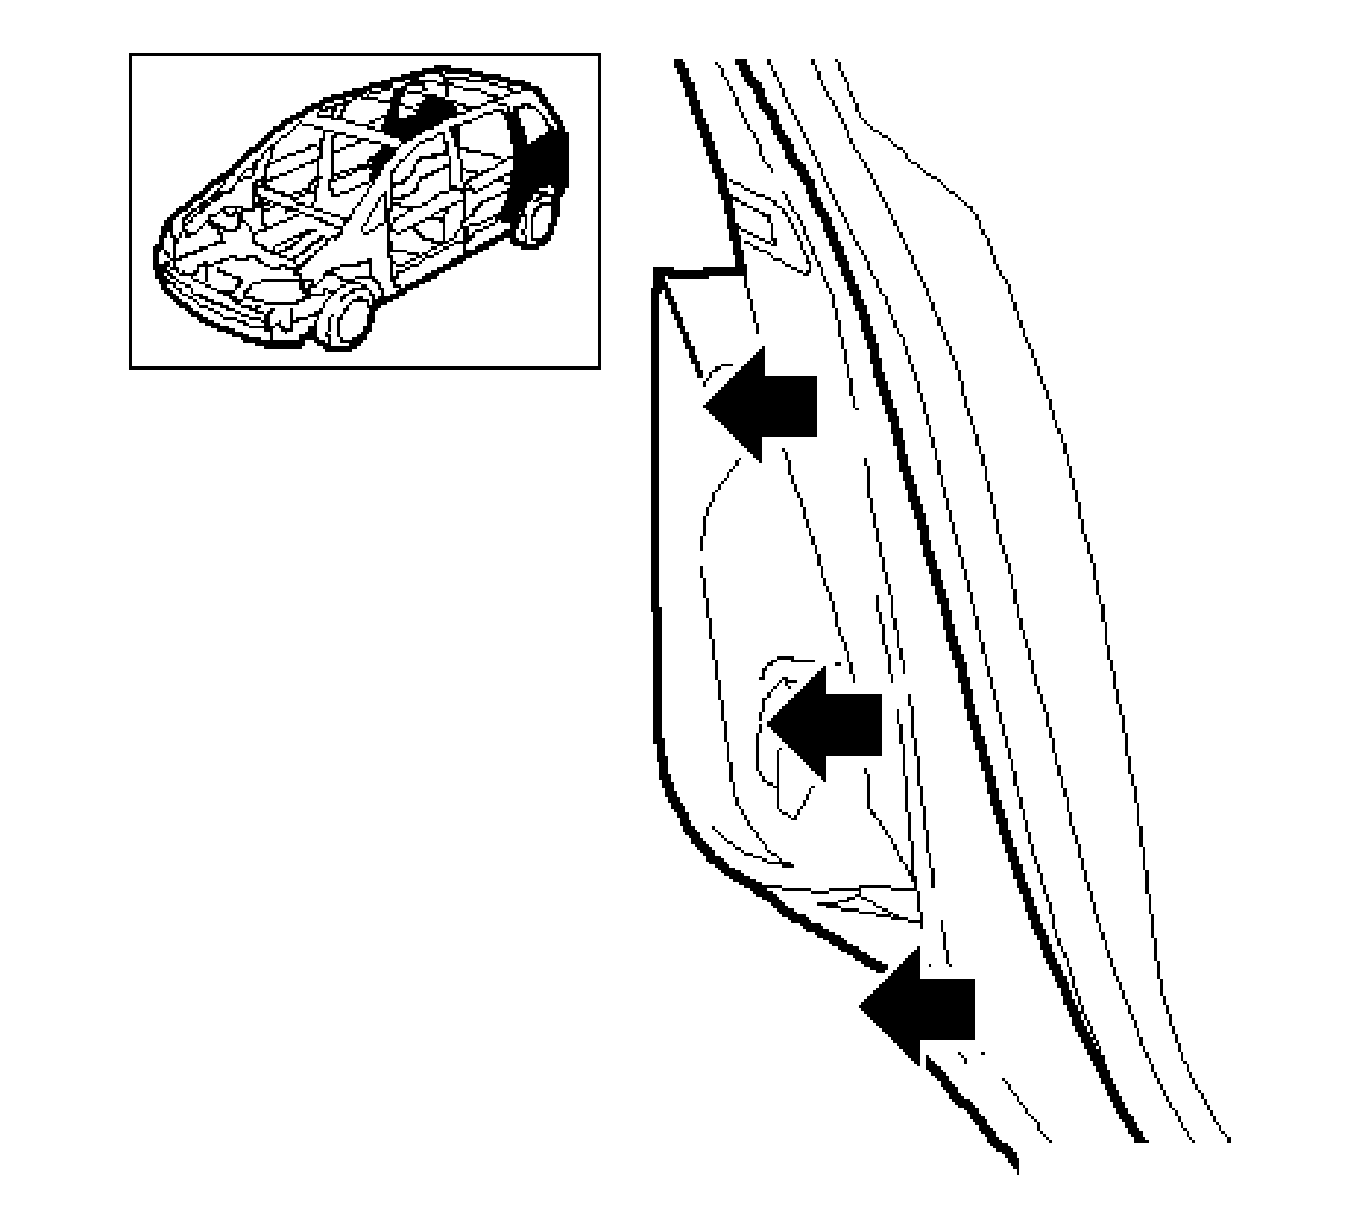
- Detach the lower center pillar garnish molding.
Release the center pillar garnish molding and remove (arrows).
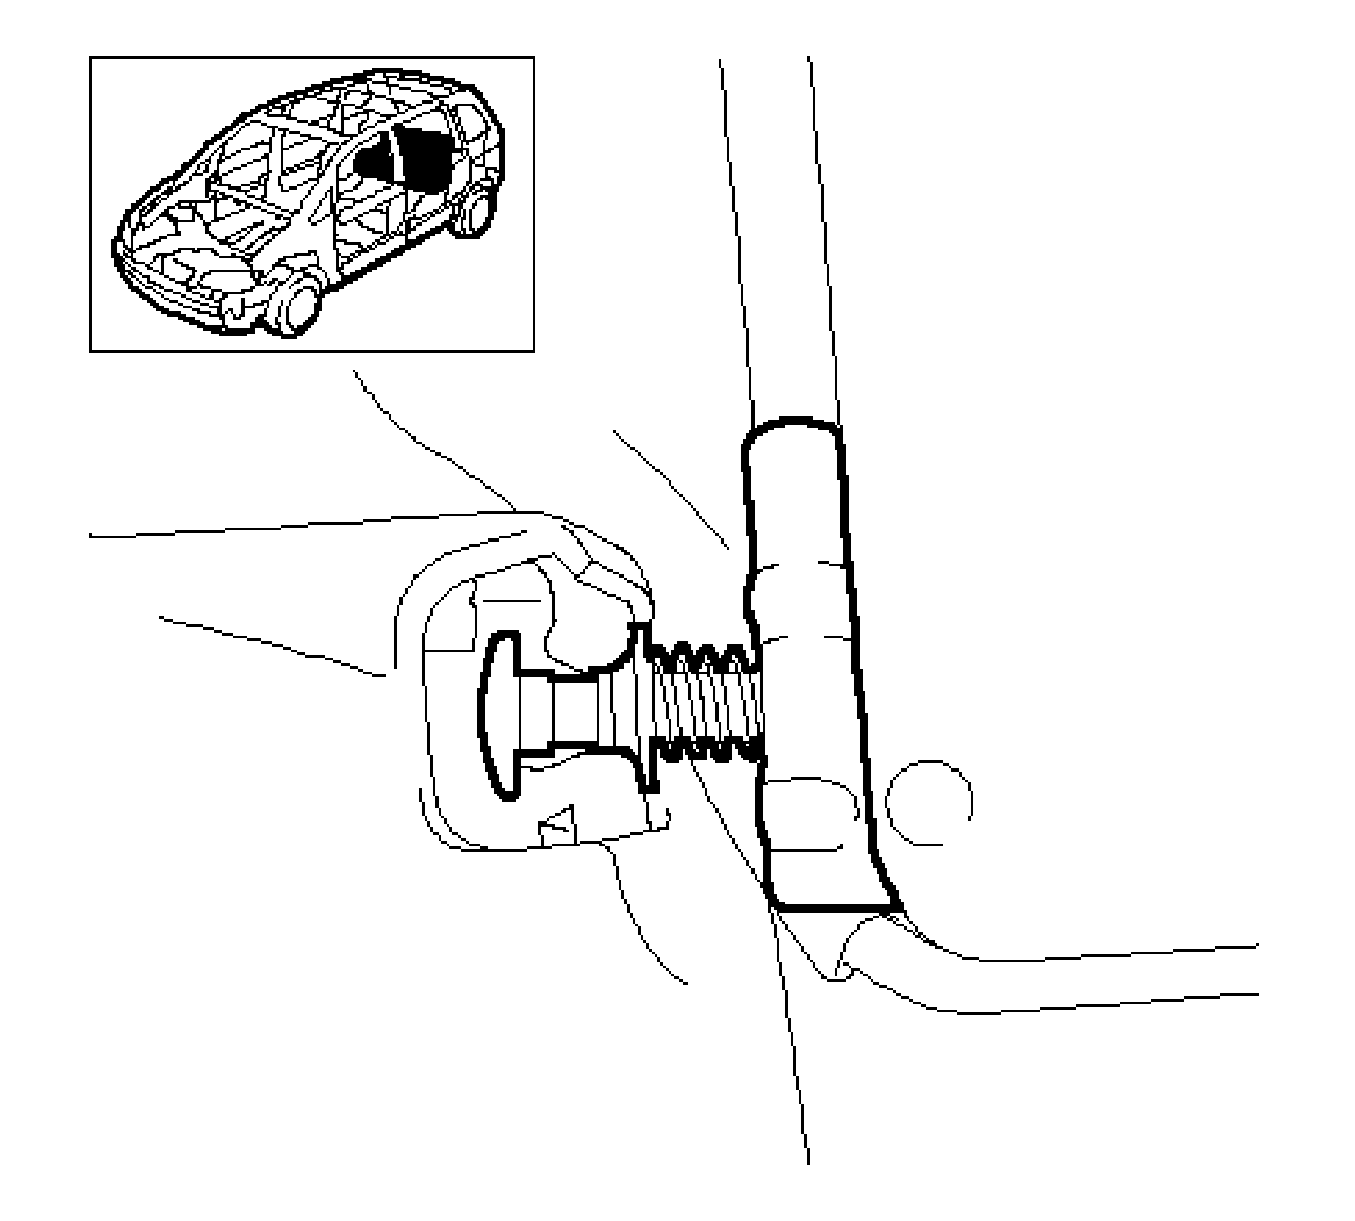
- Detach the seat belt on the lower center pillar garnish molding.
Remove the bolt.
- Remove the upper center pillar garnish molding.
| • | Release the center pillar garnish molding. |
| • | Remove the center pillar garnish molding. |
Installation Procedure
- Install the center pillar garnish molding.
| • | Clip in the center pillar garnish molding. |
Caution: Refer to Fastener Caution in the Preface section.
Note: Use screw locking compound.
- Attach the seat belt on the lower center pillar garnish molding.
Tighten
Tighten the bolt to 35 N·m (26 lb ft).
- Attach the lower center pillar garnish molding.
Note: Second mechanic required.
- Insert the rear seat backrest.
Insert the rear seat backrest into the side guide.
Note: Use screw locking compound.
- Install the rear seat backrest.
Tighten
Tighten the 3 bolts at back to 20 N·m (15 lb ft).
- Fold down the rear seat backrest.
Tighten
Tighten the front 3 bolts to belt buckle to 20 N·m (15 lb ft).
- Install the rear seat cushions.
Insert the rear seat cushion and position.
