Tools Required
| • | SA9161C Axle Boot
Clamp Installer |
| • | SA9198C C/V Joint
Snap Ring Pliers |
| • | SA9203C Axle Boot
Clamp Installer |
Disassembly Procedure
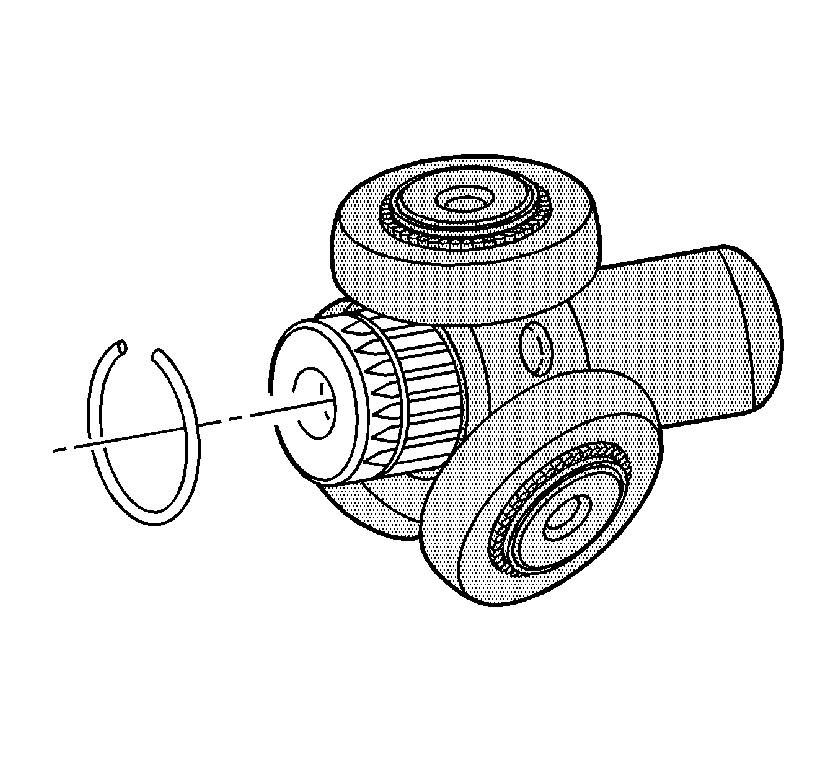
Important: Do not cut through the inboard boot and damage sealing surface of the outer
housing and the trilobal tripot bushing.
- Disconnect the small boot retaining clamp from the axle shaft using a side
cutter. Discard the small boot retaining clamp.
- Using a small bladed screwdriver, remove the earless clamp and discard.
- Remove the larger boot retaining clamp from the tripot joint with side
cutter and dispose.
- Separate the inboard boot from the trilobal tripot bushing at the large
diameter.
- Slide the boot away from the joint along the axle shaft.
- Remove the housing from the tripot joint spider and the axle shaft.
- Remove the retaining ring from the groove and the axle shaft.
- Slide the tri-pot joint spider assembly off the axle shaft. If necessary,
use a brass hammer.
- Thoroughly degrease the tri-pot housing and allow to dry prior to assembly.
- Remove the trilobal tripot bushing from the housing.
- Inspect the following parts for damage or wear:
| • | The tripot joint spider assembly |
| • | The trilobal tripot bushing |
Assembly Procedure
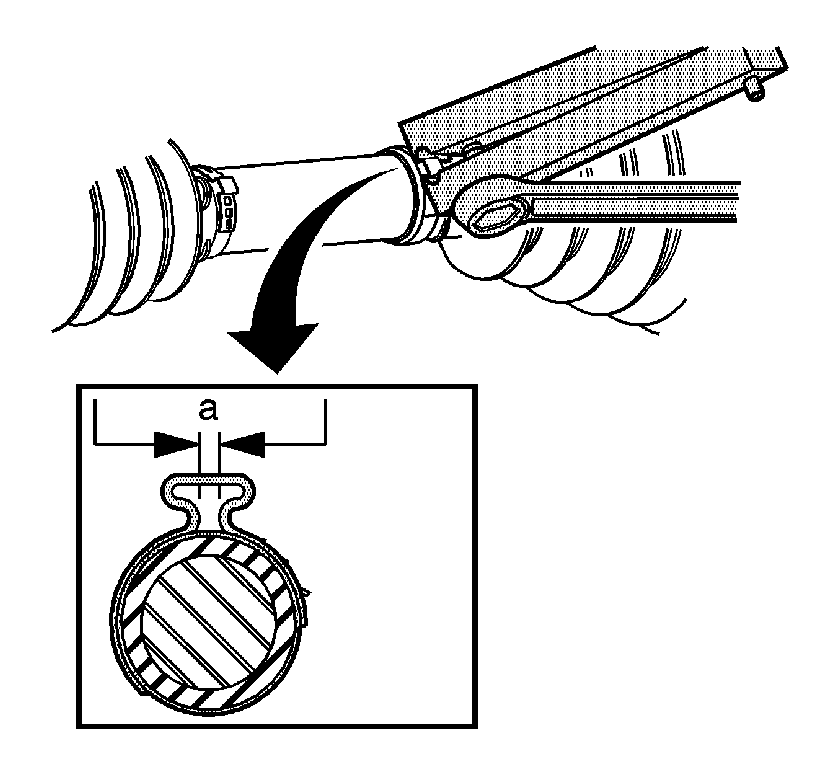
- Install the small boot retaining clamp on
the neck of the inboard boot. Do not crimp.
- Slide the inboard boot onto the axle shaft.
Important: The clamp must be in the correct orientation during the crimp operation, to
ensure a proper circumference seal.
- Crimp the boot retaining clamp with theSA9203C
- Measure the clamp end gap (a), taking care not to exceed 3 mm
(0.118 in). Repeat the previous step as necessary.
- Slide the tripot joint spider assembly past the spider retaining ring
groove until seated against the shoulder.
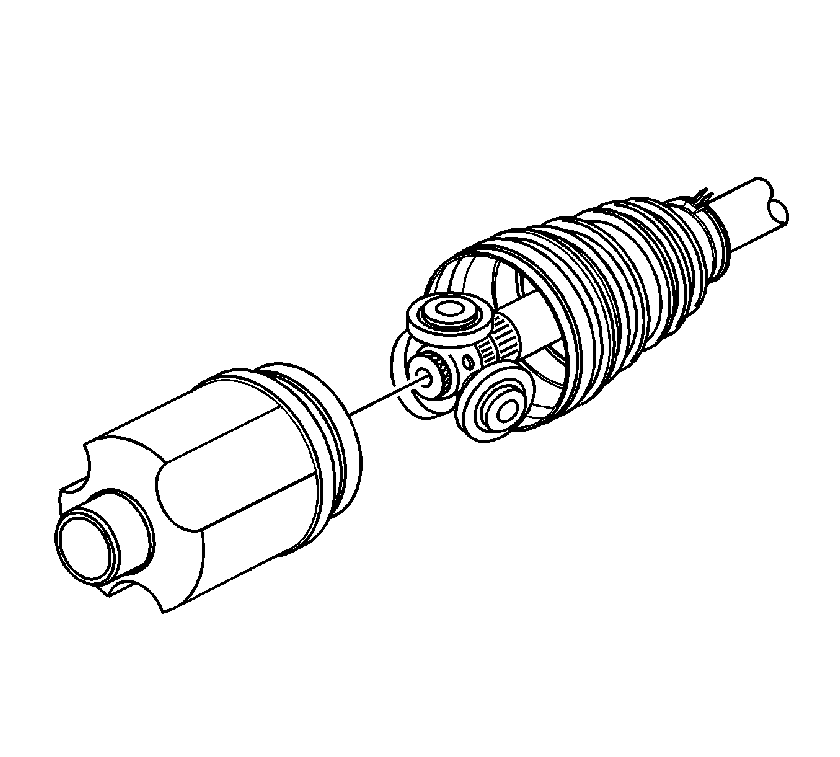
- Install the spider retaining ring in the
groove of the axle shaft with theSA9198C
.
- Place approximately half of the grease from the service kit in the inboard
boot. Use the remainder of the grease to repack the housing.
Important: The CV joint must be assembled with the convoluted retainer in position. Boot
damage will result if the joint is not assembled correctly.
- Install the trilobal tripot bushing to the housing. Ensure the trilobal tripot
bushing is flush with the face of the housing.
- Position the larger new clamp on the inboard boot.
- Slide the housing over the tripot joint spider assembly on the axle shaft.
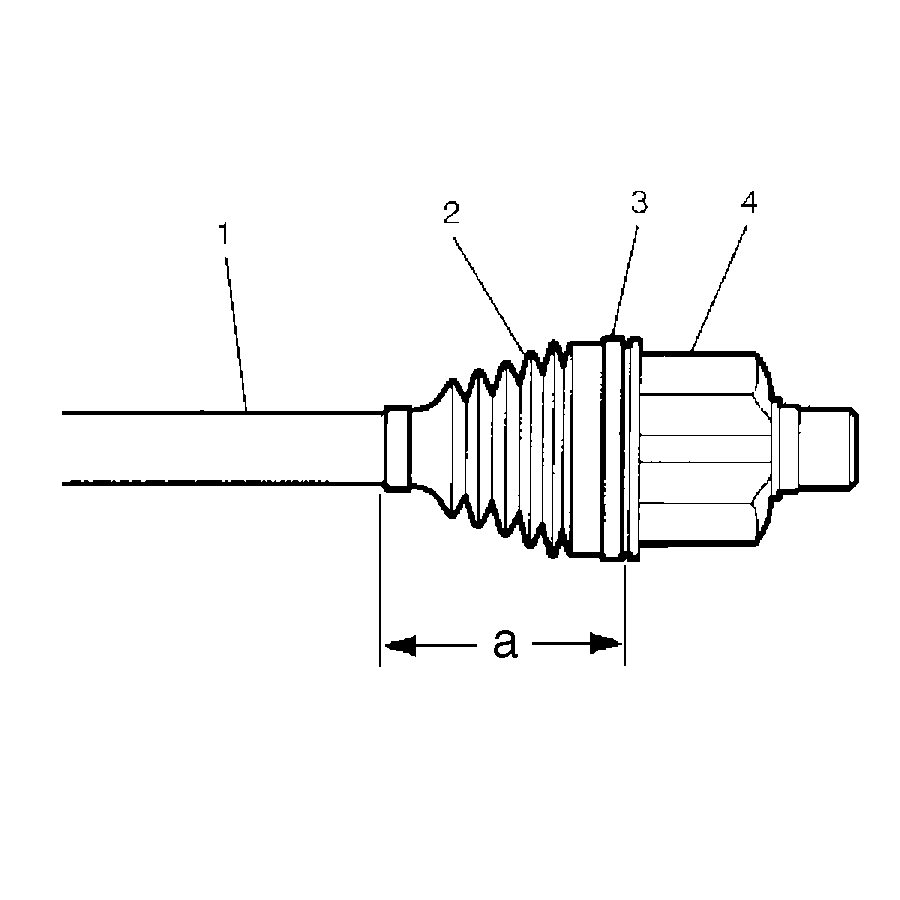
- Slide the large diameter of the inboard
boot (2), with the larger clamp in place (3), over the outside of
the trilobal tripot bushing and locate the lip of the boot in the groove (4).
Important: The inboard boot must not be dimpled, stretched out or out of shape in any
way. If the inboard boot is not shaped correctly, carefully insert a thin flat
blunt tool (no sharp edges) between the large boot opening and the trilobal tripot
bushing to equalize the pressure. Shape the inboard boot properly by hand. Remove
the tool.
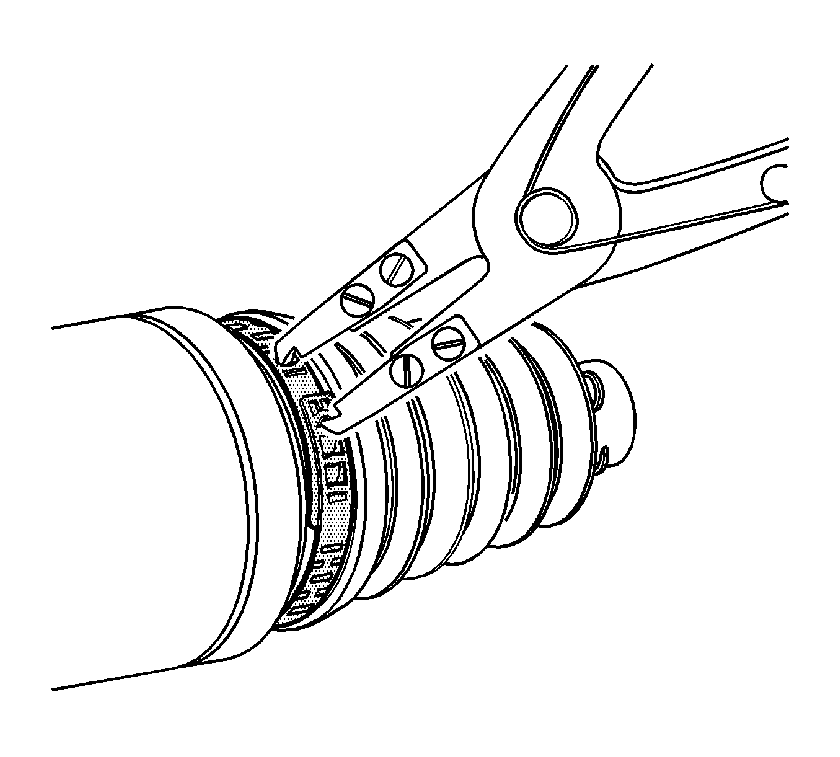
- Place the large boot retaining clamp around the boot and close using the SA9161C
.


