For 1990-2009 cars only
Removal Procedure
- Disconnect the negative battery cable. Refer to Battery Negative Cable Disconnection and Connection in Engine Electrical.
- Raise and support the vehicle. Refer to Lifting and Jacking the Vehicle in General Information.
- Remove the cradle. Refer to Frame Replacement in Frame and Underbody.
- Lower the vehicle.
- Remove the air cleaner assembly. Refer to Air Cleaner Assembly Replacement in Engine Controls 2.2L (L61).
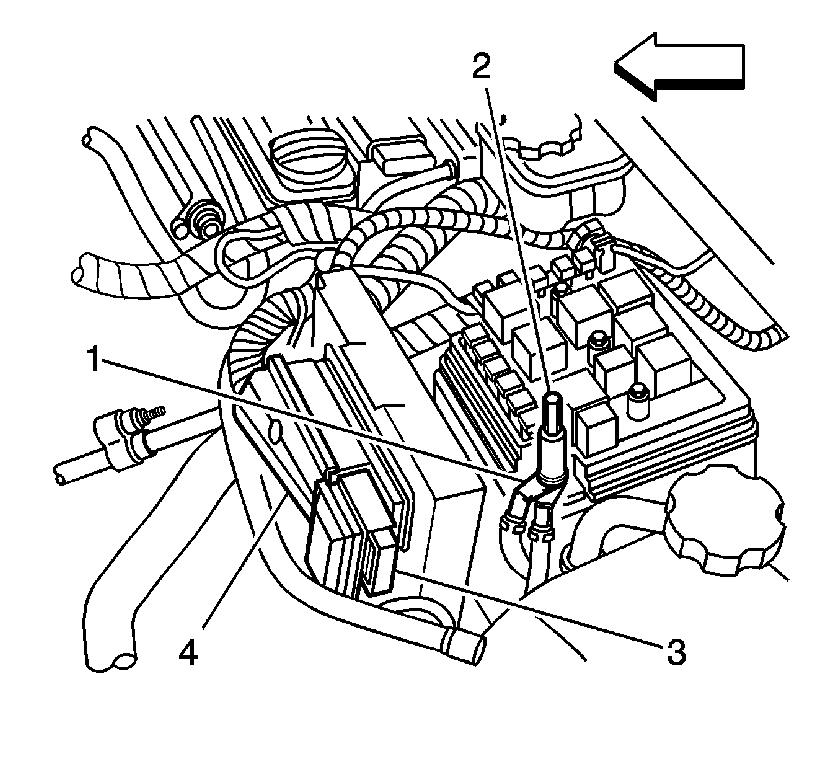
- Disconnect the engine control module harness connector (3,4).
- Remove the under hood electrical center cover.
- Disconnect the positive battery cables (1) from the under hood electrical center.
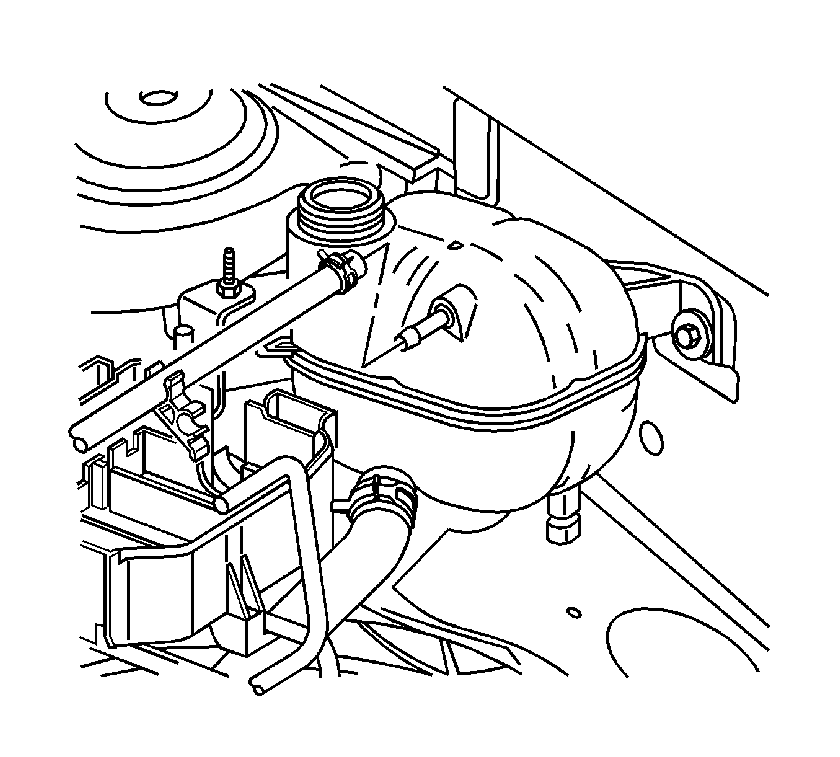
- Disconnect the surge tank inlet hose from the surge tank.
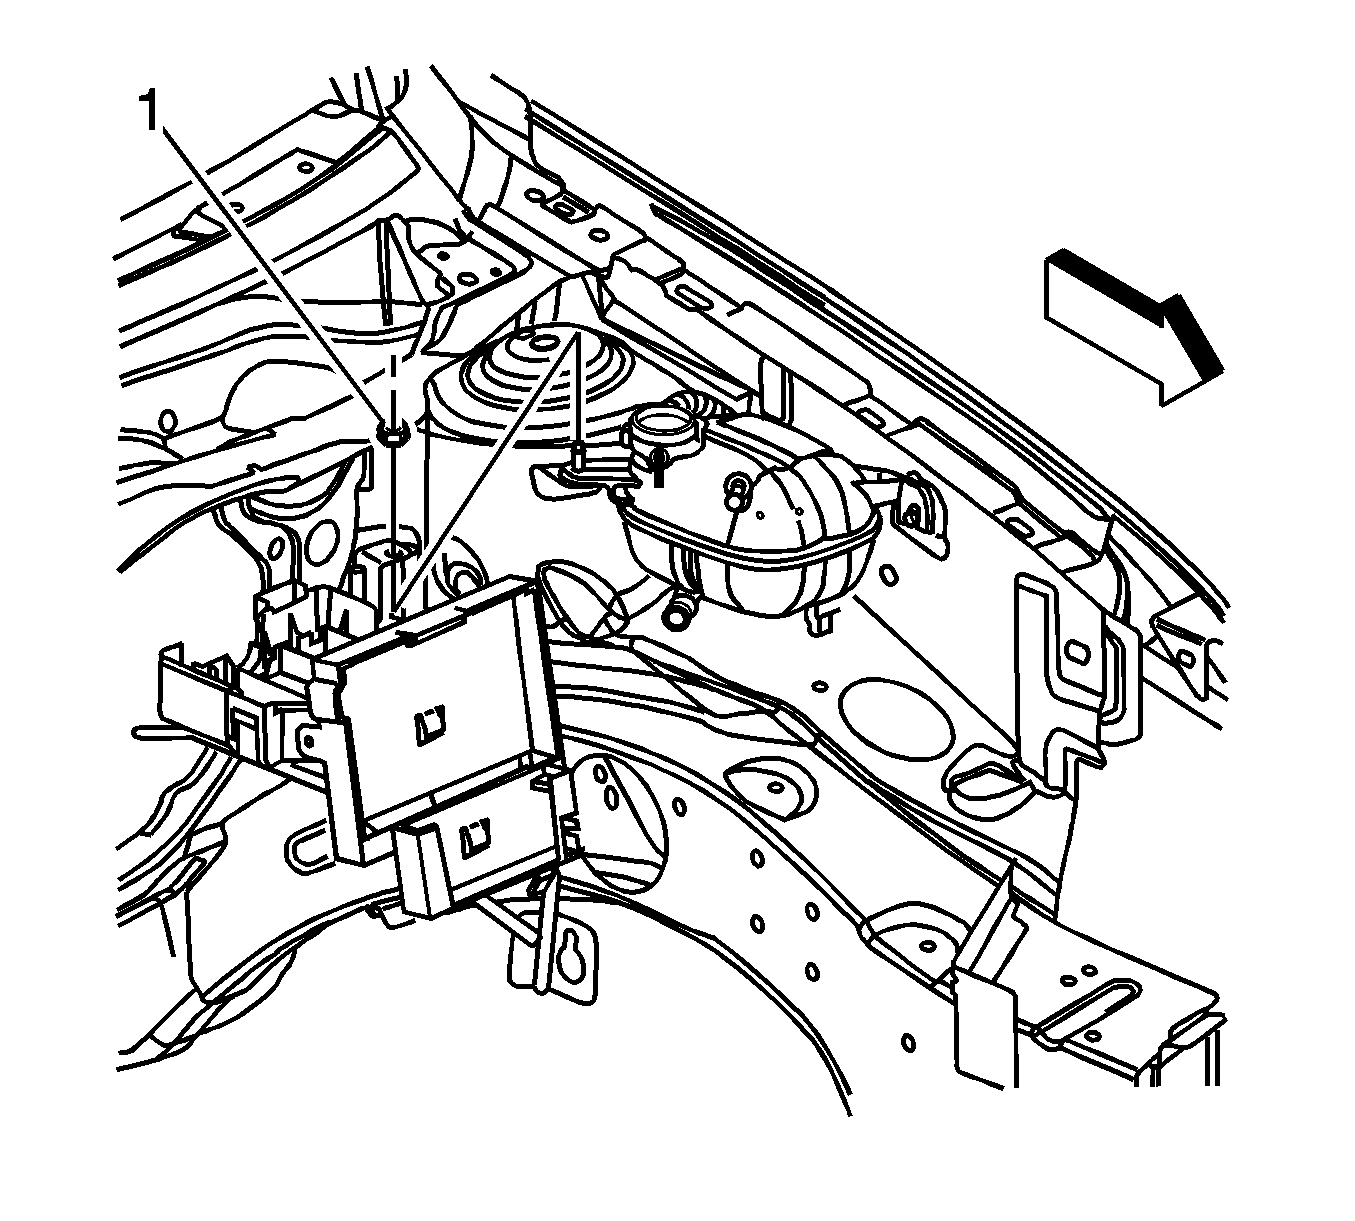
- Remove the under hood electrical center tray bracket nuts (1,2) and bolt (3).
- Disconnect the wiring harness retainer from the tray bracket.
- Lift the electrical center up and swing it back and out of the way.
- Install the engine support fixture. Refer to Engine Support Fixture in Engine Mechanical 2.2L (L61).
- Remove the engine mount. Refer to Engine Mount Replacement in Engine Mechanical 2.2L (L61).
- Disconnect the upper transmission cooler line from the radiator.
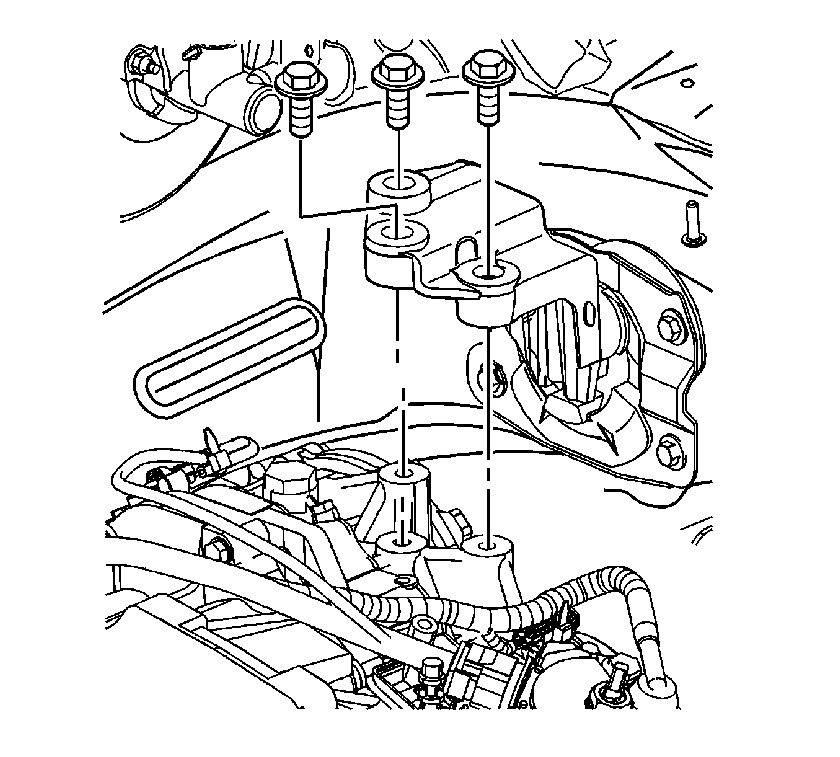
- Remove the transmission mount to transmission bolts.
- Slowly lower and tilt the entire powertrain assembly down approximately 4 inches.
- Remove the transmission mount to mid-rail bolts.
- Remove the transmission mount from the mid-rail.
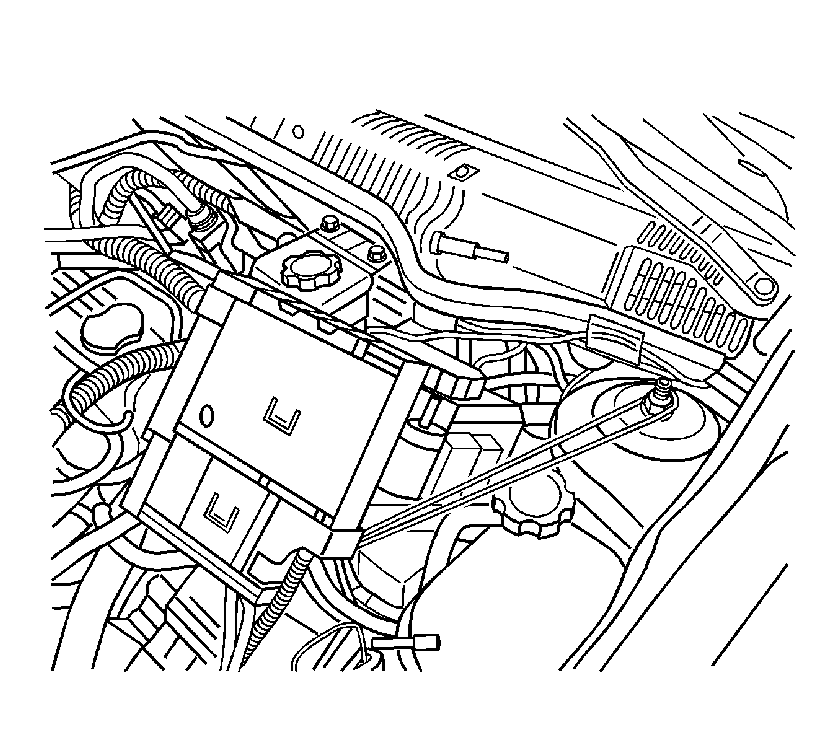
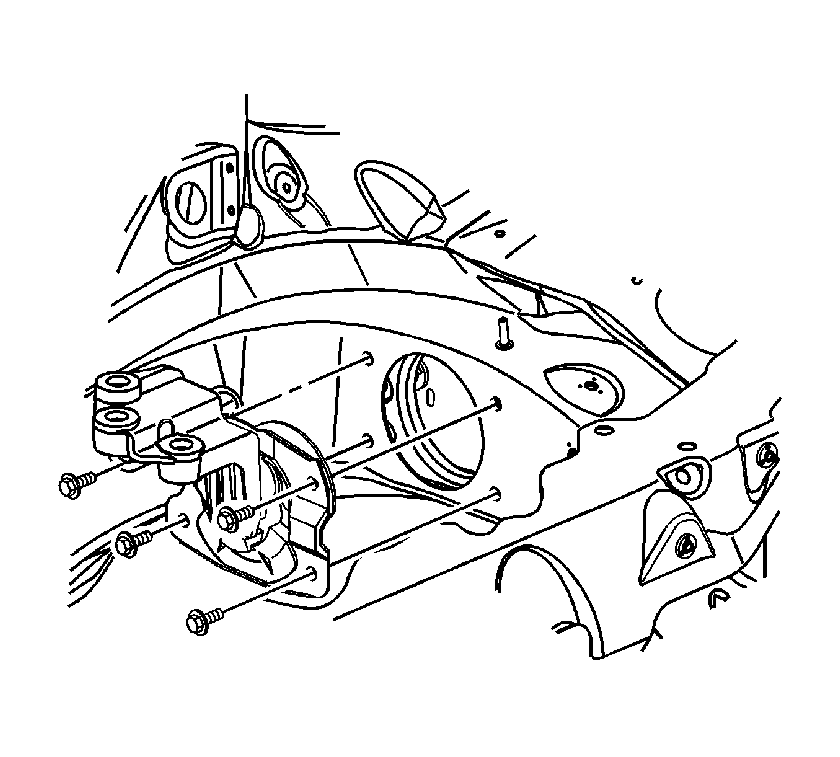
Important: Make sure the A/C compressor clutch does not contact the inner metal rail of the vehicle.
Installation Procedure
- Install the transmission mount to the mid-rail.
- Hand start the transmission mount to mid-rail bolts.
- Raise the entire powertrain assembly back into place.
- Install the engine mount. Refer to Engine Mount Replacement in Engine Mechanical 2.2L (L61).
- Hand start the transmission mount to transmission bolts using the following sequence:
- Using the previous sequence, tighten the transmission mount bolts.
- Remove the engine support fixture.
- Connect the automatic transmission cooler line to the radiator.
- Reposition the under hood electrical center.
- Connect the wiring harness retainer to the tray bracket.
- Install the electrical center nuts (1,2) and bolt (3).
- Connect the surge tank inlet hose to the surge tank.
- Install the positive battery cables (1) to the under hood electrical center.
- Connect the engine control module harness connectors (3,4).
- Install the under hood electrical center cover.
- Install the air cleaner assembly. Refer to Air Cleaner Assembly Replacement in Engine Controls 2.2L (L61).
- Raise the vehicle.
- Install the cradle. Refer to Frame Replacement In Frame and Underbody.
- Lower the vehicle.
- Connect the negative battery cable. Refer to Battery Negative Cable Disconnection and Connection in Engine Electrical.

Notice: Refer to Fastener Notice in the Preface section.
Tighten
Tighten the bolts to 34 N·m (25 lb ft).

Important: The transmission mount to transmission bolts must be hand started, Do not pry the transmission or mount to align the holes.
| 5.1. | Rear bolt |
| 5.2. | Middle bolt |
| 5.3. | Front bolt |
Tighten
Tighten the bolts to 45 N·m (33 lb ft).

Tighten
| • | Tighten the nuts to 10 N·m (89 lb in). |
| • | Tighten the bolt to 25 N·m (18 lb ft). |


Tighten
Tighten the positive cable nut to 15 N·m (11 lb ft).
