Rear Outer Door Panel Cracking At Front Upper Mounting Bold/Bumper Location (Replace Door Panel and Install New Mounting Hardware)

| Subject: | Rear Outer Door Panel Cracking at Front Upper Mounting Bolt/Bumper Location (Replace Door Panel and Install New Mounting Hardware) |
| Models: | 2003 ION Quad Coupe |
| Built Up To and Including VIN Breakpoint 3Z175813 |
| Attention: | General Manager, Fixed Operations Manager, Parts Manager, Technician |
Condition:
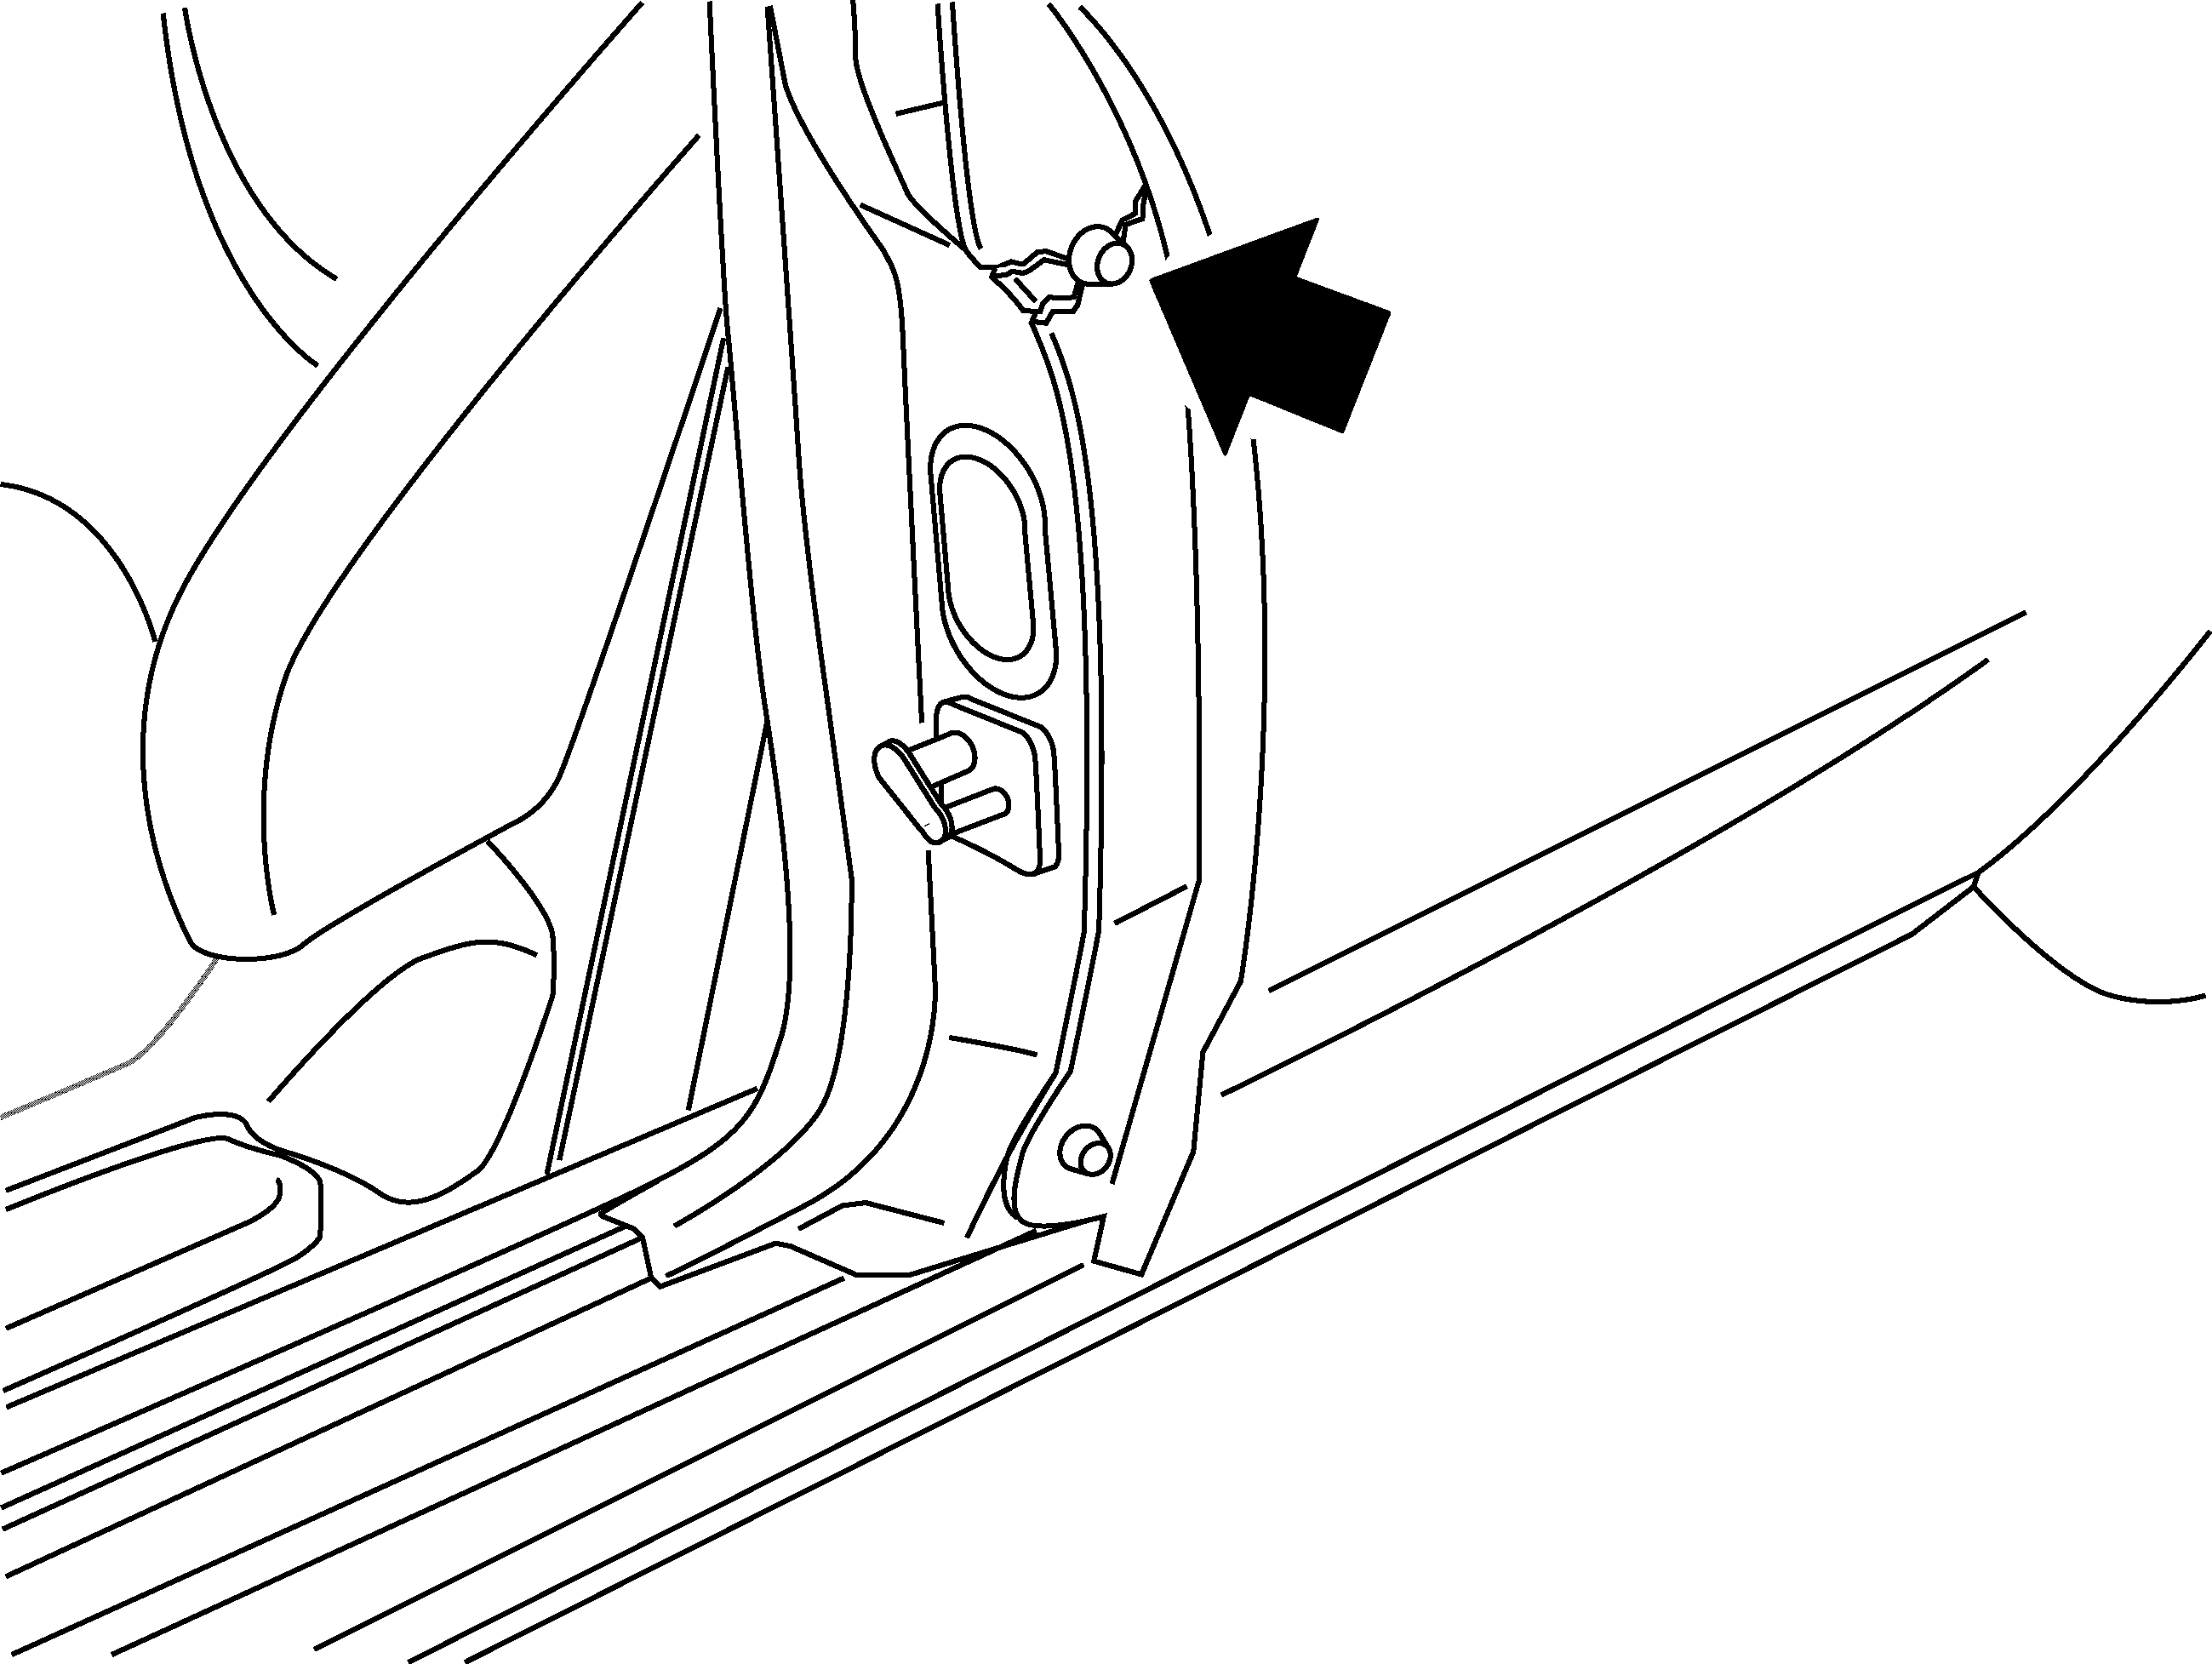
Some customers may comment on a small hairline crack on the rear outer door panel at the upper mounting bolt/bumper location only. The crack may be evident when the front door is open. The crack may be present on either the right or left side of the vehicle.
Cause:
The crack may be caused by the design of the upper mounting bolt/bumper used in the installation of the rear outer door panel.
Correction:
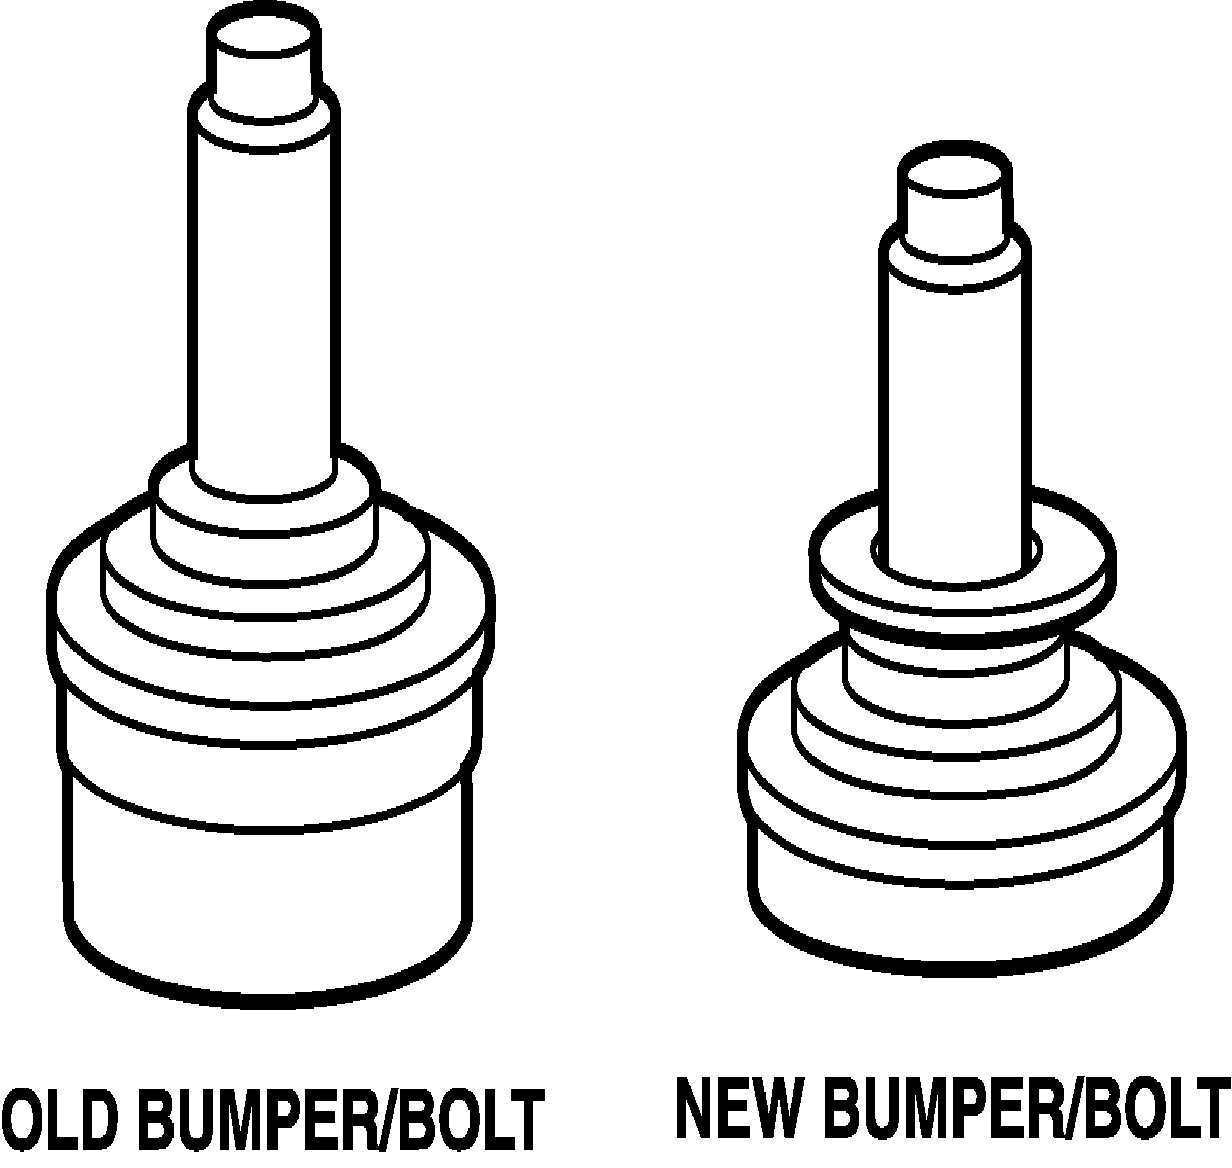
Replace cracked outer door panel with new panel and replace the existing upper mounting bolt/bumper with the new bolt/bumper design. Inspect the panel on the opposite side of vehicle and replace if cracked, or modify panel and install new upper mounting bolt/bumper if not cracked
Service Procedure
PANEL REPLACEMENT (for cracked panels)
- Inspect rear outer door panel upper mounting location for cracks. If a crack exists, proceed with step 2. If no crack present, go to Panel Modification (for intact panels) section.
- Open the door and remove the retaining bolts from the rear of the door opening.
- Close the door and remove the retaining bolts in the door opening
- Pull out the lower portion of the door panel and slide the panel downward to clear the window encapsulated molding.
- Remove the outer panel from the door and discard.
- Install new painted rear outer door panel with modified upper front mounting hole (new panels have modified holes).
- Install the upper portion of the outer door panel underneath the window encapsulated molding.
- Push the lower portion of the panel into position.
- Install the bolts, placing the new bolt/bumper in the upper position. Tighten the bolts in the sequence shown.
- Slowly close the door. Verify the alignment of the outer door panel.
Notice: Use the correct fastener in the correct location. Replacement fasteners must be the correct part number for that application. Fasteners requiring replacement or fasteners requiring the use of thread locking compound or sealant are identified in the service procedure. Do not use paints, lubricants, or corrosion inhibitors on fasteners or fastener joint surfaces unless specified. These coatings affect fastener torque and joint clamping force and may damage the fastener. Use the correct tightening sequence and specifications when installing fasteners in order to avoid damage to parts and systems.
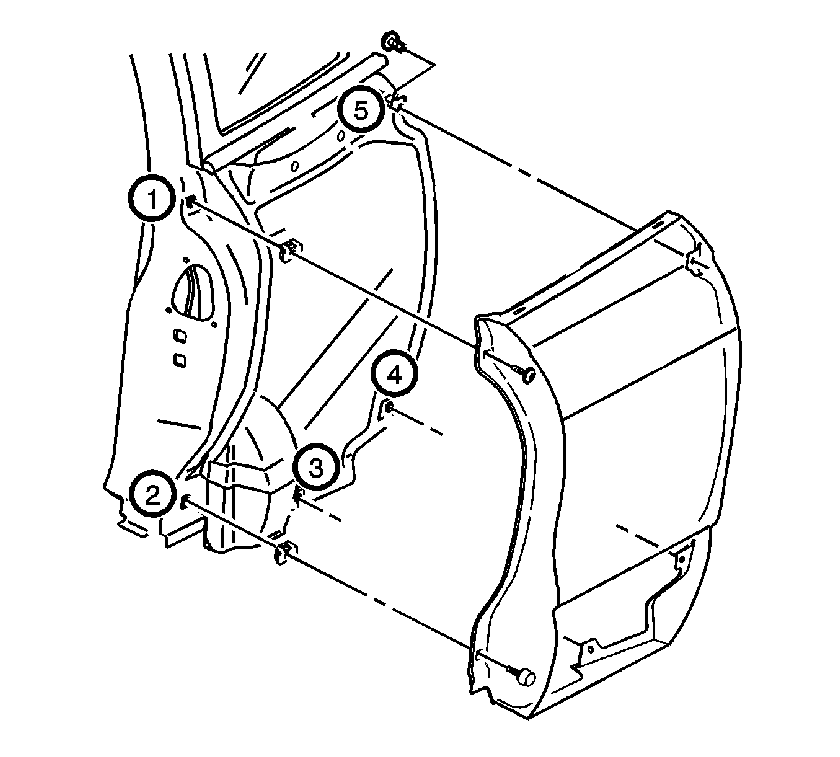
Tighten
Tighten bolt/bumper to door to 6 N·m
(53 lb-in).
PANEL MODIFICATION (for intact panels)
- When modifying upper mounting hole, apply tape to door panel edge next to upper bolt/bumper to protect paint.
- Remove upper and lower bolt/bumpers.
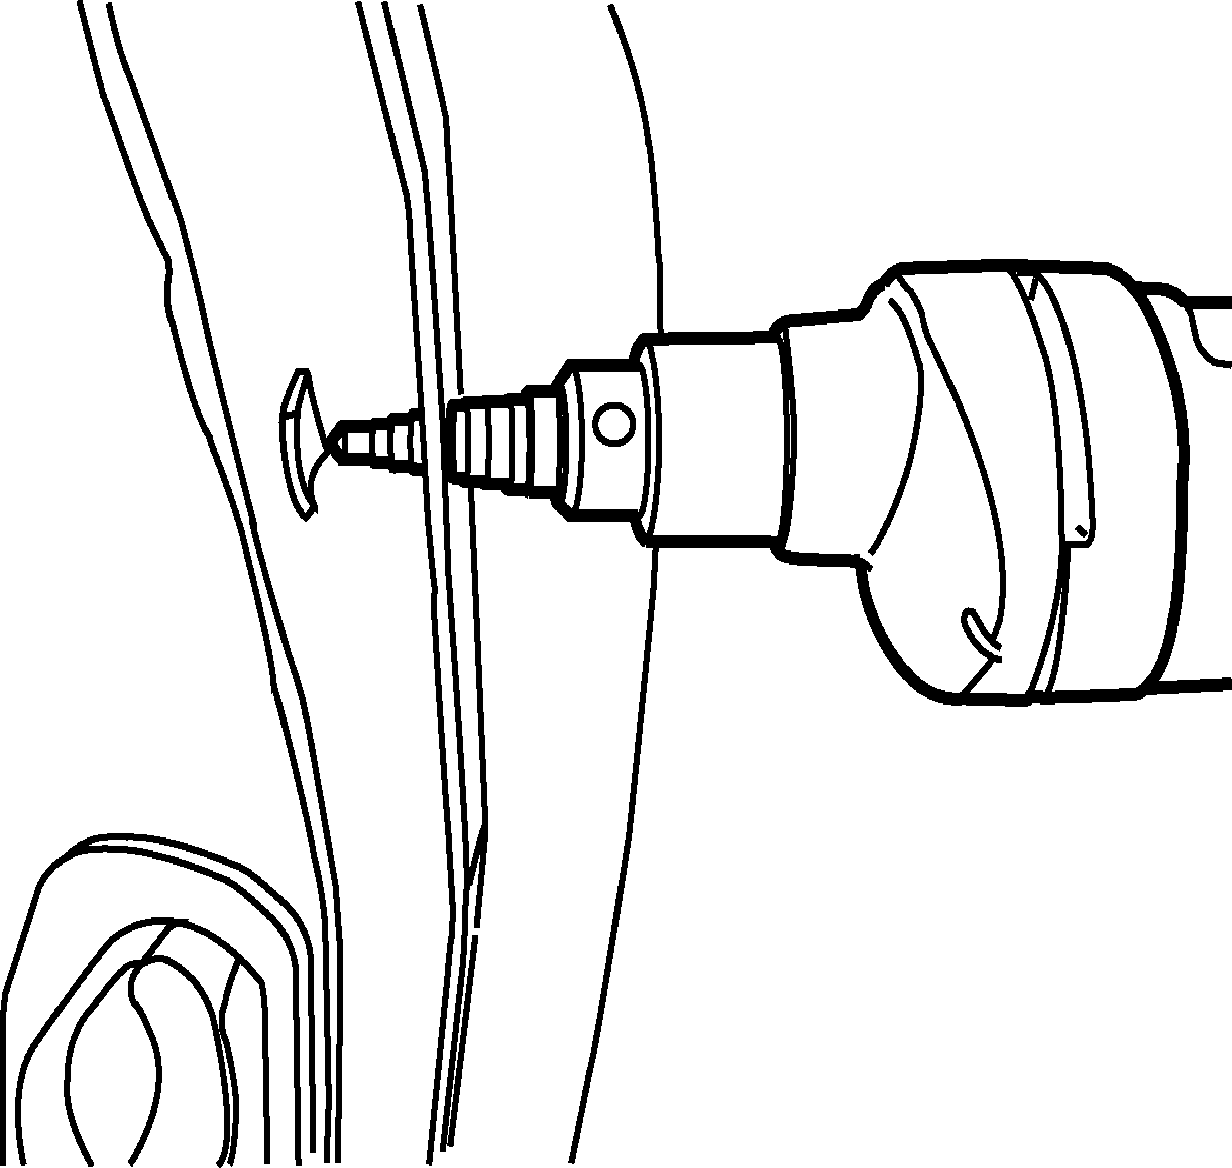
- Pull top of panel out from under the window encapsulated molding just far enough to keep drill from contacting the body while modifying panel.
- Using an unibit stepdrill, drill the upper front mounting hole to 12.7 mm (0.5 in) diameter.
- Reposition panel to installed location and hand install original lower retaining bolt/bumper and the new style upper retaining bolt/bumper.
- Tighten both bolt/bumpers to door.
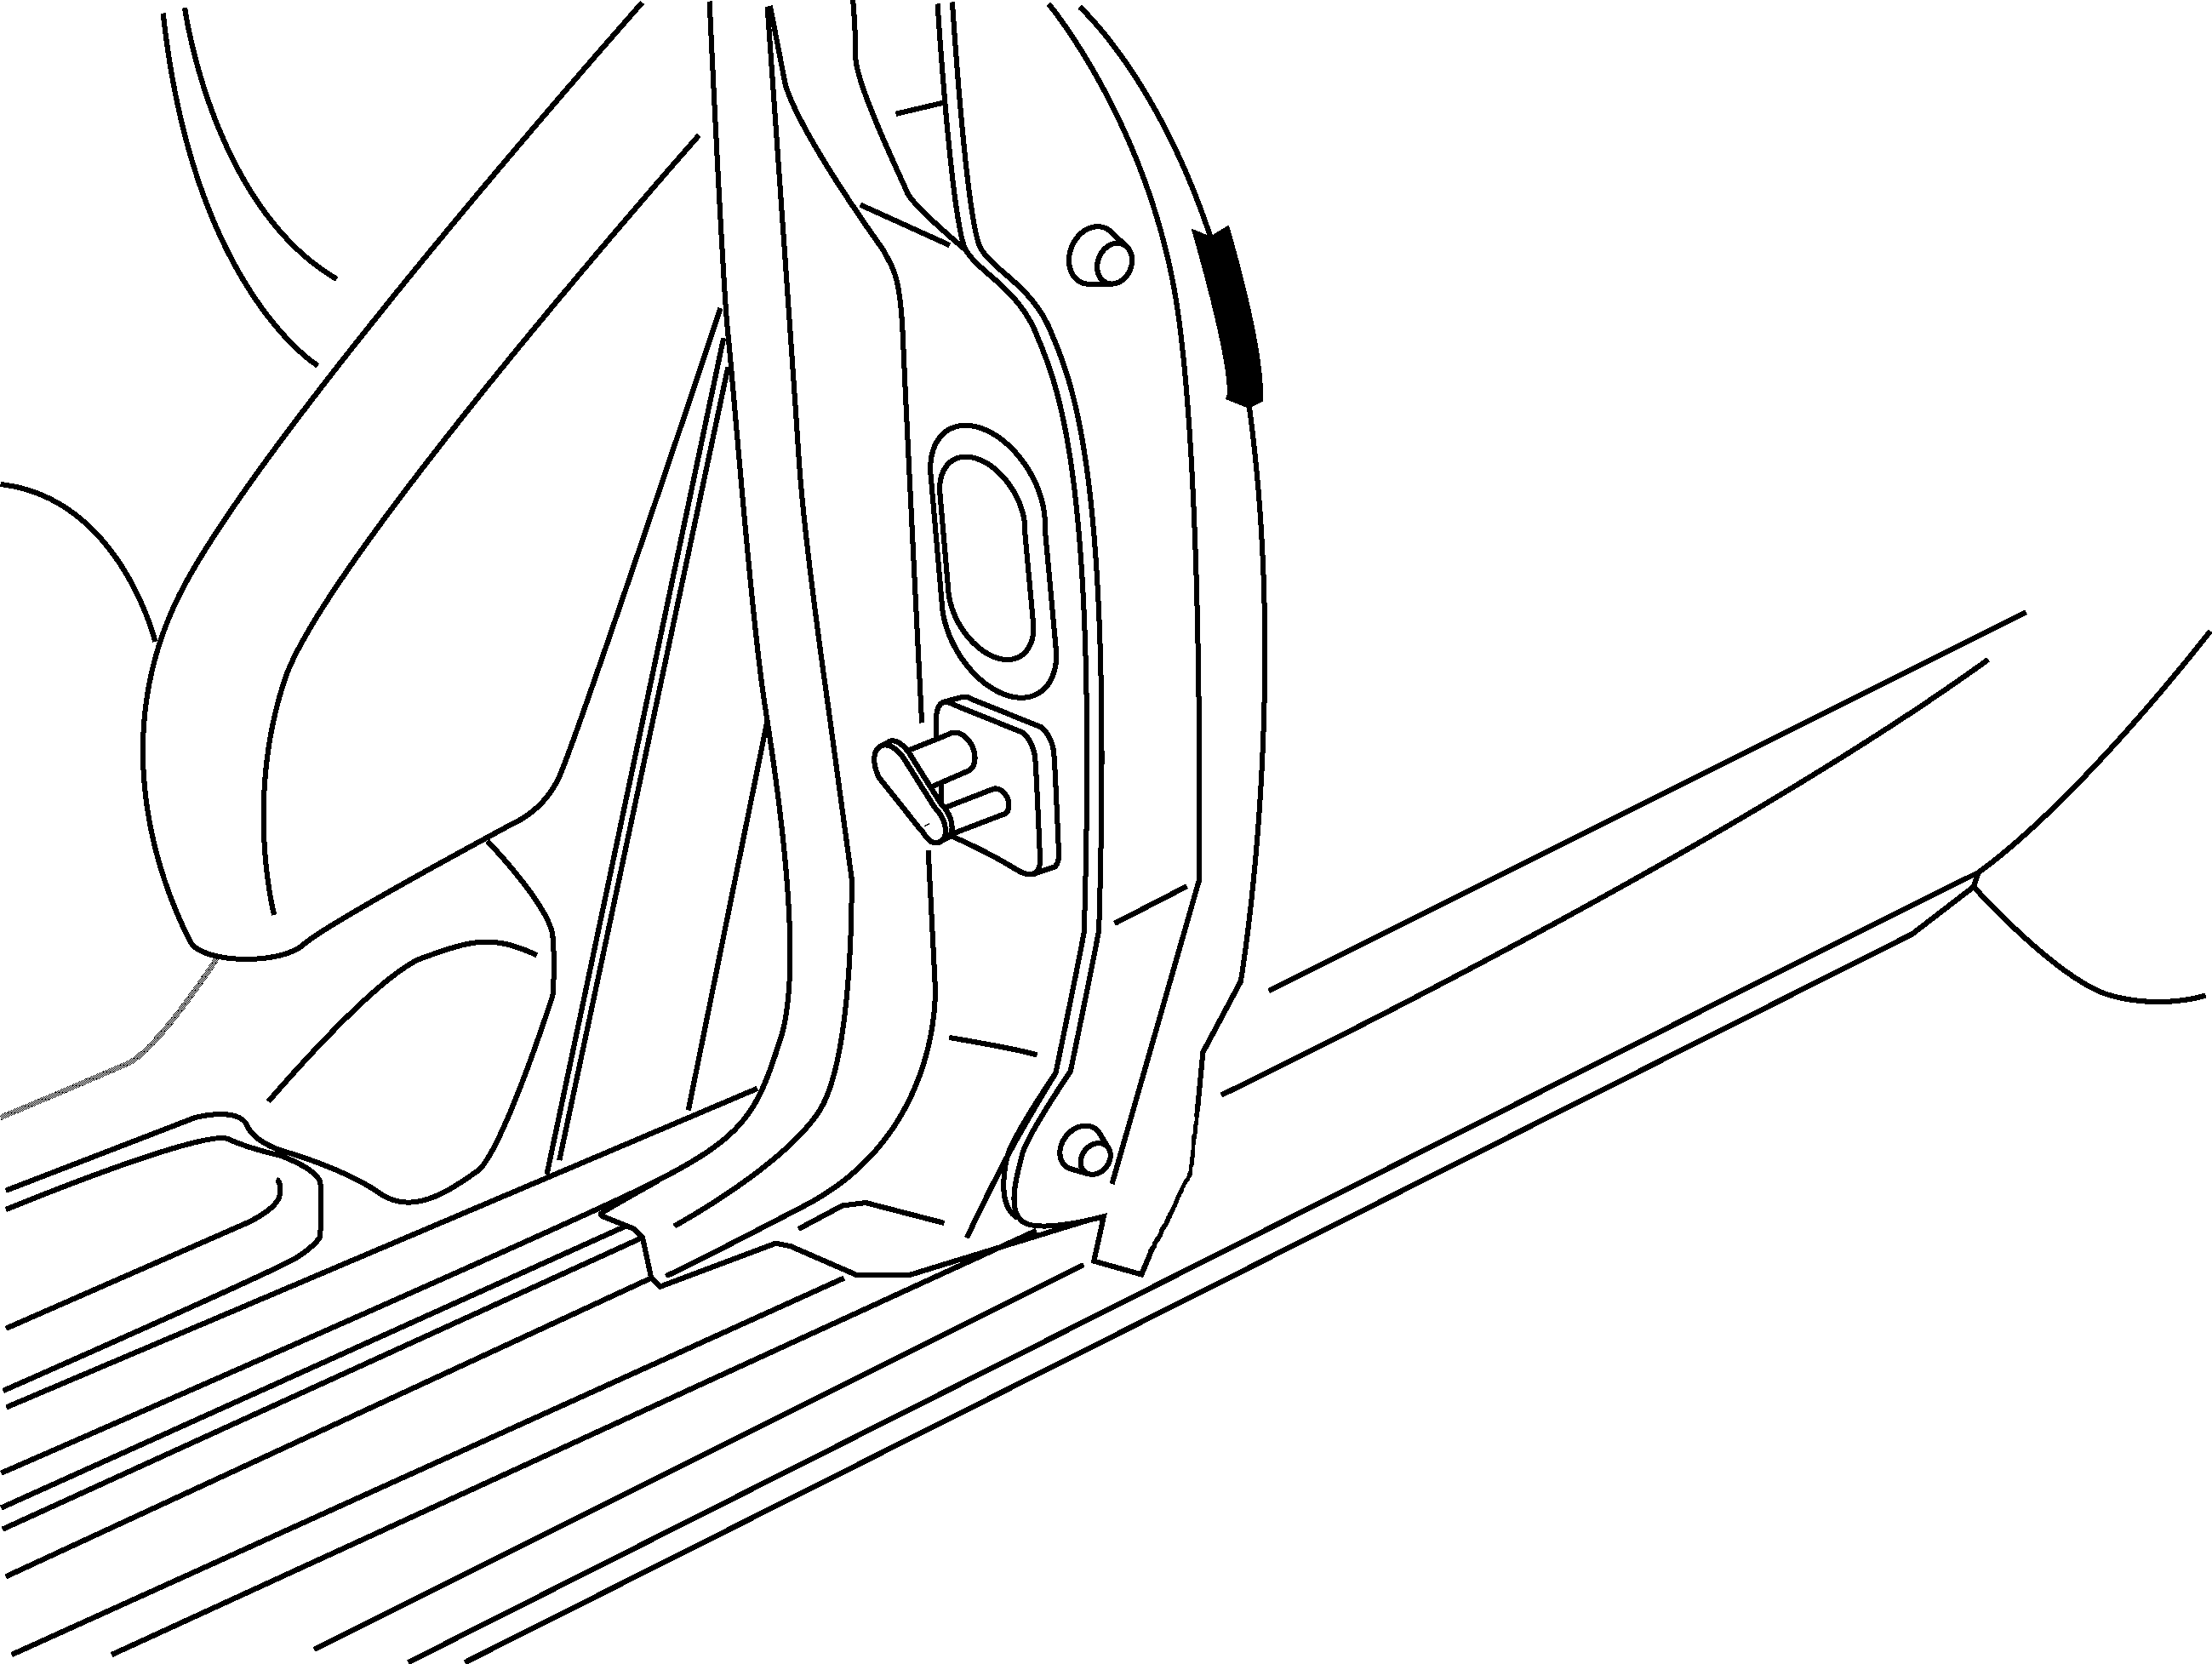
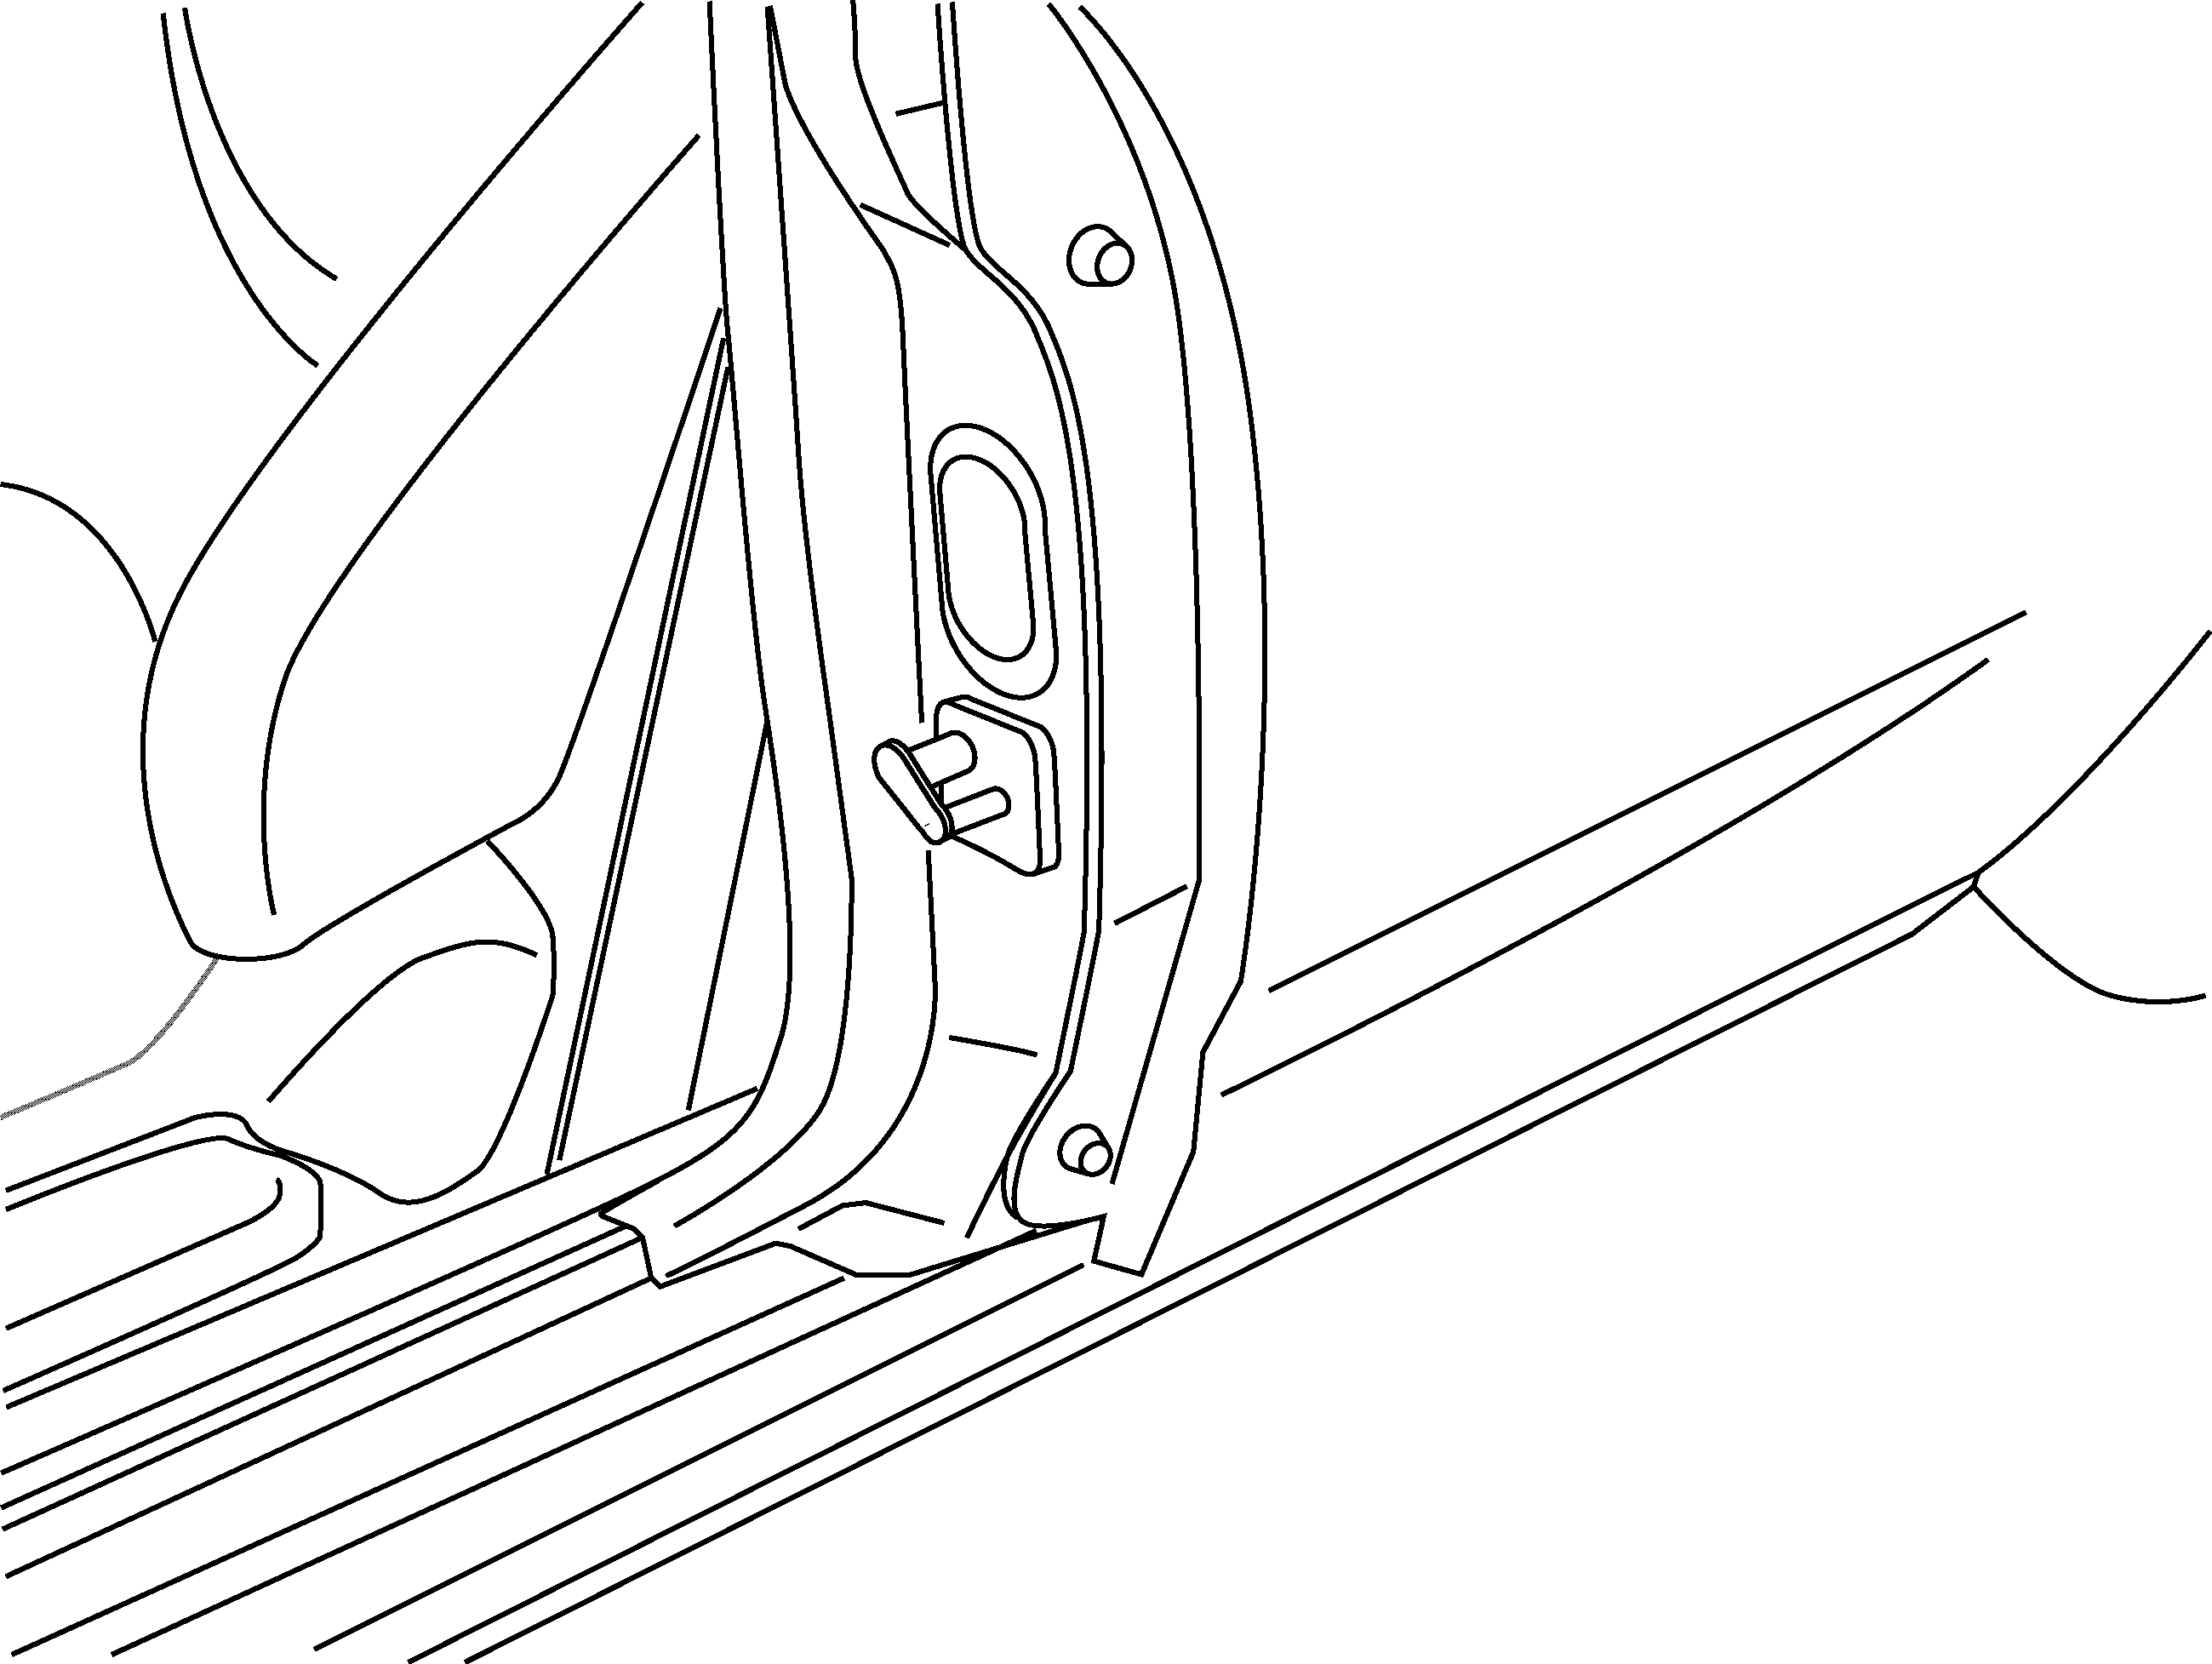
Important: Make sure drill does not contact any painted surface of the door panel.
Tighten
Tighten bolt/bumper to door to 6 N·m
(53 lb-in).
Parts Information
Part Number | Description |
|---|---|
11609223 | Upper bolt/bumper |
22713878 | Rear door outer panel LH |
22713879 | Rear door outer panel RH |
Claim Information
To receive credit for this repair during the warranty coverage period, submit a claim through the Saturn Dealer System for S0900 (Panel, Rear Door Outer, Right -- Replace) or S0901 (Panel, Rear Door Outer, Left -- Replace). An Add Time will be added to the door panel that is replaced, for drilling out the hole and installing the new fastener on the other door.
Important: When claiming the door replacement operation, claim the operation for the door that is actually replaced.
Important: The Add Time for drilling out the upper door hole and installing the new fastener can only be claimed on vehicles with VIN numbers up to and including VIN 3Z175813.
