Creaking/Squeaking Noise from the Front Suspension When Turning the Steering Wheel (Replace Front Strut Bumper)

| Subject: | Creaking/Squeaking Noise From the Front Suspension When Turning the Steering Wheel (Replace Front Strut Bumper) |
| Models: | 2003-2004 Saturn ION Vehicles |
| Attention: | Fixed Operations Manager and Technician |
Condition
Some customers may comment on a creaking or squeaking noise from the front suspension when turning the steering wheel.
Cause
This condition may be caused by the fit between the front suspension strut bumper and the front suspension strut shaft.
Correction
To correct this condition, verify the concern and, if necessary, replace the front suspension strut bumpers. Refer to the procedure in this bulletin.
Service Procedure
- Verify the customer comment.
- If a creaking or squeaking noise is heard from either front suspension strut, then follow the procedure in this bulletin to replace the corresponding front suspension strut bumper.
| 1.1. | Vehicle should be at normal ride height. |
| 1.2. | Reach through one of the front coil springs to grasp the front suspension strut shield. |
| 1.3. | Turn the front suspension strut shield on the strut shaft and listen for any creaking or squeaking noise. |
Disassembly Procedure
- Raise and support the vehicle. Refer to "Lifting and Jacking the Vehicle" in the General Information section of the 2003 or 2004 Saturn ION Service Manual, Vol. 1 (SI Document ID #878849).
- Remove the front wheel. Refer to "Tire and Wheel Removal and Installation" in the Suspension section of the 2003 or 2004 Saturn ION Service Manual, Vol. 1 (SI Document ID #878893).
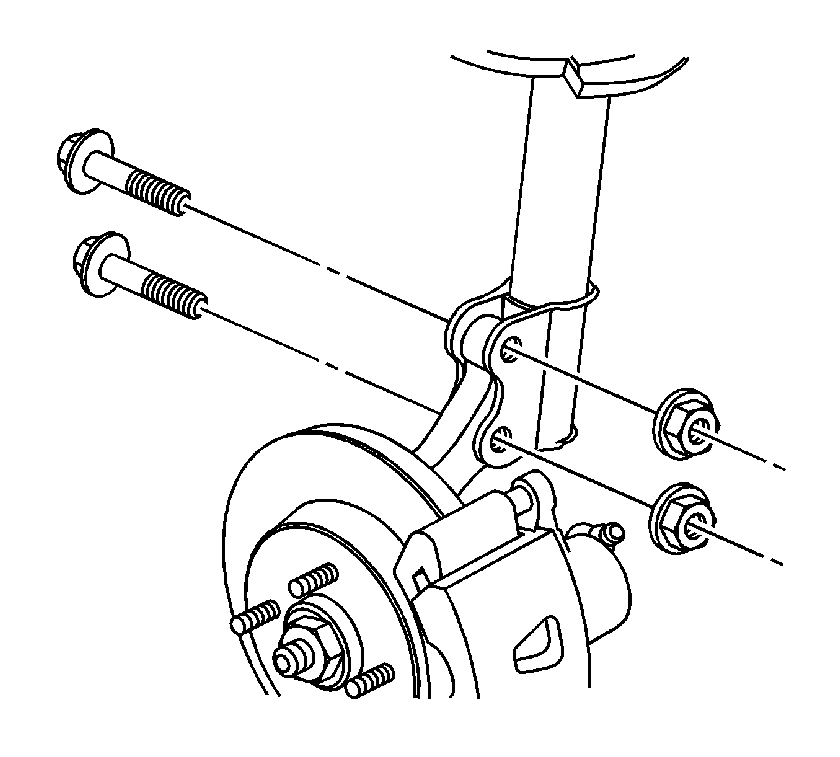
- Disconnect the stabilizer link from the strut.
- Remove the strut to steering knuckle nuts.
- If applicable, reposition the wheel speed sensor harness and bracket.
- Remove the strut to steering knuckle bolts.
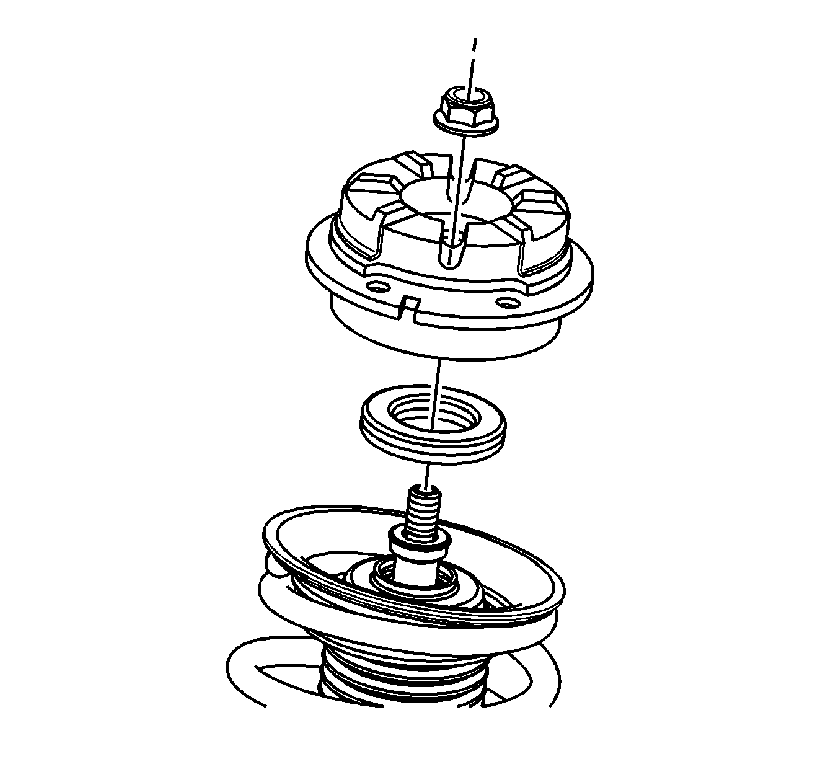
- Remove the upper strut cap to body nut.
- Remove the strut from the vehicle.
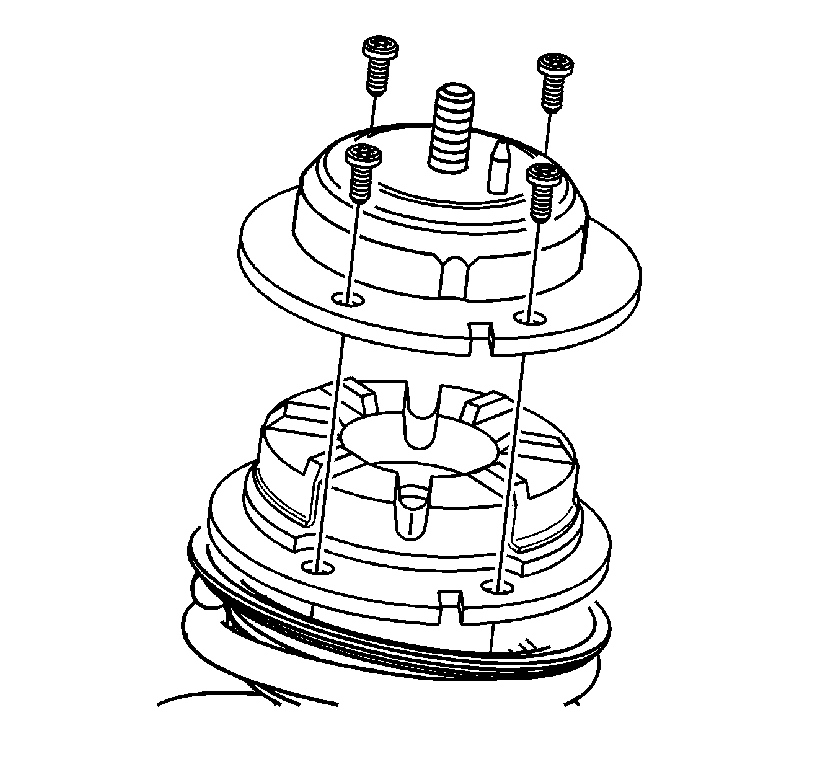
- Remove the upper strut cap screws.
- Remove the strut cap from the strut assembly.
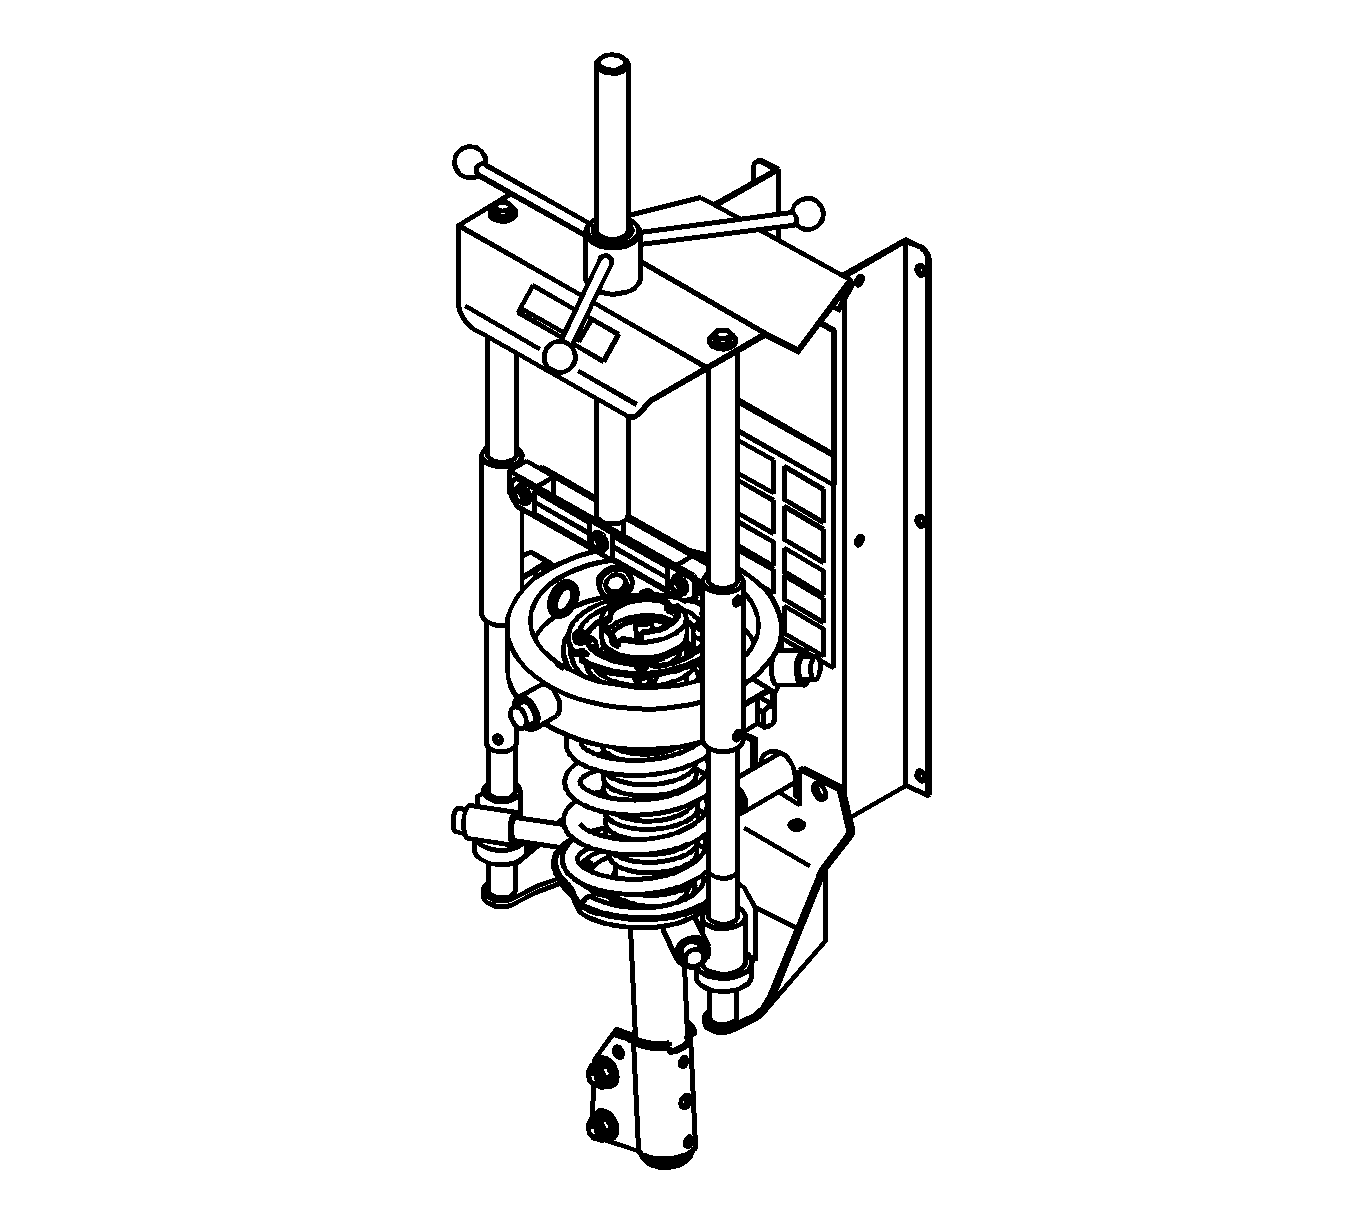
- Place the strut assembly into the Strut Spring Compressor J45400 .
- Adjust the compressing arms to contact the coils farthest away from the center of the spring.
- Using the Strut Spring Compressor J45400 , compress the spring to remove the spring tension from the upper strut mount.
- Remove the strut shaft nut, while holding the strut shaft.
- Lower the strut from the spring and the Strut Spring Compressor J45400 .
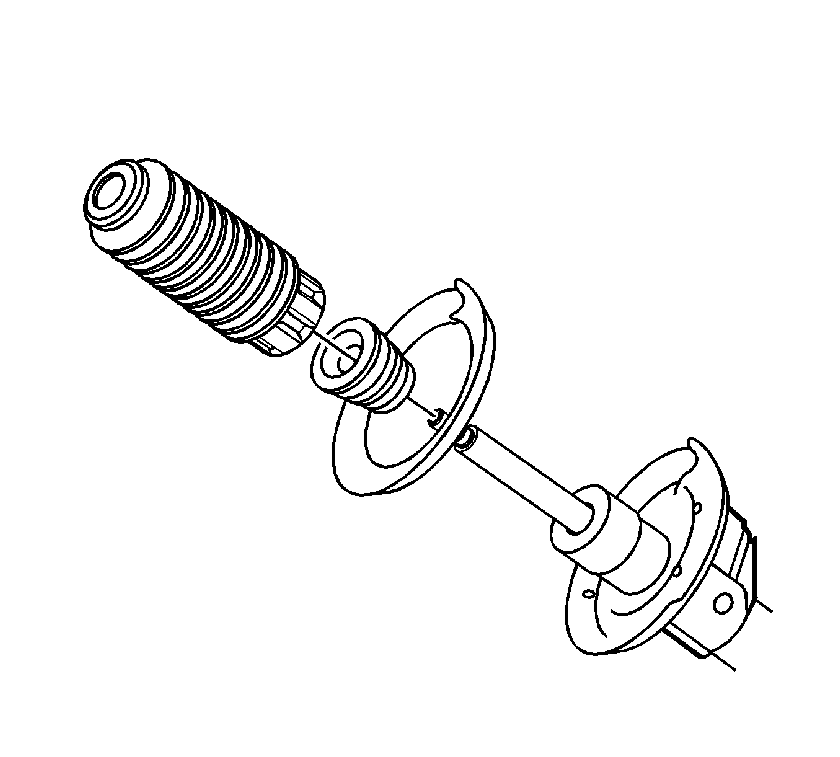
- Remove the dust shield and front suspension strut (jounce) bumper assembly from the strut shaft.
- Remove the front suspension strut (jounce) bumper from the dust shield.
- Discard front suspension strut (jounce) bumper.


Notice: In order to prevent damage to the constant velocity (CV) joint boot, place a shop towel over the CV joint.
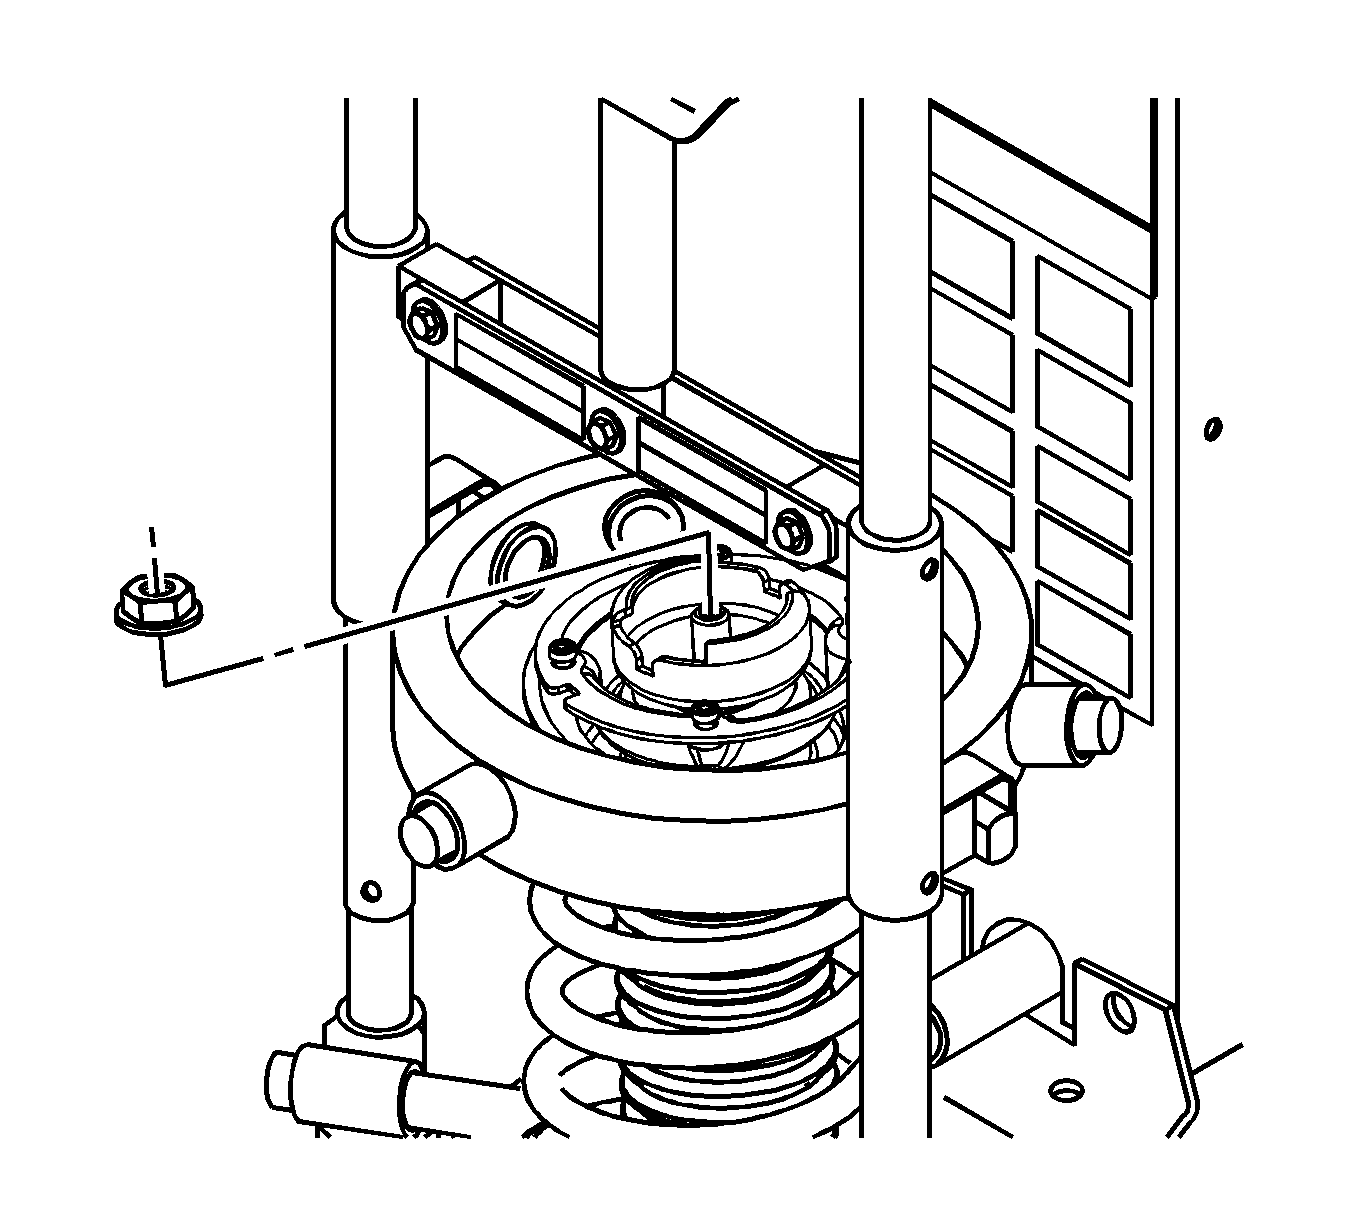
Important: Before removing the strut shaft nut, support the strut to prevent the strut from falling.
Assembly Procedure
- Extend the strut shaft to the upper limit of its travel.
- Insert the new front suspension strut (jounce) bumper, P/N 15207586, into the dust shield.
- Slide the dust shield assembly onto the strut shaft.
- Load the strut through the coil spring and the Strut Spring Compressor J45400 .
- Firmly align the lower spring coil in the spring seat pocket.
- Place the upper spring insulator and spring seat onto the top of the coil spring.
- Place the bearing and strut mount on the top of the spring seat.
- Install the upper strut shaft nut.
- Using the Strut Spring Compressor J45400 , remove the spring tension.
- Remove the strut assembly from the Strut Spring Compressor J45400 .
- Install the upper strut cap.
- Position the strut to the vehicles strut tower, using the alignment pin as a guide.
- Install the upper strut cap-to-body nut.
- Install the strut to steering knuckle bolts, leaving the nuts off.
- If applicable, place the wheel speed sensor harness and bracket to the bolt end.
- Install the strut-to-steering knuckle nuts.
- Connect the stabilizer link to the strut.
- Install the front wheels. Refer to "Tire and Wheel Removal and Installation" in the Suspension section of the 2003 or 2004 Saturn ION Service Manual, Vol. 1 (SI Document ID #878893).
- Lower the vehicle.
- Road test the vehicle and test for leads and pulls. If vehicle leads or pulls refer to "Measuring Wheel Alignment" in the Suspension section of the 2003 or 2004 Saturn ION Service Manual, Vol. 1 (SI Document ID #1477528).
- Verify that the creaking or squeaking noise condition has been eliminated.

Notice: Use the correct fastener in the correct location. Replacement fasteners must be the correct part number for that application. Fasteners requiring replacement or fasteners requiring the use of thread locking compound or sealant are identified in the service procedure. Do not use paints, lubricants, or corrosion inhibitors on fasteners or fastener joint surfaces unless specified. These coatings affect fastener torque and joint clamping force and may damage the fastener. Use the correct tightening sequence and specifications when installing fasteners in order to avoid damage to parts and systems.
Tighten
Tighten the nut to 70 N·m (52 lb-ft).
Tighten
Tighten the cap screws to 14 N·m (10 lb-ft).
Important: It may be necessary to rotate the upper strut mount cover guide to match the hole in the strut tower.
Tighten
Tighten the nut to 110 N·m (81 lb-ft).
Tighten
Tighten the nuts to 120 N·m (89 lb-ft).
Tighten
Tighten the link to 65 N·m (48 lb-ft).
Parts Information
Part Number | Description |
|---|---|
15207586 | bumper-frt susp strut |
Claim Information
To receive credit for this repair during the warranty coverage period, submit a claim through the Saturn Dealer System for E3020, E3021 or E3027 (Spring Front Coil - Replace).
