Air Conditioning (A/C) Condensation Collecting Causing a Water Leak onto the Vehicle Floor During Times of A/C Usage (Remove Obstruction From Evaporator Drain Hole)

| Subject: | Air Conditioning (A/C) Condensation Leaking onto the Vehicle Floor During Times of A/C Usage (Remove Foam Block Obstruction From Evaporator Drain Hole) |
| Models: | 2003-2005 ION Vehicles with Air Conditioning (RPO C60) |
| Attention: | Technician, Service Manager, and Field Operations Manager |
This bulletin is being revised to add a second Cause Statement. Please discard Corporate Bulletin Number 03-01-38-020 (Section 01 -- HVAC).
Condition
Some customers may comment on moisture leaking onto the floor of the vehicle when the A/C system is running.
Condition 1 - 2003-2004 vehicles with foam block obstruction built prior to VIN 4Z131776.
Condition 2 - 2004-2005 vehicles with plastic flashing built prior to VIN 5Z106107.
Cause
Cause 1 - During Assembly of the HVAC module, a foam block used to isolate the evaporator core from the HVAC module case may fall off and float over the top of the drain causing blockage.
Cause 2 - During the manufacturing of the lower A/C Evaporator Case housing, the evaporator case drain hole may be restricted with plastic flash from the injection molding process.
Correction
Remove obstruction from drain following the procedure outlined in this bulletin.
Service Procedure
Important: Prior to performing the following procedures, ensure the heater core cover front of dash condensate drain is not obstructed.
Important: The evaporator core is contained in its own compartment with its own unique drain hole (the drain hole is approximately 5 mm (.20 inches) in diameter). This drain hole allows condensation collected by the evaporator core to flow from the evaporator compartment down to the heater core compartment at which time it exits the vehicle through the heater core cover front of dash condensate drain. The evaporator compartment drain hole is located about 25.4 mm (1inch) inside and down from where the access hole is being drilled.
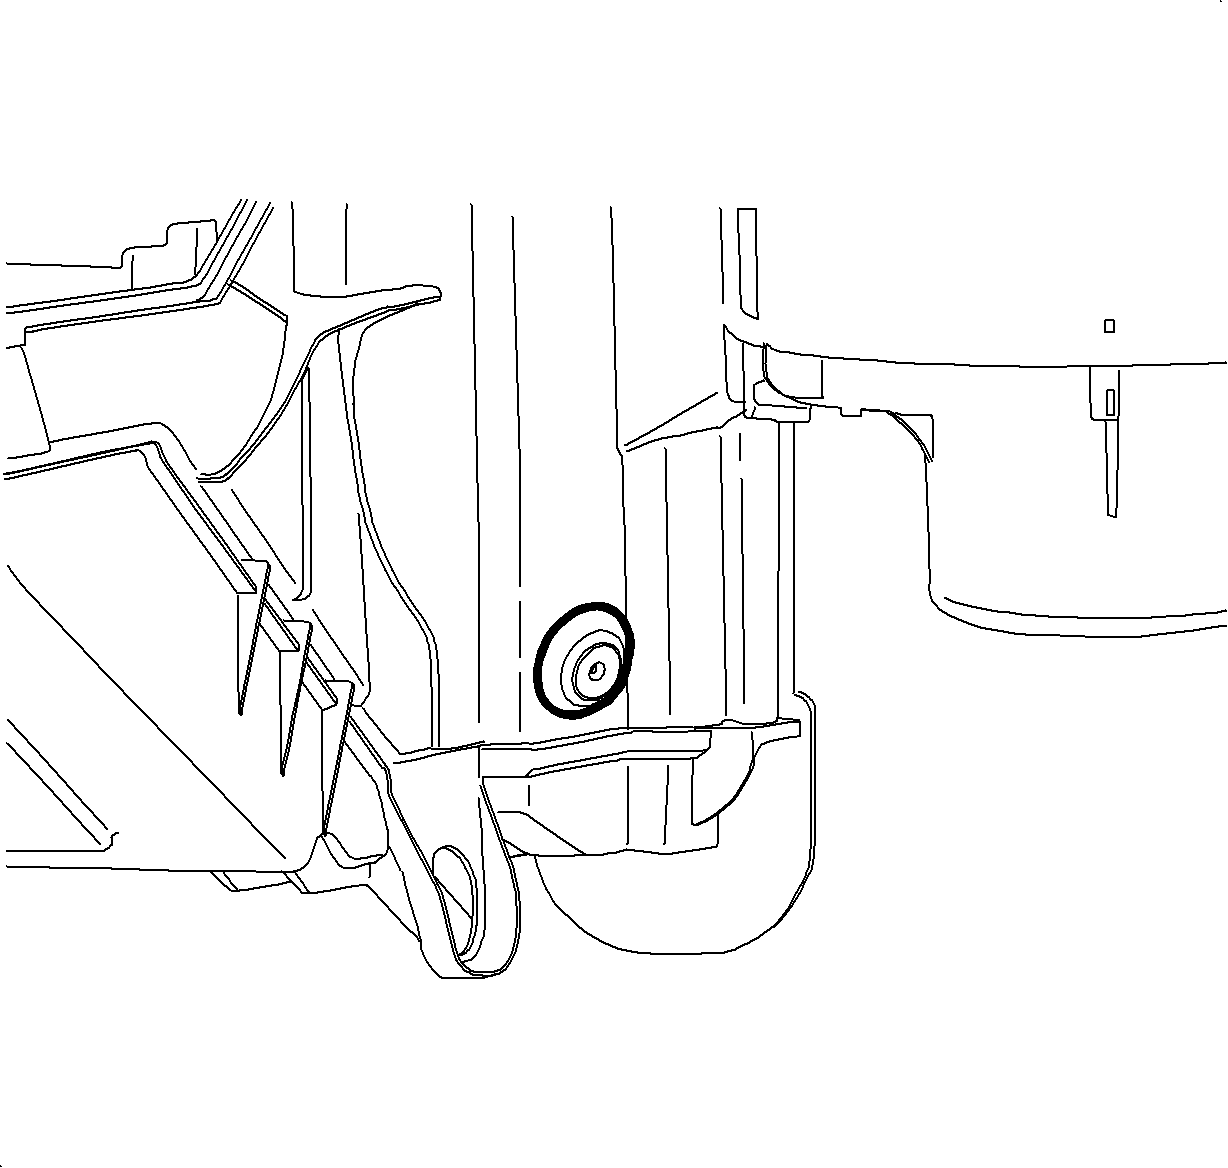
- Locate the passenger side area of the HVAC module on the right side of the console.
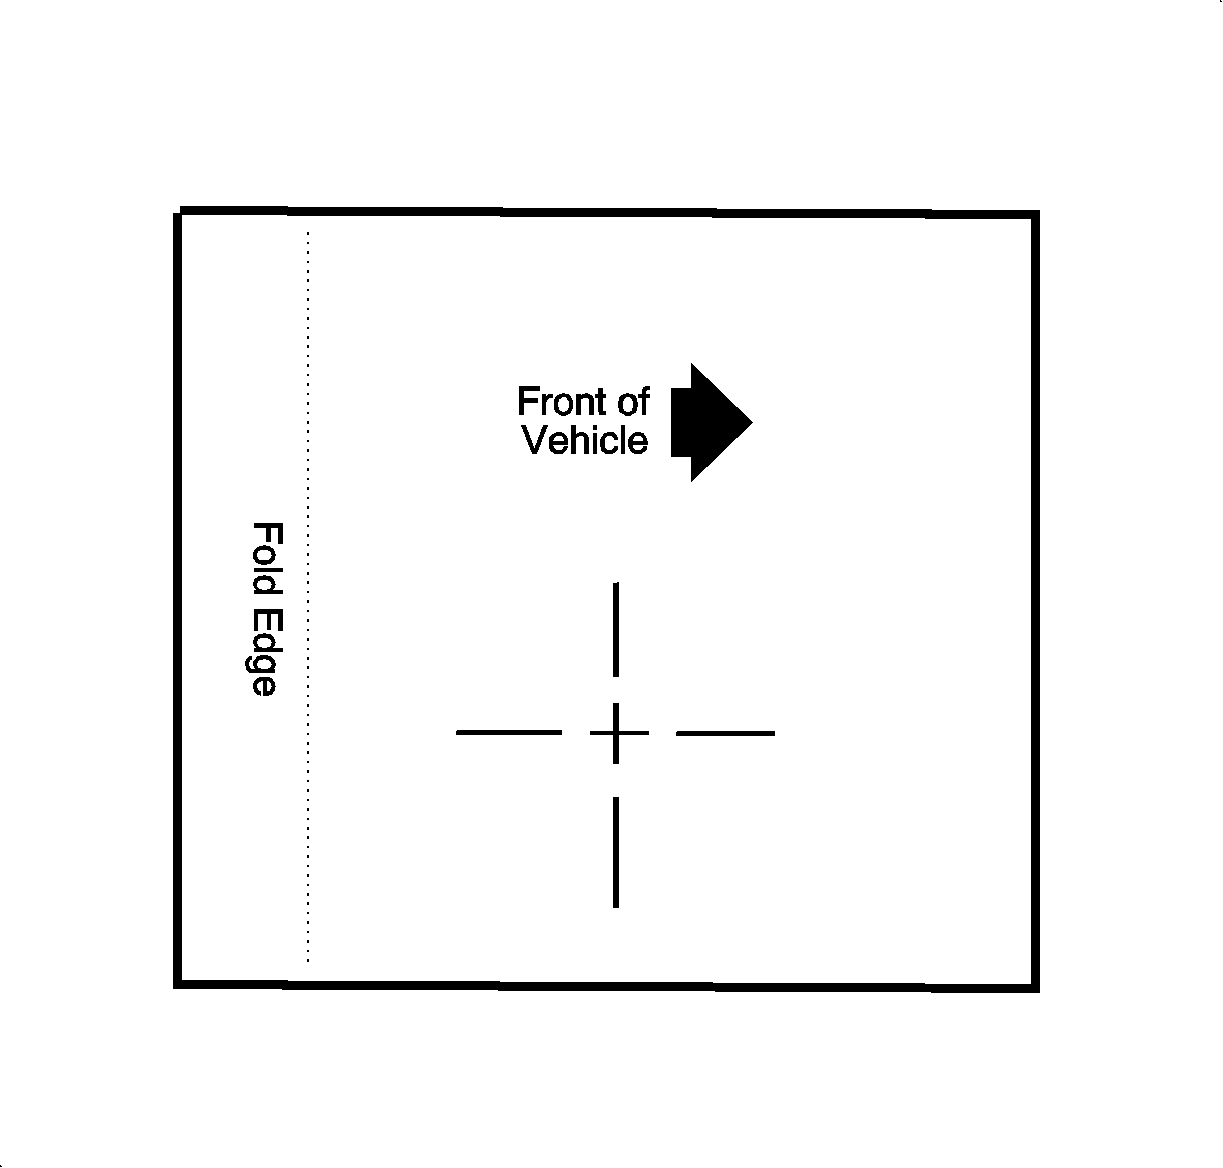
- Cut out template (several included in this bulletin) and place on right side of the HVAC module as shown in the above illustration.
- Center punch through the template.
- Using a 15/16 in. (24 mm) hole saw, drill hole at the specified location.
- Using a deburring type tool, remove all drill shavings from around access hole to ensure a proper fit for the cap plug. Do not allow these shavings to fall into the access hole.
- Once the access hole is drilled, use a work light to illuminate through the hole and identify location of 5 mm (.20 in.) drain opening located 25.4 mm (1inch) inside and down from access hole opening.
- Identify whether the obstruction is Cause 1 (foam block) or Cause 2 (plastic flashing).
- For Cause 1, remove foam block and proceed to the next step. For Cause 2, use a right angle tool (a cotter pin puller tool, or equivalent) to clear the plastic flash from the opening and then proceed to next step. Make sure the drain hole is entirely unplugged.
- To verify 5 mm (.20 in.) drain is open, with the vehicle on level ground, add approximately 4 ounces of water through access hole opening. The water should immediately drain through the front of dash condensate drain. If the water does not drain through the front of dash condensate drain, re-inspect the 5 mm (.20 in.) drain opening for other debris.
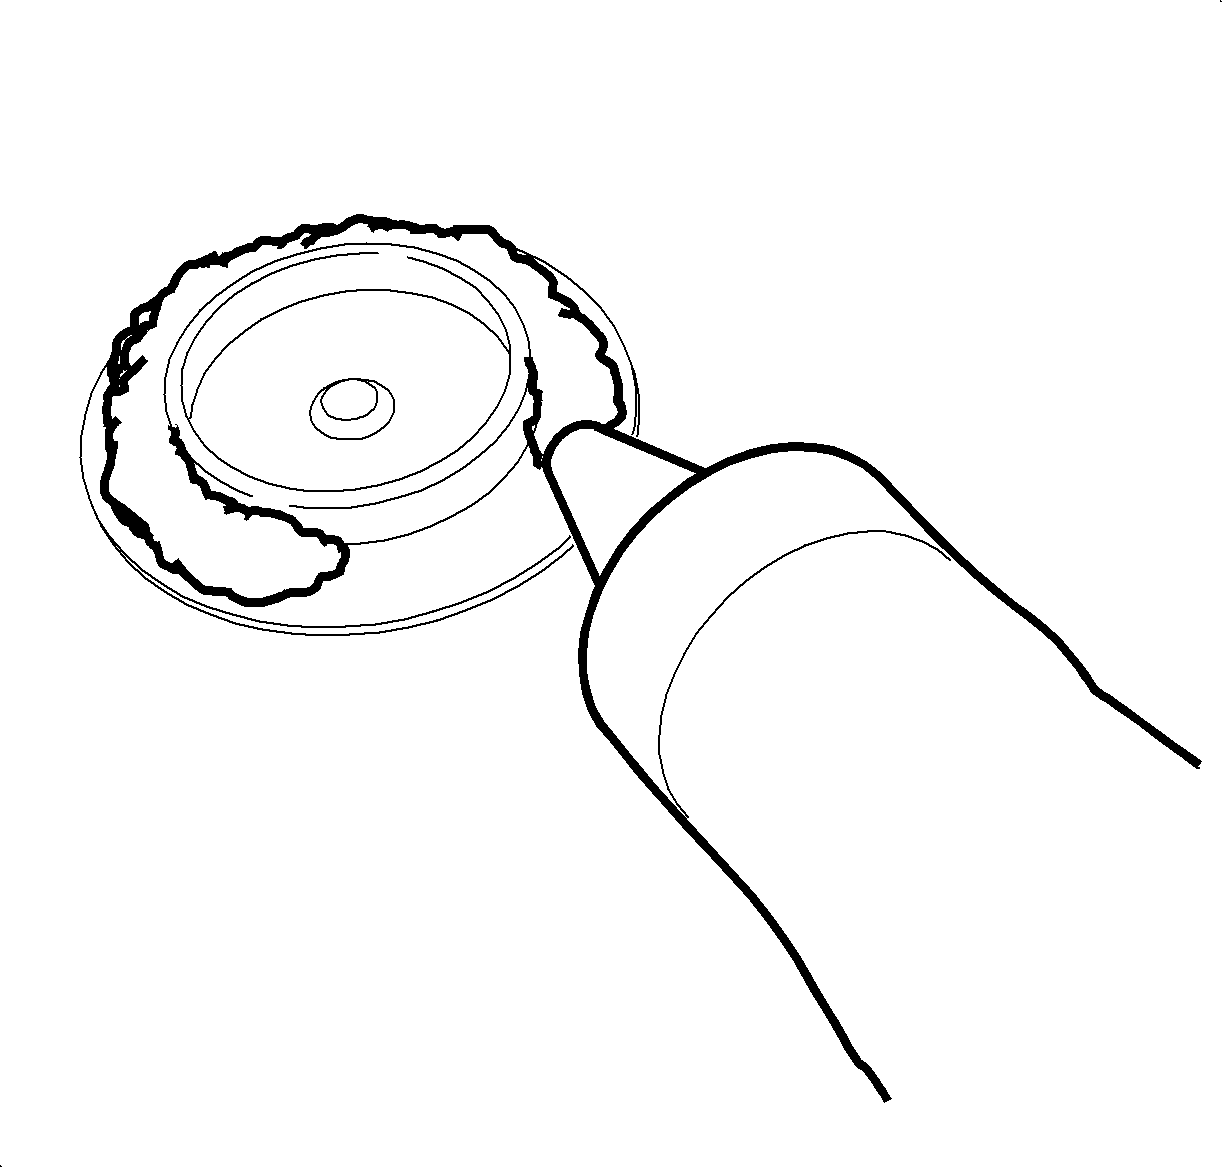
- Once the foam block and/or debris has been removed and the drain is functional, apply a bead of Kent® Leak Chek Sealer, P/N 10070, or equivalent, around the perimeter of cap plug, P/N 25652432.
- Install cap plug into access hole opening to re-seal HVAC module.
- Wipe off excess sealant.
Important: Keep copies of the original template provided in this bulletin for future use.
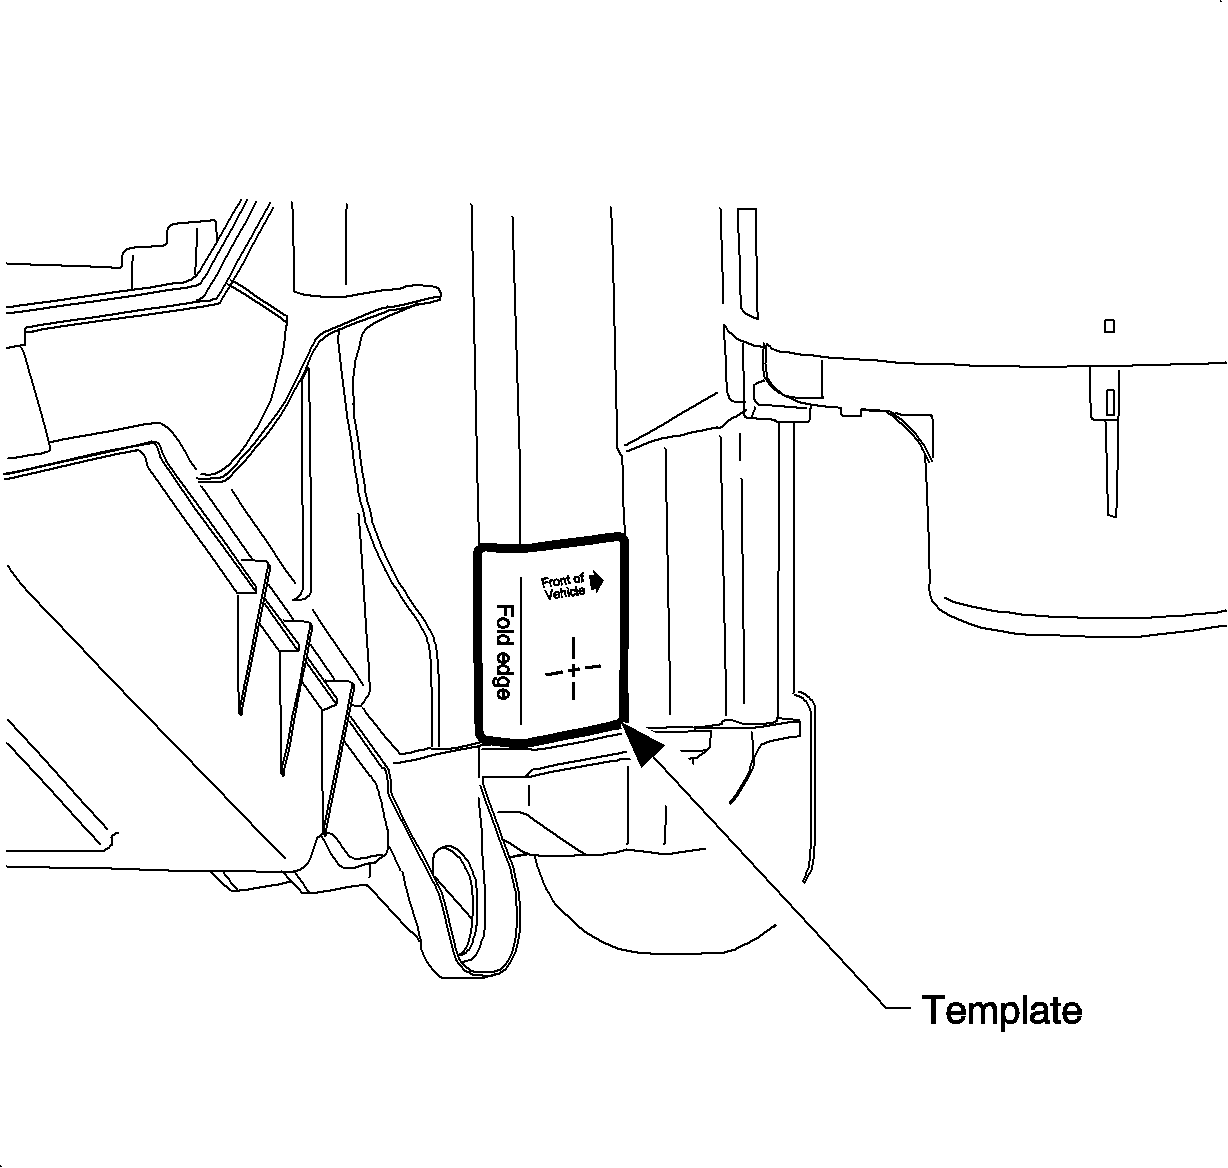
Important: Prior to drilling into HVAC module, place an absorbent towel below area to be drilled to collect any condensation that may flow out of the hole.
Notice: To prevent possible damage to the evaporator core, do not drill more than 19 mm (3/4 in.) past the HVAC module case wall.
Notice: Use of an angle drill is required. There is not enough clearance to use a standard drill motor as this will cause the hole to be drilled at an angle. Drilling at an angle will cause HVAC case damage and may result in another leak. The holesaw must be held perpendicular to the HVAC case while drilling.
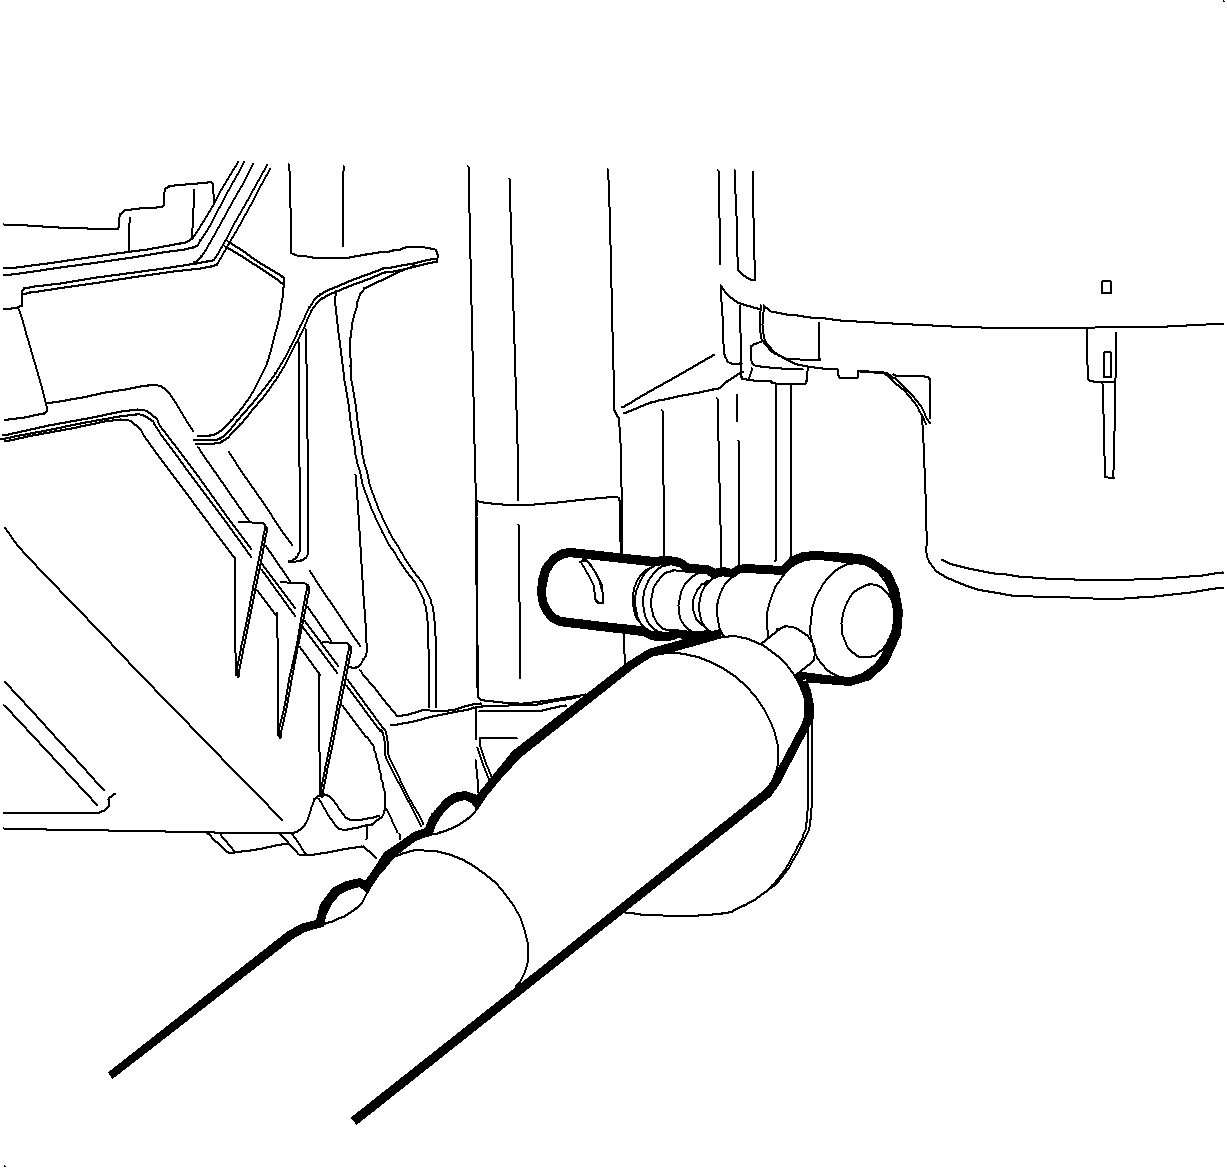
Important: The evaporator core is wrapped with a foam insulator. This insulator is visible through the access hole. Do not mistake the evaporator insulator for the loose foam block that needs to be removed.
Parts Information
Part Number | Description |
|---|---|
25652432 | Plug-RKR INR PNL RR EXTN HOLE |
10070 | Kent® Leak Chek Sealer (or equivalent) |
Important: One tube of Kent® Leak Chek Sealer, P/N 10070, will seal approximately 20 vehicles.
To order Kent Leak Chek® aerosol sealant, call 1-800-654-6333 (in Canada 1-800-563-1717) or order on-line at Kent-Automotive.com.
The minimum order amount is $25.00.
Claim Information
To receive credit for this repair during the warranty coverage period, submit a claim through the Saturn Dealer System for D9993 (HVAC Module, Repair). It will be necessary to sell the Kent® Leak Chek Sealer to the CSO as "material" using net item code "M". Claims received in the amount of $.75 ($.53 dealer cost plus %40 parts allowance) for this part will be accepted. Claims exceeding the amount of $.75 will be returned with the Return Reason 143 -Material / Reimbursement > Maximum Allowed.
Retail Reimbursement Information
One tube of Kent® Leak Chek Sealer will seal approximately 20 vehicles.
Important: The actual dimensions of template should be 55 mm wide x 50 mm high.
