For 1990-2009 cars only
Removal Procedure
- Disconnect the negative battery cable. Refer to Battery Negative Cable Disconnection and Connection in Engine Electrical.
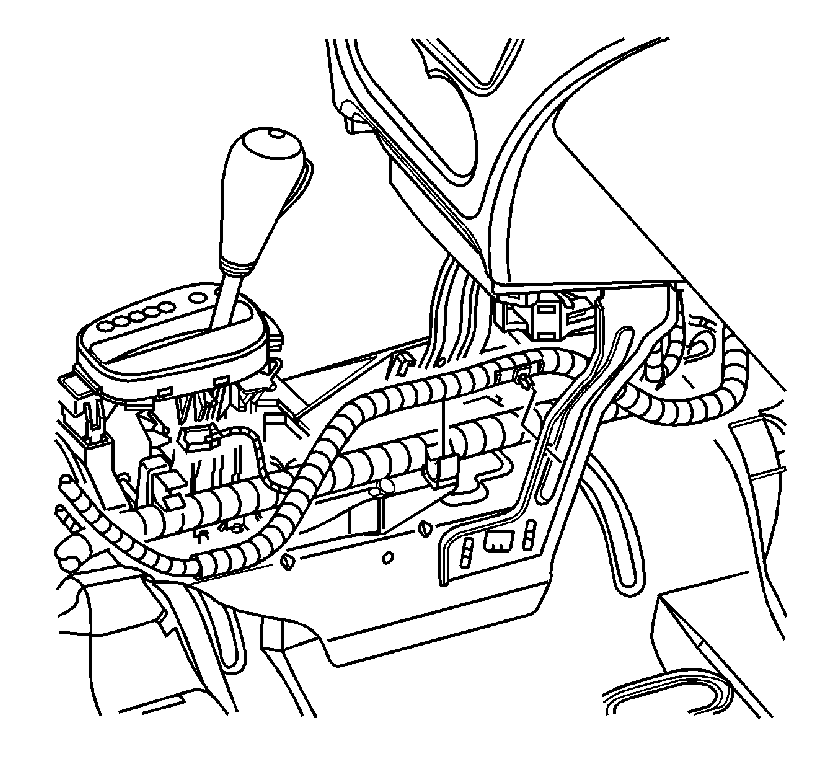
- Remove the front floor console. Refer to Front Floor Console Replacement in Instrument Panel, Gages, and Console.
- Remove the wiring harness rosebud from the right center support bracket.
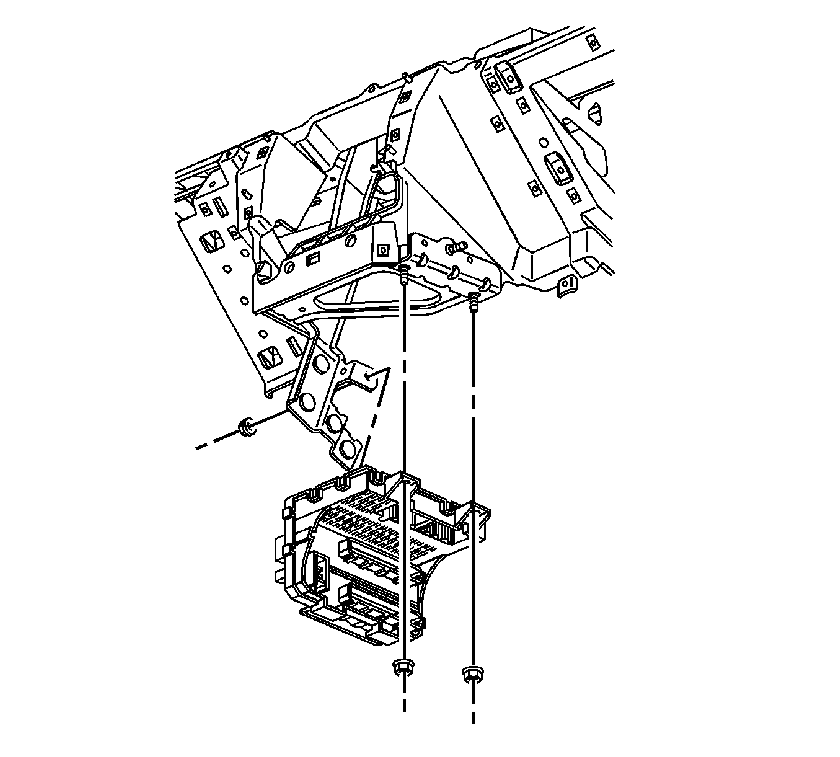
- Pull back the carpet at the bottom of the right center support bracket and remove the lower nuts.
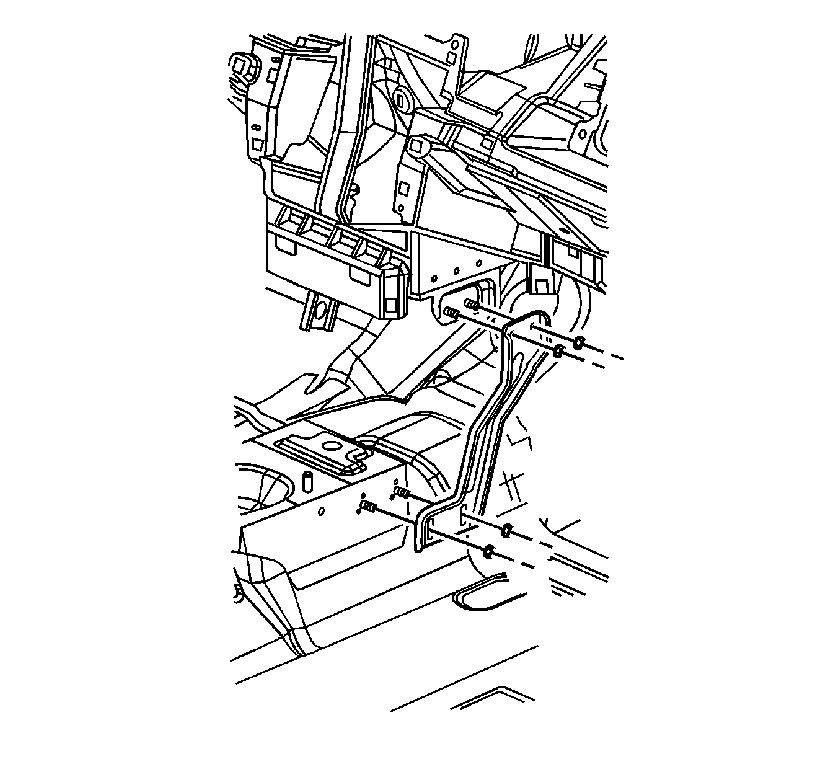
- Remove the center support bracket nuts and remove the bracket.
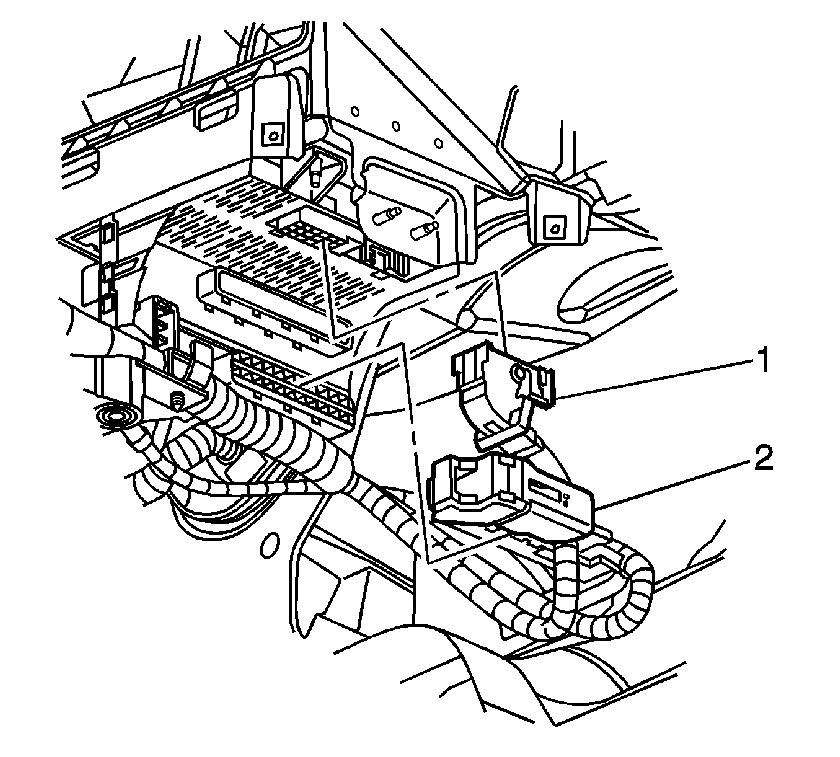
- Disconnect the small body harness connector (1) from the body control module (BCM).
- Disconnect the large body harness connector (2) from the BCM.
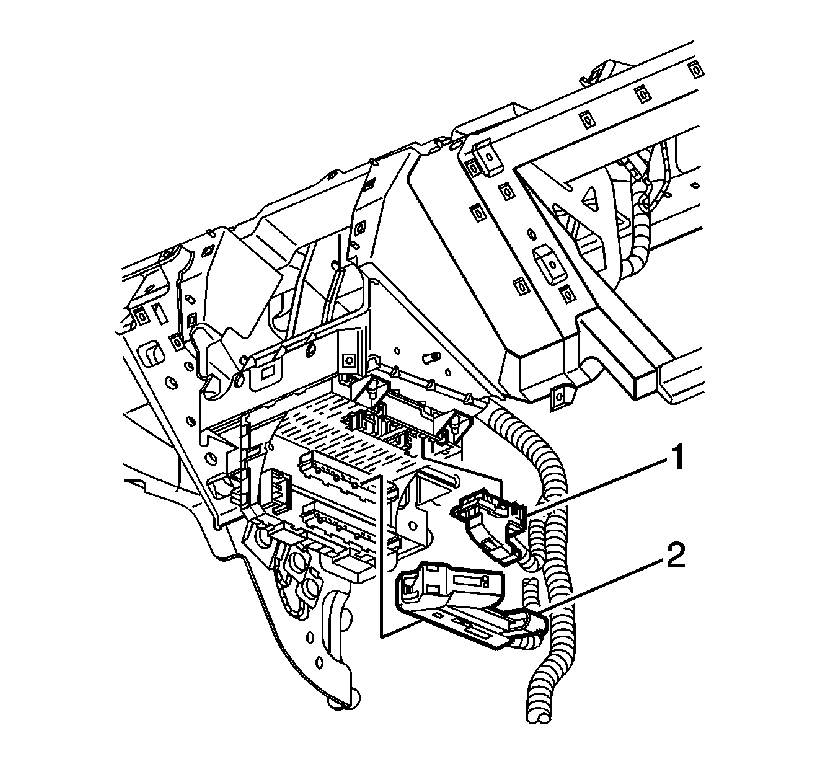
- Disconnect the small instrument panel (I/P) wiring harness connector (1) from the BCM.
- Disconnect the large I/P wiring harness connector (2) from the BCM.
- If equipped with Onstar, disconnect the OnStar connector.
- Remove the BCM nuts and remove the BCM from the vehicle.
Installation Procedure
- Install the BCM to the vehicle and install the retaining nuts.
- Connect large I/P wiring harness connector (2) to the BCM.
- Connect small I/P wiring harness connector (1) to the BCM.
- Connect the large body wiring harness connector (2) to the BCM.
- Connect the small body wiring harness connector (1) to the BCM.
- If equipped with Onstar, connect the OnStar connector.
- Pull back the carpet and position the center support bracket into position.
- Install the center support bracket nuts.
- Install the wiring harness rosebud to the center support bracket.
- Install the front floor console. Refer to Front Floor Console Replacement in Instrument Panel, Gages, and Console.
- Connect the negative battery cable. Refer to Battery Negative Cable Disconnection and Connection in Engine Electrical.
- Program a new or a remanufactured BCM. Refer to Body Control Module (BCM) Programming/RPO Configuration .
Notice: Refer to Fastener Notice in the Preface section.
Tighten
Tighten the nuts to 10 N·m (88 lb in).
Tighten
Tighten the nuts to 10 N·m (88 lb in).
