Removal Procedure
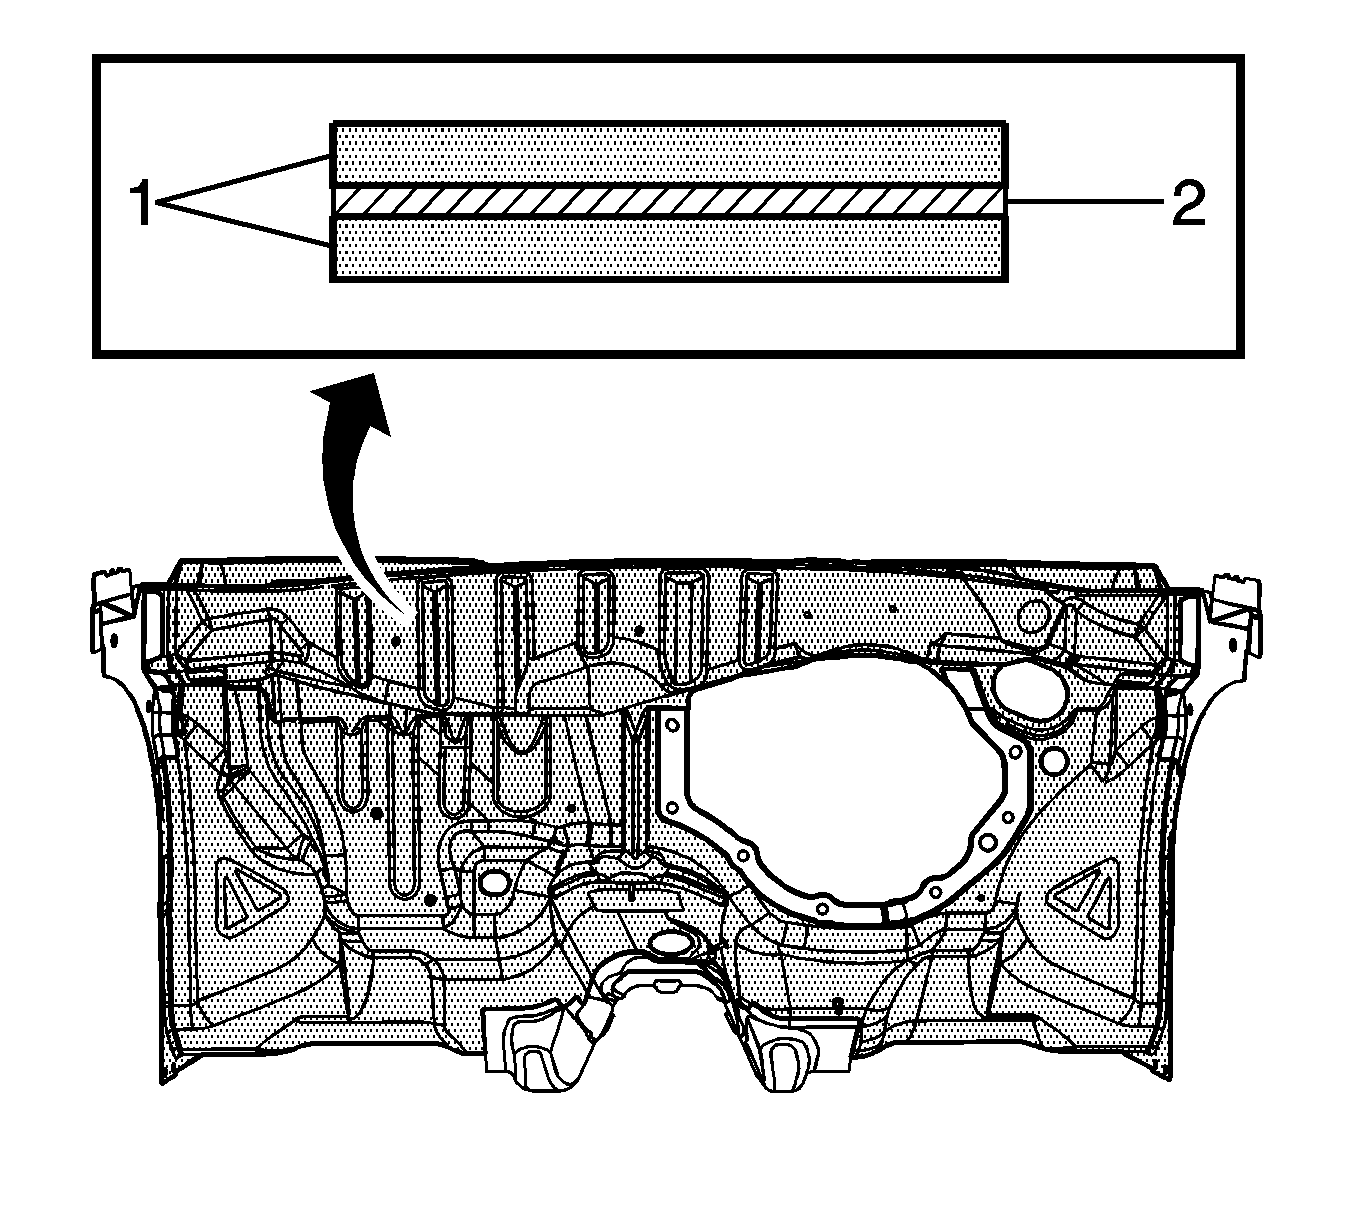
The front of the dash panel and plenum lower are formed from laminated steel. This steel is constructed by bonding 2 pieces of cold rolled steel with a viscoelastic layer of adhesive. MIG welding laminated steel does not meet GM Corporate standards for structural integrity. As an alternative, all factory welds may be replaced by using the rivet and adhesive bond method described in the installation portion of this procedure. The rivet and adhesive bond method must only be used in the areas described in this procedure.
Important: Failure to follow this procedure will compromise the structural integrity of the vehicle.
- Disable the SIR system. Refer to SIR Disabling and Enabling in SIR.
- Disconnect the negative battery cable. Refer to Battery Negative Cable Disconnection and Connection in Engine Electrical.
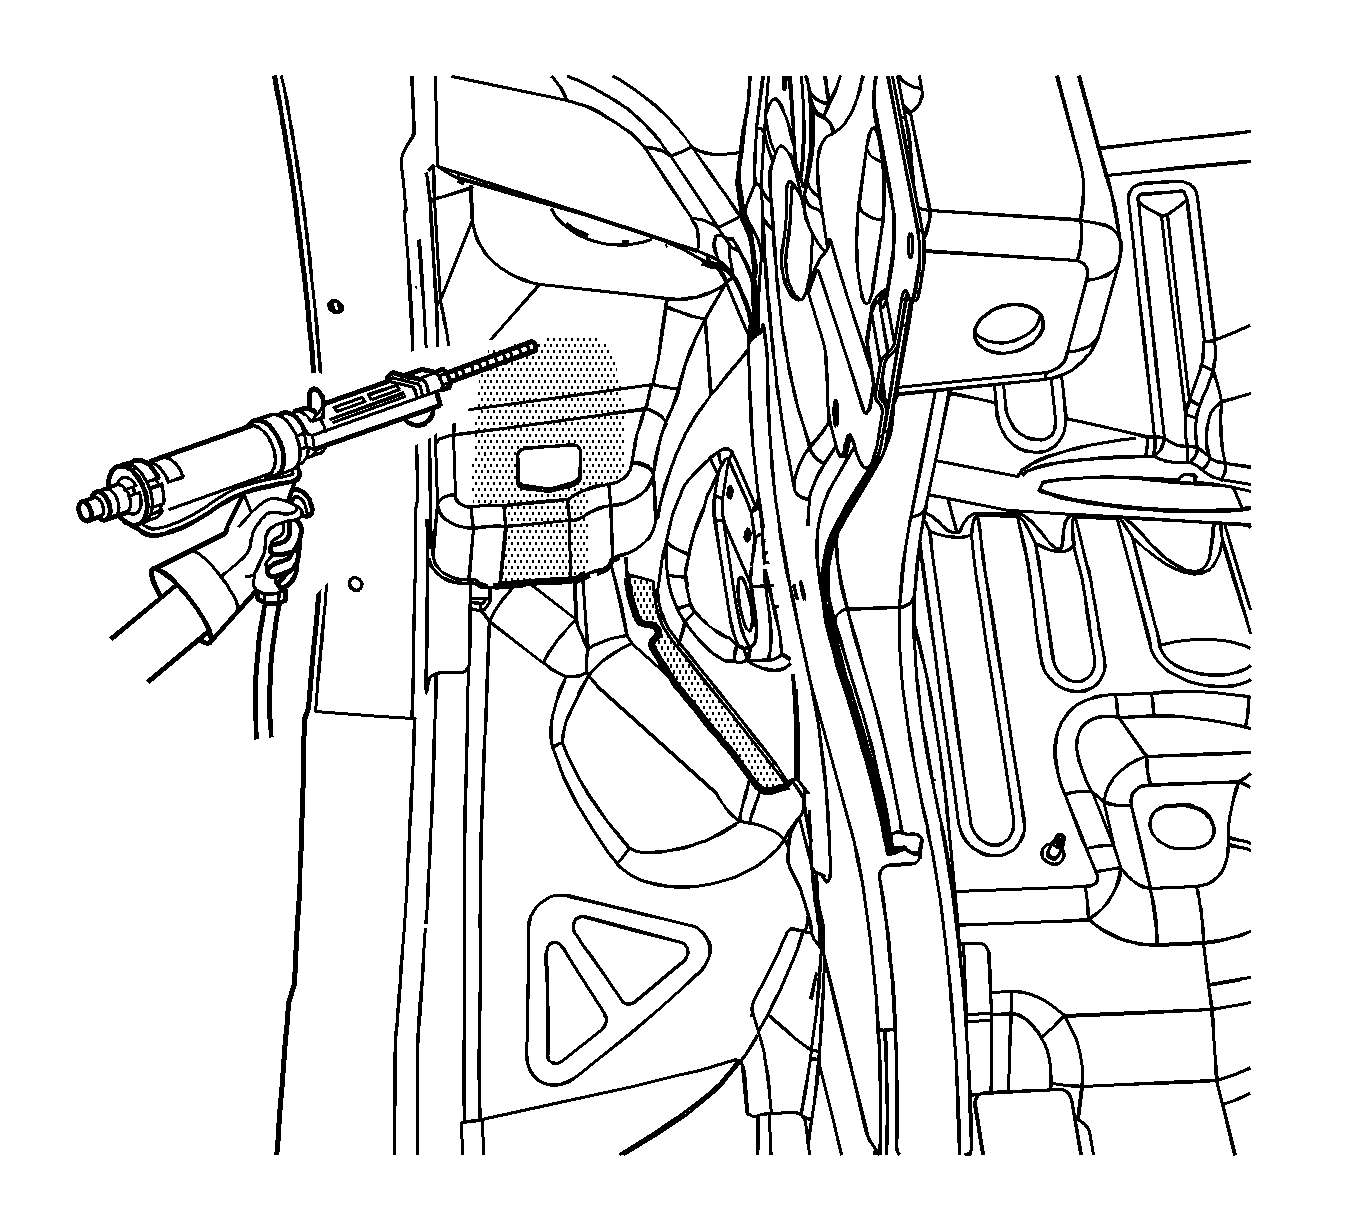
- Remove the sealers and anti-corrosion materials from the repair area, as necessary. Refer to Anti-Corrosion Treatment and Repair in Paint and Coatings.
- Visually inspect the damaged area. Repair as much of the damage as possible. Refer to Dimensions - Body .
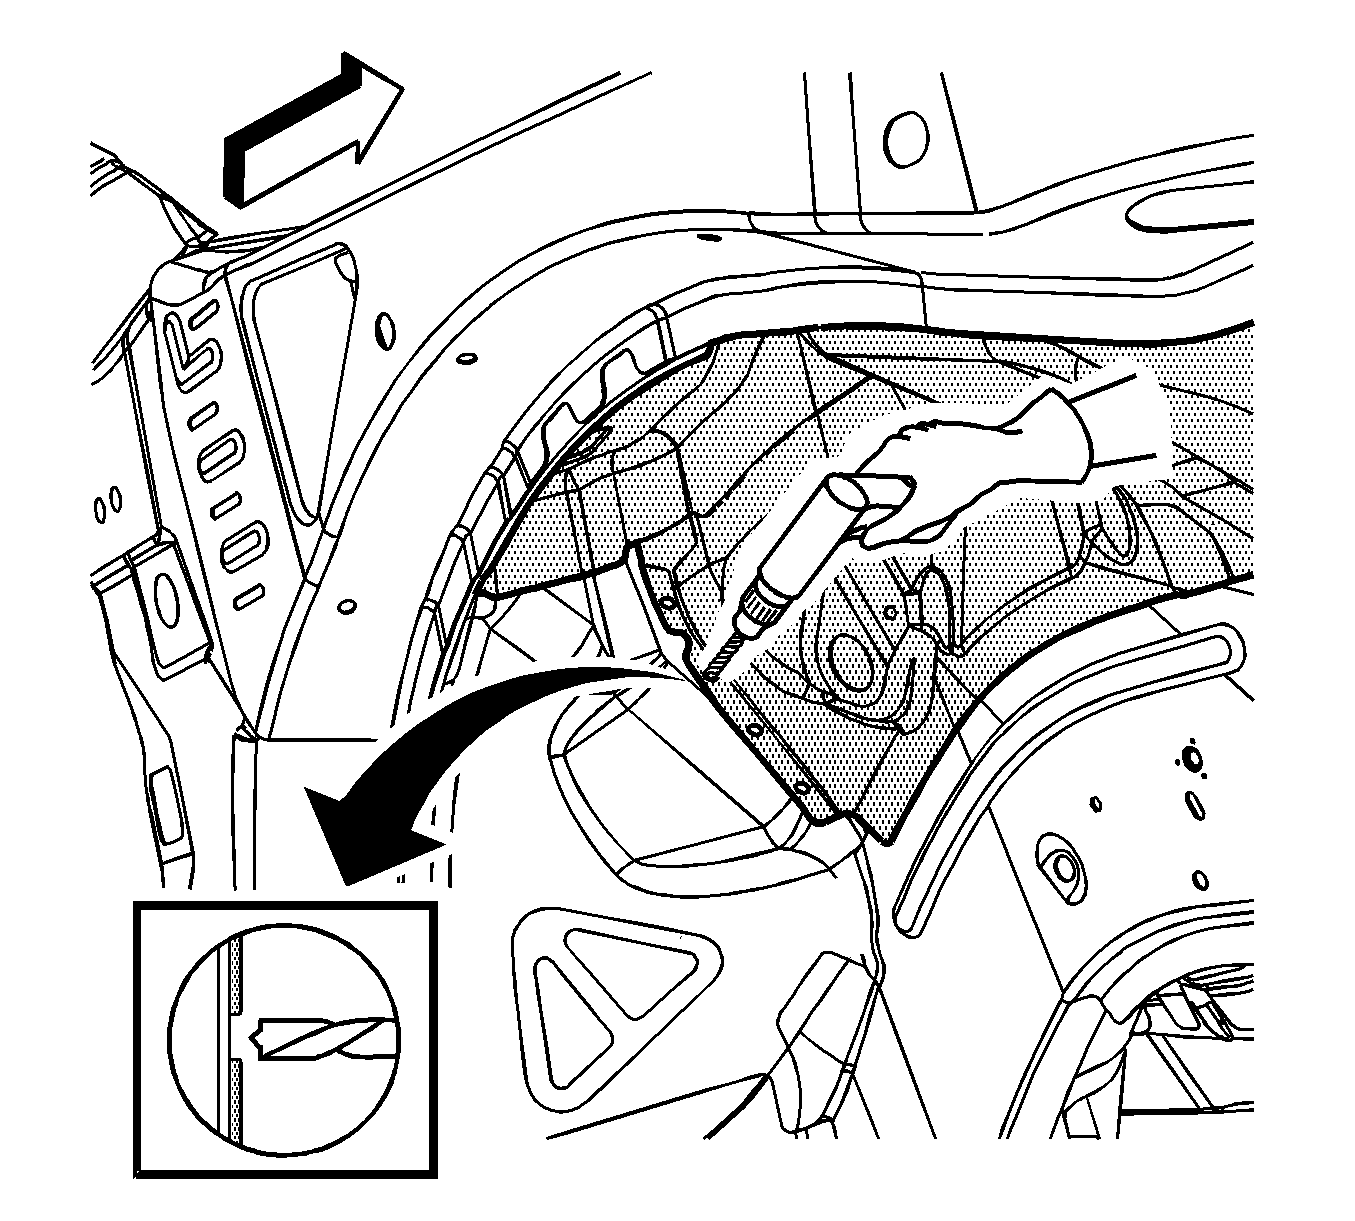
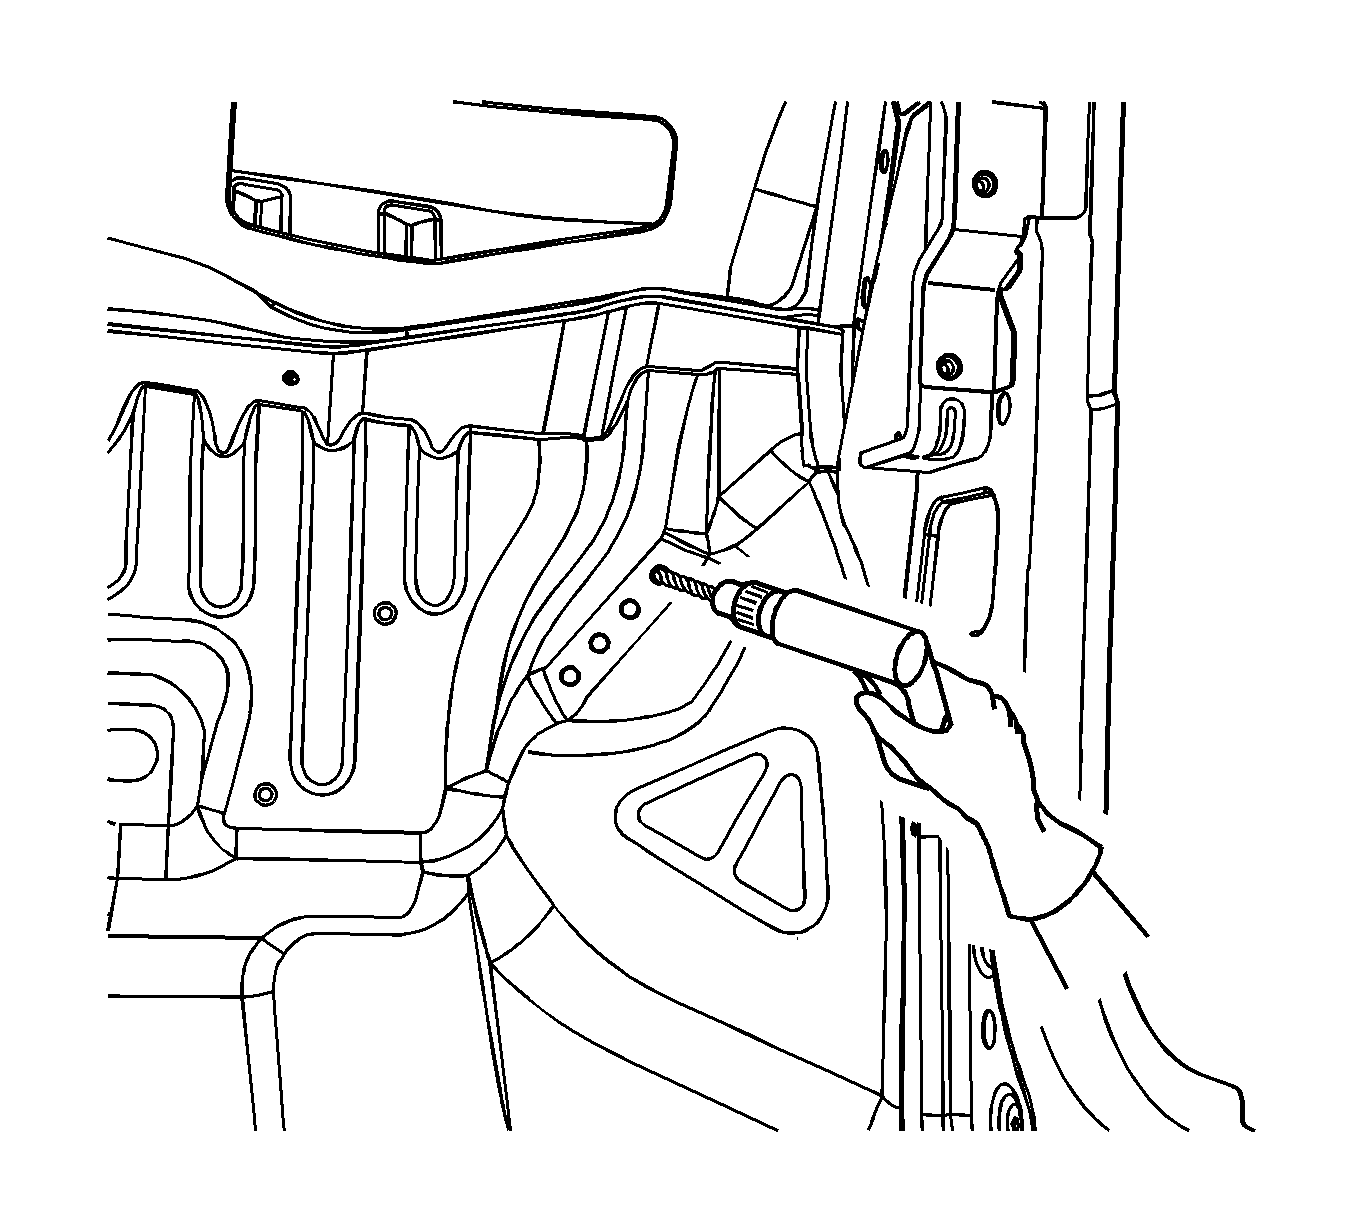
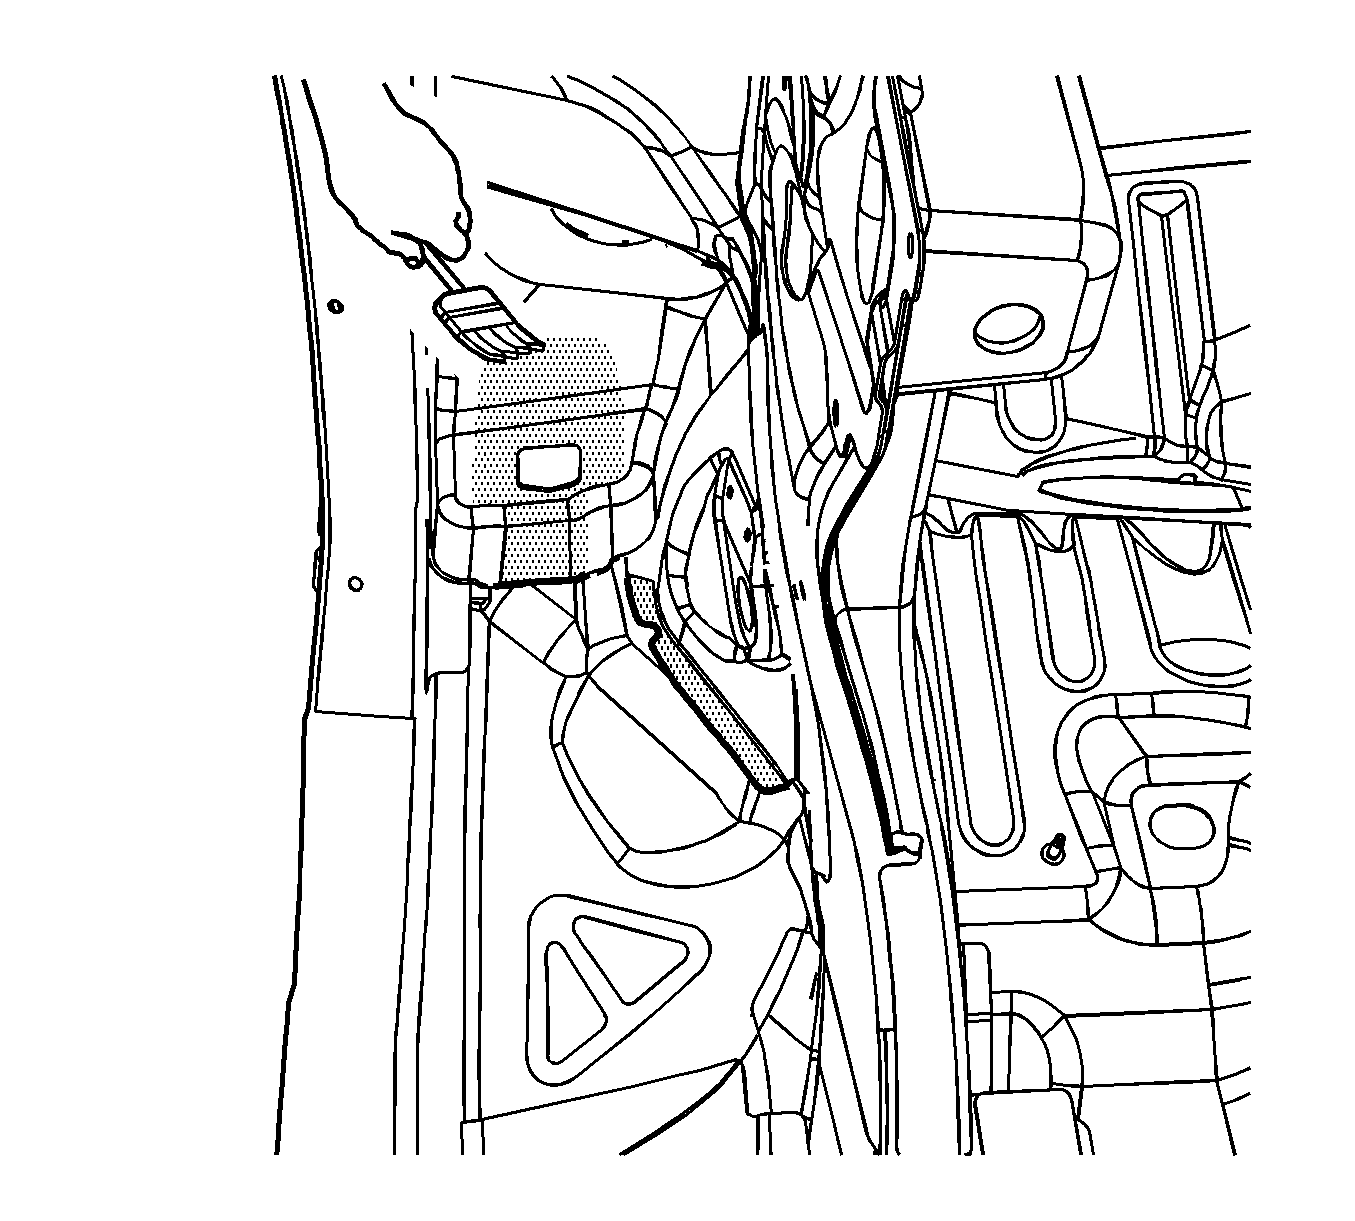
- Using an 8 mm (5/16 In) spot weld remover, locate and drill out the factory welds on the weld flange connecting the wheelhouse to the dash panel.
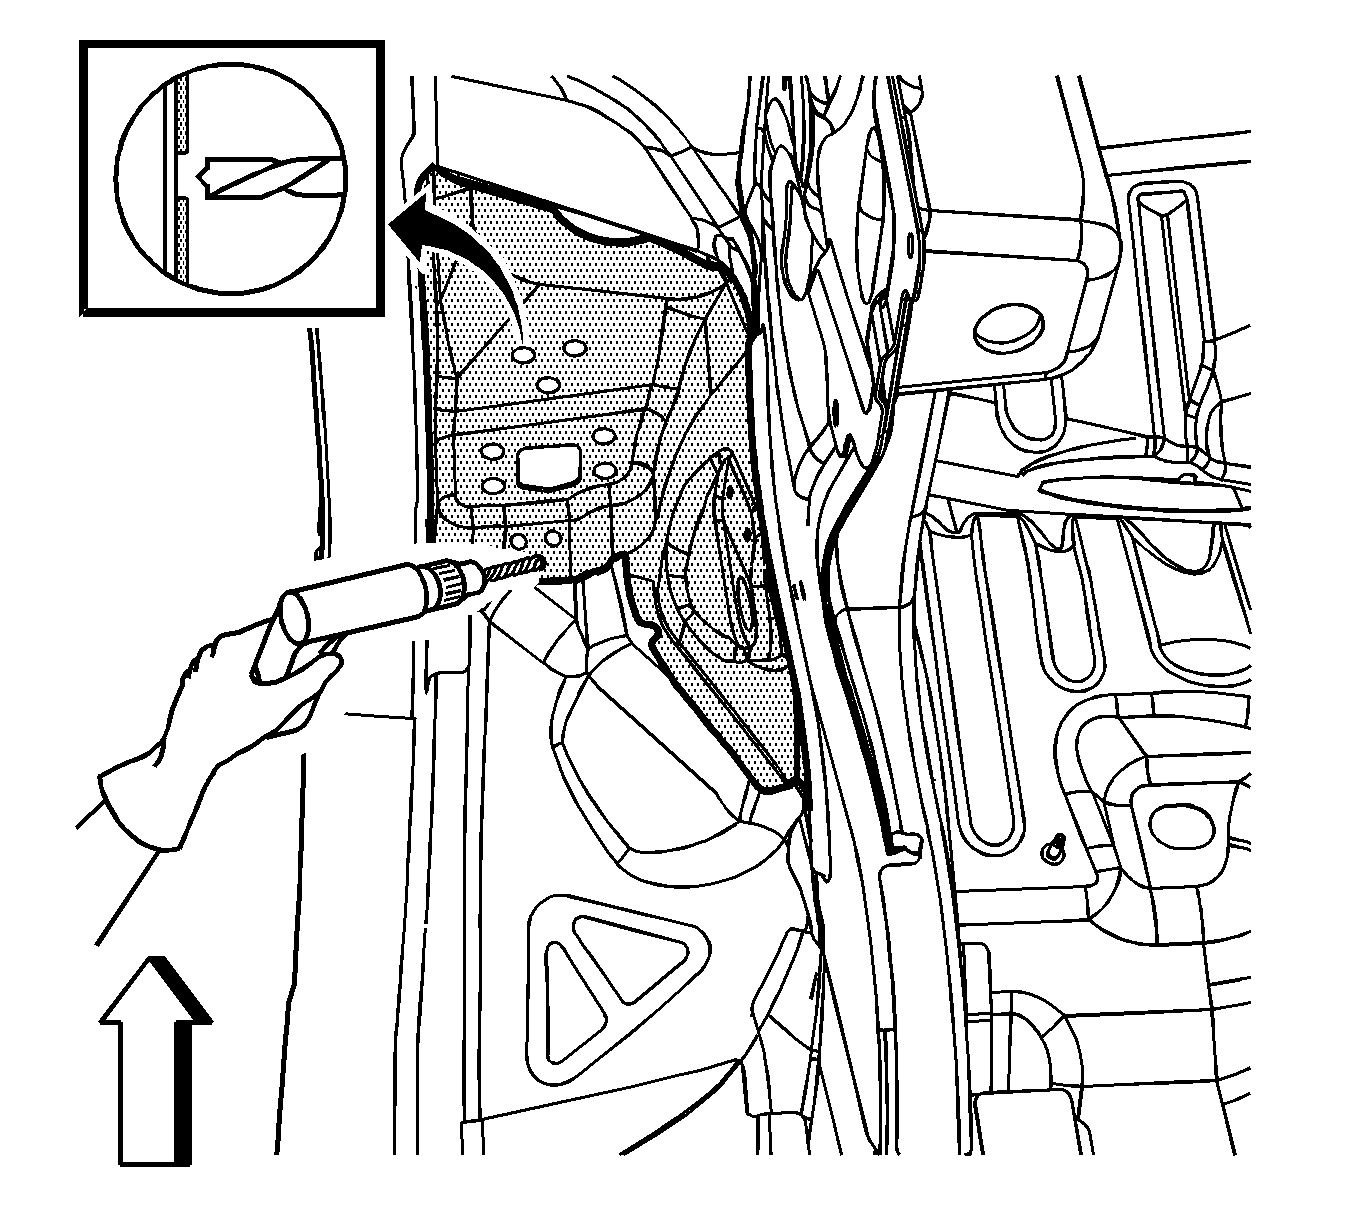
- Using an 8 mm (5/16 In) spot weld remover, locate and drill out the factory welds on the weld area that connects the top of the wheelhouse strut cap to the lower plenum.
- Locate and drill out all remaining factory welds.
- Remove the front wheelhouse from the vehicle.
Caution: Refer to Approved Equipment for Collision Repair Caution in the Preface section.
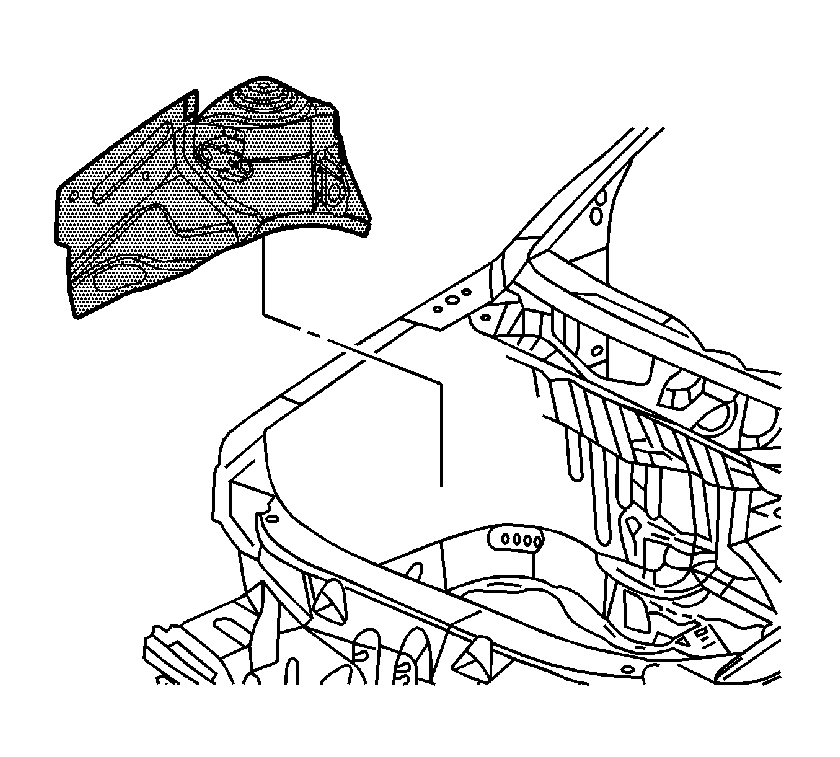
Important: The upper strut mounting surface is a dimensionally critical area, and 3-dimensional measuring equipment should be used to locate the front wheelhouse assembly. The front wheelhouse can be serviced as a complete assembly for both the left and right wheelhouses. A wheelhouse front panel is also available to service separately on the left or the right sides.
Important: Be sure to inspect the front of the cowl and dash panel for damage. If the metal surface is damaged, the cowl panel must be repaired to restore the structural integrity of the vehicle.
Important: Drill through the wheelhouse flange only. Do not drill into the dash panel.
Important: Drill through the wheelhouse strut cap only. Do not drill into the plenum lower.
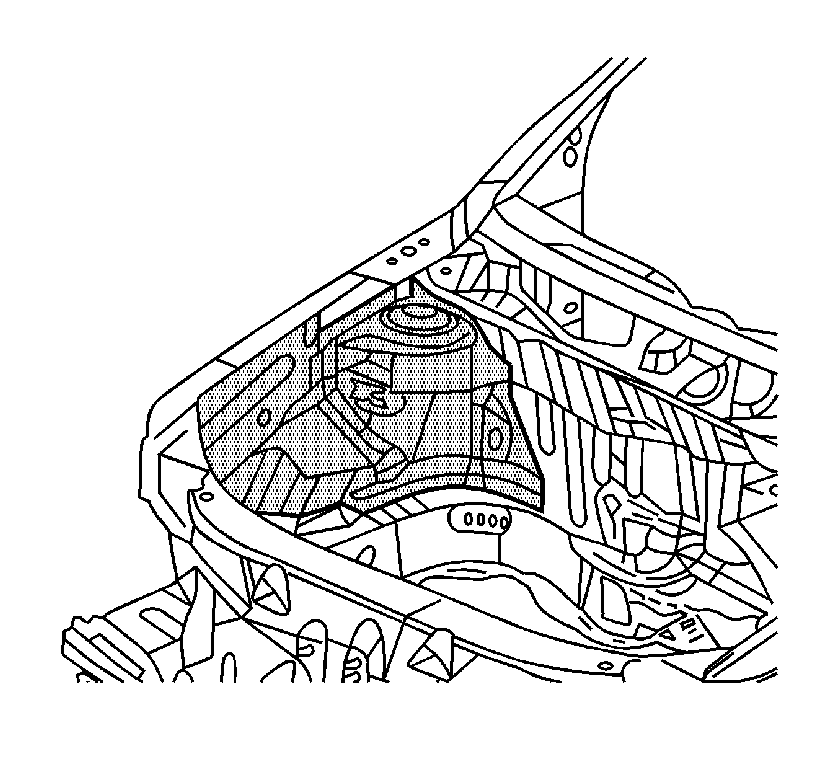
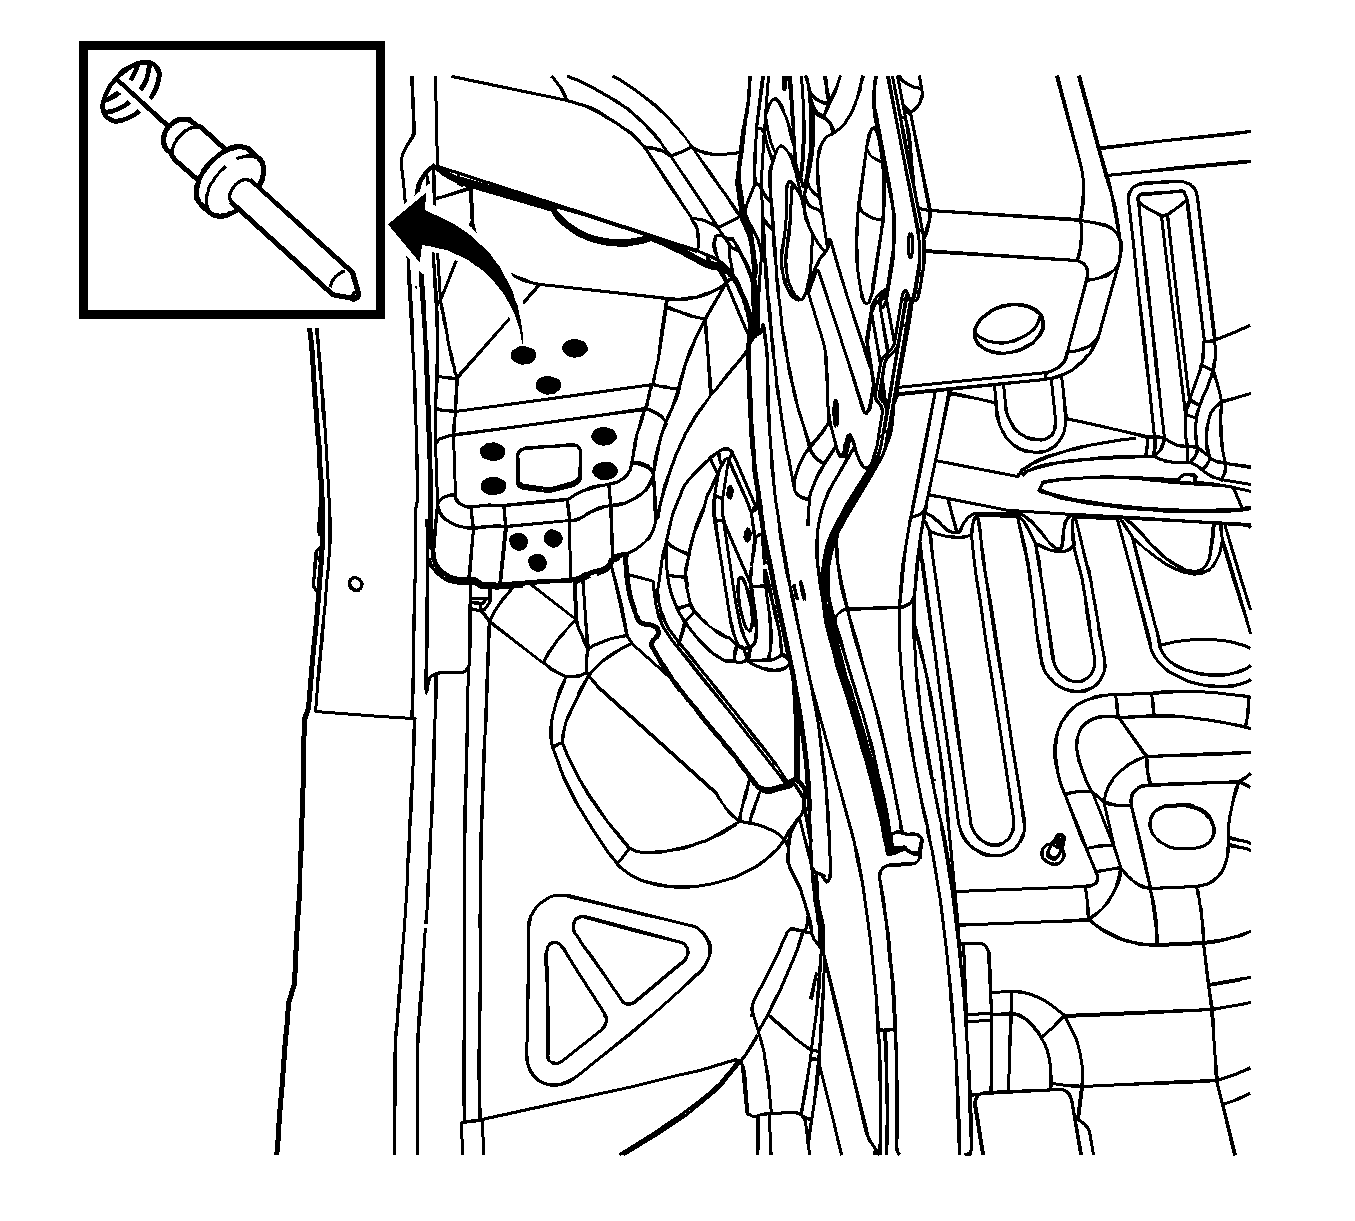
Important: Note the number and location of welds for installation of the front wheelhouse
Installation Procedure
- Position the service front wheelhouse in the vehicle using 3-dimensional measuring equipment. Clamp the wheelhouse in place.
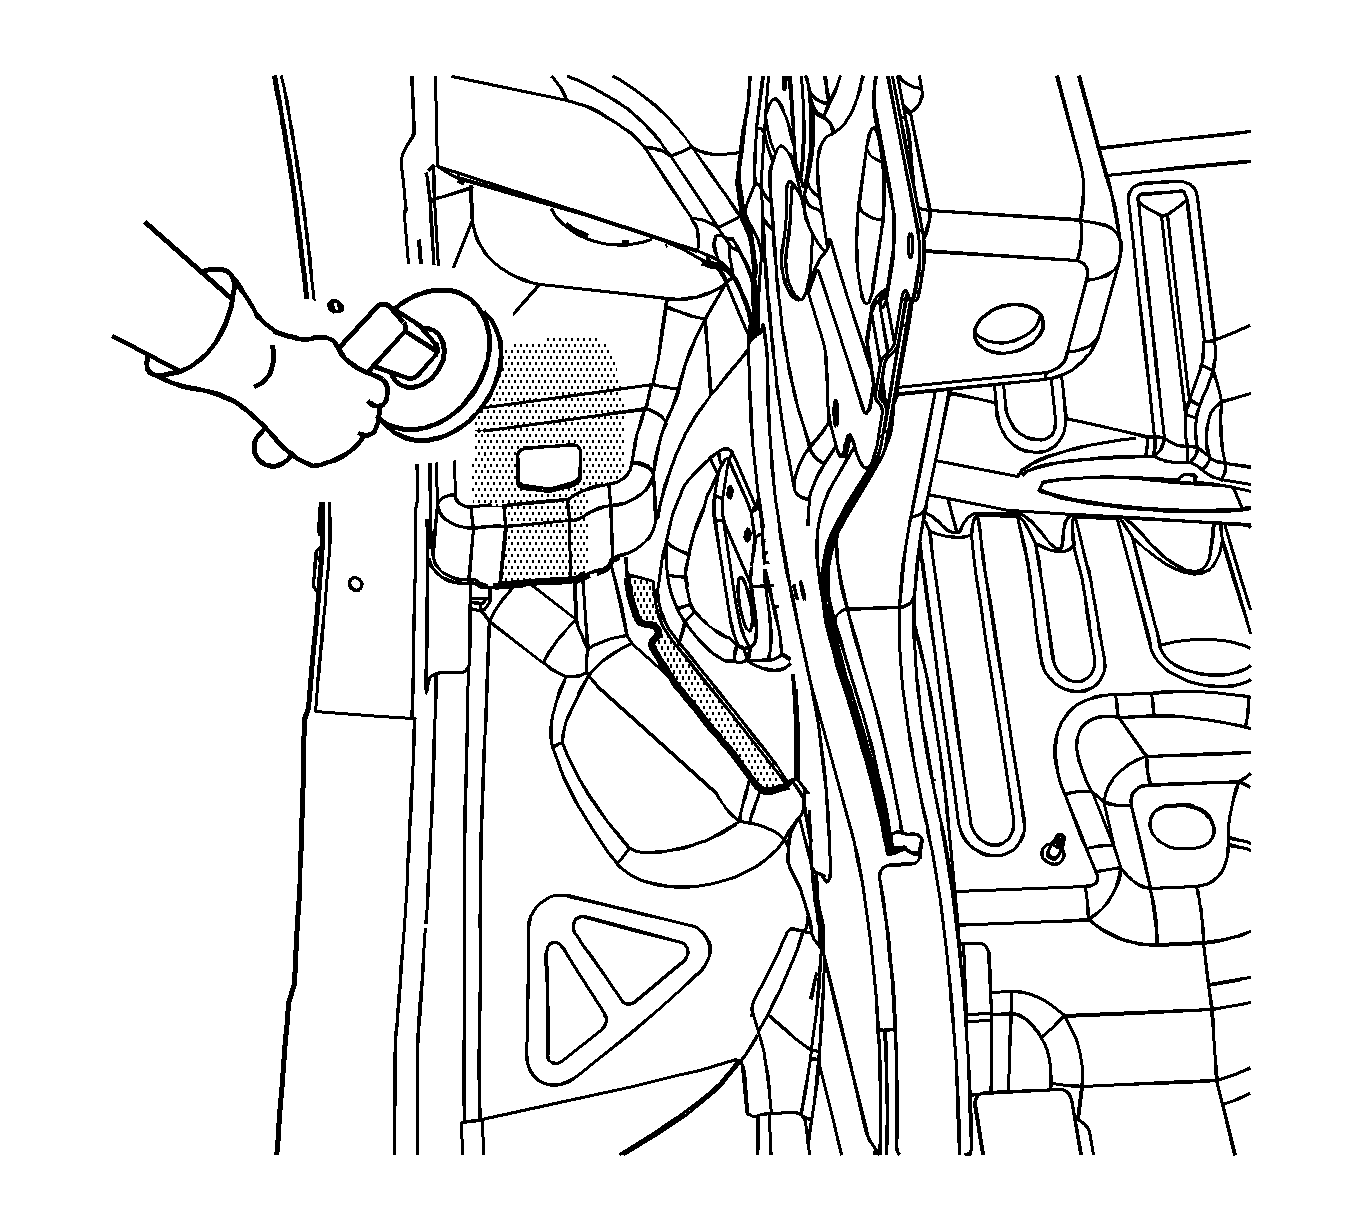
- Using a 7 mm (17/64 in) bit, drill the rivet attachment holes through the service wheelhouse and the dash and the lower plenum in the locations as noted from the factory wheelhouse.
- Remove the service front wheelhouse.
- Drill 8 mm (5/16 in) plug weld holes as necessary in the locations noted from the original assembly.
- Prepare the MIG weld mating surfaces as necessary.
- Apply 3M Weld-Thru Coating P/N 05916 or equivalent to all MIG weld mating surfaces. This includes all welds not attached to the dash or the lower plenum.
- Prepare the bonding mating areas by grinding to bare steel the surface of the body mating and at the service wheelhouse flanges.
- Apply a 3-6 mm (1/8-1/4 in) bead of metal panel bonding adhesive P/N 12378567 (Canadian P/N 88901675) or equivalent to the mating surfaces of the dash and lower plenum, and the wheelhouse service panel.
- Using a small acid brush, spread a coating of adhesive on the mating surfaces. Cover all of the bare metal to ensure corrosion protection.
- Position the service front wheelhouse to the vehicle using 3-dimensional measuring equipment. Clamp the front wheelhouse in place.
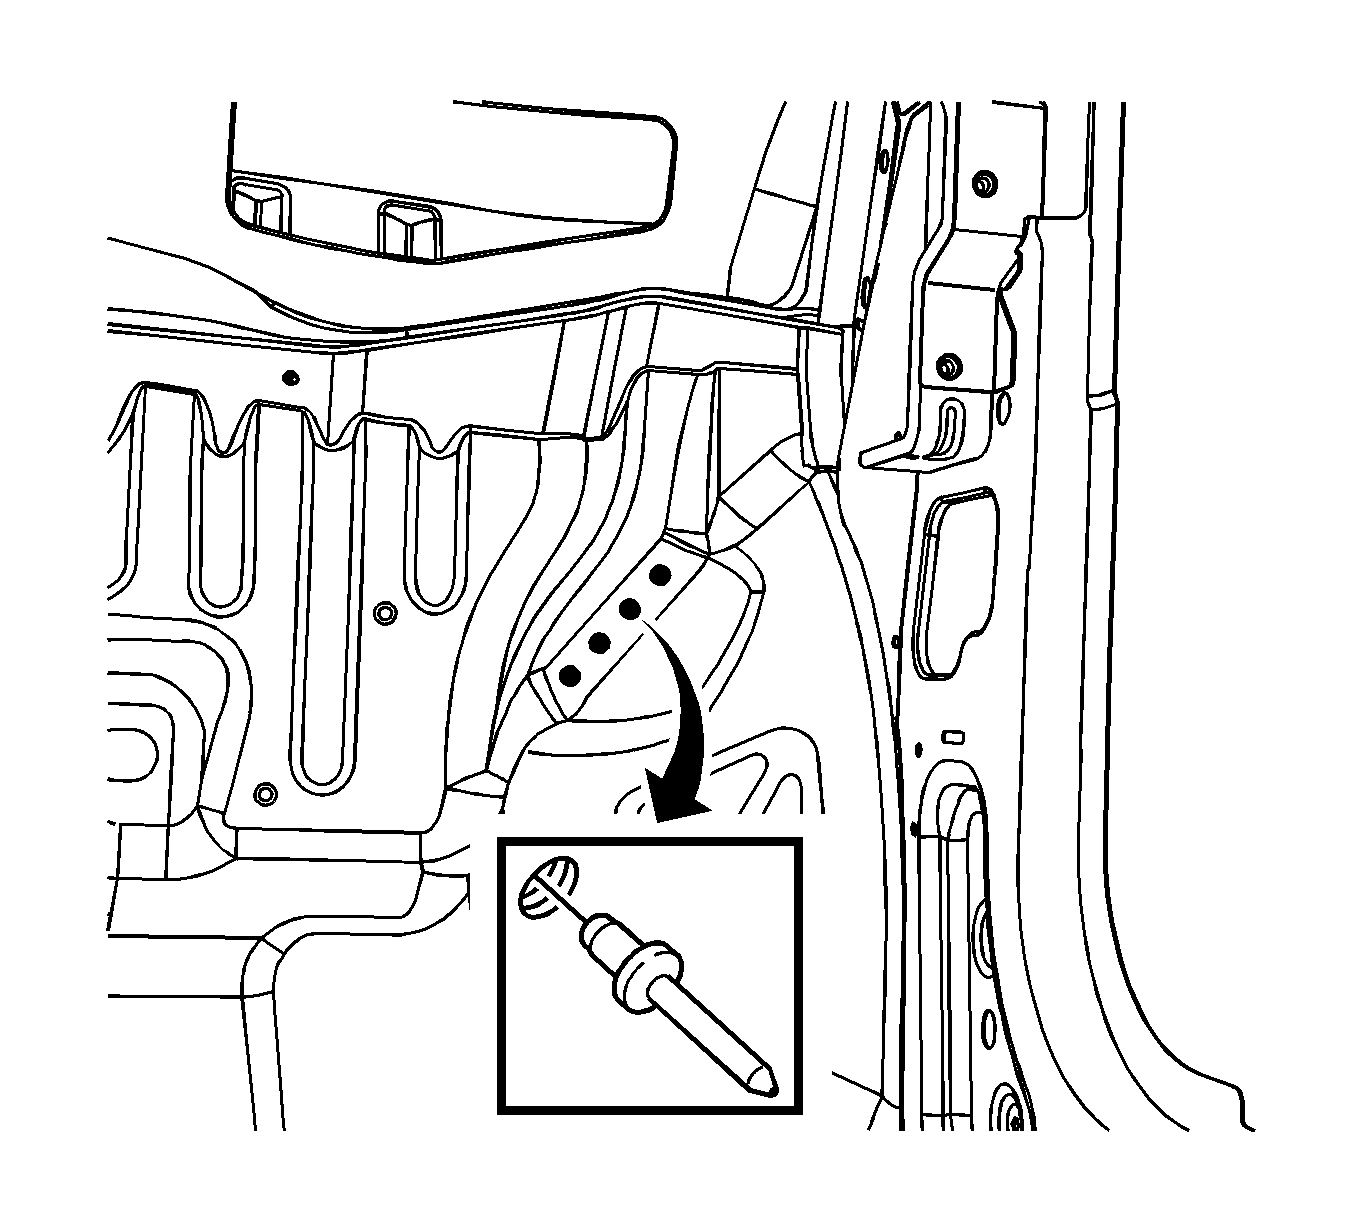
- Install the 9 mm (11/32 in) long rivets so that the rivet head contacts the wheelhouse cap bottom side.
- Install the 9 mm (11/32 in) long rivets so that the rivet head contacts the dash panel.
- Remove the excess adhesive from the front wheelhouse bond rivet area.
- Plug weld accordingly.
- Clean and prepare all of the welded surfaces.
- Apply the sealers and anti-corrosion materials to the repair area, as necessary. Refer to Anti-Corrosion Treatment and Repair in Paint and Coatings.
- Paint the repaired area. Refer to Basecoat/Clearcoat Paint Systems in Paint and Coatings.
- Install all related panels and components.
- Connect the negative battery cable. Refer to Battery Negative Cable Disconnection and Connection in Engine Electrical.
- Enable the SIR system. Refer to SIR Disabling and Enabling in SIR.
Important: If the location of the original plug weld holes can not be determined, space the plug weld holes every 40 mm (1 1/2 in) apart.
Important: Do not damage the corners on the thin metal during the grinding process.
Important: Do not pull the front wheelhouse off of the dash on the plenum after adhesion. To align the parts, slide the front wheelhouse against the front of the dash.
Important: Verify the proper positioning of the service front wheelhouse prior to riveting and welding.