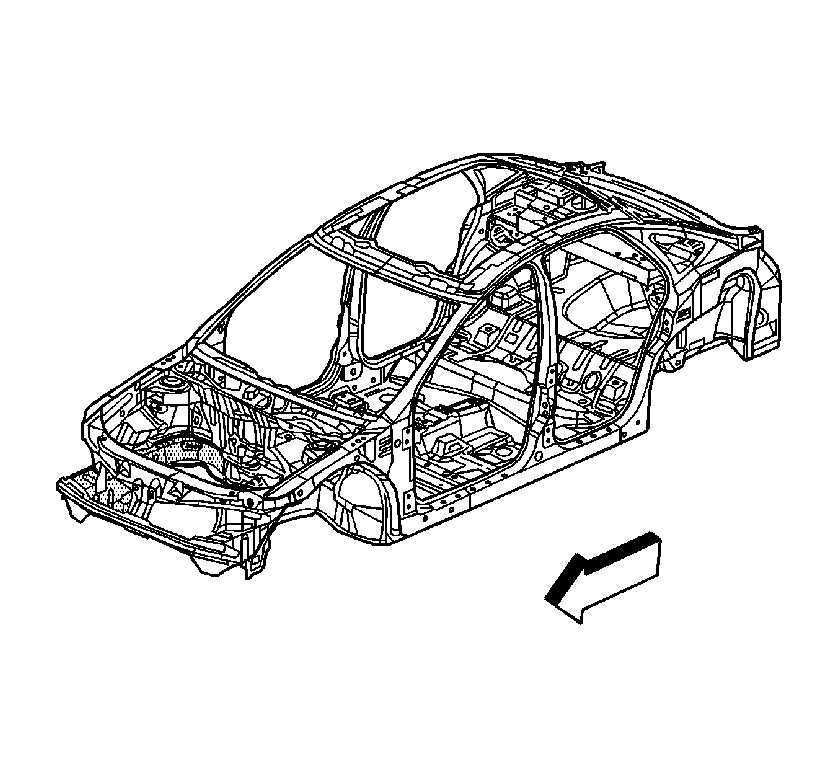
Removal Procedure
Caution: Refer to Approved Equipment for Collision Repair Caution in the Preface section.
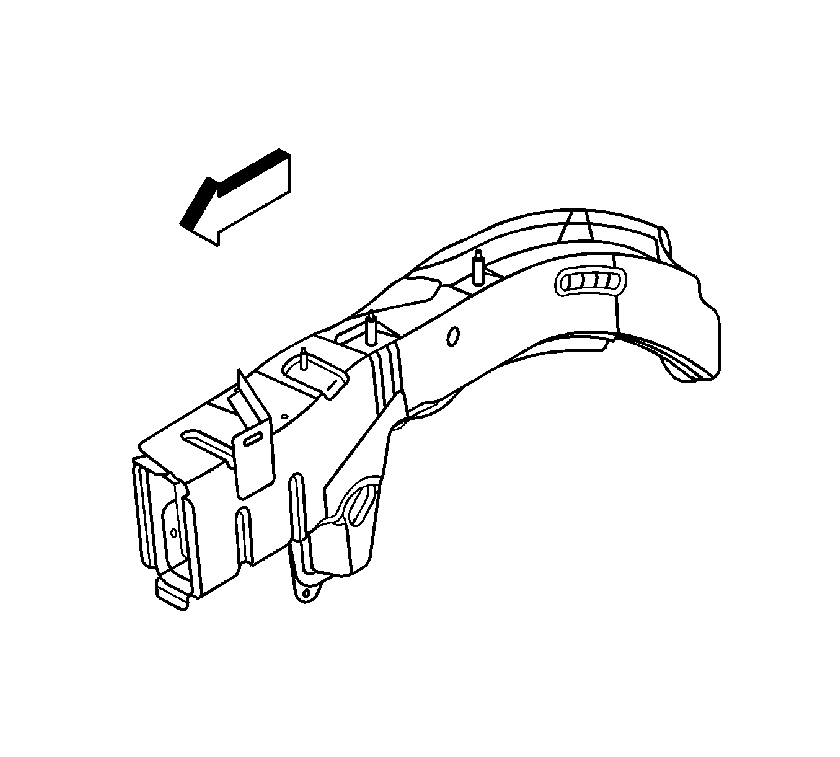
Important: The service part is developed from a complete assembly and will require the spot weld removal at the rail mid joint. The lower rail service part comes as a complete front rail assembly, including all the brackets and the reinforcements.
- Support the engine and the transmission with suitable equipment. Refer to Engine Support Fixture .
- Remove the fasteners to the engine and the transmission.
- Remove all the other related panels and components as necessary, including the suspension and the crossmember .
- Visually inspect the damaged area. Repair as much of the damage as possible to factory specifications. Refer to Dimensions - Body .
- Remove the sealers and anti-corrosion materials from the repair area, as necessary. Refer to Anti-Corrosion Treatment and Repair .
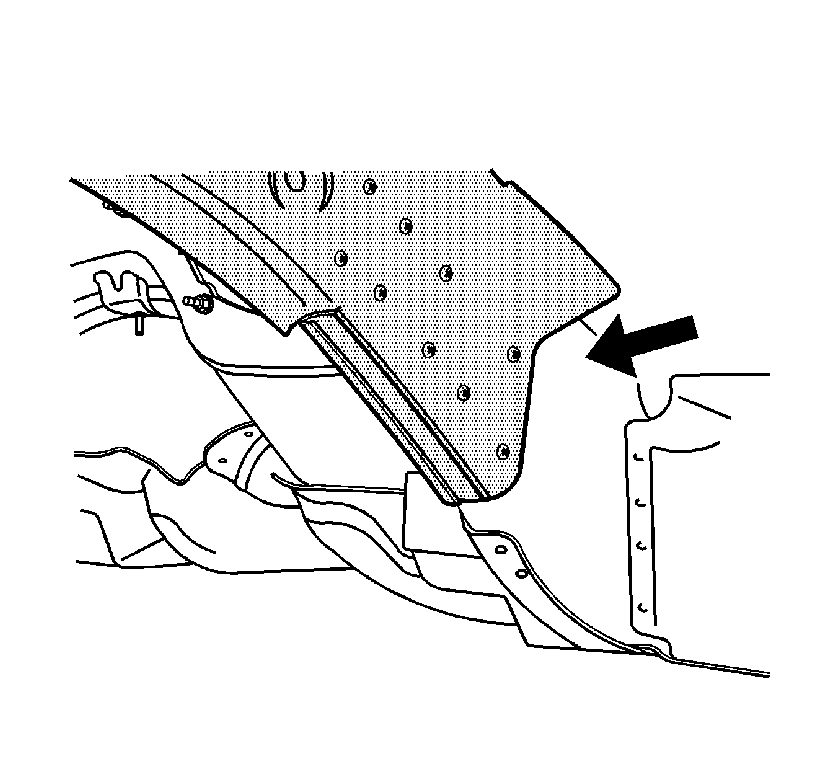
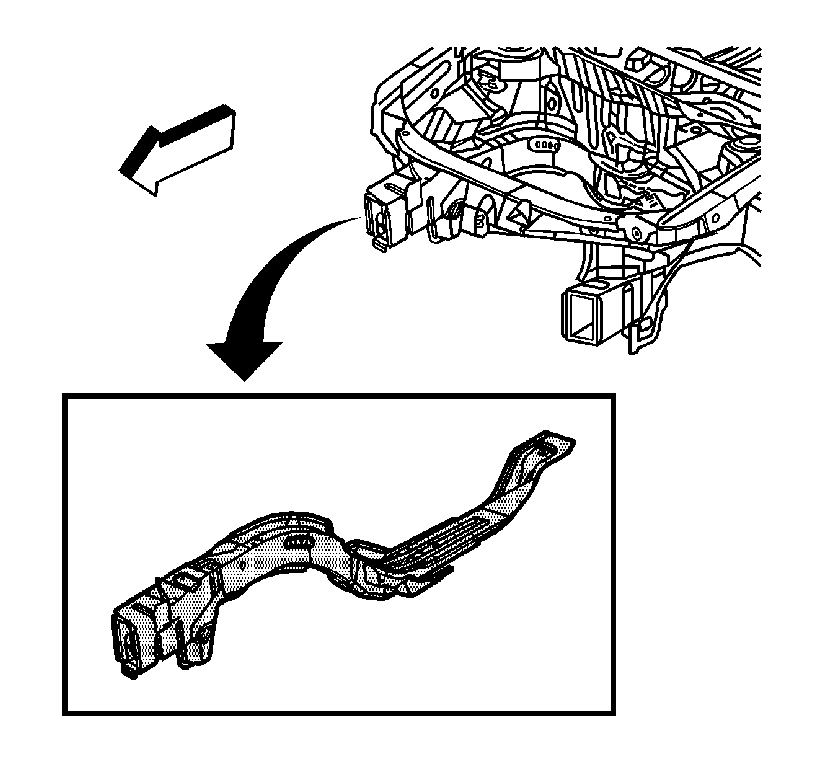
- Locate the area where the front compartment will be separated from the rail.
- Locate and drill the factory welds along the flanges of the rail, only up to and including the rail mid joint just forward of the dash panel.
- Drill out the factory welds.
- Pry open the outer layer of the rail at the front rail mid joint to allow the front portion of the rail to be removed from the vehicle.
- Remove the damaged front lower rail.
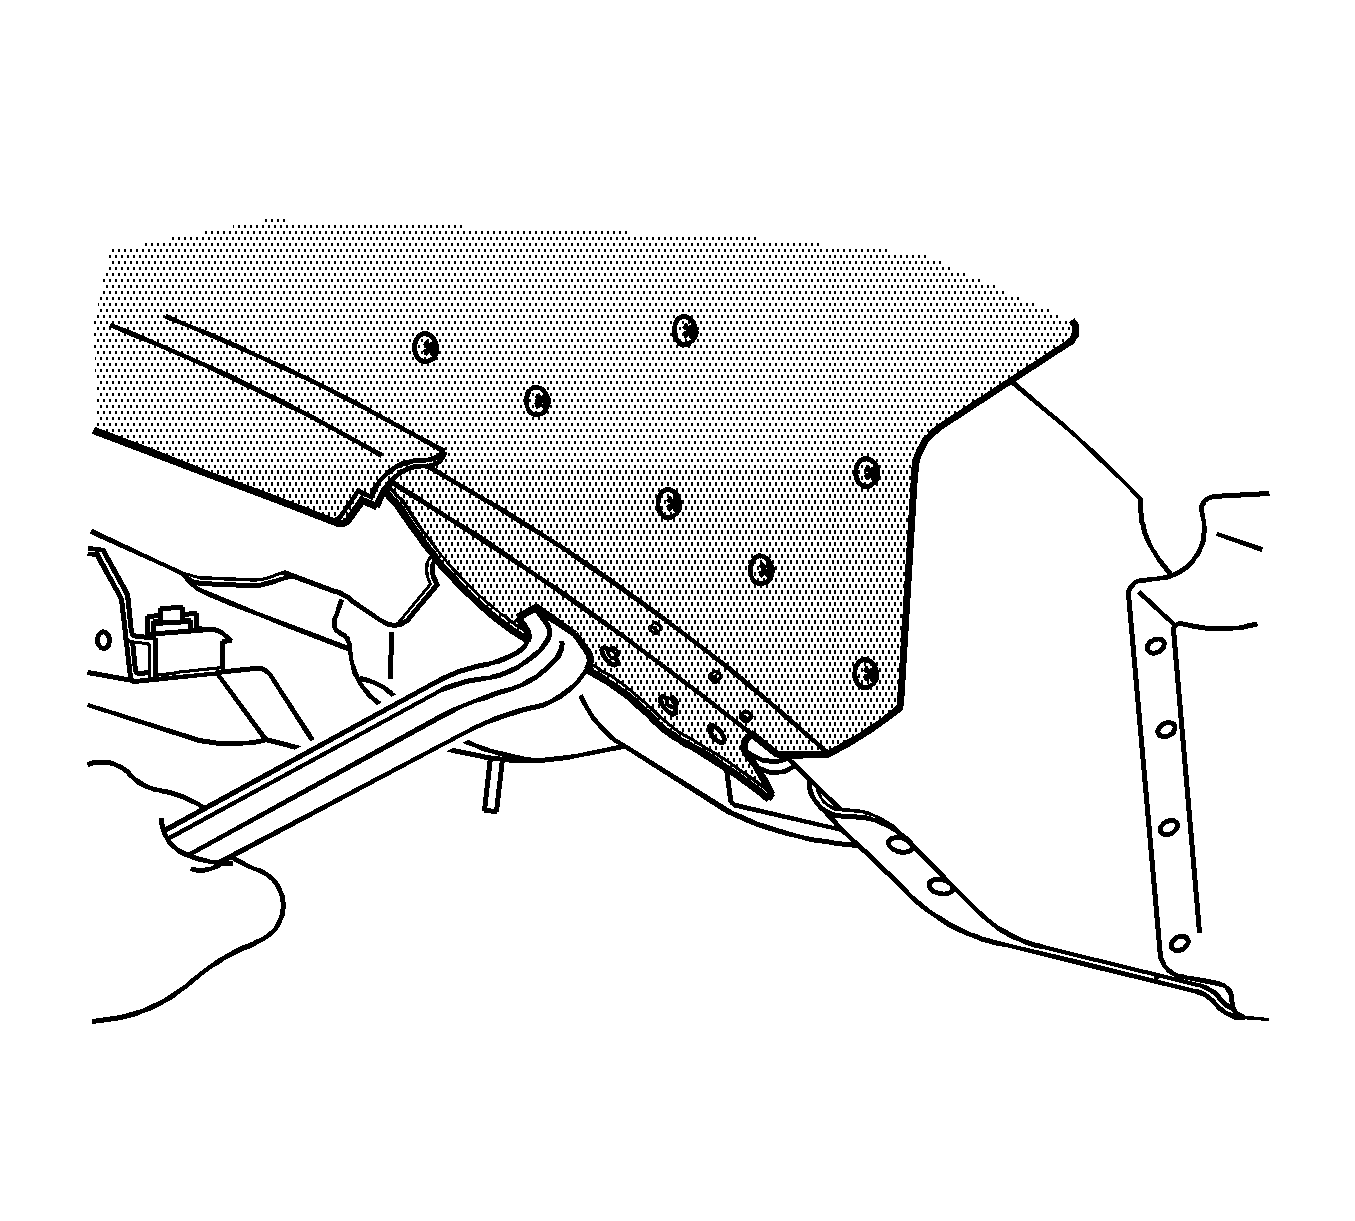
- Drill out the factory welds at the service rail assembly mid joint.
- Remove the forward portion of the front rail assembly at the mid joint.
- Prepare the mating surfaces as necessary.
- Apply GM-approved Weld-Thru Coating or equivalent to all mating surfaces. Refer to Anti-Corrosion Treatment and Repair .
Important: Loosen and protect the fuel and brake lines during rail replacement.
Installation Procedure
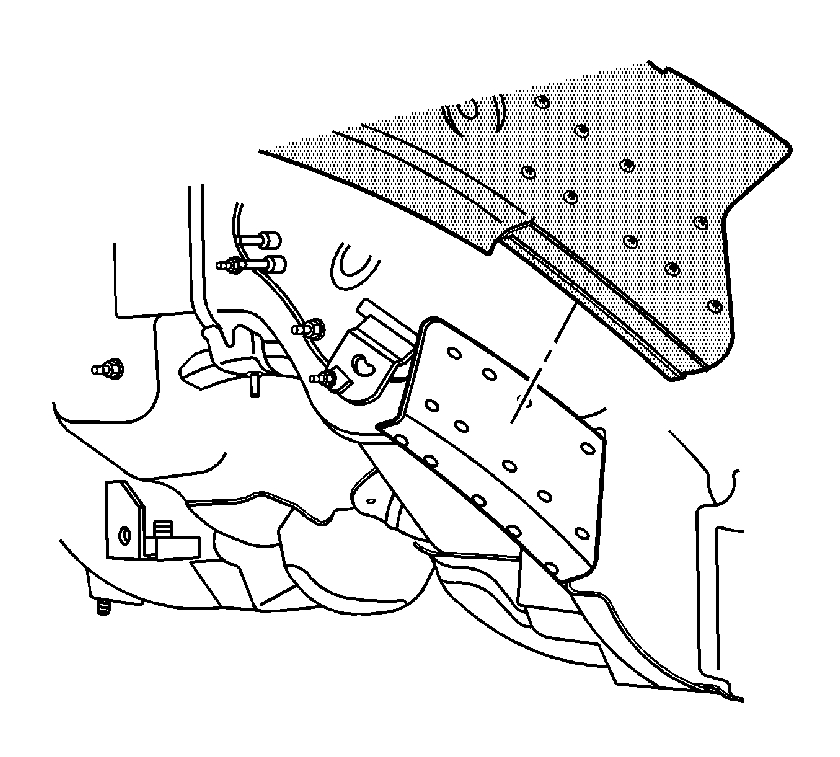
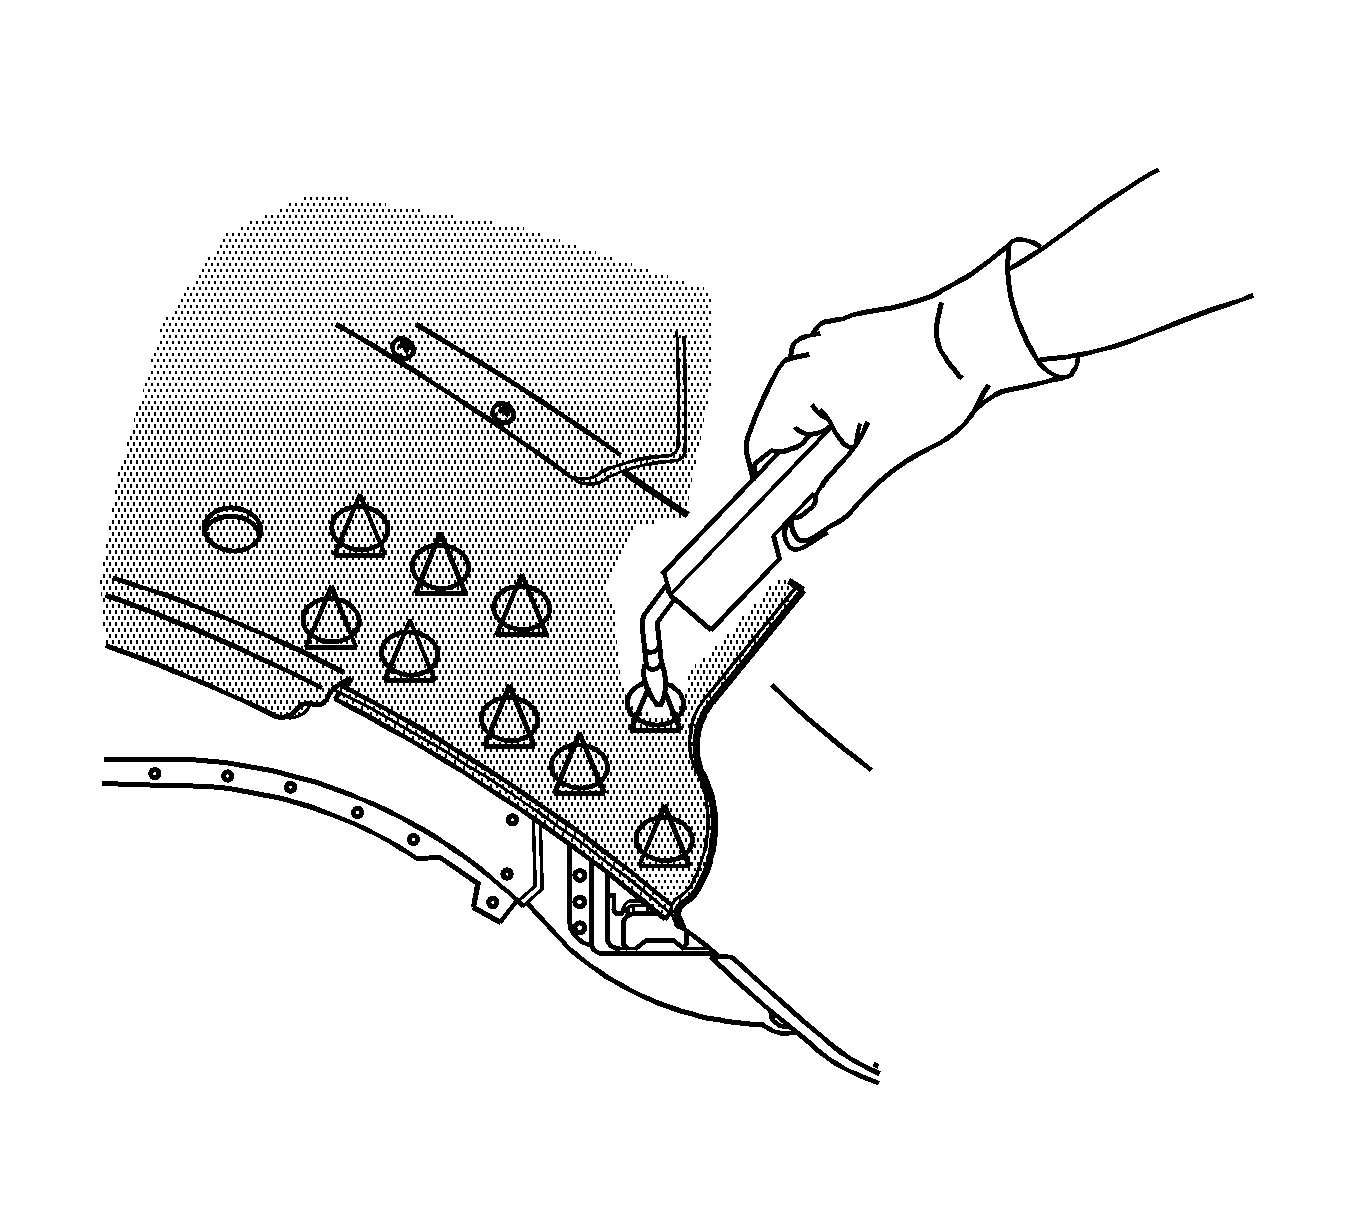
- Drill 8 mm (5/16 in) plug weld holes in the service part as necessary in the locations noted from the original panel.
- Prepare all mating surfaces as necessary.
- Apply GM-approved Weld-Thru Coating or equivalent to all mating surfaces. Refer to Anti-Corrosion Treatment and Repair .
- Position the rail to the vehicle.
- Plug weld accordingly.
- Clean and prepare all of the welded surfaces.
- Install all related panels and components.
- Apply sealers and anti-corrosion materials to the repair area, as necessary. Refer to Anti-Corrosion Treatment and Repair .
- Install the suspension crossmember. Refer to Frame Replacement .
Important: If the location of the original plug weld holes cannot be determined, space the plug weld holes every 40 mm (1½ in) apart.
Notice: Use the correct fastener in the correct location. Replacement fasteners must be the correct part number for that application. Fasteners requiring replacement or fasteners requiring the use of thread locking compound or sealant are identified in the service procedure. Do not use paints, lubricants, or corrosion inhibitors on fasteners or fastener joint surfaces unless specified. These coatings affect fastener torque and joint clamping force and may damage the fastener. Use the correct tightening sequence and specifications when installing fasteners in order to avoid damage to parts and systems.
Tighten
Tighten the fasteners to 100 N·m (74 lb ft) plus 180 degrees.
