Parking Brake Adjustment Disc Brake
Caution: Refer to Brake Dust Caution in the Preface section.
Important: The park brake cable adjusting nut is a nylon lock type. Use ONLY HAND TOOLS whenever tightening or loosening the adjusting nut.

- Apply and fully release the park brake several times. Verify that the park brake lever releases completely.
- Turn ON the ignition. Verify the red BRAKE warning lamp is not illuminated.
- If the red BRAKE warning lamp is illuminated, verify the following:
| • | The park brake lever is in the fully released position and against the stop. |
| • | There is no slack in the park brake cables. |
- If the red BRAKE warning lamp remained illuminated and there were no other visible causes, refer to
Symptoms - Hydraulic Brakes
.
- Turn OFF the ignition.
- Release the park brake lever boot from the floor console by applying light pressure inward on the sides of the boot retainer, and pull the boot back.
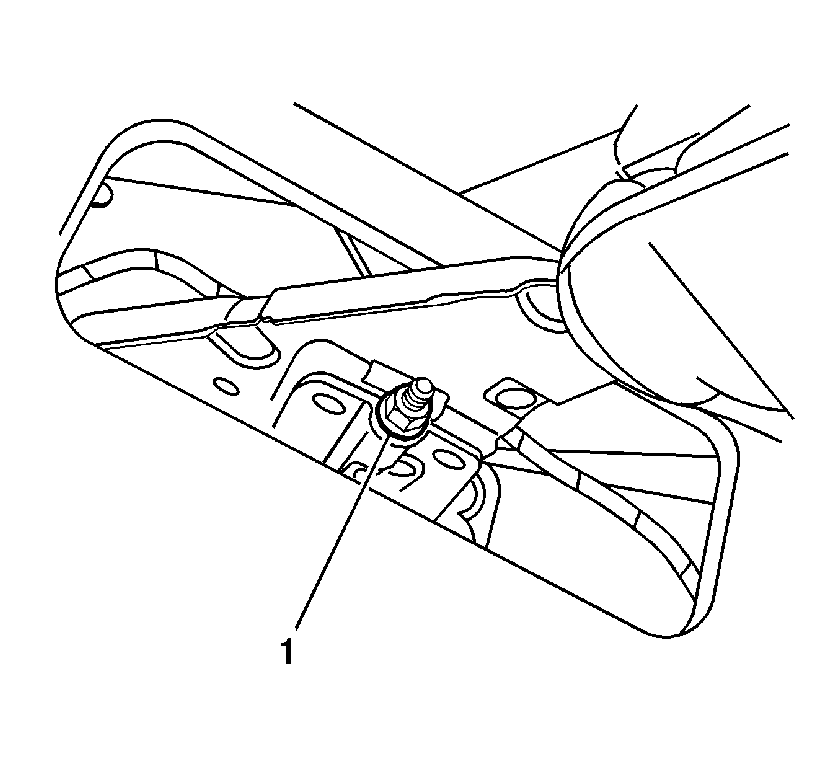
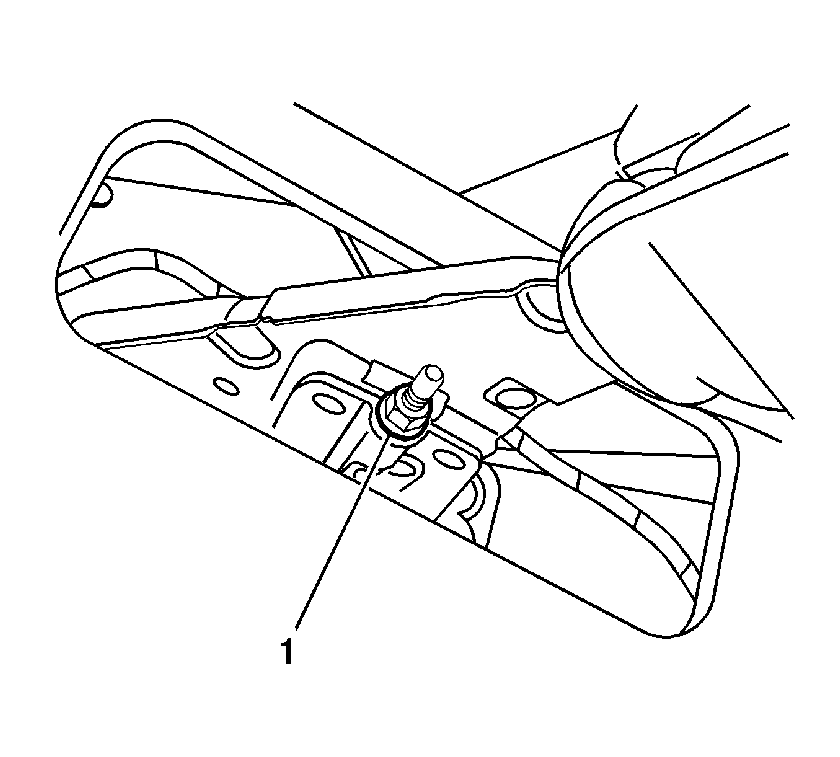
- With the park brake lever in the released position, loosen the adjusting nut (1) enough to completely relieve tension on the front cable.
- Raise and support the vehicle. Raise the vehicle just enough to observe the rear calipers and rotate the rear tire and wheel assemblies. Refer to
Lifting and Jacking the Vehicle
.
- With all tension relieved from the park brake cables, rotate the rear tire and wheel assemblies, or the rear brake rotors if the wheels have been removed. Observe the amount of effort required for rotation, and the amount of drag if present.

- Tighten the park brake cable adjusting nut (1) until all slack is taken out of the front cable.
- Further tighten the adjusting nut (1) until one of the park brake levers on the rear calipers is just lifted off the stop on the caliper housing.
- Slowly back off the adjusting nut until the park brake lever just rests on the stop.
- Back off the adjusting nut one full turn.
- Fully apply and release the park brake lever 3-5 times.
- Raise the park brake lever 3 detent positions and attempt to rotate the rear tire and wheel assemblies, or the rear brake rotors.
| • | If rotating the tire and wheel assemblies, they should be difficult to rotate, but should not be locked. |
| • | If rotating the brake rotors, they should be locked. |
- Raise the park brake lever one additional detent position and attempt to rotate the rear tire and wheel assemblies, or the rear brake rotors. The tire and wheel assemblies, or the rear brake rotors should be locked.
- Fully release the park brake lever.
- Verify the park brake is released by rotating the rear tire and wheel assemblies, or the rear brake rotors. The rotors should rotate freely and exhibit no brake shoe drag from the park brake system.
- With the lever released, if the rotors required more effort to rotate, or exhibited more drag than noted previously when all cable tension was relieved, check the park brake levers on the rear calipers. The levers should be on the stops.
- If the levers are not against the stops, loosen the adjusting nut just until the levers rest against the stops, then repeat steps 14-18.
- If the rotors still do not rotate freely, with the park lever fully released, park brake adjustment is not the cause of any drag in the brake system.
- Lower the vehicle.
- Position the park brake lever boot to the floor console and press the boot retainer into place to secure.
- Release the park brake lever.
Parking Brake Adjustment Drum Brake
Caution: Refer to Brake Dust Caution in the Preface section.
Important: The park brake cable adjusting nut is a nylon lock type. Use ONLY HAND TOOLS whenever tightening or loosening the adjusting nut.

- Apply and fully release the park brake several times. Verify that the park brake lever releases completely.
- Turn ON the ignition. Verify the red BRAKE warning lamp is not illuminated.
- If the red BRAKE warning lamp is illuminated, verify the following:
| • | The park brake lever is in the fully released position and against the stop. |
| • | There is no slack in the park brake cables. |
- If the red BRAKE warning lamp remained illuminated and there were no other visible causes, refer to
Symptoms - Hydraulic Brakes
.
- Turn OFF the ignition.
- Release the park brake lever boot from the floor console by applying light pressure inward on the sides of the boot retainer, and pull the boot back.
- With the park brake lever in the released position, loosen the adjusting nut (1) enough to completely relieve tension on the front cable.
- Raise and support the vehicle. Raise the vehicle just enough to allow rear tire and wheel assembly removal and rear drum adjustment. Refer to
Lifting and Jacking the Vehicle
.
- Remove the rear tire and wheel assemblies. Refer to
Tire and Wheel Removal and Installation
.
- Adjust the rear drum brakes. Refer to
Drum Brake Adjustment
.
- Ensure there is no brake shoe drag after adjustment by rotating the brake drums. If drag exists, re-center the brake shoes and perform the brake shoe adjustment again.
- Install 2 wheel nuts to the wheel studs and firmly hand tighten in order to retain the brake drums.
- Raise the park brake lever 6 detent positions.
Notice: Refer to Fastener Notice in the Preface section.

- Tighten the park brake cable adjusting nut (1).
Tighten
Tighten the nut to 3.9 N·m (35 lb in).
- Attempt to rotate the rear brake drums. There should be no rotation forward or rearward.
- Fully release the park brake lever.
- Verify the park brake is released by rotating the rear brake drums. The drums should rotate freely and exhibit no brake shoe drag.
- If the drums do not rotate freely, repeat the park brake cable adjustment procedure.
- Raise the park brake lever 3 detent positions and attempt to rotate the rear brake drums:
| • | One of the brake drums should not rotate forward or rearward. |
| • | The other brake drum should not rotate forward or rearward, or should require substantial effort to rotate. |
- Raise the park brake lever one additional detent position and attempt to rotate the rear brake drums.
- Verify that the left and right brake drums cannot be rotated.
- Remove the wheel nuts retaining the brake drums.
- Install the rear tire and wheel assemblies. Refer to
Tire and Wheel Removal and Installation
.
- Lower the vehicle.
- Position the park brake lever boot to the floor console and press the boot retainer into place to secure.
- Release the park brake lever.


