For 1990-2009 cars only
Removal Procedure
- Remove the sunshade panel. Refer to Sunroof Sunshade Replacement.
- Remove the sunroof window. Refer to Sunroof Window Replacement.
- Lower the headliner. Refer to Headlining Trim Panel Replacement.
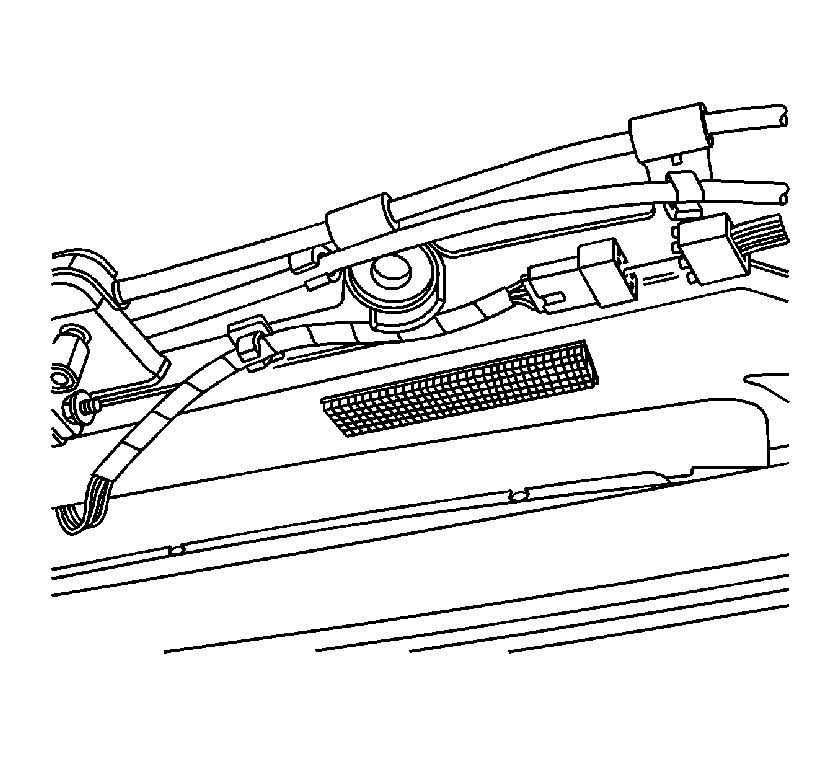
- Disconnect the electrical connector on the sunroof actuator.
- Disconnect the electrical connector from the sunroof module.
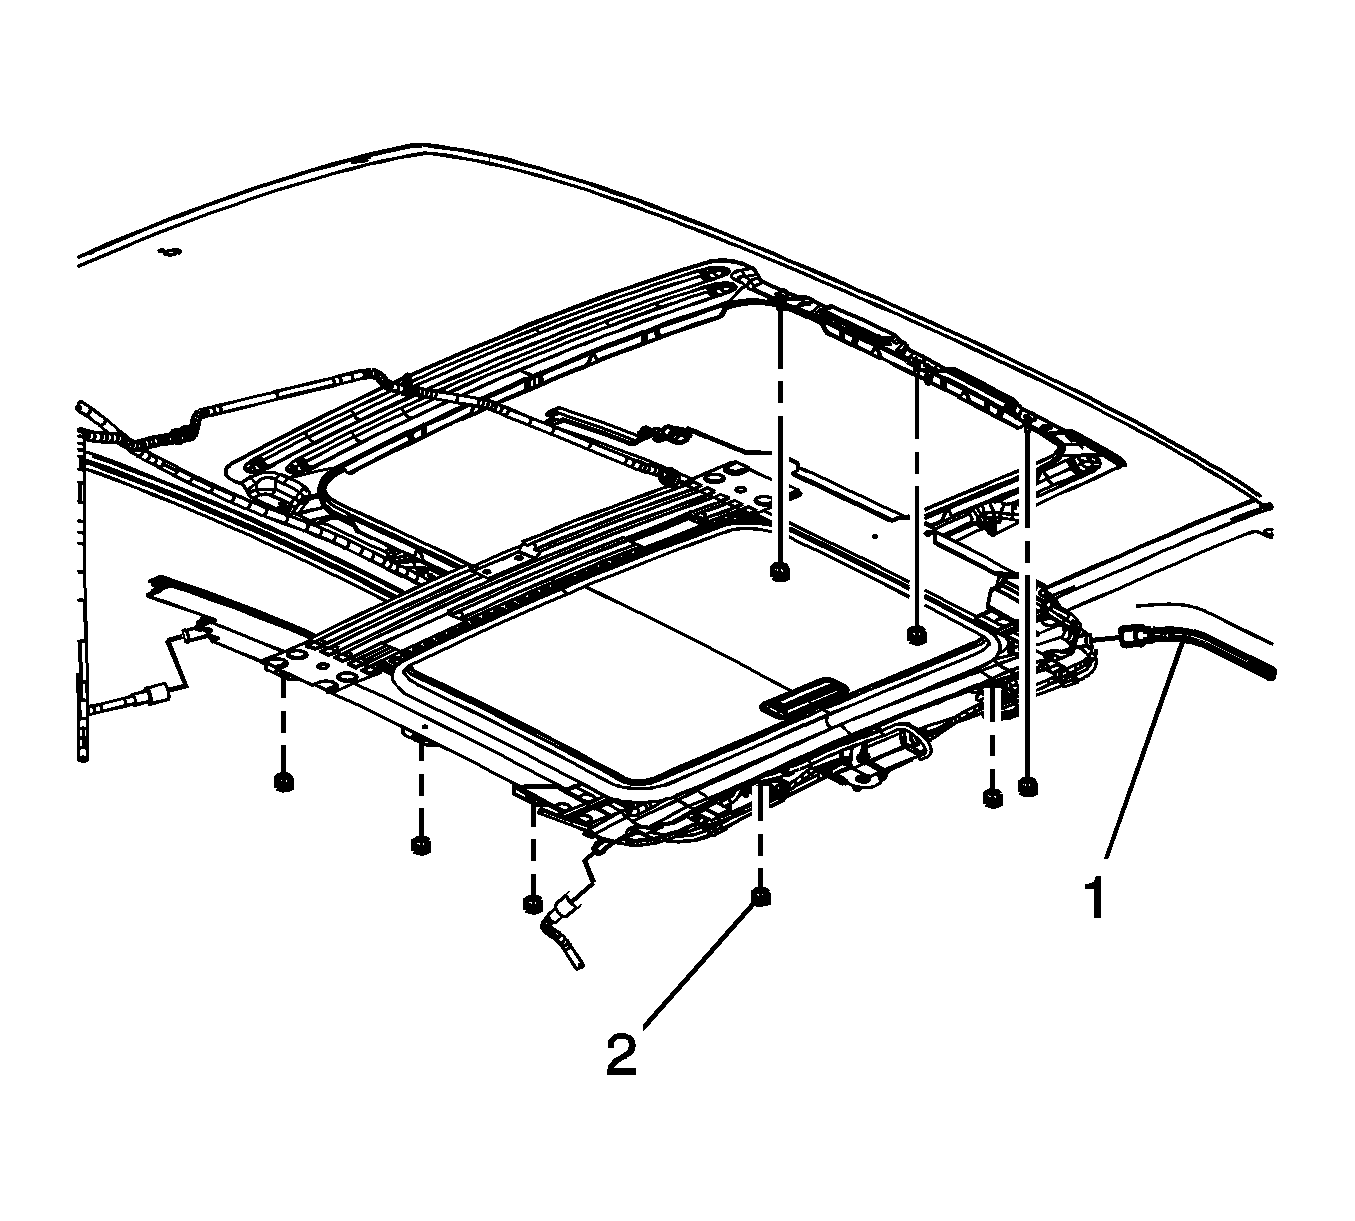
- Disconnect the front and rear drain hoses (1) from the drain spouts on the sunroof module.
- Remove the sunroof module nuts (2) from the roof.
- Remove the center nuts from the sunroof module.
- With the aid of an assistant, lower and remove the sunroof module from the vehicle.
Important: A new sunroof module assembly does not include the sunroof window or the sunshade as components. You must install the old sunroof window and sunshade to the new sunroof module assembly.

Important: It is only necessary to lower the headliner. Only do the steps in headliner replacement that will lower the headliner enough to gain access.

Important: Remove the 2 center nuts last in order to help support the sunroof module to the roof ring.
Installation Procedure
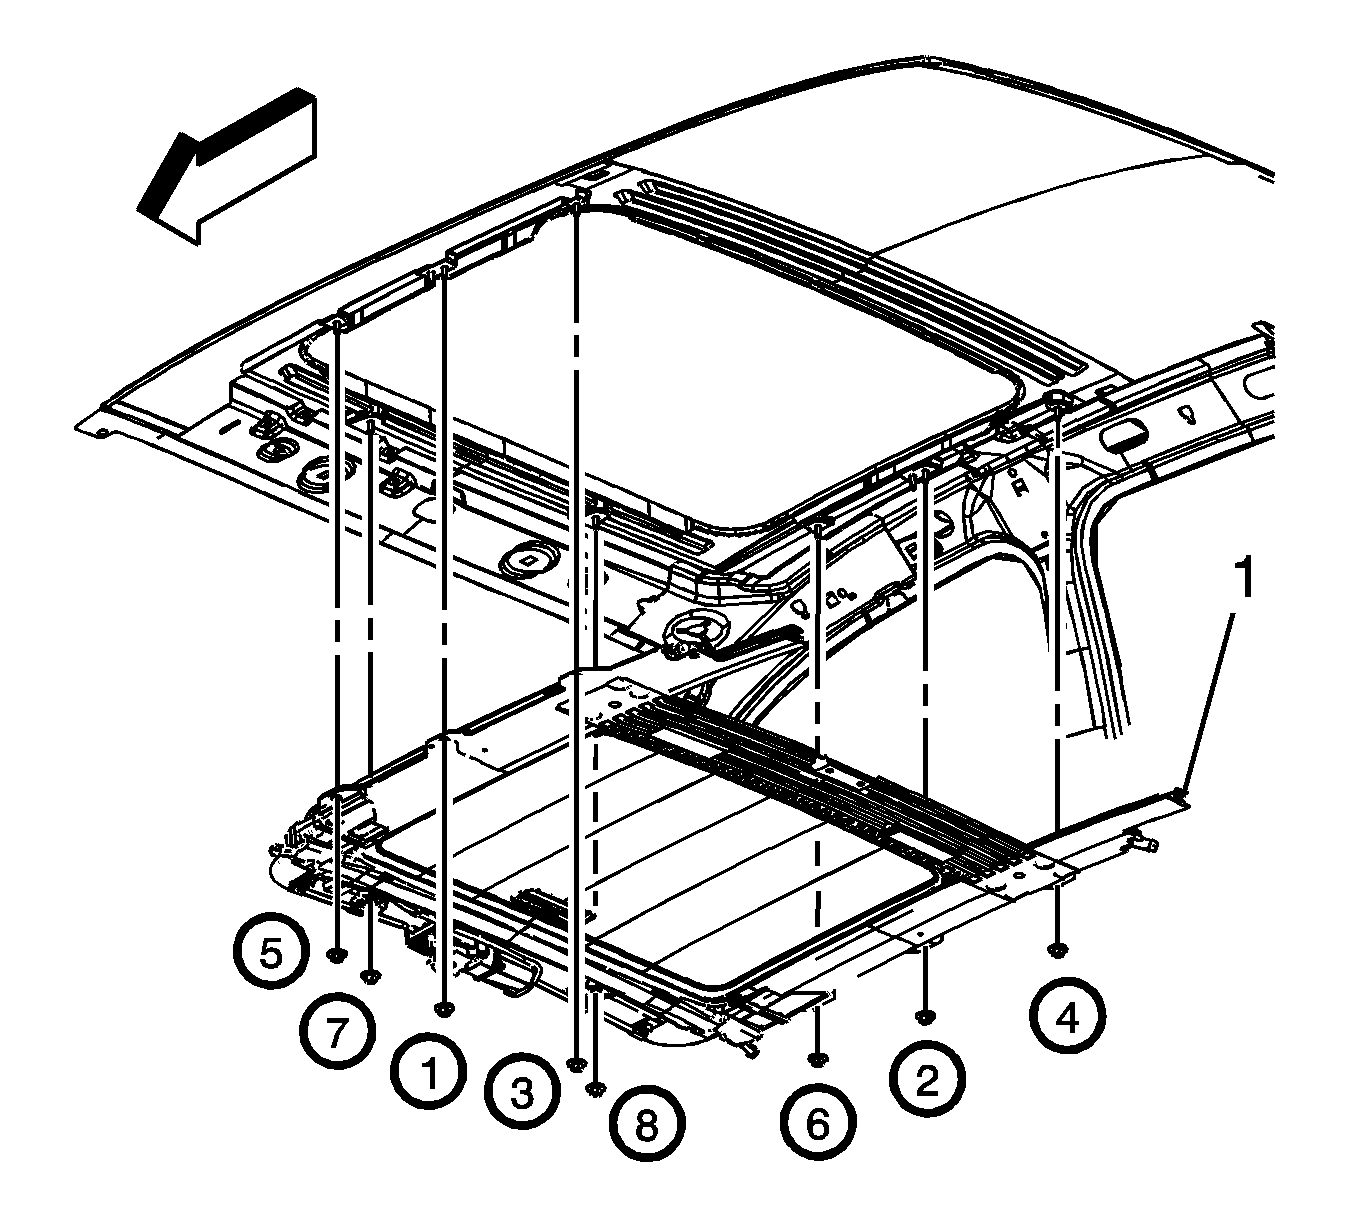
- With the aid of an assistant, position the new sunroof module assembly to the studs located on the roof ring.
- Install the center sunroof module to roof nuts (1, 2) and tighten by hand.
- Install the remaining sunroof module (1) nuts to the module in sequence (3, 4, 5, 6, 7, 8).
- Connect the front and rear drain hoses (1) to the drain spouts on the sunroof module.
- Install the sunroof window to the new sunroof module. Refer to Sunroof Window Replacement.
- Install the sunshade panel to the new sunroof module. Refer to Sunroof Sunshade Replacement.
- Connect the electrical connector to the sunroof motor/actuator.
- Secure the harness to the sunroof module.
- Verify the proper operation of the sunroof before securing the headliner.
- Raise and install the headliner. Refer to Headlining Trim Panel Replacement.

Notice: Refer to Fastener Notice in the Preface section.
Tighten
Tighten all of the nuts to 10 N·m (89 lb in).


