| • | 87 91 204 Output Shaft Bearing Race Sleeve |
| • | 87 92 103 Output Shaft Assembly Tool |
| • | 87 92 202 Output Shaft Bearing Race Sleeve |
- Press on the output shaft bearing using the 87 92 202 and the 87 91 204 .
- Install the 1st gear synchronizer assembly, blocking ring, and inner and outer cones to the 1st driven gear.
- Install the 1st/2nd synchronizer hub into the synchronizer sleeve. The reference mark on the hub made during disassembly faces up, away from 1st gear, and the fork groove on the sleeve faces down, towards 1st gear.
- Install the 1st/2nd synchronizer inserts into their positions between the hub and sleeve.
- Hook one of the synchronizer springs into a synchronizer insert and route the spring in a clockwise direction. Carefully turn over the 1st/2nd synchronizer hub and sleeve and install the remaining synchronizer spring. The spring should hook into the same insert as the previously installed spring and should also route in a clockwise direction.
- Install the 1st/2nd synchronizer hub and sleeve onto the 1st driven gear and blocking ring.
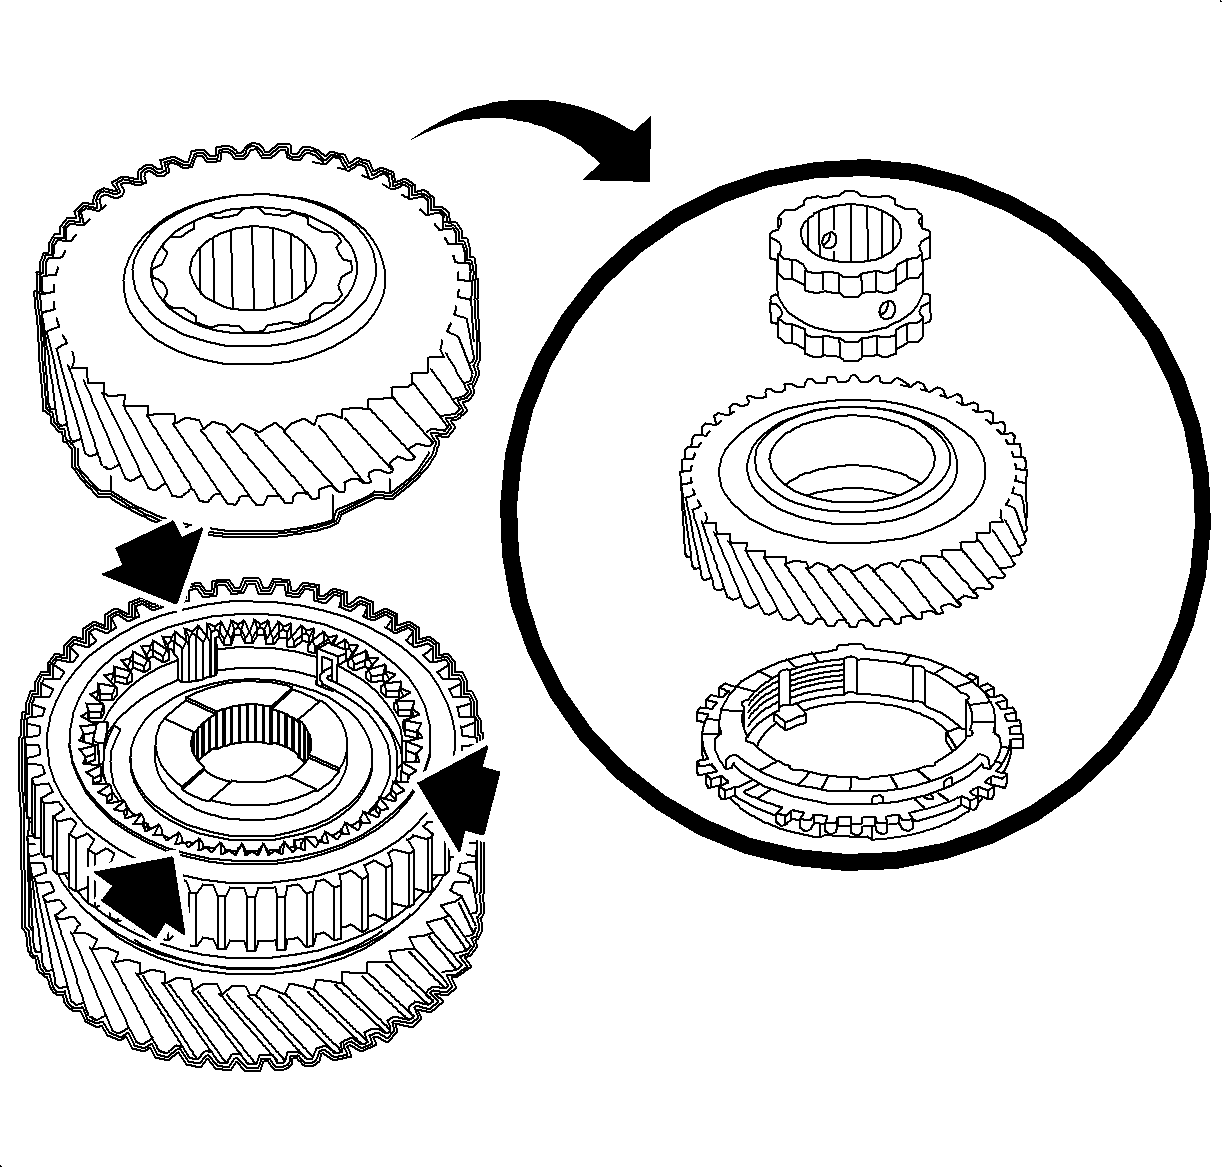
- Install the 2nd driven gear synchronizer assembly, blocking ring, and inner and outer cones to the 1st/2nd synchronizer hub. Align the blocking ring lugs with gaps in the synchronizer hub.
- Install the 2nd driven gear.
- Install the 2nd driven gear bushing.
- Hold down the 2nd gear and move the synchronizer sleeve up and down to check for proper operation.
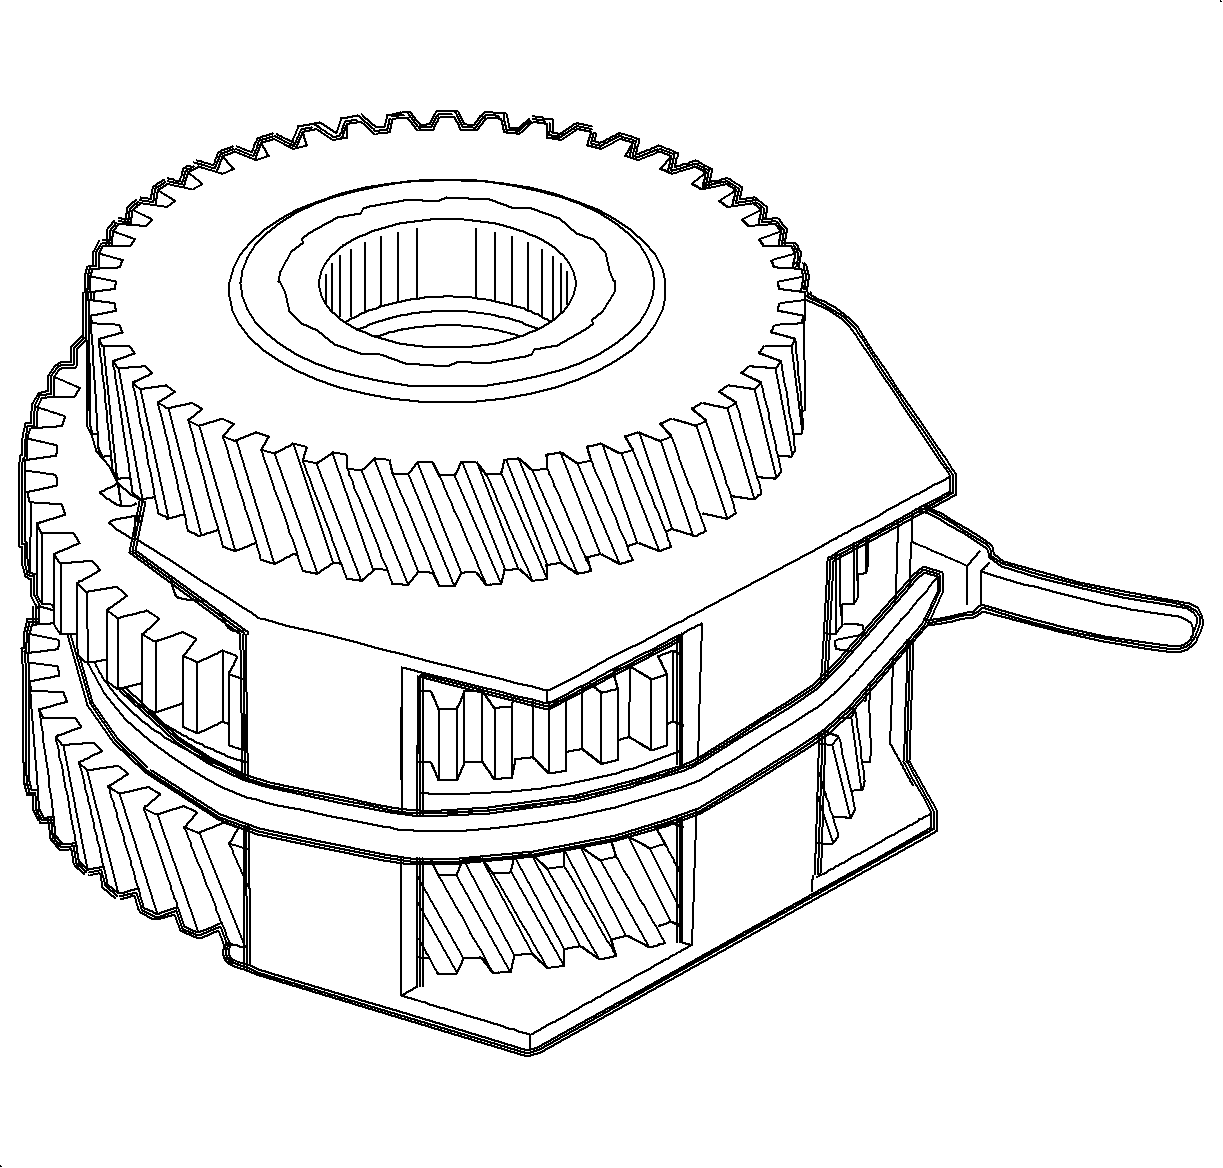
- Install the 87 92 103 around 1st gear and the 1st/2nd gear synchronizer sleeve as shown. This tool holds the 1st and 2nd synchronizer assemblies together during transaxle assembly. Secure the tool with a plastic tie.
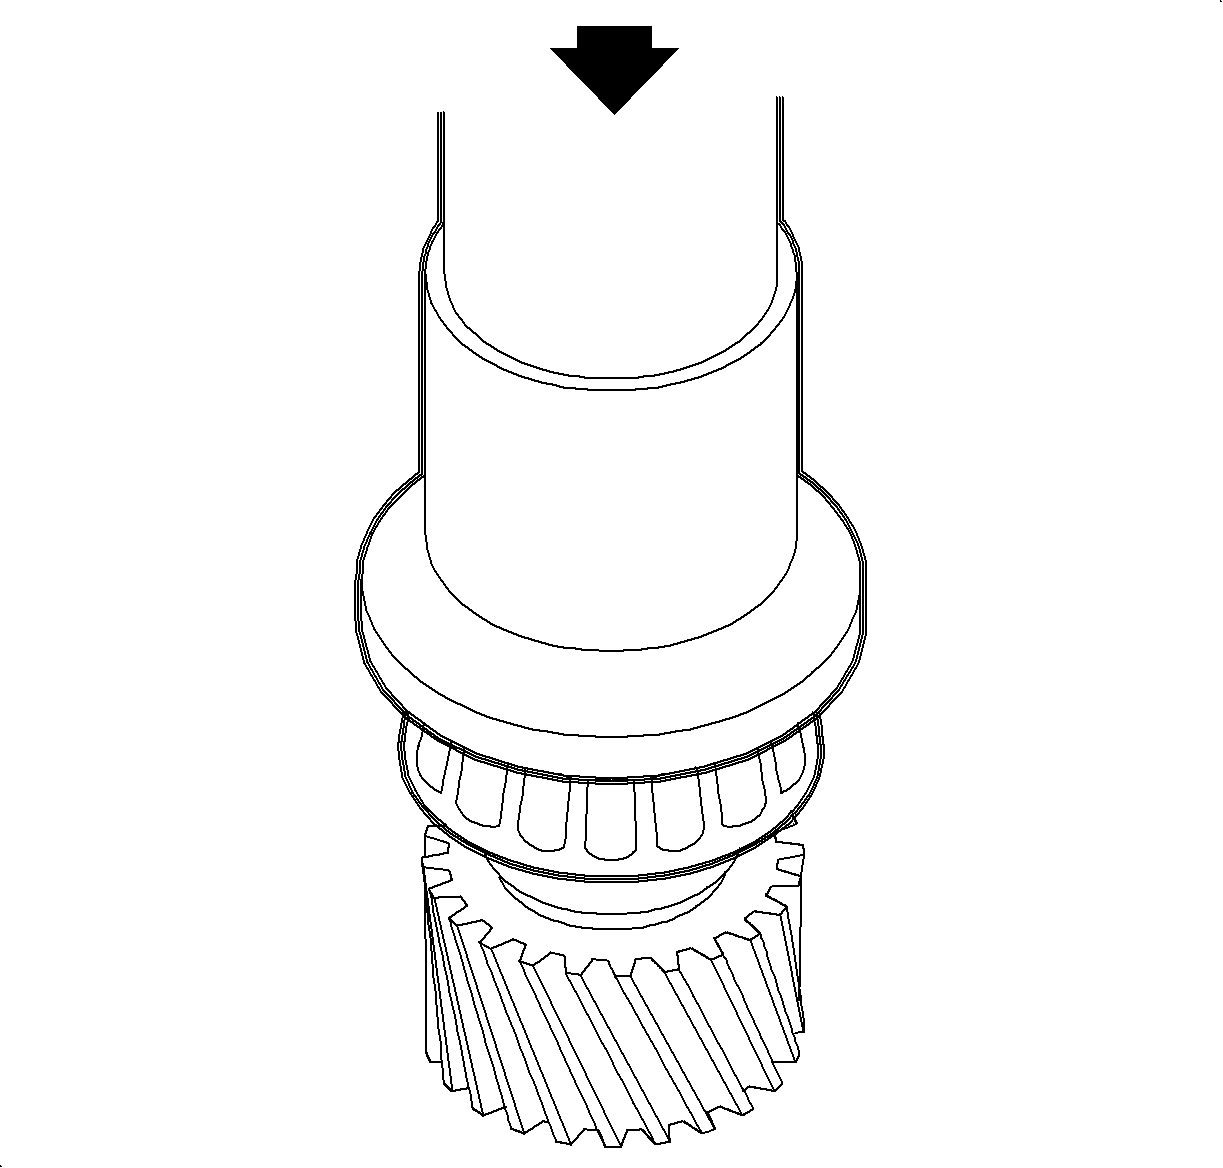
Important: Lubricate all rotating parts and bearings with manual transaxle lubricant P/N 21018899 during assembly.
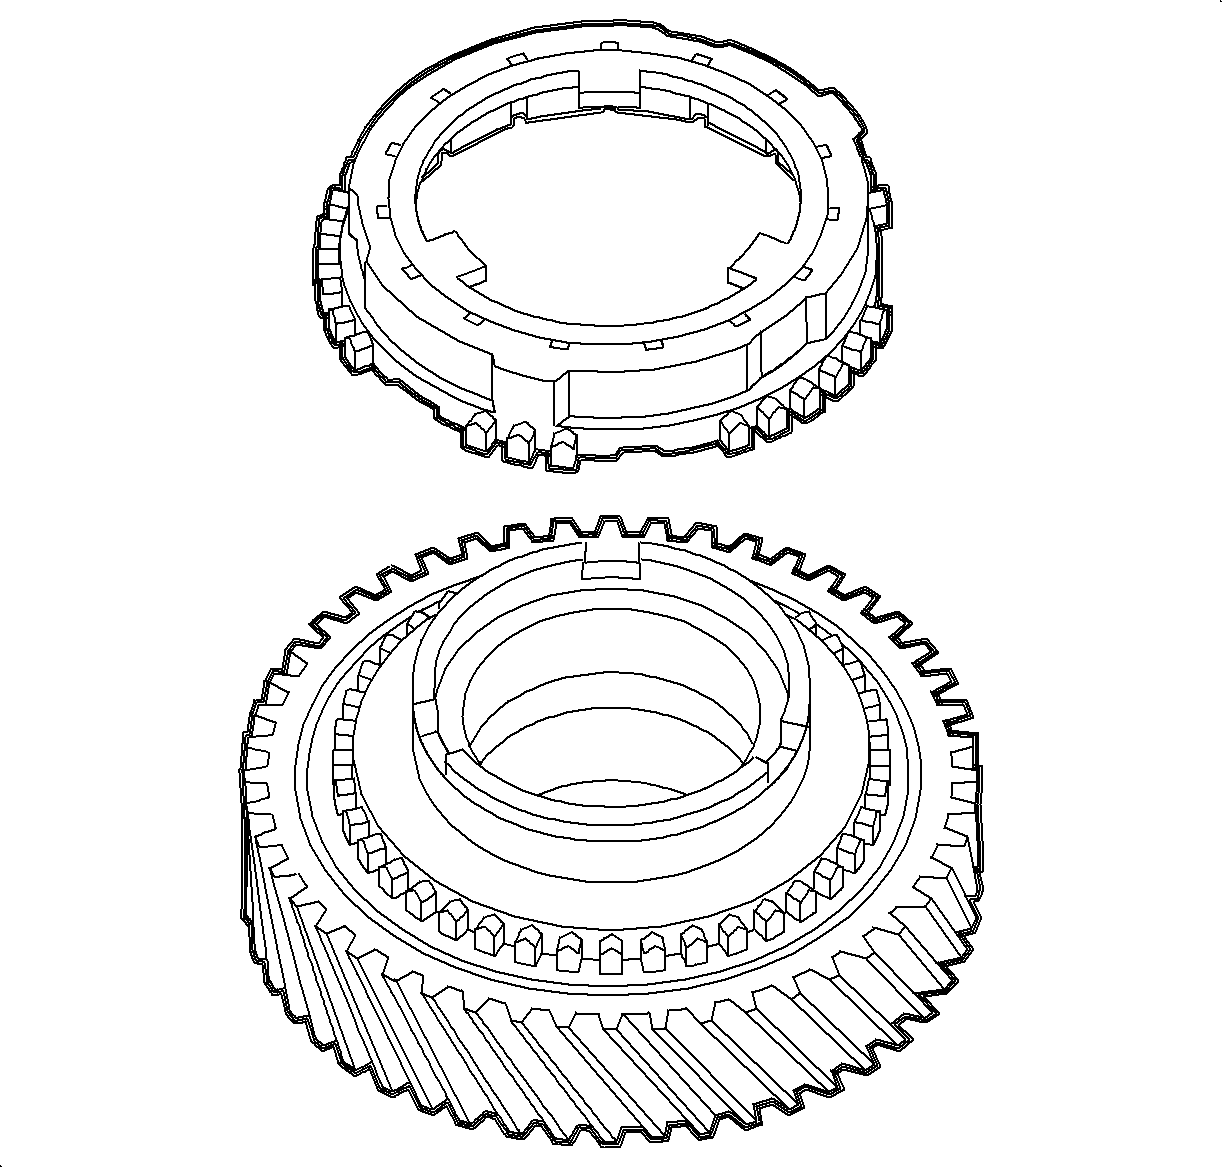
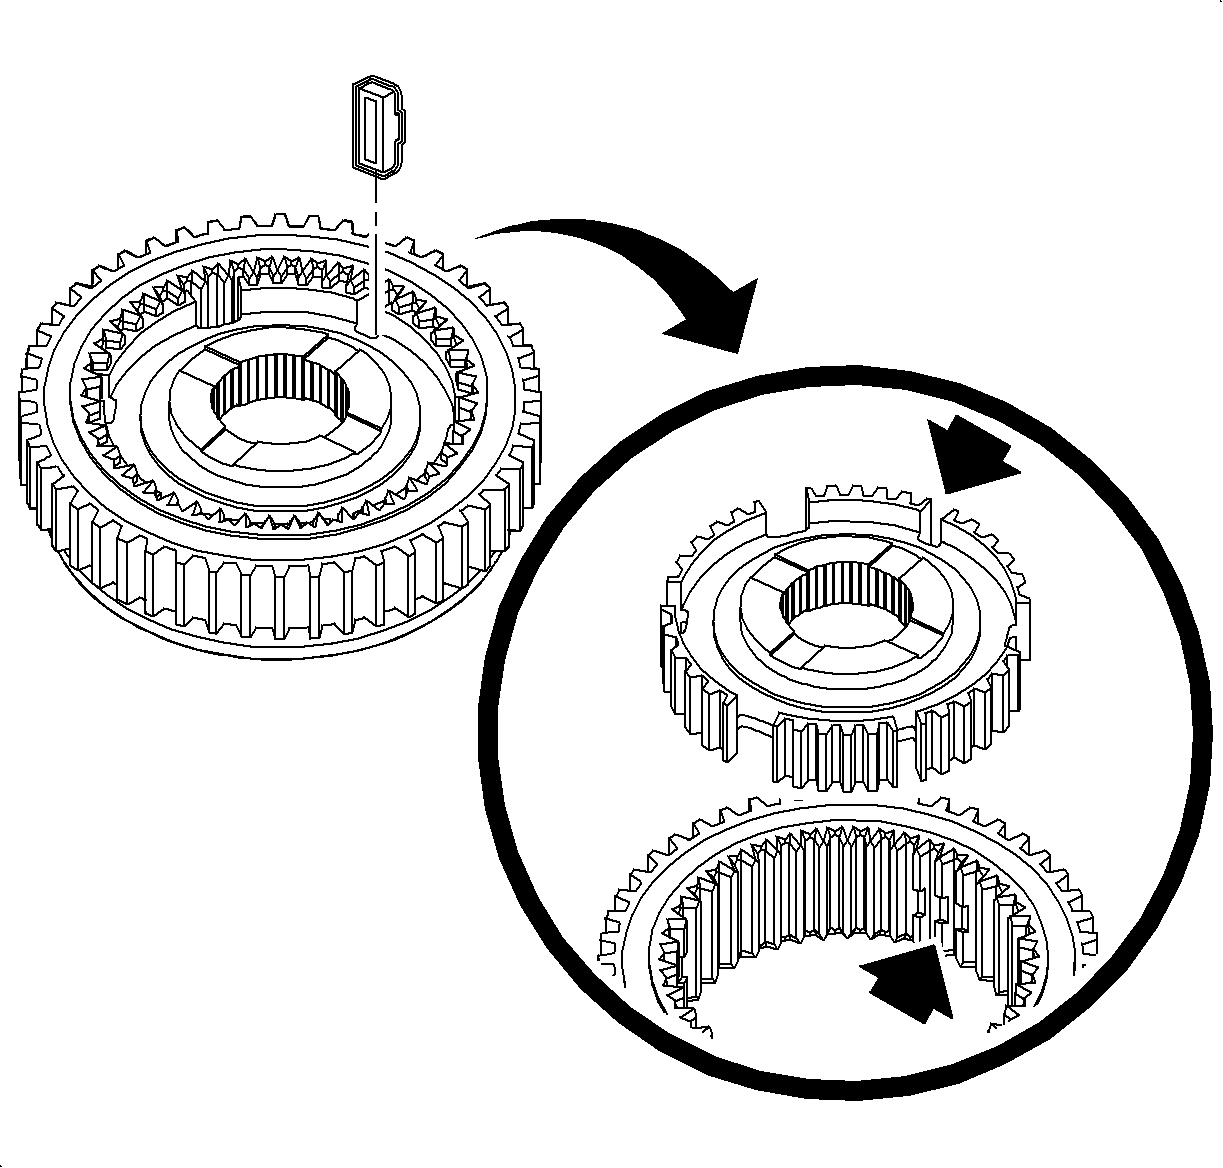
Important: The recesses in the 1st/2nd synchronizer sleeve must align with the narrow gaps in the synchronizer hub.
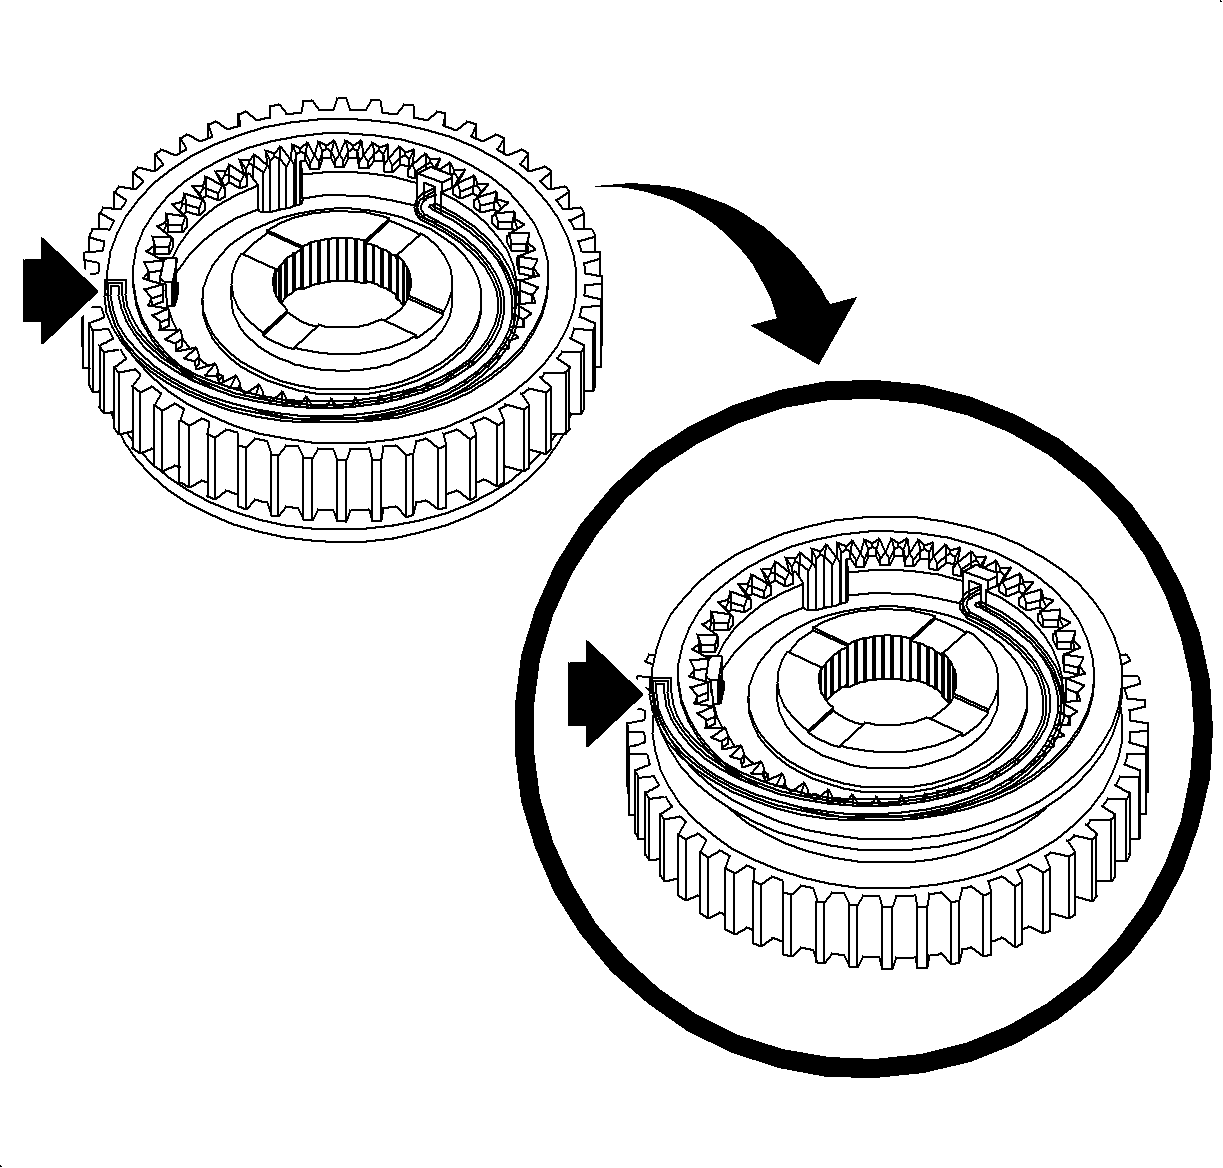
Important: The 1st/2nd synchronizer springs on the top and bottom of hub must hook into the same insert.
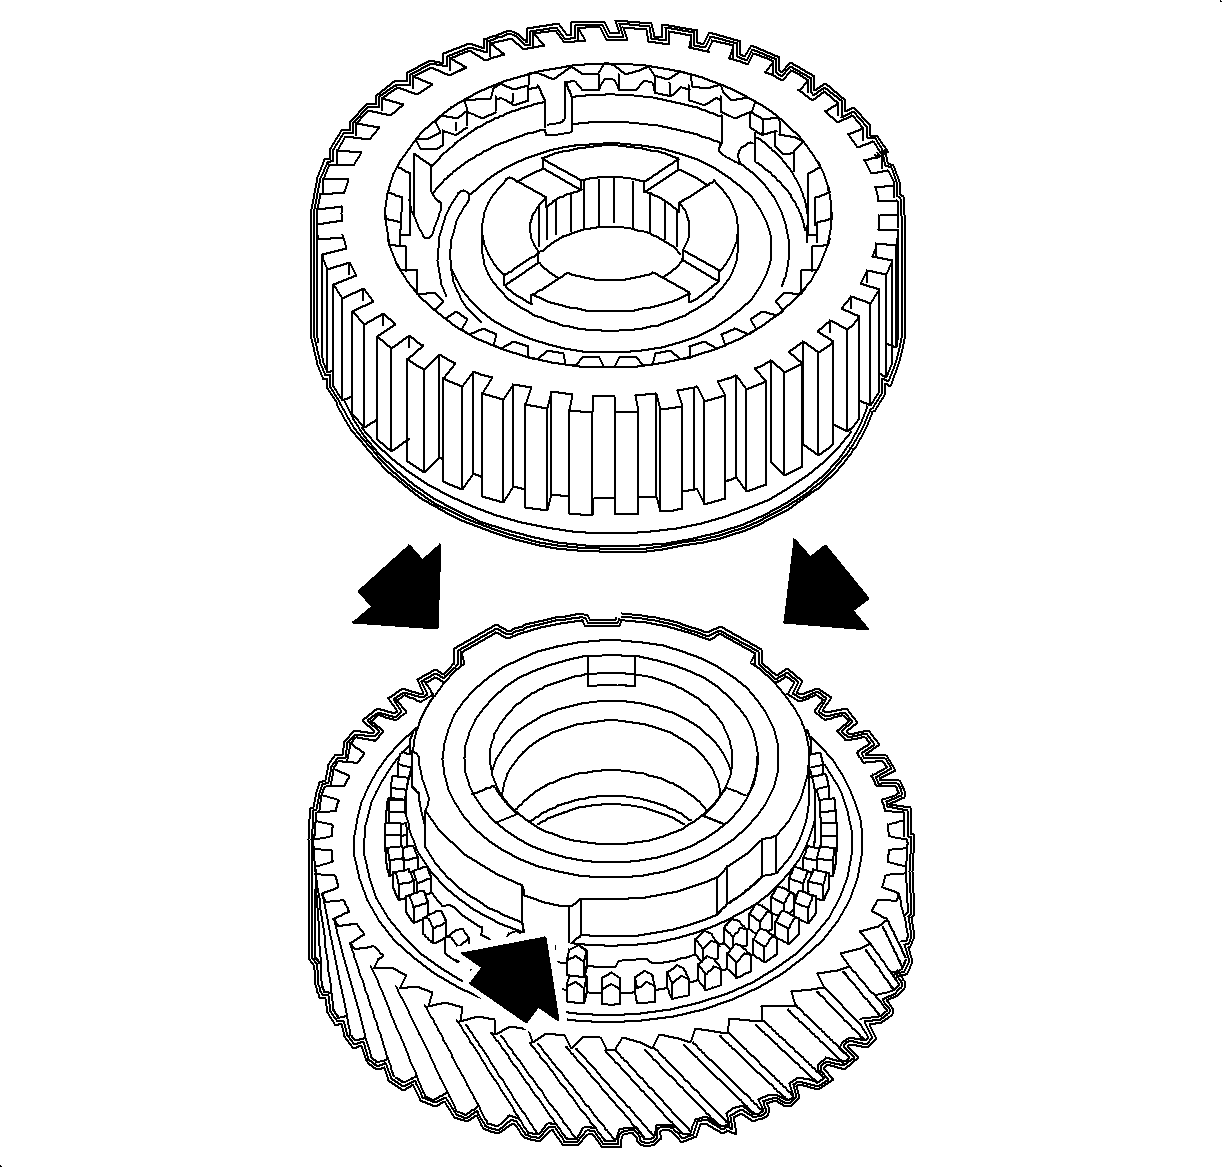
Important: The fork groove on the sleeve faces 1st gear. Align the gaps in the synchronizer hub with the blocking ring lugs.
Tools Required
| • | 87 91 204 Output Shaft Bearing Race Sleeve |
| • | 87 92 202 Output Shaft Bearing Race Sleeve |
| • | 87 92 103 Output Shaft Assembly Tool |
- Press on the output shaft bearing using the 87 92 202 and the 87 91 204 .
- Install the 1st gear synchronizer assembly, blocking ring, and inner and outer cones to the 1st driven gear.
- Install the 1st/2nd synchronizer hub into the synchronizer sleeve. The reference mark on the hub made during disassembly faces up, away from 1st gear, and the fork groove on the sleeve faces down, towards 1st gear.
- Install the 1st/2nd synchronizer inserts into their positions between the hub and sleeve.
- Hook one of the synchronizer springs into a synchronizer insert and route the spring in a clockwise direction. Carefully turn over the 1st/2nd synchronizer hub and sleeve and install the remaining synchronizer spring. The spring should hook into the same insert as the previously installed spring and should also route in a clockwise direction.
- Install the 1st/2nd synchronizer hub and sleeve onto the 1st driven gear and blocking ring.
- Install the 2nd driven gear synchronizer assembly, blocking ring, and inner and outer cones to the 1st/2nd synchronizer hub. Align the blocking ring lugs with gaps in the synchronizer hub.
- Install the 2nd driven gear.
- Install the 2nd driven gear bushing.
- Hold down the 2nd gear and move the synchronizer sleeve up and down to check for proper operation.
- Install the 87 92 103 around 1st gear and the 1st/2nd gear synchronizer sleeve as shown. This tool holds the 1st and 2nd synchronizer assemblies together during transaxle assembly. Secure the tool with a plastic tie.

Important: Lubricate all rotating parts and bearings with manual transaxle lubricant P/N 21018899 during assembly.


Important: The recesses in the 1st/2nd synchronizer sleeve must align with the narrow gaps in the synchronizer hub.

Important: The 1st/2nd synchronizer springs on the top and bottom of hub must hook into the same insert.

Important: The fork groove on the sleeve faces 1st gear. Align the gaps in the synchronizer hub with the blocking ring lugs.


