For 1990-2009 cars only
Removal Procedure
- Disable the SIR system. Refer to SIR Disabling and Enabling.
- Remove the defroster grille. Refer to Defroster Grille Replacement .
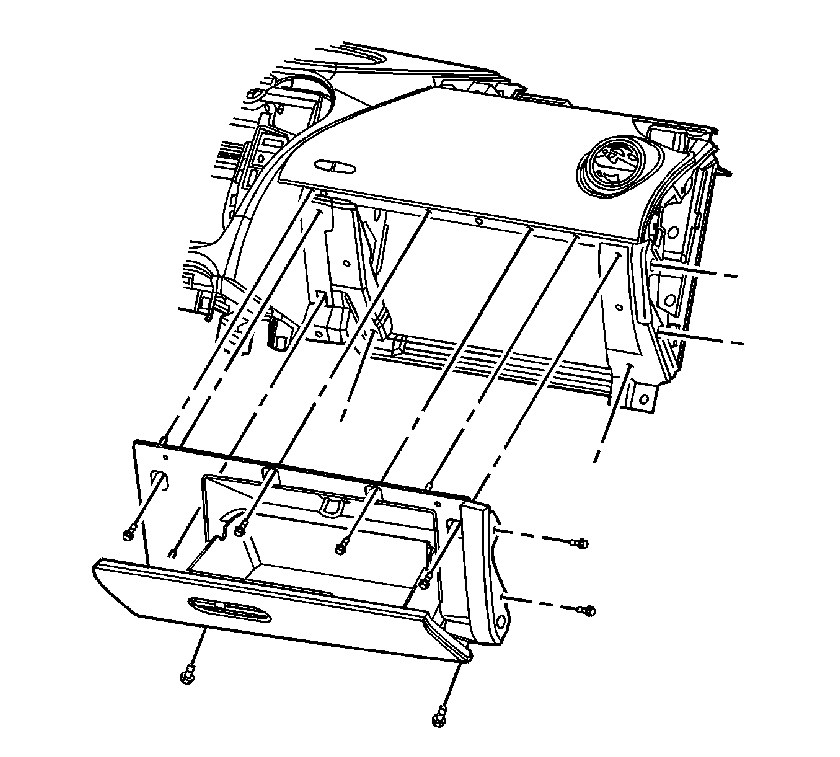
- Open the instrument panel (I/P) compartment.
- Remove the I/P compartment screws.
- Remove the I/P compartment by pulling out on the compartment.
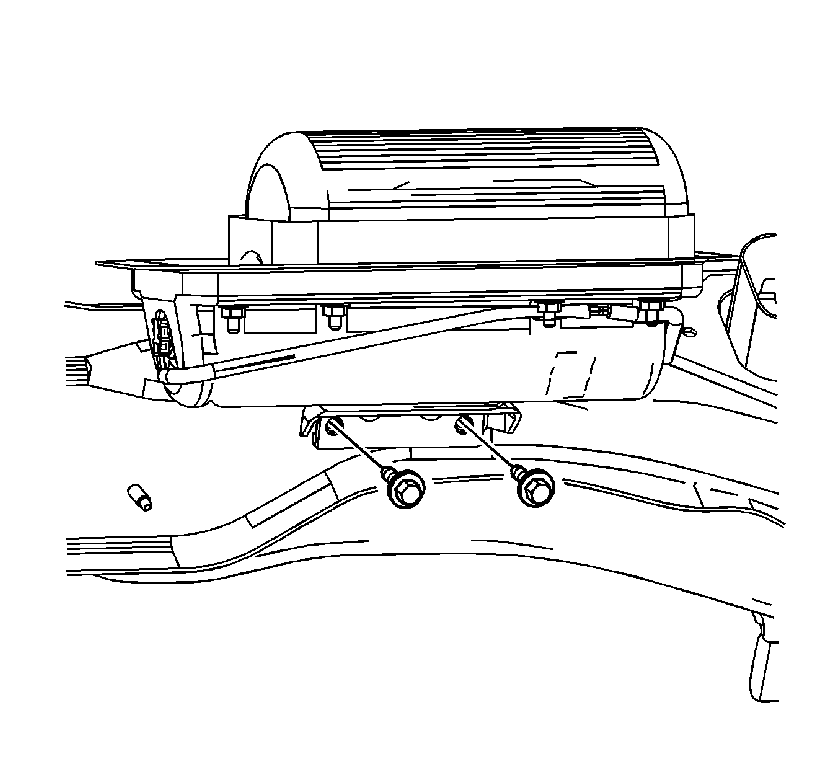
- Remove the bolts from the I/P inflatable restraint module.
- Slide the restraint module down and rearward to allow clearance for the I/P trim panel bracket.
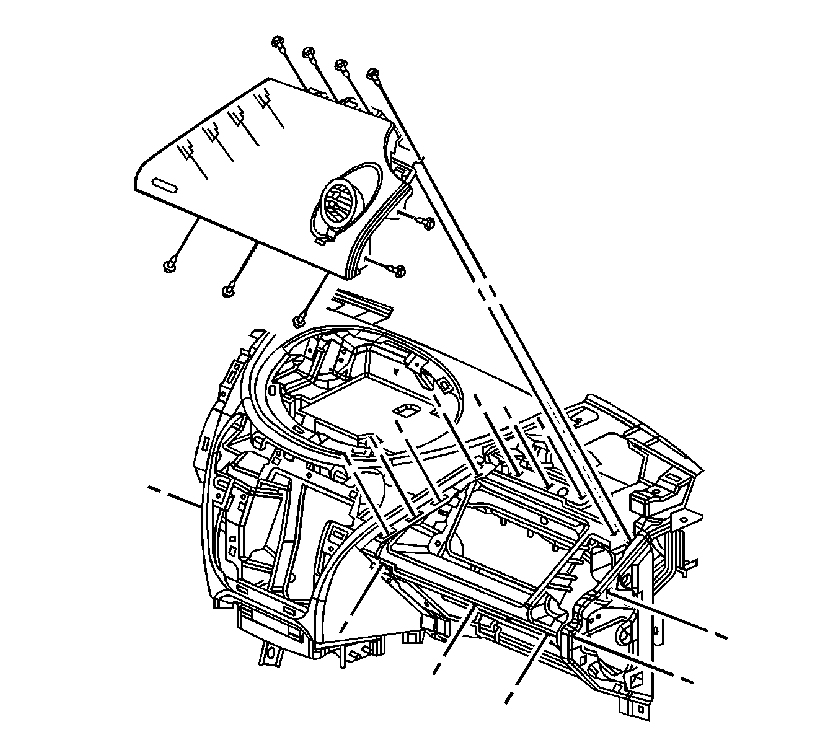
- Remove the I/P trim panel screws.
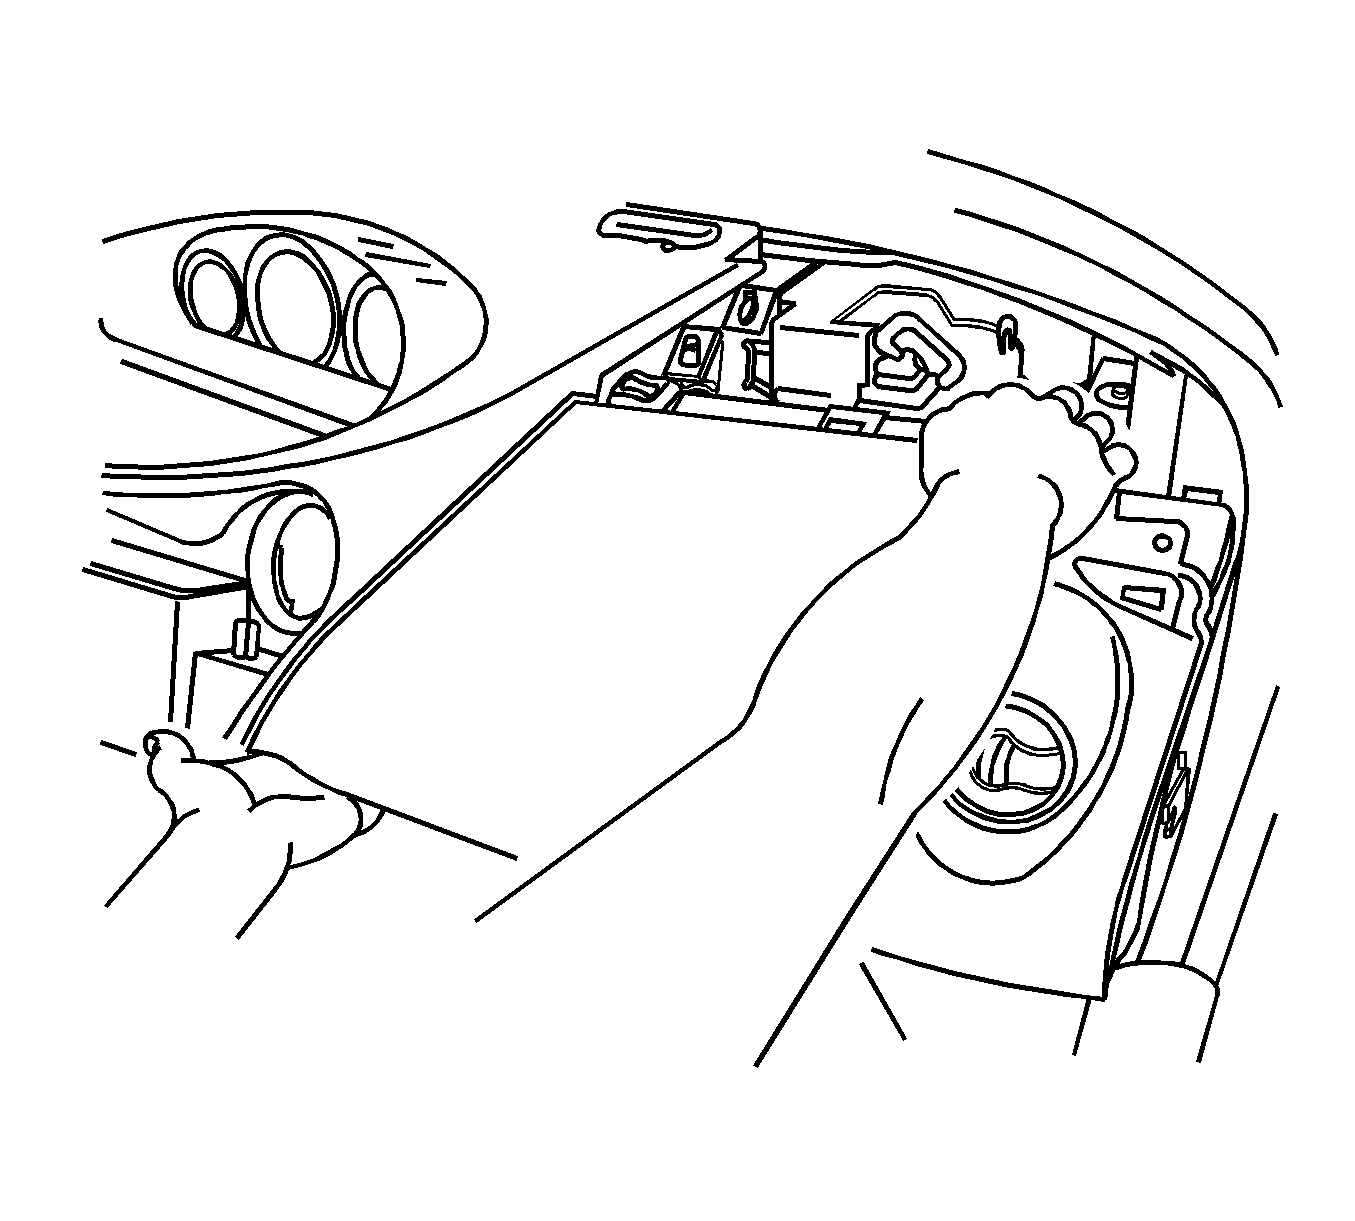
- Push on the upper right corner of the trim panel while lifting up on the lower left corner to release the retaining clips and disengage the trim panel bracket from the I/P retainer.
- Pull up on the I/P trim panel in order to remove.
Caution: Refer to SIR Caution in the Preface section.


Installation Procedure
- Verify that the retaining clips are installed on the I/P trim panel and that no clips remain in the I/P center trim panel.
- Align the locating pins and the retaining clips with the I/P. Push on the I/P trim panel in order to secure.
- Pull up on the upper edge of the trim panel to verify that the bracket is hooked onto the I/P retainer.
- Install the I/P trim panel screws.
- Slide the I/P inflatable restraint module up into position.
- Install the bolts to the restraint module.
- Align the locating pins with the I/P.
- Push in on the I/P compartment in order to secure the compartment in place.
- Install the I/P compartment screws.
- Install the defroster grille. Refer to Defroster Grille Replacement .
- Enable the SIR system. Refer to SIR Disabling and Enabling.

Notice: Refer to Fastener Notice in the Preface section.
Tighten
Tighten the screws to 2.5 N·m (22 lb in).

Tighten
Tighten the bolts to 10 N·m (88 lb in).

Tighten
Tighten the screws to 2.5 N·m (22 lb in).
