For 1990-2009 cars only
Removal Procedure
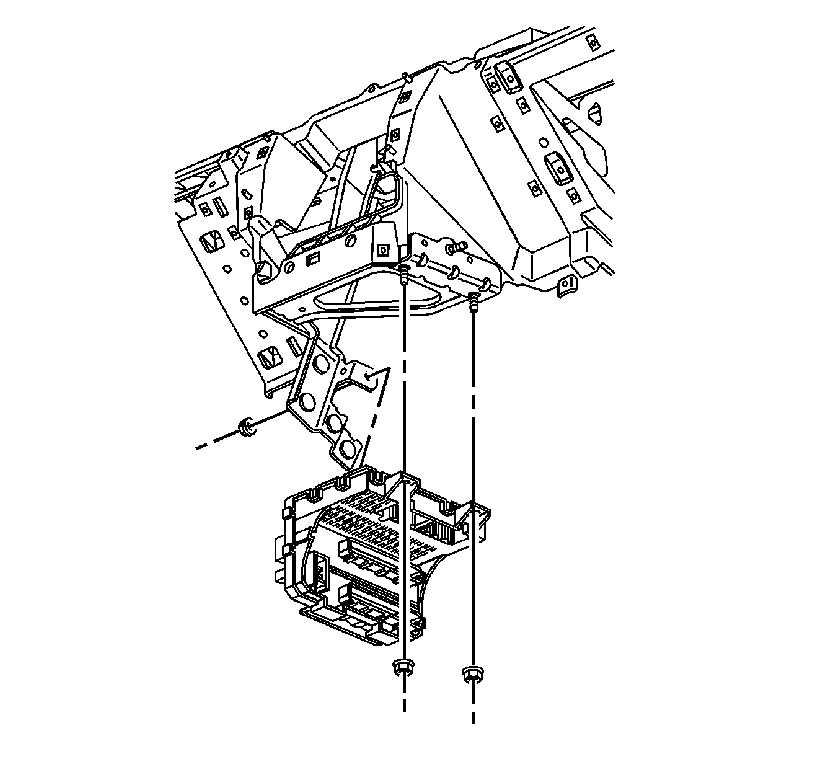
- Remove the body control module (BCM) from the vehicle. Refer to Body Control Module Replacement.
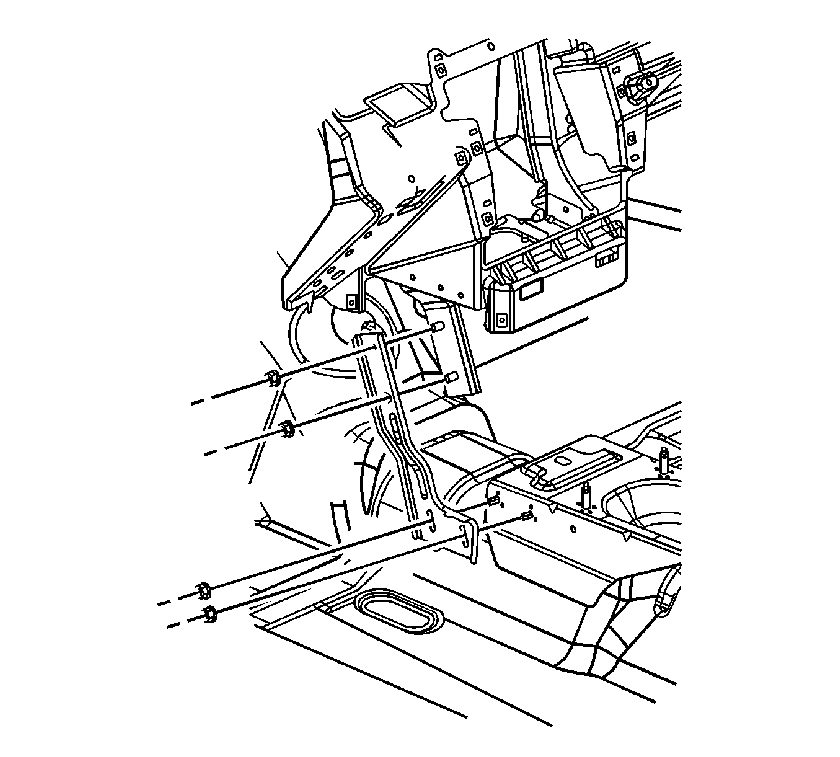
- Pull back the carpet at the bottom of the left instrument panel (I/P) center support bracket and remove the left I/P center support bracket nuts.
- Remove the left I/P center support bracket.
- Remove the accelerator control pedal from the front of the dash and position out of the way. Refer to Accelerator Pedal Position Sensor Replacement .
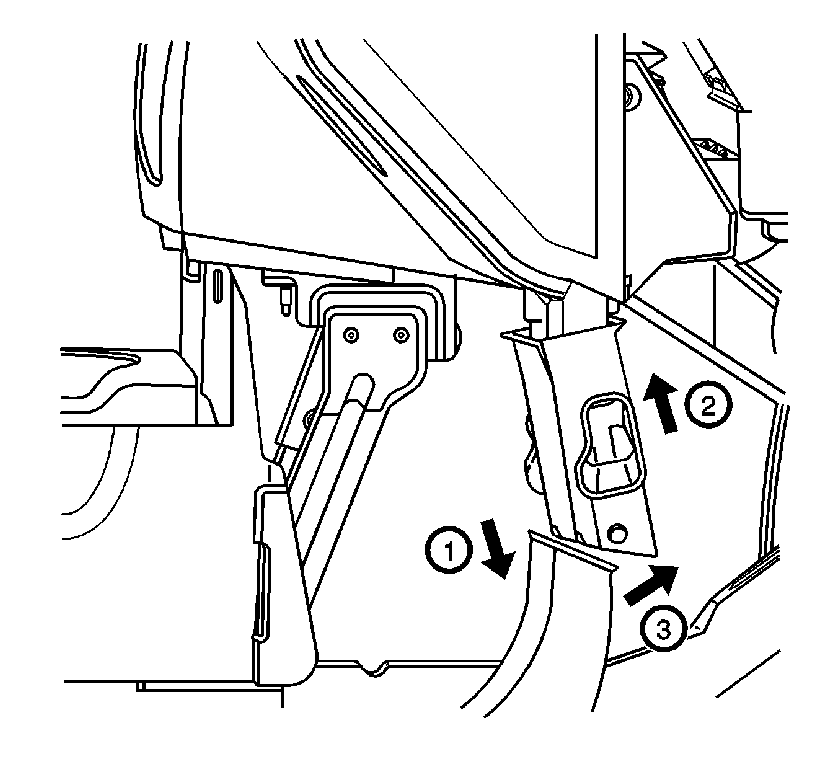
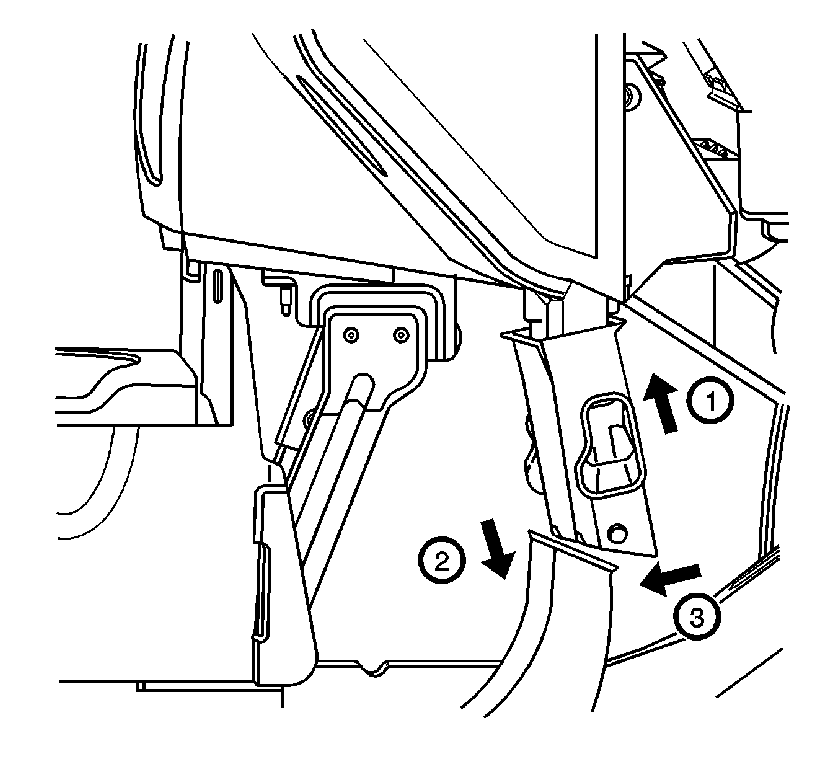
- Raise the center floor outlet duct while pushing the floor ducts down to disengage the ducts.
- Rotate the center floor outlet duct forward in the vehicle and pull down to disengage it from the HVAC module.
- Remove the heater core cover screws.
- Pull the heater core cover down just enough to clear the locating pins from the HVAC module. Slide the heater core cover rearward until the drain tube clears the front of dash. Slide the heater core cover down, rearward, and to the right to remove.
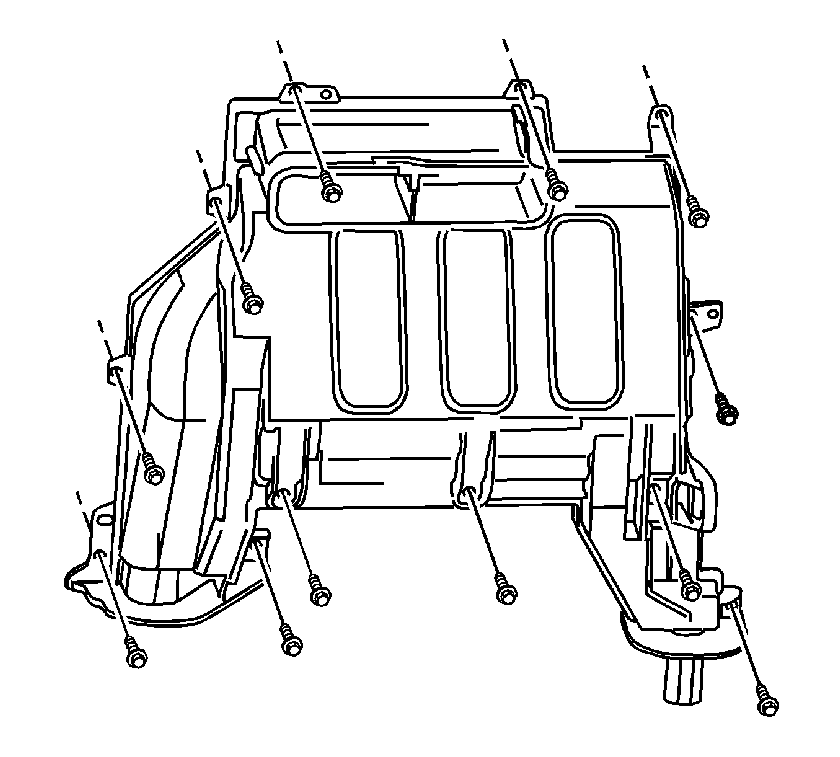
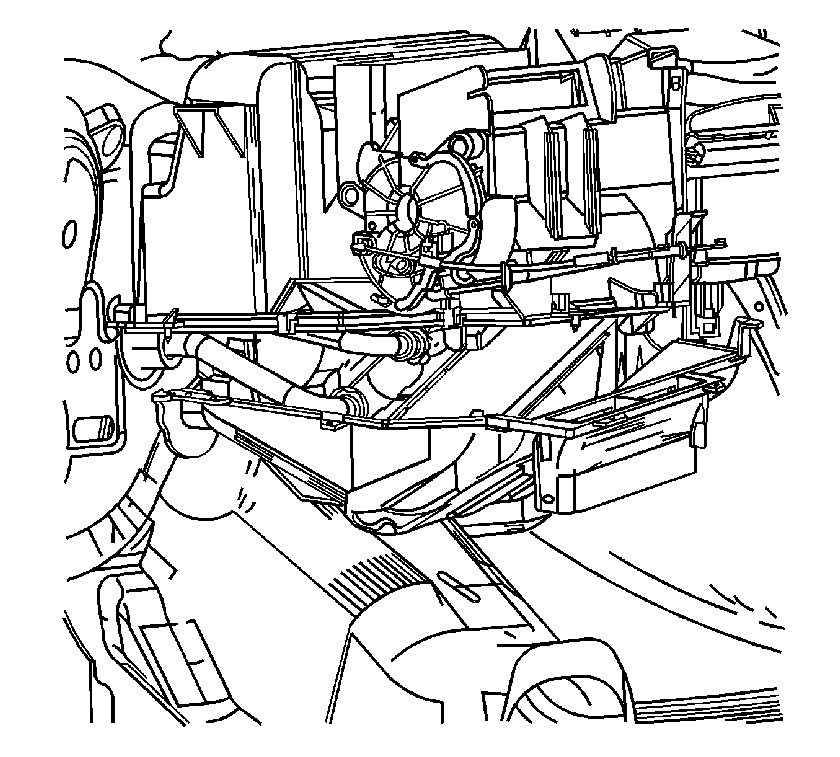
Important: Make certain that all of the heater core cover screws are removed before attempting to remove the heater core cover.
Installation Procedure
- Install a new drain tube seal onto the drain tube.
- Install the heater core cover from the right side. Slide up and forward into position. Align the drain tube with the hole in the front of dash. Raise the heater core cover into position while aligning holes with the locating pins from the HVAC module.
- Install the heater core cover screws.
- Align the center floor duct with the HVAC module.
- Push the center floor duct up while rotating rearward in the vehicle to install on the HVAC module.
- Push down on the floor duct while rotating the center floor outlet ducts to align the ducts.
- Slide the center floor outlet duct down into position in the floor ducts.
- Install the accelerator control pedal. Refer to Accelerator Pedal Position Sensor Replacement .
- Pull back the carpet and place the left center support bracket into position.
- Install the left center support bracket nuts.
- Install the BCM to the vehicle. Refer to Body Control Module Replacement.
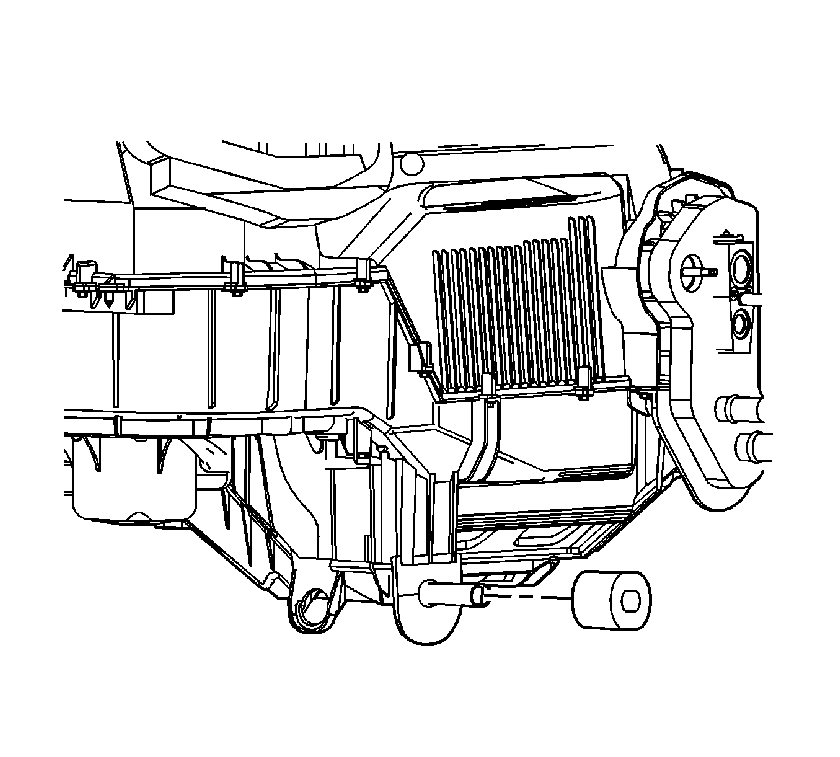

Important: Spraying the heater core seal and the dashmat with a soap and water mixture will ease installation.
Notice: Refer to Fastener Notice in the Preface section.

Important: Make certain that the heater core cover is properly positioned and is fully seated on the HVAC module before installing the screws. Be sure to install all heater core cover screws.
Tighten
Tighten the heater core cover screws to 1.8 N·m (15 lb in).

Tighten
Tighten the left center support bracket nuts to 10 N·m (88 lb in).
