Front Side Door Adjustment Bolt On
- Note the original position of the door lock striker.
- Remove the bolts.
- Remove the striker and the striker shim if present.
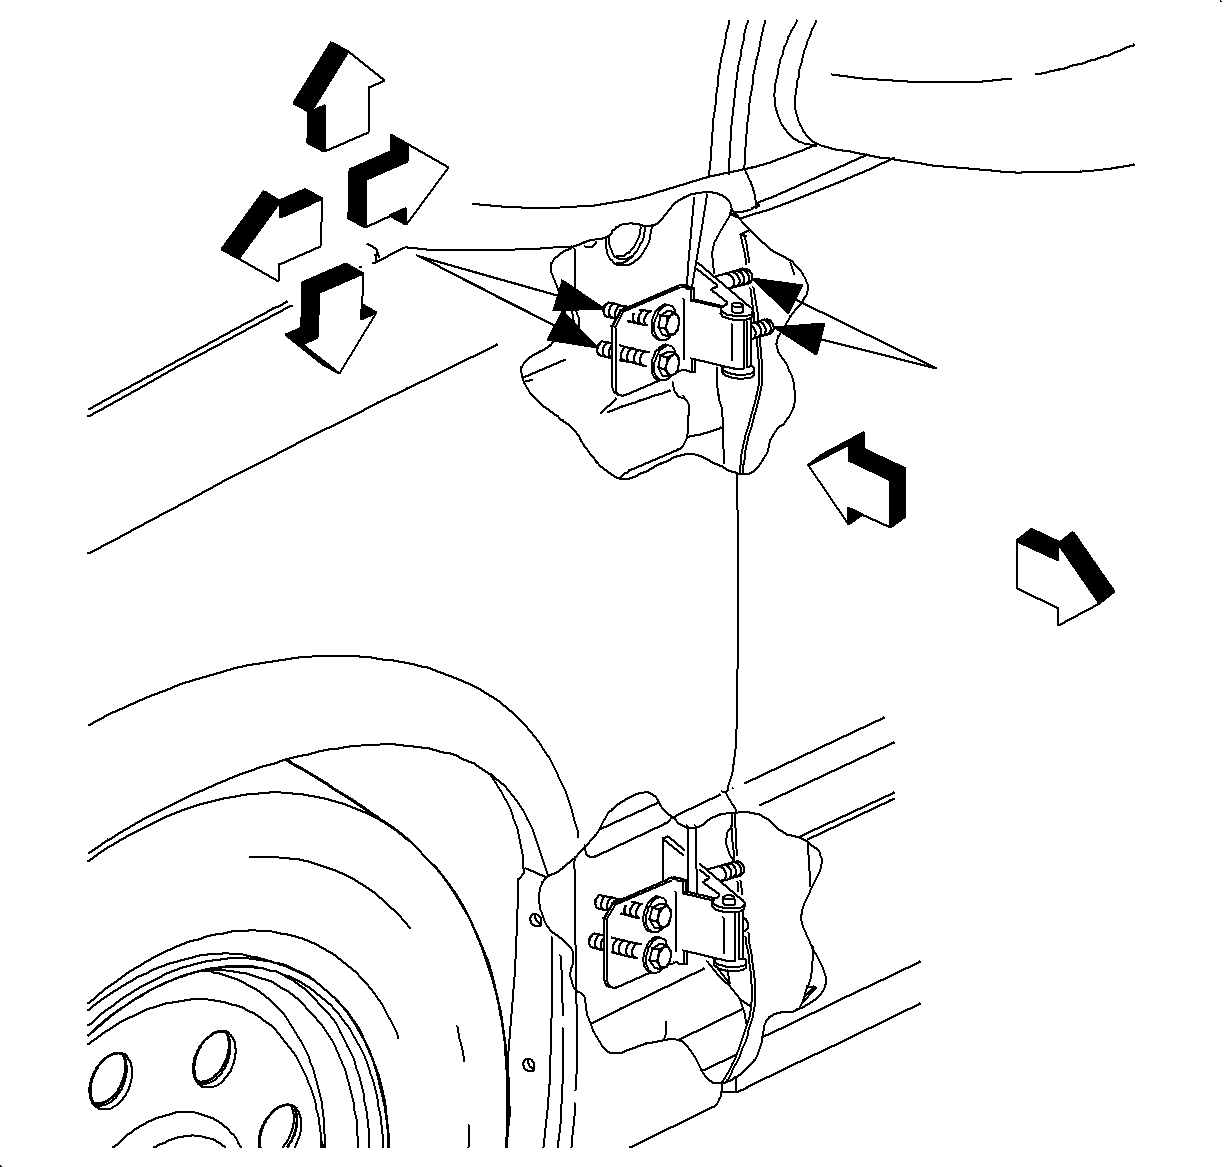
- For up, down, forward, or rearward adjustment, loosen the hinge to hinge pillar bolts.
- For inboard or outboard adjustment, perform the following steps:
- If sufficient door adjustment cannot be obtained, perform the following steps:
- Move the door within the door opening to achieve the best alignment and operation.
- Tighten all of the hinge fasteners that were loosened.
- Install the striker to the approximate proper position. Refer to Front Side Door Lock Striker Replacement .
- Adjust the door striker. Refer to Front Side Door Lock Striker Adjustment .
- Check the seals for proper engagement.
| 5.1. | Remove the front door outer panel. |
| 5.2. | Remove the front door insulator. Refer to Front Side Door Insulator . |
| 5.3. | Loosen the door to hinge nuts and adjust the door as necessary. |
| 6.1. | Remove the front door. Refer to Front Side Door Replacement . |
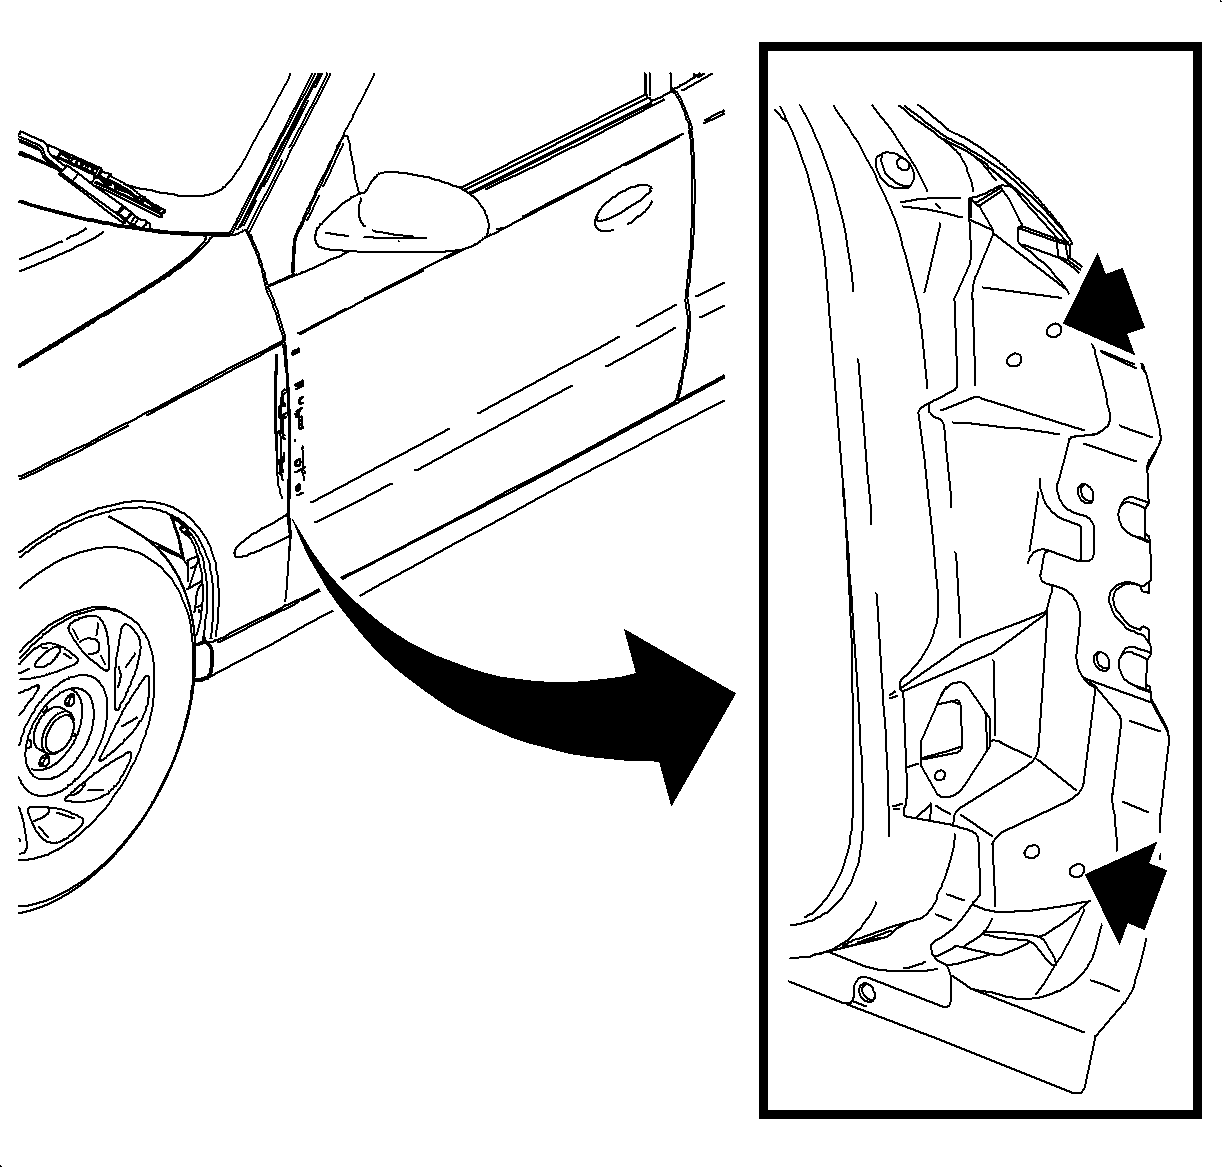
| 6.2. | Enlarge the outer 2 stud openings closest to the door panel with a drill bit to 13 mm (½ in). |
| 6.3. | Apply pinch weld primer to the bare metal areas where holes were drilled. |
| 6.4. | Install the front door. Refer to Front Side Door Replacement . |
Notice: Refer to Fastener Notice in the Preface section.
Tighten
Tighten the hinge fasteners to 30 N·m (22 lb ft).
Tighten
Tighten the door striker fasteners to 20 N·m (15 lb ft).
Front Side Door Adjustment Weld On
Important: Part interchangeability is not allowed between weld on door and bolt on door vehicles. Weld on door vehicles must be serviced with parts designed for weld on door applications. Bolt on door vehicles must be serviced with parts designed for bolt on door applications.
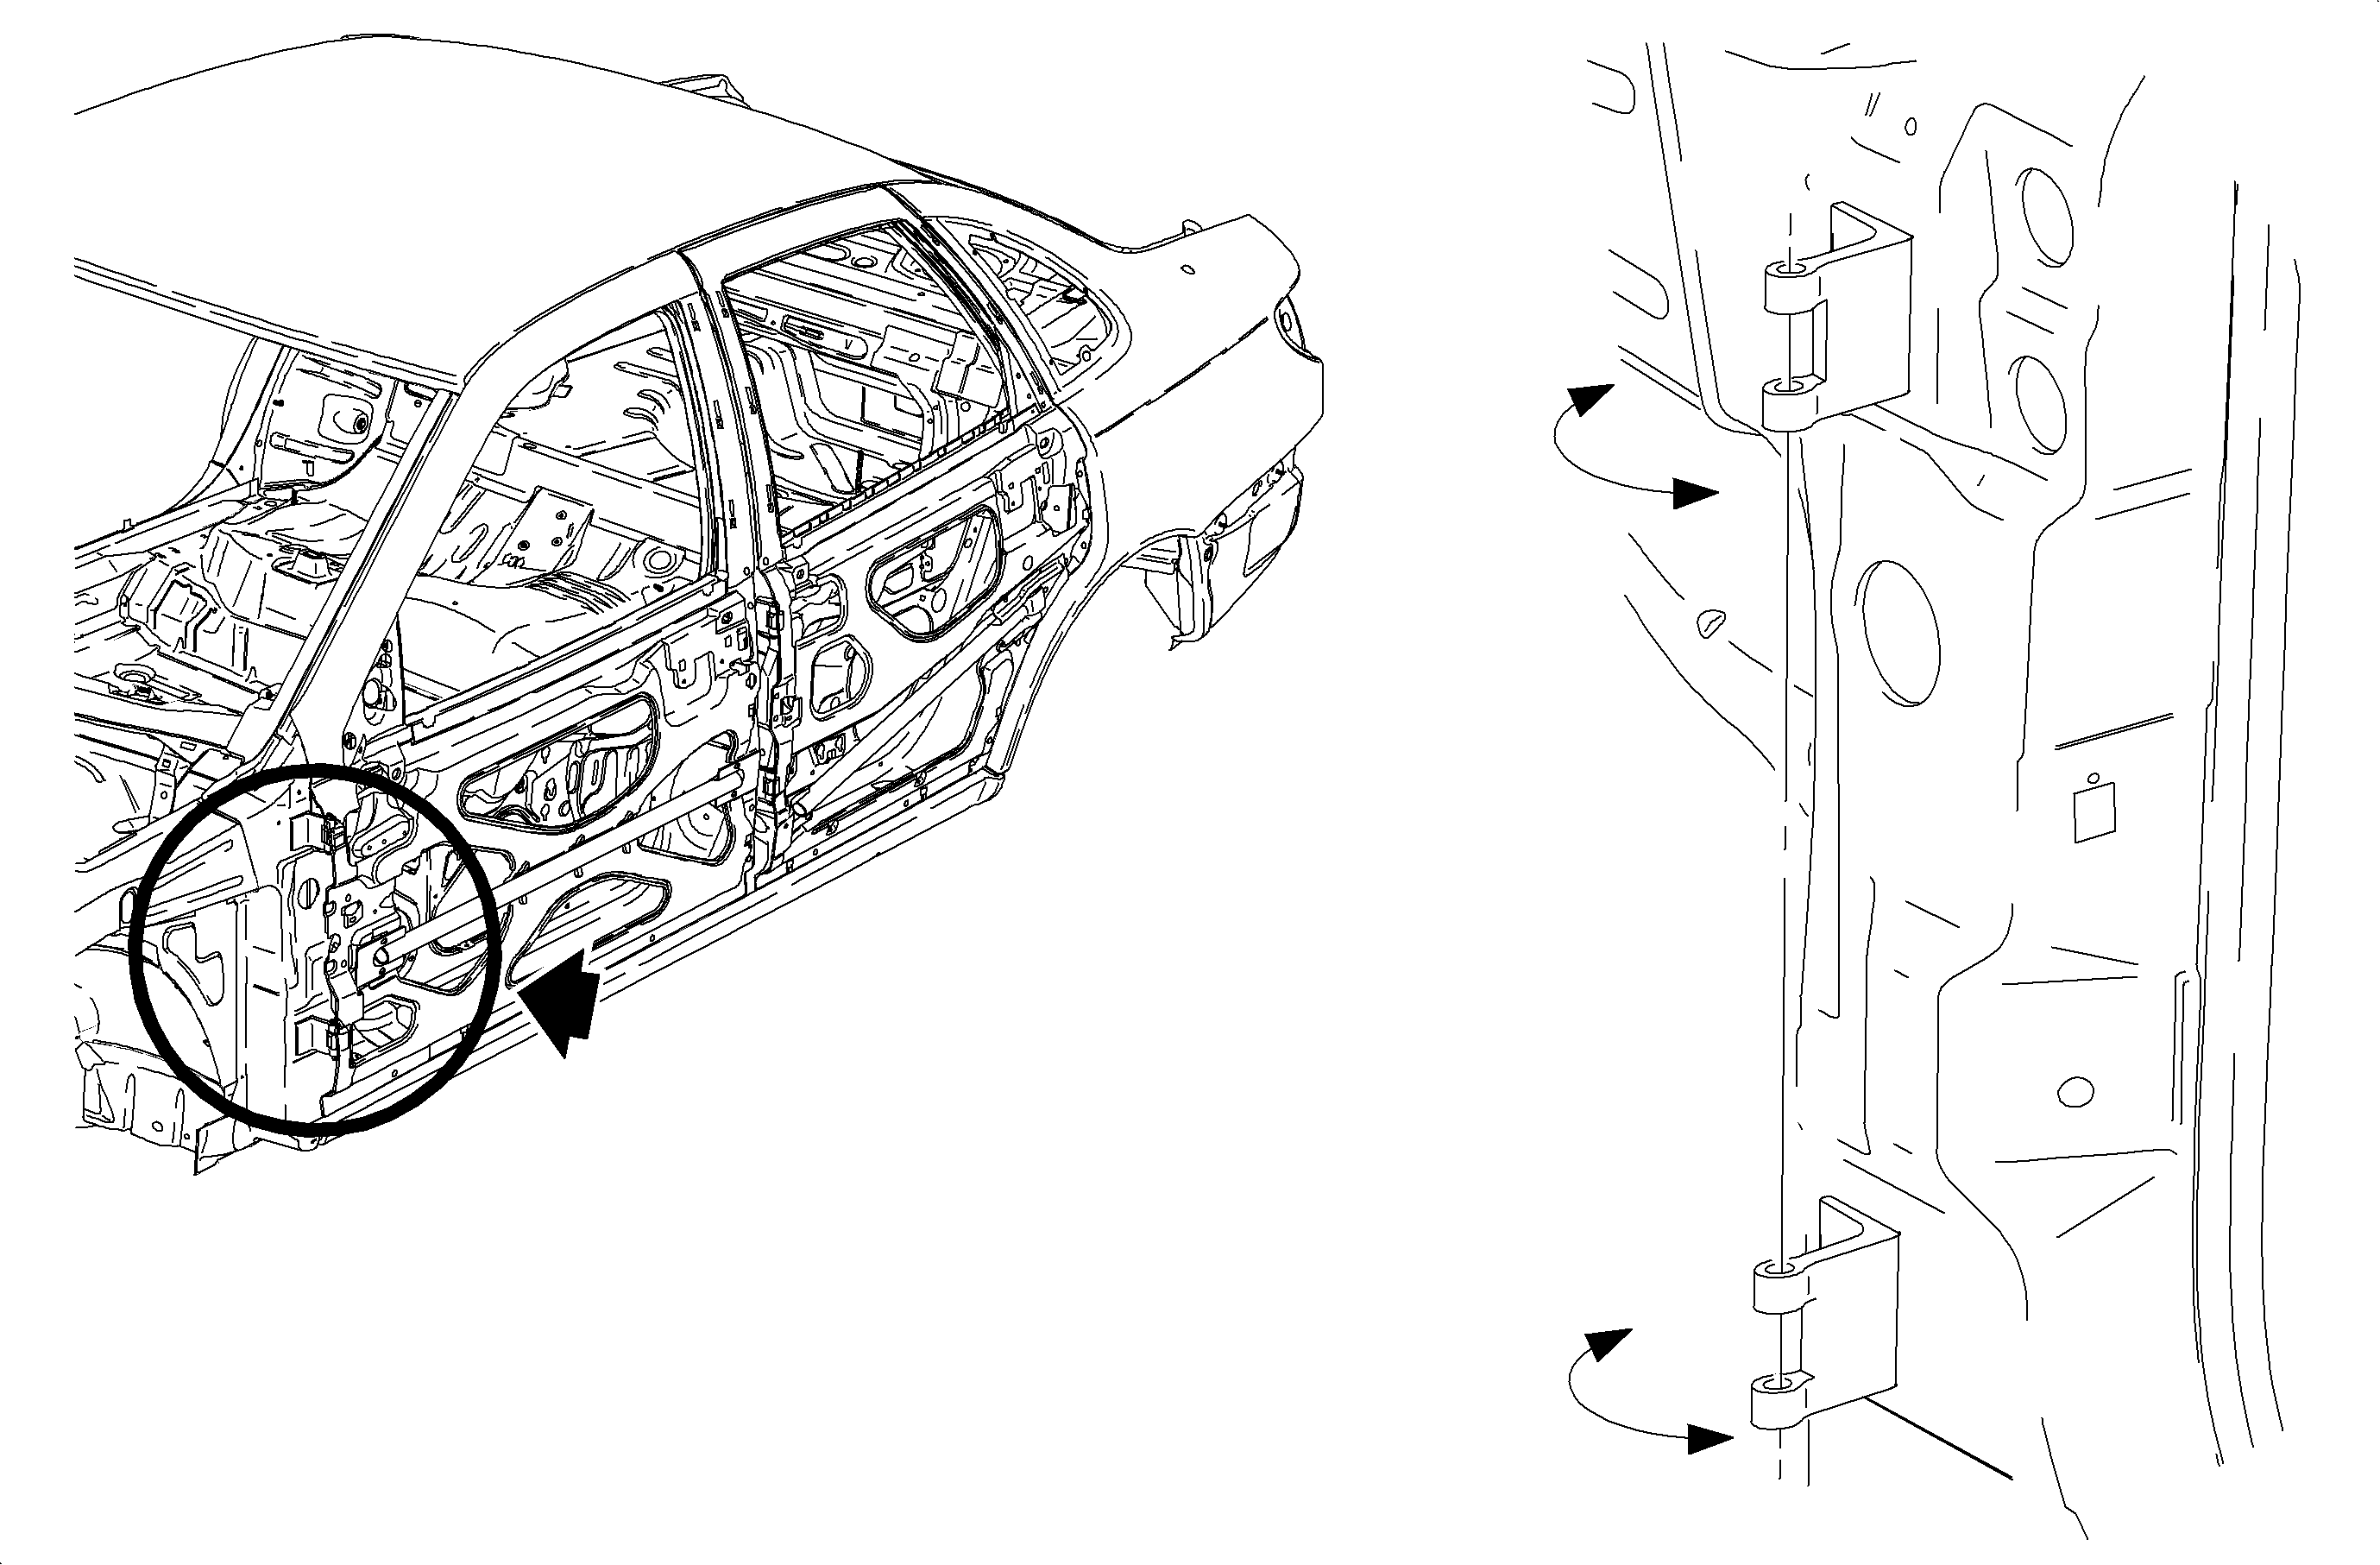
The weld on door system on the L Series vehicles has welded hinges to the body and door sides of the hinge. The pin is a replaceable part. The pin is removable with special service tools released by Saturn.
Important: Do not lift or push down on the door hinge adjustment tool. This would cause the hinge to twist, which could make the hinge difficult to install. It would also accelerate the wear of the hinge pin.
Movement of the door in the opening for alignment is limited to the movement of the door in the fore and aft directions within the door opening. Movement of the door in the crosscar direction is limited to the striker end of the door only. When the hinge is bent, it is necessary to remember do not twist the hinge along the hinge pin axis. Also the hinge pin centerline will travel in an arc when the hinge is bent perpendicular to the hinge pillar surface. It will then be necessary to check function, exterior panel fit and flushness of the exterior panels to the door. Also, be sure to check weather-strip contact and function to the door for proper sealing when the adjustment process is complete.
To move the door forward or rearward in the door opening, adjust both upper and lower hinges in the direction necessary. To move the rear edge of the door upward or downward, adjust only one of the hinges. This will also make the door travel in the opening in an arc in relation to the pillar to where the body side of the hinge is welded to the body.
Hinge tool J 44007 is used to align the door hinge to the hinge pin centerlines and for alignment to the respective hinge.
When necessary to increase or decrease weather-strip contact to the door, it is possible to adjust the pinch weld flange upon which the weather-strip is mounded in the appropriate direction. Be sure to verify sealing of the weather-strip for wind noise and water leaks after adjustment.
