Drivers Side 6 way Power Seat Inoperative and 20A Power Seat Fuse Open in (RIPFB)

| Subject: | Driver's Side 6-Way Power Seat Inoperative and 20A Power Seat Fuse Open in Right Instrument Panel Fuse Block (RIPFB) (Repair Damage Wires Within Seat Assembly) Due to addition of the 2001 model year under Models Affected, this bulletin has been revised and supersedes bulletin 00-T-30, which should be discarded. |
| Models: | All 2000 - 2001 Saturn L-Series Sedans and Wagons equipped with 6-way power driver's seat (RPO AGI) |
Condition
Some customers may comment that the driver's side 6-way power seat functions are inoperative.
Cause
This condition may be caused by chafing of the power seat harness within the seat assembly.
Correction
After all appropriate diagnostic steps have been followed, refer to the following procedure to identify and repair damaged wires.
Procedure
- Disconnect negative battery cable.
- Remove driver's side seat. (Refer to "Front Seat" removal procedure in the Seats section of the 2001 L-Series Body/Electrical Volume II Service Manual.)
- Inspect the power seat wire harness where attached to the seat frame with metal edge clips. The clips may damage the wires leading to the recliner motor.
- Remove inner recliner cover fasteners and remove cover.
- Inspect the following area for wire damage.
- Remove seat back cover. (Refer to "Front Seat Back Frame/Pad/Cover" removal procedure in the Seats section of the 2001 L-Series Body/Electrical Volume II Service Manual.
- Inspect for wire damage in the following area.
- Inspect weld for the recliner motor mount bushing to seat frame.
- Cut damage wire(s) at location of chafe or pinch.
- Remove insulation from both ends of cut wire. Recommended strip length is 9.5mm (3/8 in). Caution must be used when stripping wire to prevent cutting wire stands. Locate new splice a minimum of 40MM (1.5in.) from other splices.
- Using Saturn approved crimp and seal splice sleeve (found in special tools kit J44020) position stripped ends of wires in sleeve until wires hit stop.
- Hand crimp splice sleeve using appropriate crimping tool. Gently tug on wires after crimping to ensure they are secure.
- Apply heat using Ultratourch® (or equivalent) device, heating to 175° C (347° F) until glue flows around edges of sleeve.
- Check repaired wire(s) continuity and verify proper repair.
- Tape wiring harness with electrical tape to prevent the possibility of future chafing.
- Install seat back cover. (Refer to "Front Seat Back/Frame/Pad/Cover" installation procedure in the Seats section of the 2001 L-Series Body/Electrical Volume II Service Manual.)
- Install inner recliner cover and fasteners.
- Install driver's side seat. (Refer to "Front Seat" installation procedure in the Seats section of the 2001 L-Series Body/Electrical Volume II Service Manual.)
- Connect negative battery cable.
- Verify that all seat functions operate as designed.
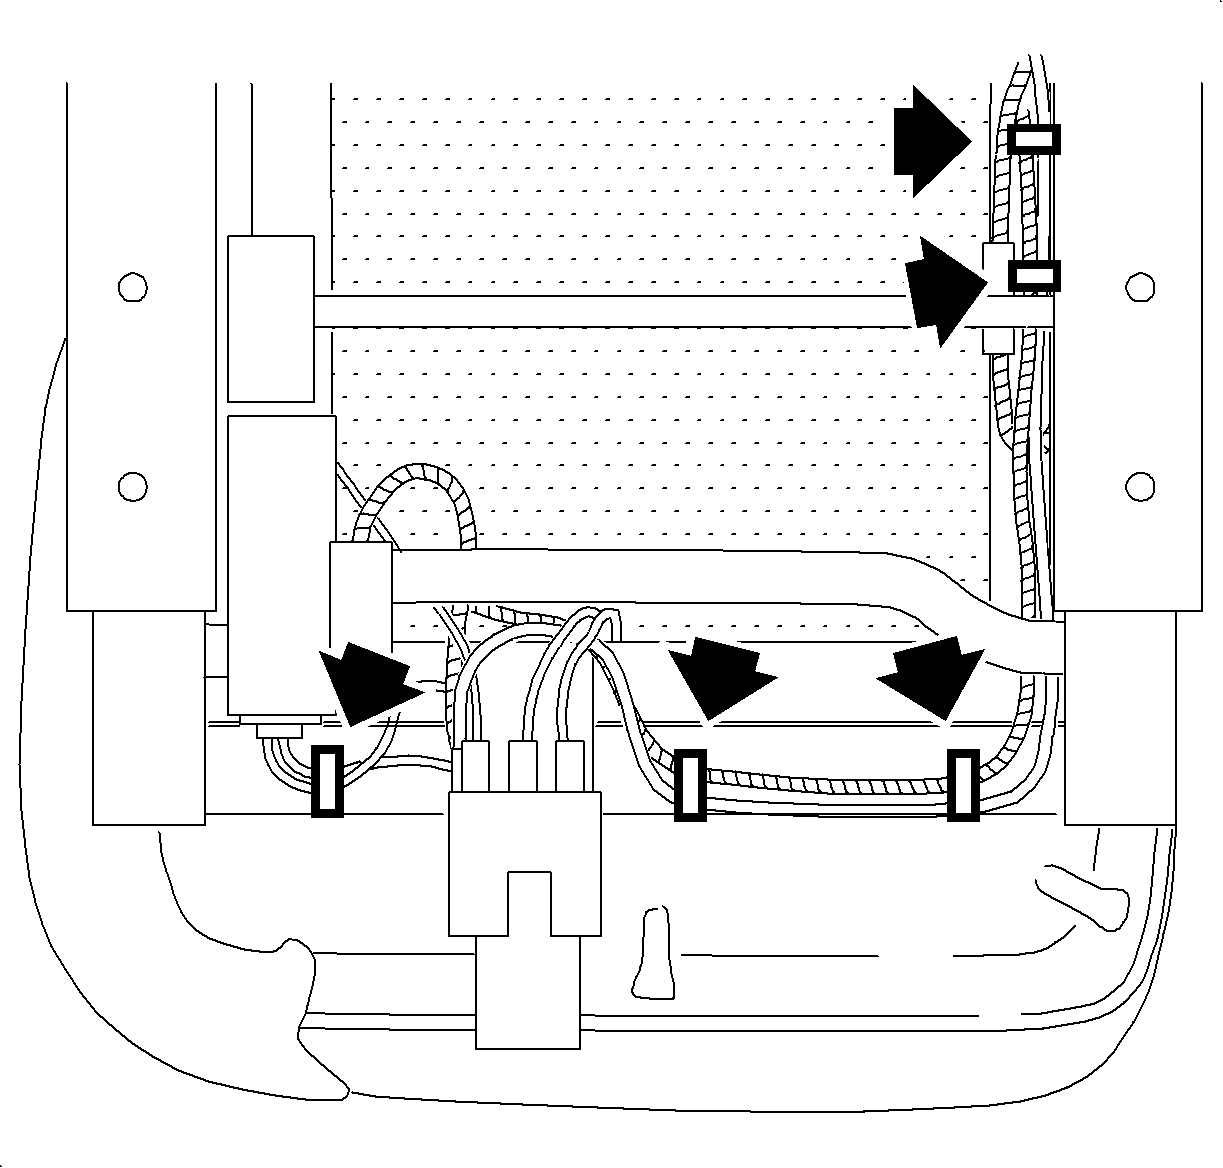
| • | If no wires damage is present in this location proceed to step 4. |
| • | If wire damage is present refer to wire repair procedure in this bulletin. |
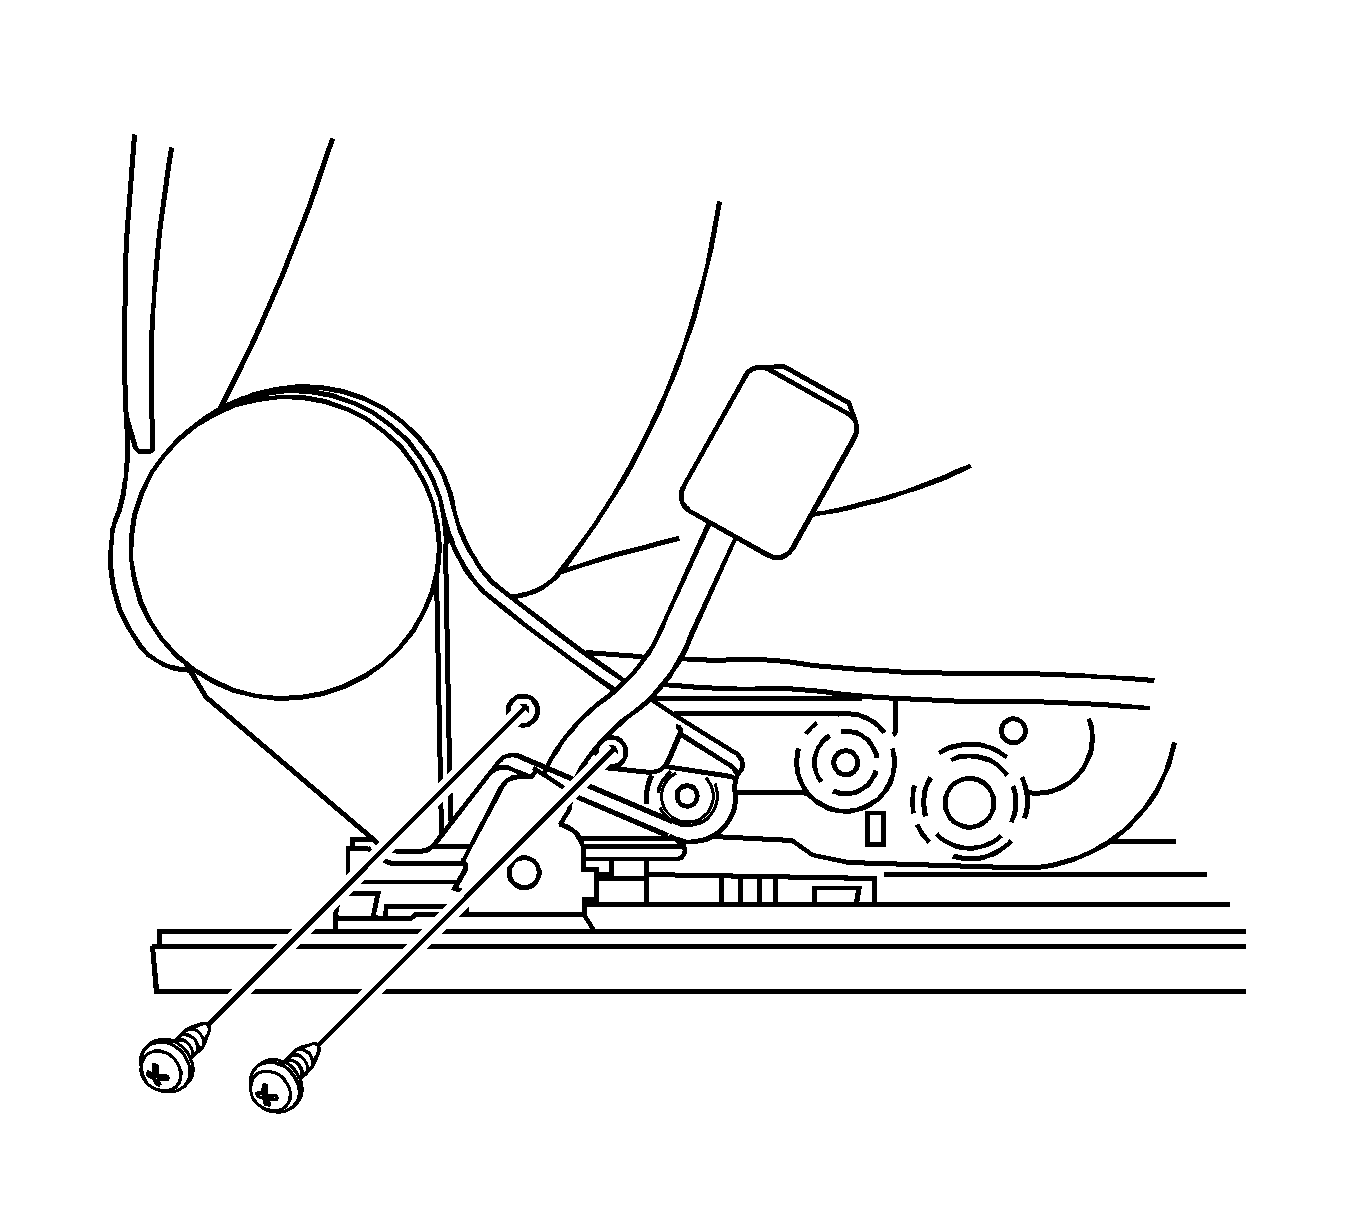
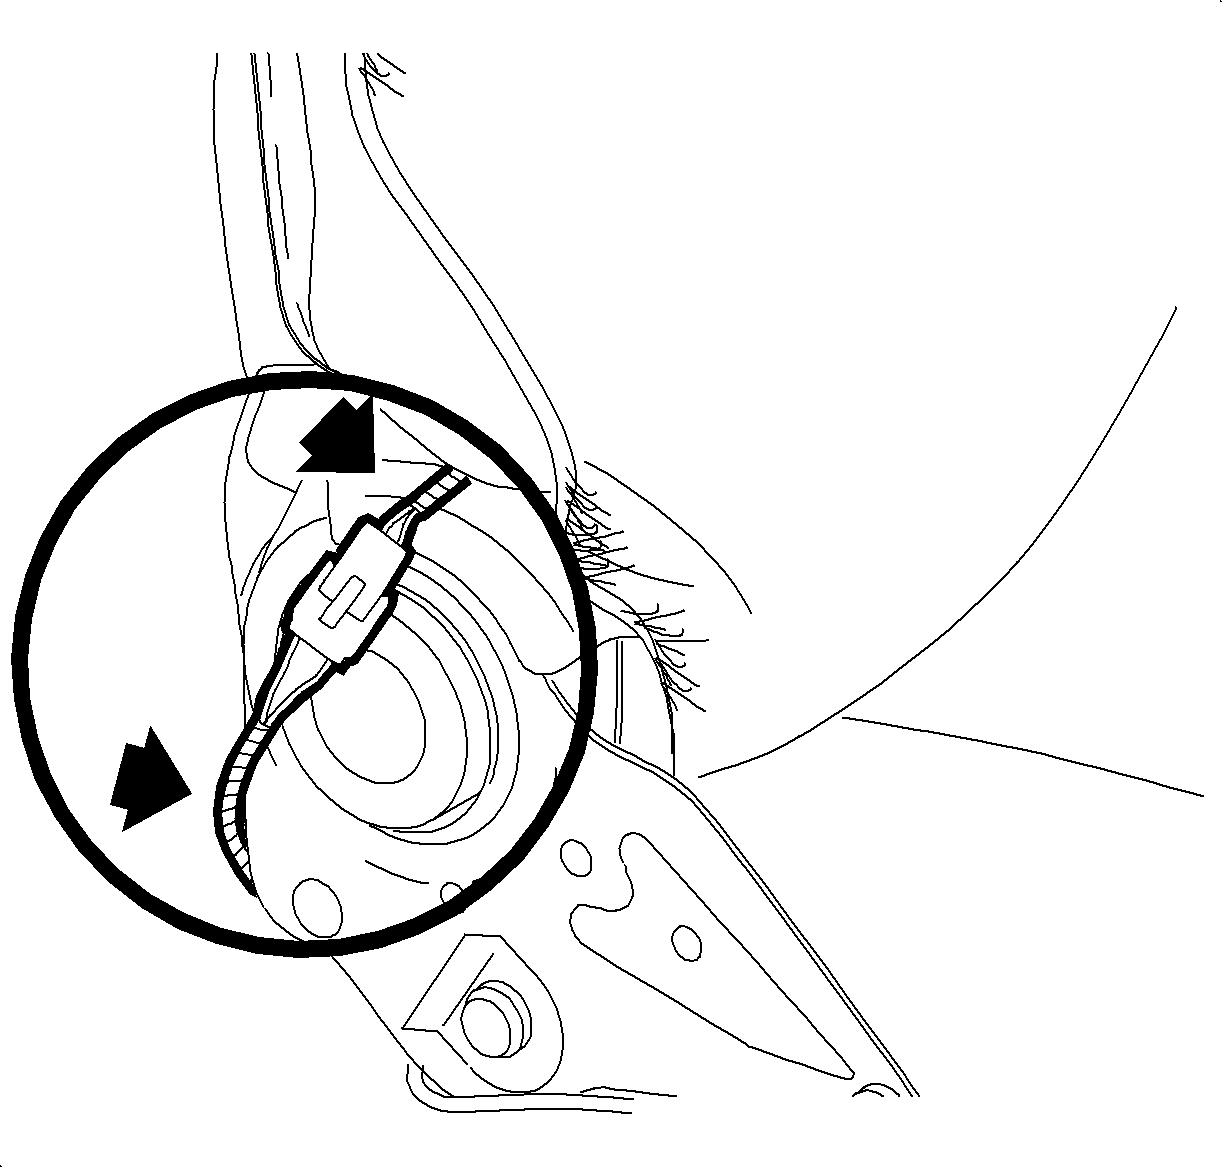
| • | If wire damage is present refer to wire repair procedure in this bulletin. |
| • | If no wire damage is present proceed to step 6. |
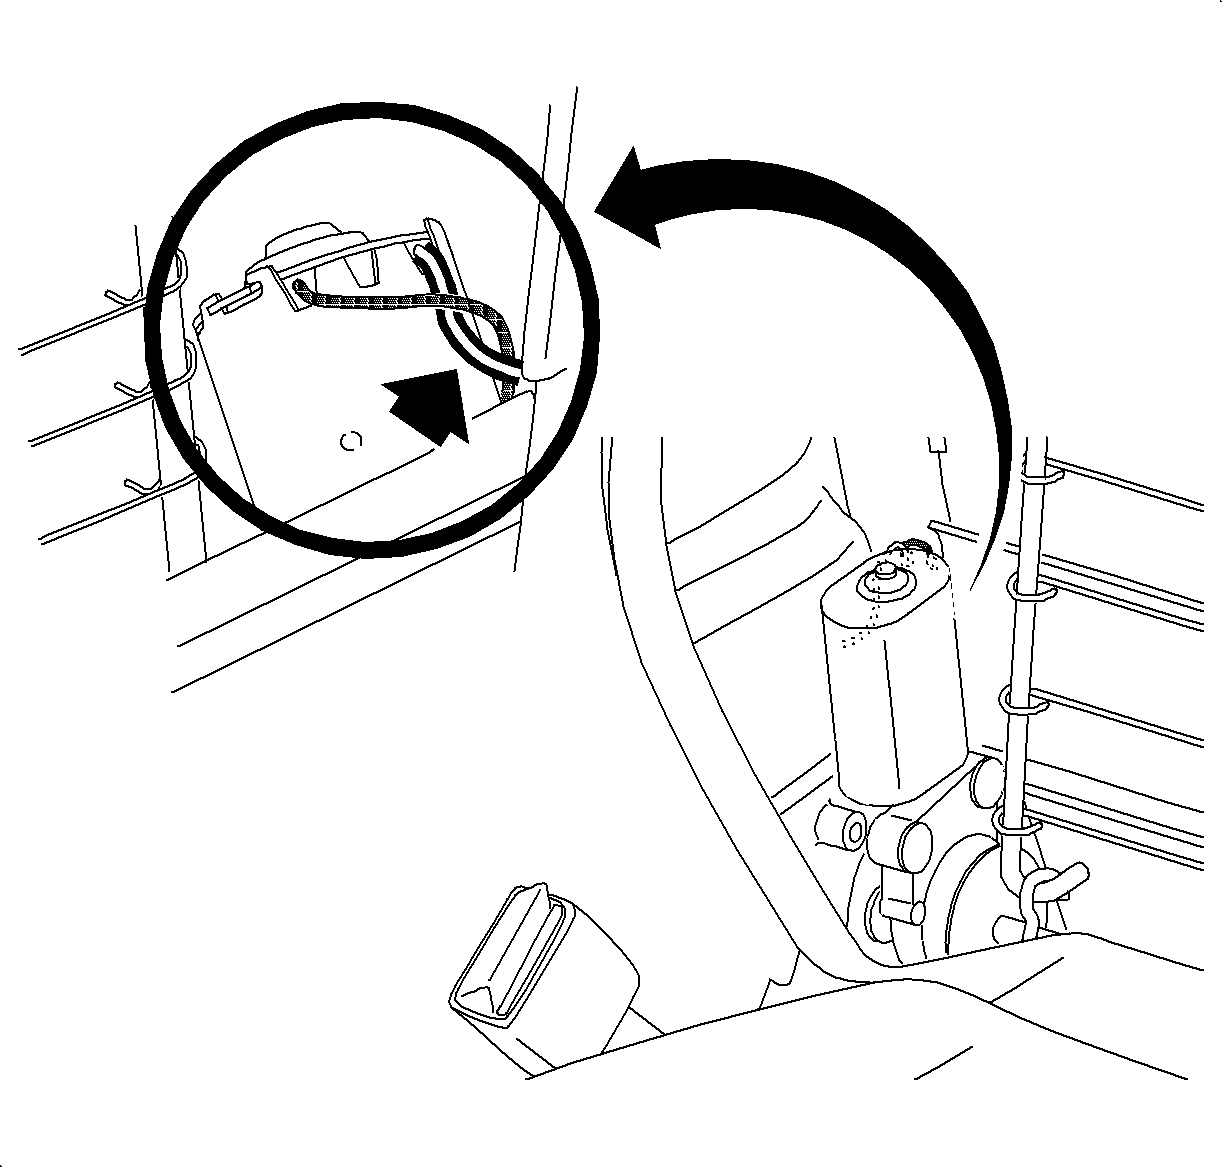
| • | If wire damage is present and vehicle VIN is YY605292 or before proceed to step 8. |
| • | If wire damage is present and vehicle VIN is YY605293 or later skip to wire repair procedure in this bulletin. |
| • | If no wire damage is present. (Refer to "Diagnostic" in the Seats section of the 2001 L-Series section of the Body/Electrical Volume II Service Manual.) |
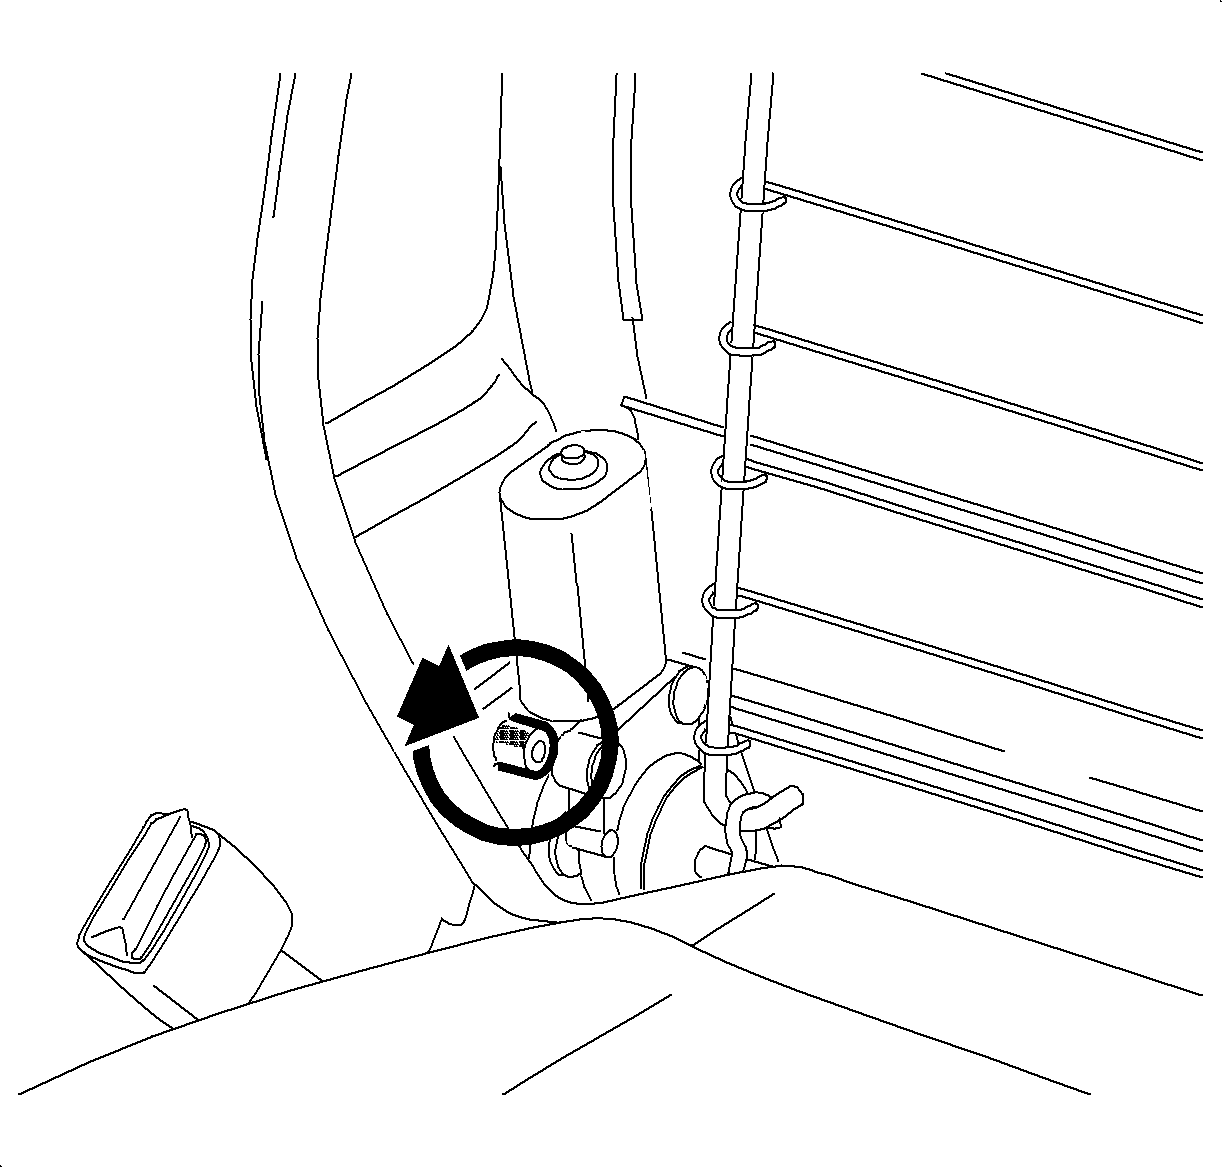
| • | If weld is broke seat back frame replacement is necessary. (Refer to "Front Seat Back Frame/Pad/Cover" removal procedure in the Seats section of the 2001 L-Series Body/Electrical Volume II Service Manual. |
| • | If weld is intact continue to wire repair procedure in this bulletin. |
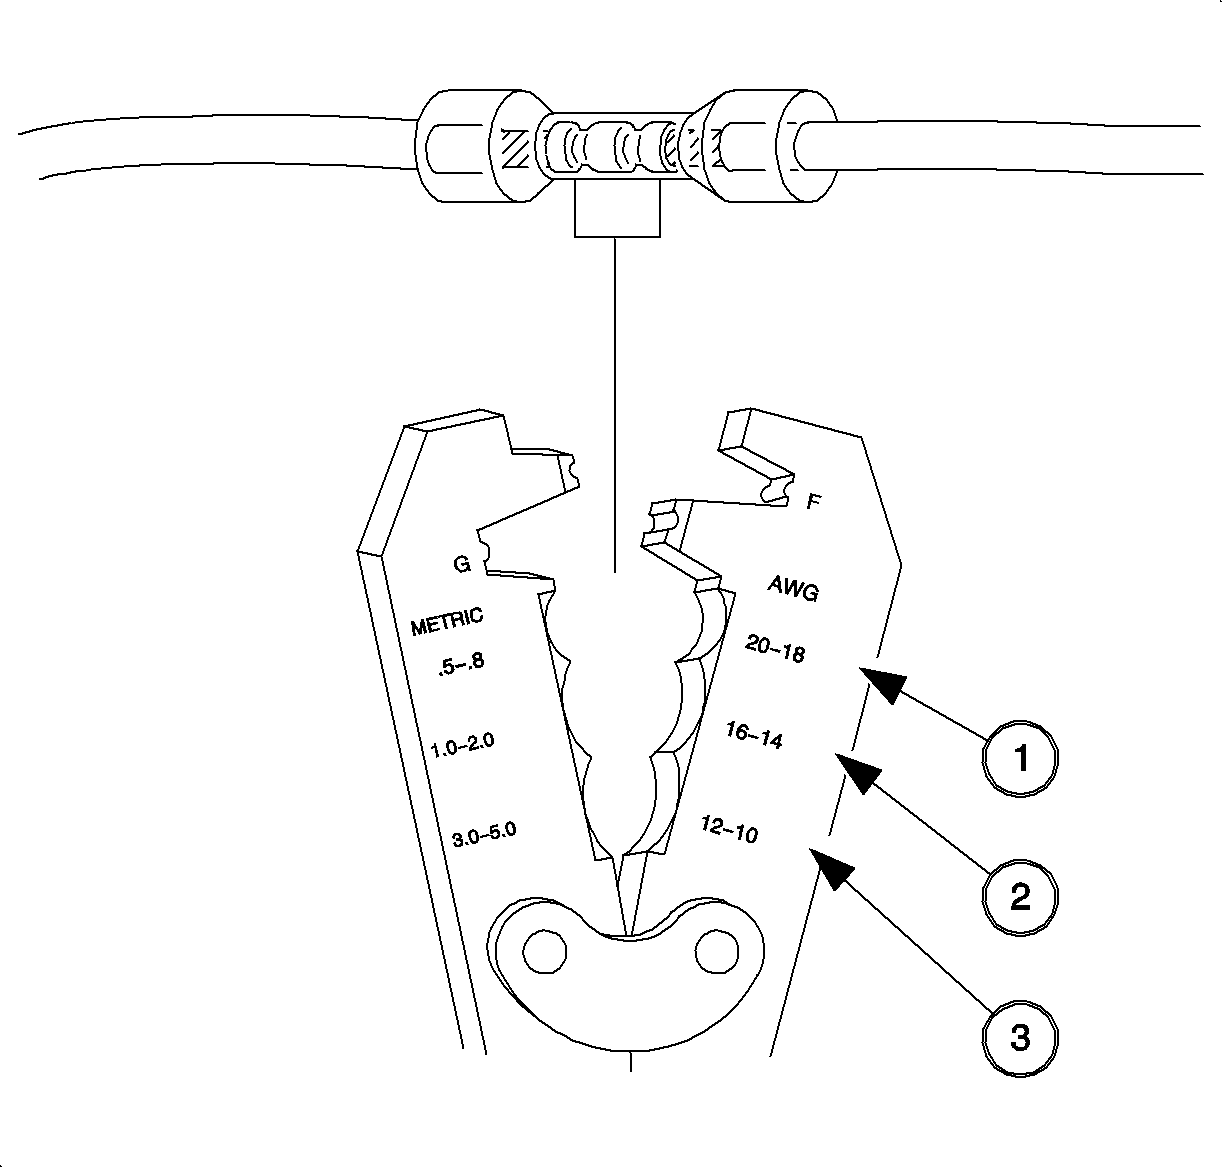
Important: With wiring used in Saturn vehicles, it is recommended that approved Packard Crimp and Seal Splice Sleeves (or equivalent) be used.
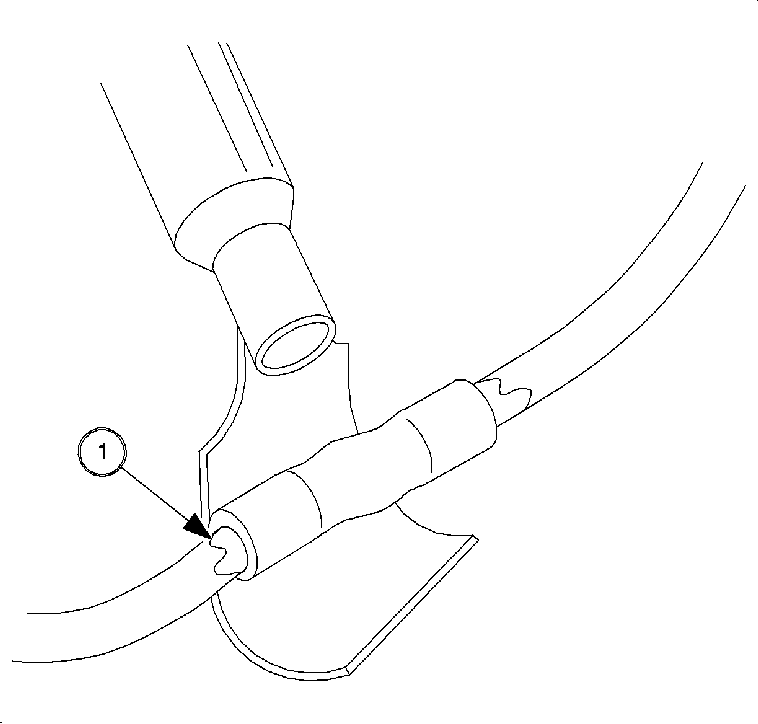
Caution: Do not sue a match or open flame to apply heat to splice sleeve.

Tighten
Tighten the inner recliner cover screw to 2.5N·m (22 lb in).
Wire Size (In millimeters) Wire Gage | .35 - .50 - .80 22 - 20 - 18 | 1.0 - 2.0 16 - 14 | 3.0 - 5.0 12 - 10 | |
PACKARD P/N * | SPECIAL TOOLS P/N | -- | -- | -- |
12089189 | (217670) | --SALMON-- | -- | -- |
12089190 | (217671) | -- | BLUE | -- |
12089191 | (217672) | -- | -- | YELLOW |
CLAIM INFORMATION
To receive credit for this repair during the warranty coverage period , submit a claim through the Saturn Dealer System as follows:
Case Type | Description | Labor Operation Code | Time |
|---|---|---|---|
VW | Remove seat and inspect wiring at seat frame | Z4098 | 0.3 hrs |
Add: | A. To repair wire at seat frame metal clips | -- | 0.1 hrs |
B. To remove inner cover and repair wire | -- | 0.2 hrs | |
C. To remove inner and seat back covers and repair wire | -- | 0.6 hrs | |
D. To replace seat back frame and repair wire | -- | 0.8 hrs | |
E. To Repair Each Additional Wire | -- | 0.1 hrs |
