Power Seat Switch Inadvertently Actuates Recliner Motor When Driver Enters or Exits Vehicle

| Subject: | Power Seat Switch Inadvertently Actuates Recliner Motor When Driver Enters or Exits Vehicle (Install Redesigned Switch) Due to a change in models affected, new part, and service procedure, this bulletin has been revised and supersedes bulletin 00-T- 37, which should be discarded. |
| Models: | 2000 Saturn L-Series vehicles equipped with power driver seats (RPO AGI) |
Condition
Some customers may comment that the power driver seat recliner is inadvertently actuated when the driver enters or exits the vehicle.
Cause
The occupant's body weight at or near the seat cushion side bolster causes the side bolster to fold onto the power seat switch.
Correction
Use the following procedure to install redesigned switch.
Service Procedure
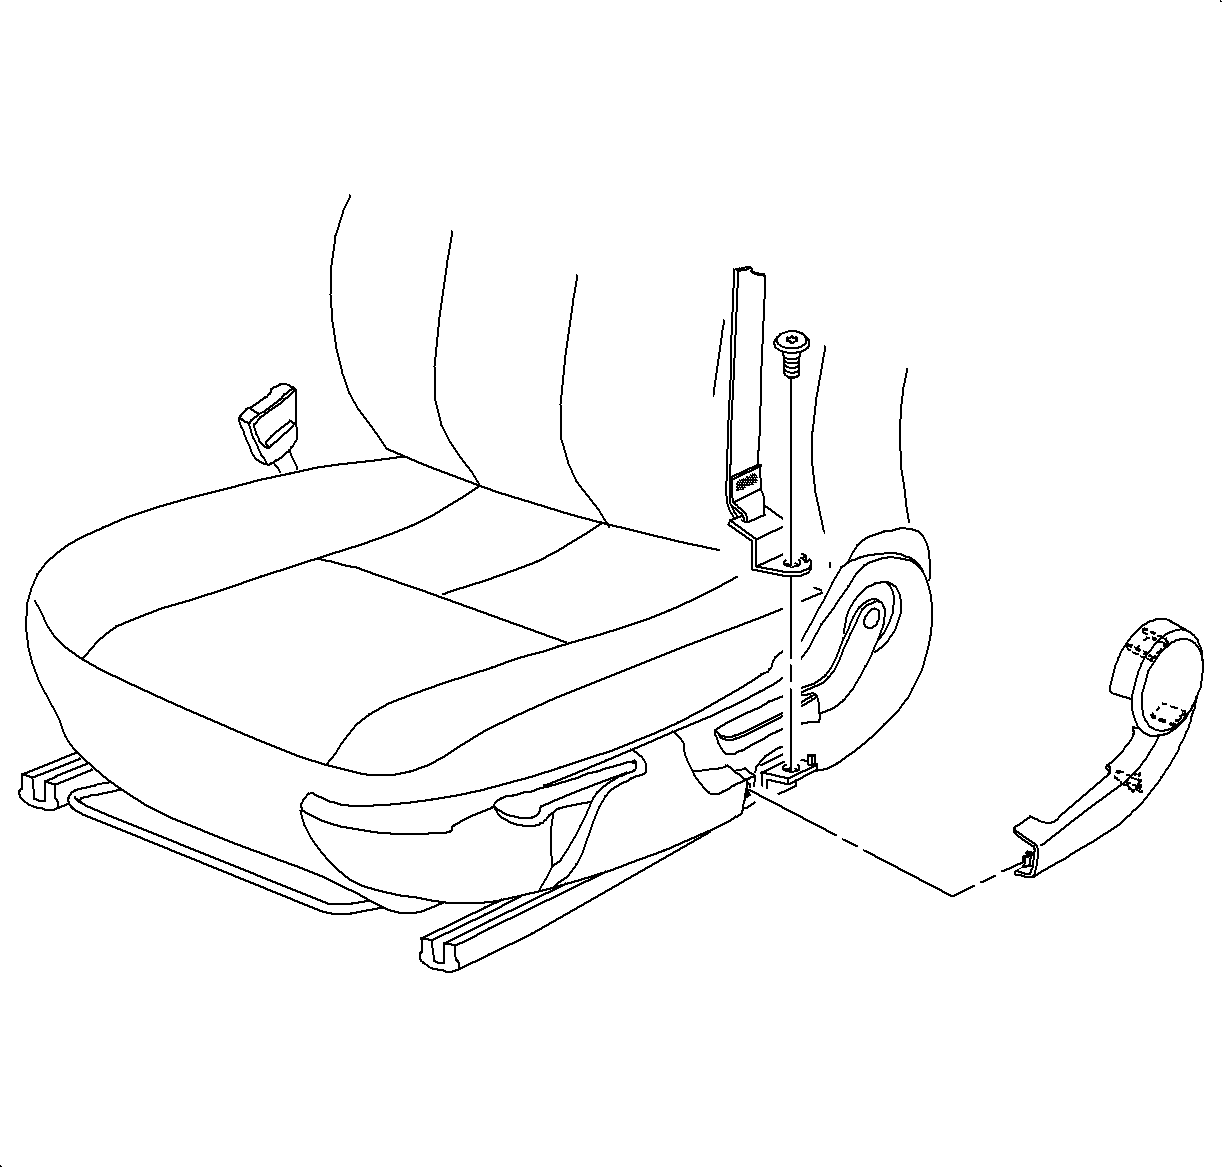
- Move seat to full forward position and remove front seat fasteners.
- Disconnect negative battery cable.
- Remove front seat shoulder belt outer cover.
- Remove shoulder belt from seat frame.
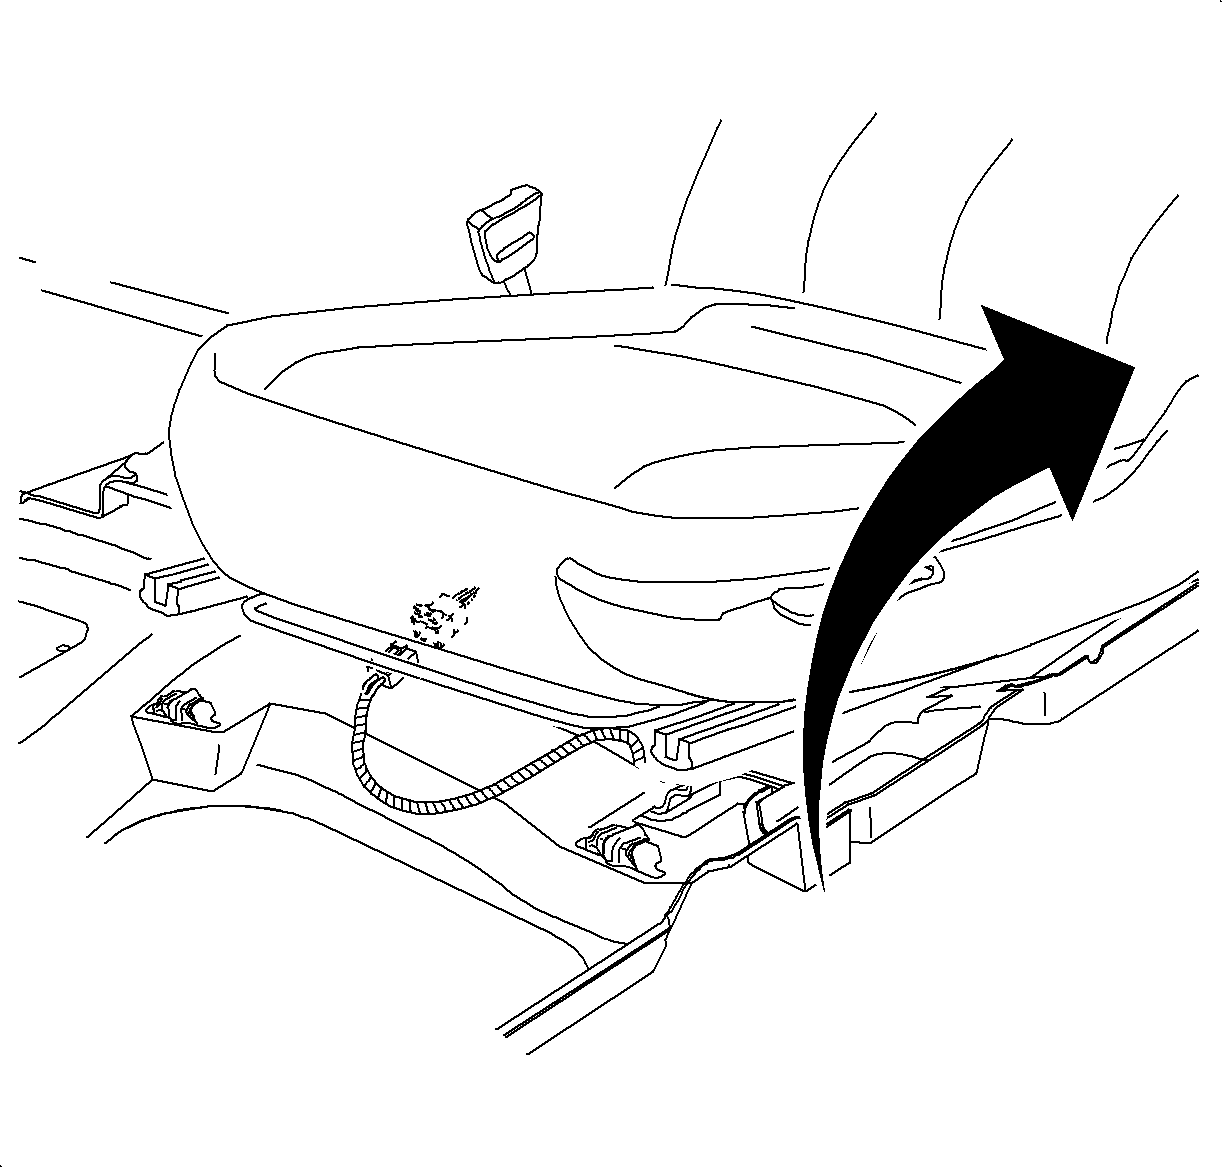
- Pull seat assembly slightly rearward to disengage seat fro seat track hooks.
- Tilt seat rearward and disconnect seat wiring harnesses.
- Remove seat from vehicle and place on clean protected work surface.
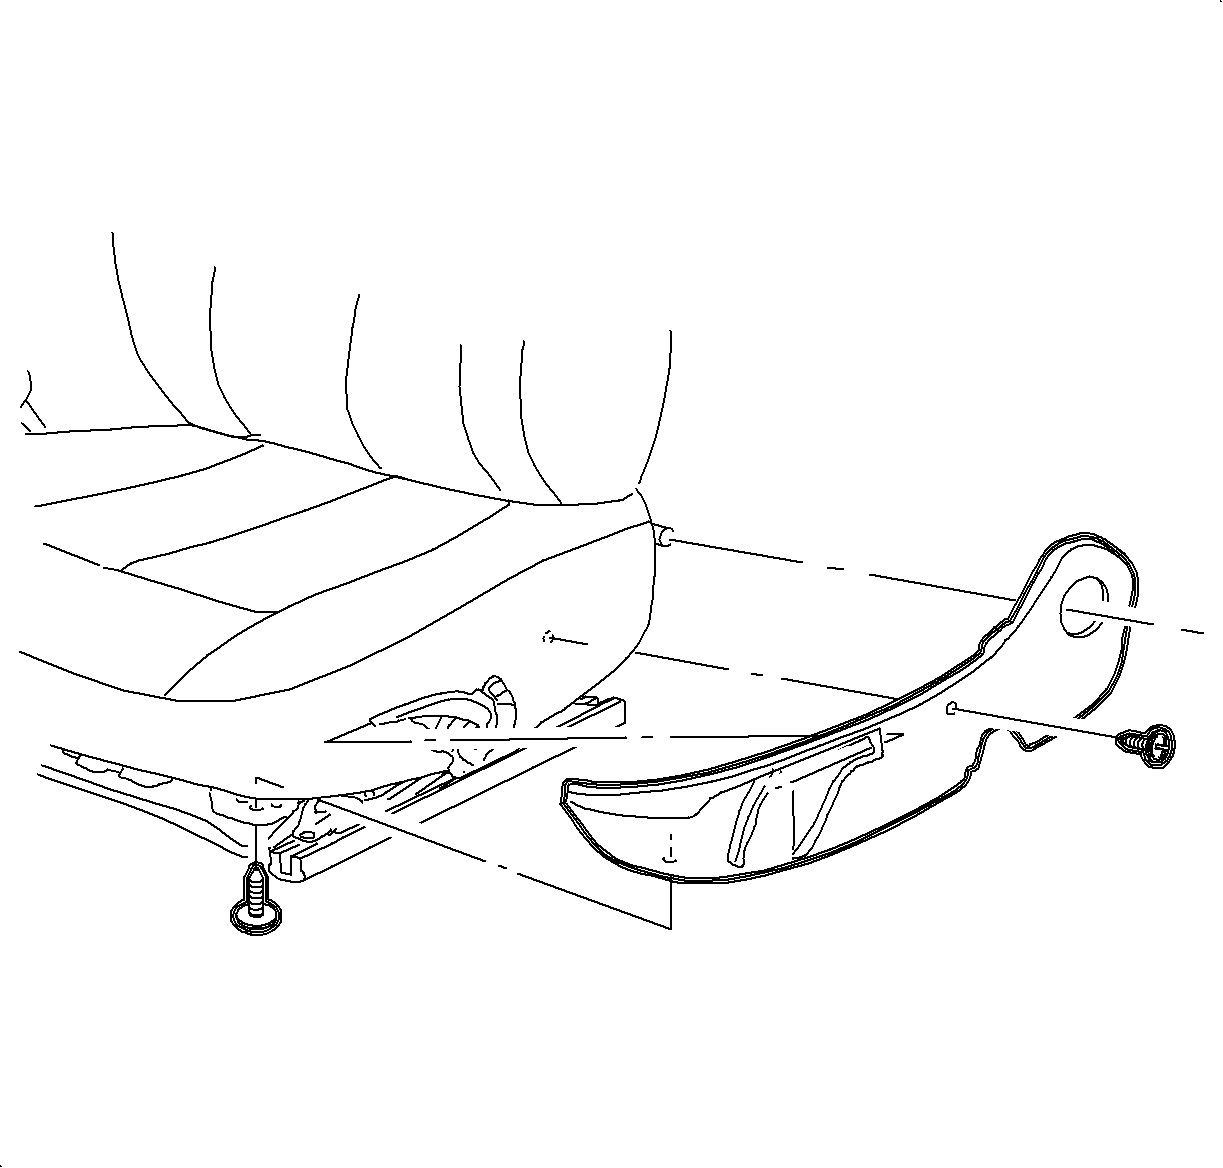
- Remove fasteners and remove outer valance.
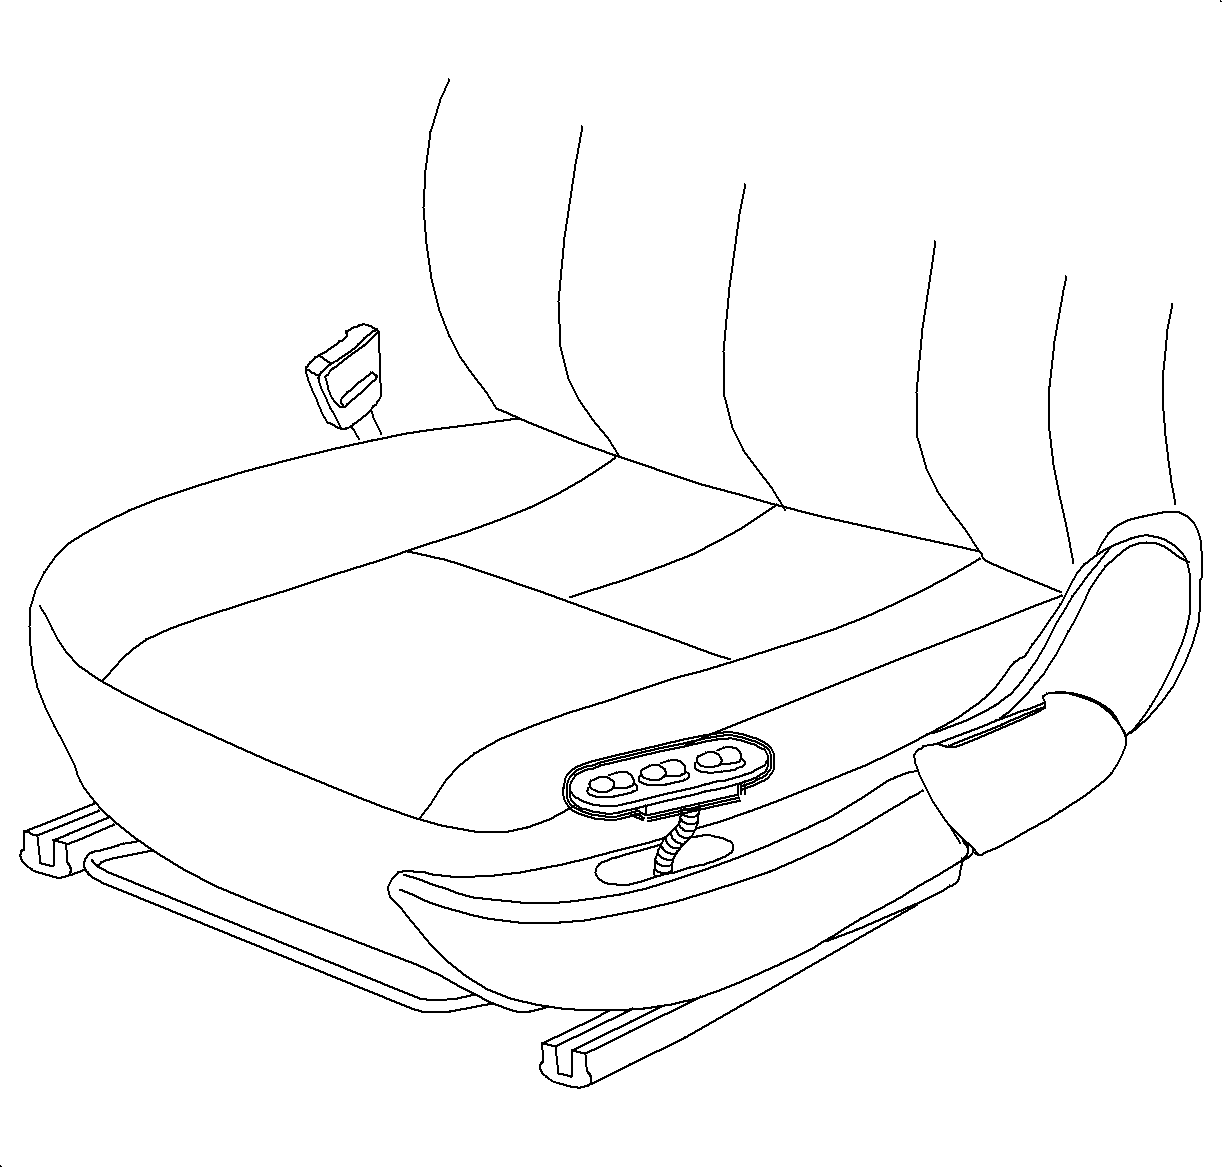
- Disconnect power seat switch from harness.
- Using a flat blade screwdriver, gently pry upward to disengage attaching clips, while pushing switch out of valance.
- Snap new power seat switch into outer valance. Refer to Parts Requirements section in this bulletin for specific part information.
- Connect switch harness to switch.
- Position valance to seat adjuster, then slide valence rearward to lock valance into seat adjuster tongue.
- Install valance fasteners.
- Position seat into vehicle.
- Tilt seat rearward and connect seat wiring harnesses.
- Slide seat forward into tracks.
- Apply Loctite® 242 Threadlocker (or equivalent) to seat fasteners and install seat fasteners.
- Install shoulder belt to seat frame.
- Install shoulder belt outer cover.
- Connect negative battery cable.
- Function electrical seat components to ensure proper operations.


Tighten
Tighten the outer seat valance fasteners to 2.5 N·m
(22 lb in).
Tighten
Tighten the seat fasteners to 25 N·m
(19 lb in).
Caution: Apply Loctite 242® (or equivalent) on all restraint fasteners prior to installation.
Tighten
Tighten shoulder belt-to-seat frame bolt to 20 N·m
(15 lb ft).
Tighten
Tighten battery terminal bolt to 17 N·m
(13 lb ft).
Part Number | Color | Description |
|---|---|---|
22677353 | Lt Oak | SWITCH ASM-D/SEAT ADJR |
22677355 | Ebony | SWITCH ASM-D/SEAT ADJR |
22677356 | Md Dark Pewter | SWITCH ASM-D/SEAT ADJR |
CLAIM INFORMATION
To receive credit for this repair during the warranty coverage period, submit a claim through the Saturn Dealer System for N2411 (Switch, Seat Adjuster, Left - Replace.
