
| Subject: | Service Manual Update for All the 2000 L-Series L61 Engine Service Manuals |
| Models: | 2000 Saturn L--Series Sedans and Wagon equipped with L61 (4 cyl.) engines |
Purpose
The purpose of this bulletin is to update all the 2000 L-Series L61 Engine Service
Manuals at your location. Please go through this bulletin carefully and make necessary
updates in the service manual as indicated.
Obtain all the 2000 L-Series L61 Engine Service Manuals at your location and
update according to the information contained in this bulletin.
| • | On page 389, toward bottom of page under step 5, write in the following
new procedure step. |
| | 6. Install fuel tank grounding strap nut located near fuel
filter. |
Tighten
Tighten nut to 4.5 N·m (40 in lbs)
| • | On page 393, cross out existing Important statement above step 3 and write
in the following new important statement. |
| | Important: The fuel pump module to tank seal must always be replaced and lubricated with
clean engine oil whenever module is removed from fuel tank.
|
| • | On page 395, write in the following new Important statement above step
12. |
| | Important: The fuel pump module to tank seal must always be replaced and lubricated with
clean engine oil whenever module is removed from fuel tank.
|
| • | On page 404, write in the following new Important statement above step
3. |
| | Important: The fuel pump module to tank seal must always be replaced and lubricated with
clean engine oil whenever module is removed from fuel tank.
|
| • | On page 405, cross out step 5 and illustration in middle of page. |
| • | On page 408, write in the following new Important statement above step
3. |
| | Important: The fuel pump module to tank seal must always be replaced and lubricated with
clean engine oil whenever module is removed from fuel tank.
|
| • | On page 410, cross out step 4 and illustration in middle of page. |
| • | On page 413, write in the following new Important statement at the top
of the page above step 4. |
| | Important: The fuel pump module to tank seal must always be replaced and lubricated with
clean engine oil whenever module is removed from fuel tank.
|
| • | On page 415, under FUEL PRESSURE REGULATOR installation procedure, cross
out existing Important statement and write in the following new Important statement. |
| | Important: Both O-rings must be oiled with clean engine oil and installed into fuel rail
prior to installing fuel pressure regulator.
|
| • | On page 415, FUEL PRESSURE REGULATOR installation procedure, cross out
existing step 1 and write in the following new step 1. |
| | 1. Install small oiled O-ring into fuel rail. |
| • | On page 437, under FUEL-CUT OFF MODE near bottom of page, cross out the
SOHC and DOHC information and write in the following: |
| | L61
Auto/Manual Trans. 4000 rpm in Park/Neutral |
| • | On page 532, under step 2, write in the following procedure steps. |
| | 2.1 Install water pump sprocket and retaining bolts. |
Tighten
Tighten nut to 10 N·m (89 in lbs)
| • | 2.2 Install water pump sprocket access plate. |
| • | On page 630, before step 1 of Engine Flywheel Installation procedure,
write in the following Notice statement. |
| | Notice: Ensure that the correct bolts are used when installing manual transaxle flywheel
or automatic transaxle flexplate. If the incorrect bolts are used, powertrain damage
may result.
|
| • | Make photo copies of page 4 of this bulletin. Turn to page 378 and write
in the following after step 3 and insert photo copy between pages 378 and 379. |
| | (Refer to inserted illustration.) |
| • | Make photo copies of pages 5 - 7 of this bulletin. Turn to page
725 and 726 and across out the entire Engine Oil and Oil Filter Replacement procedure.
Insert photo copies of pages 4 - 6 made from this bulletin before page 725. |
Photo copies of this page are to be made and inserted between pages 378 and
379 of all the 2000 L-Series L61 Engine Service Manuals at your location. Also, write
in the following after step 3 on page 378:
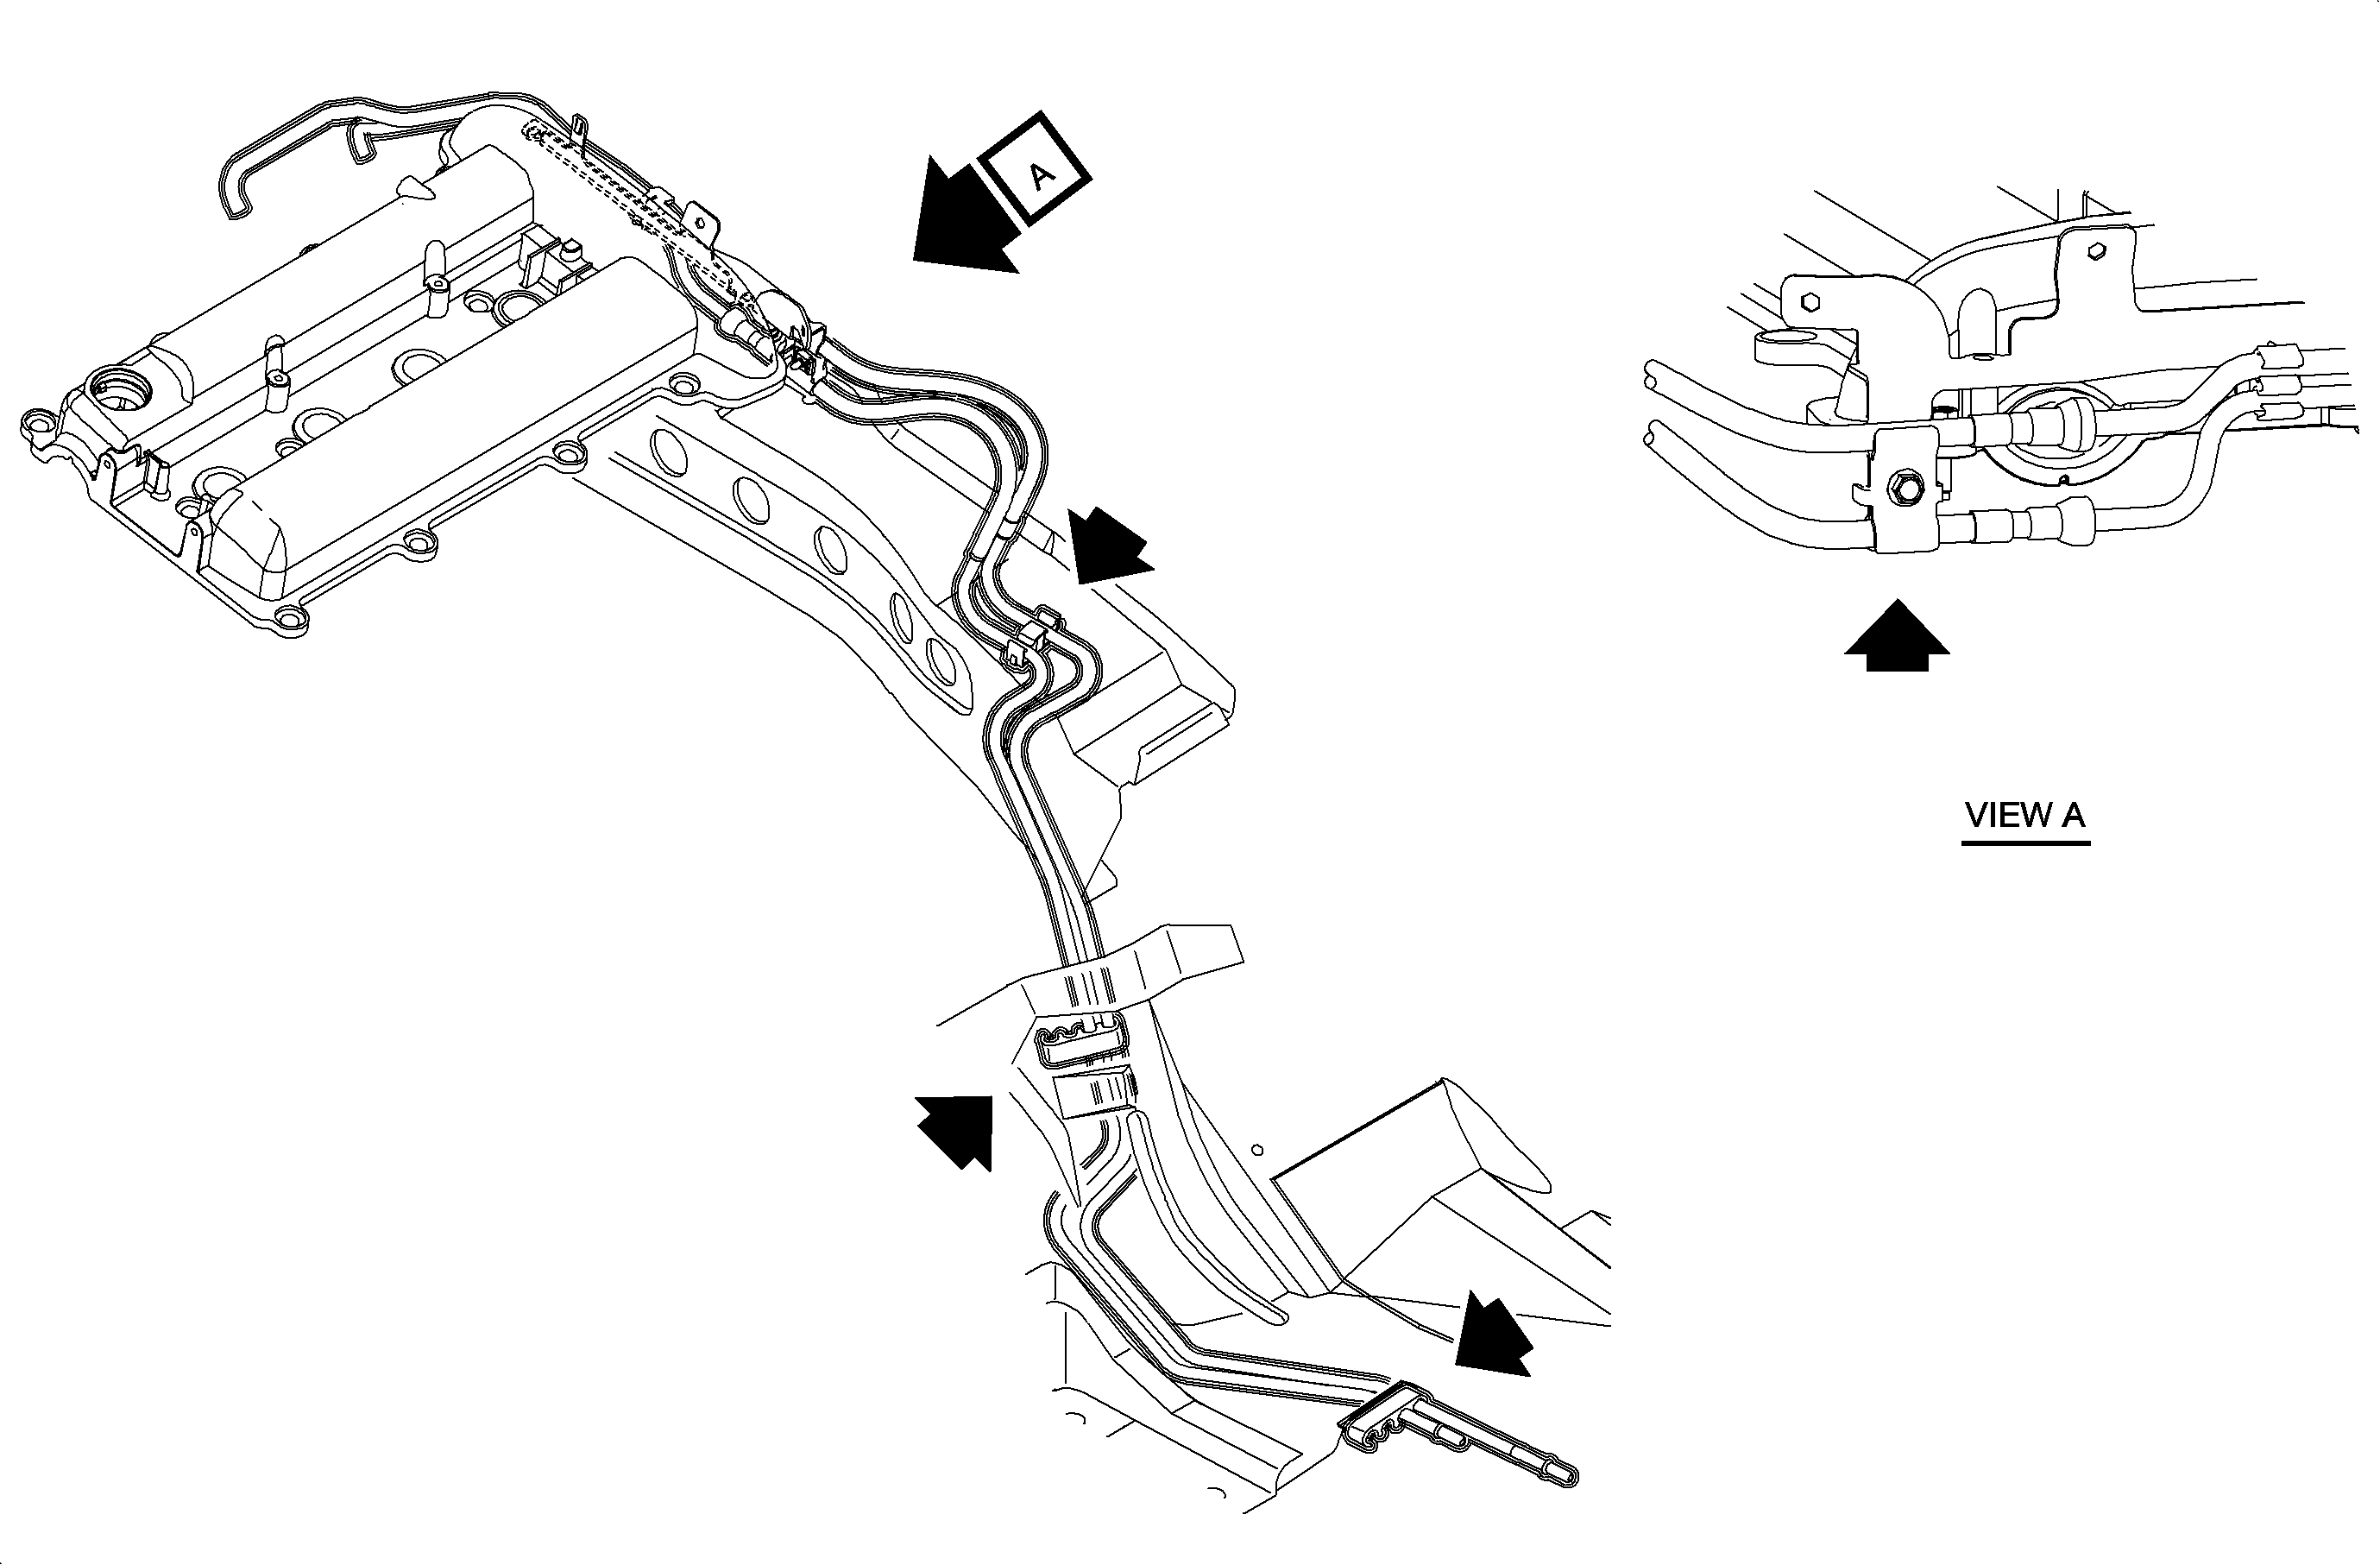
(Refer to inserted illustration.)
Photo copies of pages 5 - 7 are to be made and inserted in
all the 2000 L-series L61 Engine Service Manuals at your location. After making
photo copies, turn to page 725 and cross out the entire Engine Oil and Oil Filter
Replacement procedure. Insert photo copies before 725.
Procedure
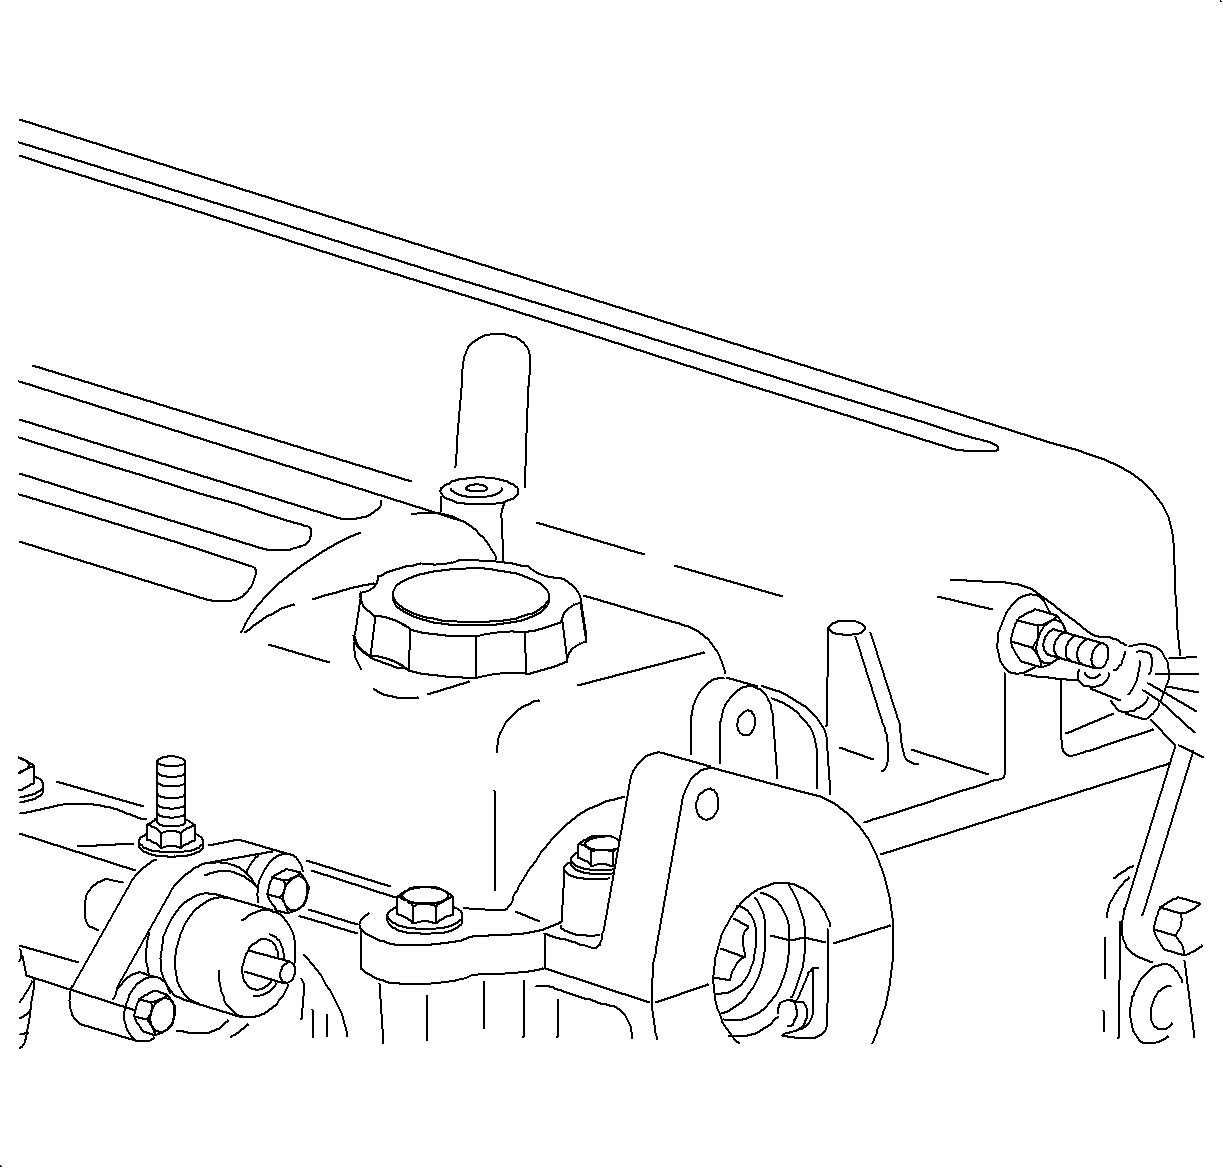
- Remove engine oil filler cap.
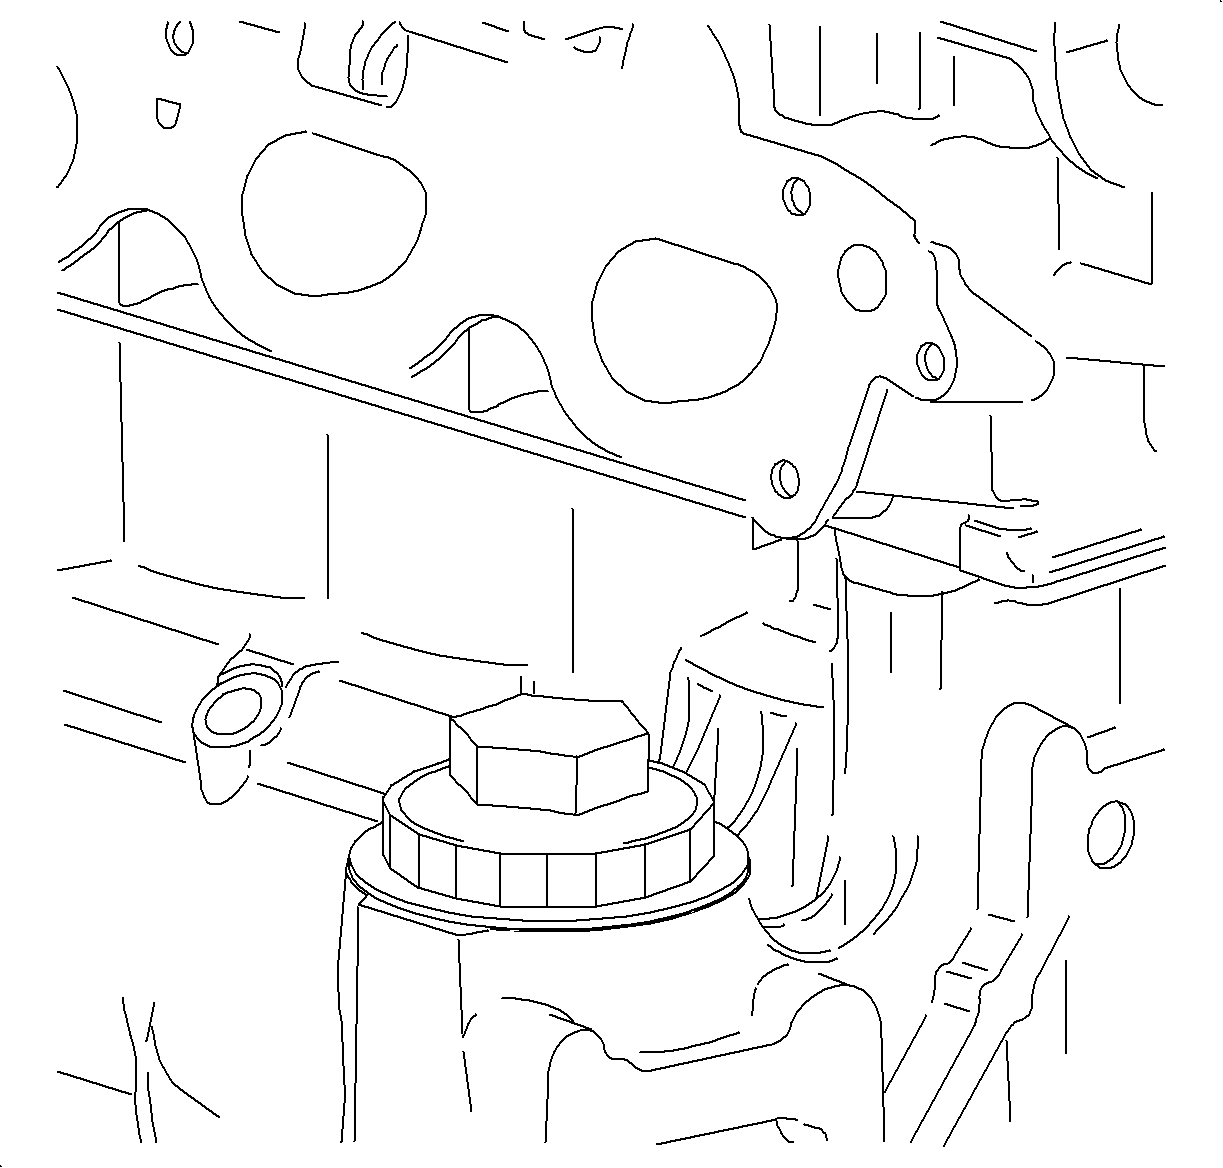
- Using a flat 68 mm (2.68 in.) oil filler wrench
or 32 mm (1.26 in.) wrench, fully unscrew oil filter housing cap to allow drain back
oil contained in housing.
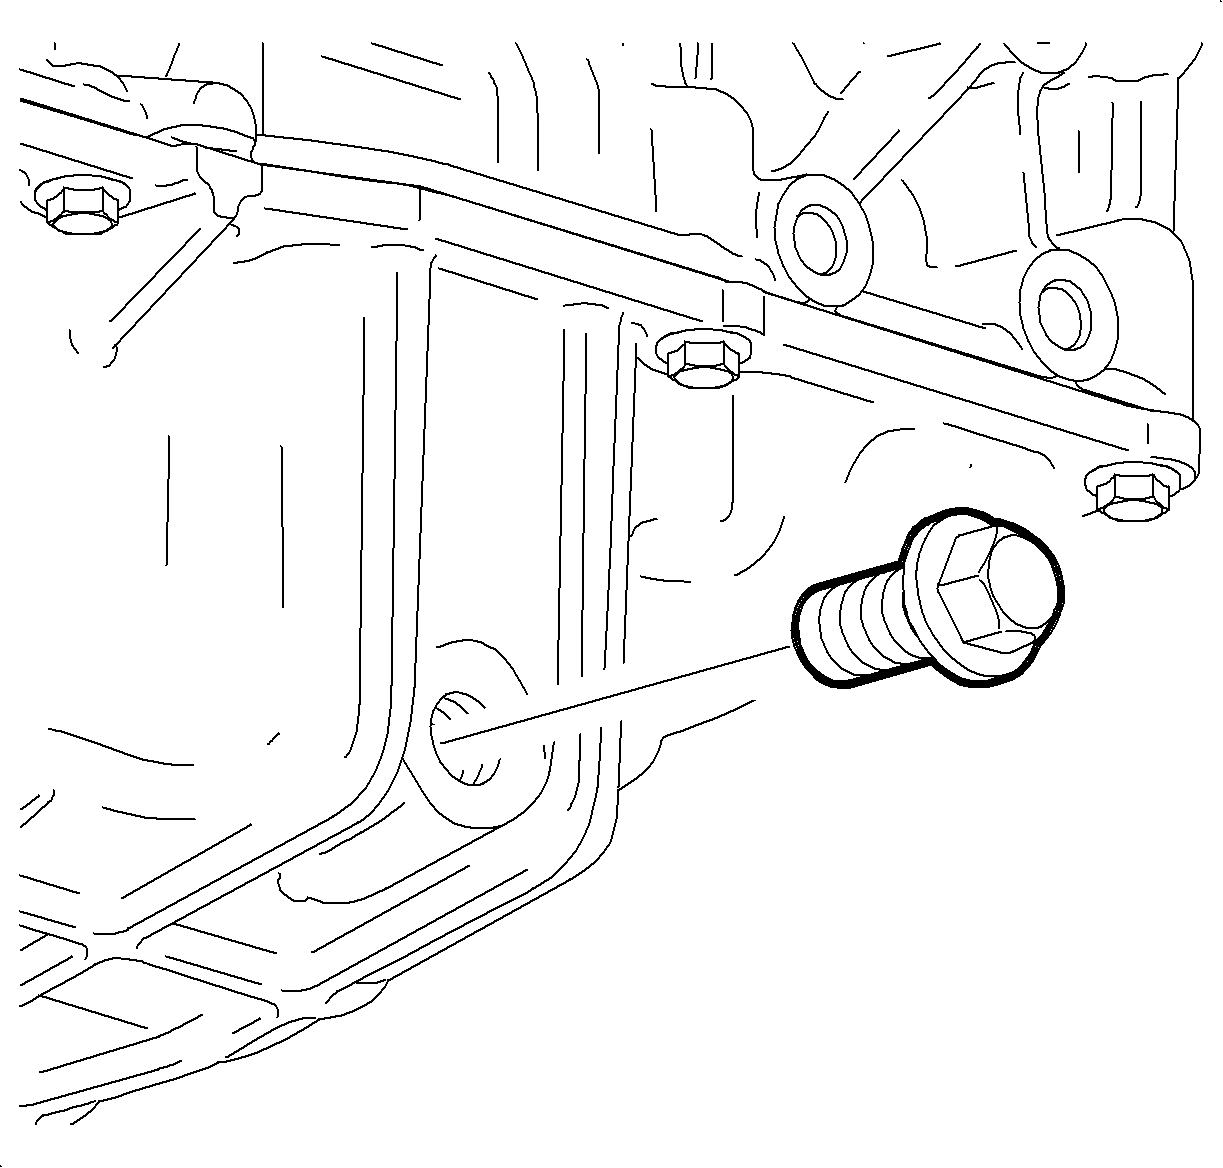
- Remove engine oil drain plug and drain oil into
approved container.

- Remove oil filter assembly from oil filter housing.
- Grasp filter housing cap with filter element attached and gently tap filter
element on recycling container to release filter element into container.
- Install new oil filter element into filter housing cap.
- Inspect filter housing cap O-ring and replace if worn, cut, or damaged.
- Using a 14-flat 68 mm (2.68 in.) oil filter wrench
or 32 mm (1.26 in.) wrench, install oil filter assembly into oil filter housing.
Tighten
Tighten nut to 25 N·m (18 ft lbs)
- Clean and install engine oil drain plug. Replace
drain plug sealing ring if worn or damaged.
Tighten
Tighten nut to 25 N·m (19 lbs ft)
- Fill engine with 4.73 L (5 qt.) of new 5W-30
engine oil.
Capacities:
Engine Oil:
4.73 L (5 qt.)
- Install engine oil filler cap.
- Start engine and check for leaks.
- Check engine oil level after engine is Off for
5 minutes. Add oil if necessary.
- Rest "SERVICE OIL SOON" telltale lamp.
