HVAC Blower Motor Operates on High Fan Speed Only

| Subject: | HVAC Blower Motor Operates on High Fan Speed Only (Replace Blower Motor and Resistor Card) |
| Models: | 2000 Saturn L-Series vehicles built before and including VIN YY649000 |
Condition
Some customers may comment the HVAC blower motor runs only on high fan speed.
Cause
This condition may be caused by an internal fault within the HVAC blower motor that could cause the blower motor resistor card to open from excessive current draw.
Correction
Follow diagnostic procedure in this bulletin for blower motor and resistor card diagnosis.
If it is determined the blower motor and/or resistor card is inoperative, both components must be replaced by following the procedures outlined in this bulletin.
Diagnostic Procedure
- Turn ignition to the RUN position and check the operation of the HVAC blower motor to verify which speeds are not functioning.
- If the blower motor does not operate in any other speed than HI, check the 20A HVAC Sw fuse in the left instrument panel fuse block (LIPFB).
- Turn the HVAC blower control to a non-functioning blower speed.
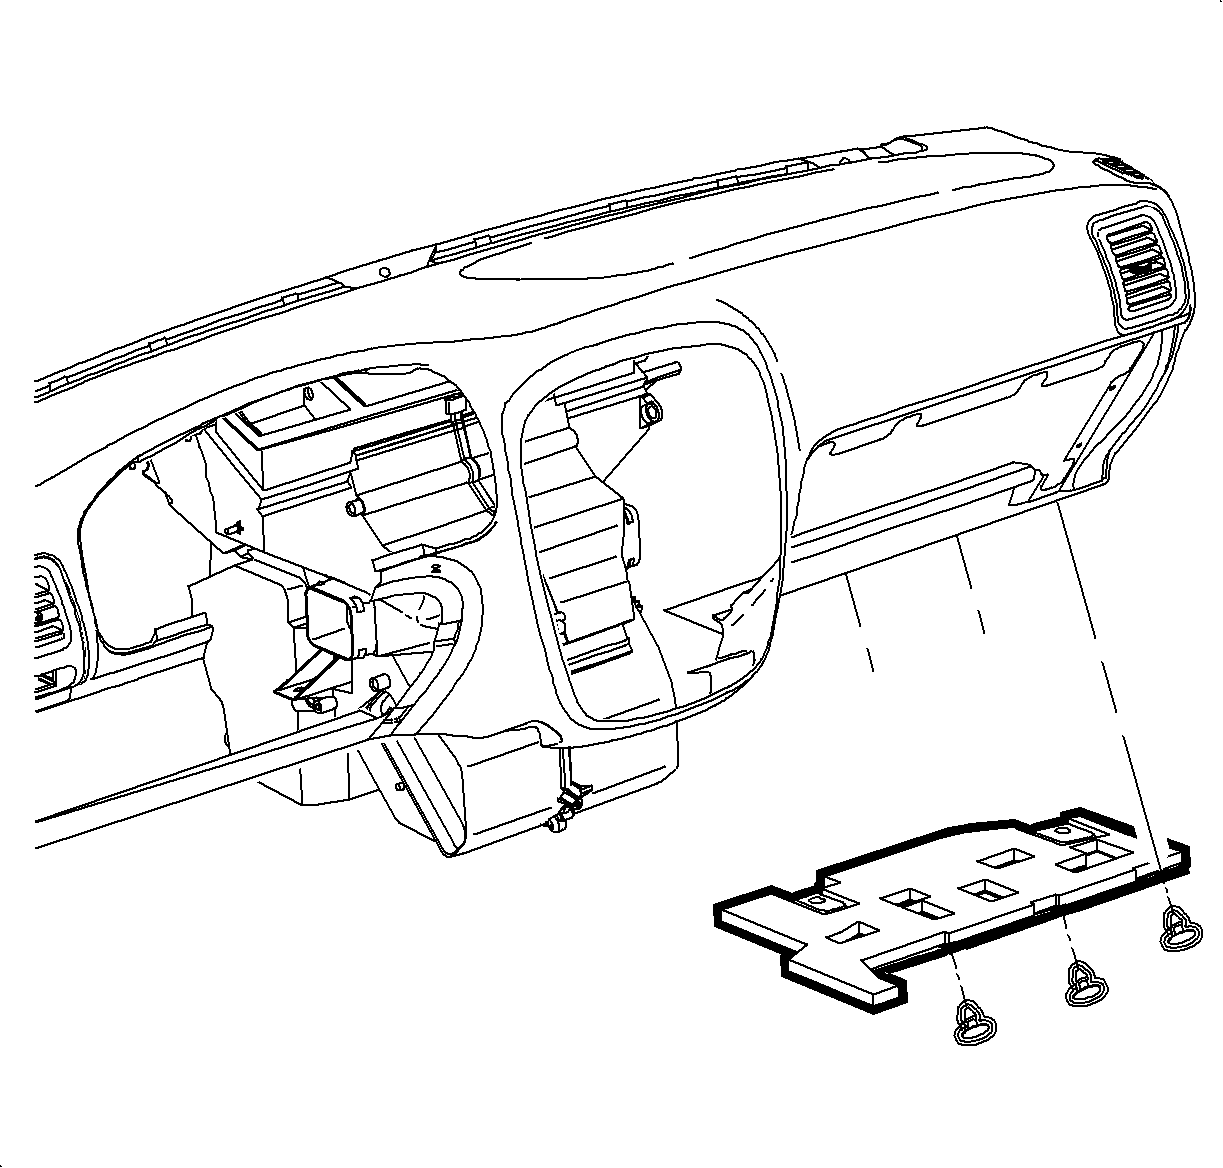
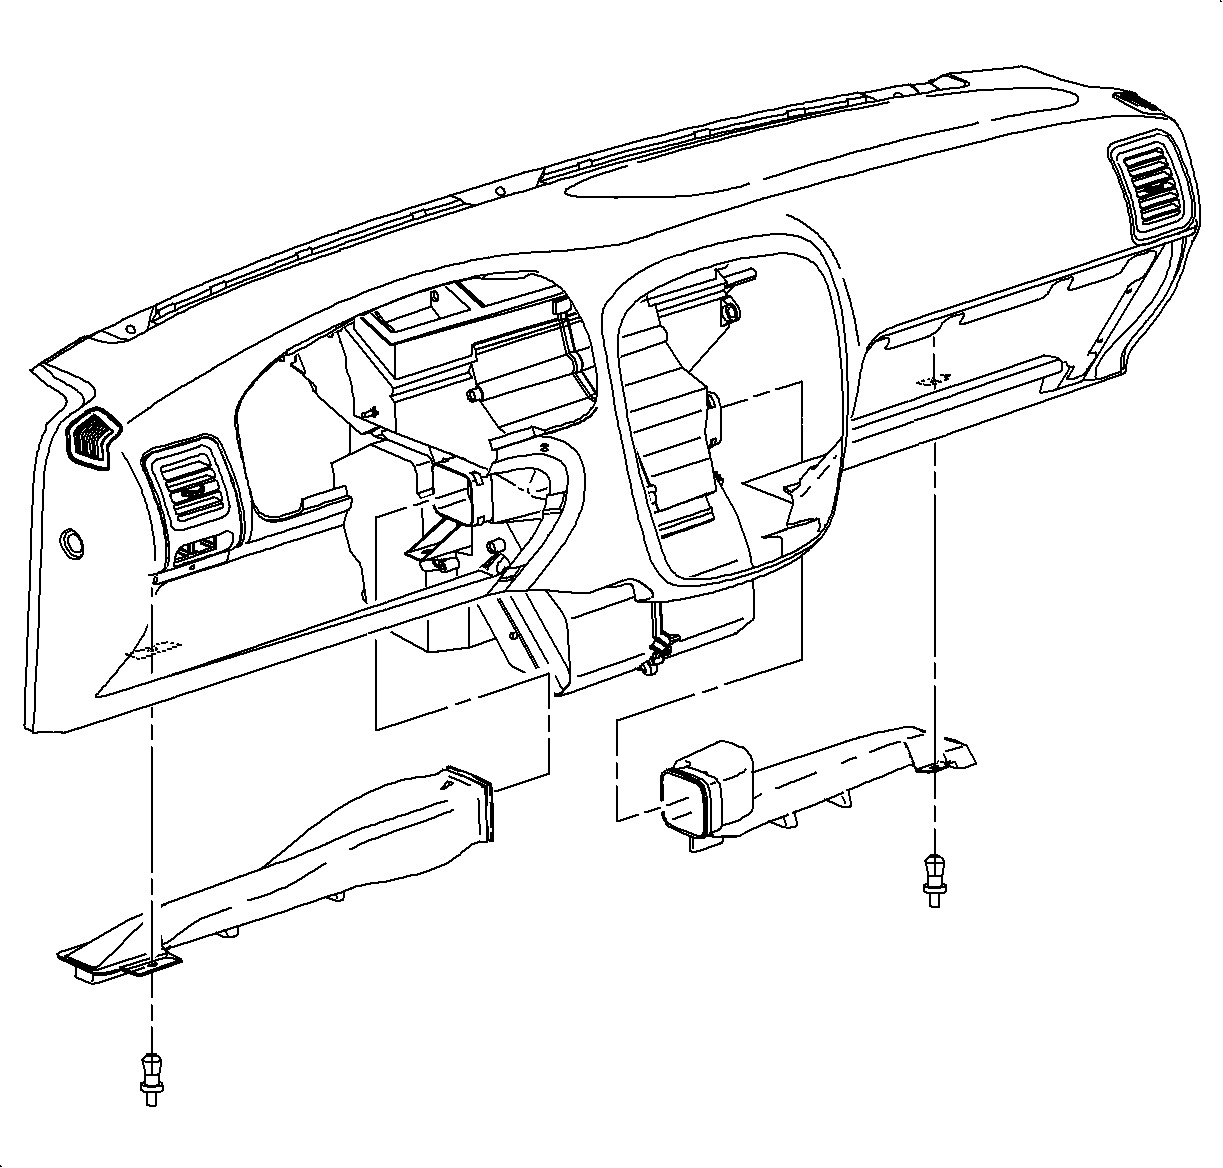
- Remove the right side I/P lower dash insulator retainers.
- Pull the insulator rearward to detach from the forward insulators retainers.
- Remove the right side heater outlet assembly retainer and remove the outlet.
- Use a DVOM to backprobe and check for voltage at the blower motor resistor card between terminal C (YEL ckt 268) and ground.
- Disconnect the blower motor resistor card connector. Use a DVOM to check voltage at the appropriate blower motor resistor card terminals of non-functional speeds.
| • | If the fuse is not OK, refer to "HVAC Blower Controls" schematic in the 2000/2001 L-Series HVAC Service Manual and perform additional diagnostics as necessary. |
| • | If the fuse is OK, proceed to the next step. |
| • | If voltage is present at terminal C, refer to "HVAC Blower Controls" schematic in the 2000/2001 L-Series HVAC Service Manual and perform additional diagnostics as necessary. |
| • | If voltage is not present, proceed to the next step. |
Speed | Terminal |
LO | D |
M1 | A |
M2 | B |
| • | If the voltage is present on all non-functional speeds, replace the blower motor and resistor card. Follow procedures outlined in this bulletin. |
| • | If the voltage is not present on all non-functional speeds, refer to "HVAC Blower Controls" schematic in the 2000/2001 L-Series HVAC Service Manual and perform additional diagnostics as necessary. |
Service Procedure
Blower Motor Replacement
- Turn the ignition On and select outside air on HVAC control head.
- Turn the ignition Off.
- Open the engine compartment hood and disconnect the negative battery cable.
- Remove the wiper arm assemblies.
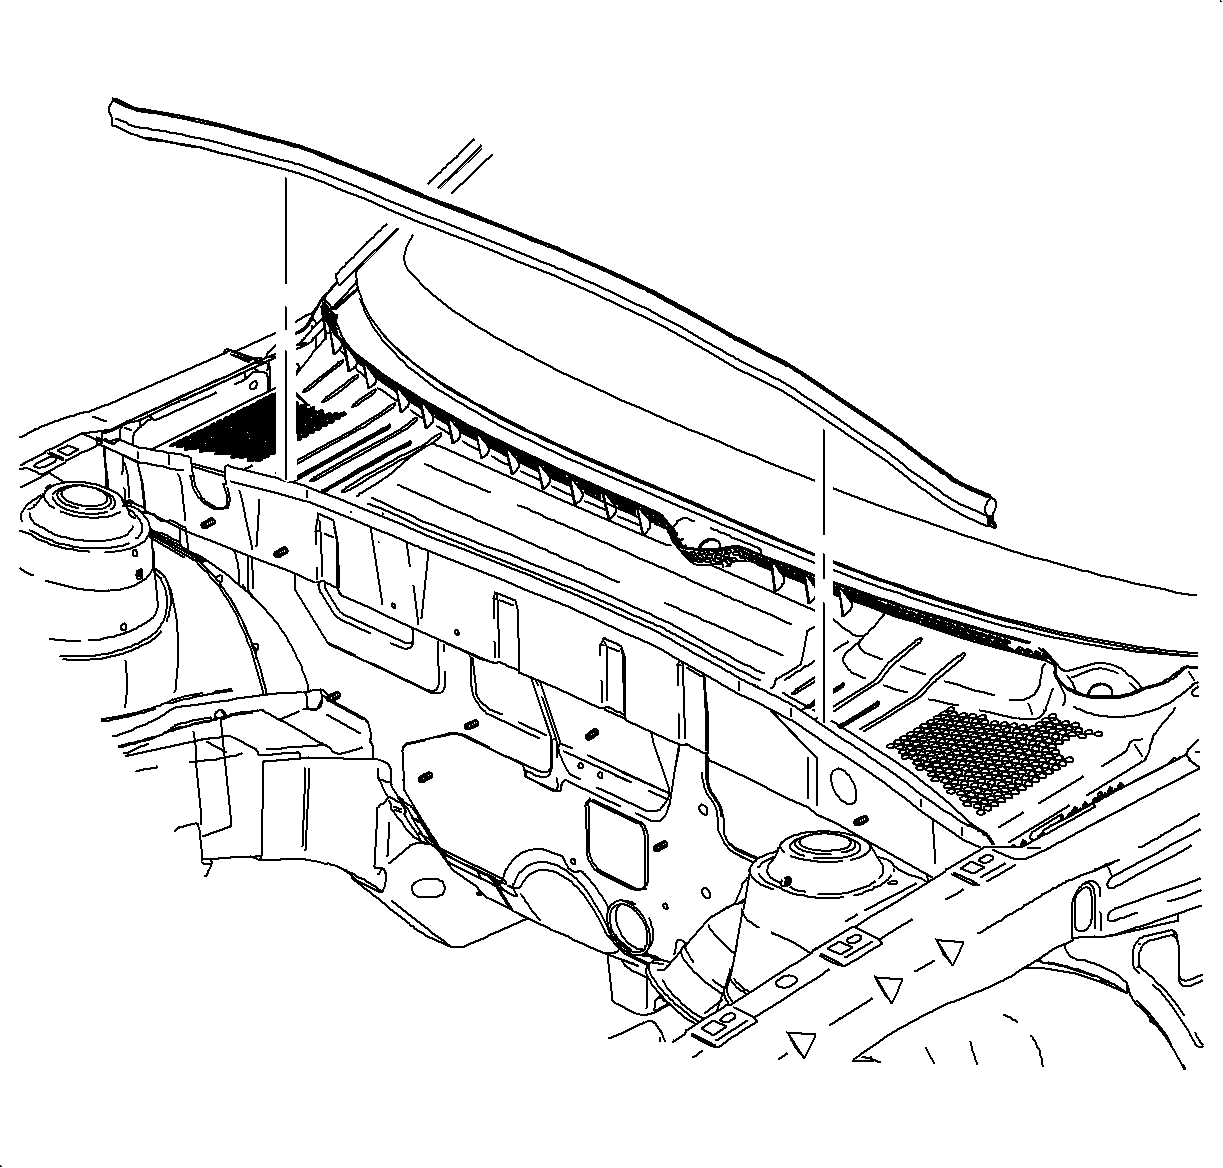
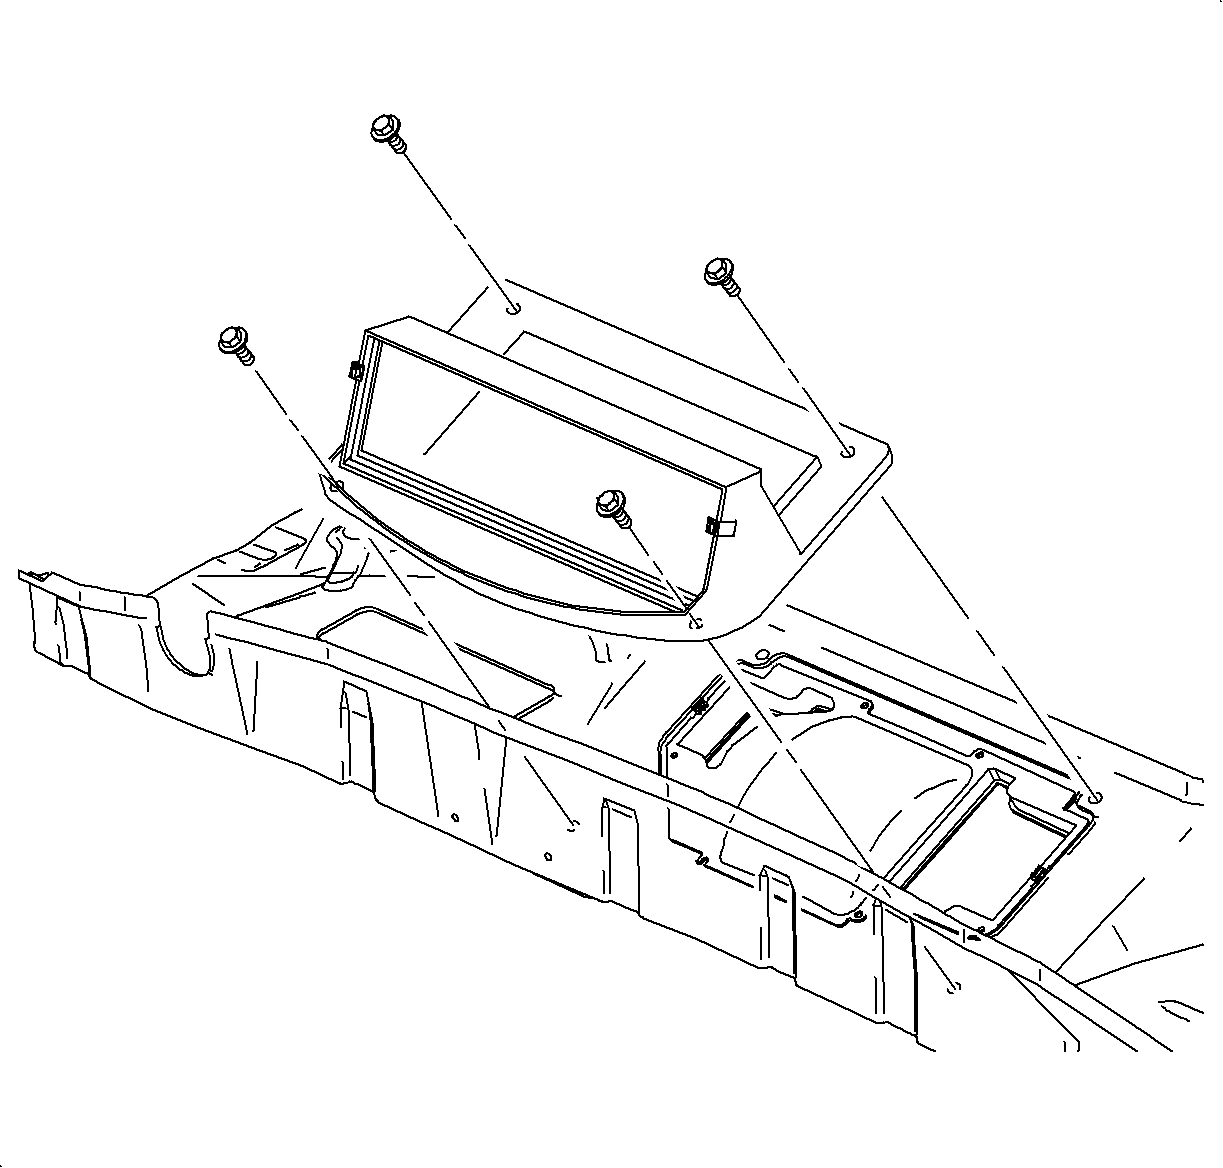
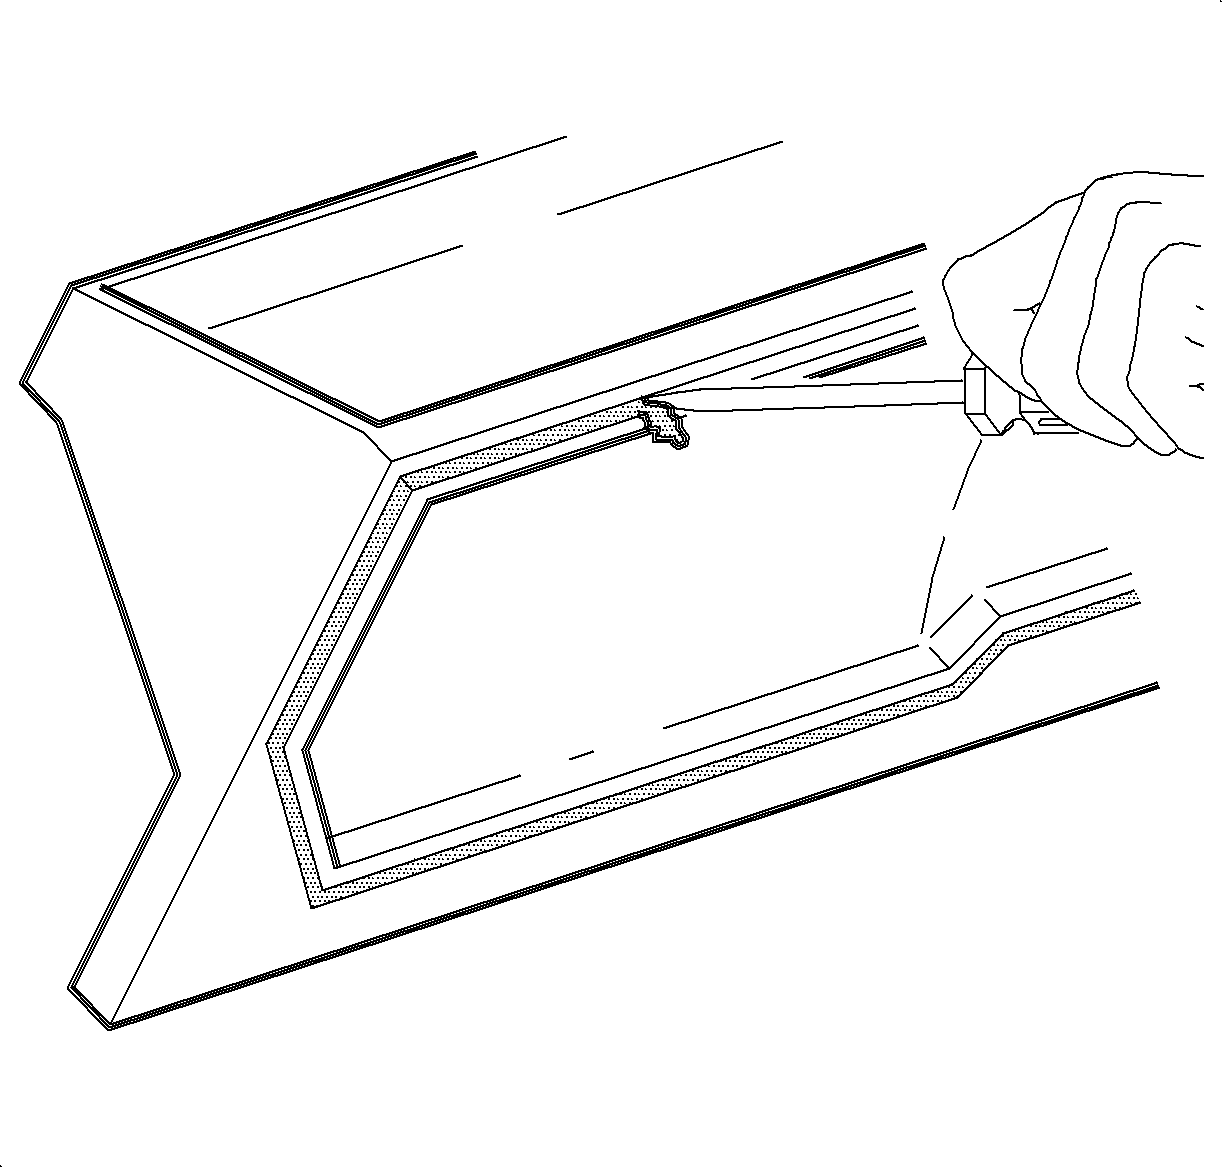
- Remove the weatherstrip at the rear of the engine compartment.
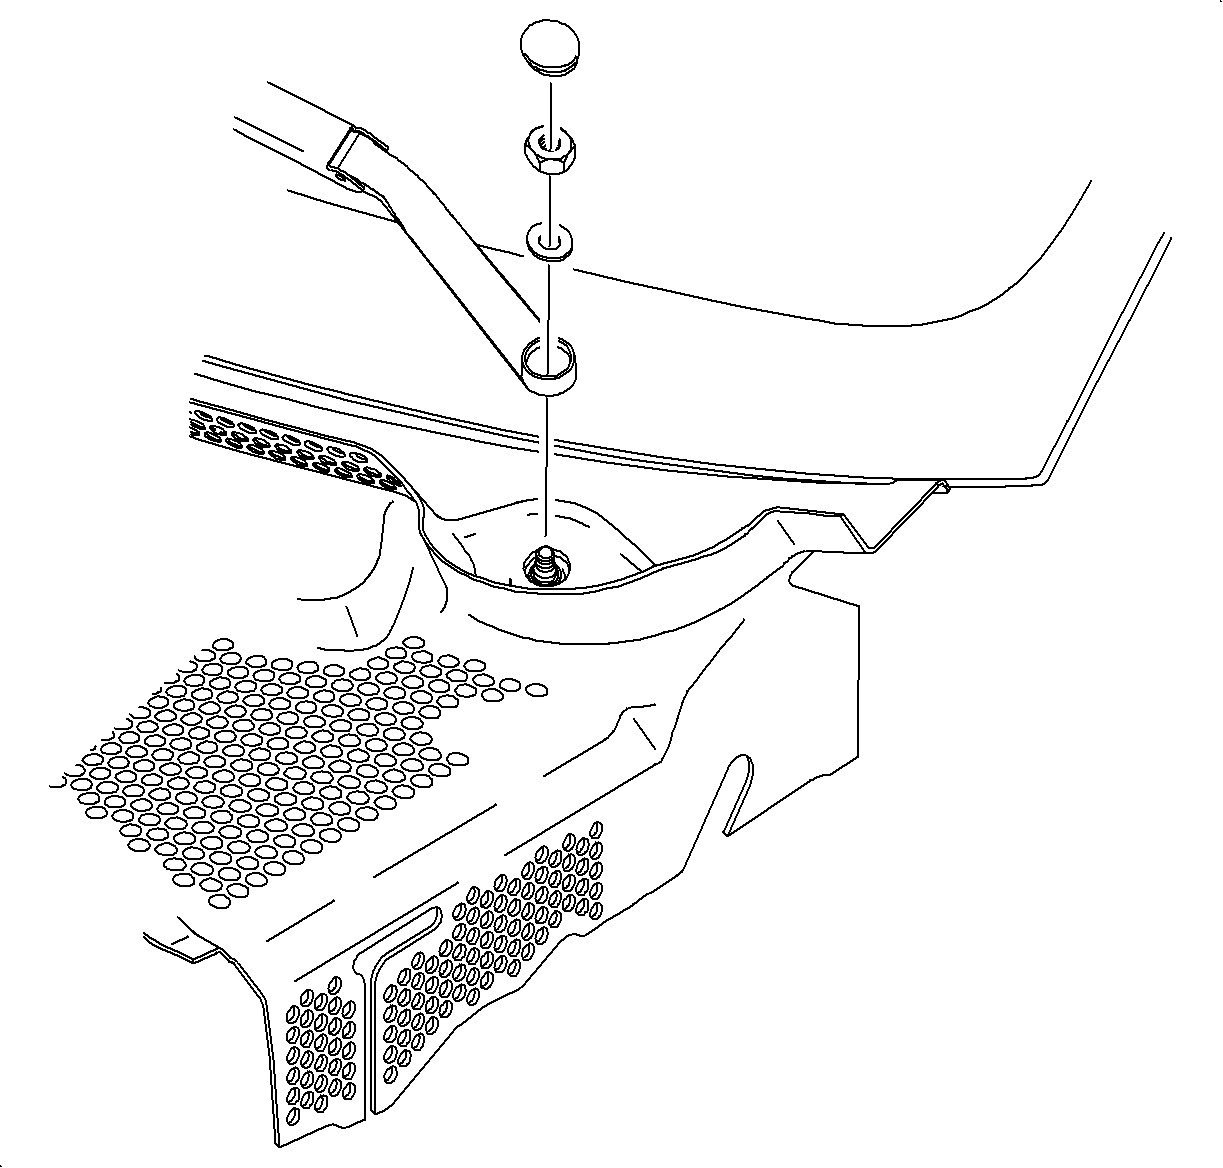
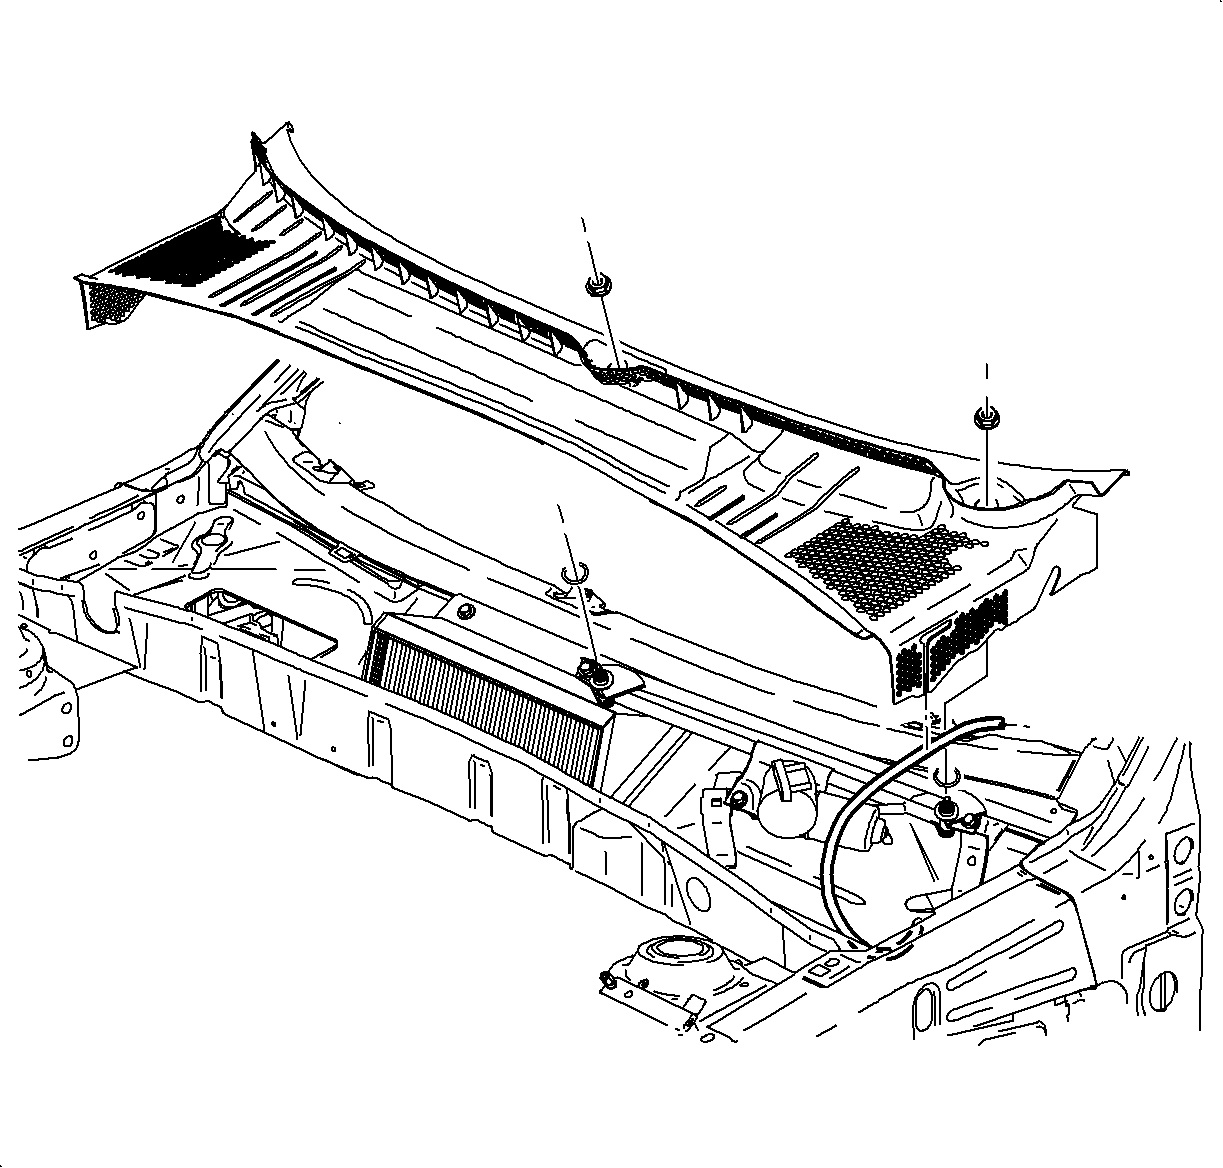
- Remove the cowl retaining nuts and remove the cowl screen assembly.
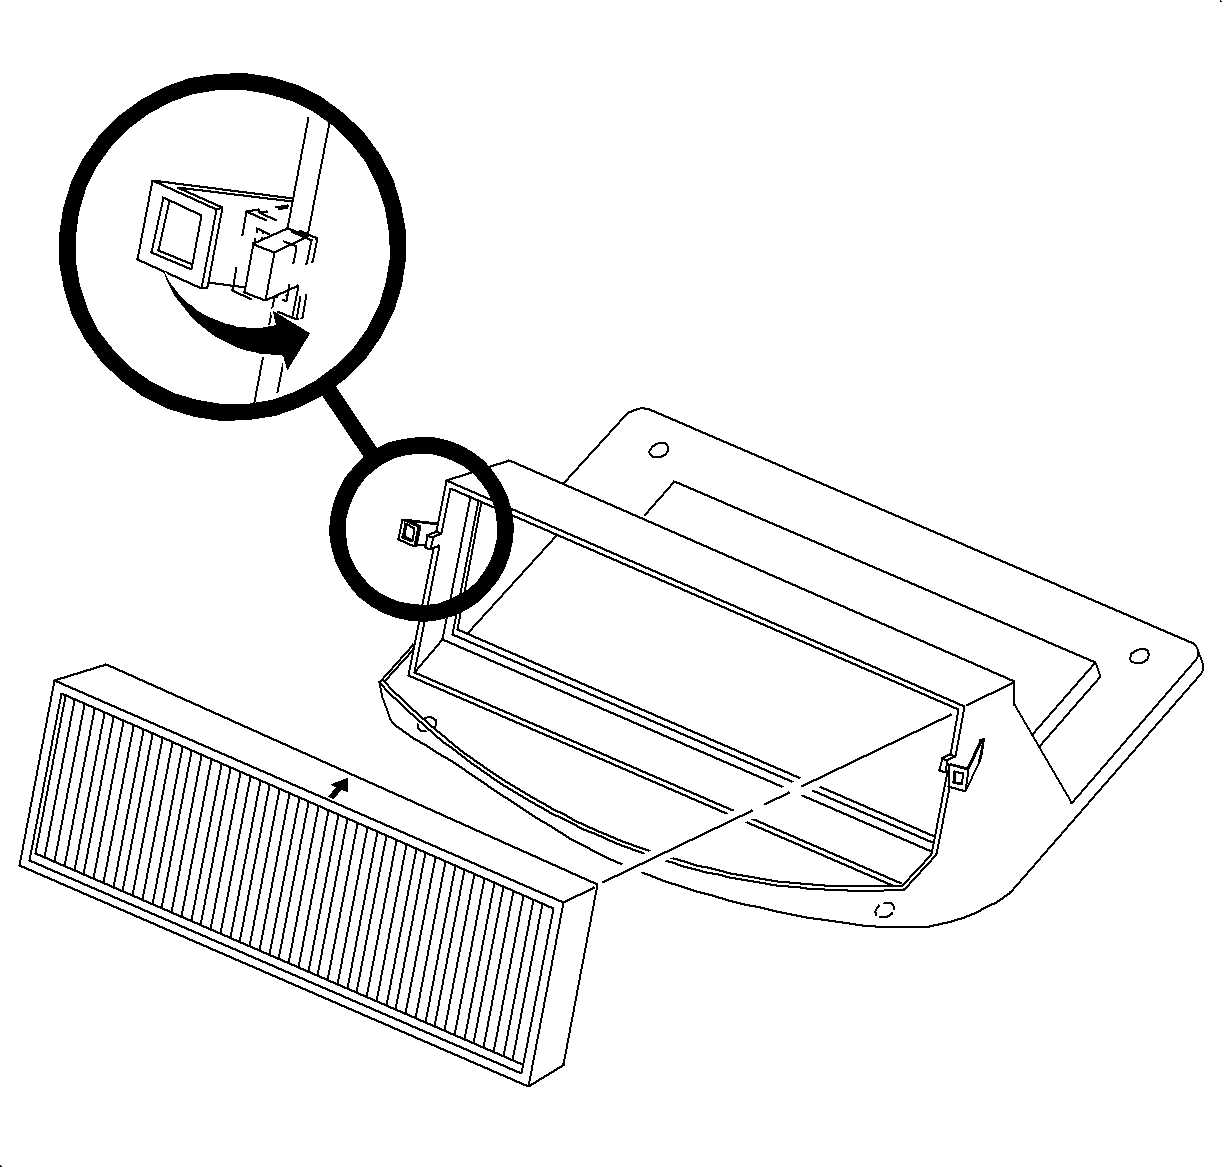
- Rotate the locking tabs outward to release passenger compartment air filter assembly.
- Remove the filter by lifting straight up.
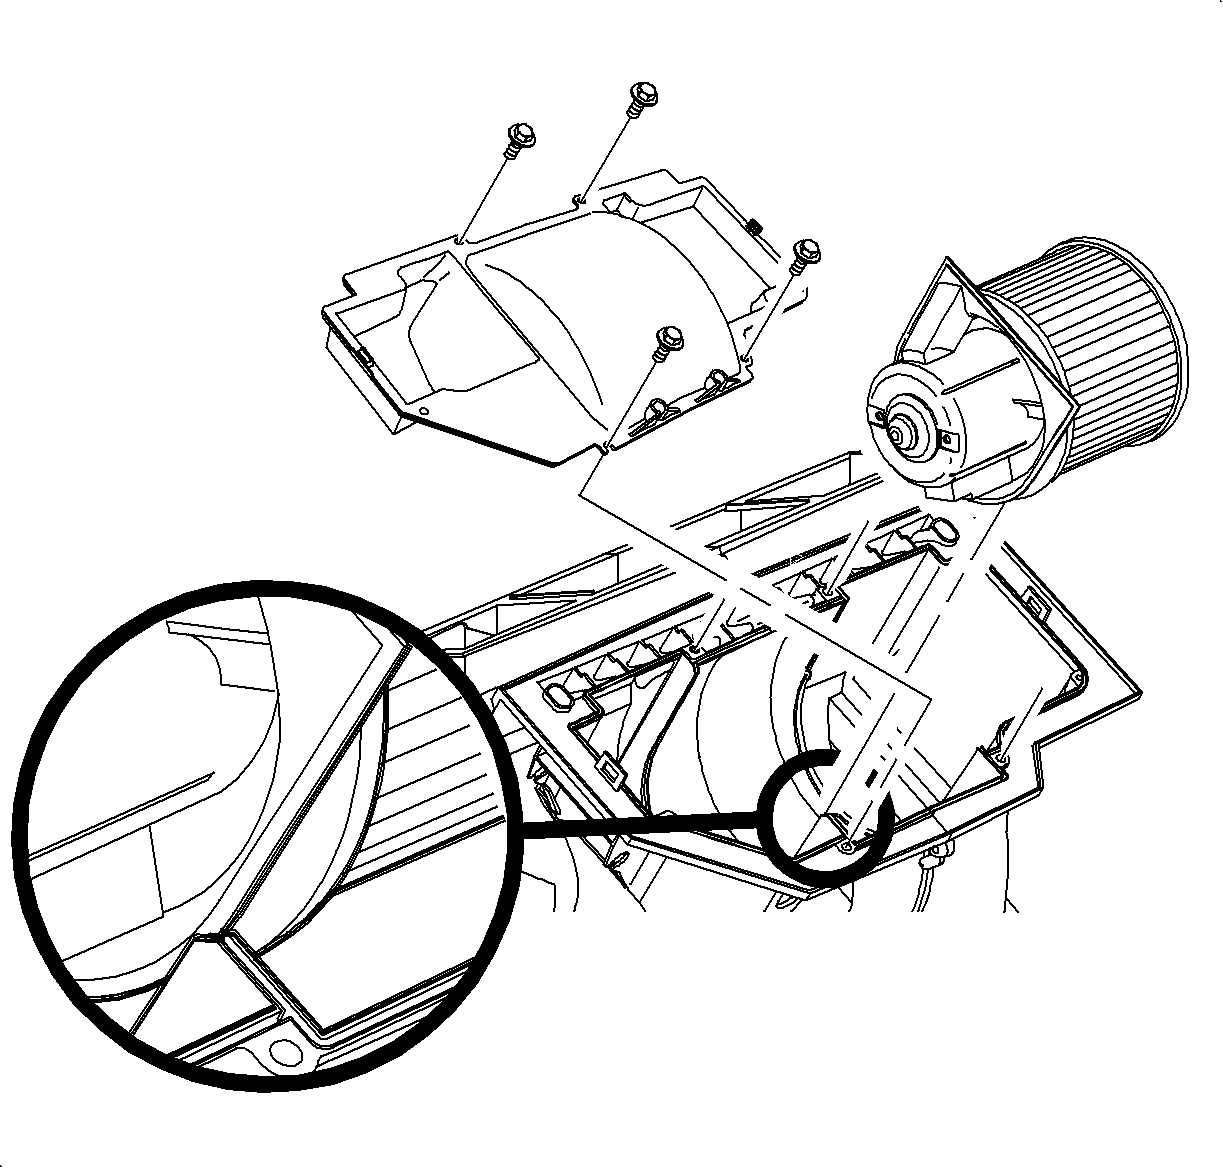
- Remove the passenger compartment air filter housing attachment bolts and remove the filter housing.
- Remove the blower motor housing screws, release the locking tabs and remove fan housing.
- Disconnect the blower motor electrical connector by squeezing the bottom of the connector and pulling downward.
- Remove the blower motor assembly by lifting straight out.
- Obtain the new replacement blower motor assembly (P/N 24427572).
- Install the new blower motor assembly into the module housing. Fan motor assembly rib must be located into channel in module housing.
- Connect the blower motor electrical connector.
- Install the blower motor housing. Housing rib must fit into the slot in the module case. Snap the left and right clip into place and install the fan housing to the module screws.
- Remove the filter housing seal using a small flat blade screwdriver.
- Install a new filter housing seal (P/N 09179222).
- Install the passenger compartment air filter housing and screws.
- Install the passenger compartment air filter, paying special attention to the air flow direction indicator printed on the side of the filter.
- Rotate the locking tabs on the filter housing inward to secure the filter in place.
- Install the cowl screen and fasteners.
- Install the weatherstrip at the rear of the engine compartment.
- Close the passenger compartment air filter access door.
- Install the wiper arm assemblies.

Caution: Sharp edge revealed after weatherstrip is removed.
Notice: It may be necessary to reconnect the battery and activate the wipers so the blower motor housing will clear the wiper linkage.
Tightening
Tighten the Fan Housing-to-Blower Motor Housing Screws to 1 N·m
(9 lb in).
Notice: A new filter housing seal must be used whenever the filter housing is removed to prevent water from leaking into the HVAC module.
Tightening
Tighten the Filter Housing Screws to 3.5 N·m (31 lb in).
Tightening
Tighten the Screen-to-Front of Dash to 1 N·m (9 lb in).
Tightening
Tighten the Wiper Arm Retaining Nuts to 12 N·m (9 lb in).
Blower Motor Resistor Card Replacement
- Remove the right side I/P lower dash insulator retainers.
- Pull the insulator rearward to detach from the forward insulator retainers.
- Remove the right side of the heater outlet assembly retainer and remove the outlet.
- Remove the blower motor resistor card screws.
- Use the electrical harness to pull the resistor card out of the HVAC module.
- Disconnect the blower resistor card from the electrical connector.
- Obtain a replacement blower motor resistor card (P/N 90583344).
- Connect the blower motor resistor card electrical connector to the resistor card.
- Install the new blower motor resistor card into the module slot with the circuit side facing towards the rear of the vehicle. It will fit one way.
- Install the blower motor resistor card screws.
- Install the heater outlet with the retainer.
- Install the lower dash insulator with the retainers.
- Connect the negative battery cable.
- Test the HVAC system with the blower fan on all speeds to verify the proper operation.
Tightening
Tighten the Blower Motor Resistor Card Screws to 1 N·m (9 lb in).
Tightening
Tighten the Battery Terminal Bolts to 17 N·m (13 lb in).
Parts Requirements:
| • | 24427572 Blower ASM |
| • | 90583344 Resistor ASM-BLO MOT |
| • | 09179222 Seal-Pass Compt Air FLTR HSG |
Claim Information:
To receive credit for this repair during the warranty coverage period, submit a claim through the Saturn Dealer System as follows:
Case Type | Description | Labor Operation Code & Time |
|---|---|---|
VW | Perform Blower Motor Resistor Card Diagnostics | Z4115 -- 0.2 hrs. |
ADD: A To Replace Blower Motor and Resistor Card | 0.8 hrs. |
