For 1990-2009 cars only
Removal Procedure
- Turn the ignition OFF.
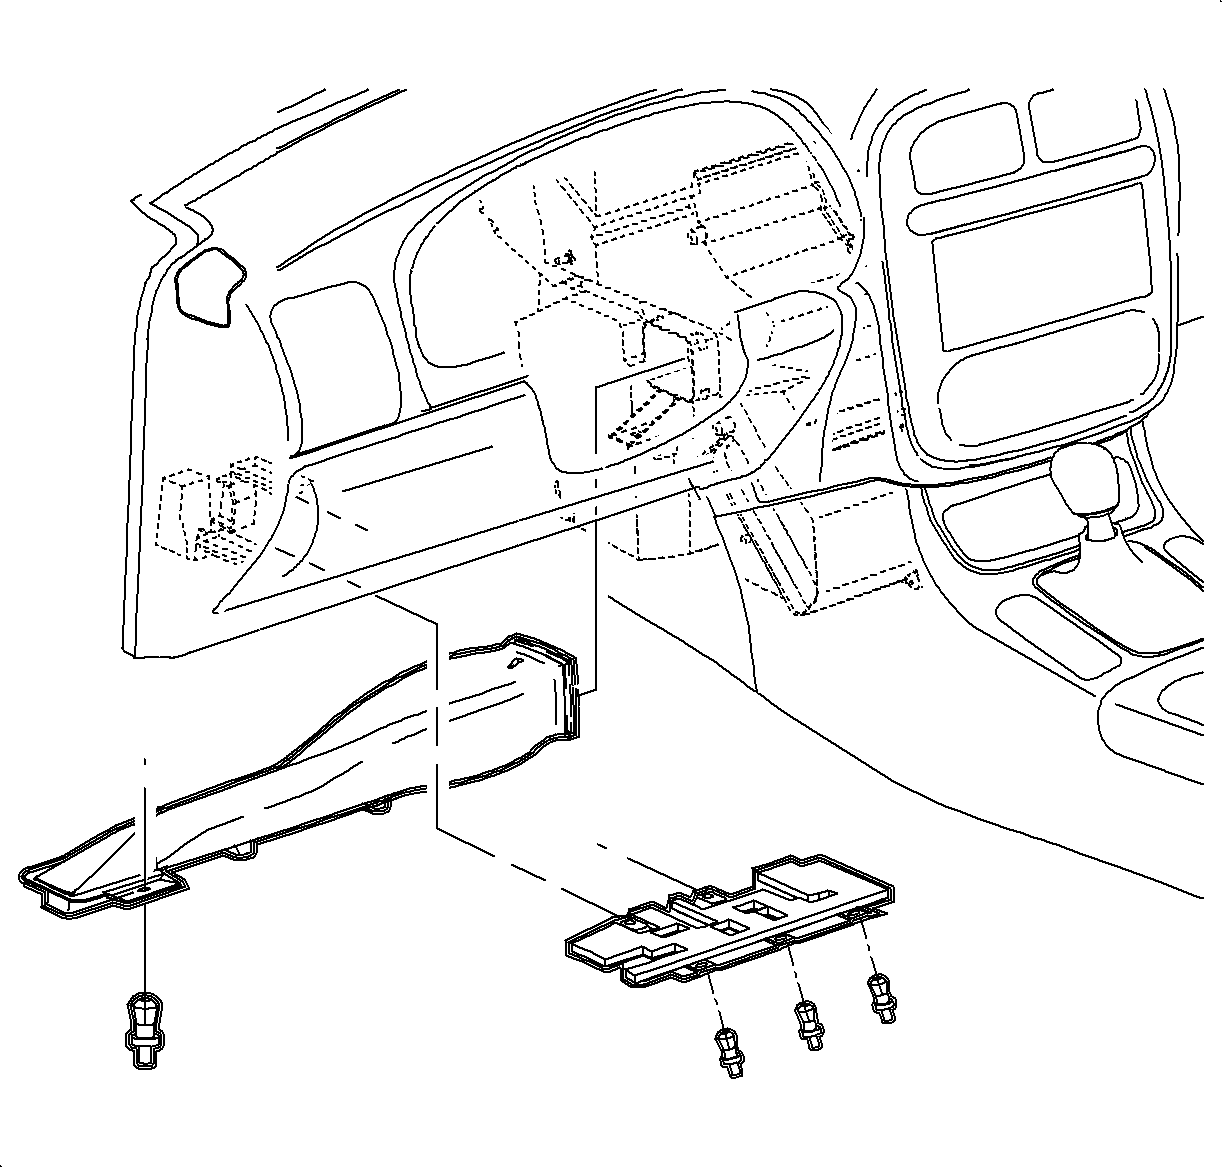
- Remove the left side lower I/P closeout panel (hush panel) push pin fasteners and remove the panel.
- Remove the left side lower heater duct assembly push pin fastener and remove the duct.
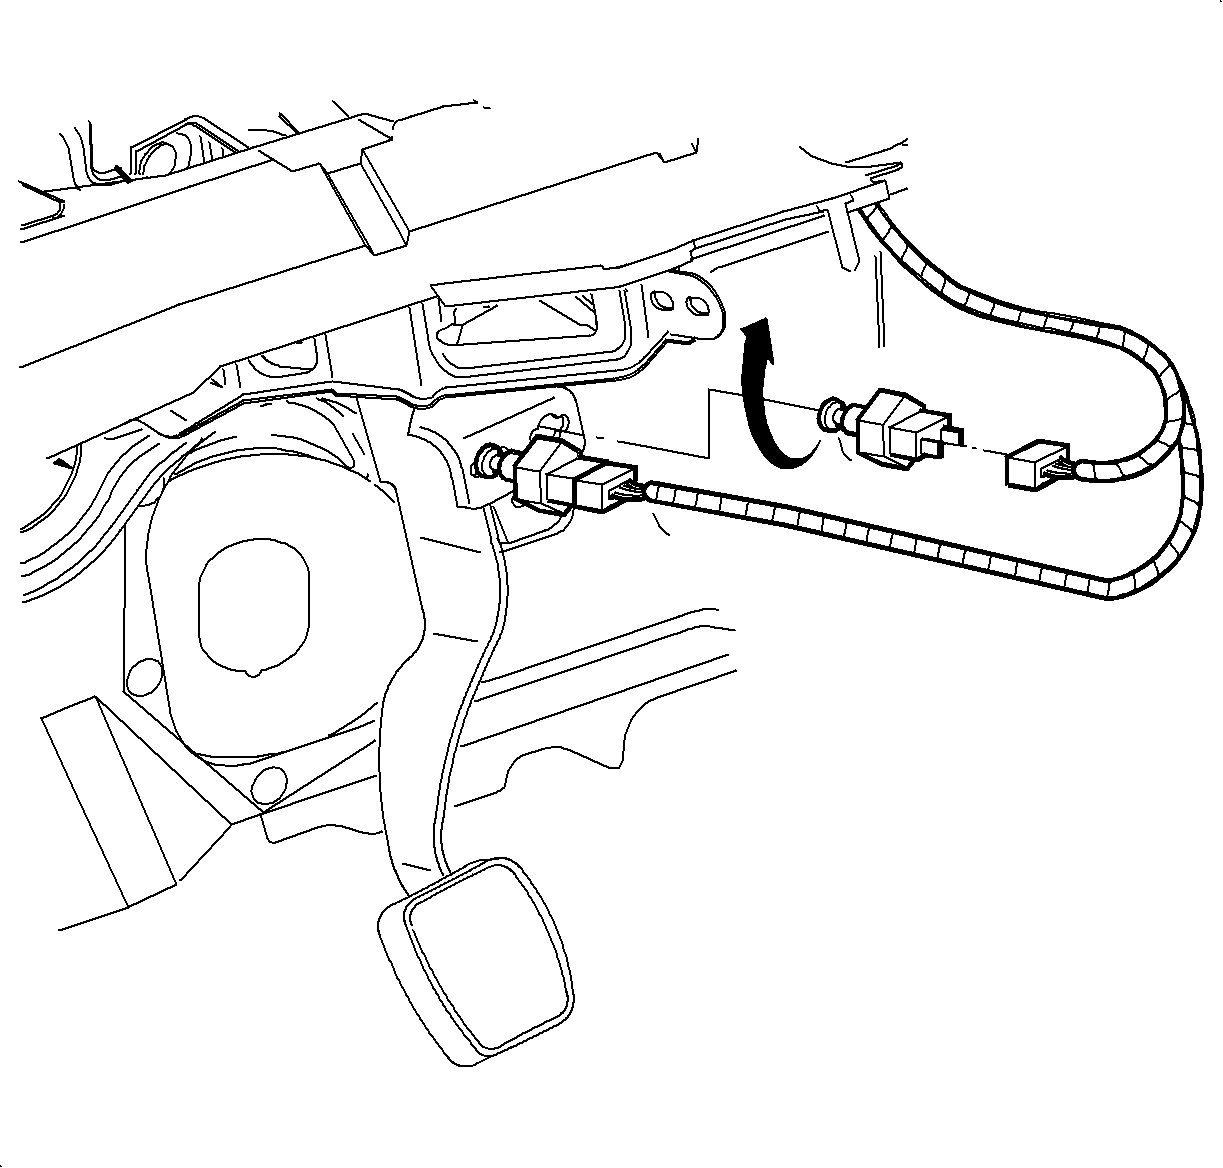
- Disconnect the stop lamp switch harness connector.
- Remove the stop lamp switch by rotating it 180 degrees so it will pull out from the bracket.


Installation Procedure
- Pull the switch plunger all the way out to prepare for adjustment. It may require moderate force to pull the switch plunger all the way out.
- Install the stop lamp switch into the bracket and rotate 180 degrees while holding the brake pedal down during installation.
- Connect the stop lamp switch harness connector. Push in the connector until a click is heard and pull back to confirm a positive engagement.
- Adjust the stop lamp switch by pulling the brake pedal all the way up by hand. The switch internal ratchet mechanism will lock the switch in the adjusted position.
- Install the left side lower heater duct and push pin fastener.
- Install the left side lower I/P closeout panel (hush panel) and push pin fasteners.

Important: The notch on the plunger will be fully visible when the plunger is all the way out.
