For 1990-2009 cars only
Removal Procedure
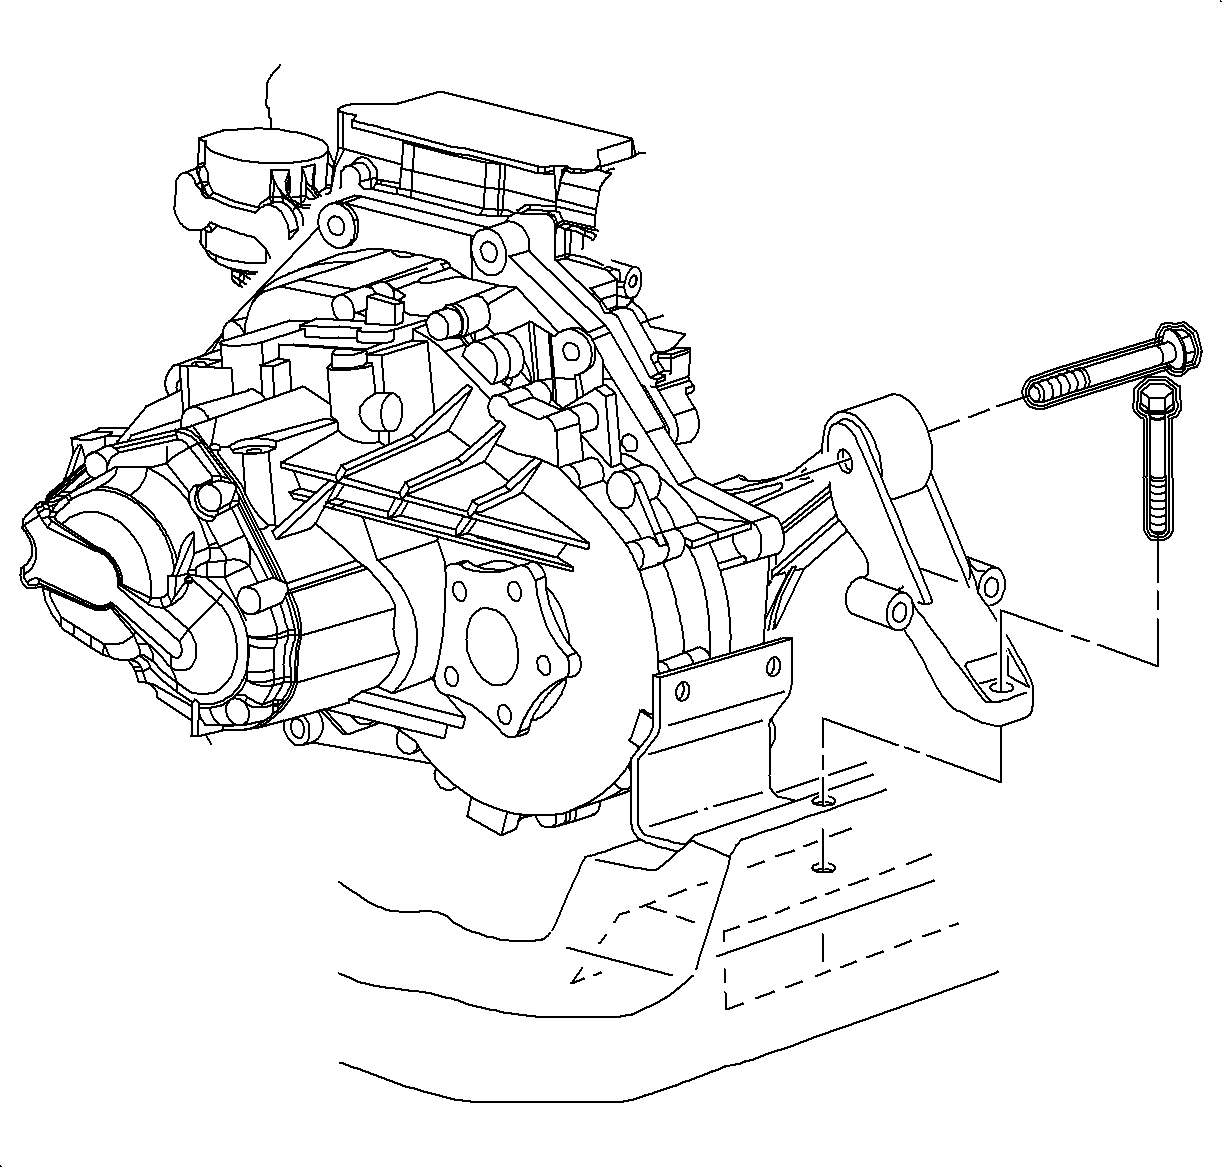
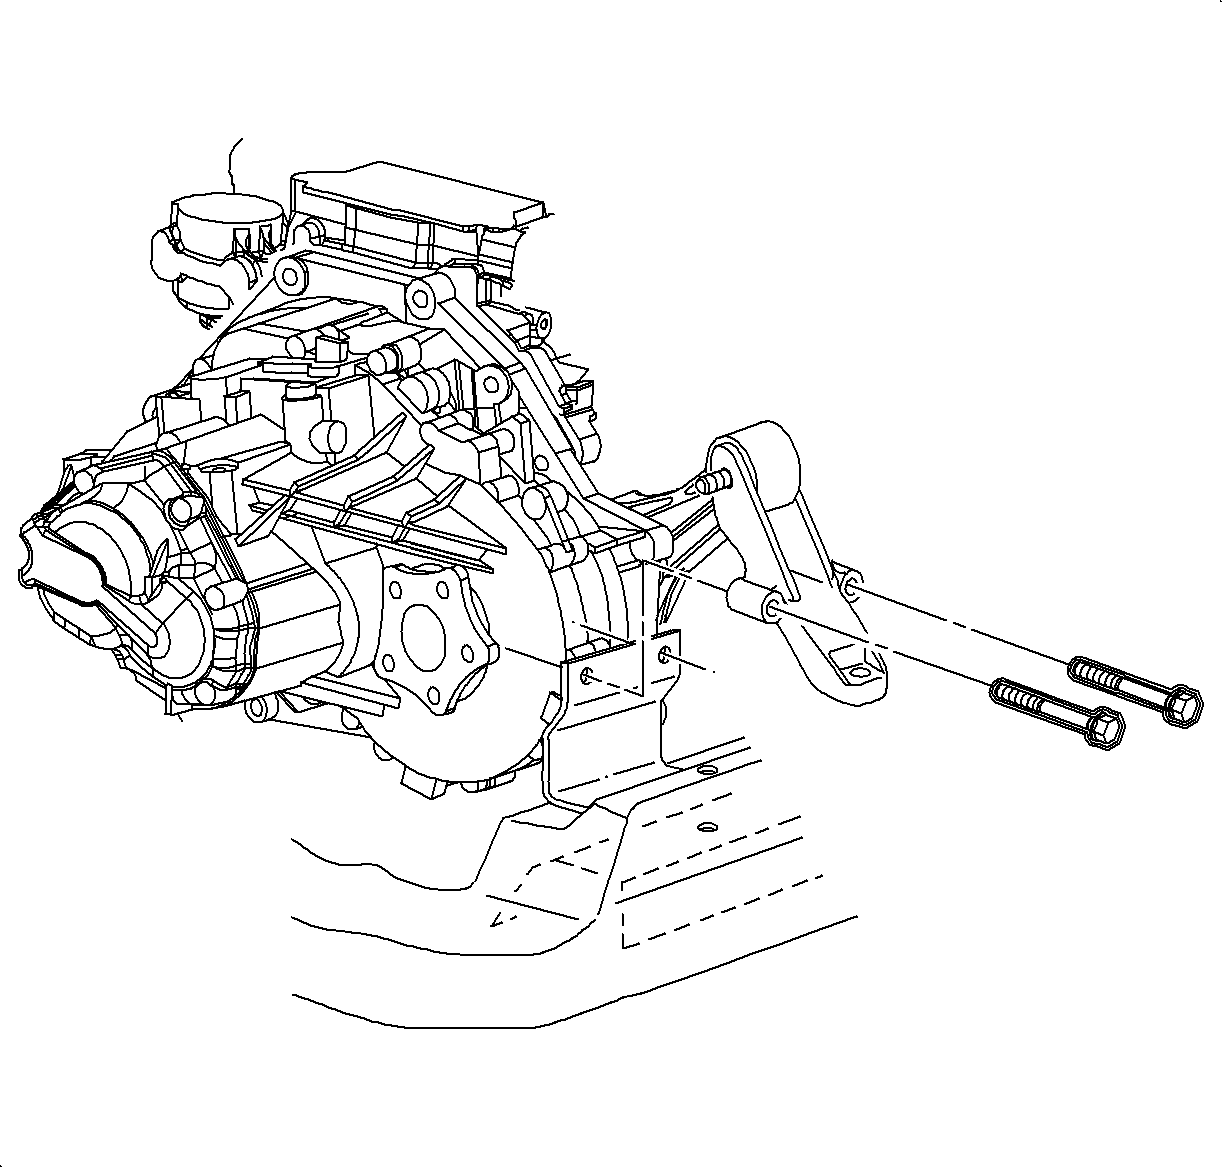
- Remove rear transaxle mount through bolt.
- Remove one of three transaxle mount bracket to frame bolts.
- Raise vehicle on hoist.
- Remove remaining mount bracket to frame attachment bolts.
- Remove transaxle mount bracket from vehicle.
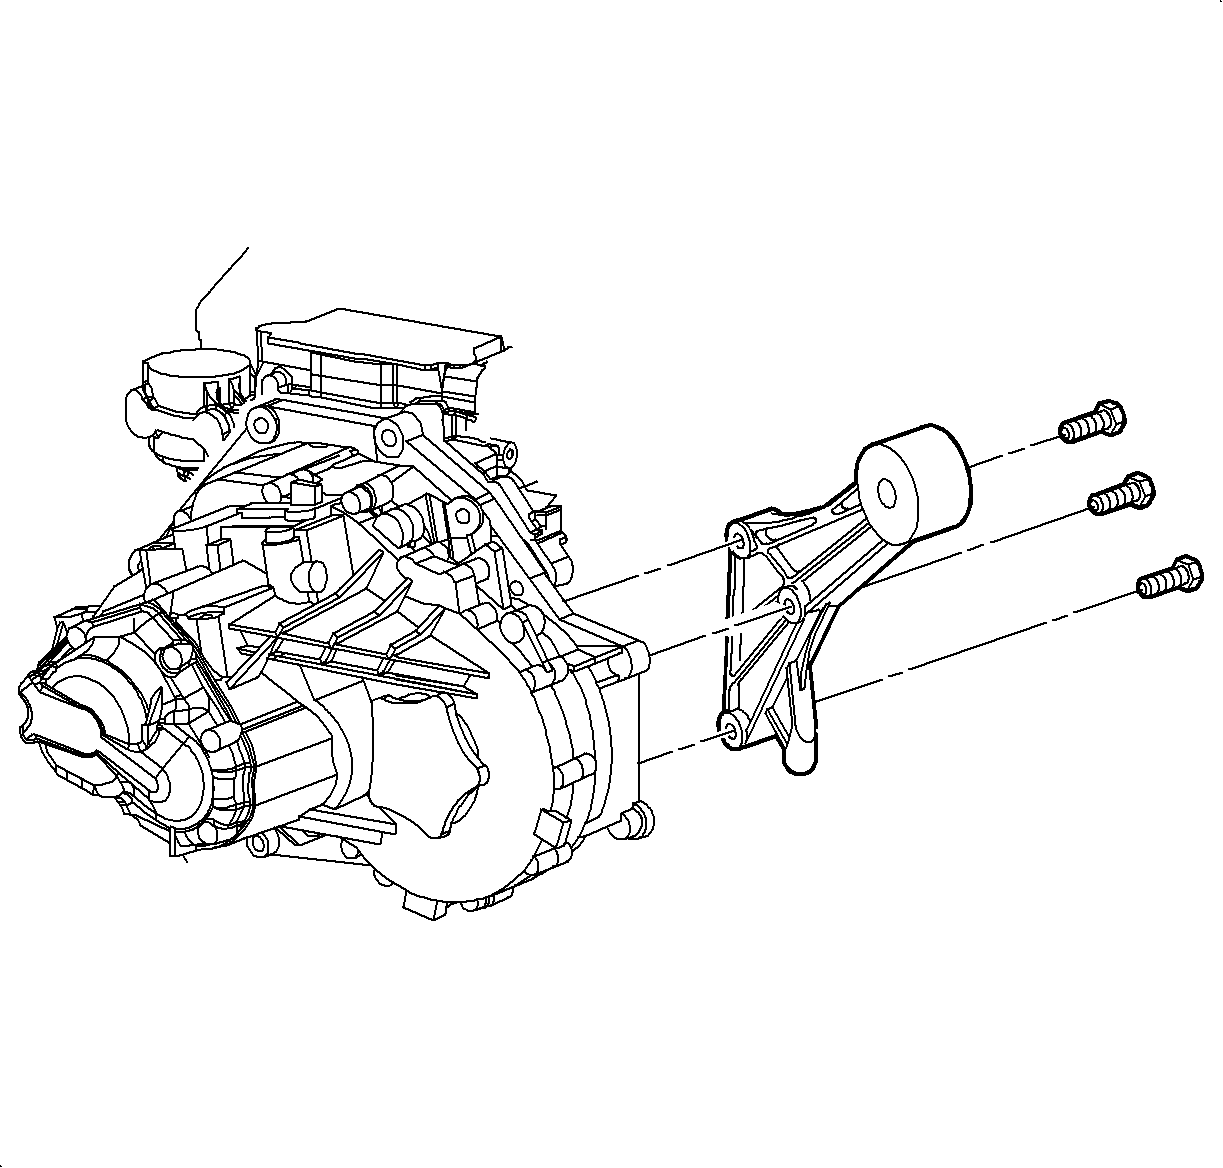
- Remove the transaxle mount to transaxle bolts.
- Remove transaxle mount from vehicle.

Caution: Refer to Vehicle Lifting Caution in the Preface section.


Installation Procedure
- Install rear transaxle mount to transaxle and tighten fasteners.
- Install the two transaxle mount bracket to frame attachment fasteners and tighten.
- Lower vehicle from hoist.
- Install and tighten the transaxle mount bracket to frame attachment fastener.
- Install the transaxle mount to bracket through bolt.

Tighten
Tighten Rear Transaxle Mount-to-Transaxle Bolts to: 90 N·m (66 lb ft)

Tighten
Tighten Rear Transaxle Mount Bracket-to-Frame Bolts to: 60 N·m (44 lb ft)

Tighten
Tighten Rear Transaxle Mount Bracket-to-Frame Bolts to: 60 N·m (44 lb ft)
Tighten
Tighten Rear Transaxle Mount Through Bolt to: 90 N·m (66 lb ft)
