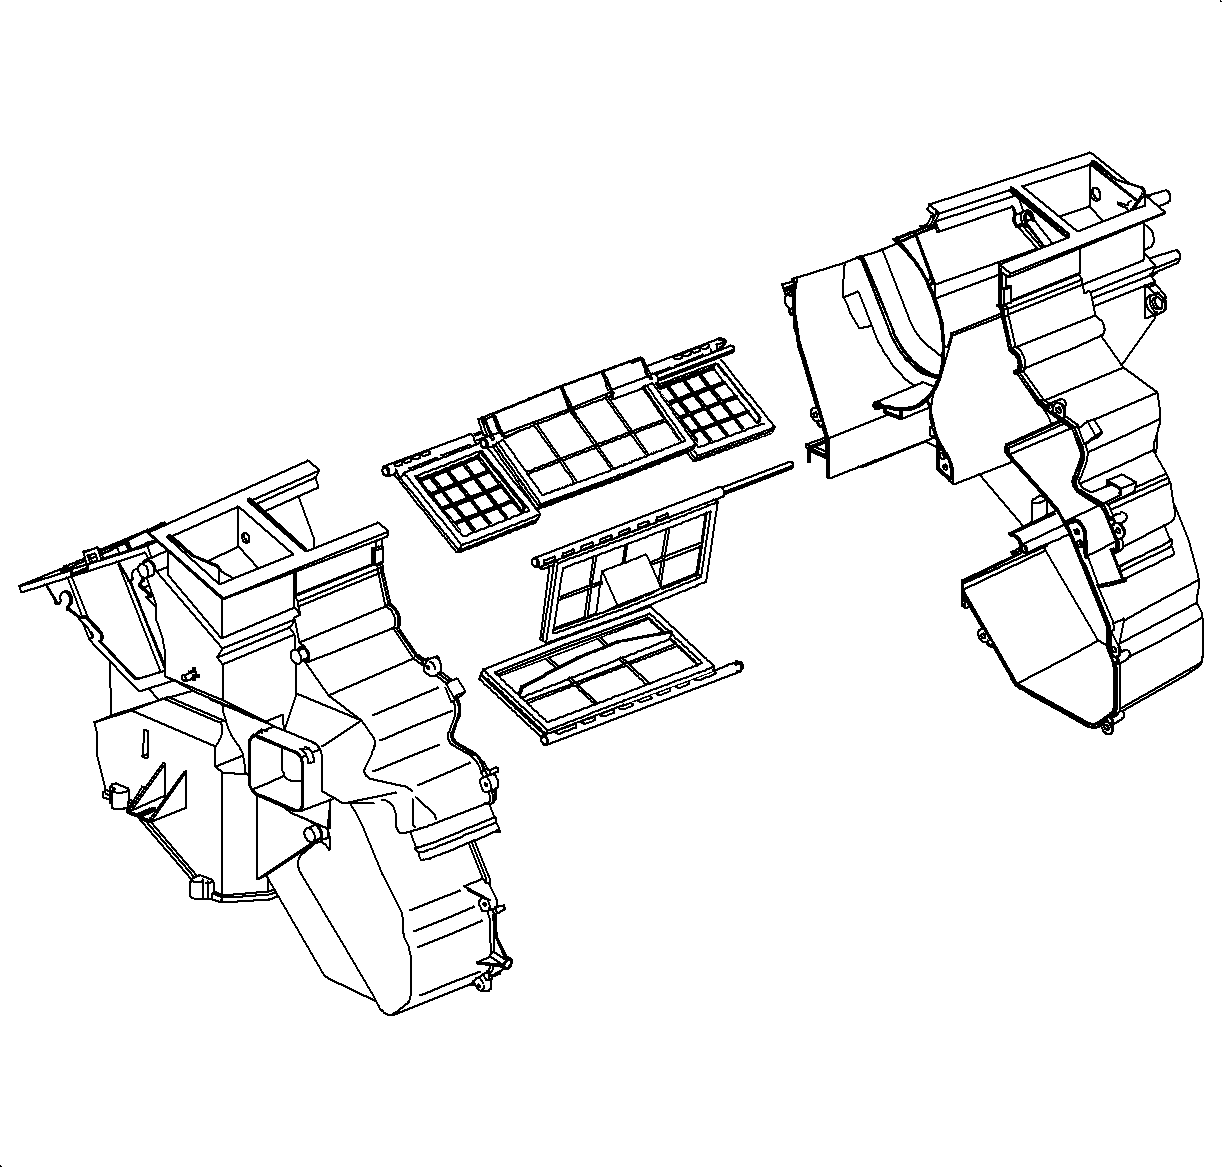
- Install temperature, heater, defroster, and vent doors into case.
- Install right side of case, carefully lining up door shafts with case openings.
- Verify that each door can be easily rotated through out its entire motion.
- Install case screws and clips.
- Install evaporator into bottom of case.
- Install module lower case and install screws.
- Install heater core into case.
- Install heater pipes into case and then into heater core. Shorter pipe is upper.
- Install heater pipe retaining clamps.
- Install heater core retaining strap.
- Install TXV/Heater pipe seal.
- Install TXV/Heater pipe seal.
- Install recirculation doors.
- Install recirculation door rod to small door. With both doors held firmly closed, snap rod into retainer clip and close clip.
- Install recirculation actuator assembly onto door shaft. Shaft has two flats that must be aligned to actuator. Install recirculation actuator bracket to module screws.
- Install vent and heater sub-levers. These sub-levers are identical and should have the slotted end inward.
- Install defrost door to sub-lever.
- Install vent primary lever.
- Install heater primary lever.
- Install cam. Rotate to verify proper installation.
- Install mode actuator.
- For vehicles equipped with standard HVAC only - Install the blower motor resistor card.
- For vehicles equipped with automatic climate control only - Install the aspirator hose.
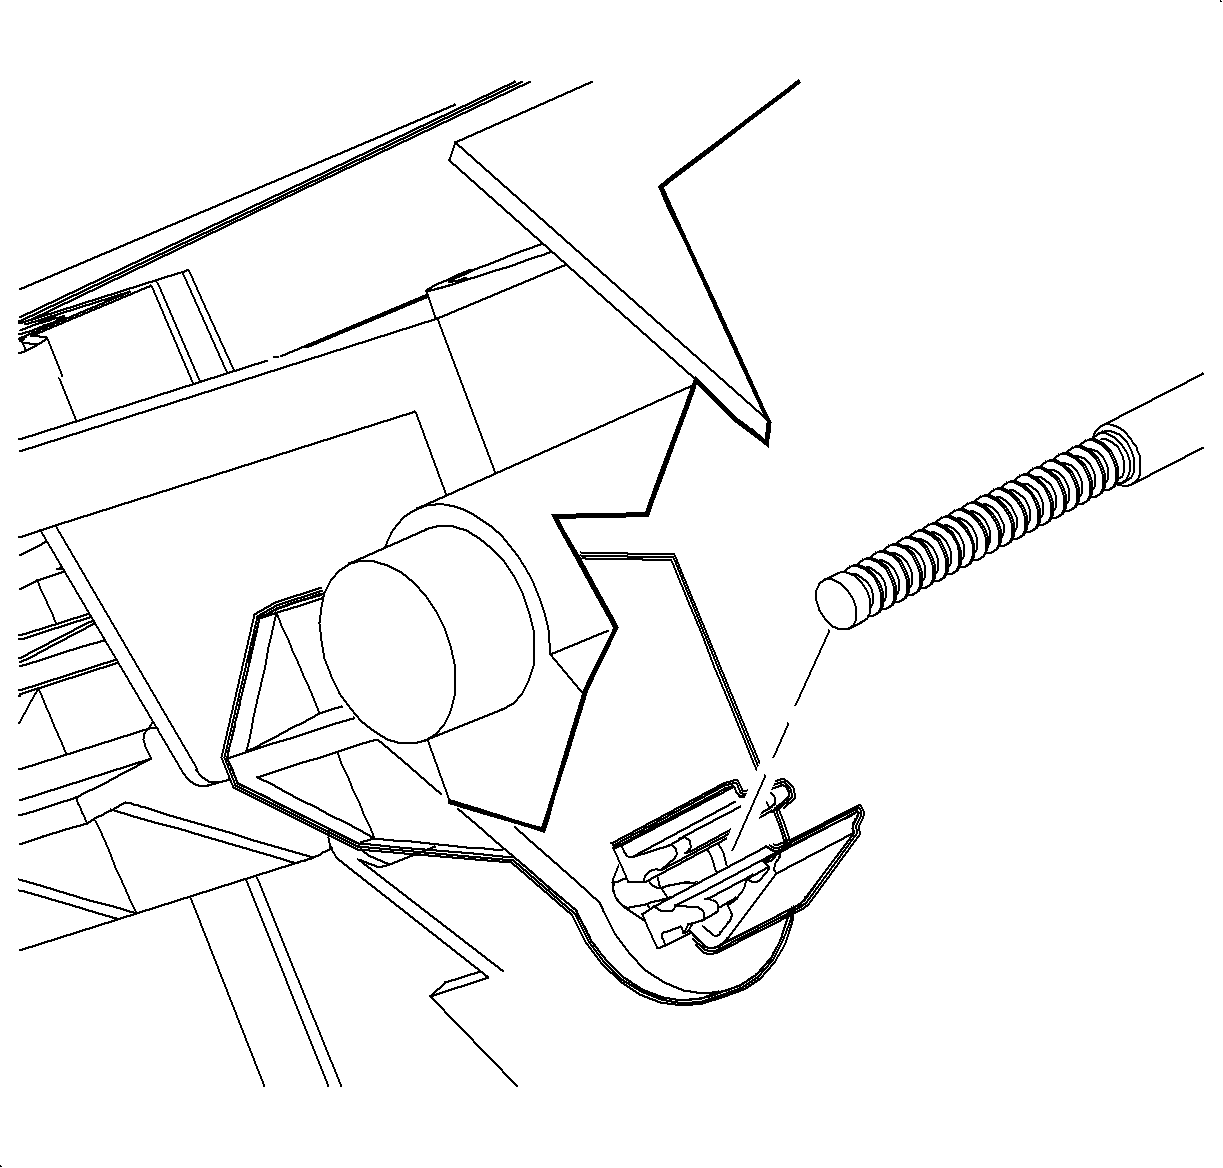
- For vehicles equipped with standard HVAC vehicles - Install the temperature door cable eyelet over temperature door lever. Do not install housing into retaining clip at this time.
- Attach electrical harness to back of module. Connect actuators, blower resistor, and route to blower motor.
- For vehicles equipped with automatic climate control only - Attach the electrical harness to back of module. Connect the actuators, blower control module and route to blower motor.
- Push the blower motor harness grommet through hole then pull back to seat.
- Install the harness to case screw at mode actuator.
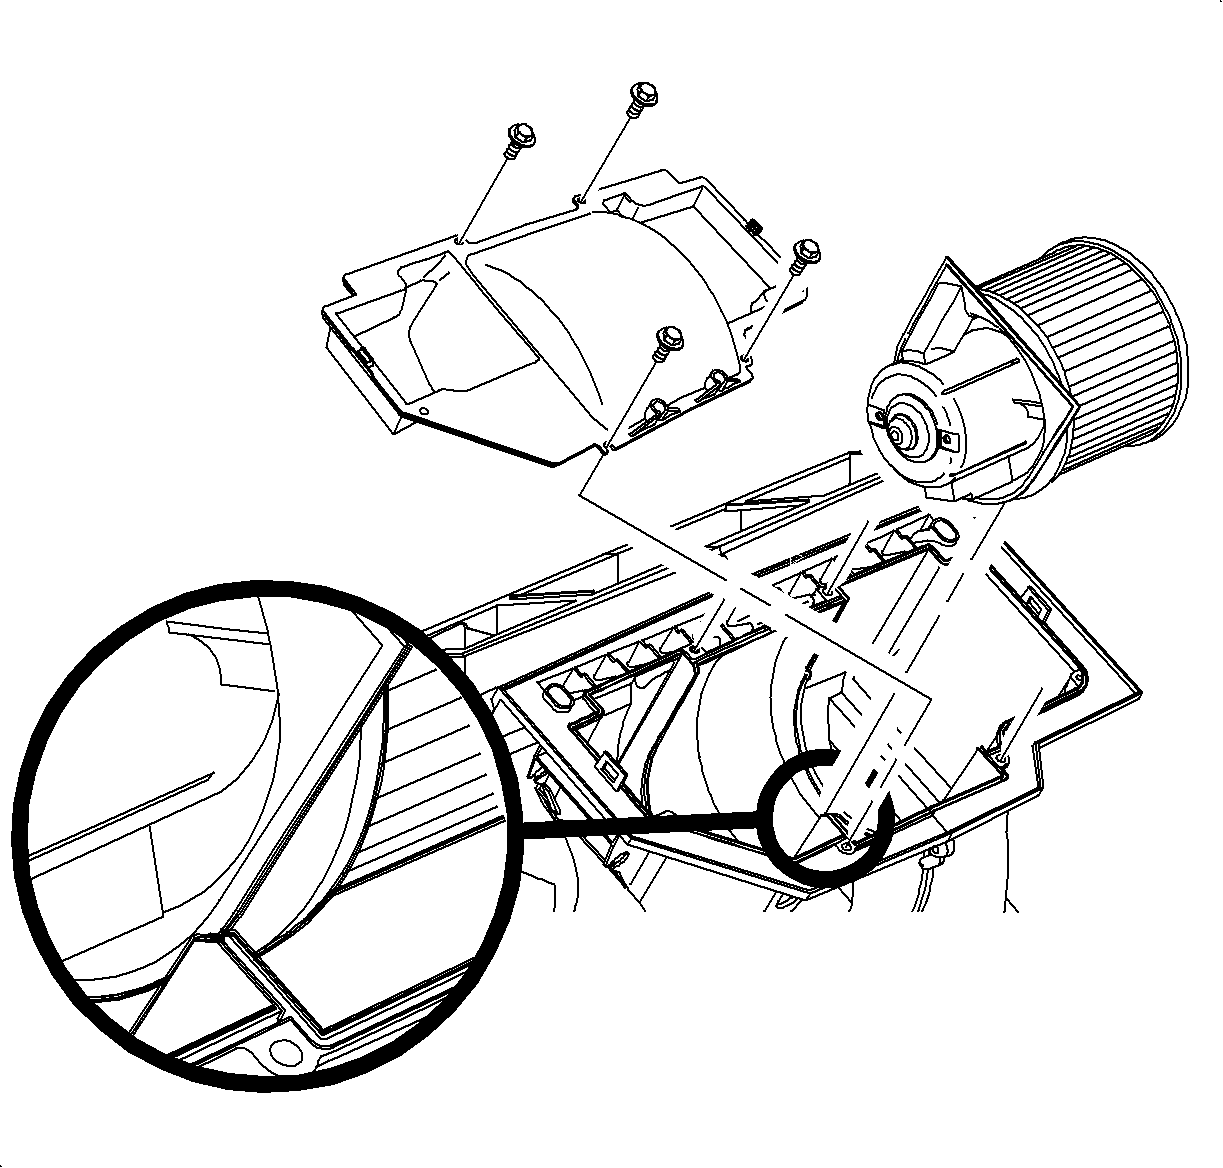
- Install blower motor assembly into module housing. Blower motor assembly rib must fit into channel in housing.
- Connect blower motor electrical connector.
- Install blower motor housing. Housing rib must fit into slot in case. Snap left and right clips into place and install screws.
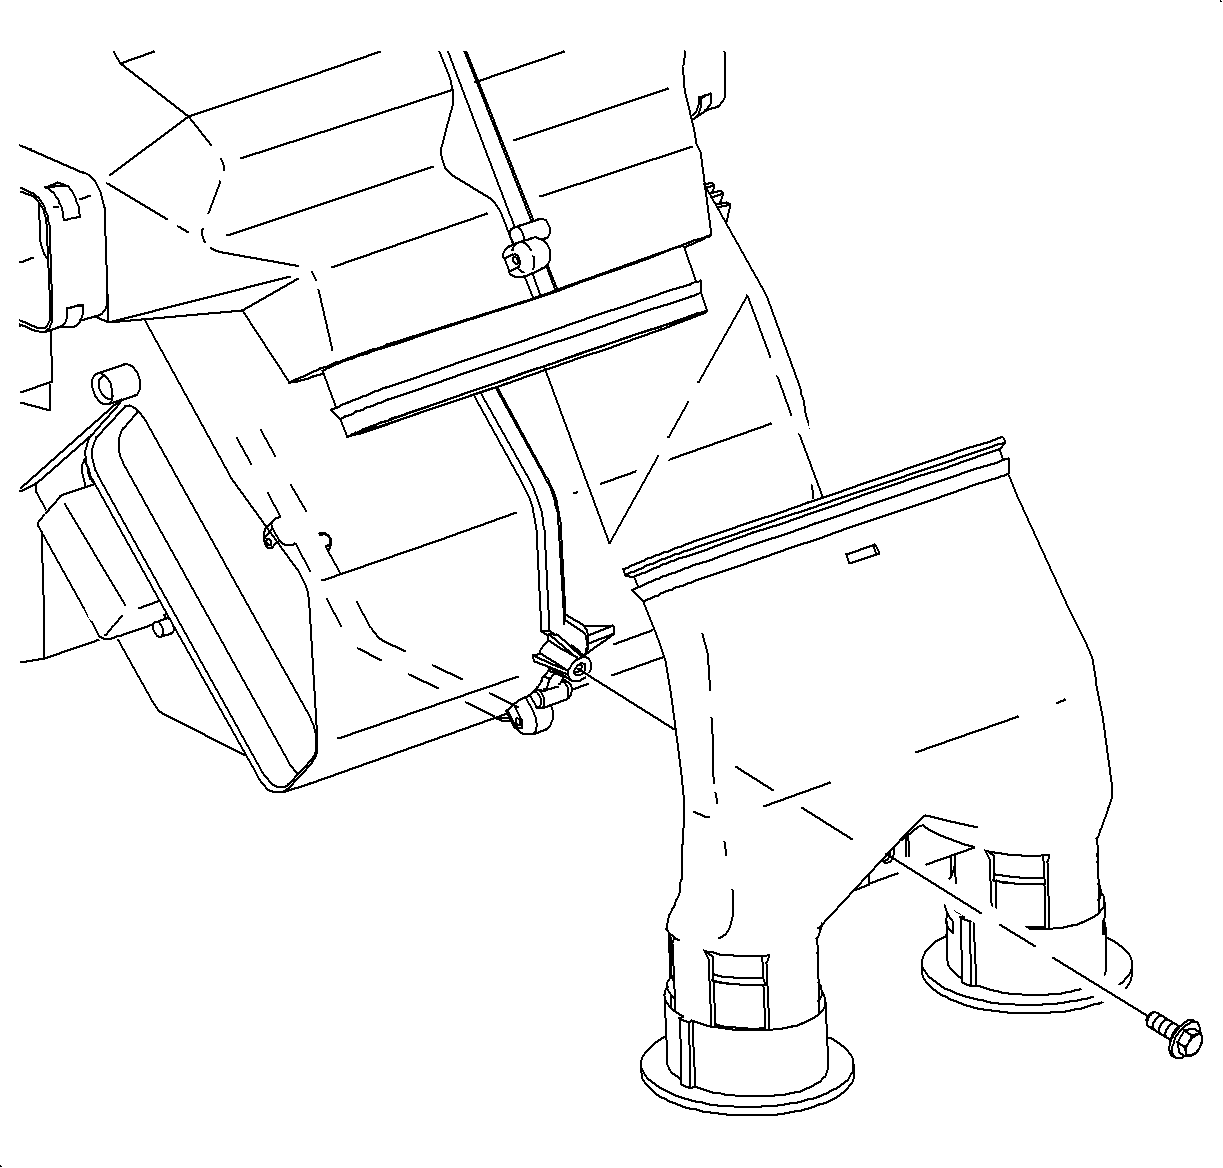
- Install connector duct to HVAC module and install screw.
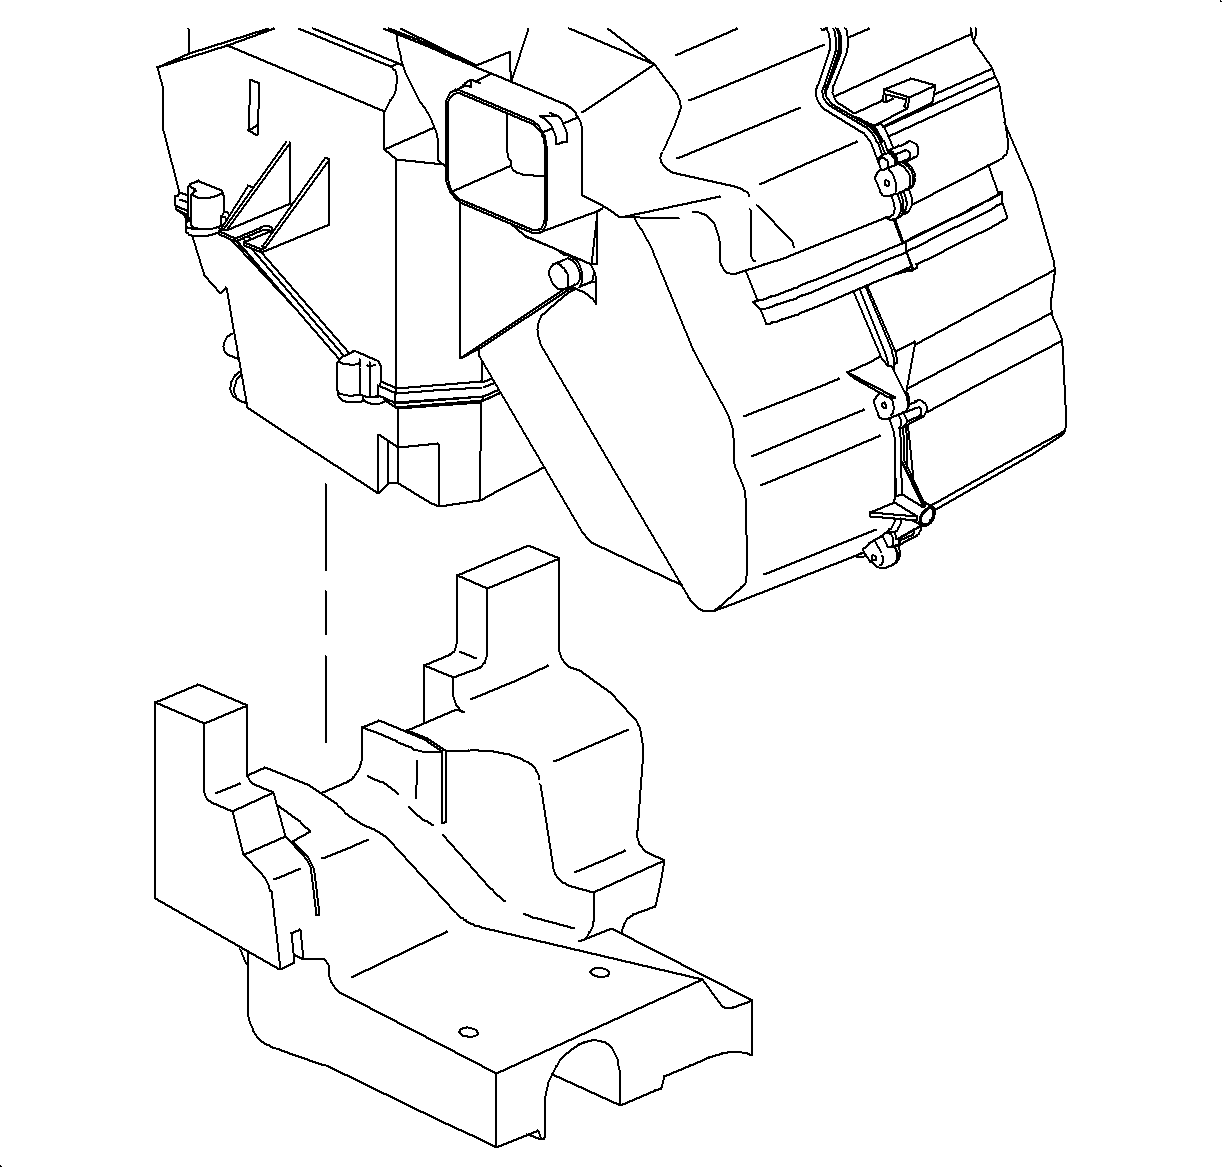
- Install lower insulator into forward edge of case then stretch to hook on barbs.
Notice: Refer to Fastener Notice in the Preface section.
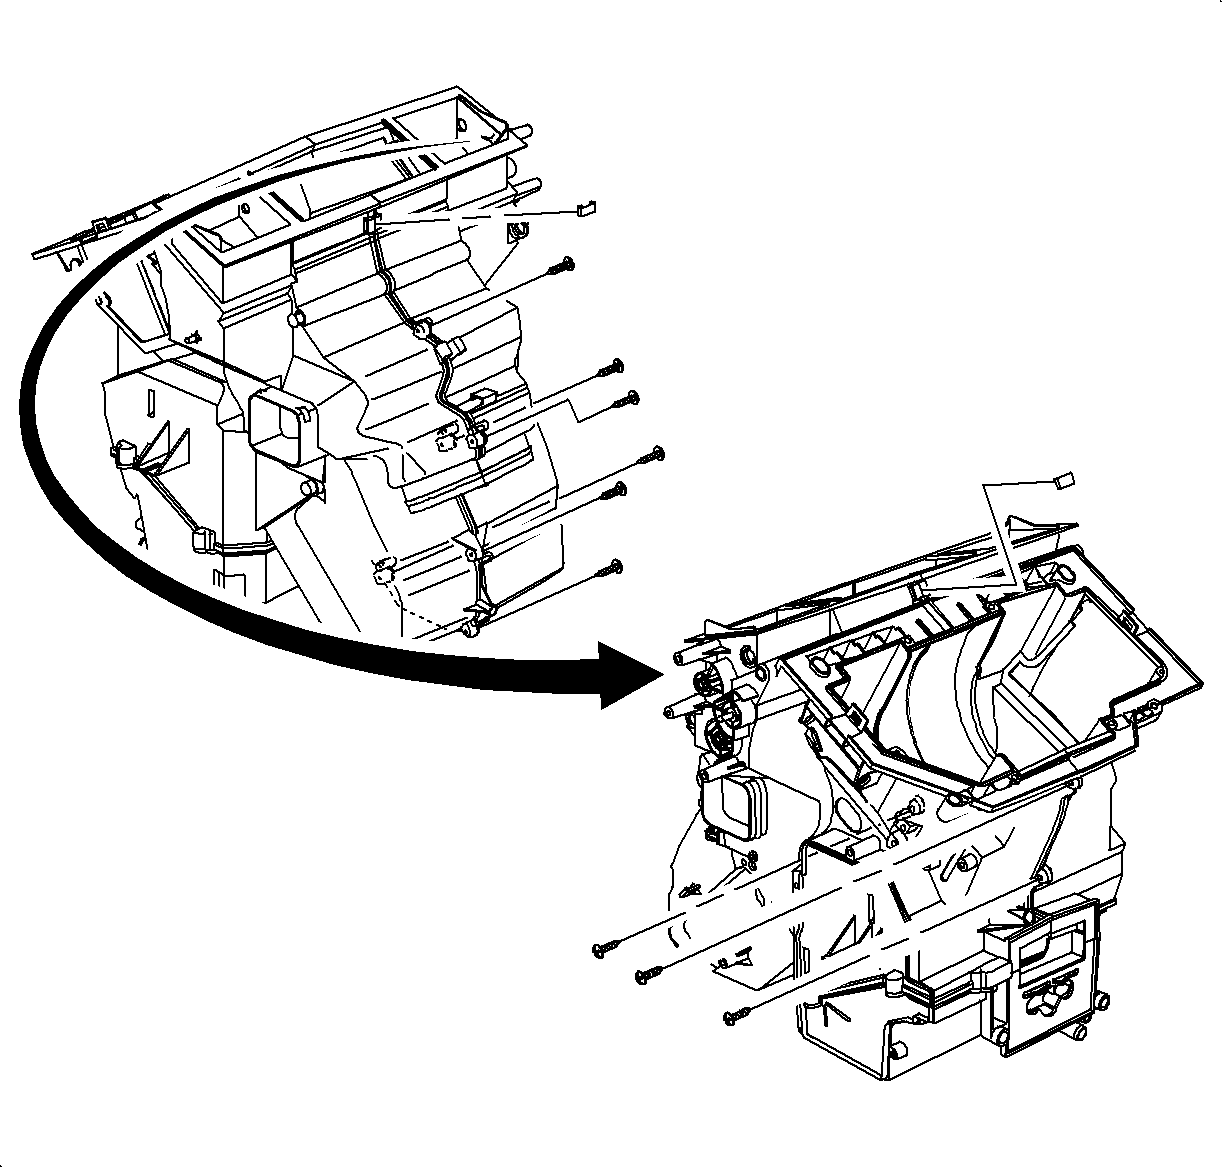
Tighten
Tighten the HVAC module screws to 1.0 N·m (9 lb in).
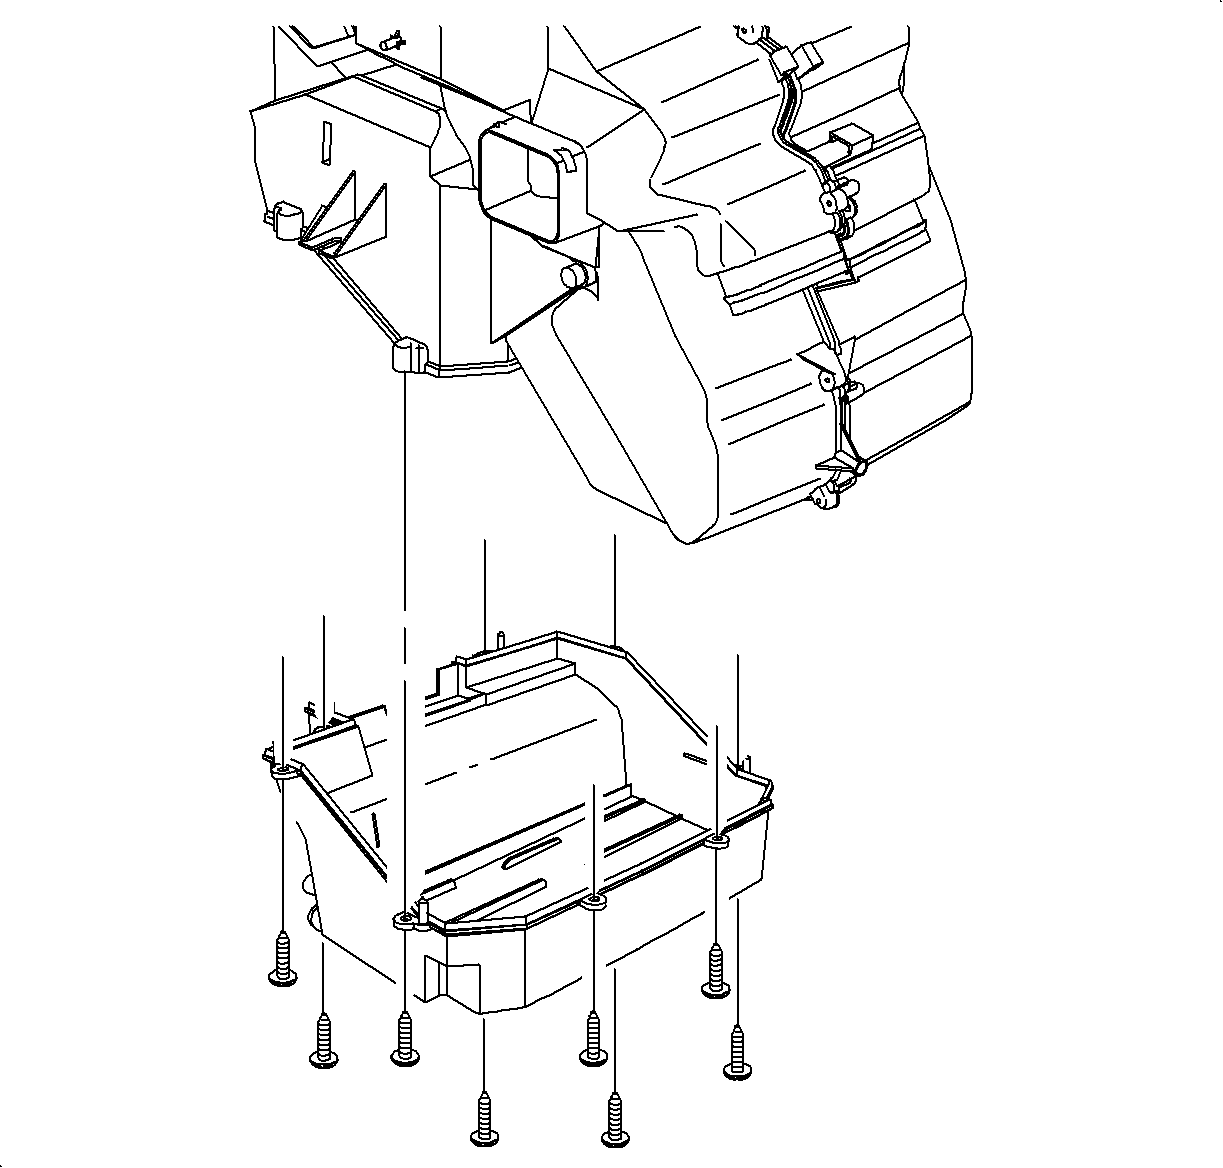
Tighten
Tighten the HVAC module screws to 1.0 N·m (9 lb in).
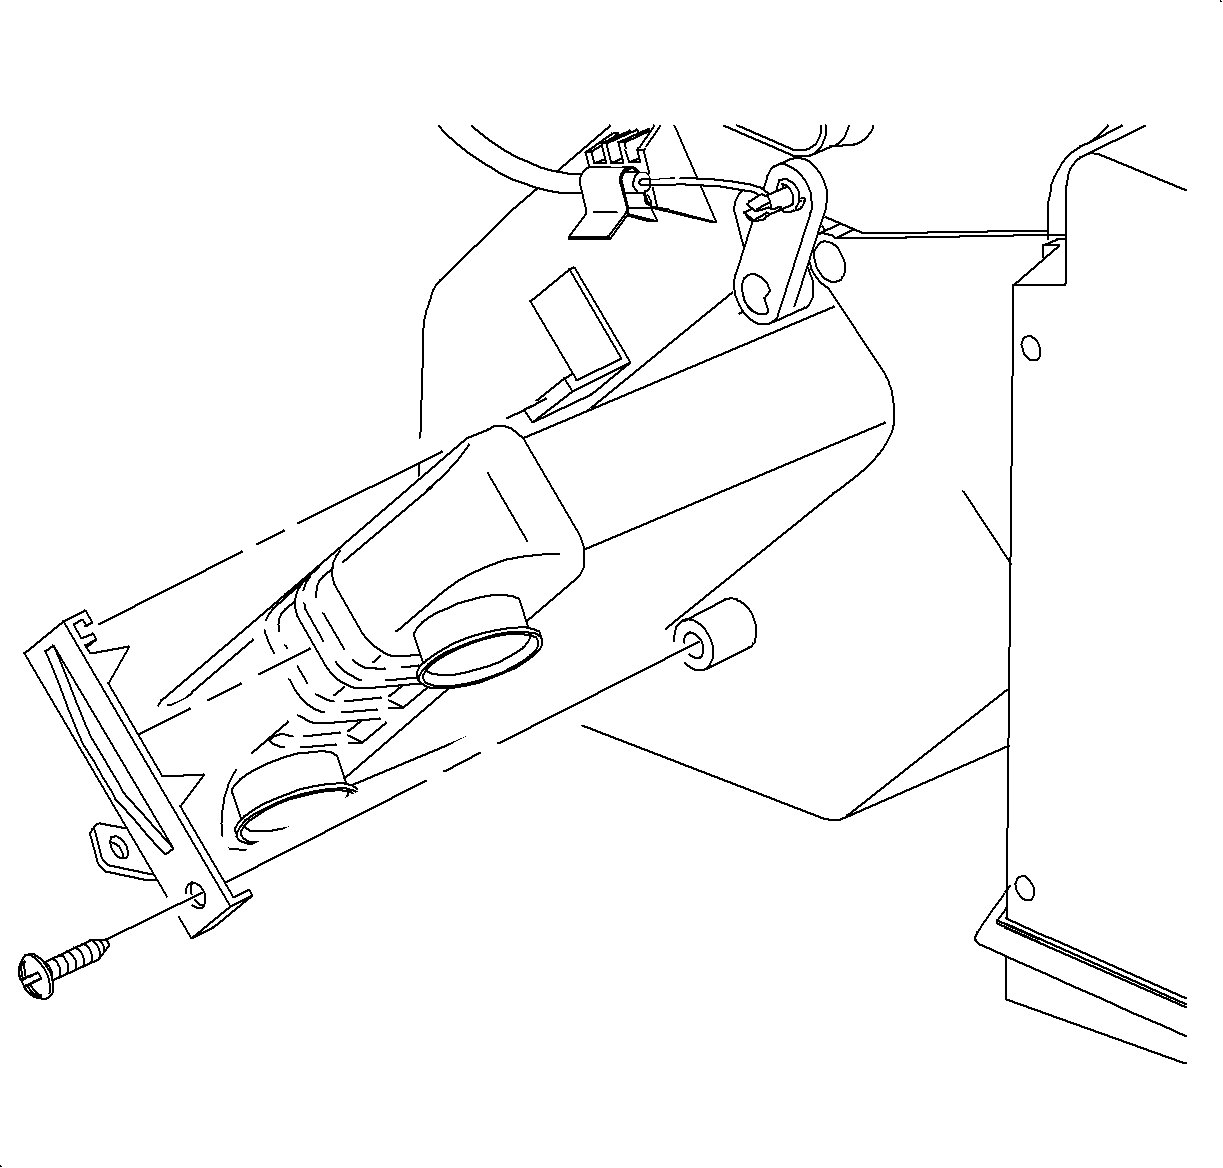
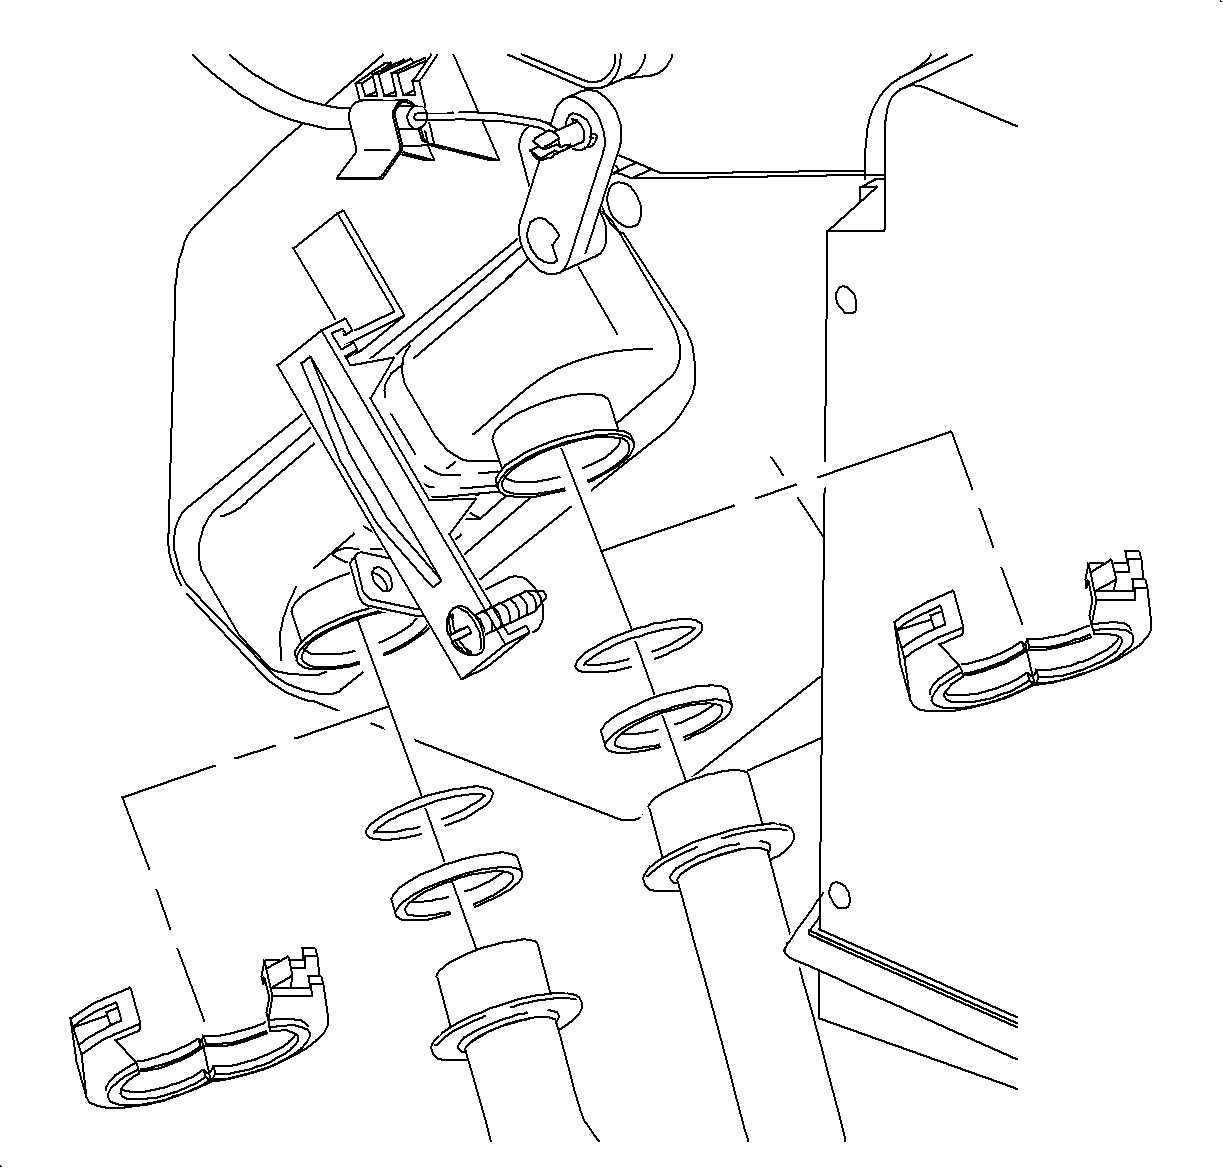
Important: Verify that both pipes have a bushing and O-ring installed before installing into core.
Important: Lower heater pipe clamp hinge fits into the tab of the heater core retainer strap.
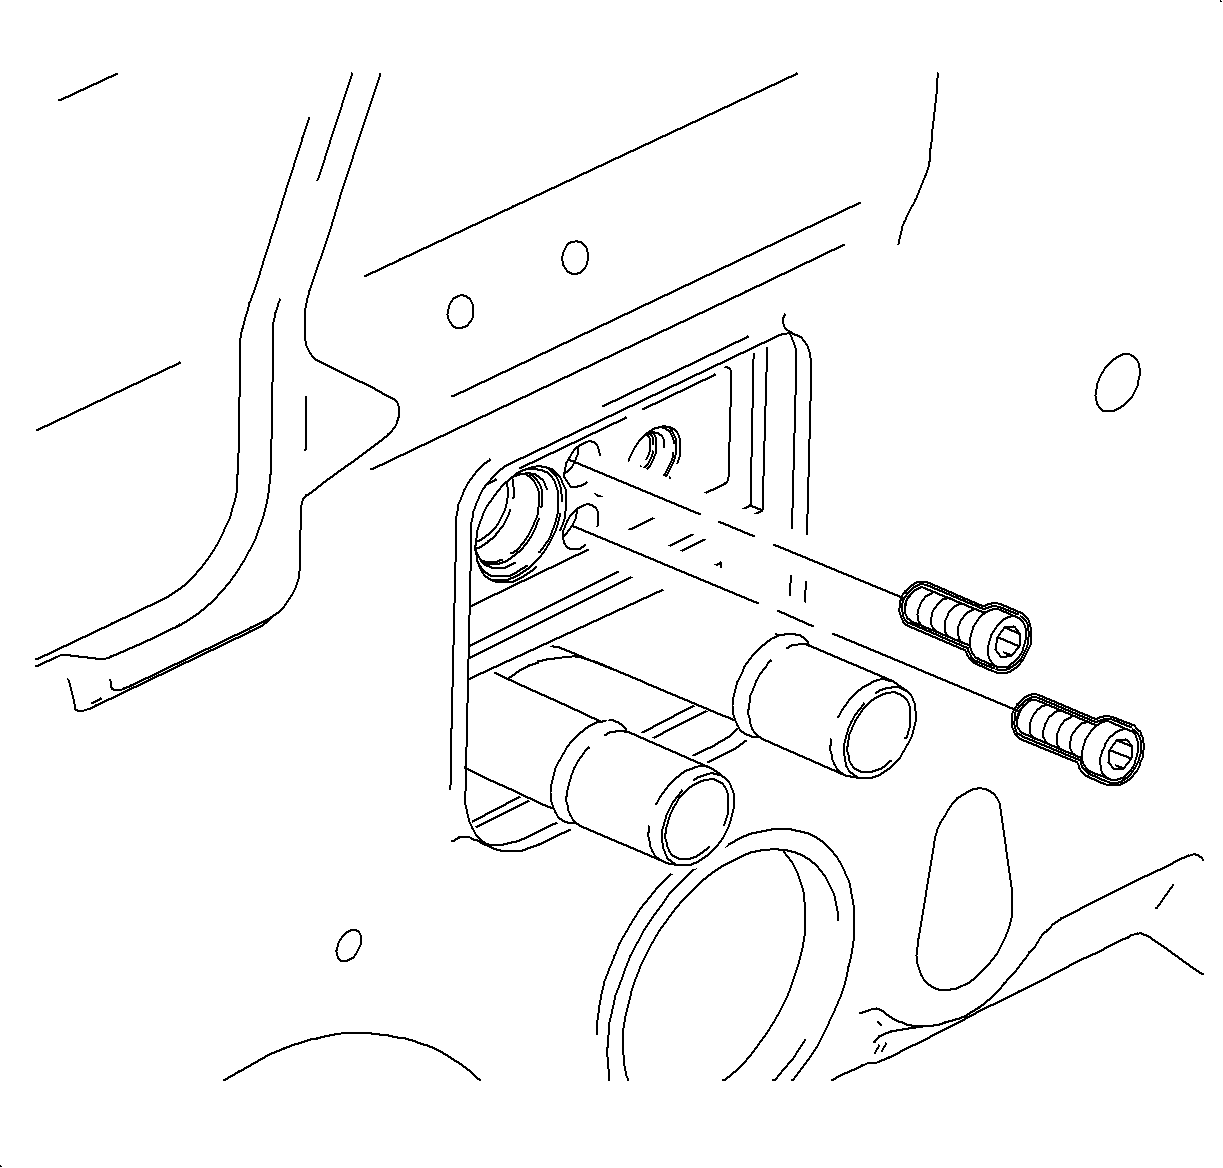
Tighten
Tighten the TXV-to-block bolts to 7.0 N·m (62 lb in).
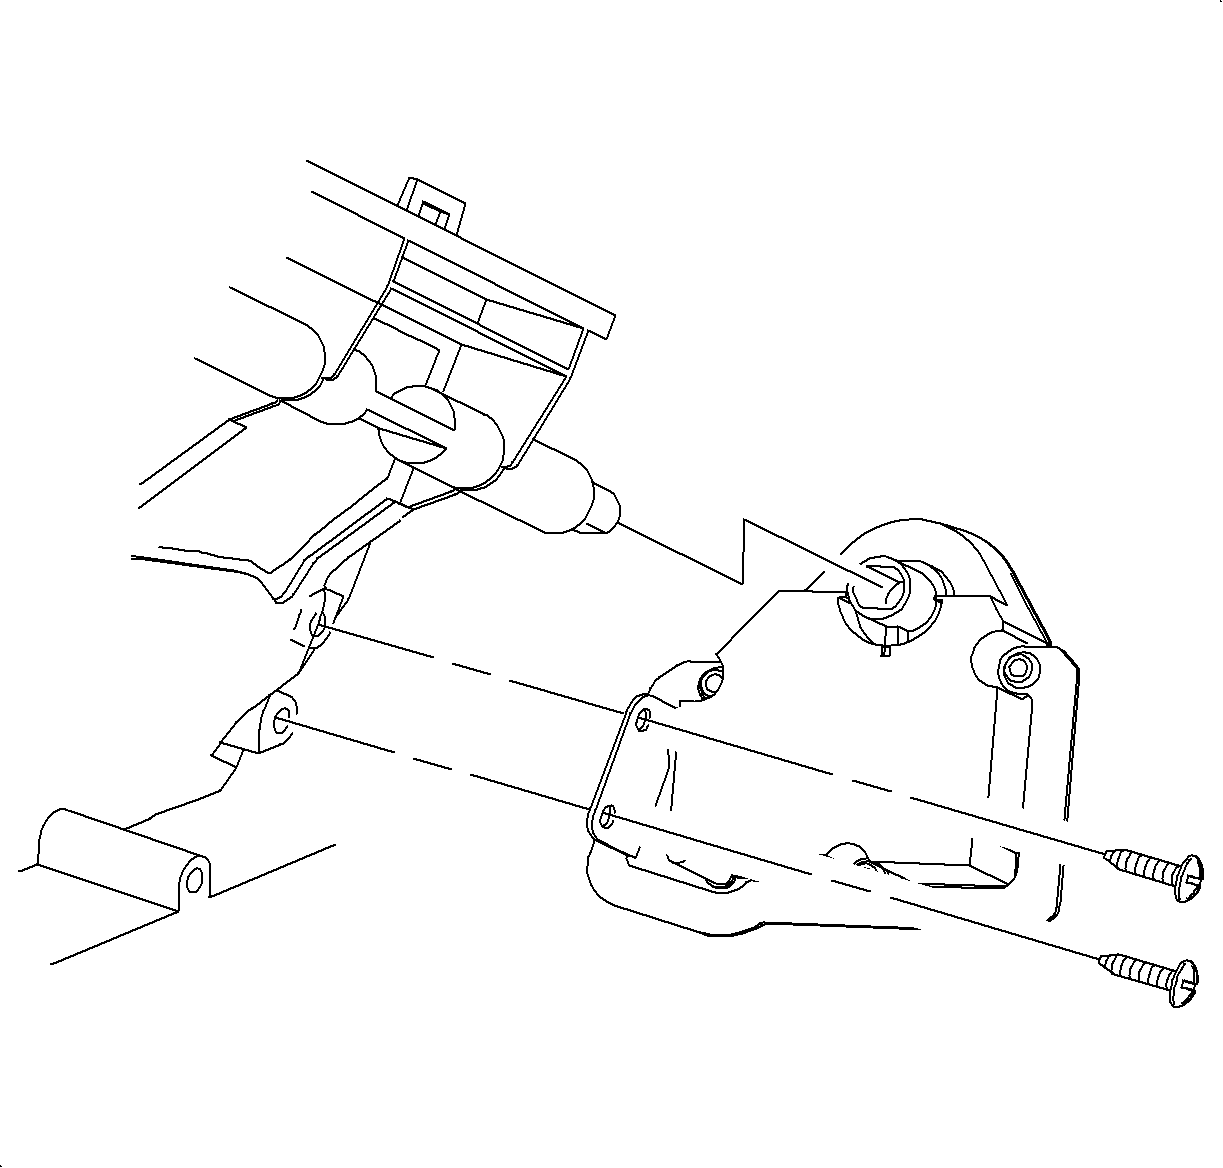
Tighten
Tighten the recirculation actuator bracket-to-HVAC module screws to 1.0 N·m
(9 lb in).
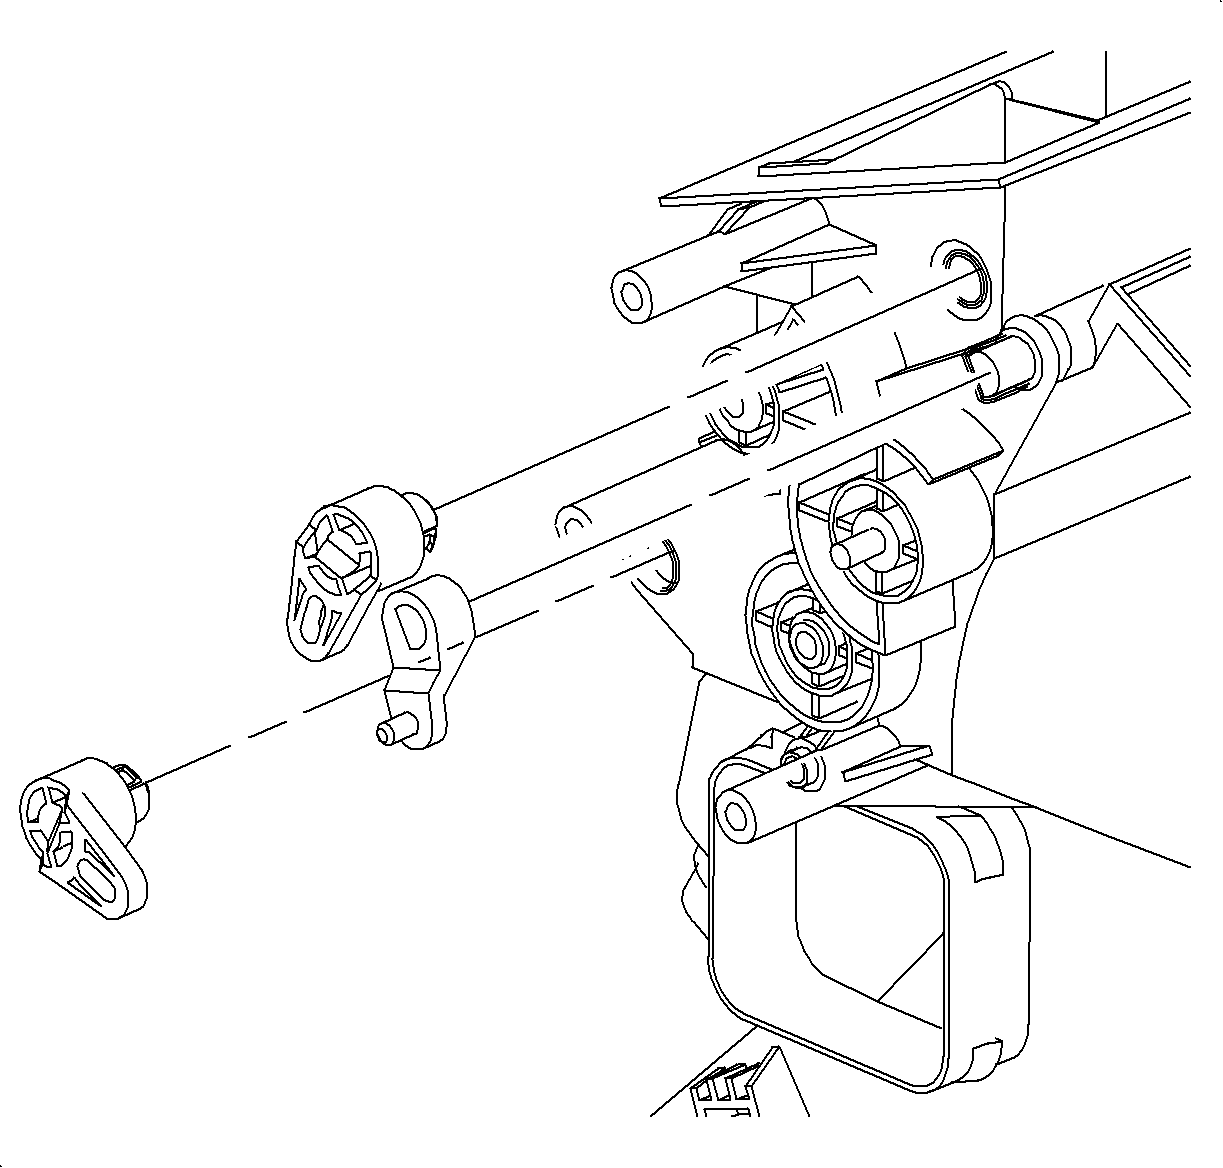
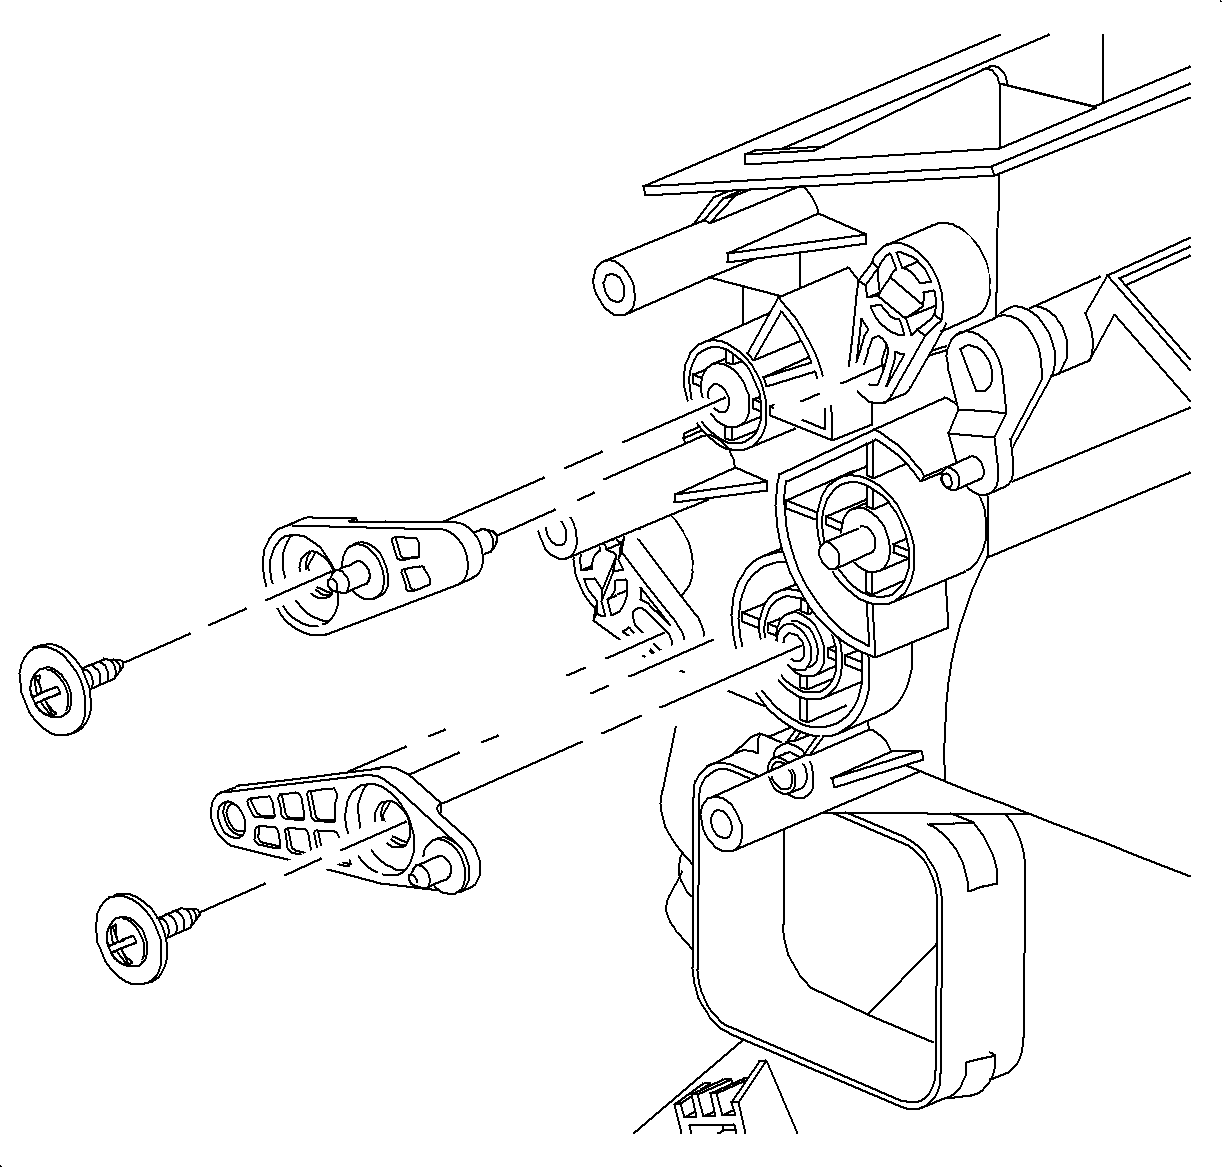
Tighten
Tighten the vent primary lever fastener to 1.0 N·m (9 lb in).
Tighten
Tighten the heater primary lever fastener to 1.0 N·m (9 lb in).
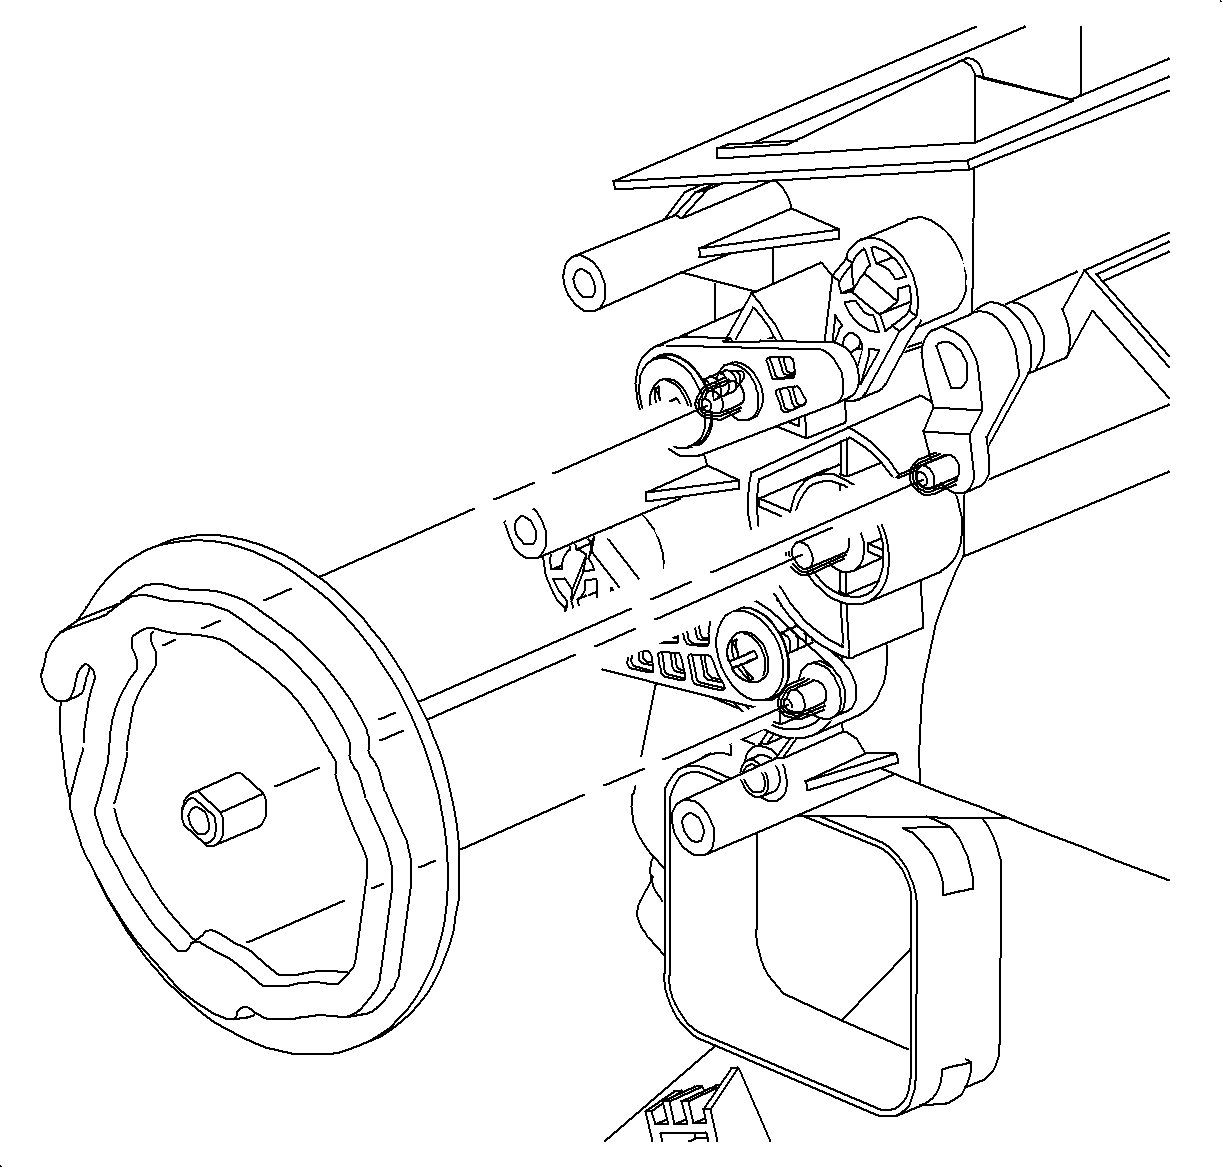
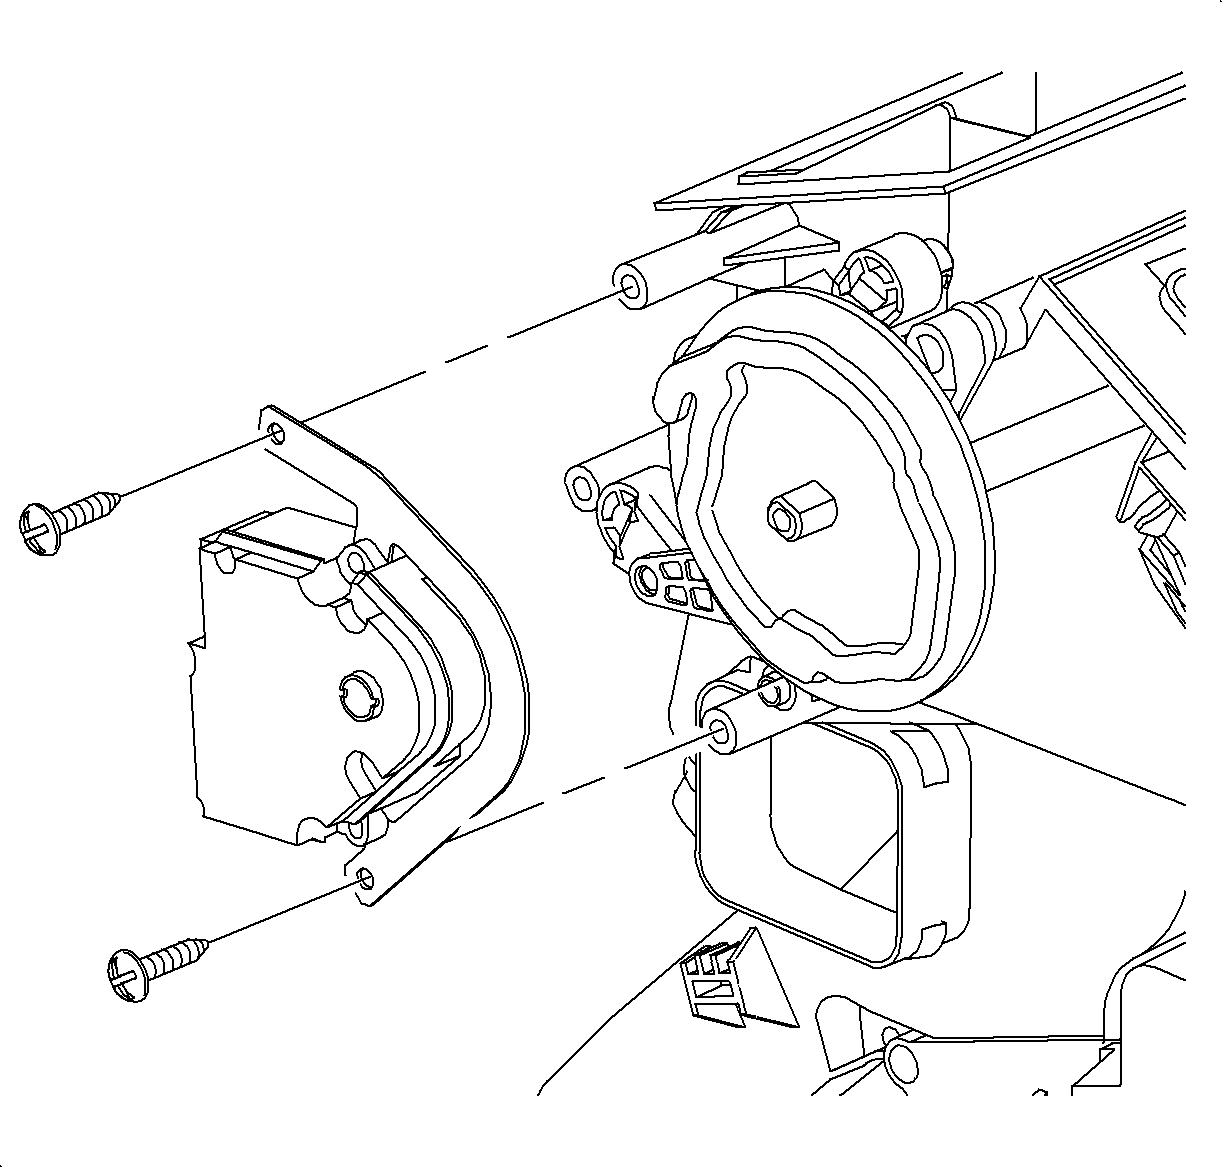
Tighten
Tighten the mode actuator fastener to 1.0 N·m (9 lb in).
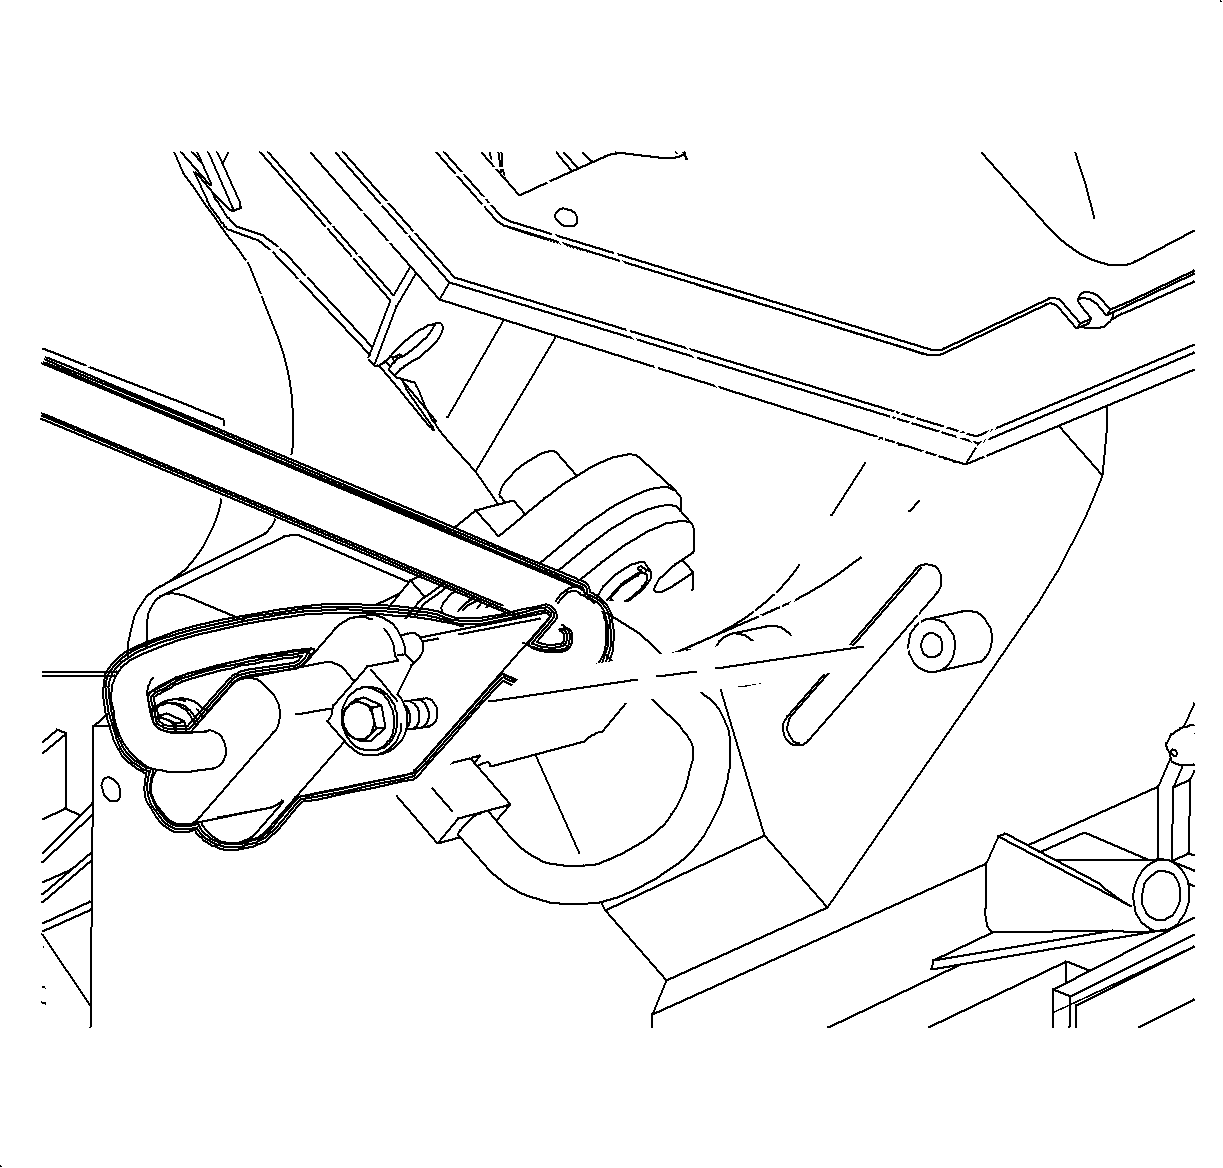
Tighten
Tighten the blower motor resistor card fastener to 1.0 N·m (9 lb in).
Tighten
Tighten the blower motor control module to 3.0 N·m (27 lb in).
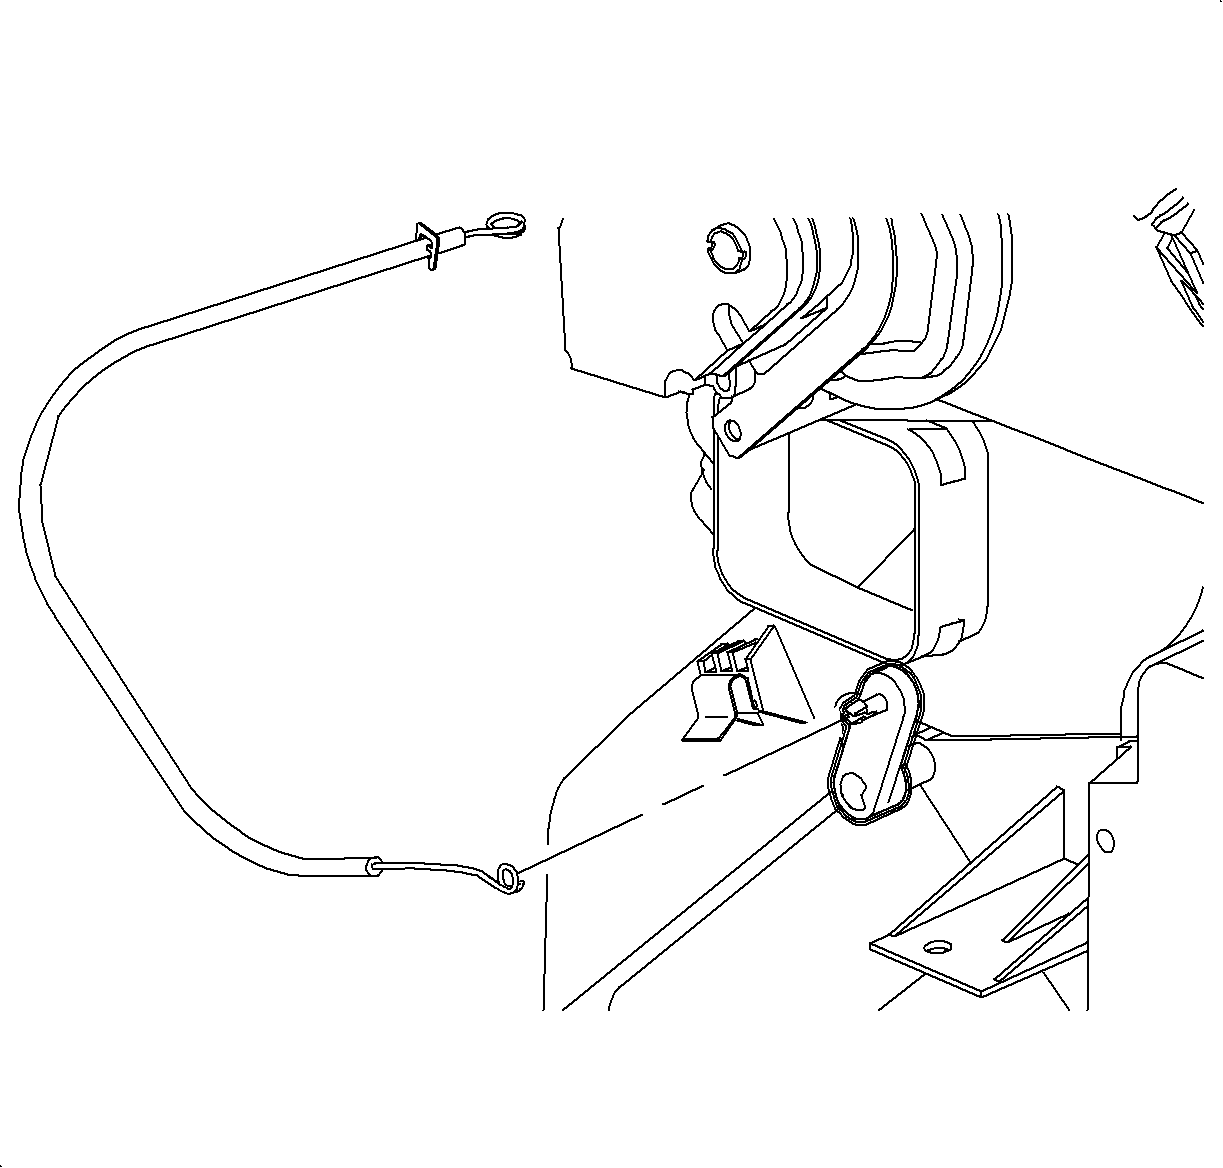
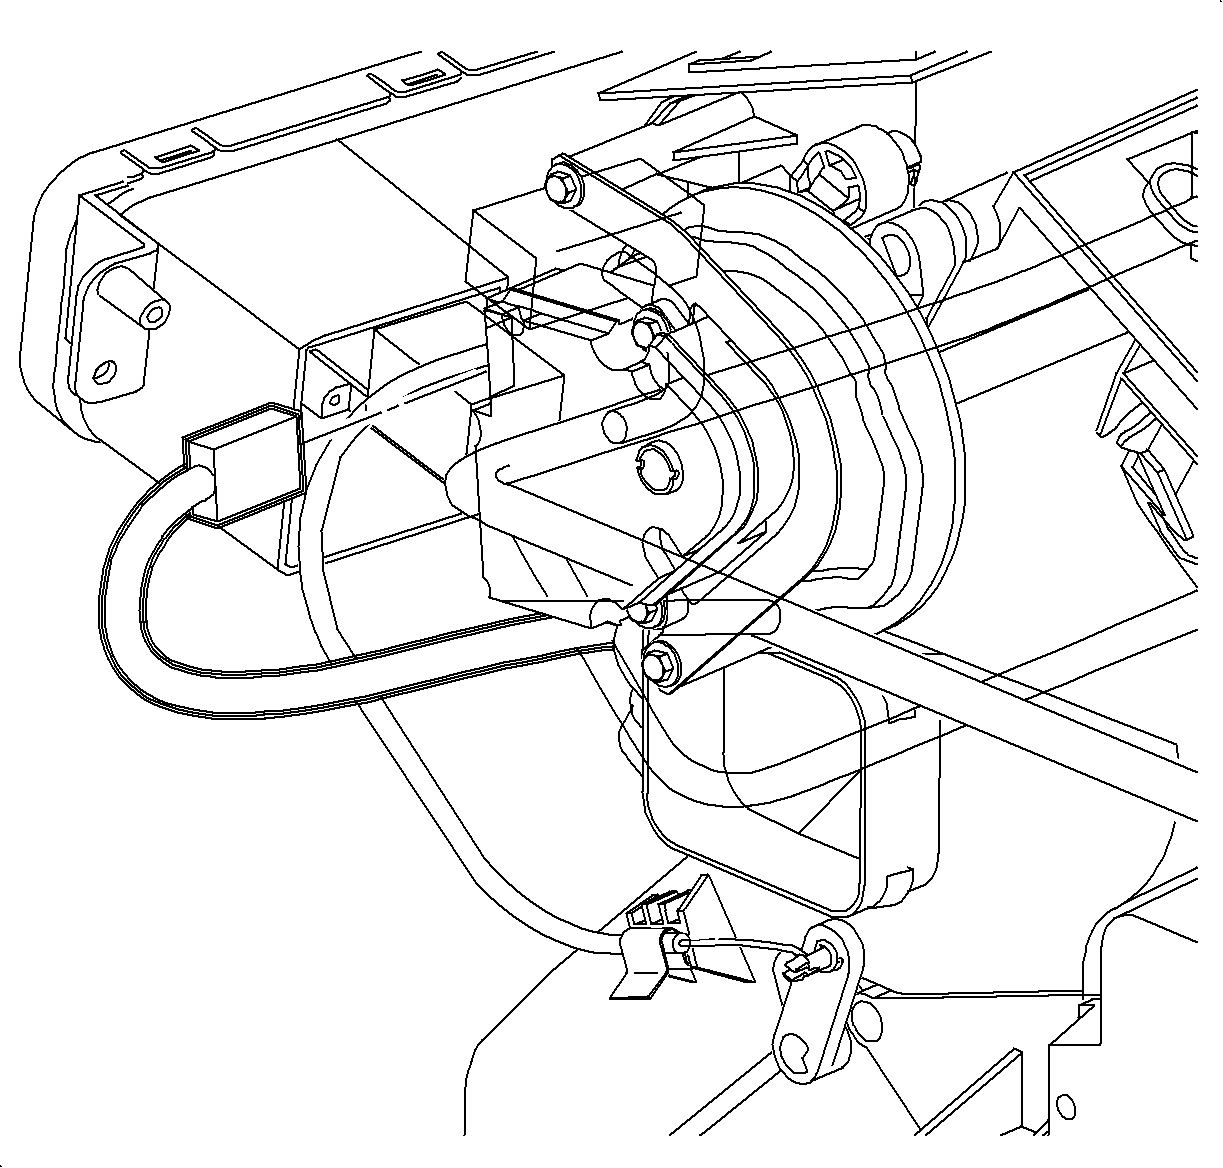
Tighten
Tighten the blower motor housing screws to 1.0 N·m (9 lb in).
Tighten
Tighten the HVAC module duct screws to 1.0 N·m (9 lb in).
