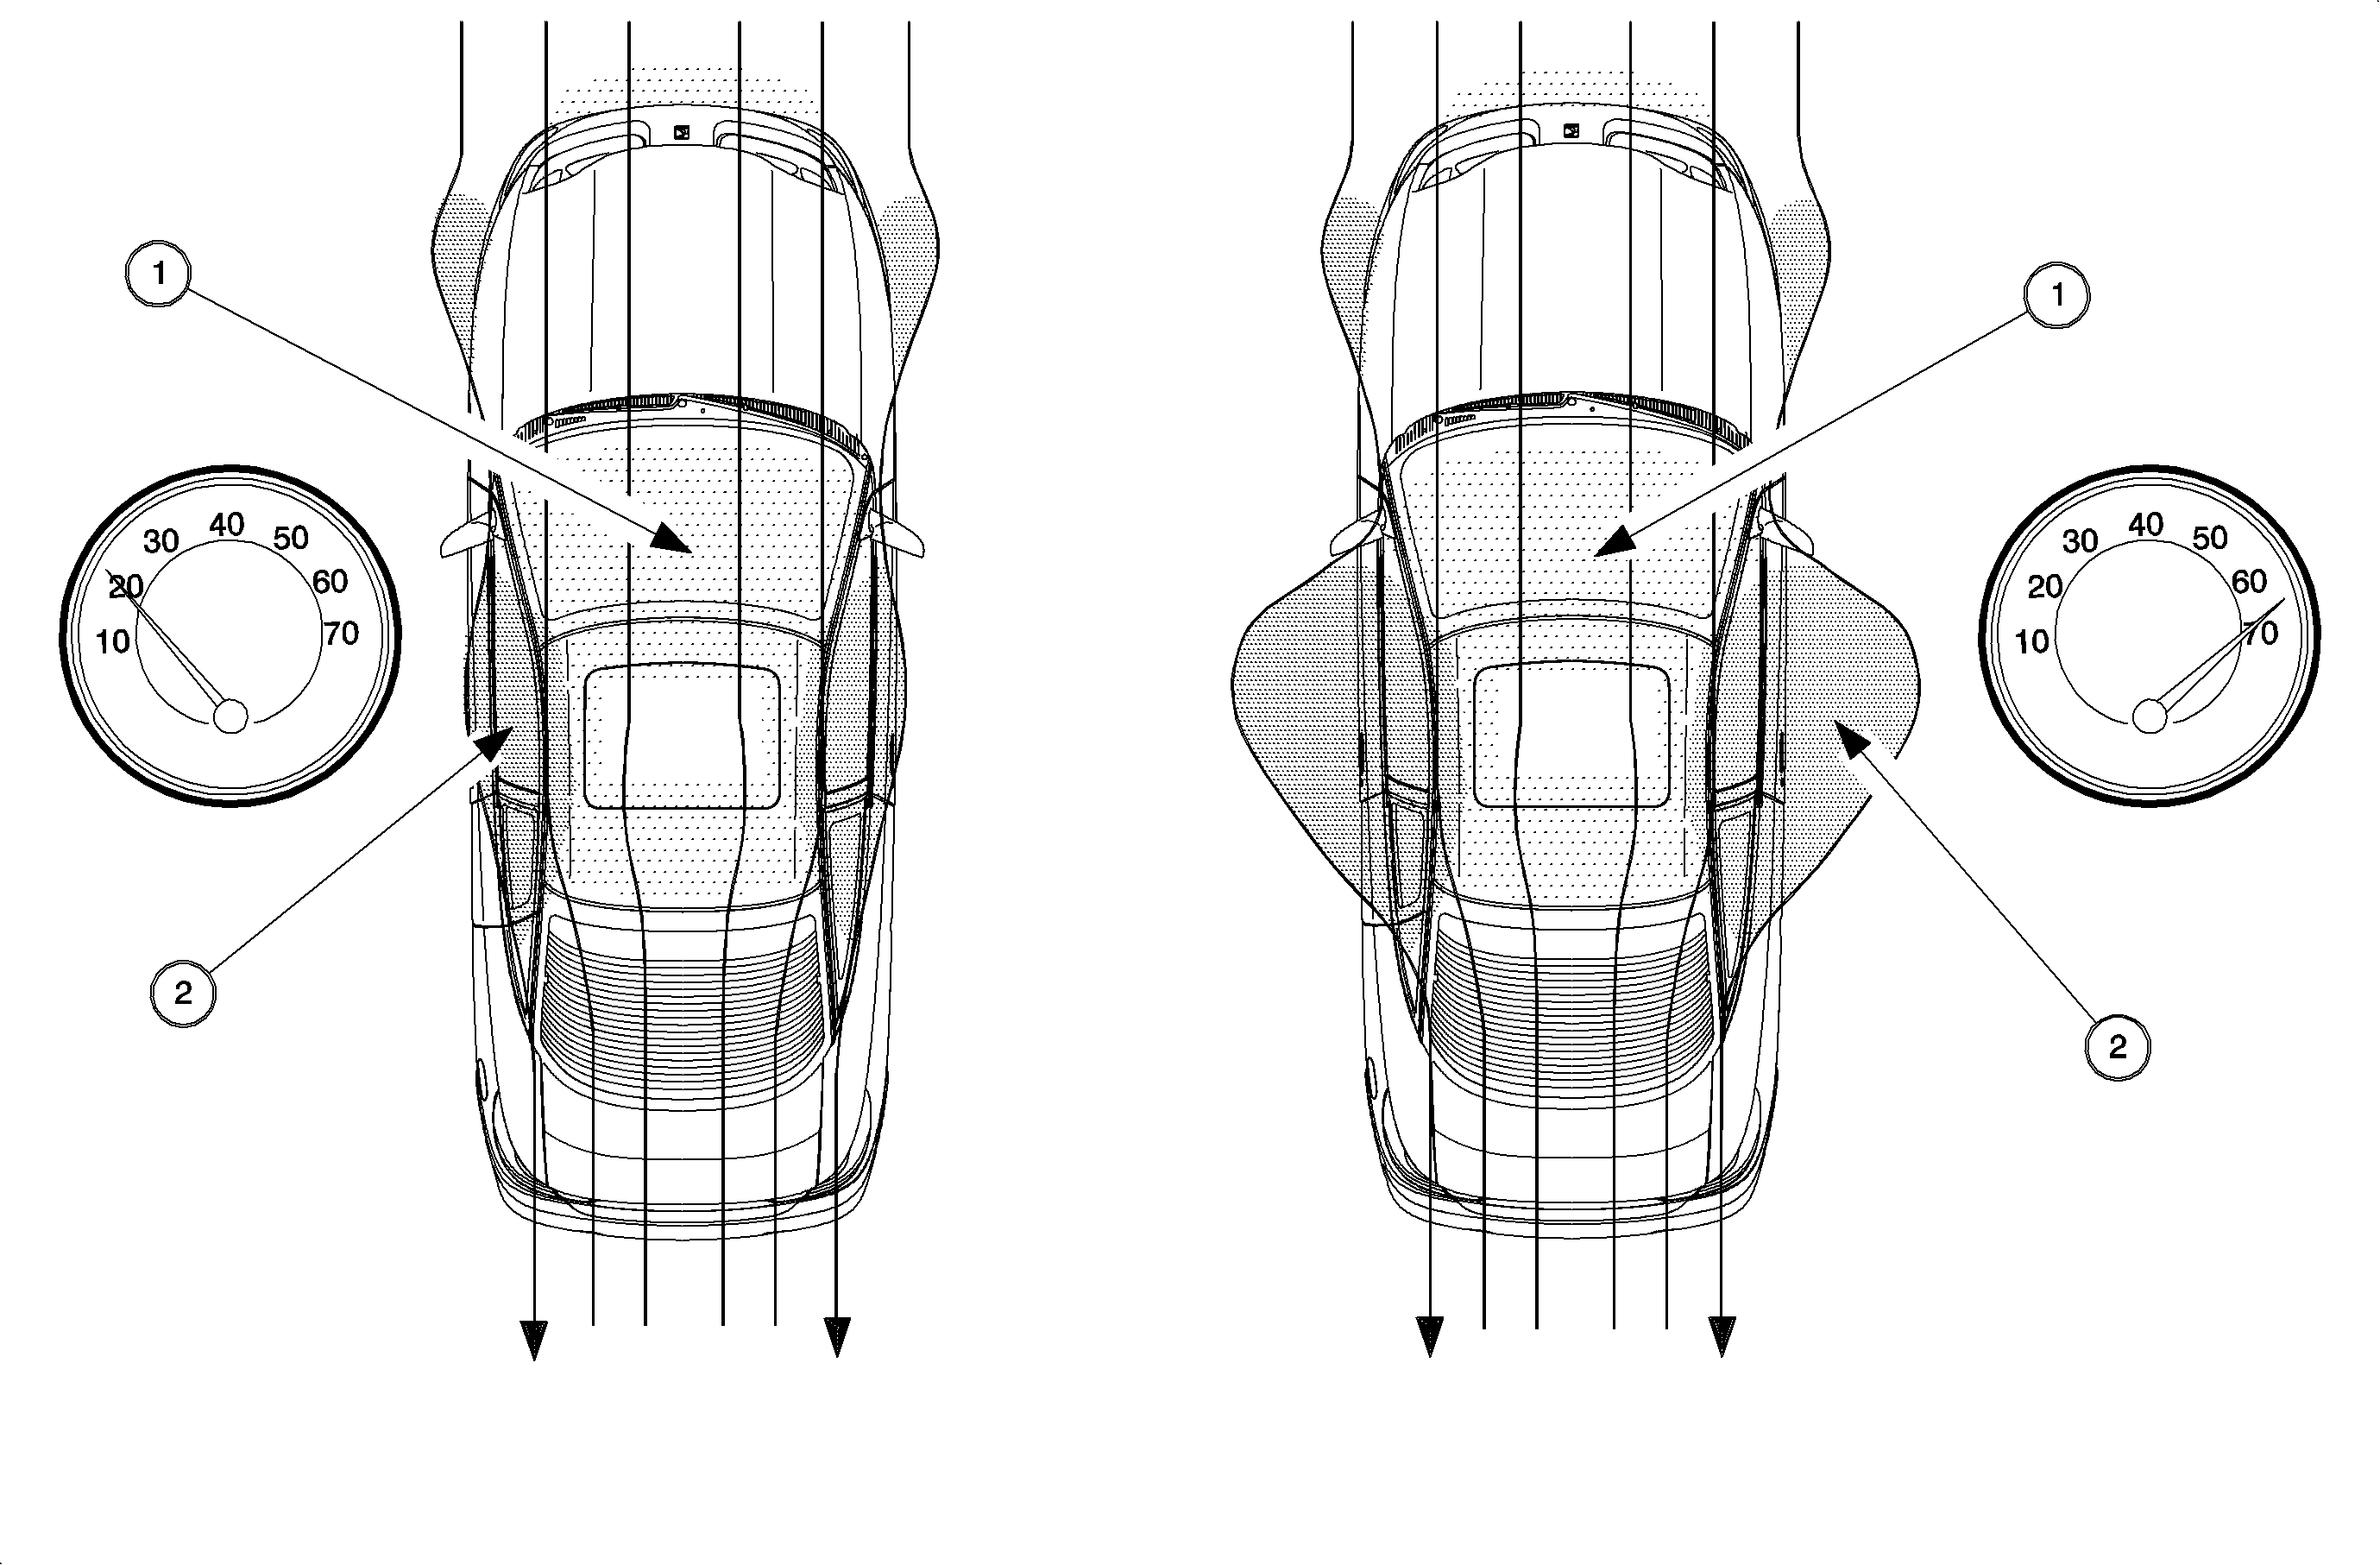
Windnoise Condition
The first step of the repair process in correcting windnoise is to identify the cause of the noise. A determination must be made as to whether the cause of the noise is air escaping from the vehicle or if it is the result of outside air turbulence.
To assist in diagnosing the cause of a windnoise concern, answers to the following questions should be obtained from the customer:
- What specific noise is objectionable?
- At what speed does the noise occur?
- Does the noise appear to be:
- In what general area does the noise appear to originate?
- Is the heater/AC blower motor ON or OFF?
| • | Whistle |
| • | Flutter |
| • | Rush of air |
| • | Internal windnoise - Air leaving the body? |
| • | External windnoise - Air passing over the body's exterior surface? |
| • | Front of the vehicle |
| • | Side of the vehicle |
Analyzing Windnoise

When analyzing windnoise, it is important to understand the forces that act upon the vehicle that can create this condition. As air strikes and bends around the front of a vehicle in motion, it causes a low-pressure area to develop around the front pillars and side window locations of the body. At the same time air flow that is filtered through the vehicle's vents and/or AC system will cause high-pressure to build-up inside the passenger compartment. The faster the vehicle is traveling, the greater the pressure difference between the inside and outside of the vehicle becomes.
The high inside pressure (1) and low outside pressure (2) is separated only by the vehicle's exterior panels, glass, weather-strips, and body seals. When an opening is created at a body seam or weak weather-strip contact area, the high inside pressure will move towards the low outside pressure and create an internal windnoise.
Wind rush or external windnoise is created by the air passing over and around misaligned body components such as mirrors and door moldings.
The Road Test
Caution: For safety reasons an assistant should drive the vehicle while the technician checks for the location of the reported condition(s).
To analyze a reported windnoise condition, a test drive in the vehicle is necessary due to the many conditions that could cause the objectionable noise and determine if the windnoise condition is external, internal or a combination of the 2.
Notice: Often there is one primary leak source and one or more secondary leaks that contribute to the noise condition. Repairing only one of these sources may not completely repair the total condition, but only reduce it.
The following items should be used by the technician during the test drive to aid in locating the leak area:
| • | Mechanic's stethoscope or vacuum hose |
| • | Masking tape, 5 cm (2 in) in width |
| • | 3M® Strip-Calk - P/N 08578, or equivalent. |
| • | China marking pencil |
The vehicle should be driven at the speed in which the noise was noticed by the customer or until it is heard.
Important: Safe legal speeds should never be exceeded.
If the noise can be heard with the door glass lowered and the vehicle driven, it is most likely external windnoise.
Locating an external windnoise is accomplished by taping off various moldings and gaps until the noise is eliminated to pinpoint the exact cause of the noise.
If the noise is more distinct with the windows in a full-up position while the vehicle is driven, it is most likely internal windnoise caused by an open body seam or poor glass/door weather-strip sealing surface.
Visual Inspection
Visually check for misaligned components, loose fasteners, torn weather-strips, broken weld joints and/or sealer, and/or adhesive skips.
Tracing Powder or Chalk Test
Clean the weather-strips and contact surfaces with cleaning solvent. Apply powder or chalk in an unbroken line around the perimeter of the trunk lid, door, door glass, or hood. Surrounding areas must be free of chalk or powder. Close the panel completely. Do not slam closed. The line applied on the weather-strip will be marred where contact is good. A corresponding imprint will be on the mating surfaces. Gaps or irregularities in the powder or chalk line indicate a poor seal.
Air Pressure Test
Turn ON the vehicle's ventilation fan. Close all of the doors, windows, etc. An abnormal amount of high pressure will build up in the vehicle and will escape through voids or poor seals. With a stethoscope or length of vacuum hose, listen for escaping air along the door and window seals.
